Image Creator
Learn how configuring brand colors, tone, and content guidelines once helps you create on-brand AI-generated assets, every time.
Overview
Image Creator helps you instantly create, edit, or refine images for your campaigns, all within CleverTap, without the need for external design tools. It combines advanced AI capabilities with your Brand Kit to generate on-brand, campaign-ready visuals quickly and efficiently. This makes it easier for teams to design creative images directly in the campaign editor, reducing dependency on design teams and accelerating go-to-market time.
AvailabilityImage Creator is available on Pro and Ultimate plans. To access this feature, contact your Customer Success Manager.
With Image Creator, you can do the following:
- Save time creating campaigns by generating campaign banners, promotional visuals, or lifestyle images directly in the campaign builder.
- Maintain brand consistency at scale by automatically applying your Brand Kit, colors, logo, and visual style, across all campaign images.
- Reduce dependency on design teams by generating campaign-ready images on demand.
- Produce multiple visual variations for A/B testing.
- Refining and editing an existing image concept (for example, adjusting mood, style, or elements) without starting from scratch.
Learn How Image Creator Works
The feature is embedded within the campaign editor, next to image upload fields, such as Expanded Image or Large Icon. You can use it to:
- Create new images from scratch using descriptive prompts.
- Edit or refine existing visuals with prompts.
The Image Creator automatically applies your Brand Kit to ensure every generated image aligns with your brand colors, styles, and tone.
Brand Kit ApplicationThe latest created Brand Kit is automatically selected and applied to your image, even if you don’t manually choose one.
If only one Brand Kit exists, it is applied by default. If multiple kits are available, the most recently created one is auto-selected.
Supported Channels
Image Creator supports the following channels:
- Push
- SMS
- Web channels
- Native Display
- App Inbox
- InApp
Generate Image Using Prompt
Before you use Image Creator, ensure that your account's Brand Kit is configured with your brand's visual identity (colors, logo, and imagery style), so generated images stay on-brand.
NoteThe process differs slightly depending on the channel. The steps below use Push as the example. For channel-specific fields and behavior, refer to Supported Channels.
To generate an image using prompts:
- Open your Push Notification campaign editor.
- For Android, click
 CleverAI for the Expanded image or Large icon fields. For iOS, click
  CleverAI in the Rich media field.
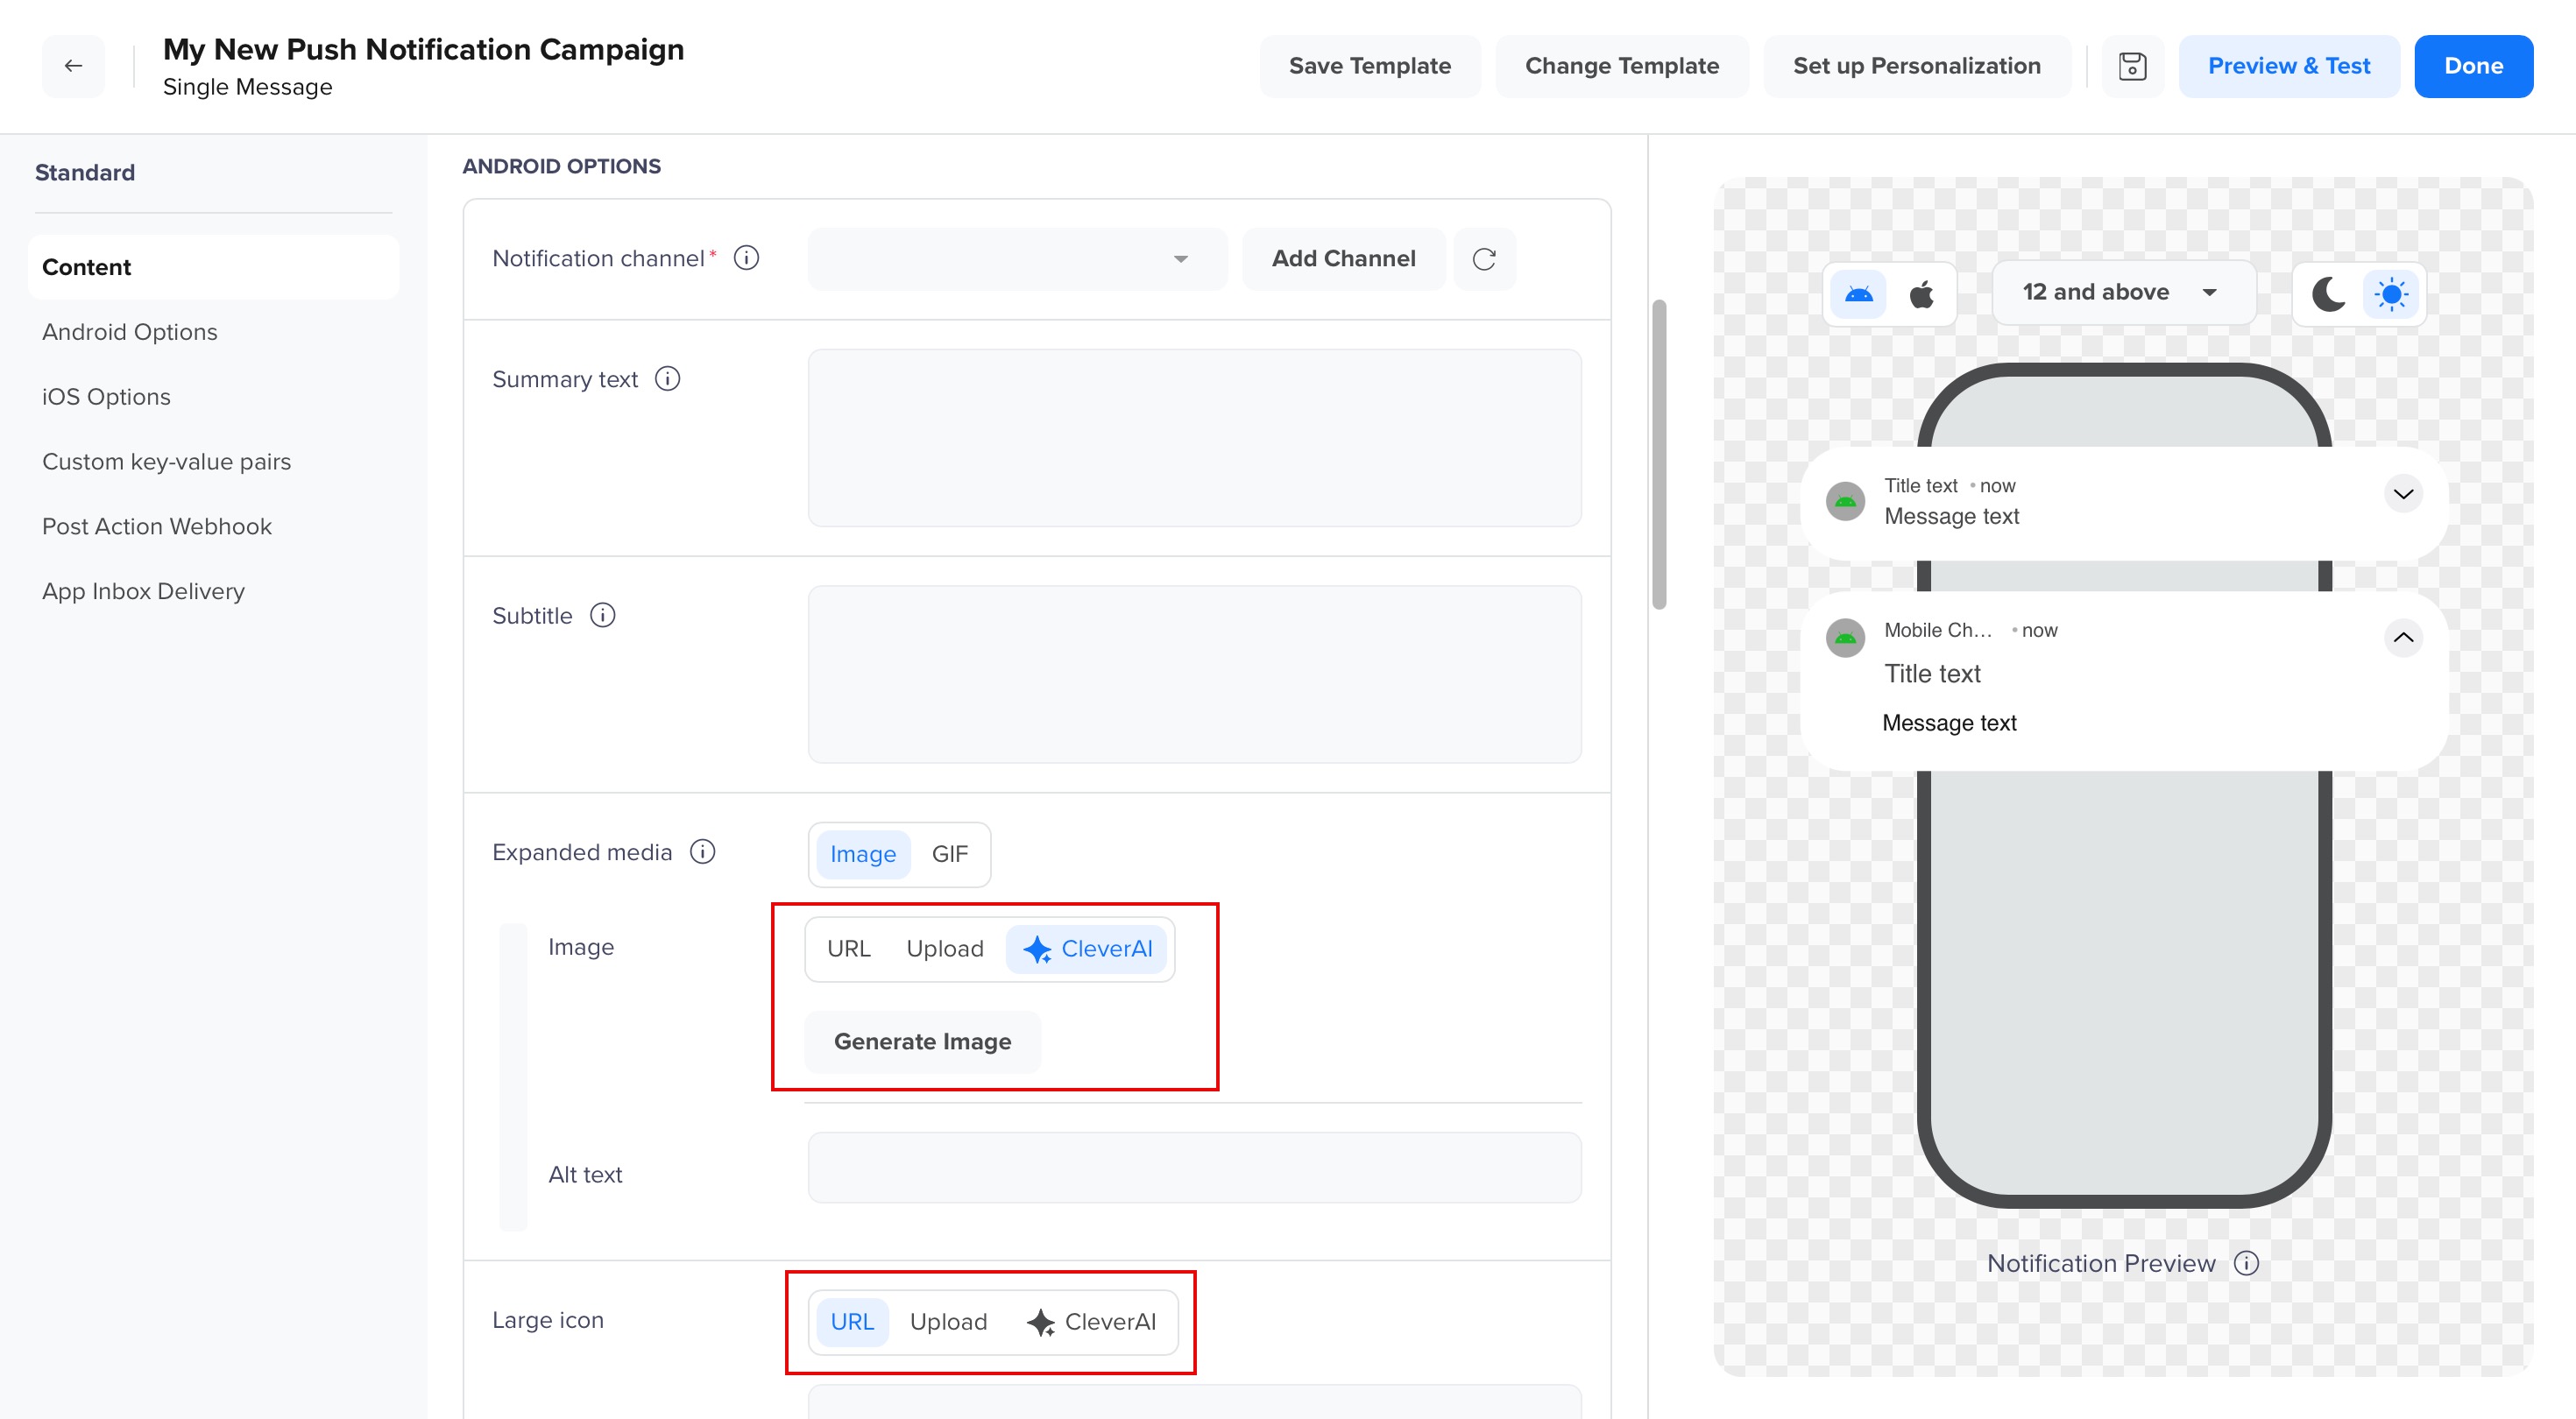
Image Creator for Push Notification
- Click Generate Image. The Generate Image window opens.
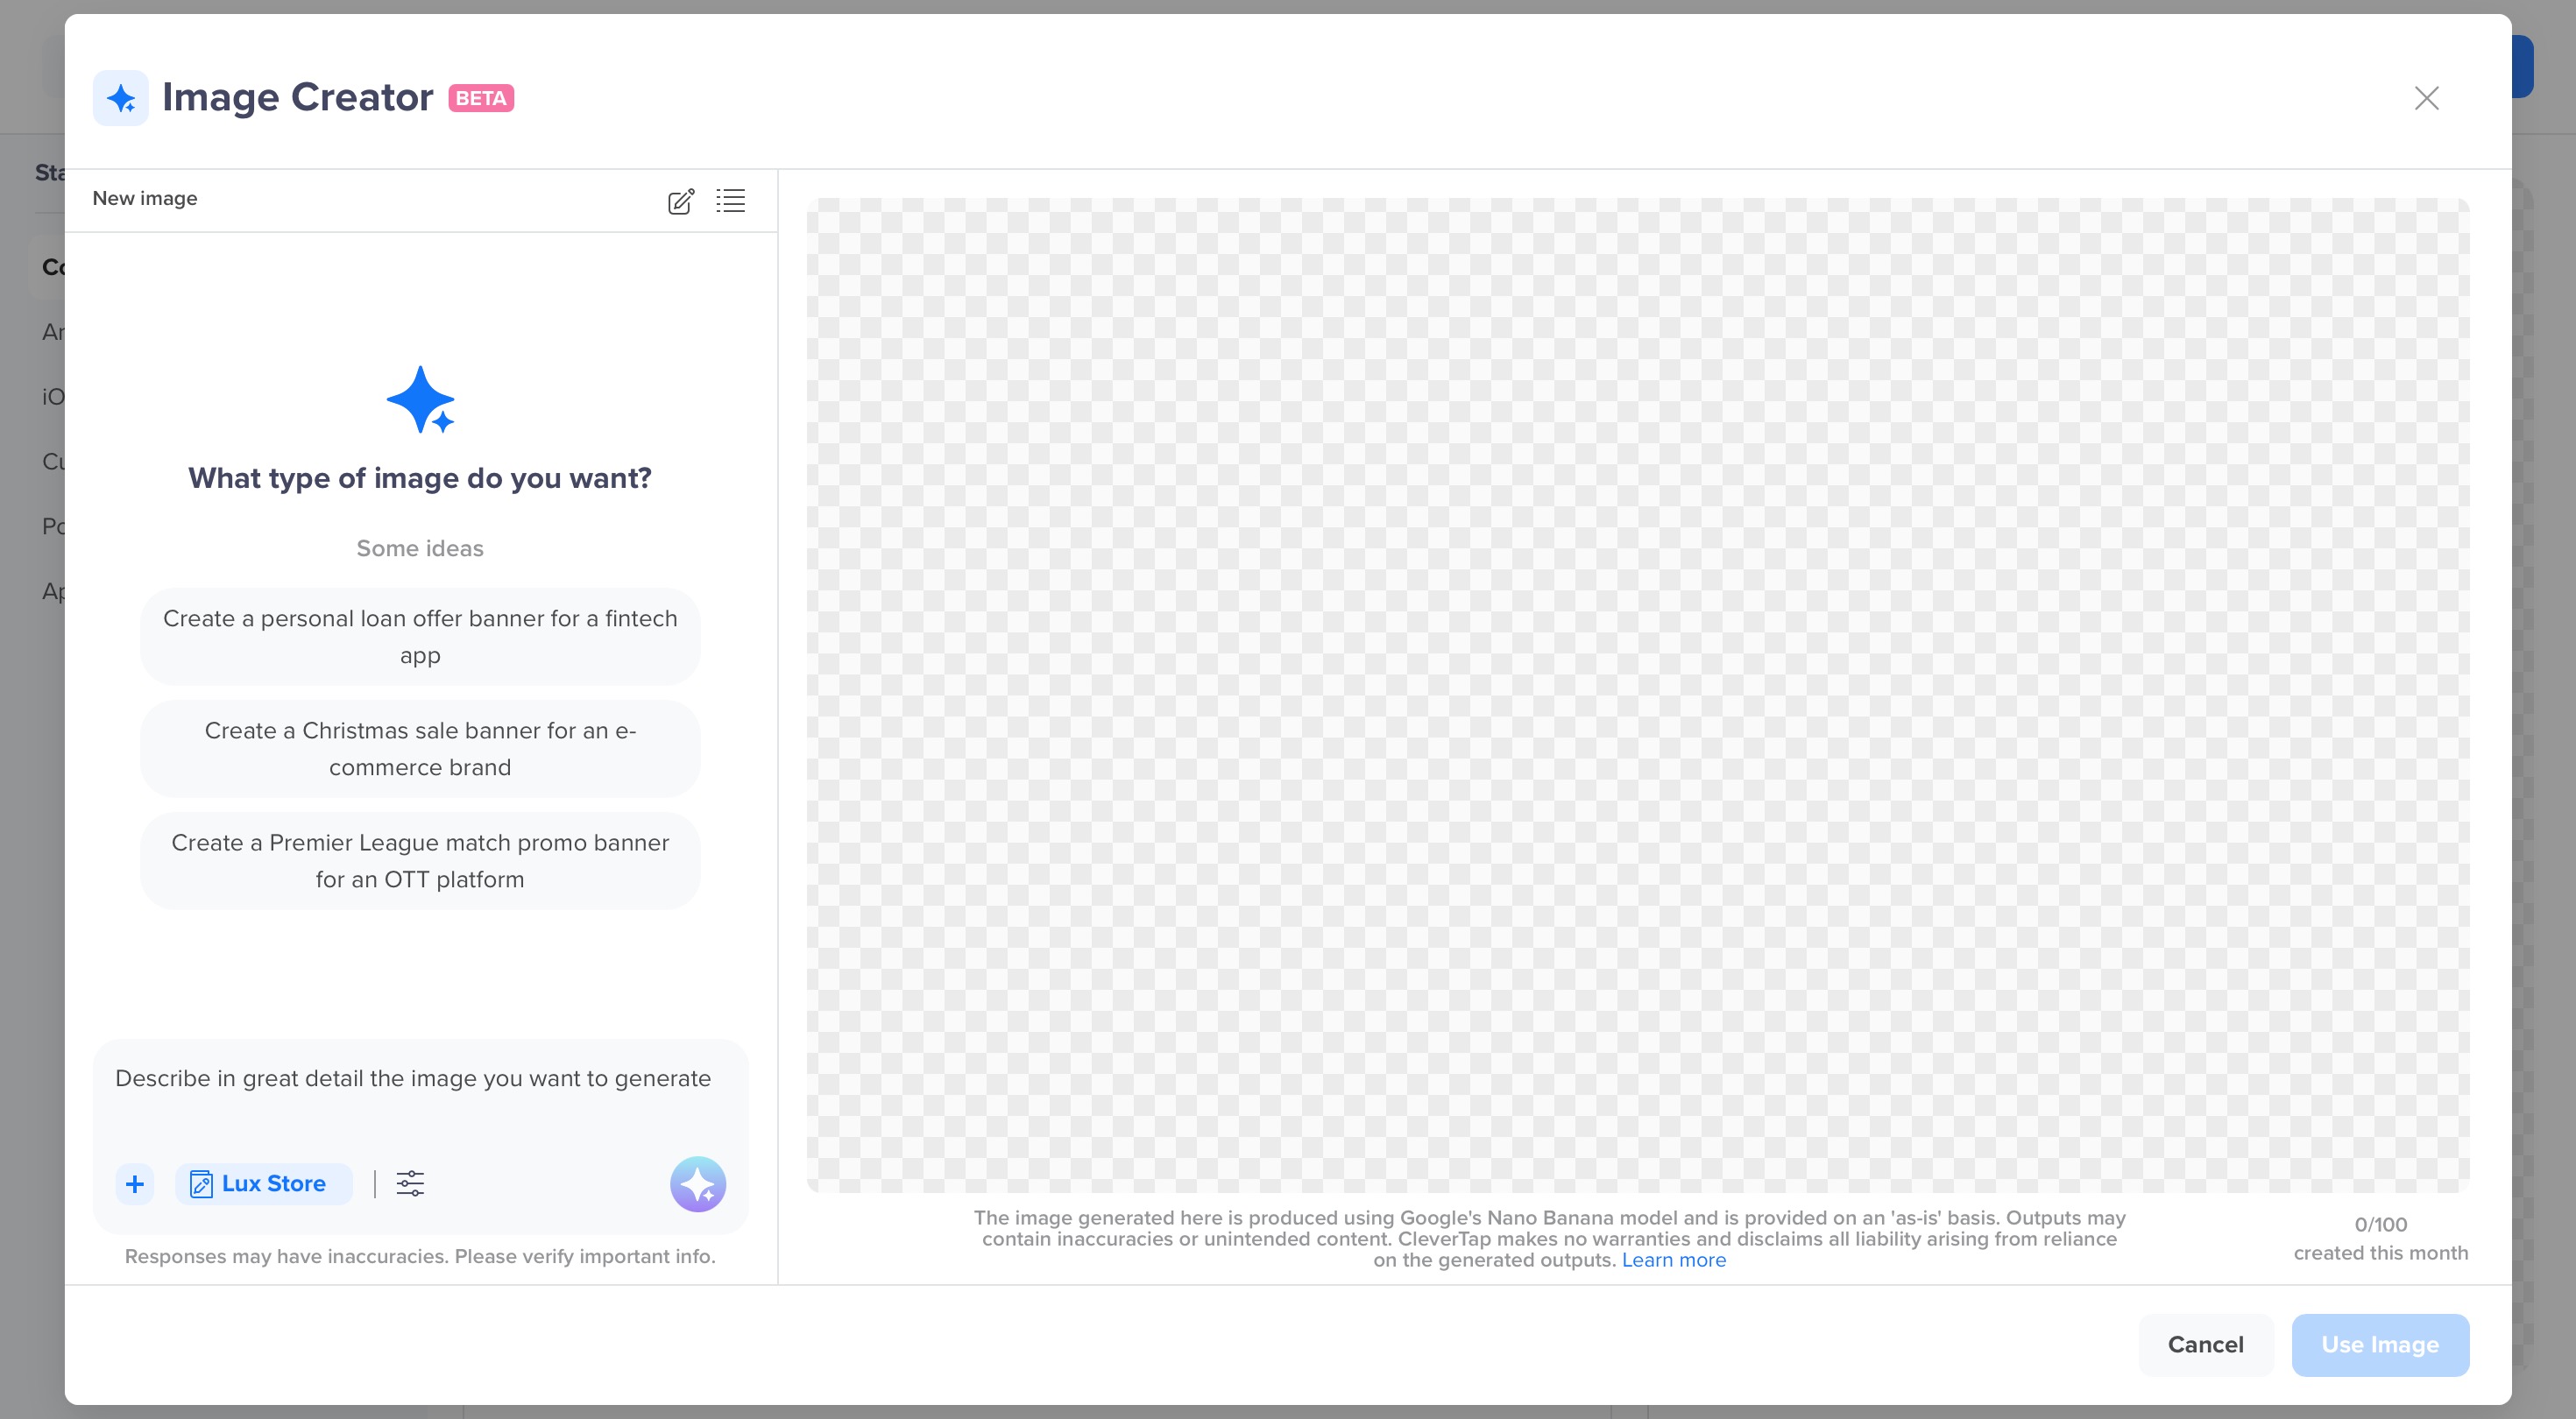
Generate Image
- Apply a Brand Kit to ensure brand consistency, and customize the Image Settings to align with your campaign goals.
- Describe the image you want in the prompt field at the bottom. For example, refer to the sample image below for an OTT platform to promote an upcoming Premier League football match:
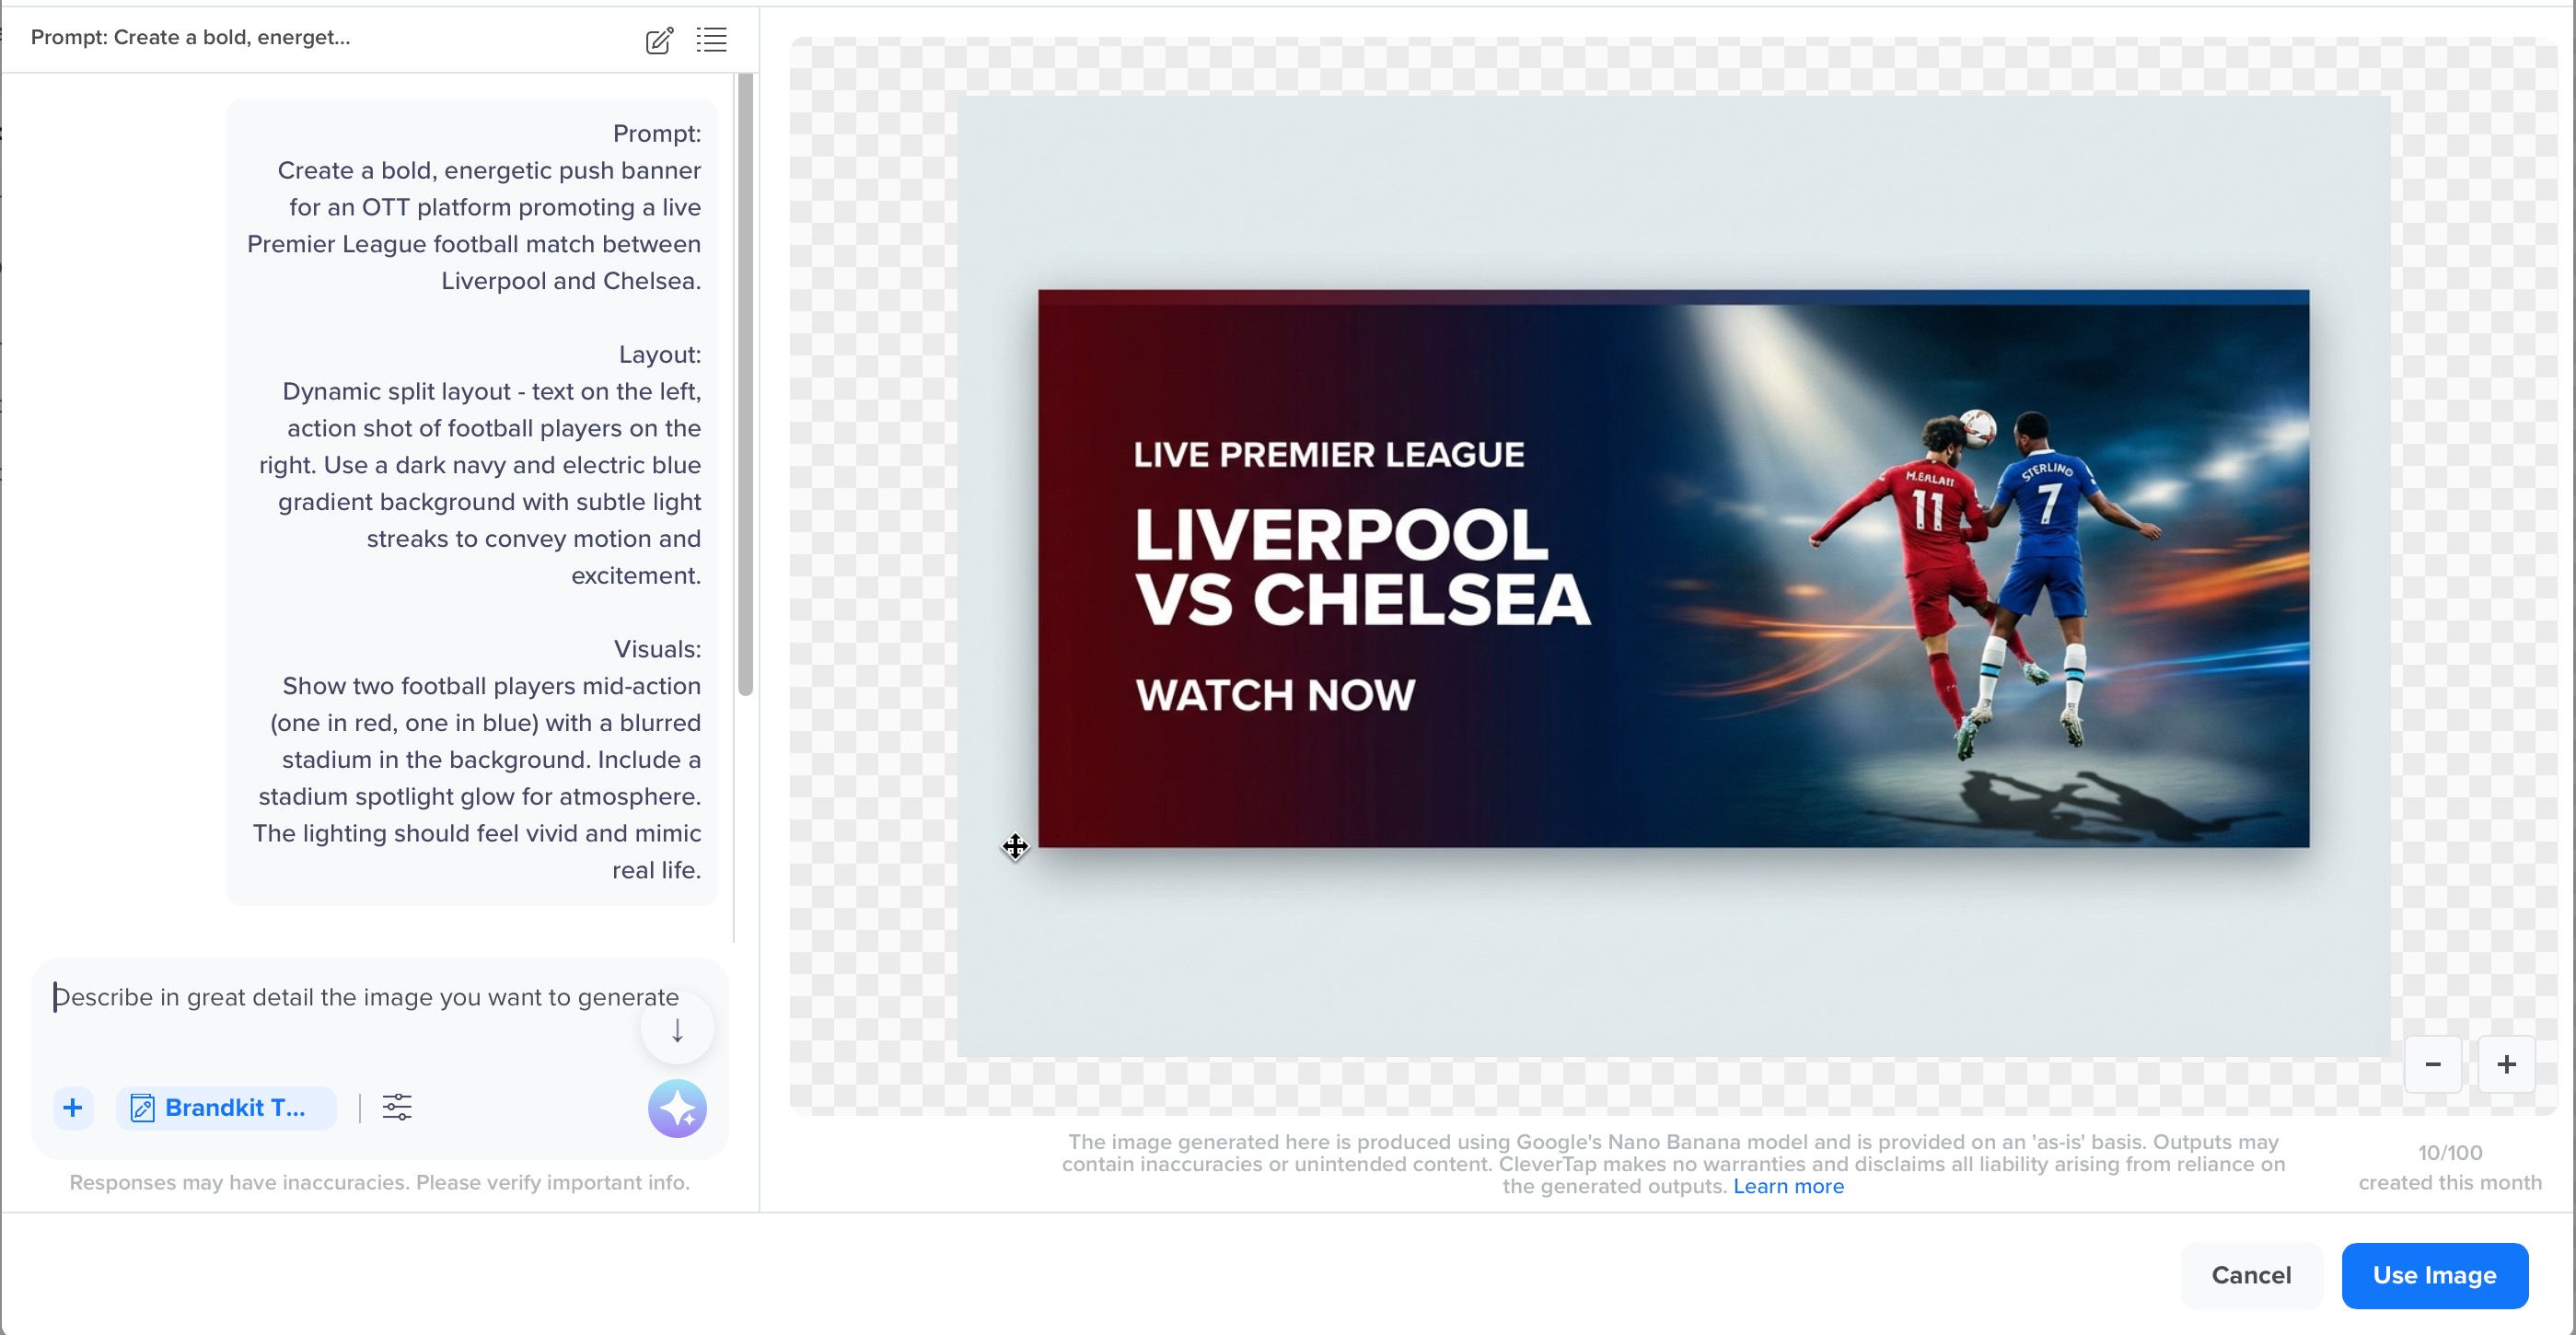
Image Generated Using Text to Image Option
- Click Generate. Review the generated image, then click Insert to add it to your campaign.
- After inserting the image, you can edit or refine the image directly within the editor:
- Enter follow-up prompts in the same chat thread to refine the image.
- To edit an existing image, go to the Message Editor, click Upload, and select the image. Click
 and describe the change you want to make (for example, Change CTA text from "Claim Now" to “Claim Fast”).
 - Each refinement creates a new version saved in your Threads history, allowing you to revisit or reuse past iterations.
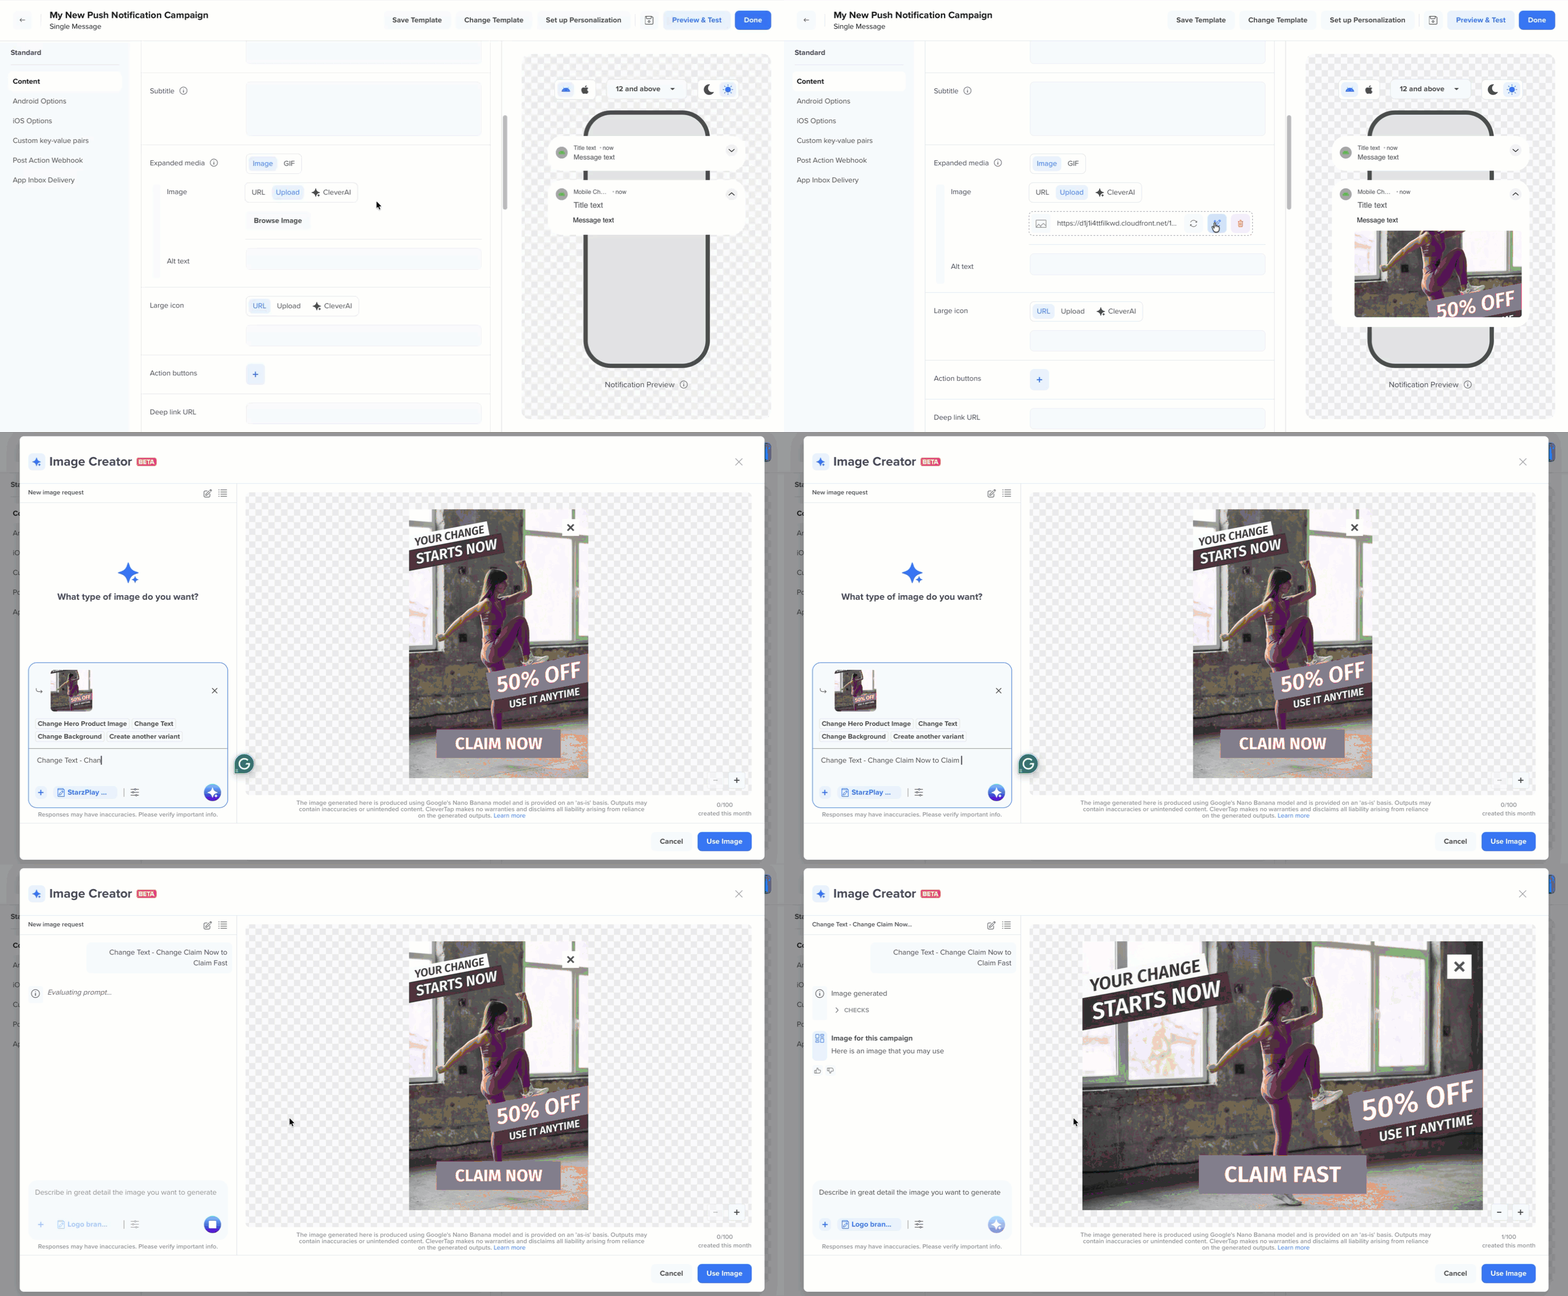
Edit Generated Image
Why detailed prompts matter?The Image Creator relies on the clarity of your description to produce accurate, high-quality visuals. The more specific you are about theme, colors, layout, or mood, the better the output will align with your campaign goals. Include contextual details (like event name, offer type, or brand tone) for best results. For more information, refer Generate On-Brand Images with Effective Prompts.
Generate Using Reference Image
To generate an image using a reference image, perform the following steps:
- Open your Push Notification campaign editor.
- Go to the Message Editor, click Upload to upload the image, and select the image. Click Edit.
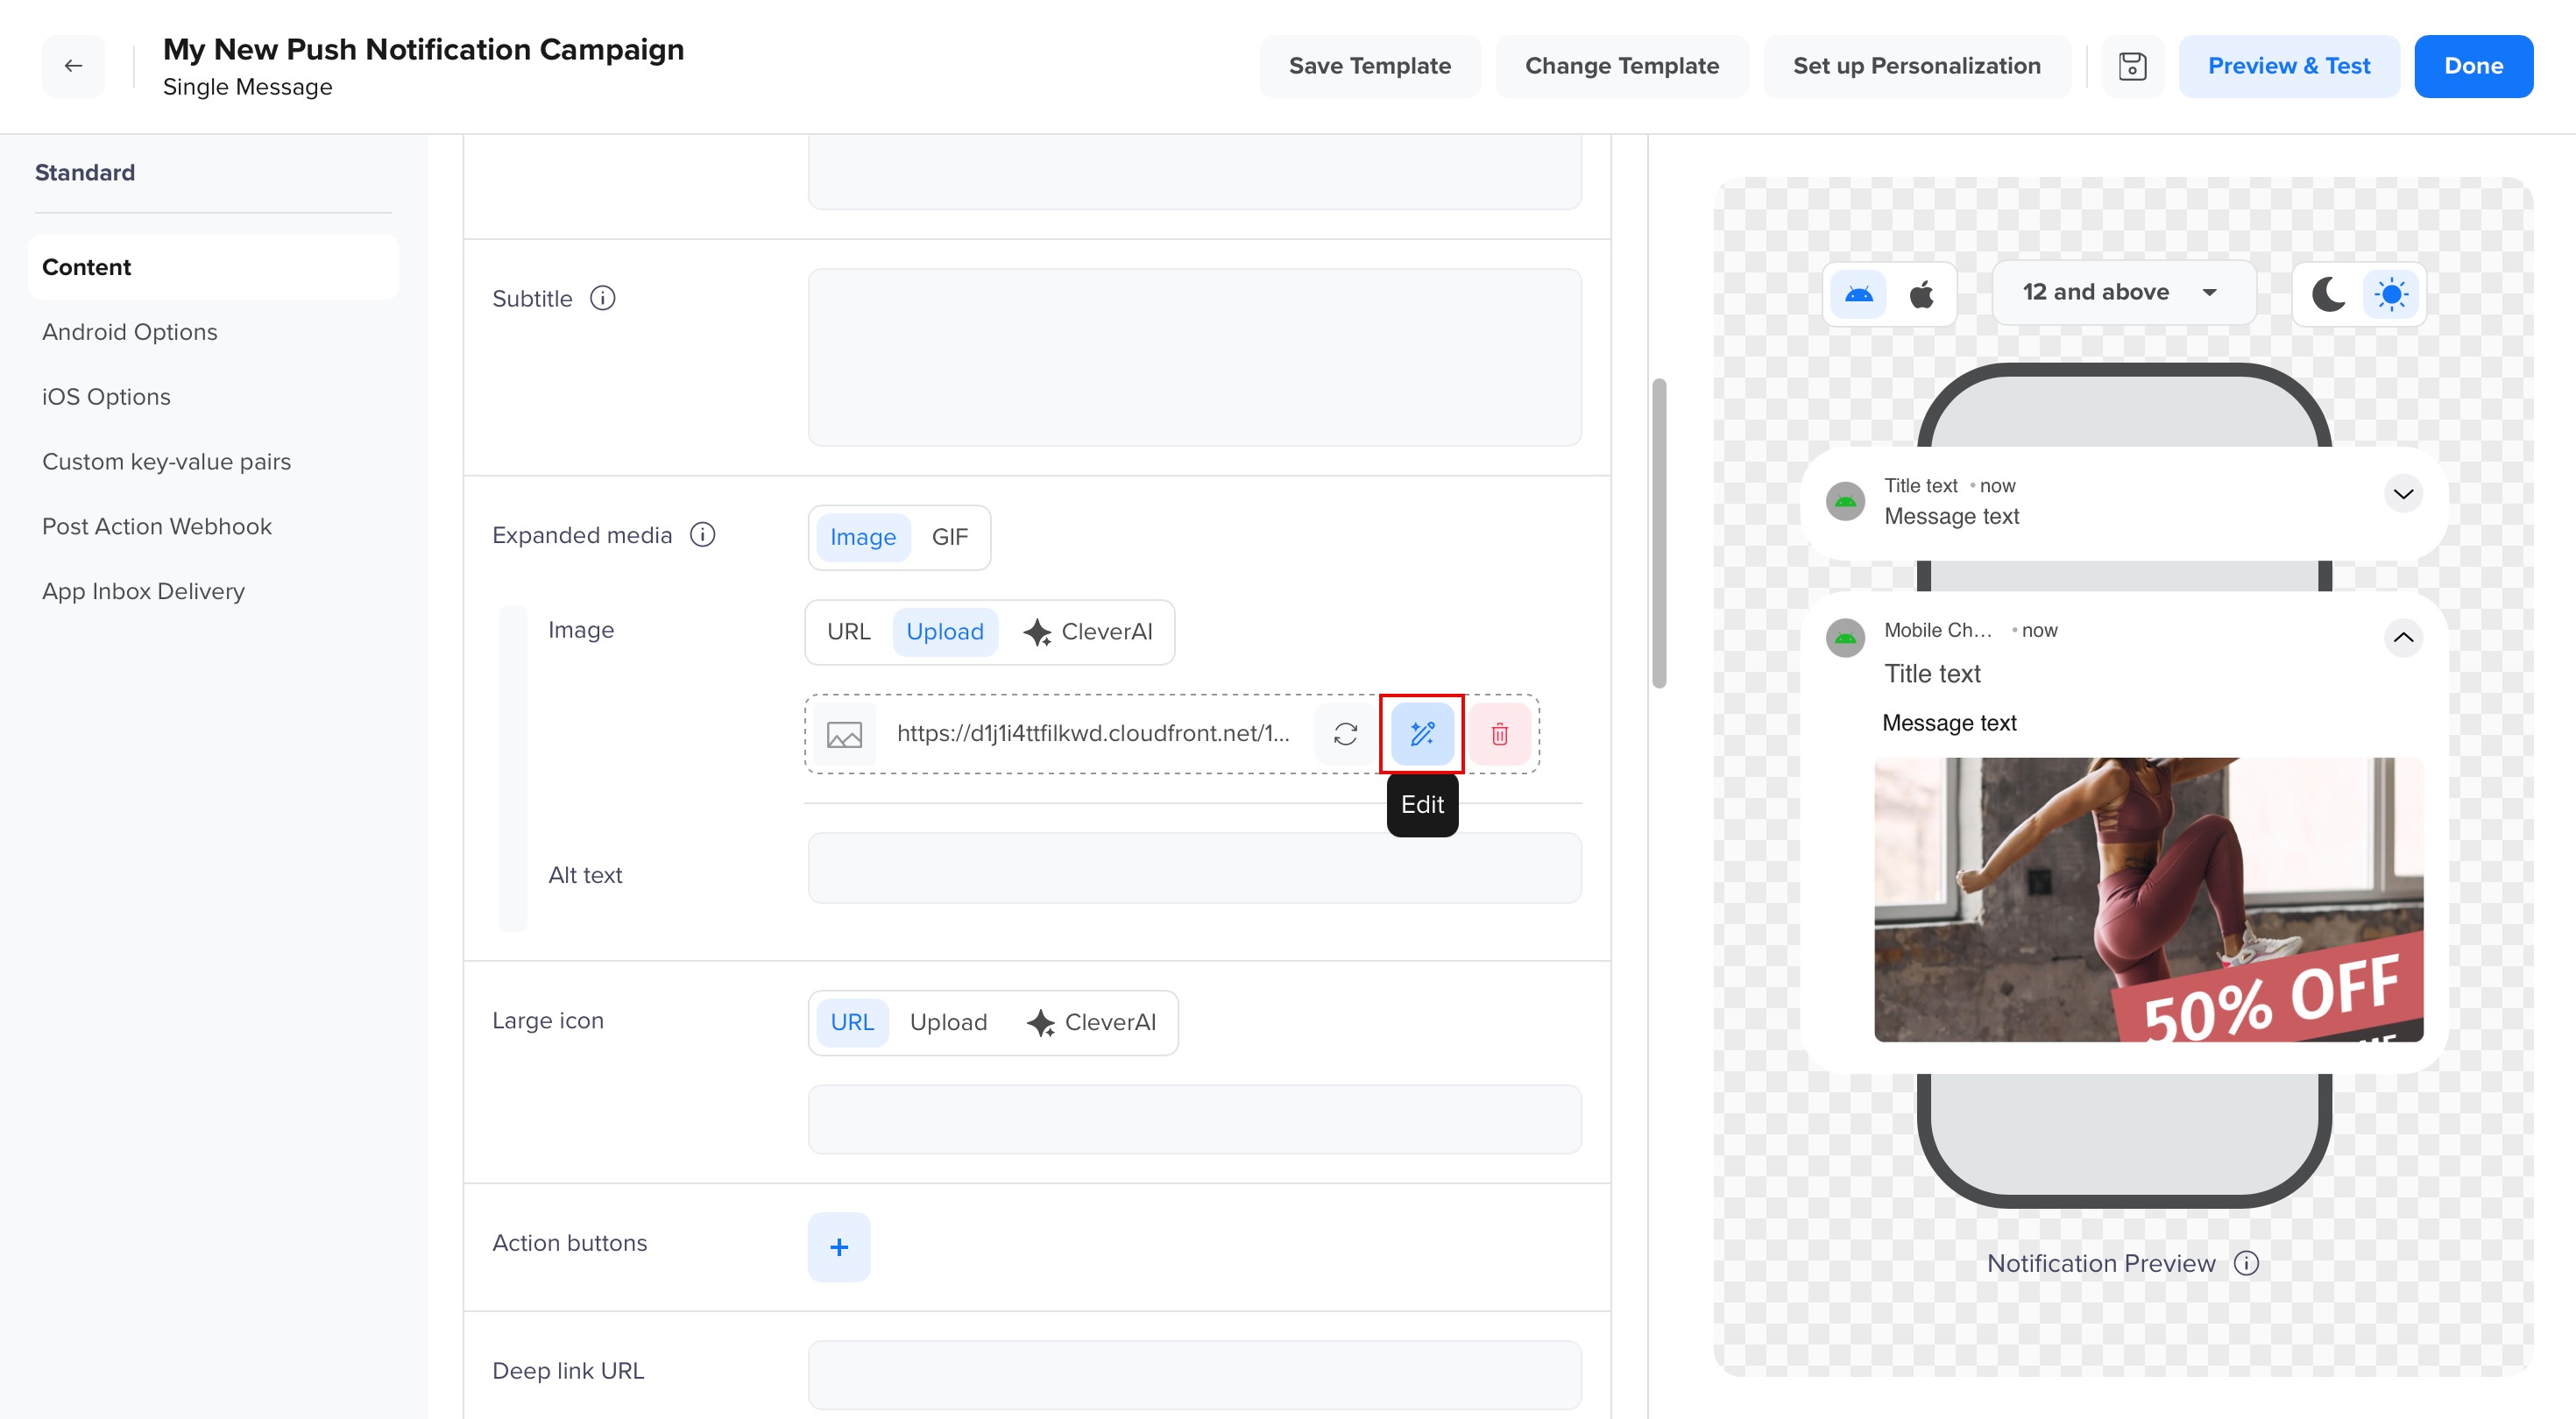
Edit Image
- Click
 to select the reference image from CMS.
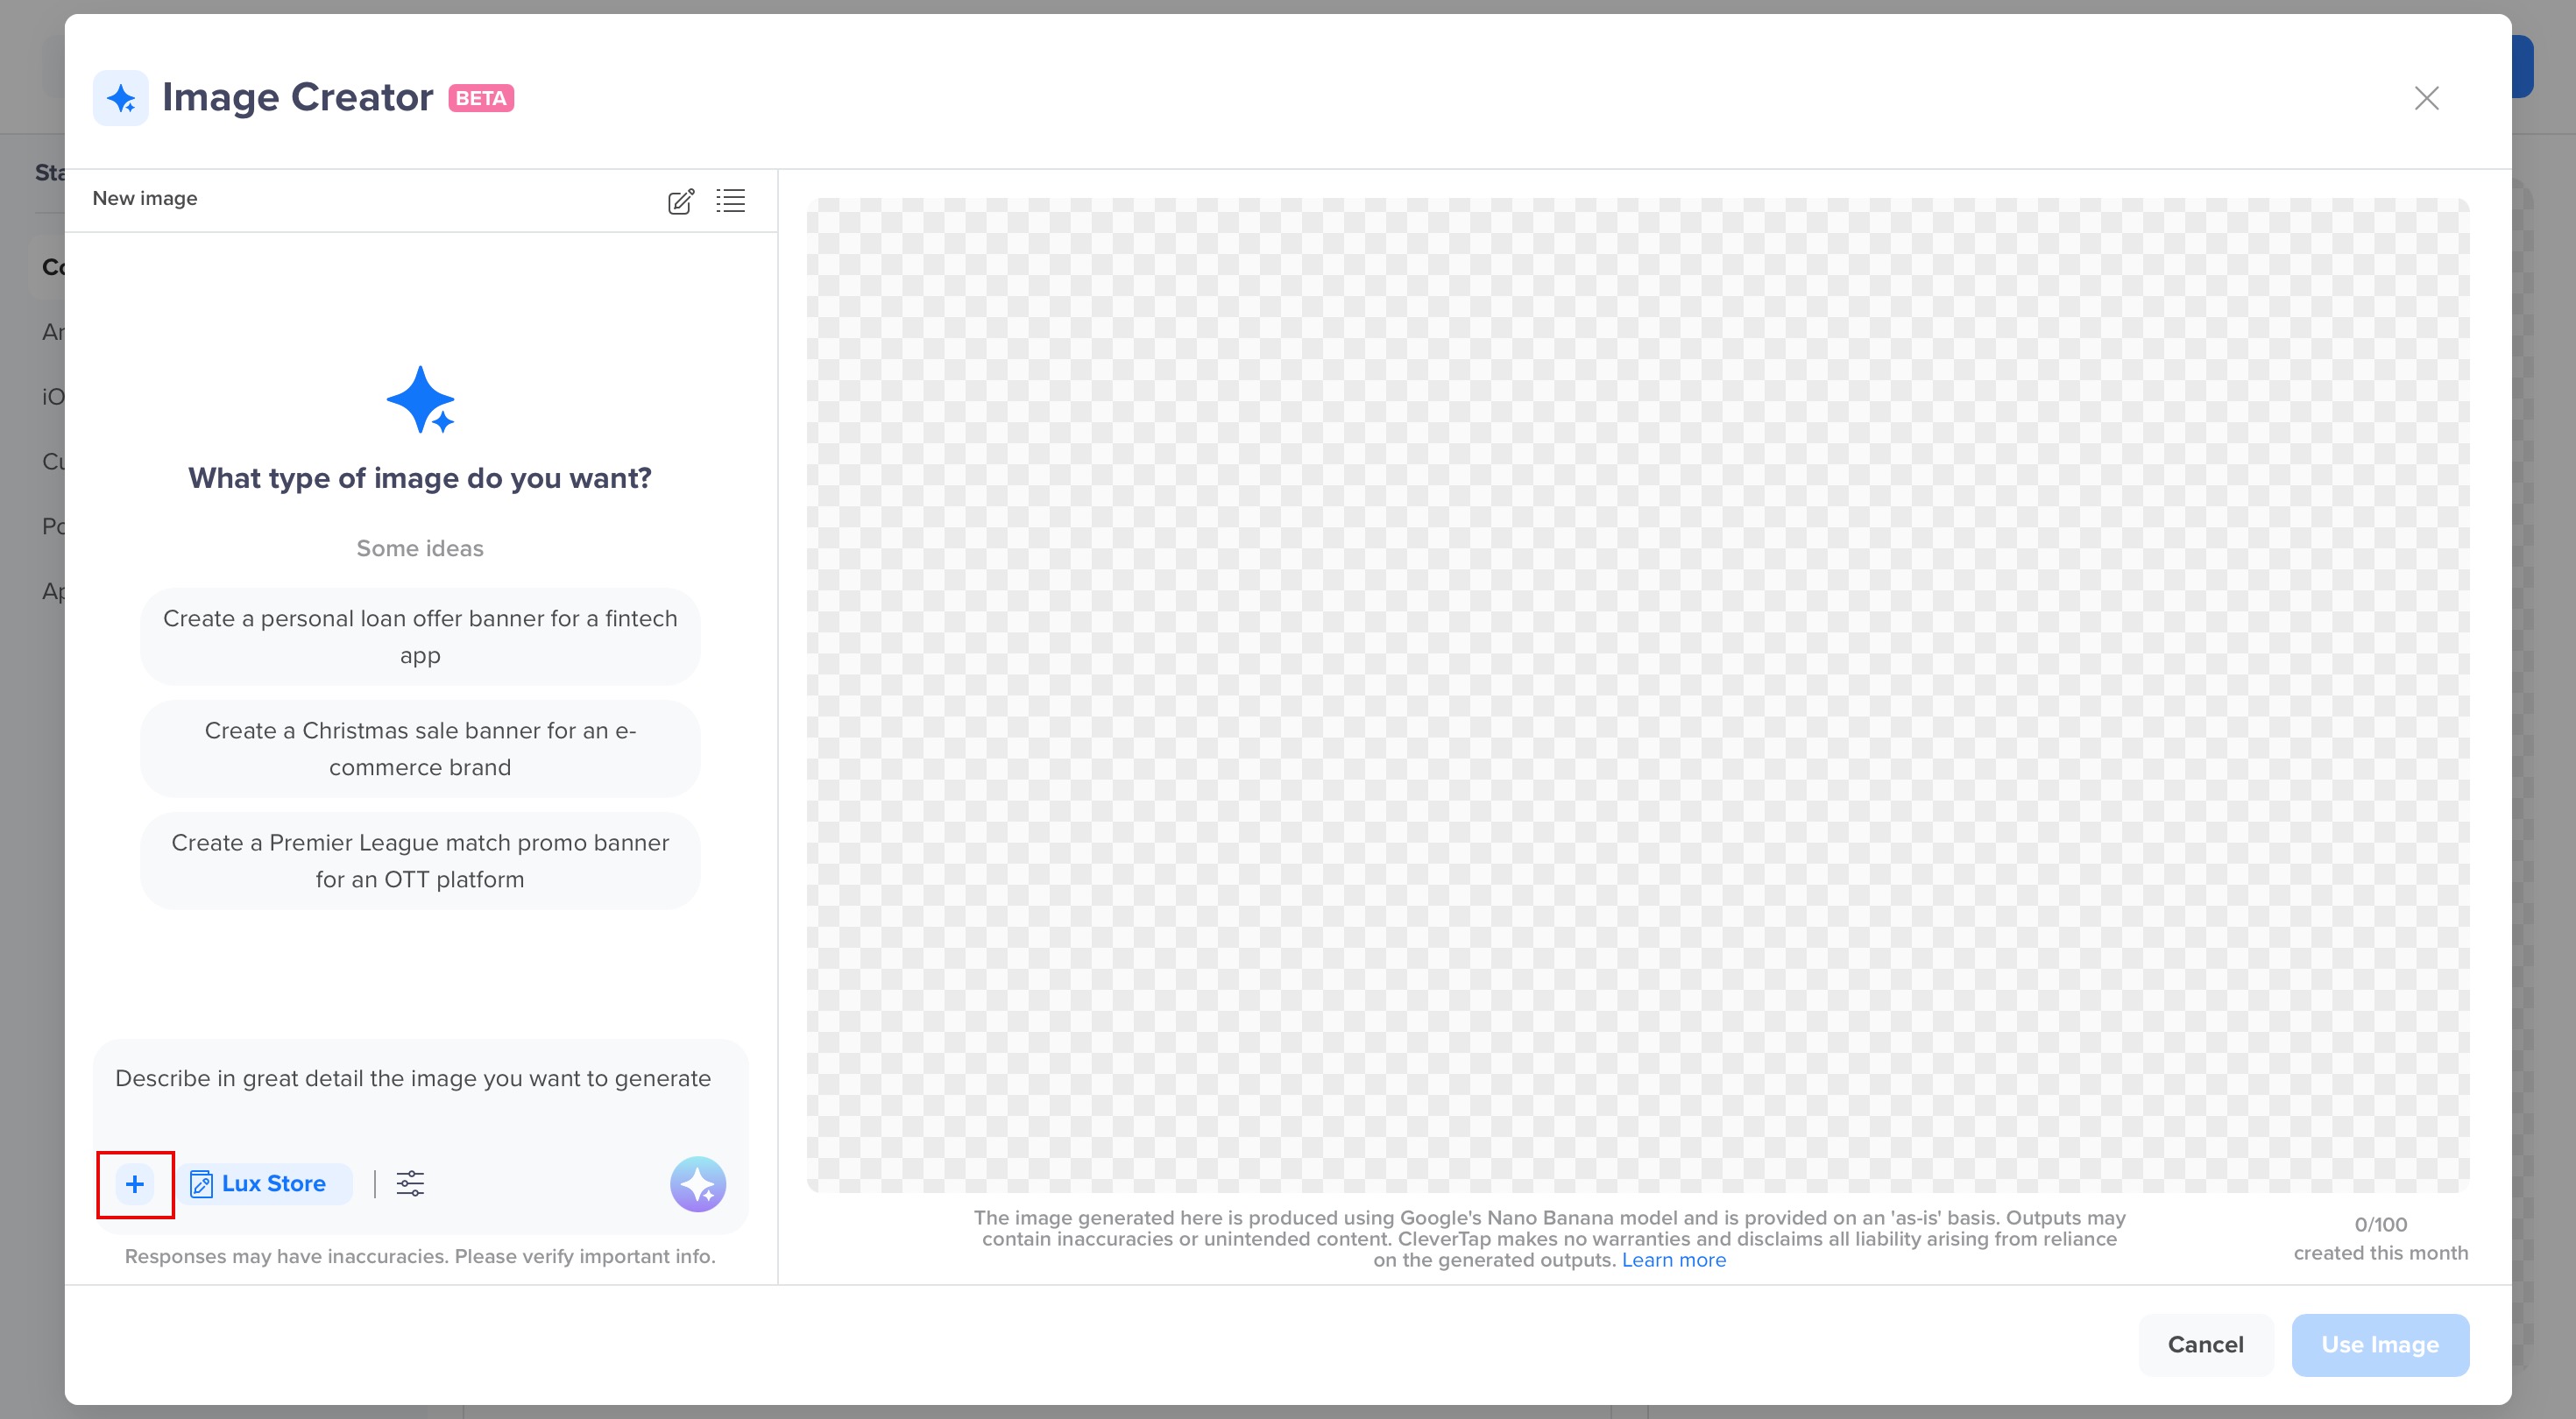
Add files
- In the prompt field, describe the updates or new campaign details you want to apply. Once you select an image, you can:
- Change text: For example, update offer amounts, taglines, or call-to-action text.
- Change background: Modify colors, replace backgrounds, or adjust contrast for seasonal themes.
- Replace visual elements: Swap product photos, icons, or logos.
- Adjust layout: Realign elements, add or remove visual sections, or reposition branding.
- Add highlights or effects: Emphasize key offers or add simple visual effects, such as a glow or drop shadows. For example, if you want to use 30% Off banner as a reference and update it for Holi with bright color accents and festive treats.
- Click Brand Kit to view or switch to another kit if needed.
- Click Generate. It analyzes your reference image and applies the prompt instructions you provide. A new image is generated that maintains the layout and design consistency of your requirements.
- Review the generated image and click Insert to add it to your campaign.
Use Secondary Image to Update Primary Image
Upload an existing image as a reference. Clever.AI uses its layout, style, and color palette to create a fresh visual. You can use this method when you want to: refresh a past campaign creative, maintain a consistent look and feel across offers, and make quick adaptations for regional or seasonal variations.
This helps with the following:
- Retains brand tone and design balance.
- Reduces turnaround for variant creation.
To generate an image using this method, perform the following steps:
- Open your Push Notification campaign editor.
- For Android, click CleverAI for the Expanded image or Large icon fields. For iOS, click CleverAI for the Rich media field.
- Click Generate Image. The Generate Image window opens.
- Click to upload the following.
- Primary Image: The creative you want to update.
- Secondary Image: The visual reference that defines your desired color tone, layout, or design.
- In the prompt field, describe how you want to adapt or align the primary image to match the secondary one.
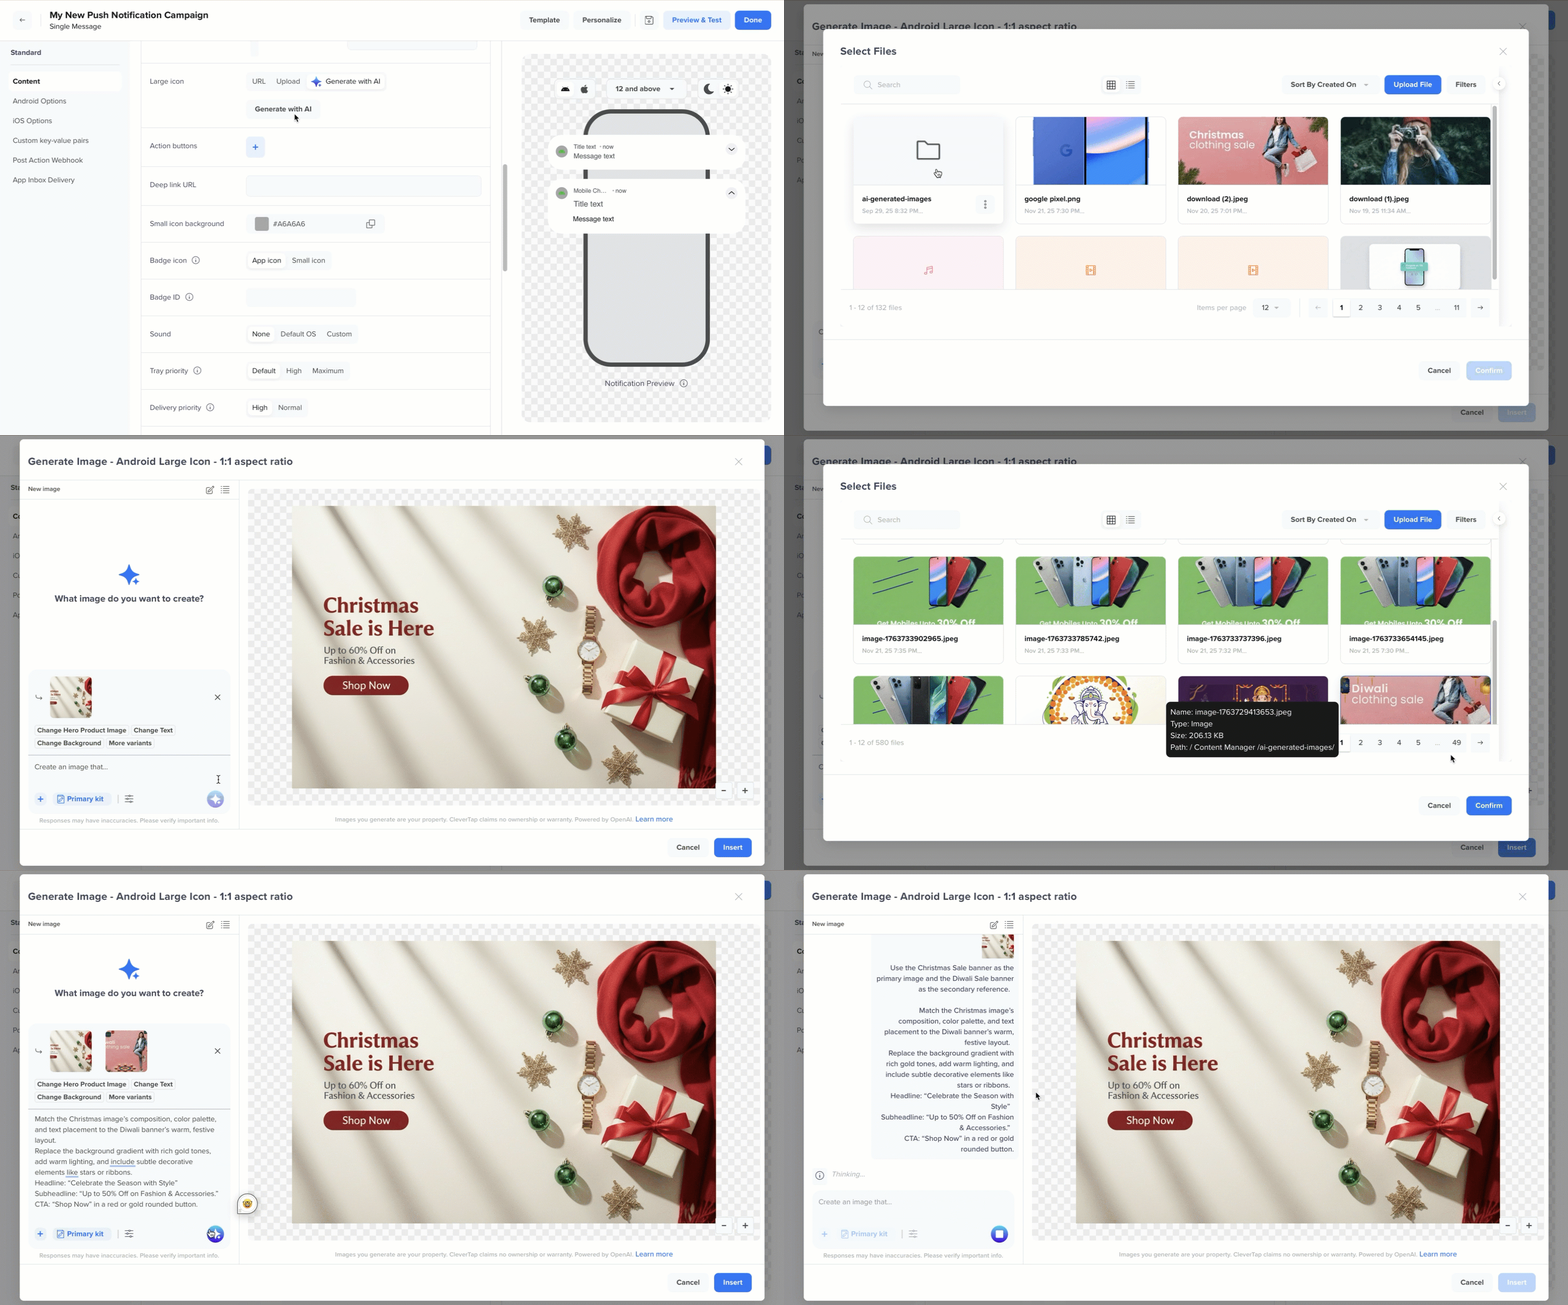
Use Secondary Image to Update Primary Image
Refer to the following example prompt:
Use the Christmas Sale banner as the primary image and the Diwali Sale banner as the secondary reference.
Match the Christmas image’s composition, color palette, and text placement to the Diwali banner’s warm, festive layout.
Replace the background gradient with rich gold tones, add warm lighting, and include subtle decorative elements like stars or ribbons.
Headline: “Celebrate the Season with Style”
Subheadline: “Up to 50% Off on Fashion & Accessories.”
CTA: “Shop Now” in a red or gold rounded button.
- Click Brand Kit to apply your brand’s predefined colors, tones, and layout.
- Click Generate. It analyzes both images and adjusts the primary to match the secondary in tone, layout, and design style.
- Review the generated image in the preview panel and click Insert to add it to your campaign. To make refinements, use follow-up prompts.
Brand Kit and Image Settings
Image Creator gives you the options to adjust and filter your generated image. The Image Settings menu lets you adjust your file format, and Brand Kit lets you apply brand styling to your generated image.
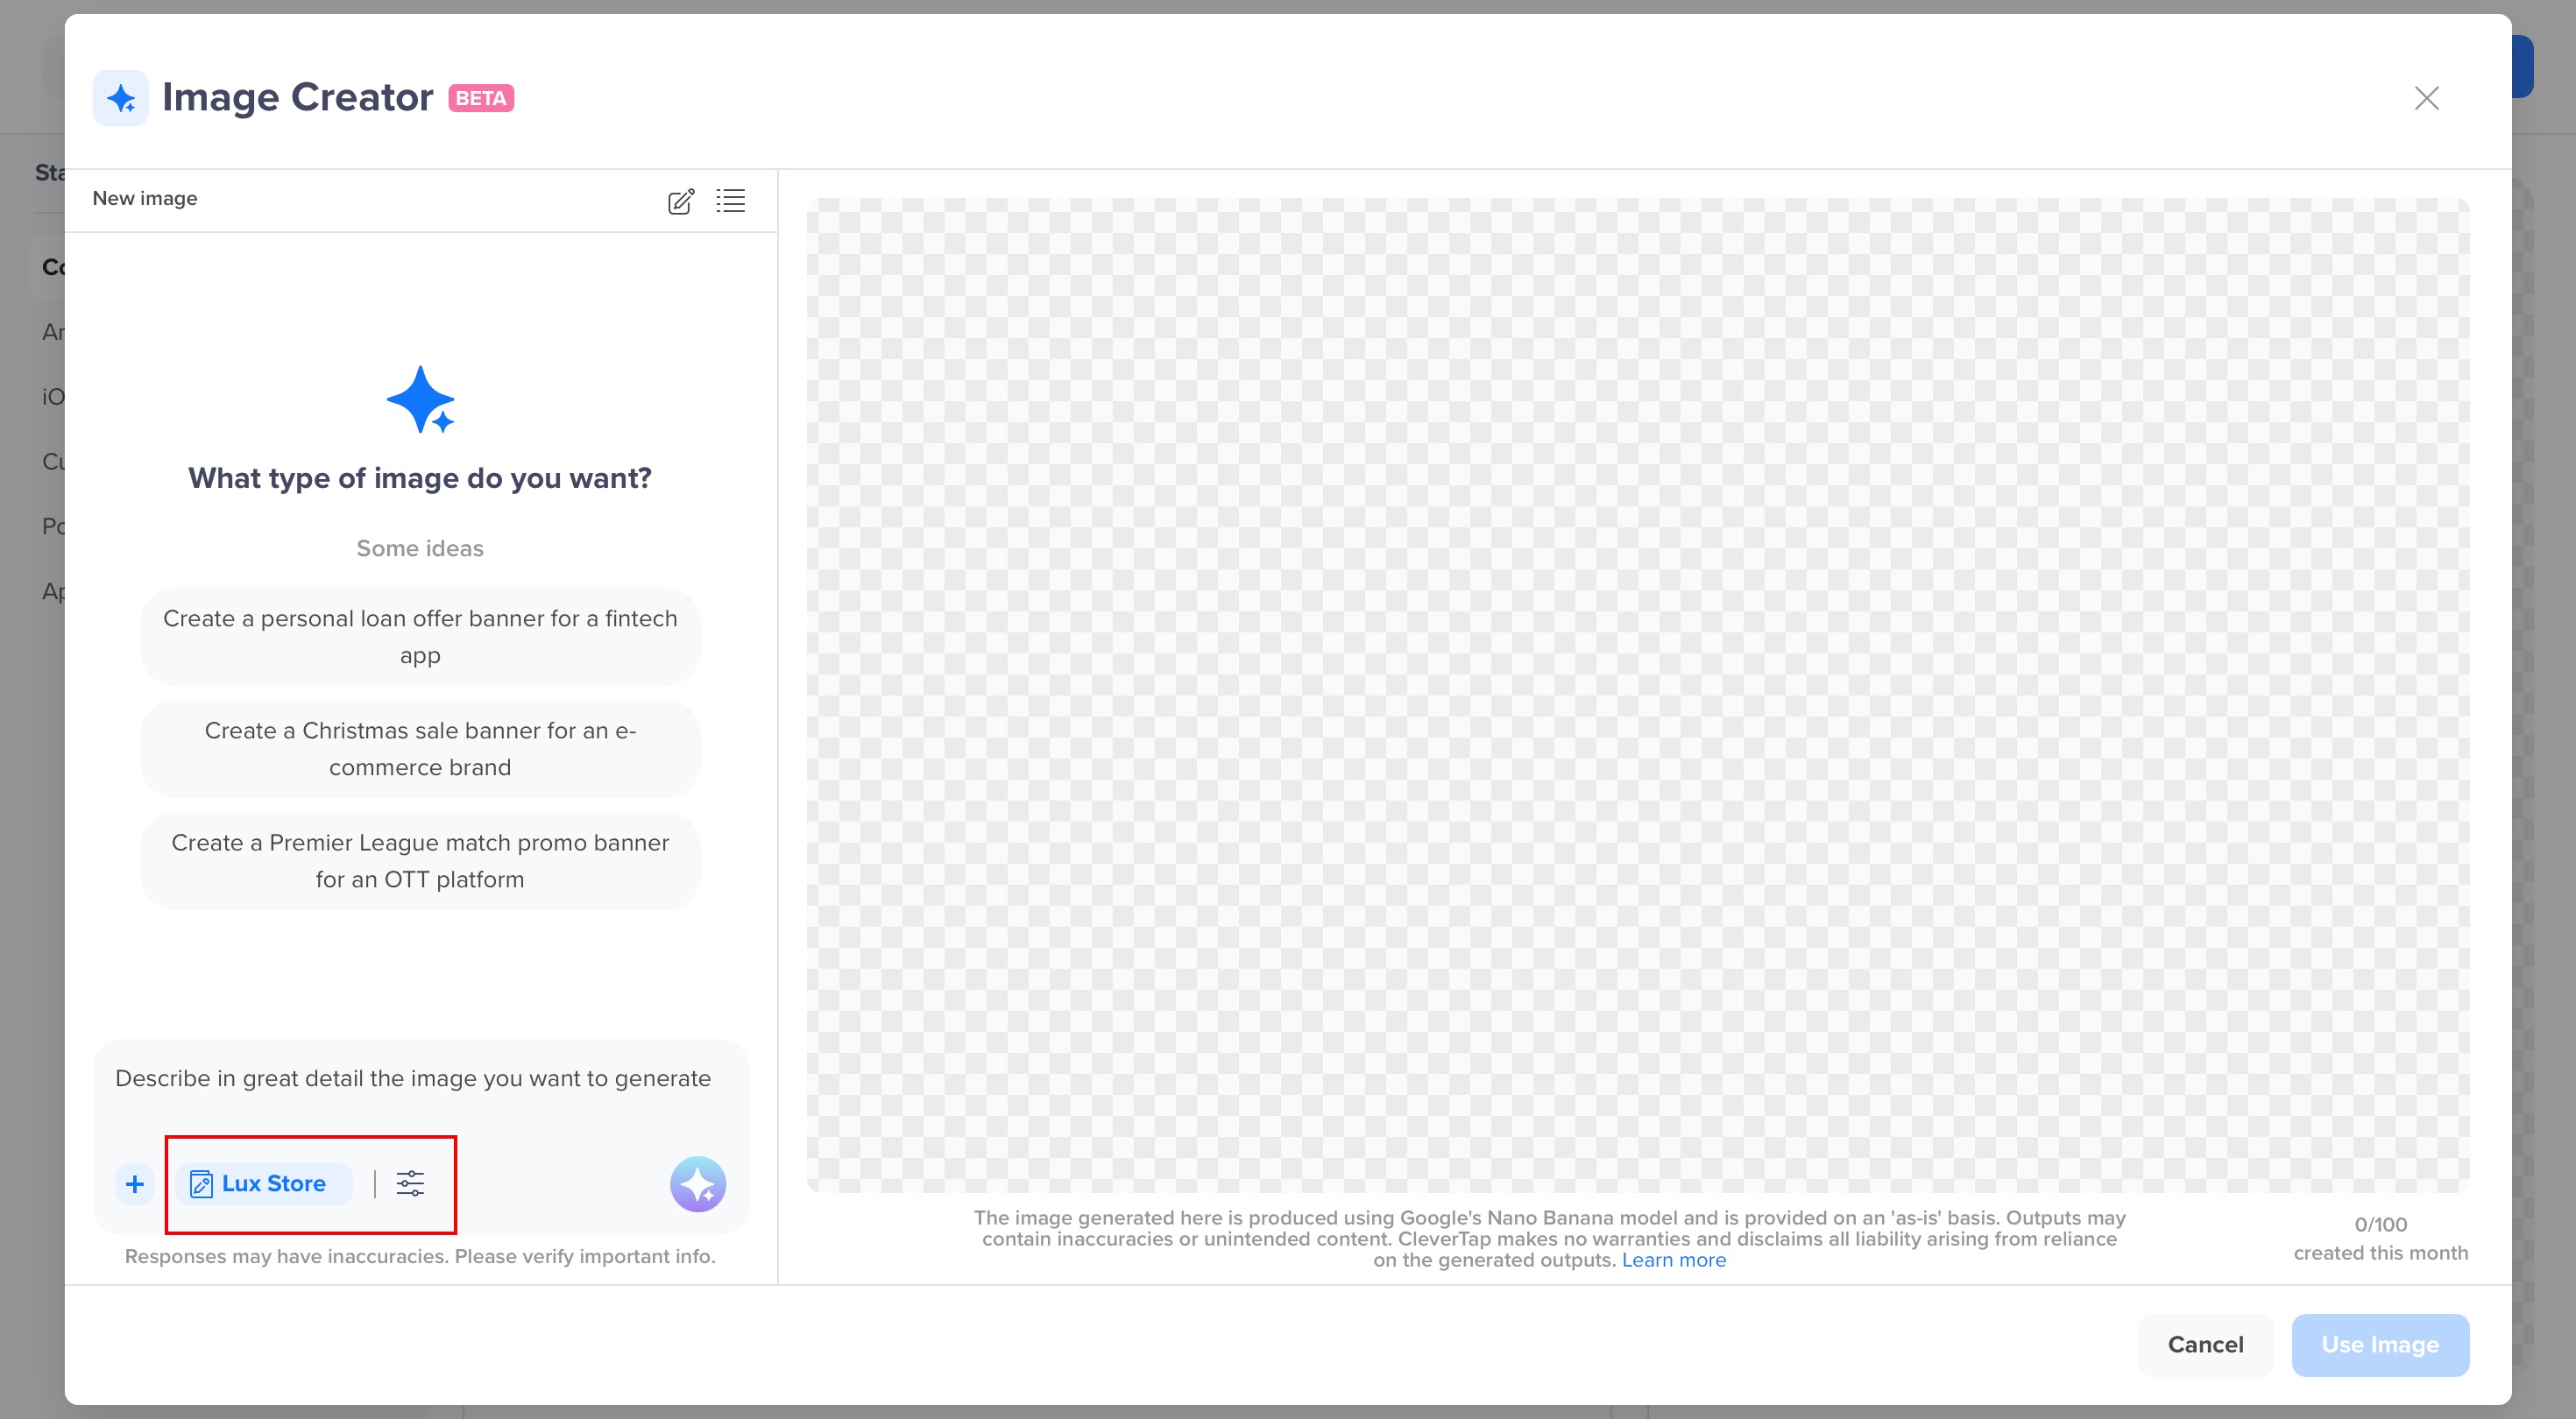
Filters and Brand Kit
Brand Kit
Click on Brand Kit to view your brand’s style, button colors, brand colors, and so on, for your image. Click Apply to this Thread. You can also select other kits or configure a custom kit for the current image. The applied Brand Kit ensures that all generated visuals remain consistent with your brand identity.
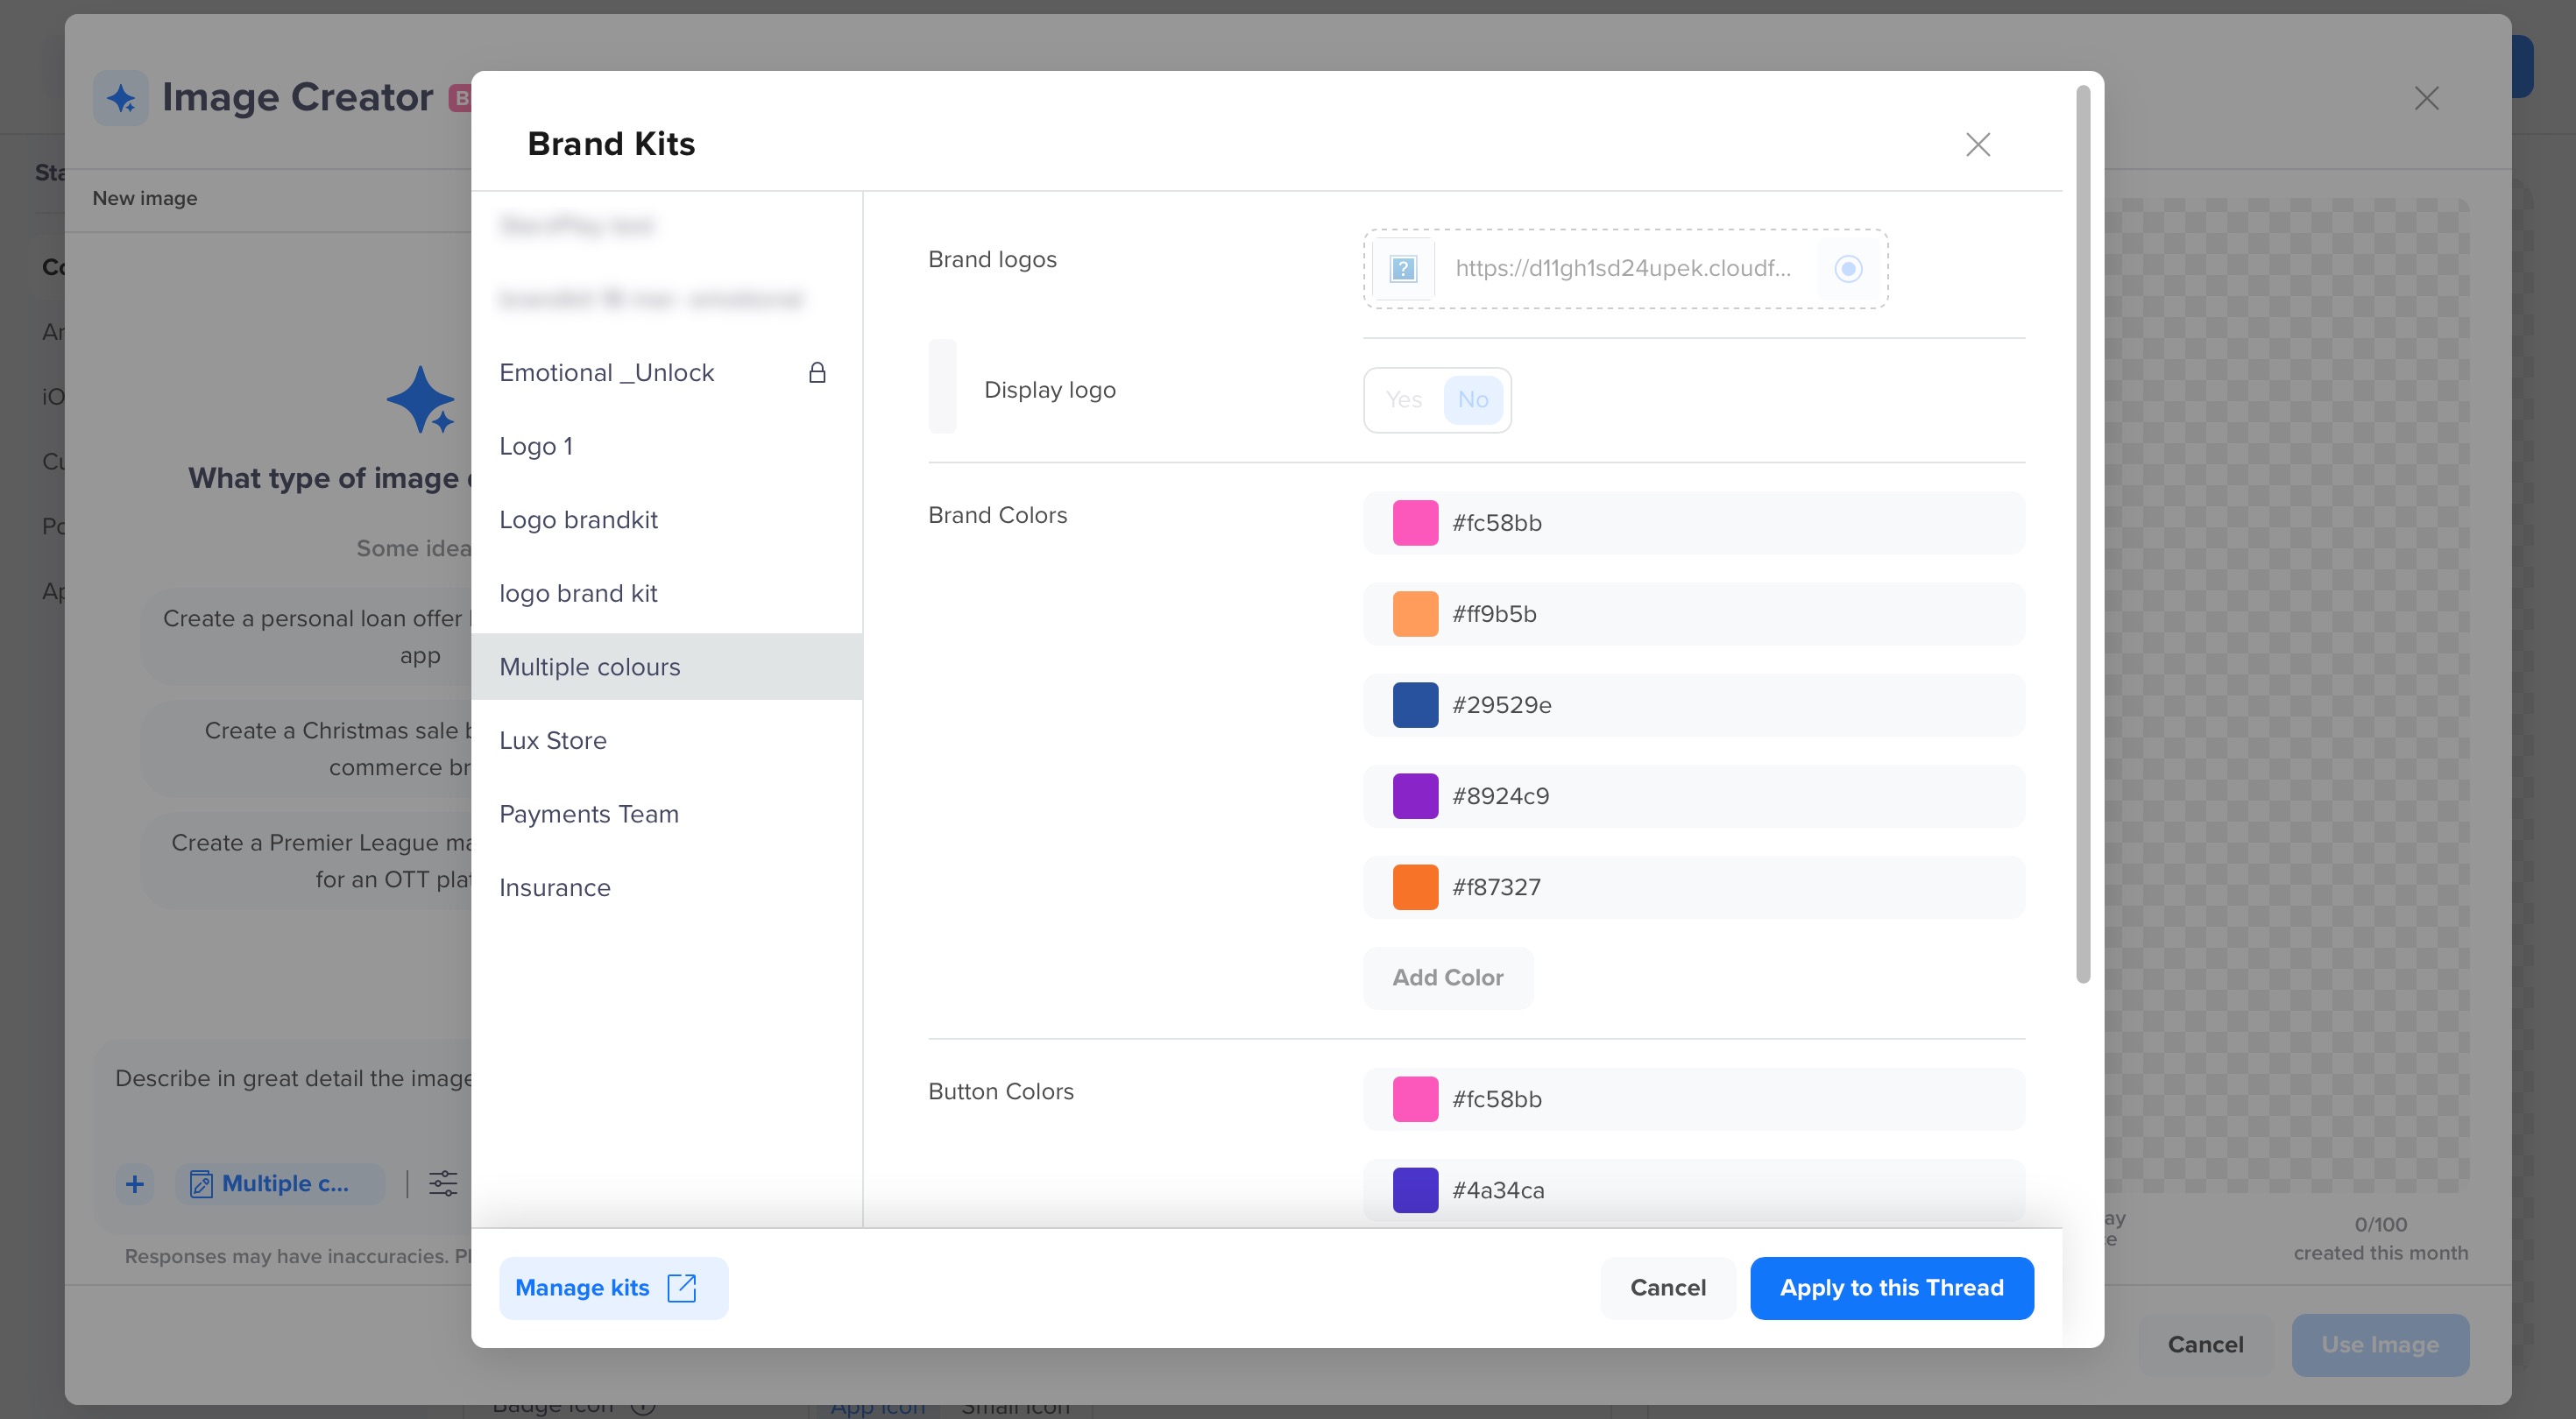
Brand Kits
Note
- Locked kits cannot be edited within the campaign flow.
- Any changes made to BrandKit through campaign flow only apply to the current thread.
- If a prompt conflicts with Brand Kit settings (for example, brand colors or tone), the AI automatically follows the Brand Kit settings to maintain consistency.
For more information on setting up and using brand kits, refer to Brand Kit.
Image Settings
Click  to open Image Settings. Here, you can:
- Select the File format between JPEG or PNG.
- View the Aspect ratio and size, which are auto-selected and non-editable. The aspect ratio and size are automatically aligned with Push OS specifications (for example, 1:1 for Large Icon and 3:2 for Expanded Image) to ensure compatibility.
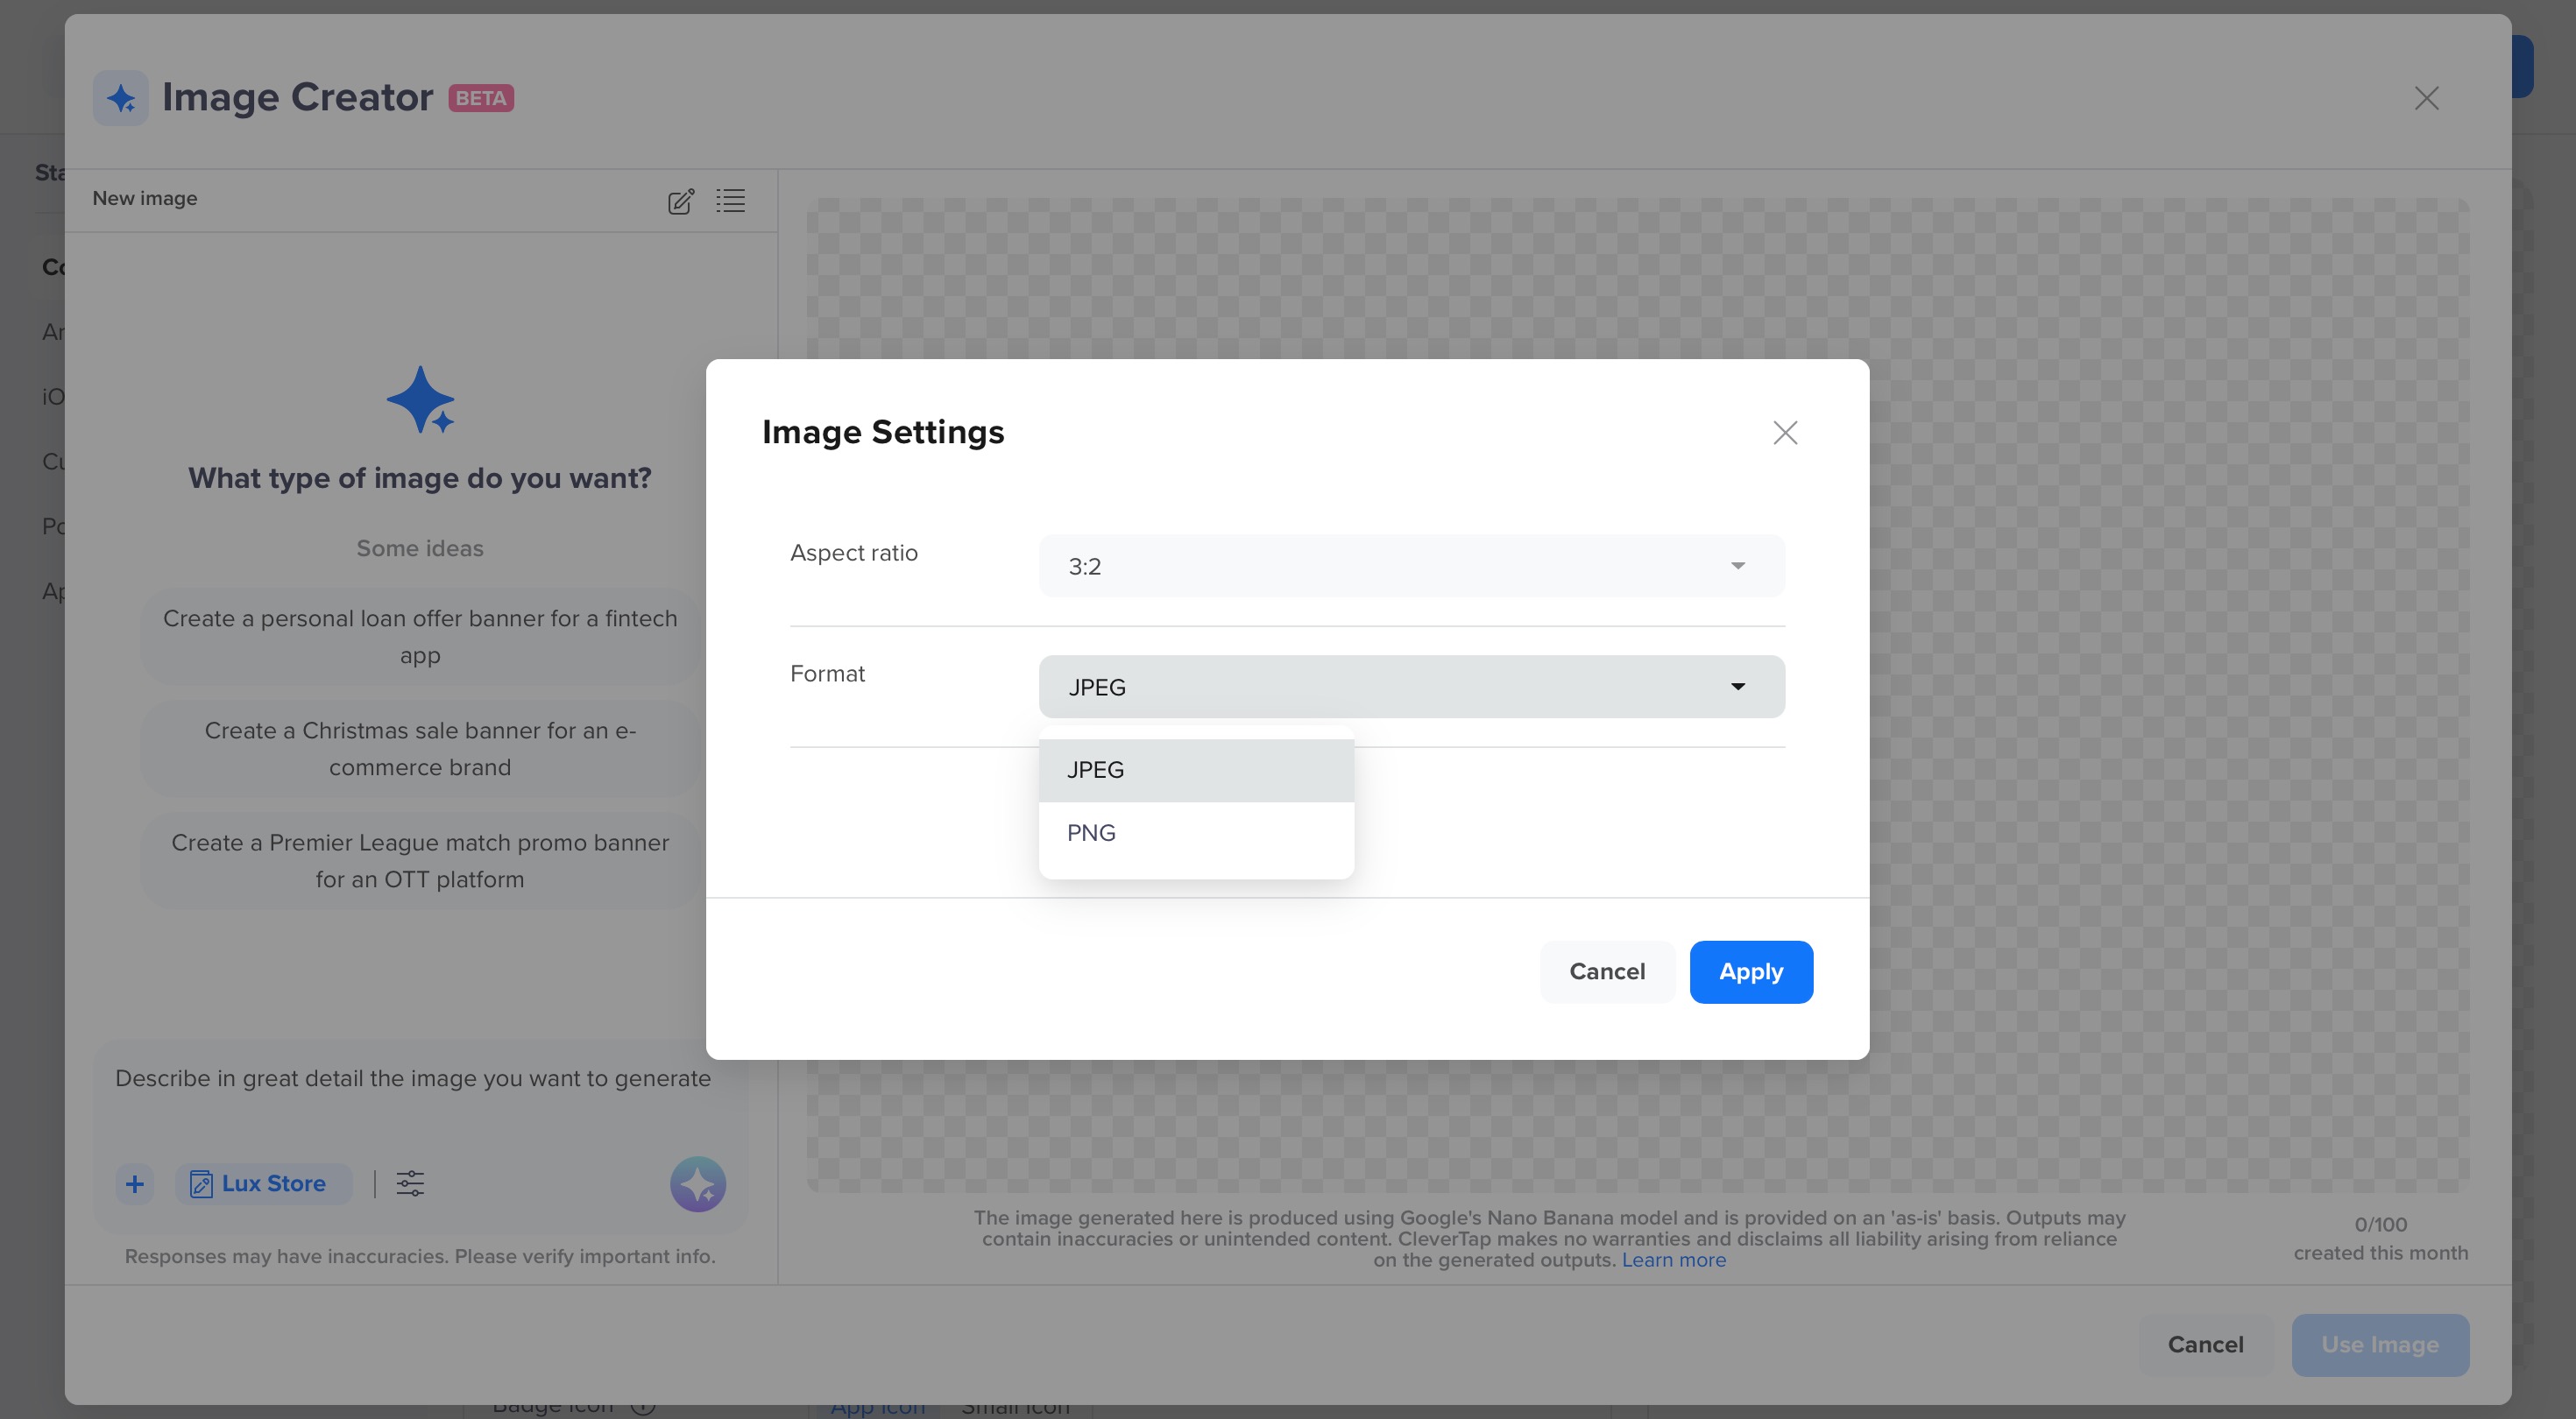
Image Settings
Manage Generated Images
All AI-generated images can be accessed via Threads and AI Images Folder.
Threads
Once you start generating images, CleverTap automatically saves your sessions under the Threads  tab. Each session is stored as a thread, which captures your prompts, refinements, and generated outputs, helping you resume from where you left off without losing context.
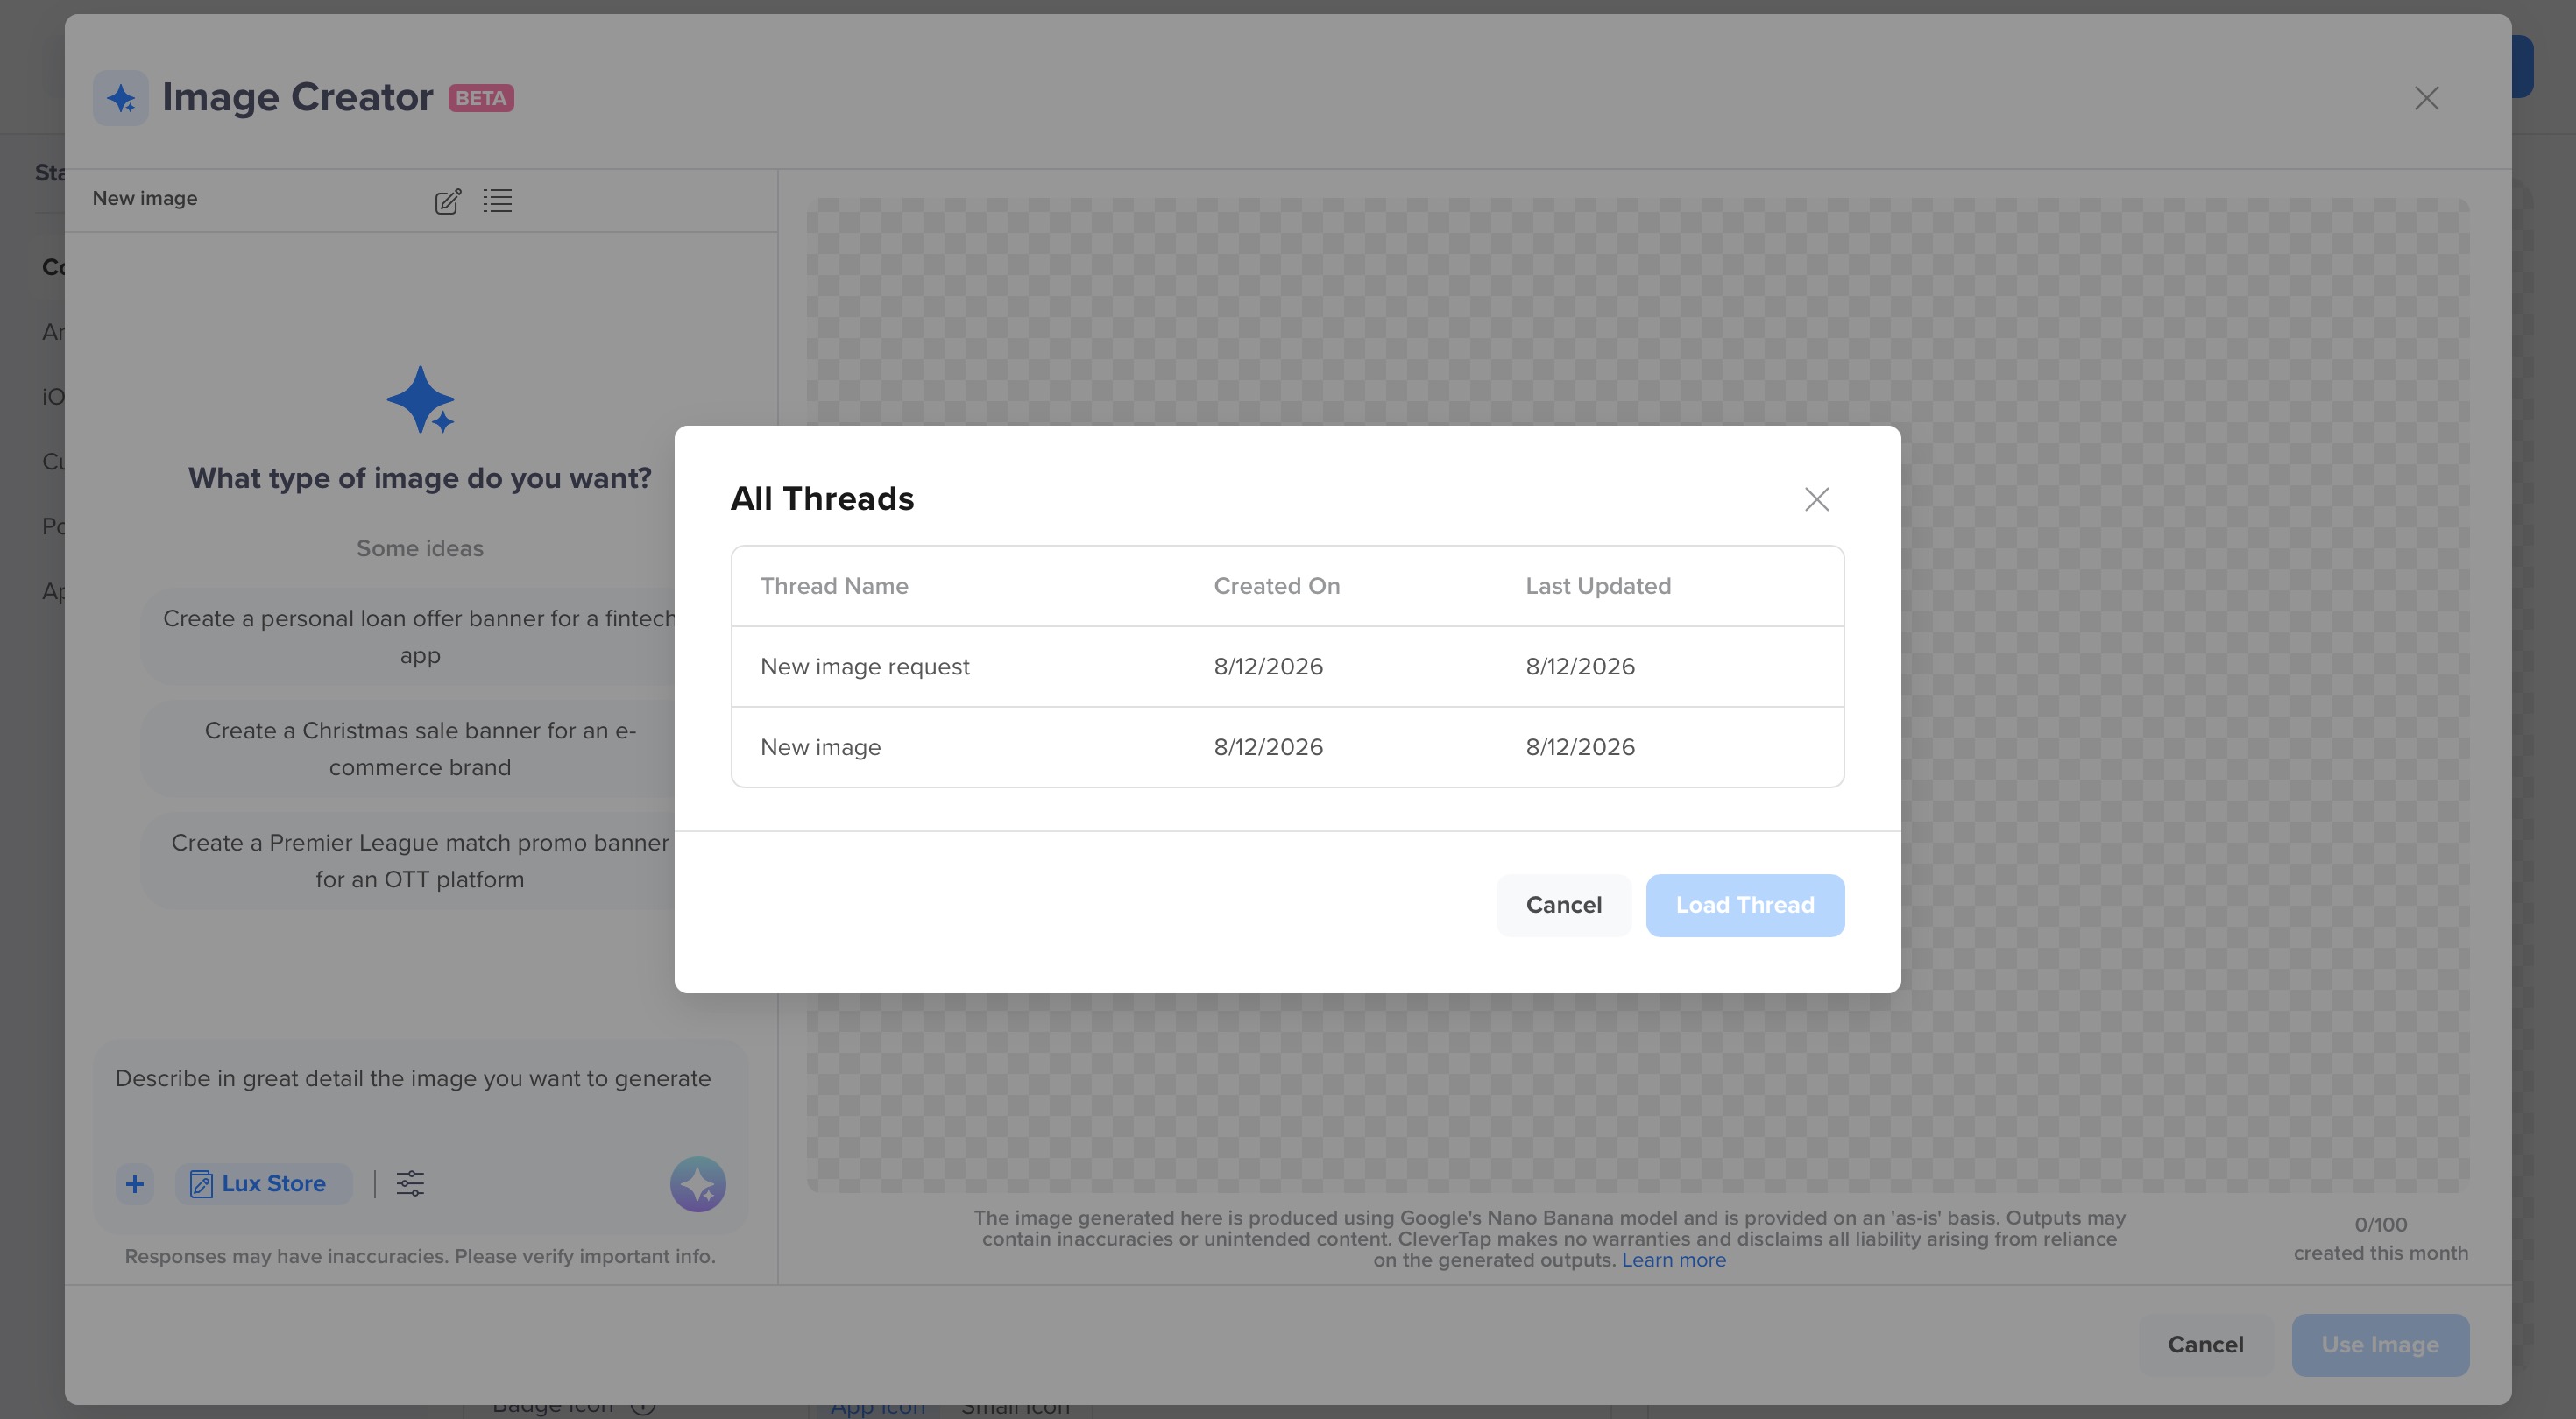
All Threads
How Threads Work
Threads are scoped to your Account, Agent, and User, ensuring that your history remains personalized and relevant. All threads for your account appear in the All Threads popup. A thread becomes the context for your next generation, allowing Clever.AI to remember your prior visual style, brand preferences, or edits. They are not tied to specific campaigns; they persist across multiple campaigns for seamless continuity.
If multiple users from the same account use AI tools:
- Each user sees only their own threads and the latest image generation session that they have participated in.
- Threads are separate for Segmentation, Analytics, Image Creator, and Scribe, even under the same account.
Manage Threads
From the All Threads view, you can:
- Reopen an older thread to continue generating or editing images using the same context.
- Review and compare multiple image versions created during that session.
- Restore or reuse previously generated images without regenerating them.
TipFor subsequent edits, you need not restart a session. You can type your next instruction directly in the chat. For example: “Make the background blue and add a 50% OFF badge in the corner.” The AI will update the existing image while maintaining your brand styling and earlier visual tone.
AI Images Folder
All AI-generated images are automatically stored in your CMS, under the AI Images folder for your account. This allows you to reuse, manage, or download previously created visuals without needing to regenerate them.
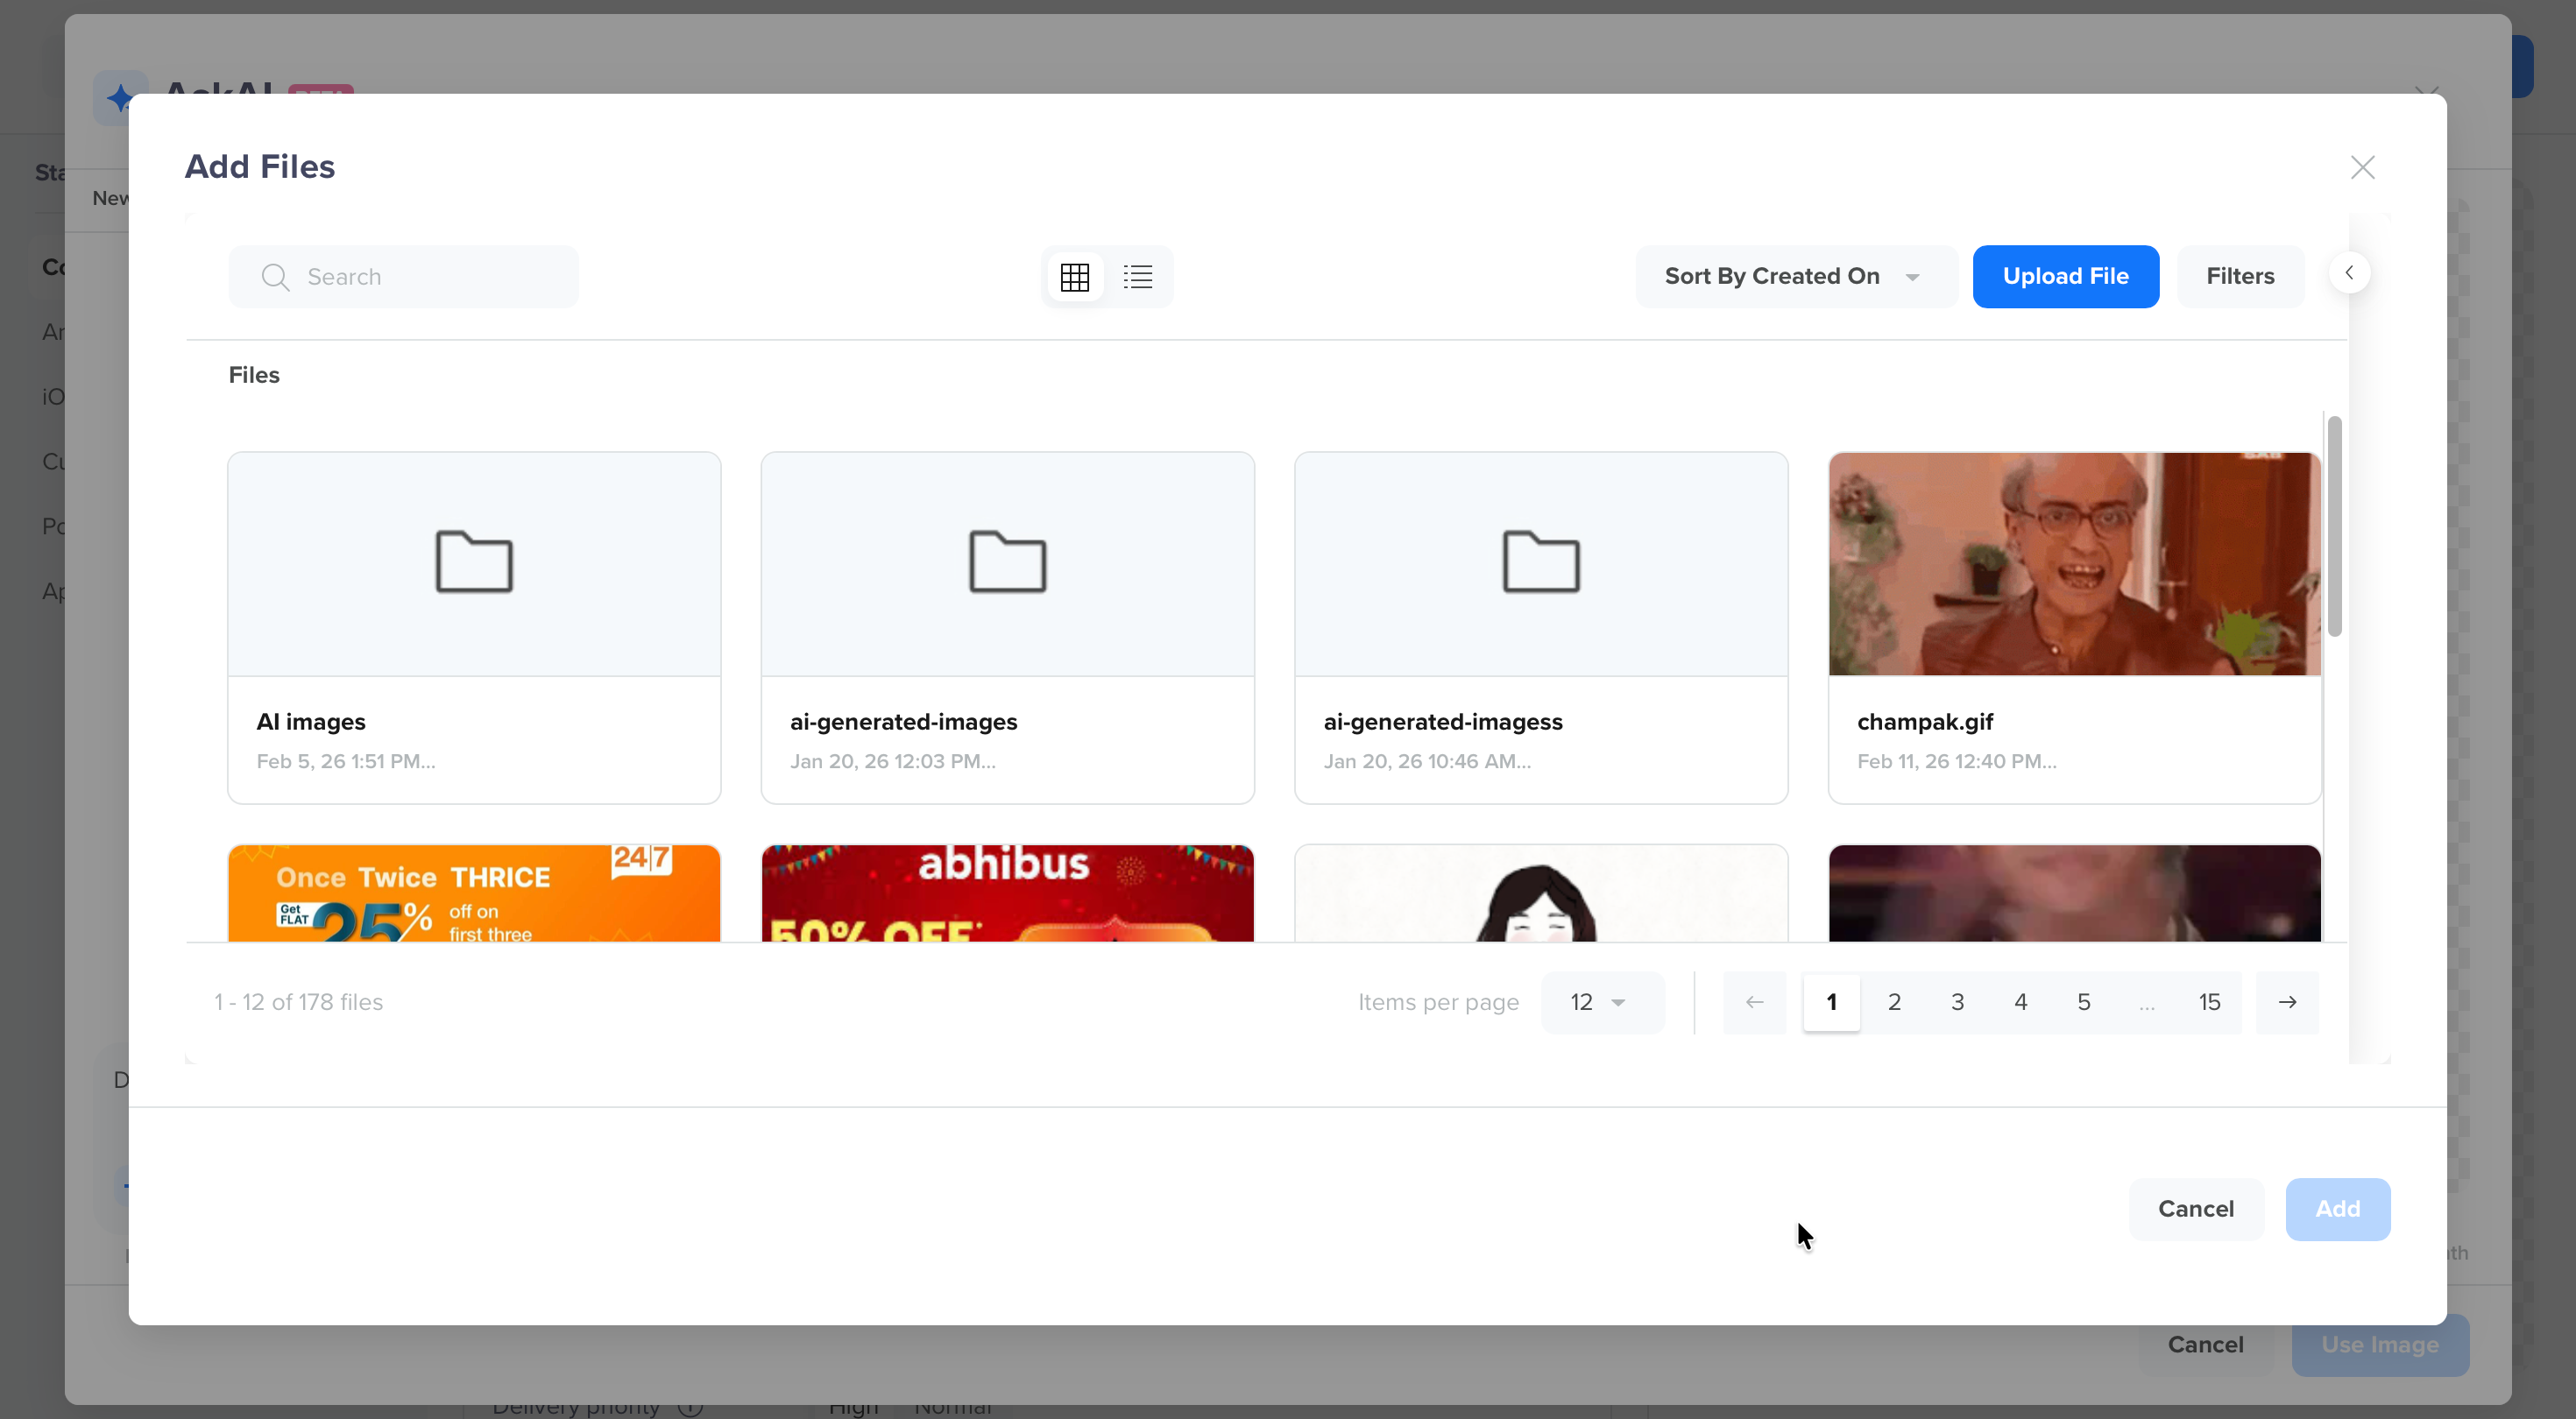
AI Images Folder
NoteThe AI Images folder is system-managed and cannot be renamed, moved, or deleted. Images stored in this folder can be download and reused in campaigns, but cannot be renamed or moved to a different folder.
Best Practices for Writing Prompts
The following best practices will help you with writing more detailed prompts:
- Be specific and include theme, tone, and visual intent.
Example: “Create a modern app promo banner with minimalist icons.” - Add context; specify what the image is for (for example, offer, product launch, festival).
- Use your brand kit for visual alignment.
- Don’t write one-liners. A prompt like “banner” or “sale” gives the AI too little to work with — resulting in generic, off-brand images.
- Describe the scene, emotion, and layout you want to see.
Example: “Create a 1:1 In-App image for a festive Diwali campaign with maroon and gold tones, decorative lamps, and a bold ‘Shop Now’ button in brand colors.” - Review and refine your prompt if the output doesn’t match your intent.
The Image Creator relies on the clarity of your description to produce accurate, high-quality visuals. The more specific you are about theme, colors, layout, and mood, the better the output aligns with your campaign goals.
For more information, refer to Generate On-Brand Images with Effective Prompts.
Image Generation LimitAI image generation is capped at 100 images per account per month. The quota refreshes monthly and applies across all users within the account. Once the limit is reached, image generation will be disabled until the next reset.
To increase the cap for image generation after limit is reached, contact your Customer Success Manager.
Additional Resources
For more information, refer to the following resources:
Updated about 1 month ago