IP Whitelisting
Understand how to leverage the IP Whitelisting feature to restrict dashboard access.
Overview
CleverTap's IP Whitelisting feature makes the IP restriction process more intuitive and self-serve for the customers.
The CleverTap dashboard showcases business-sensitive information such as revenue, application installs, conversions, etc. Therefore, organizations might need to restrict dashboard access to certain administrative users after integrating CleverTap SDK for different business reasons.
Whitelist IP Addresses
To whitelist an IP address, the admin needs to perform the following steps:
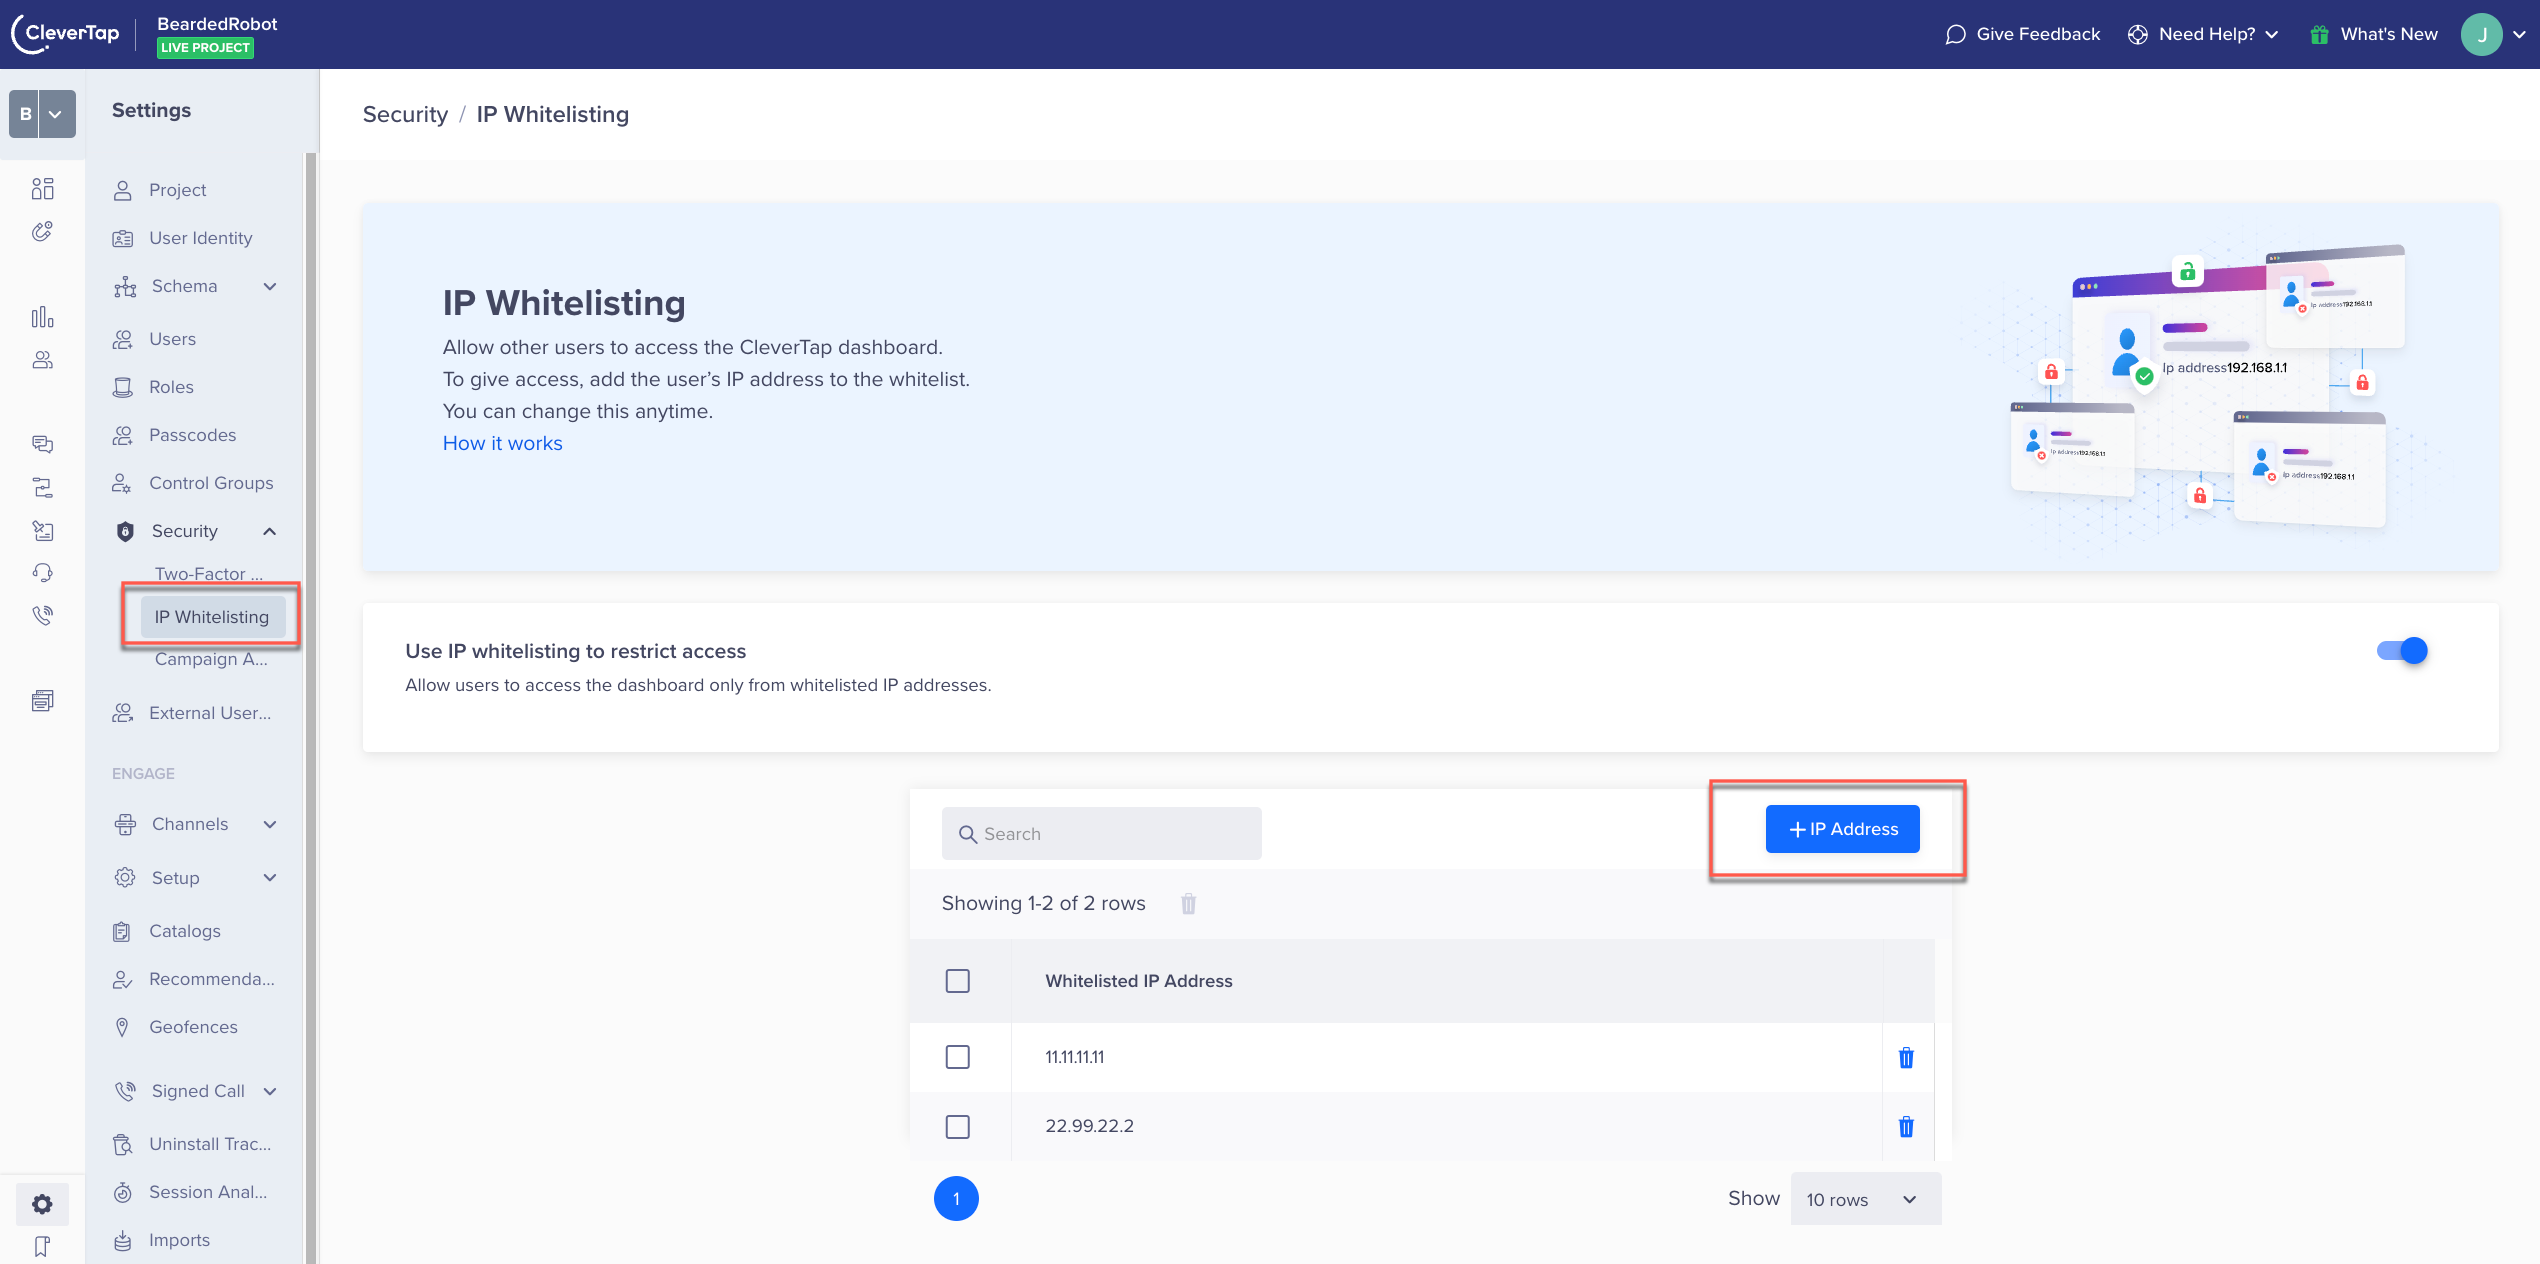
- Navigate to Settings > Security > IP Whitelisting . Ensure that the Use IP whitelisting to restrict access toggle is turned on.
- From the IP Whitelisting page, click +IP Address to add a new IP address.
IP Whitelisting ToggleOnly admins can turn on/off the Use IP whitelisting to restrict access toggle on the IP whitelisting page.

IP Whitelisting
-
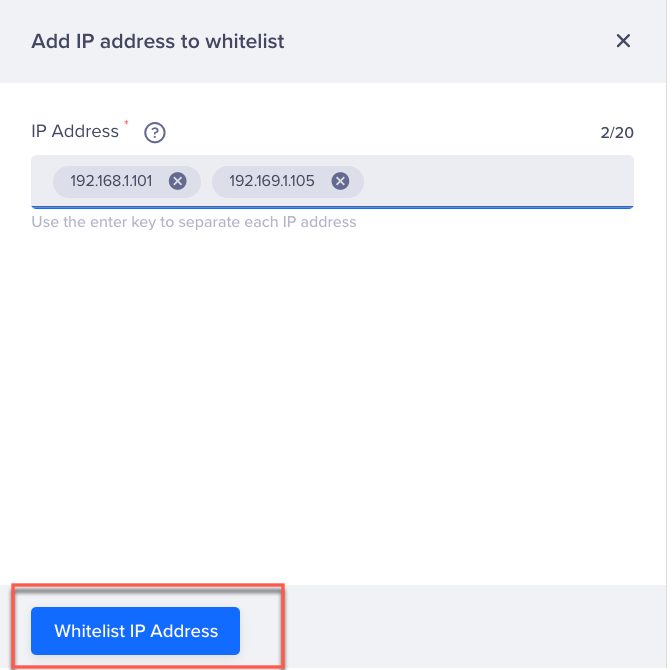
Enter the IP address you wish to whitelist in the IP Address field. CleverTap supports both IPV4 and IPV6 addresses.
You can add up to 20 IP addresses at once. If you are adding multiple IP addresses, use commas to separate them. After you enter all the IPs, click Whitelist IP Address.

Whitelist IP Address View
NoteIf you are whitelisting IPs for the first time, you need to ensure that you whitelist your own IP, as it avoids locking your own account.
Remove Whitelisted IP Addresses
To remove a particular IP address:
- Click the
 icon adjacent to the particular IP from the IP Whitelisting page.
 - Click Remove.
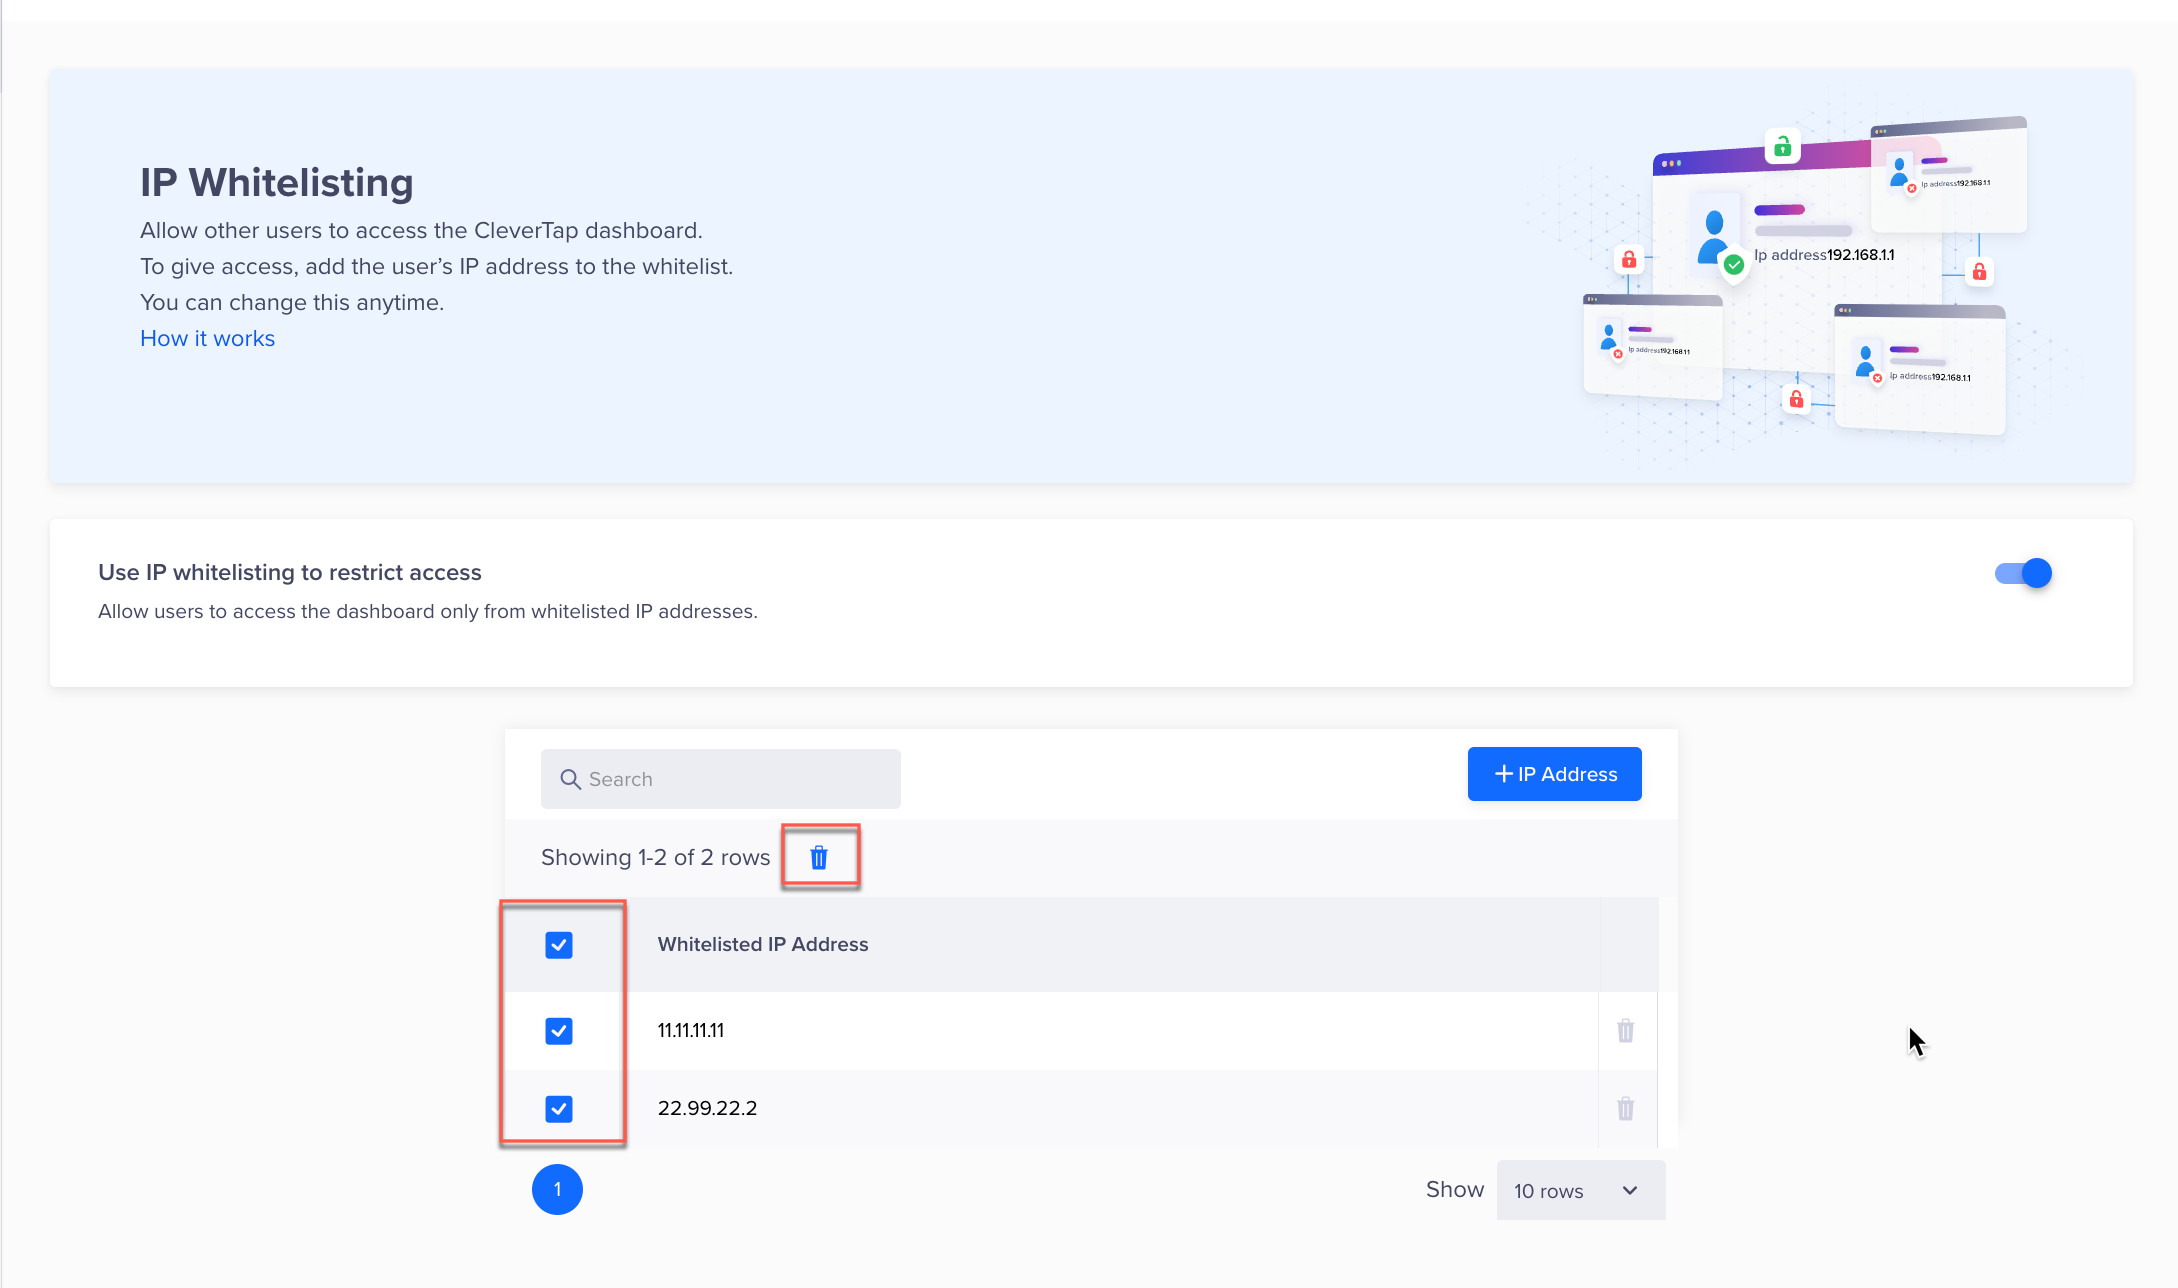
To delete multiple IP addresses together, select all the IP addresses from the whitelisted list and click the delete ![]() icon, as highlighted below:
icon, as highlighted below:

Delete Multiple IP Addresses
NoteTurn off the Use IP whitelisting to restrict access toggle button to pause the IP whitelisting configuration.
Updated about 1 month ago
