Weather API
Contextual Location Partner
Overview
WeatherAPI provides real-time and forecasted weather data for any global location. By integrating WeatherAPI with CleverTap, you can:
- Trigger contextual campaigns based on local weather
- Deliver personalized messages such as umbrella offers on rainy days or sunscreen promos on sunny days
- Drive higher engagement through dynamic targeting powered by weather conditions
This document shows you how to configure WeatherAPI in CleverTap using Linked Content and use it in a Push Notification campaign.
Prerequisites for Integration
Before integrating WeatherAPI with CleverTap, check the following:
- An active WeatherAPI account
- Your WeatherAPI Key (from the WeatherAPI dashboard)
- Access to the CleverTap Dashboard with admin permissions
Integrate WeatherAPI with CleverTap
The integration involves the following three important steps:
- Generate WeatherAPI Key
- Configure Linked Content in CleverTap
- Configure Personalized CleverTap Campaign
Generate WeatherAPI Key
An API key is required to authenticate requests to WeatherAPI. To retrieve the key, perform the following steps:
- Log in to your WeatherAPI dashboard.
- Go to My Account > API Key.
- Copy the key. You’ll use this to configure Linked Content in CleverTap.
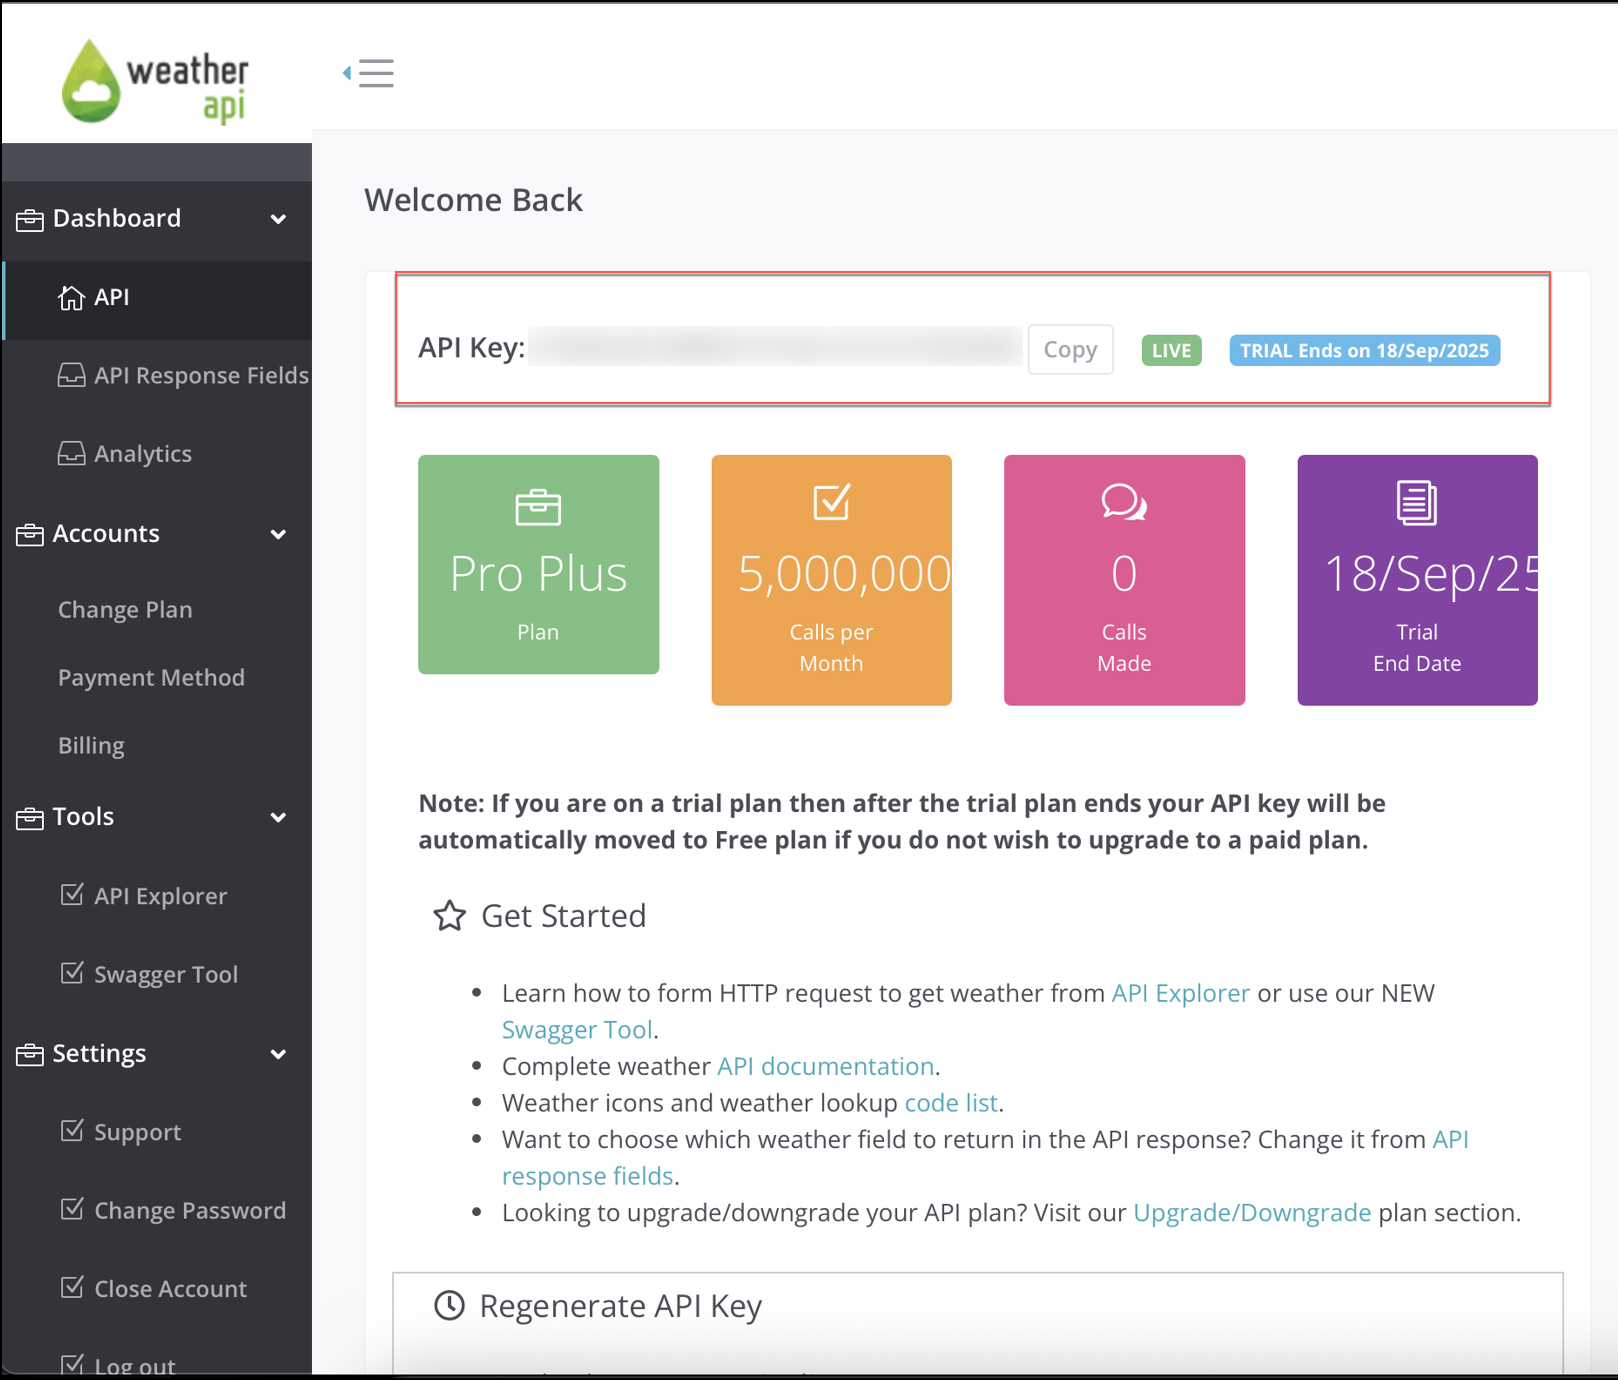
Weather API Key
Configure Linked Content in CleverTap
Connect WeatherAPI with CleverTap to fetch weather data dynamically for each user.
- Go to Settings > Setup > Linked Content on the CleverTap dashboard.
- Click + Linked Content.
- Fill in the following values:
| Field | Value |
|---|---|
| Name | Weather Lookup |
| Method | GET |
| Destination URL | https://api.weatherapi.com/v1/current.json?key=<API_KEY>&q={{city}} |
Replace <API_KEY> with your actual WeatherAPI key. The {{city}} parameter will be dynamically mapped from each user's profile property.
- Click Test to preview the API response. You should see an output in JSON, such as:
{
  "location": {
    "name": "Paris",
    "country": "France"
  },
  "current": {
    "condition": {
      "text": "Sunny"
    },
    "temp_c": 25.0
  }
}- Click Autofill Objects with Response to map the JSON fields.
- Click Test and Save to complete the setup.
Configure Linked Content in CleverTap
Configure Personalized CleverTap Campaign
Use the configured Linked Content inside a push notification campaign to dynamically personalize the message based on each user’s local weather. To do so, perform the following steps:
- Go to Campaigns, click + Campaign and select Push Notifications as a messaging channel.
- Configure the Who, When, and Where sections based on qualifying requirements.
- In the What section, click Personalization (top-right corner).
- Select the link content configured in the previous step Configure Linked Content in CleverTap.
- Map the
cityparameter in the Weather API to the appropriate user property in CleverTap (for example,{{@Profile.city | default: 'Mumbai'}}). and click Apply.
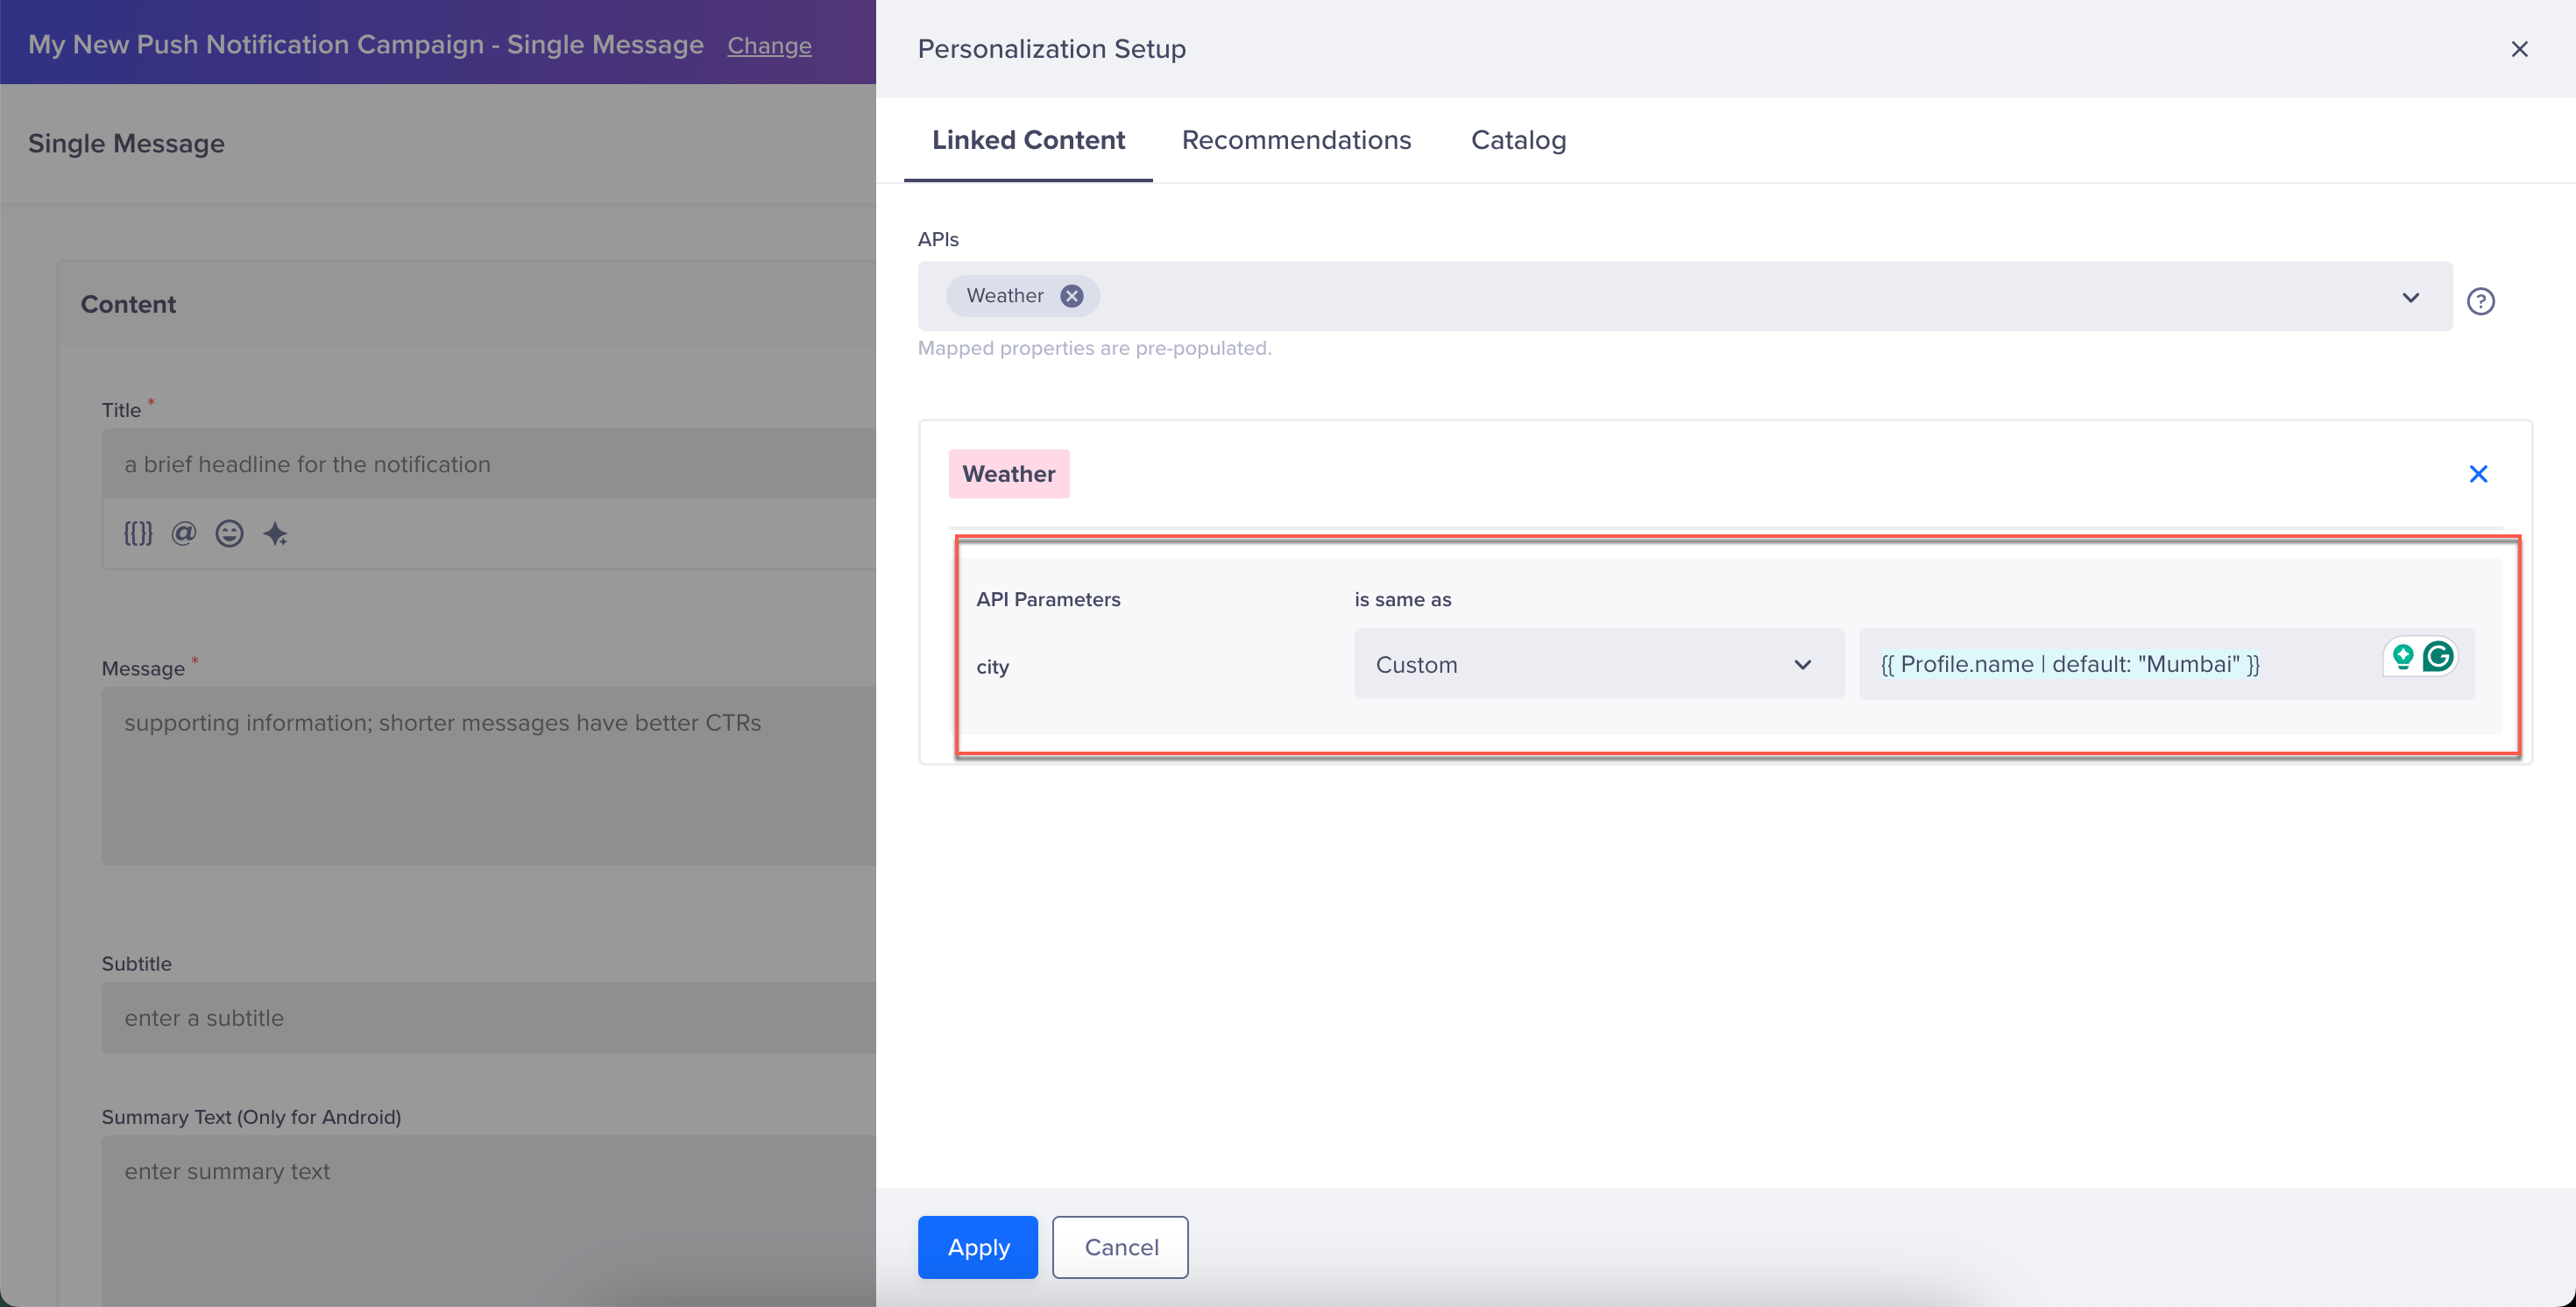
Personalization Setup
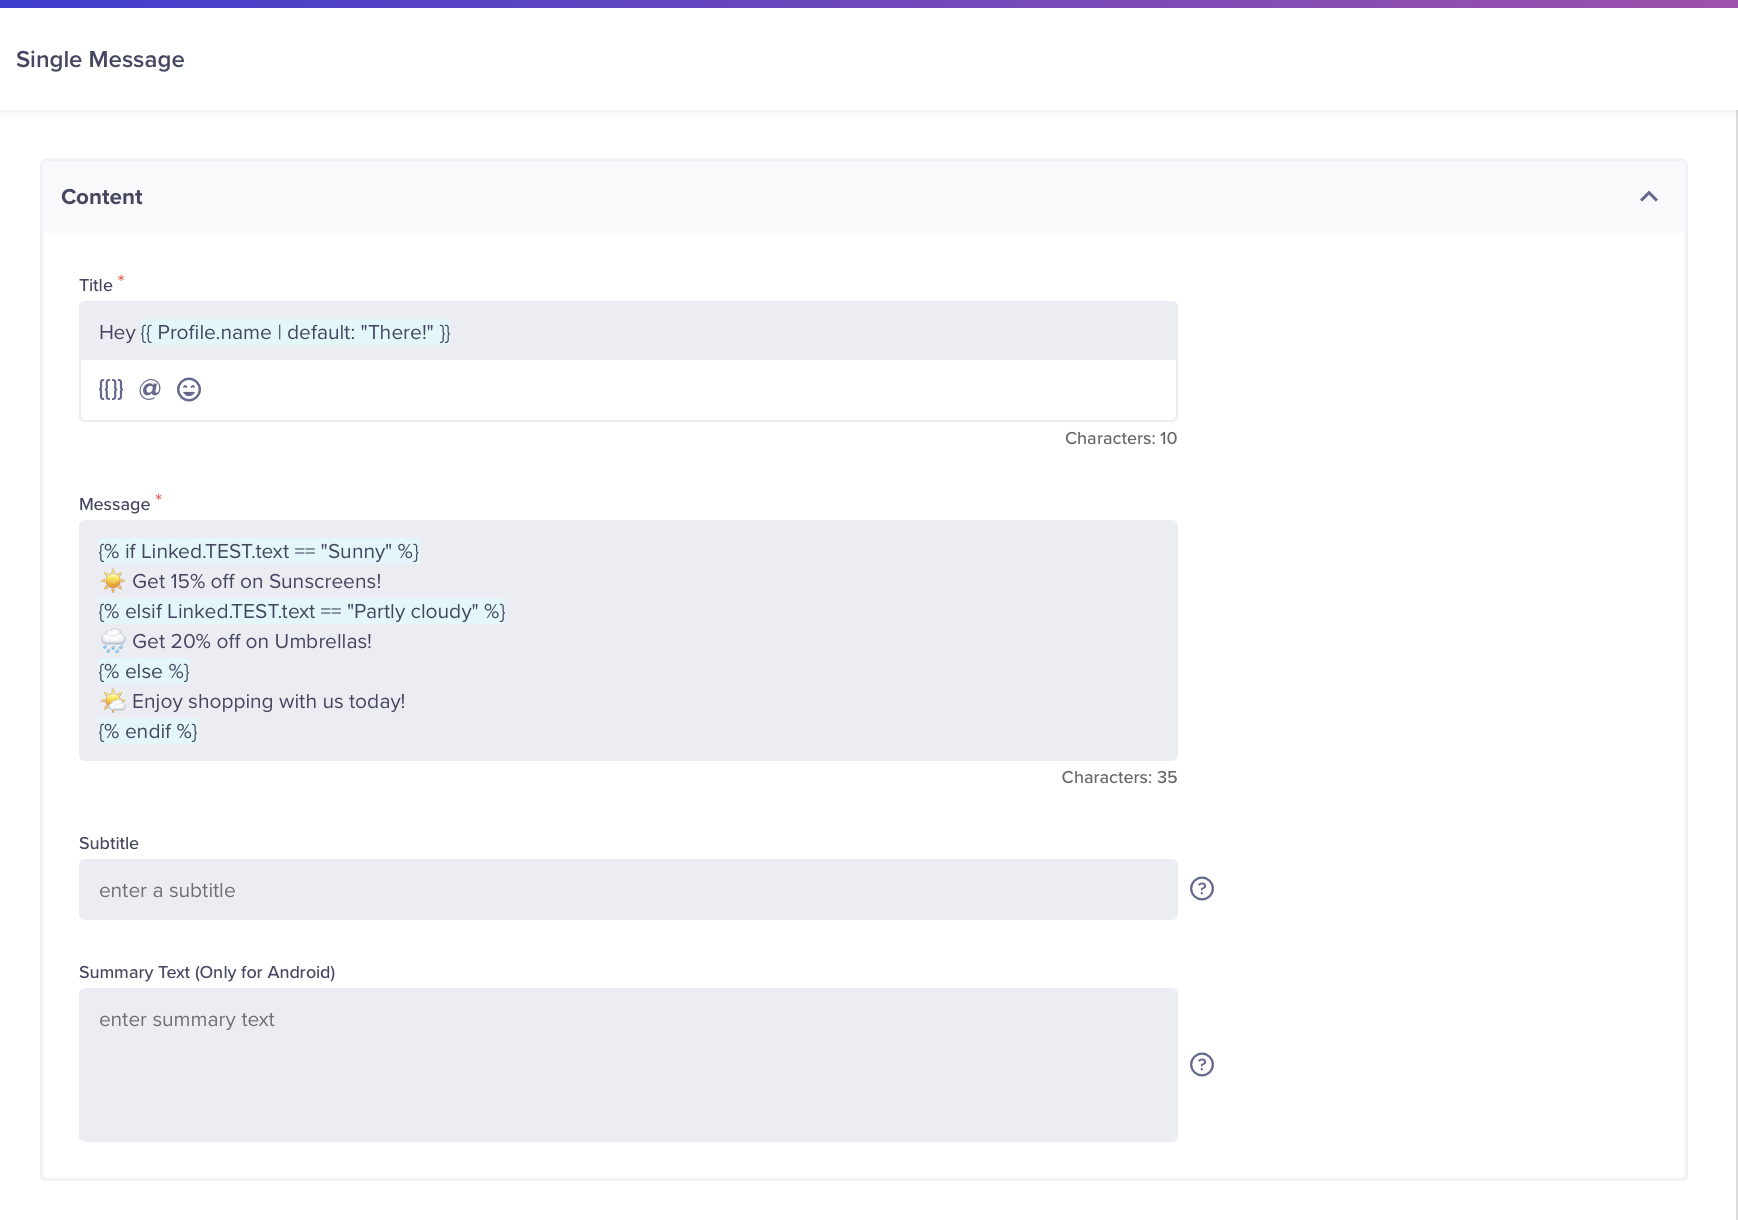
- Personalize the Title or Message field using a Liquid snippet. Following is an example where the conditions defined in the Liquid snippet use the weather API to determine which message to send based on the current weather at the user's location.
{% if Linked.WeatherLookup.current.condition.text == "Sunny" %}
🌞 Get 15% off on Sunscreens!
{% elsif Linked.WeatherLookup.current.condition.text == "Rain" %}
🌧️ Special deal on Umbrellas just for you!
{% else %}
🌤️ Enjoy shopping with us today!
{% endif %}
Messages can be customized further for weather types such as Cloudy, Storm, and so on. To learn more about Liquid syntax and available personalization tags, refer to Liquid Tags in CleverTap.
- Click Preview and Test to validate output against a test profile.
The following is a personalized notification sample based on the user’s local weather data, fetched dynamically using WeatherAPI.
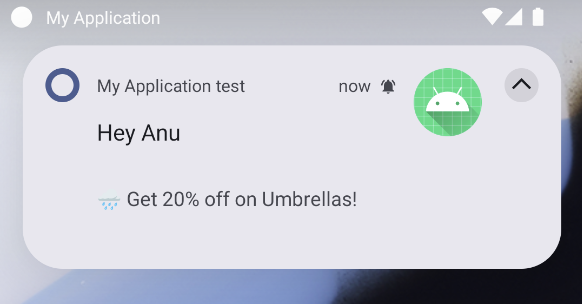
Push Notification
- After confirming accurate rendering, click Publish to launch the campaign.
Once live, the campaign will automatically personalize notifications based on each user’s real-time weather data.
Updated 8 months ago