External Trigger
Learn how to create a External Trigger campaign using the CleverTap dashboard.
Overview
External Trigger campaigns are a feature that allows you to trigger the campaign delivery based on API calls or external events. These campaigns are particularly well-suited for advanced scenarios, where the marketer creates the campaign content within the CleverTap dashboard, and the content delivery is triggered from your servers and systems. The API request used to trigger the message can include supplementary data that can be dynamically inserted into the message.
Public BetaThis feature is released in Public Beta. Contact your Customer Success Manager to know more about this feature.
Key Benefits
CleverTap's External Trigger feature can be a powerful tool for various applications across domains. The following are some of the use cases where different businesses can use this feature to provide real-time communication and automation capabilities:
-
Subscription Purchases or Upgrade Alerts
When a user purchases or upgrades their subscription plan, an external trigger can automatically send confirmation emails to the user. -
Fitness Milestones Achieved
When a user reaches a significant milestone, such as recording 15k steps daily, an external trigger can send them a congratulatory notification or email. These notifications are positive reinforcement that celebrates user achievements, motivating them to maintain their fitness routines and engage more with the app. -
Order Confirmation: Whenever an order is placed, an e-commerce platform makes an API call to the notification service, passing along the necessary information such as the product ID, product name, pricing details, and so on.
Businesses and applications can engage users effectively and ensure users receive timely updates and notifications based on specific events or conditions. Also, it significantly improves user satisfaction and overall user engagement in various domains.
Create an External Trigger Campaign
To create a new External Trigger campaign:
- From the dashboard, select Campaigns.
- Click + Campaign.
- From the Messaging Channels list, select the messaging channel. Currently, this feature is available for Push Notifications, Email, WhatsApp, and Webhook messaging channels.
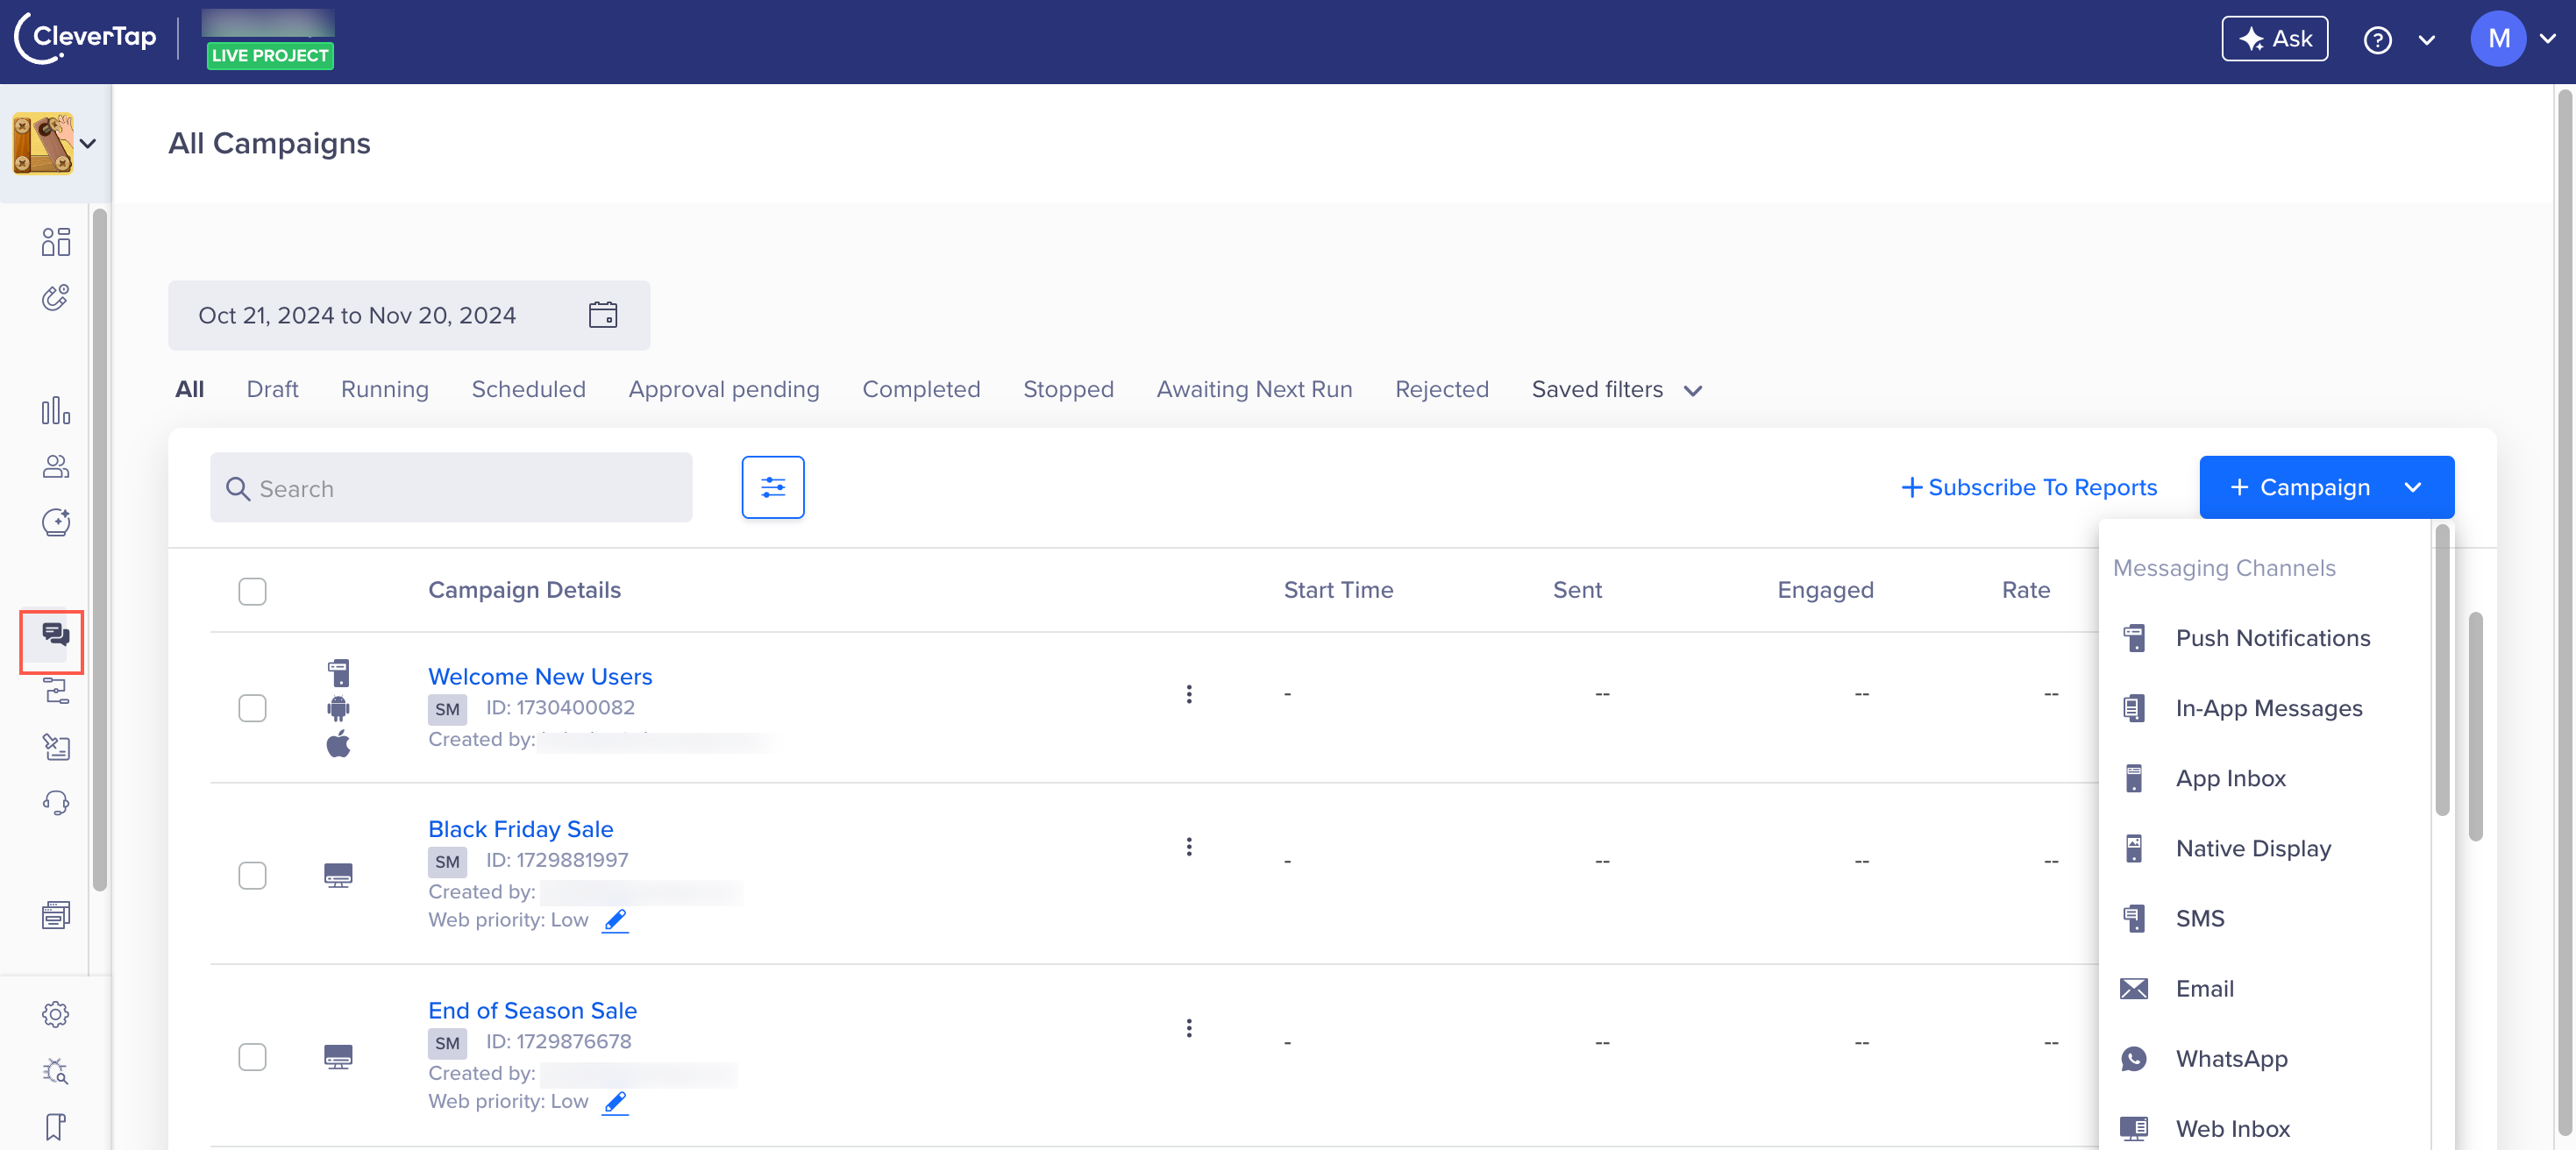
Select Messaging Channel
The campaign page displays.
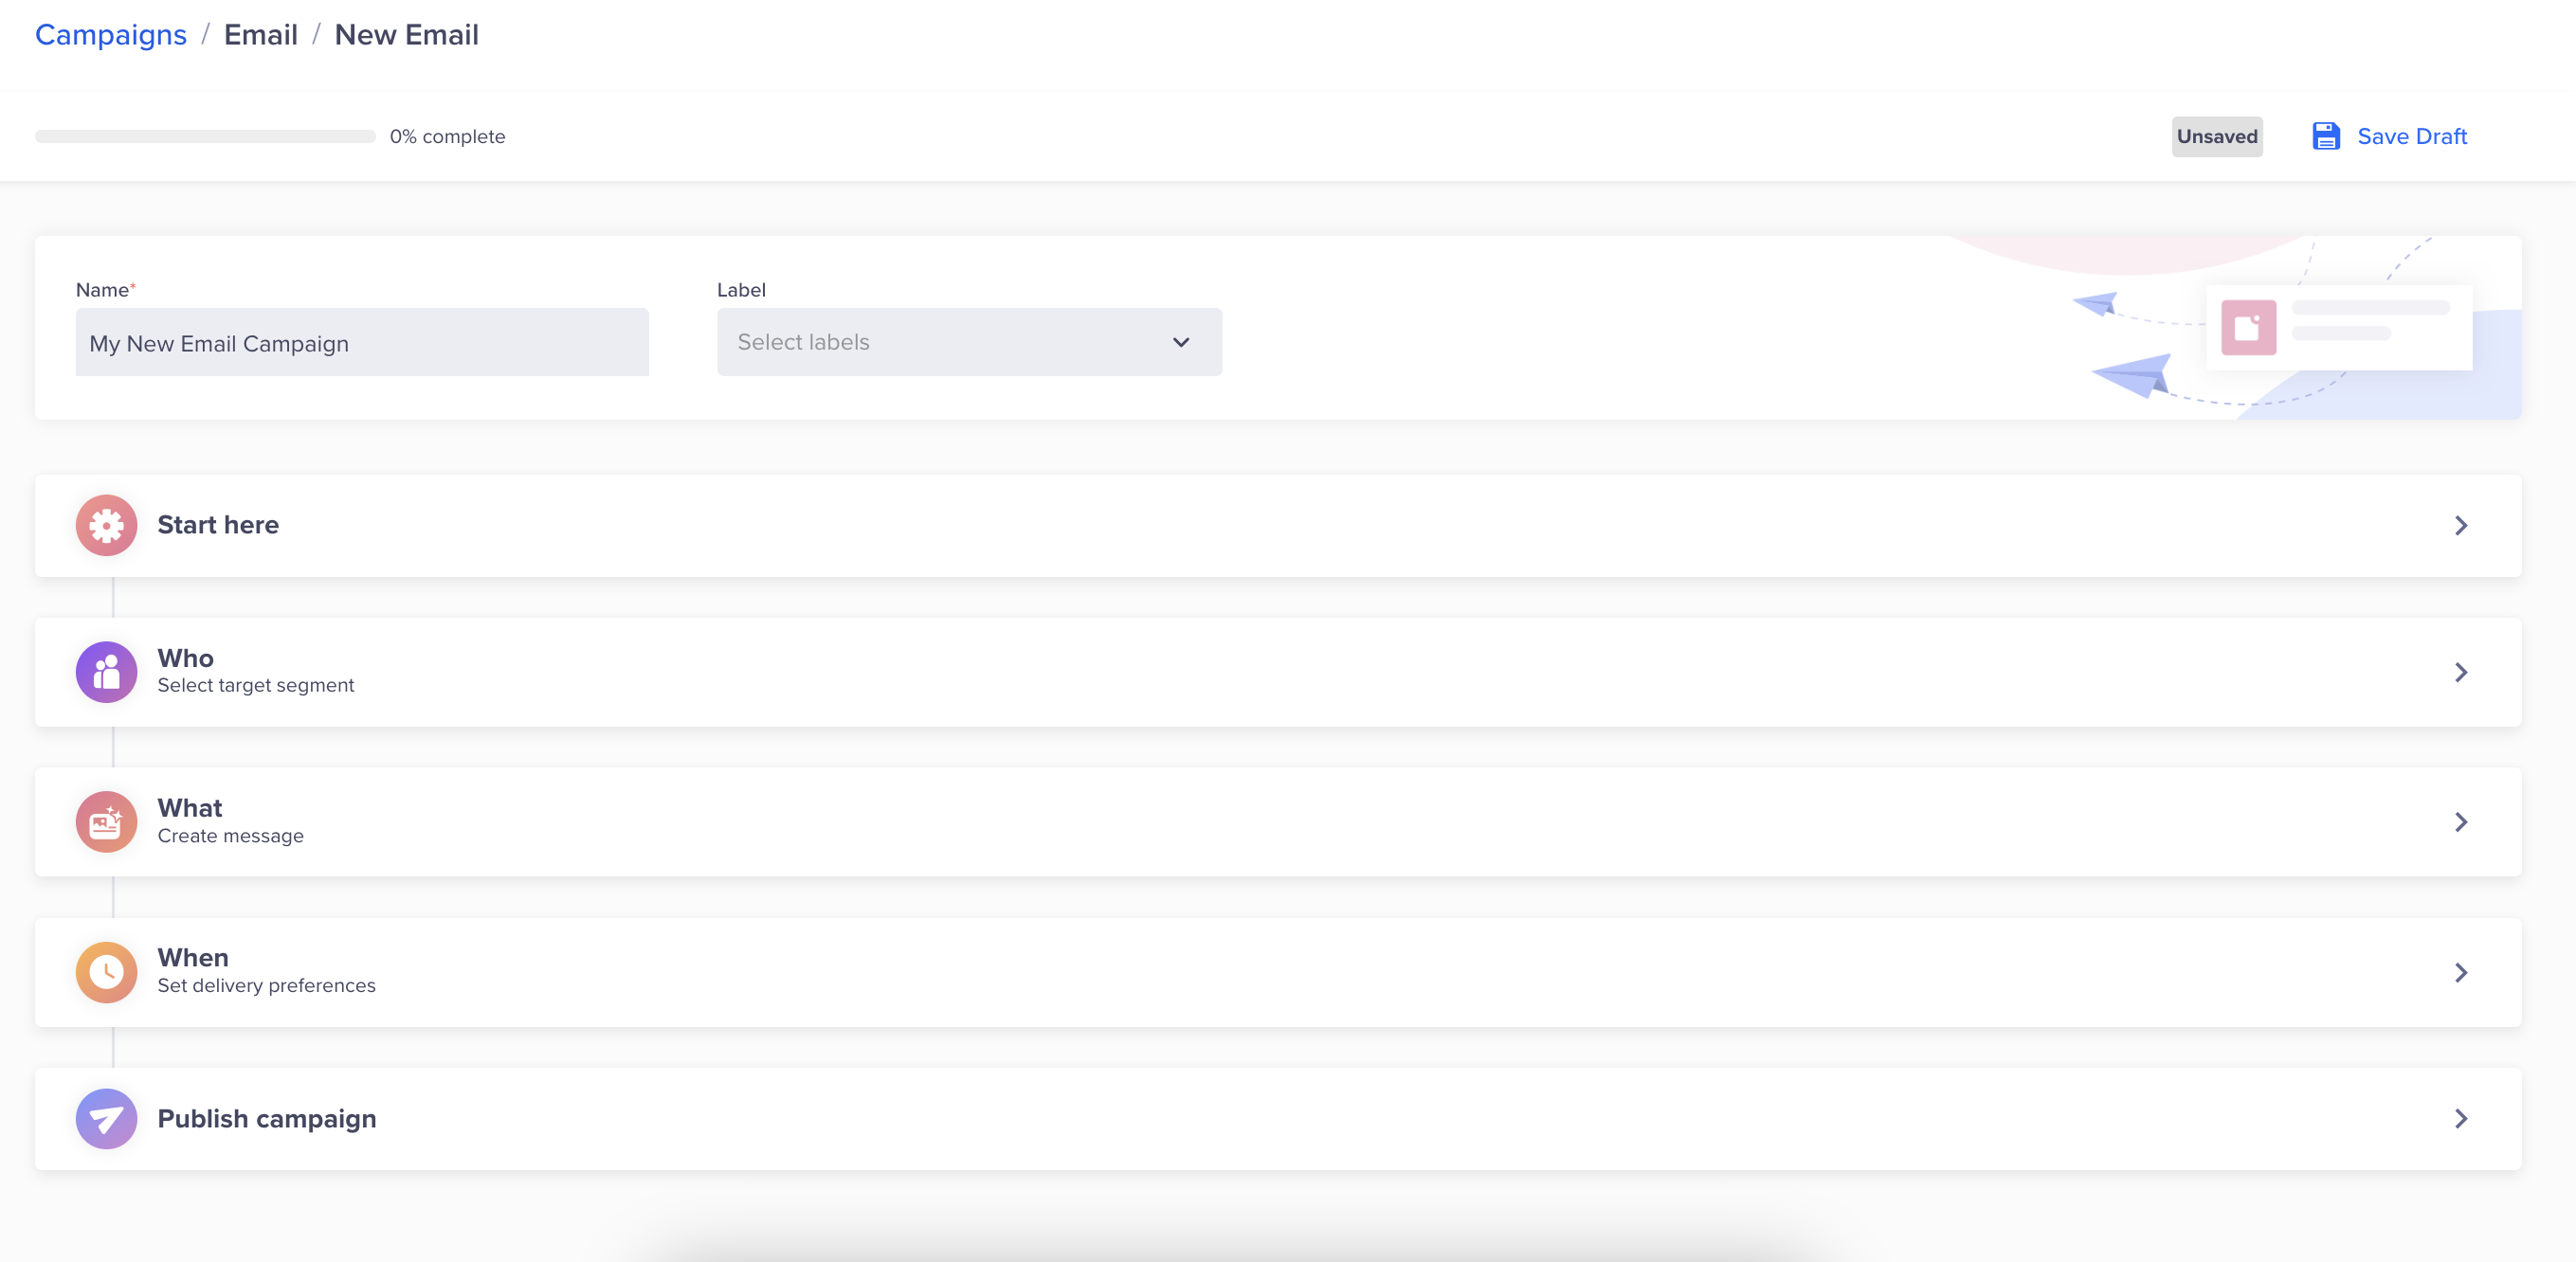
Create Campaign
- Define all the sections and publish the campaign.
- Trigger campaign via API.
Start Campaign Setup
The Start here section displays the setup information. Before moving ahead, ensure that the required platforms are integrated and ready for campaigns.
This section has the following parts:
Qualification Criteria
Setting up an External Trigger campaign takes a few steps. After selecting the messaging channel, select External Trigger from the Qualification Criteria section.
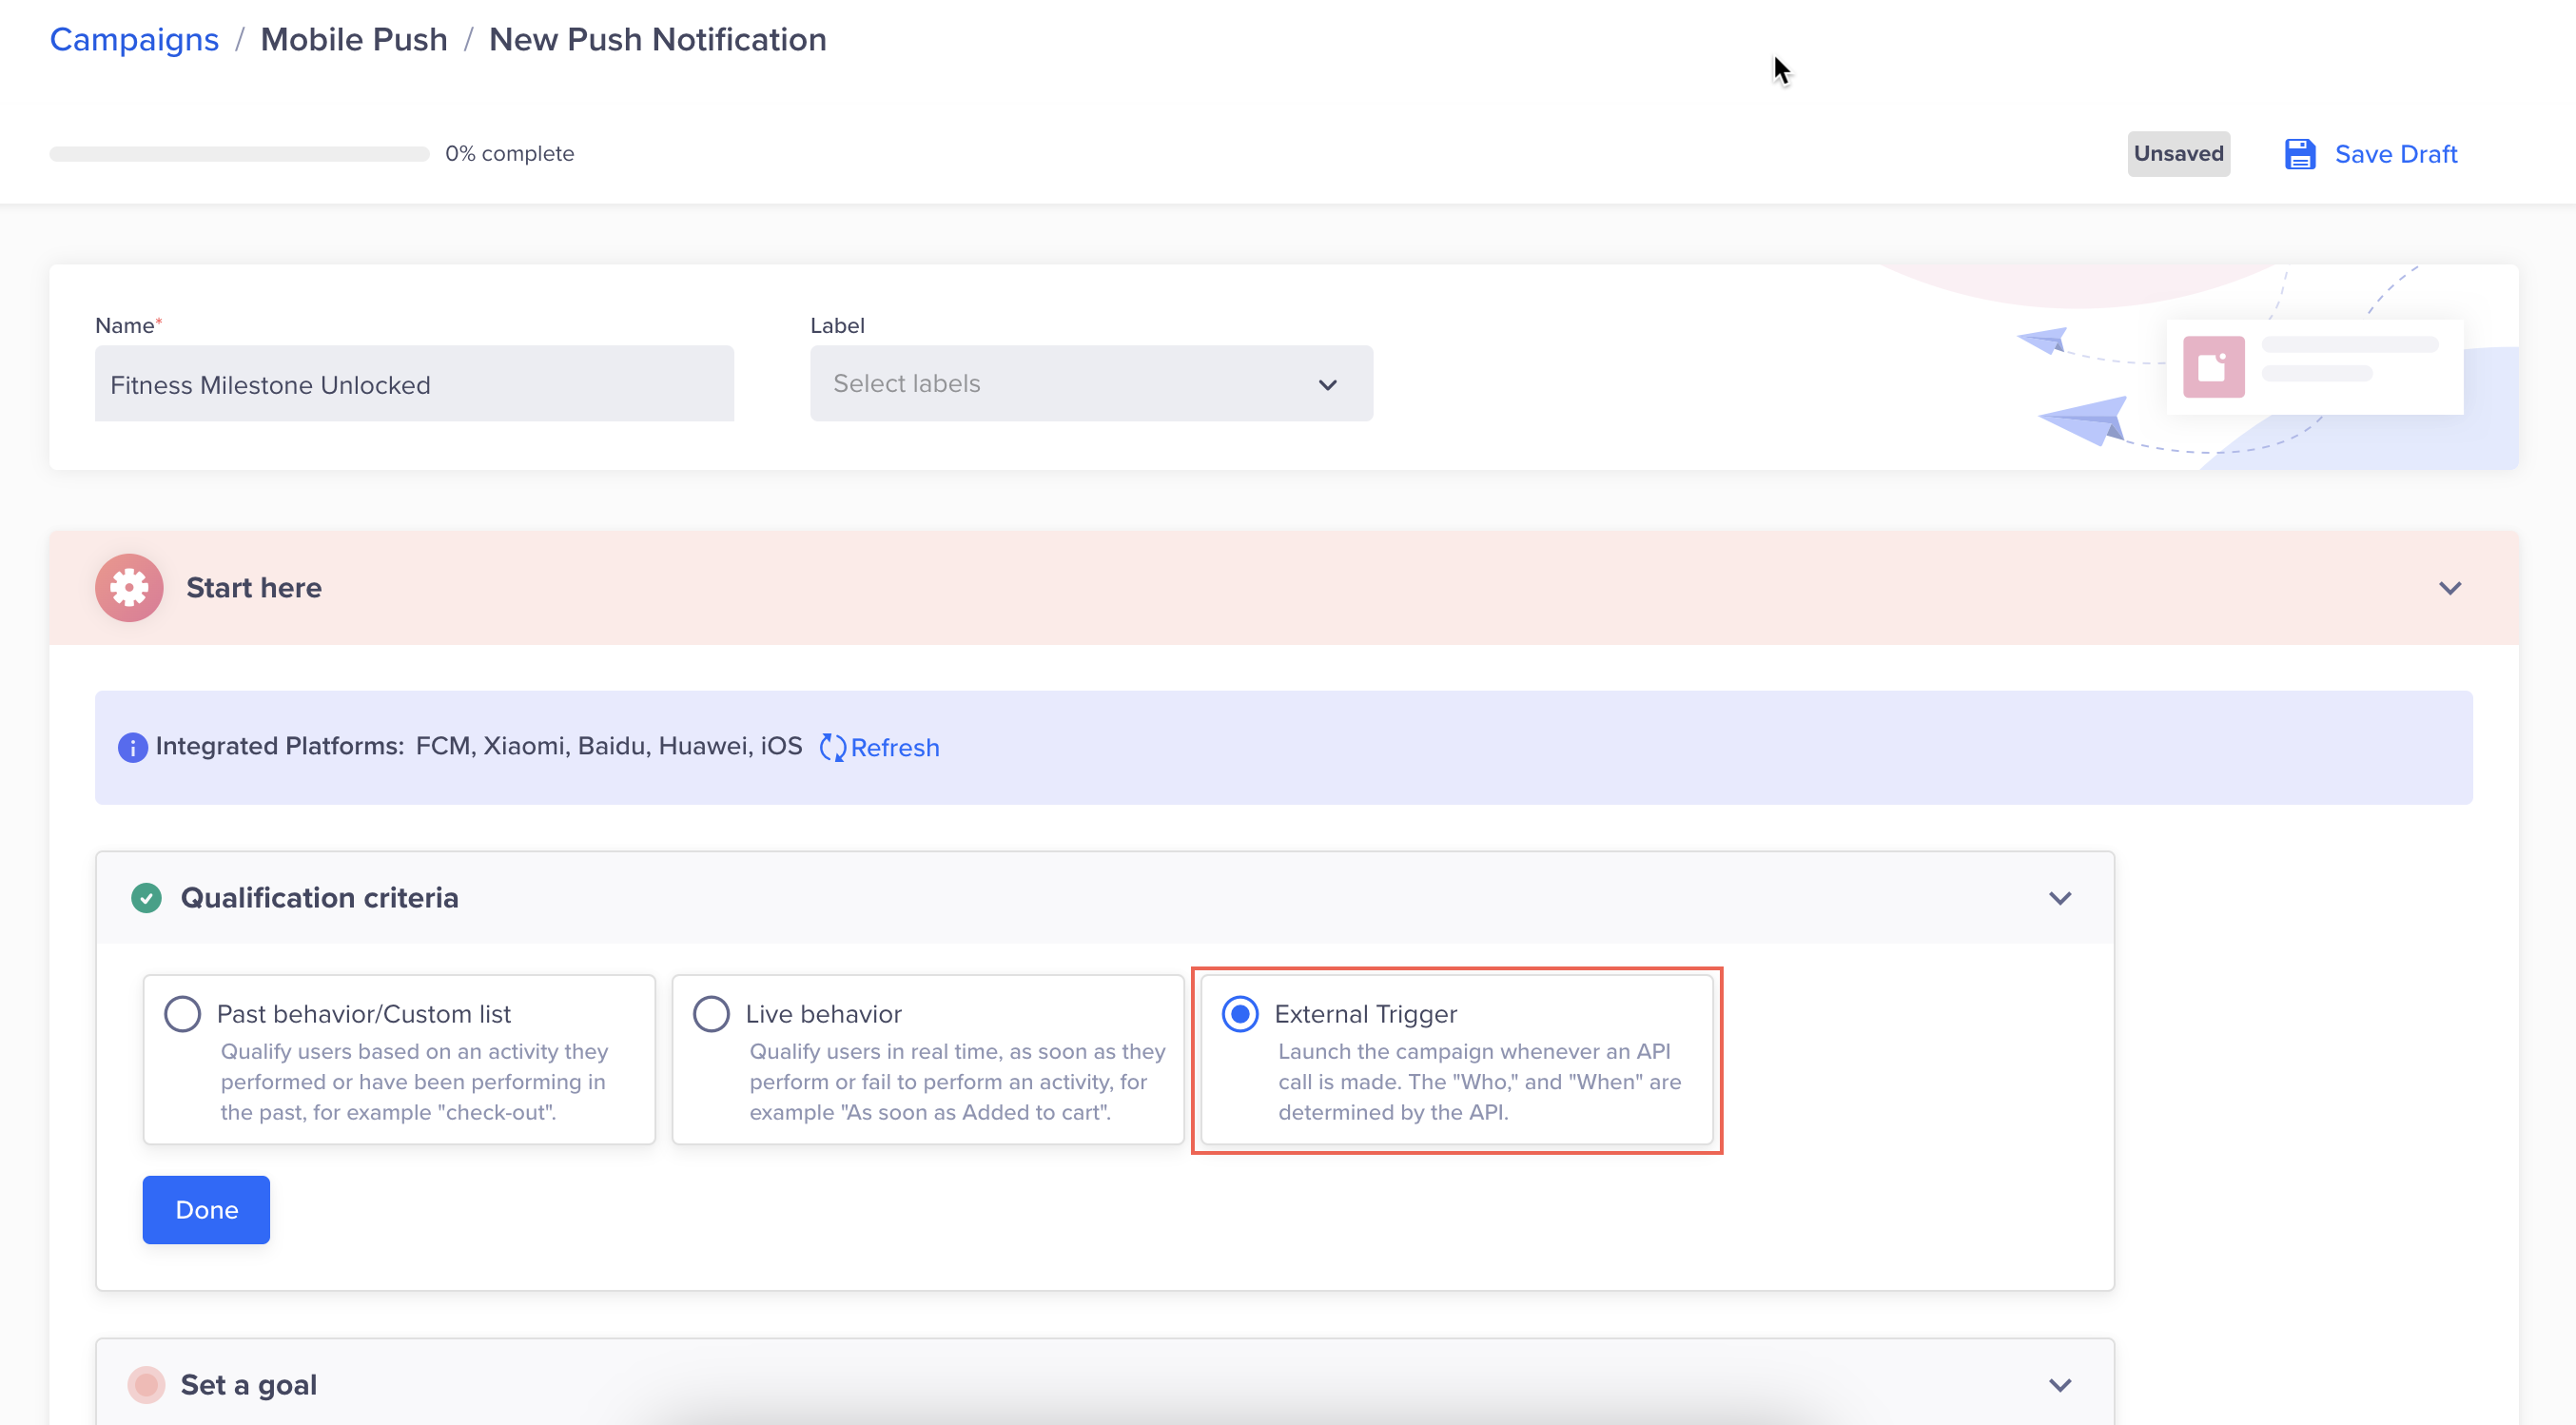
Set Up External Trigger Campaign
Set a Goal
Setting a goal is optional. It allows you to measure your campaign effectively. You can define your conversion goal further by selecting the Event and Conversion time.
The campaign goal can be as generic or as specific as you want. It can answer questions such as "How many users were influenced to purchase an X amount?" or "How many first-time visitors purchased red shoes worth a minimum of X amount and blue jackets worth a minimum of Y amount? ".
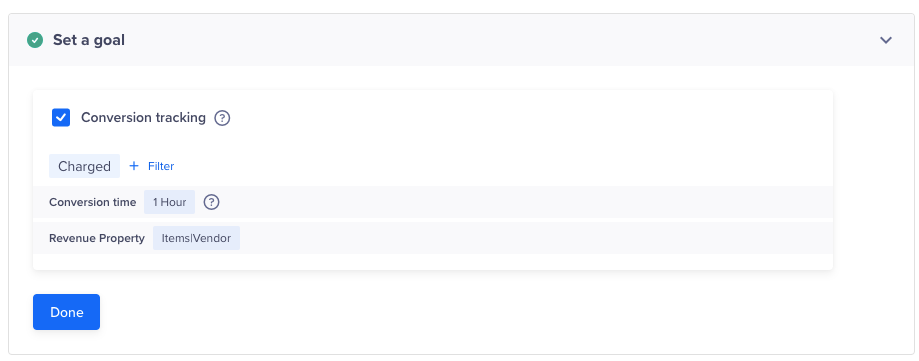
Set a Goal
Define the Audience
Target Segment
External Trigger campaigns are triggered against the user ID. However, marketers can further filter the segment based on past behavior and user properties.
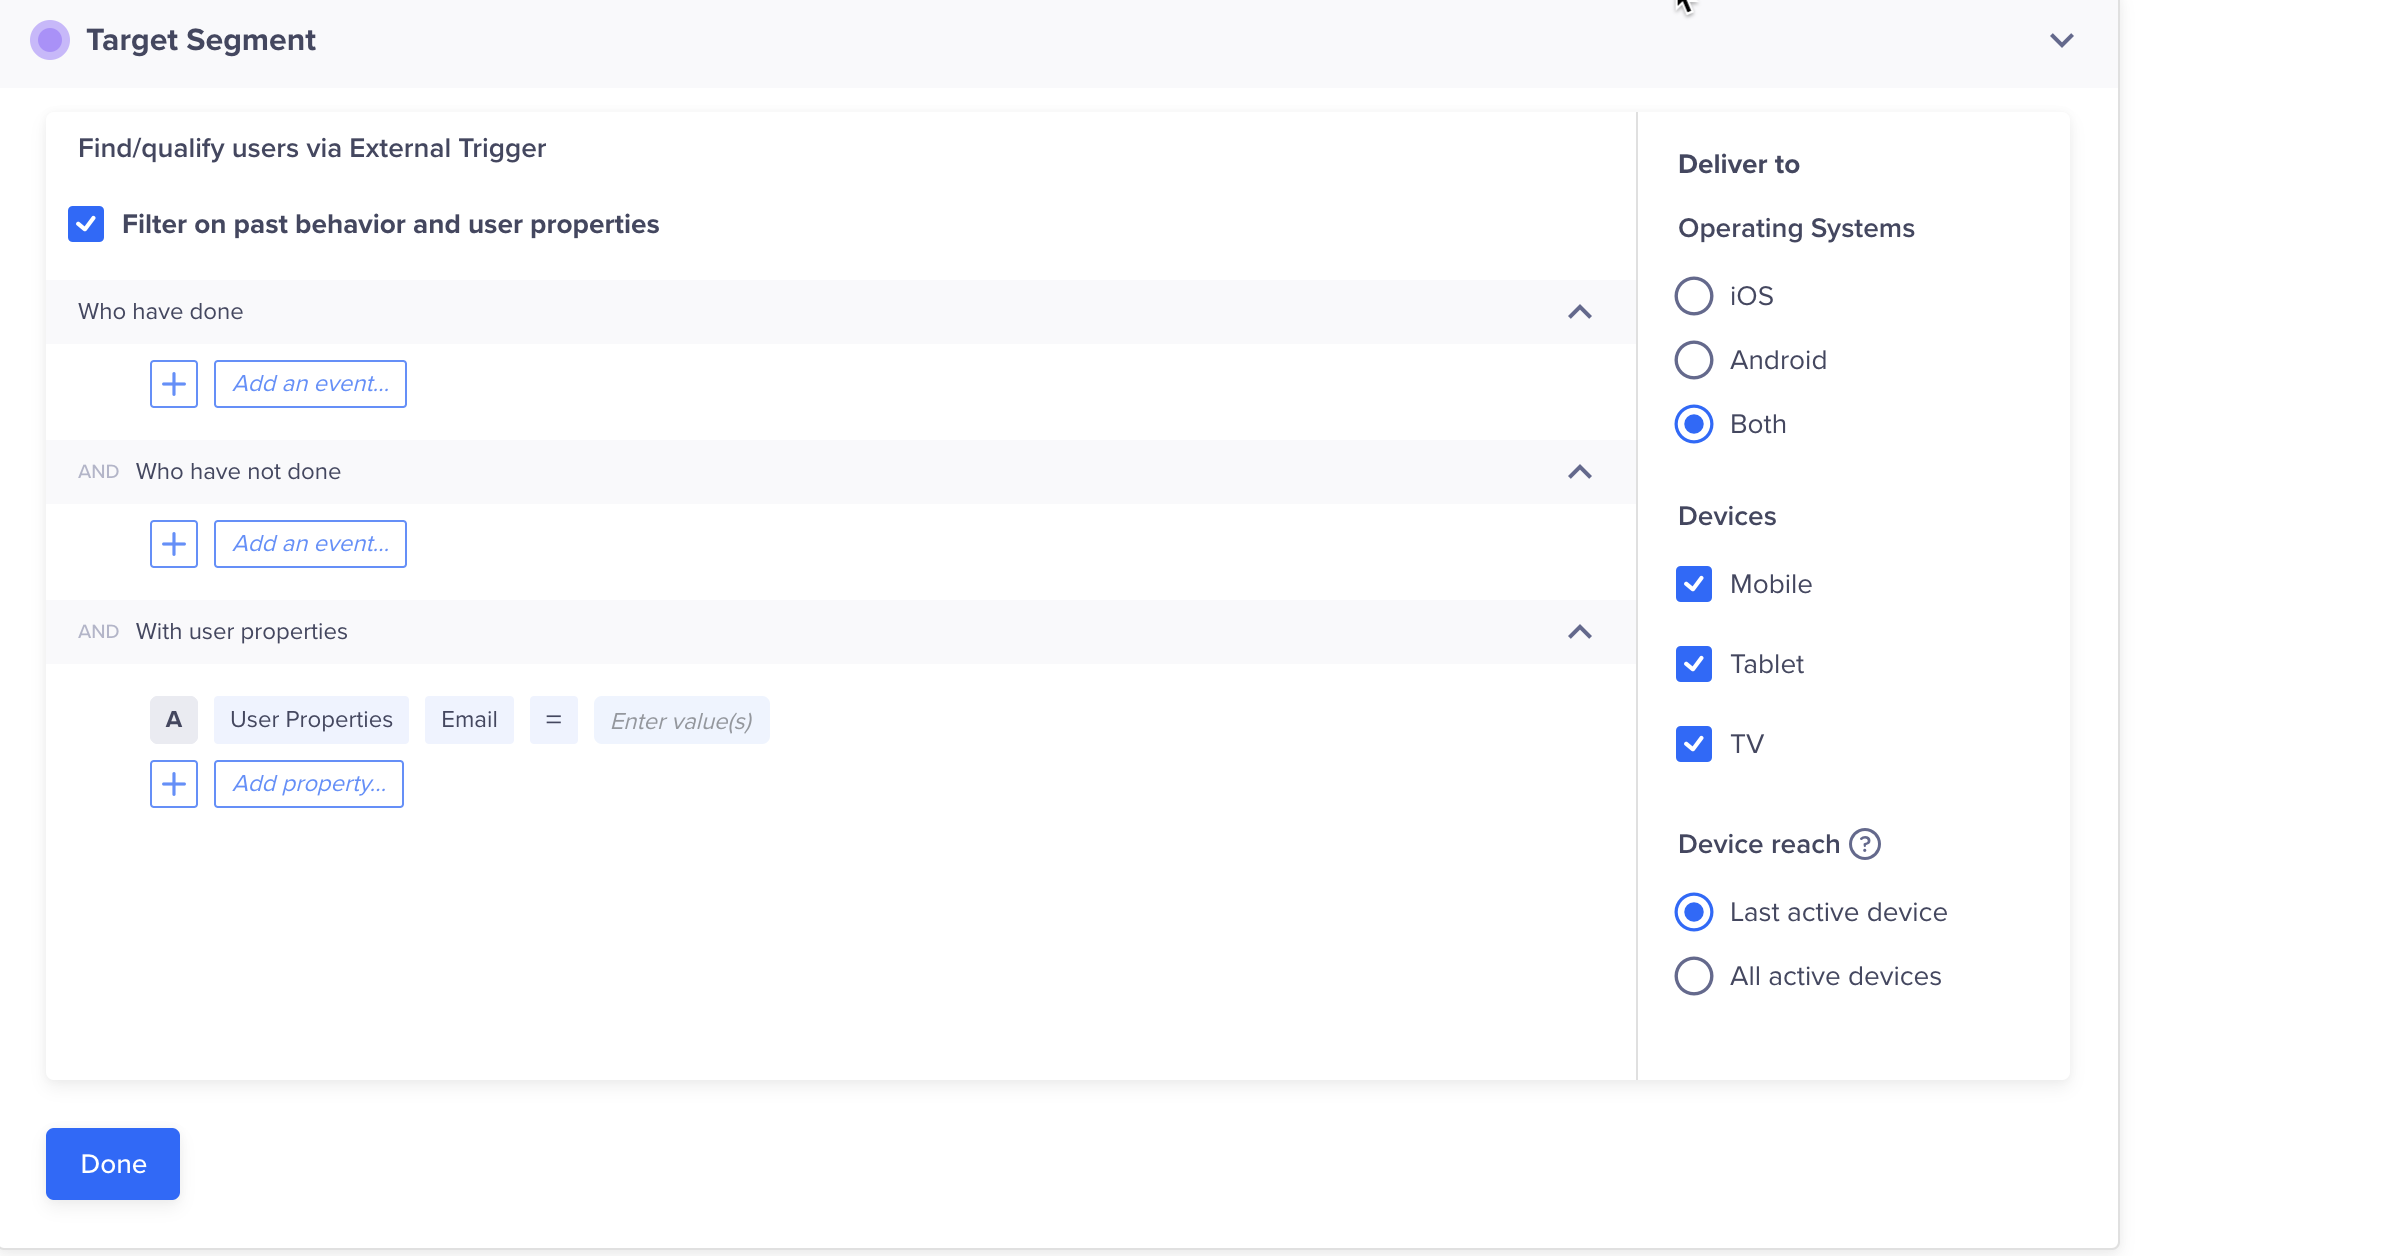
Define Target Segment - Who
For example, an e-commerce portal wants to send an order confirmation to the buyer with all the product details. In this case, the users qualify as soon as they purchase, and the External Trigger campaign is sent to the user. Though the trigger remains the same, you can further narrow your target audience by selecting the Filter on past behavior and user properties option. For example, you want to send an order summary and a discount code to your Gold members. Here, you are filtering your target audience with the user property Customer Type = Gold.
Control Group
You can define the control group to compare and measure the results of your campaign. For more information on control groups, see Control Groups.
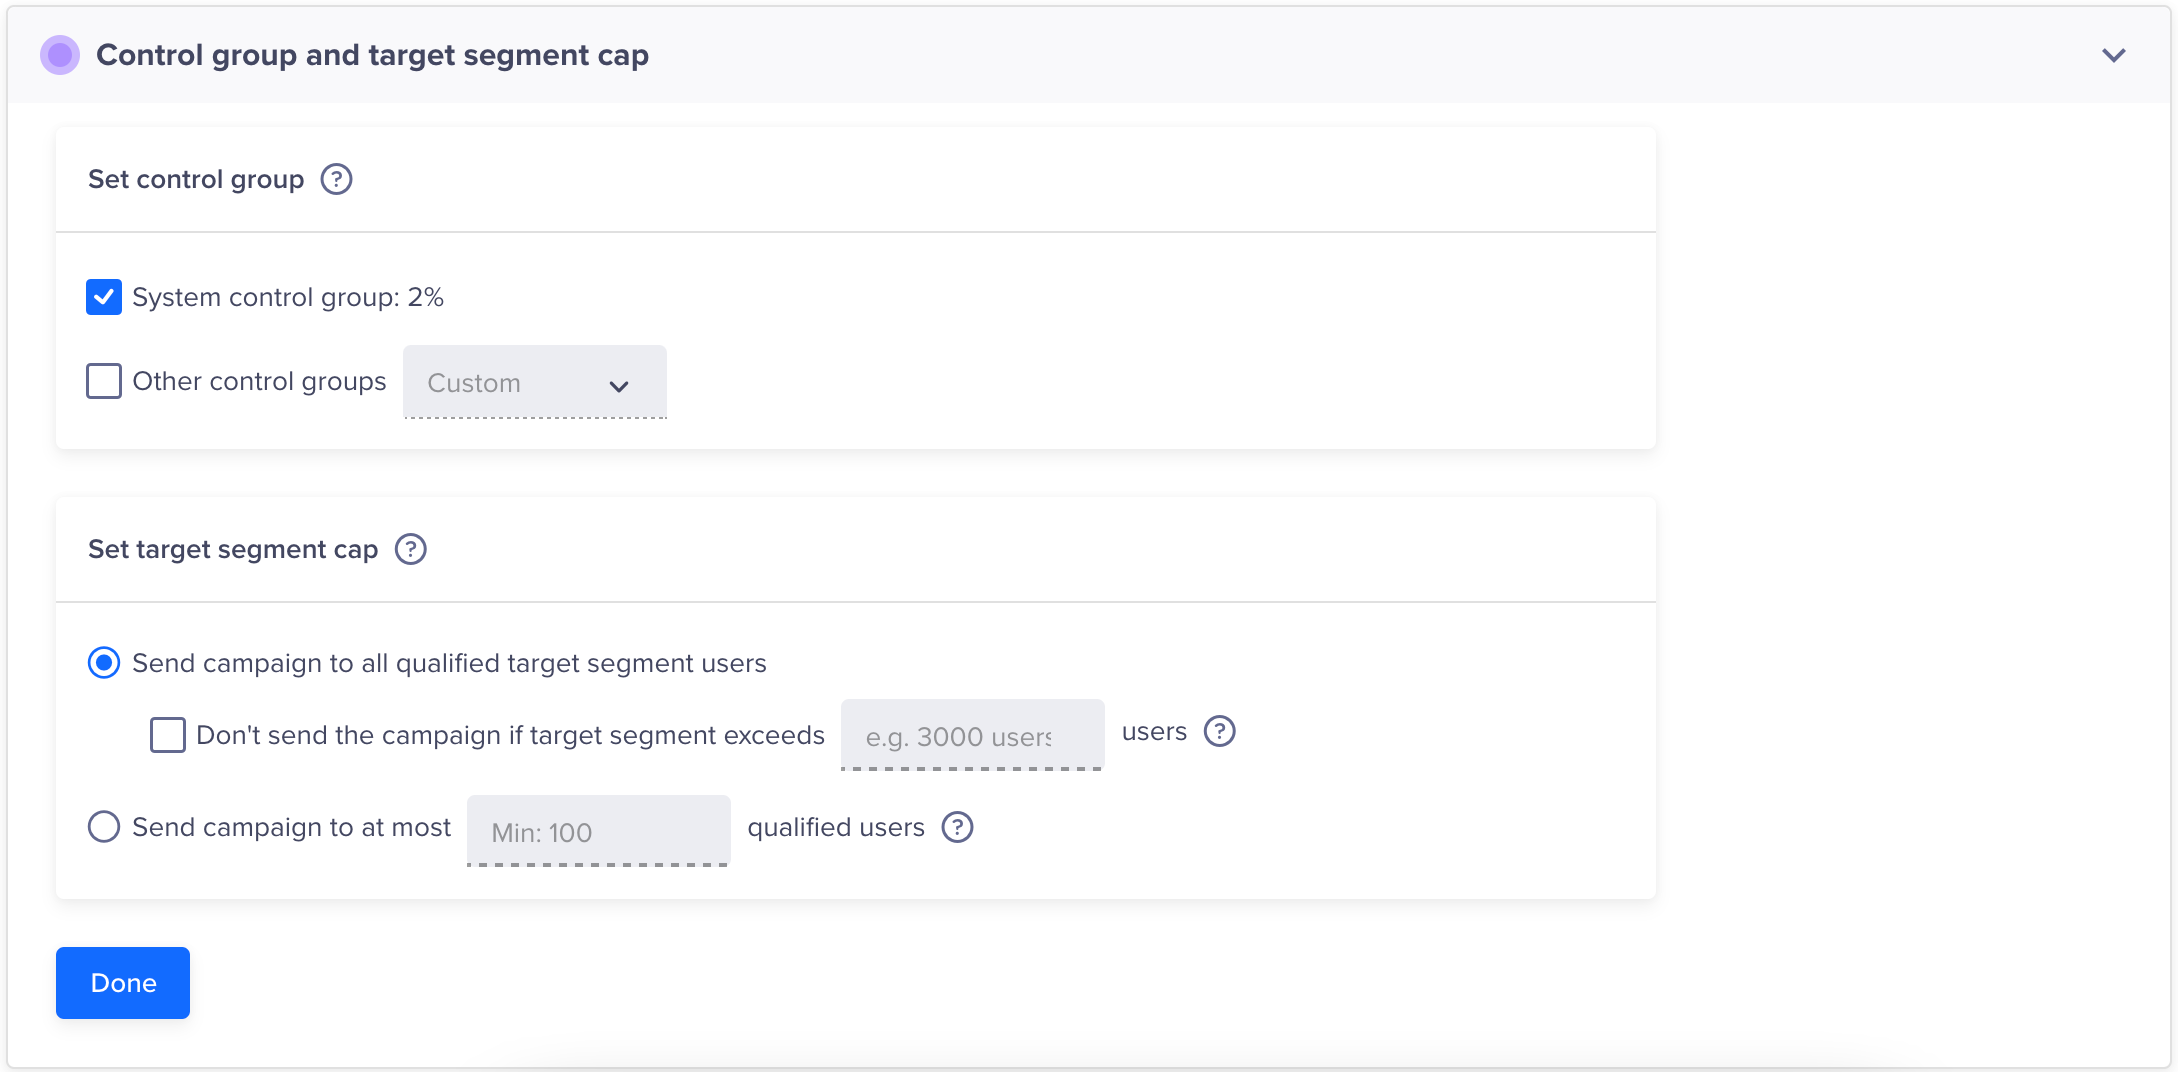
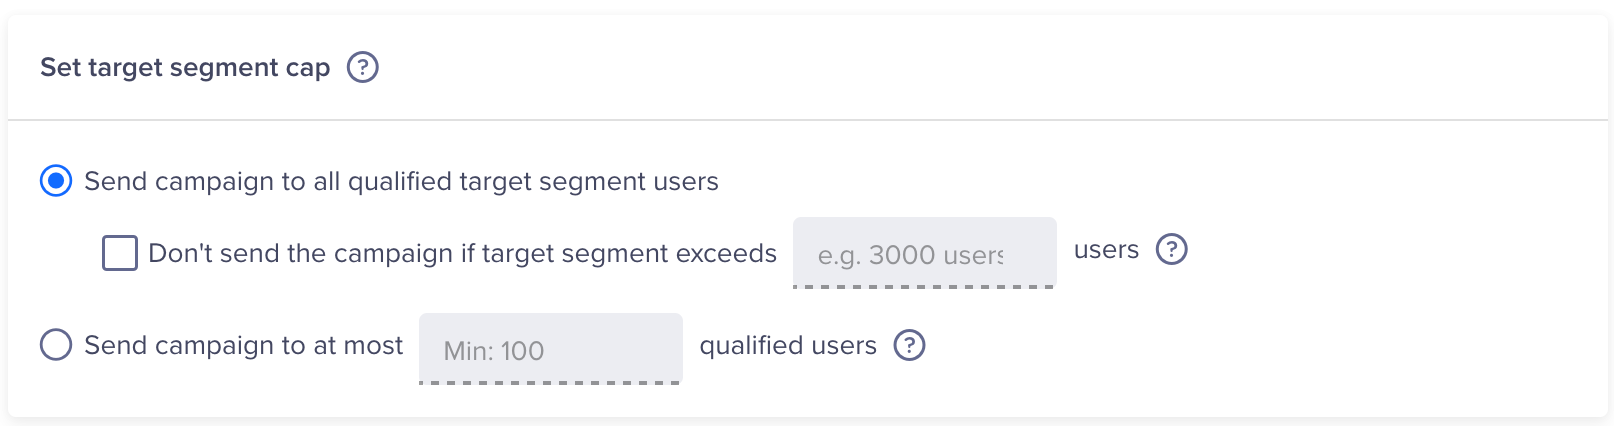
Targeting Cap
You can limit the number of users receiving the message.
A relevant use case is a limited offer where you want to distribute a fixed number of coupon codes. If the total reach for your campaign exceeds the number of coupon codes you can distribute, then you can limit the number of users who will receive the message to precisely the number of coupons you want to distribute.
Campaign LimitEnsure that you set up a limit of 100 or more, regardless of the qualified user segment size. If the limit specified is less than 100, an error occurs.
Target Cap in Campaign
Define the Message
Consider the same example where the e-commerce portal wants to send the summary of the order placed to the buyer. The summary message can include the following supplementary data:
- Product Name
- Product ID
- Product Image
- Pricing Details like Cost of the product, Transaction Fee, Processing Fee, Shipping Fee, etc
You can do so from the Editor of the respective messaging channel. CleverTap has a messaging object called ExternalTrigger that allows you to define the keys for personalization. The API call processes the user attributes object and dynamically fetches the values for keys from the incoming API payload before sending a campaign to the user.
Use Liquid Tags to include all the required parameters in your message body. The following are the sample campaigns to send order summary, including the details mentioned above:
- Example 1: Without Conditional Tags
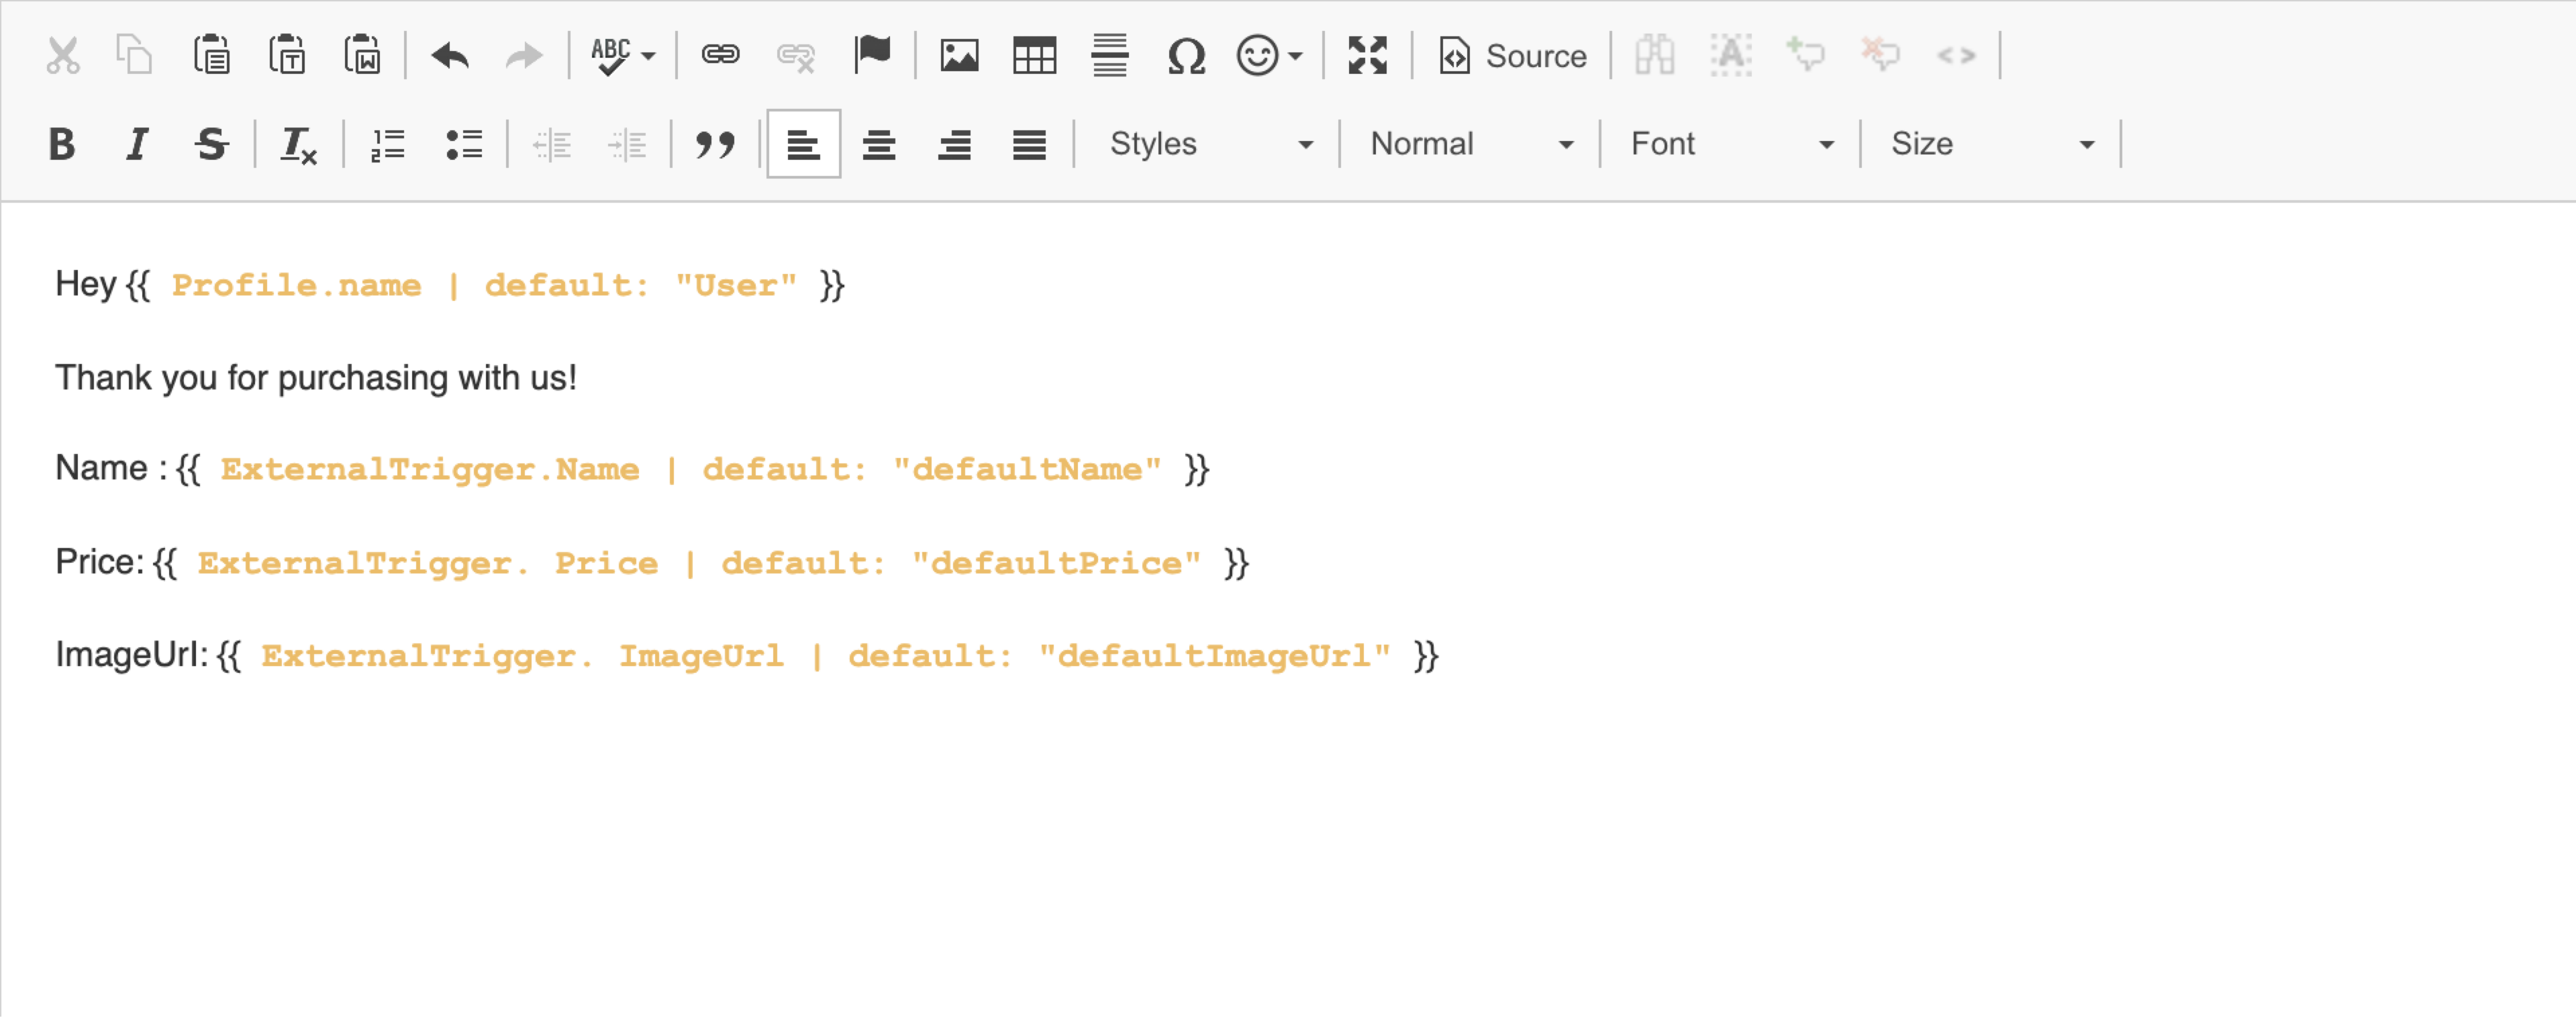
Email Campaign for Sending Order Confirmation - Without Conditional Tags
You can copy the above message body from the following block:
Hey {{ Profile.name | default: "User" }}

Thank you for shopping with us!

    Name: {{ ExternalTrigger.Name | default: "defaultName" }}
    Price: {{ ExternalTrigger.Price | default: "defaultPrice" }}
    ImageUrl: {{ ExternalTrigger.ImageUrl | default: "defaultImageUrl" }}
- Example 2: With Conditional Tags
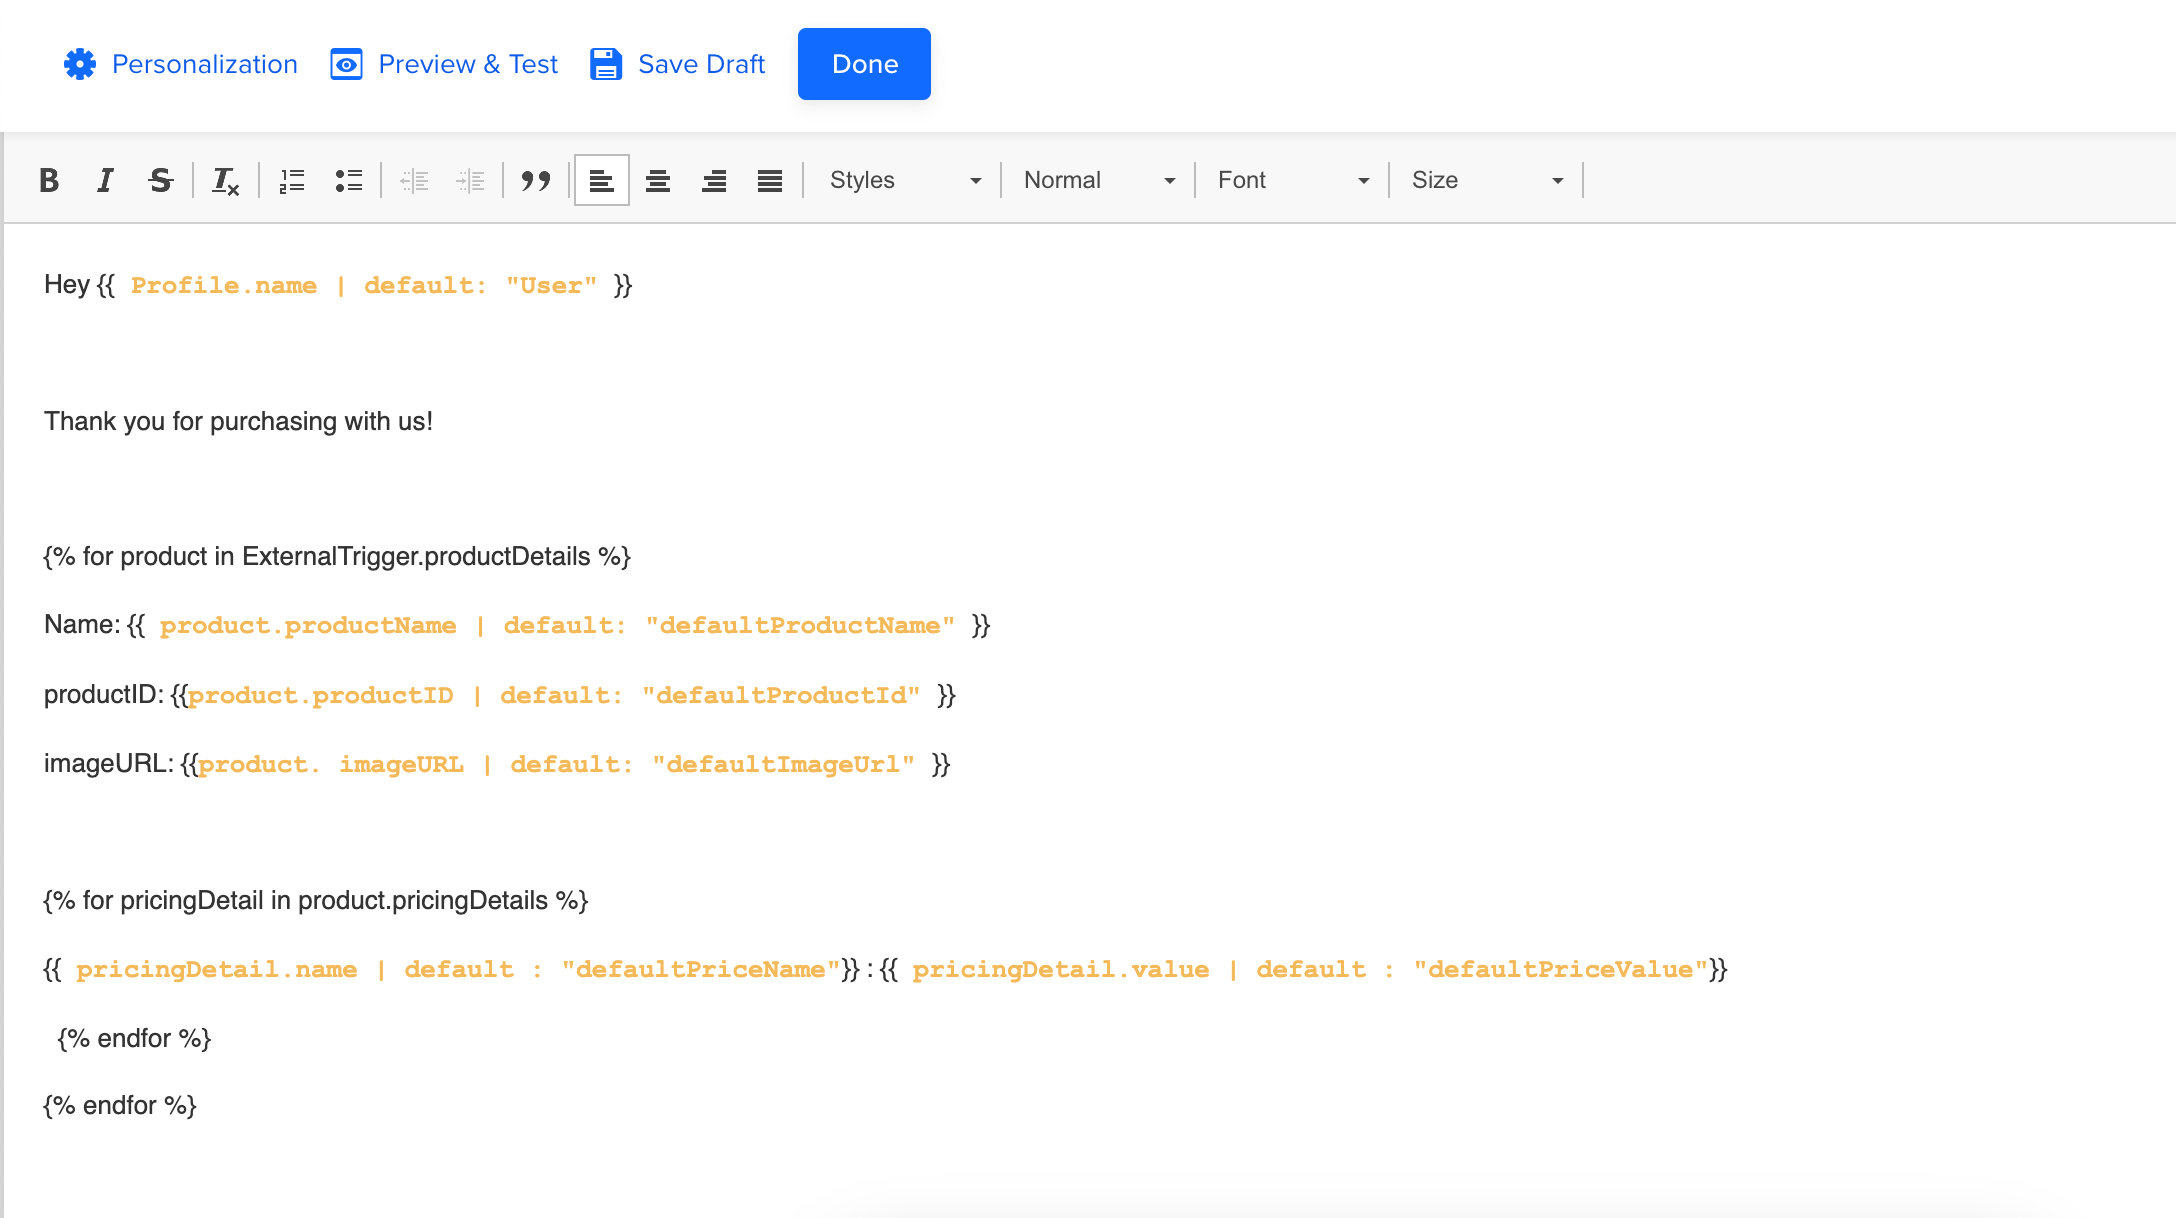
Email Campaign for Sending Order Confirmation - With Conditional Tags
You can copy the above message body from the following block:
Hey {{ Profile.name | default: "User" }}

Thank you for shopping with us!
{% for product in ExternalTrigger.productDetails %}
Name: {{ product.productName | default: "defaultProductName"}}
productID: {{product.productID | default: "defaultProductId"}}
imageURL: {{product.imageURL | default: "defaultImageUrl"}}
{% for pricingDetail in product.pricingDetails %}
{{ pricingDetail.name | default : "defaultPriceName"}} : {{ pricingDetail.value | default : "defaultPriceValue"}}
 {% endfor %}
{% endfor %}
Define the Campaign Schedule
Date and time
You can set up the When section to schedule the campaign start and end using the options below:
- Start date and time
- End date and time
Delivery preferences
You can apply global campaign limits to determine how many push notifications each app user receives per day. If you want to override these settings for an important campaign, you can click on the Don’t apply global campaign limits to this campaign checkbox.
You can also click the Advanced checkbox to specify Do Not Disturb (DND) hours during which notifications from this push campaign are prevented from going out, either by discarding them or delaying delivery after DND hours, such as 9 PM to 9 AM.
Since past behavior campaigns can have scheduled times, you have the option to stop a campaign delivery after a certain cut-off time or even deliver at the specified time in the user’s timezone. For more information, refer to Delivery in User’s Timezone.

Message Delivery Preference
Publish Campaign
After testing and once you are satisfied with the appearance of your campaign, finalize your campaign with the following steps:
- Click Continue to view your campaign summary. The Overview page displays.
- View your campaign summary, then click Publish Campaign. You must have a Campaign ID, created when you publish the campaign, to send messages with the endpoint.
Publish Campaign
Updated 8 months ago