Manage Users
Understand how you can invite and manage users on the CleverTap dashboard
Overview
To access the CleverTap dashboard, the user needs an invitation and an appropriate access level. The account admin can perform different operations, such as adding a new user, deleting an existing user, assigning a role to a user, editing the user's current role, and so on from the Settings > Users page.

User Settings
After the new user is added, the dashboard allows an admin to view the following information about all the users added to the project:
- Name
- Role
- User Status
- Last Login
- Passcode-Status.
Invite Users
To invite a new user to the CleverTap dashboard:
- Click + User from the Users page.
- Enter the email address and assign the role. For more information about different roles in the CleverTap dashboard, refer to Role-Based Access Control.
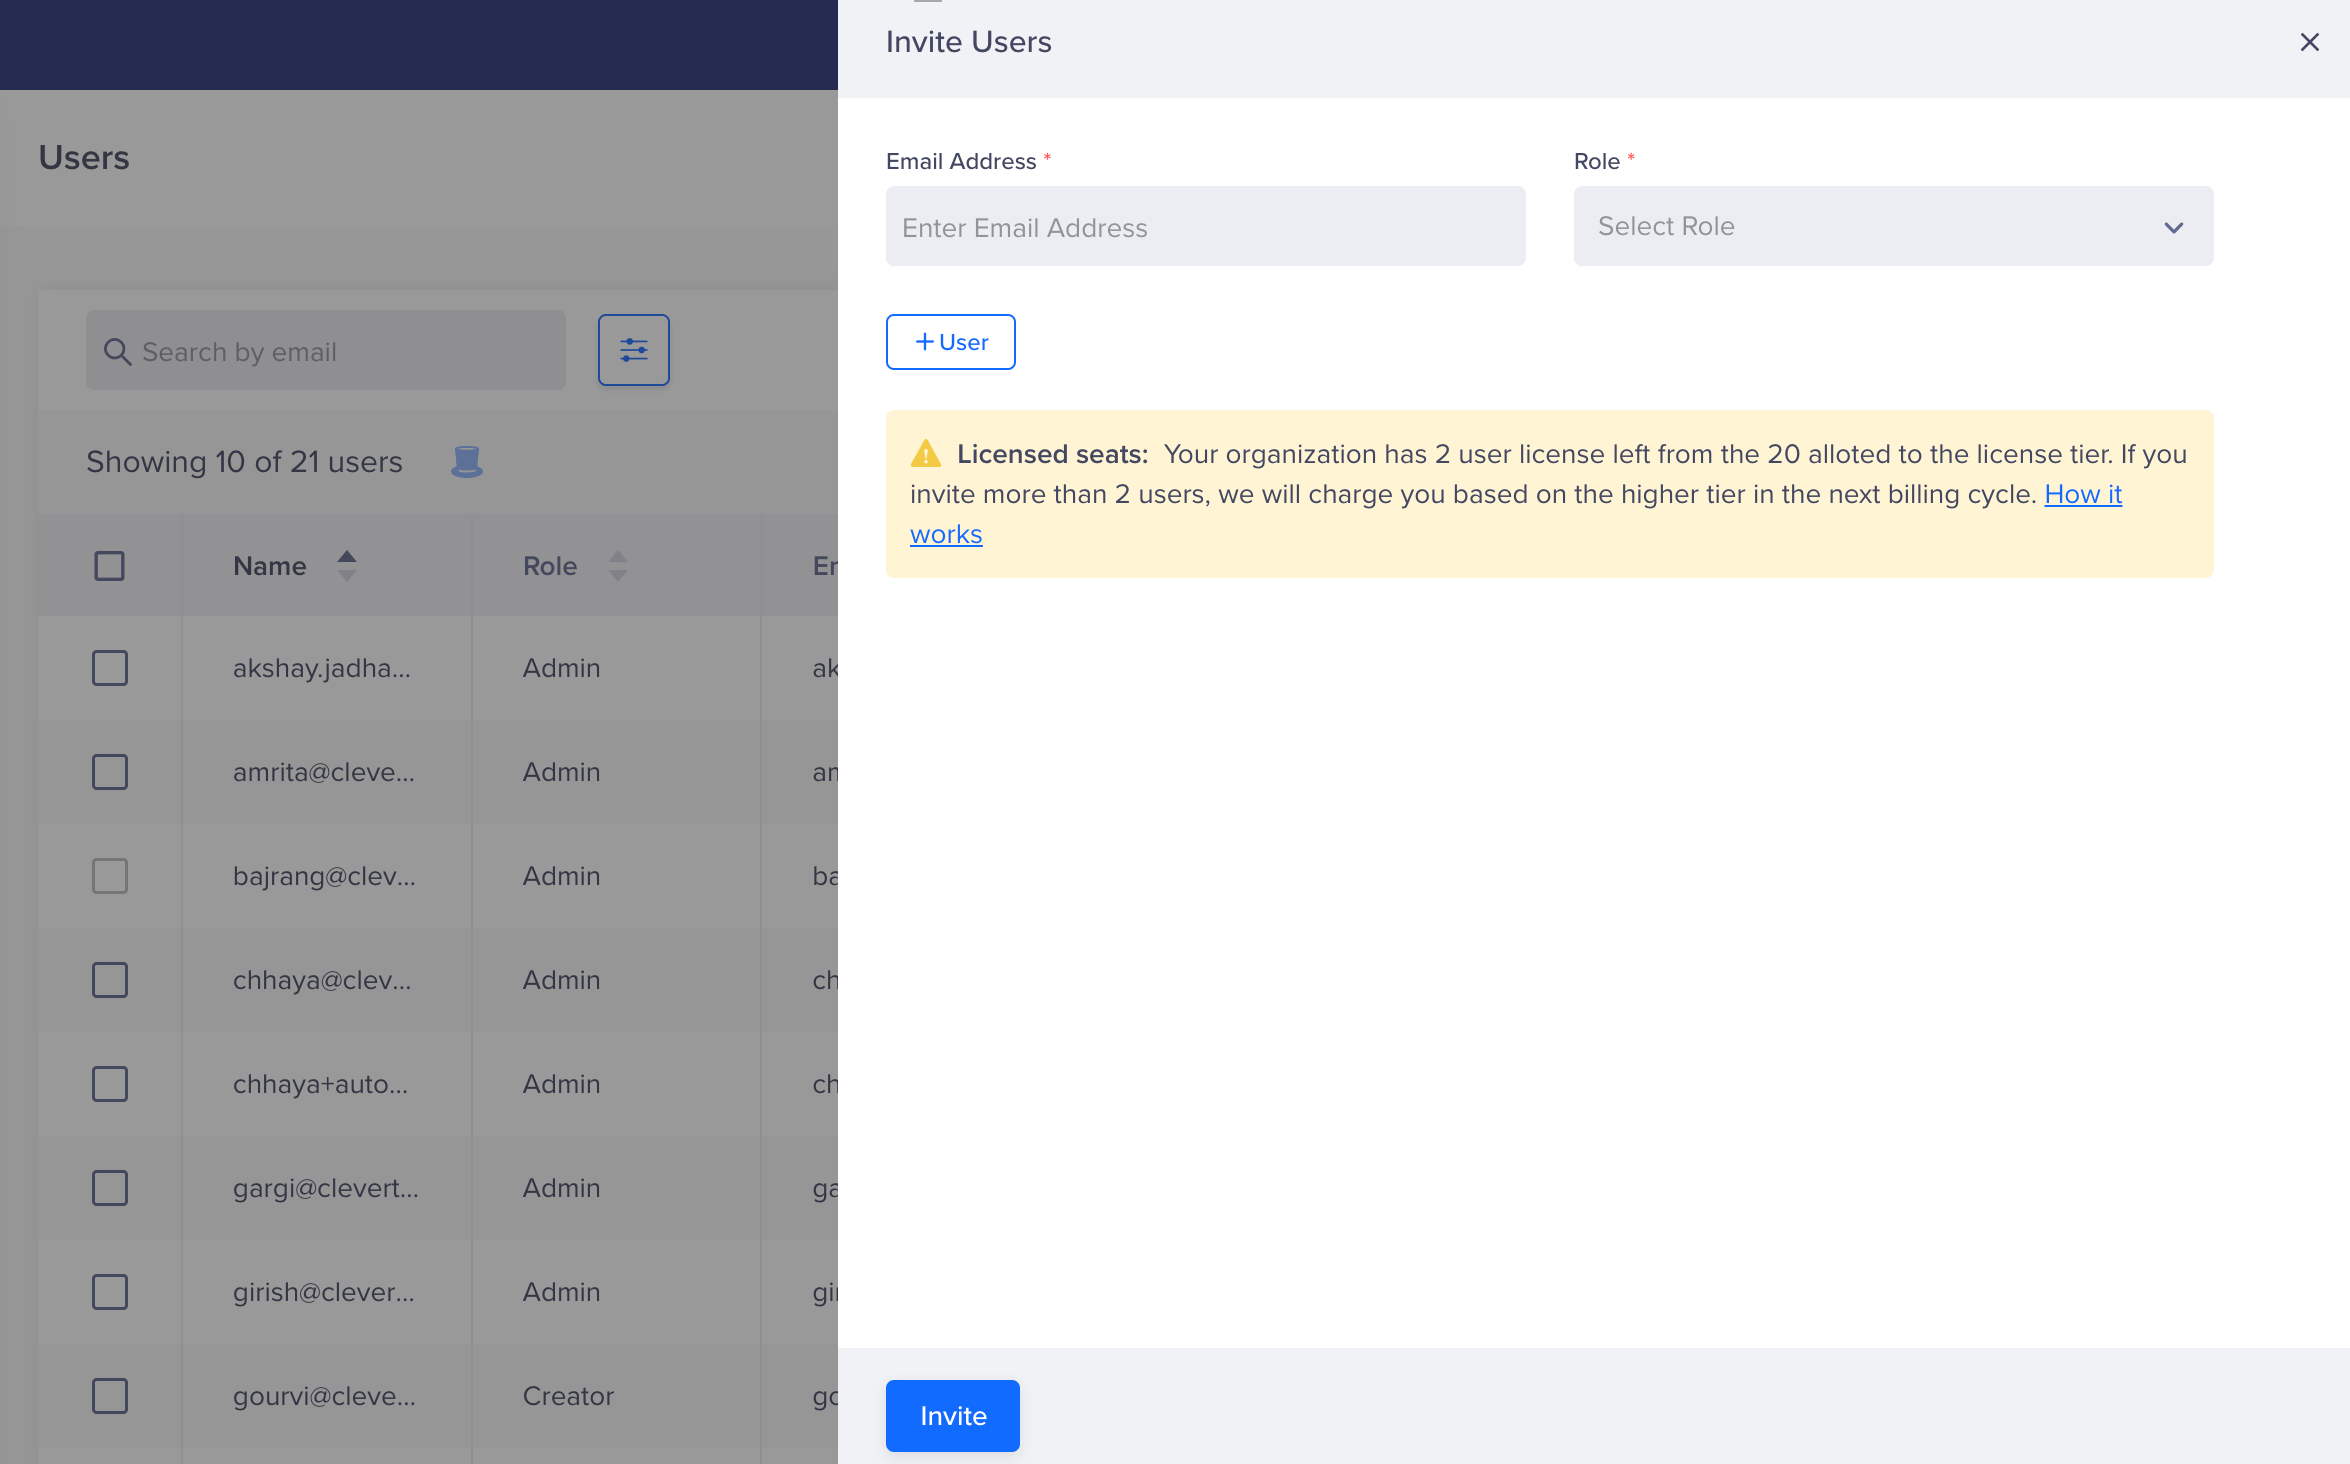
Invite Users
Assign Multiple Roles to a UserYou can assign multiple roles to a user if needed. If you assign two system roles to the user, the role with higher precedence is assigned to the user.
Invite Multiple Users at OnceYou can invite multiple users (up to 50) at once by clicking + User from the Invite User window.

Invite Multiple Users at Once
- Click Invite to extend invitations to the email IDs added.
Download User List
You can download the list of all users by clicking Download as CSV from the Users page.

Download User List as CSV
Operations
The account admin can perform different user management operations from the CleverTap dashboard. Each of these operations is described briefly in the following sections:
Revoke Access
Revoking user access implies that the user can no longer access the dashboard. To do so, click the ![]() against the required user and select Revoke User Access from the list.
against the required user and select Revoke User Access from the list.

Revoke User Access
Edit Role
You can also edit the role of the user in the future. To do so, click the ![]() against the required user and select Edit Role from the list.
against the required user and select Edit Role from the list.

Edit Role
For more information about role management, refer to Role-Based Access Control.
Bulk Action For Managing Multiple User Roles
You can assign or unassign roles for multiple users at once. To do so:
- Select the set of users for whom you want to assign or unassign the roles
- Click the
 icon.
icon.
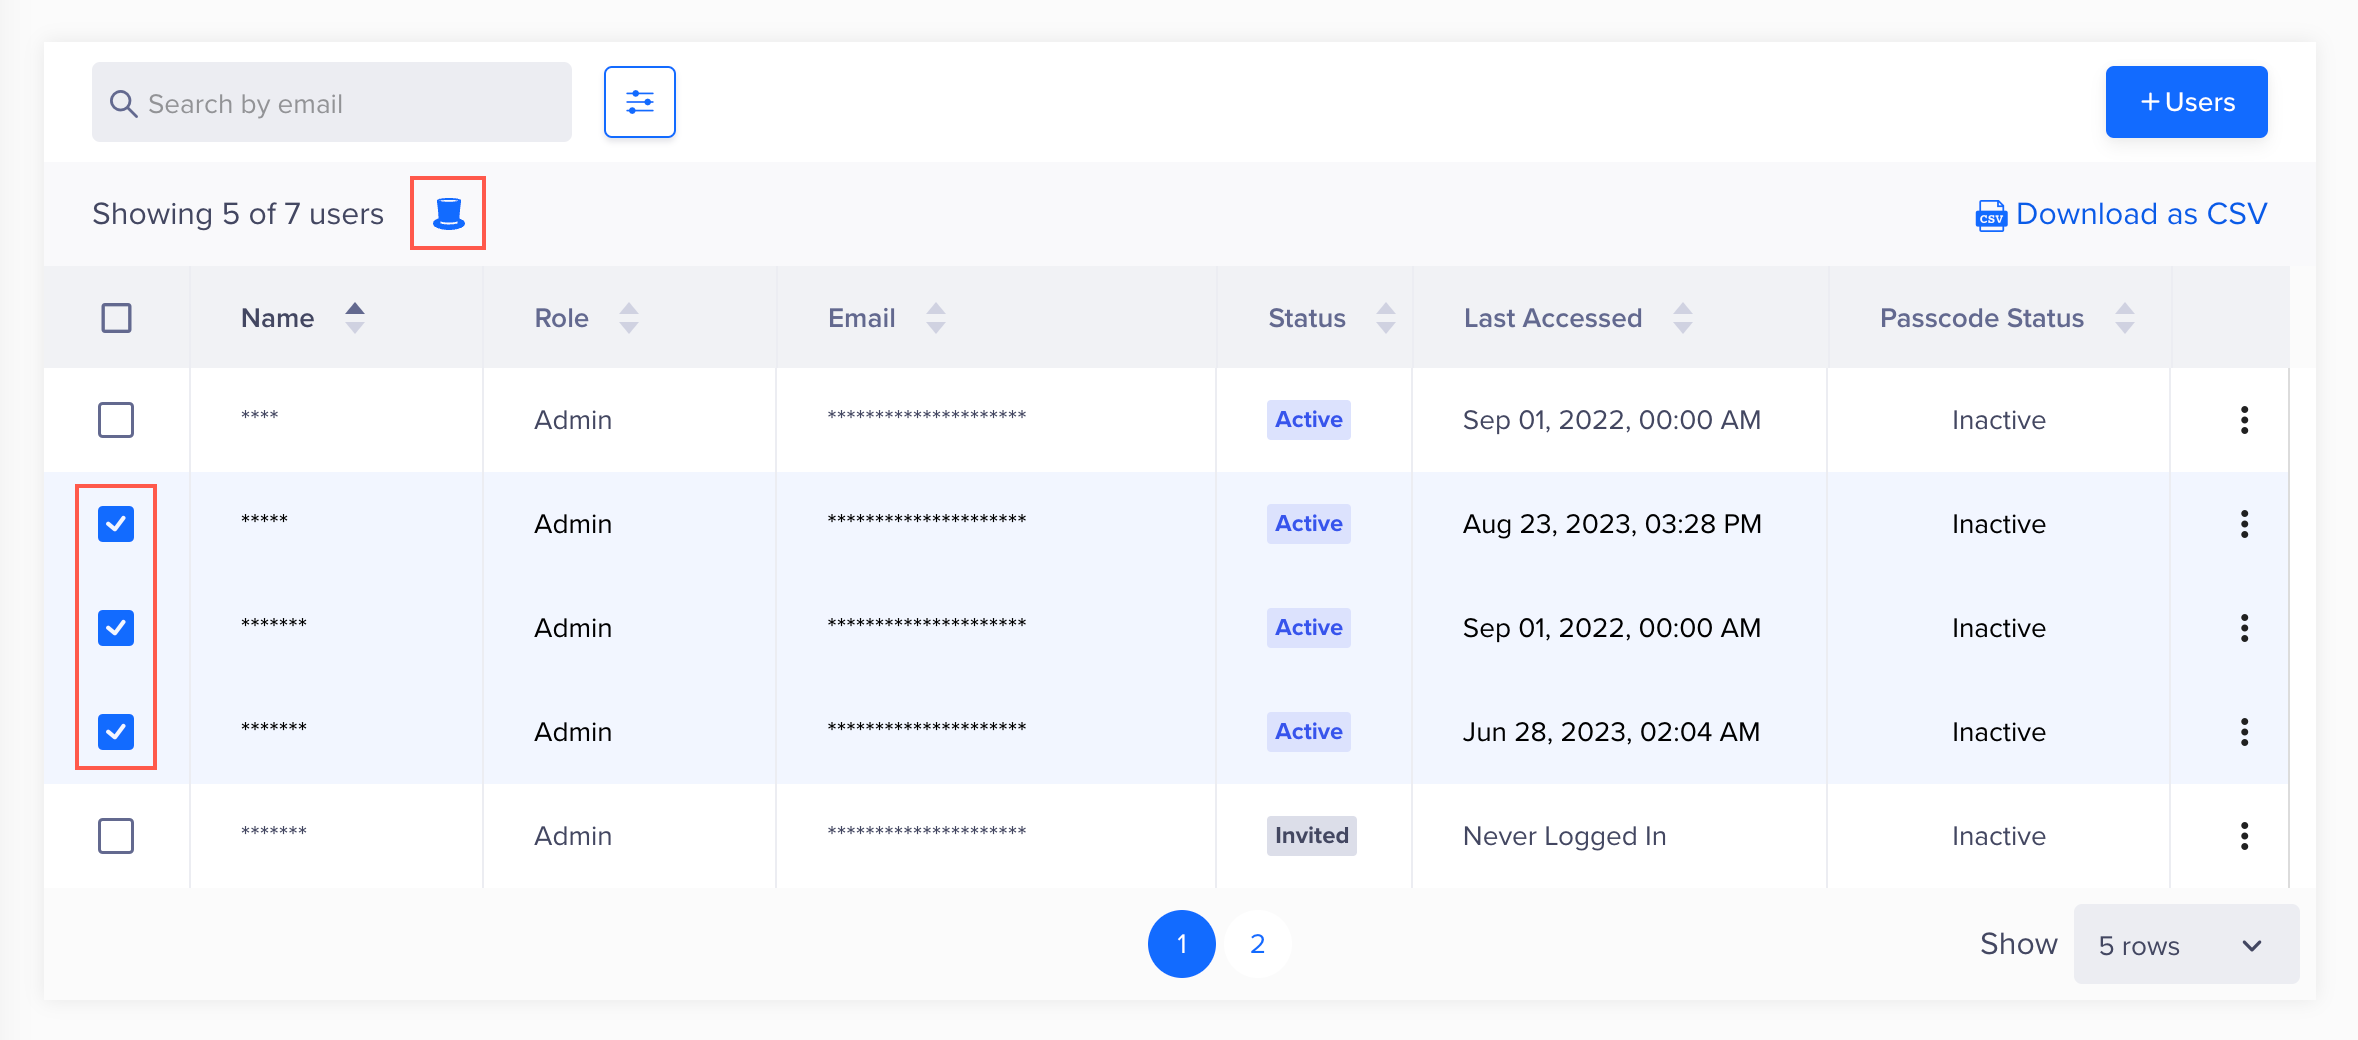
Manage Multiple User Roles in Bulk
- After the Edit Roles window opens, enter the roles you wish to assign to your users in the Assign roles field. Similarly, enter the roles you wish to unassign for your users in the Unassign roles field.
- After making the required changes, click Continue.
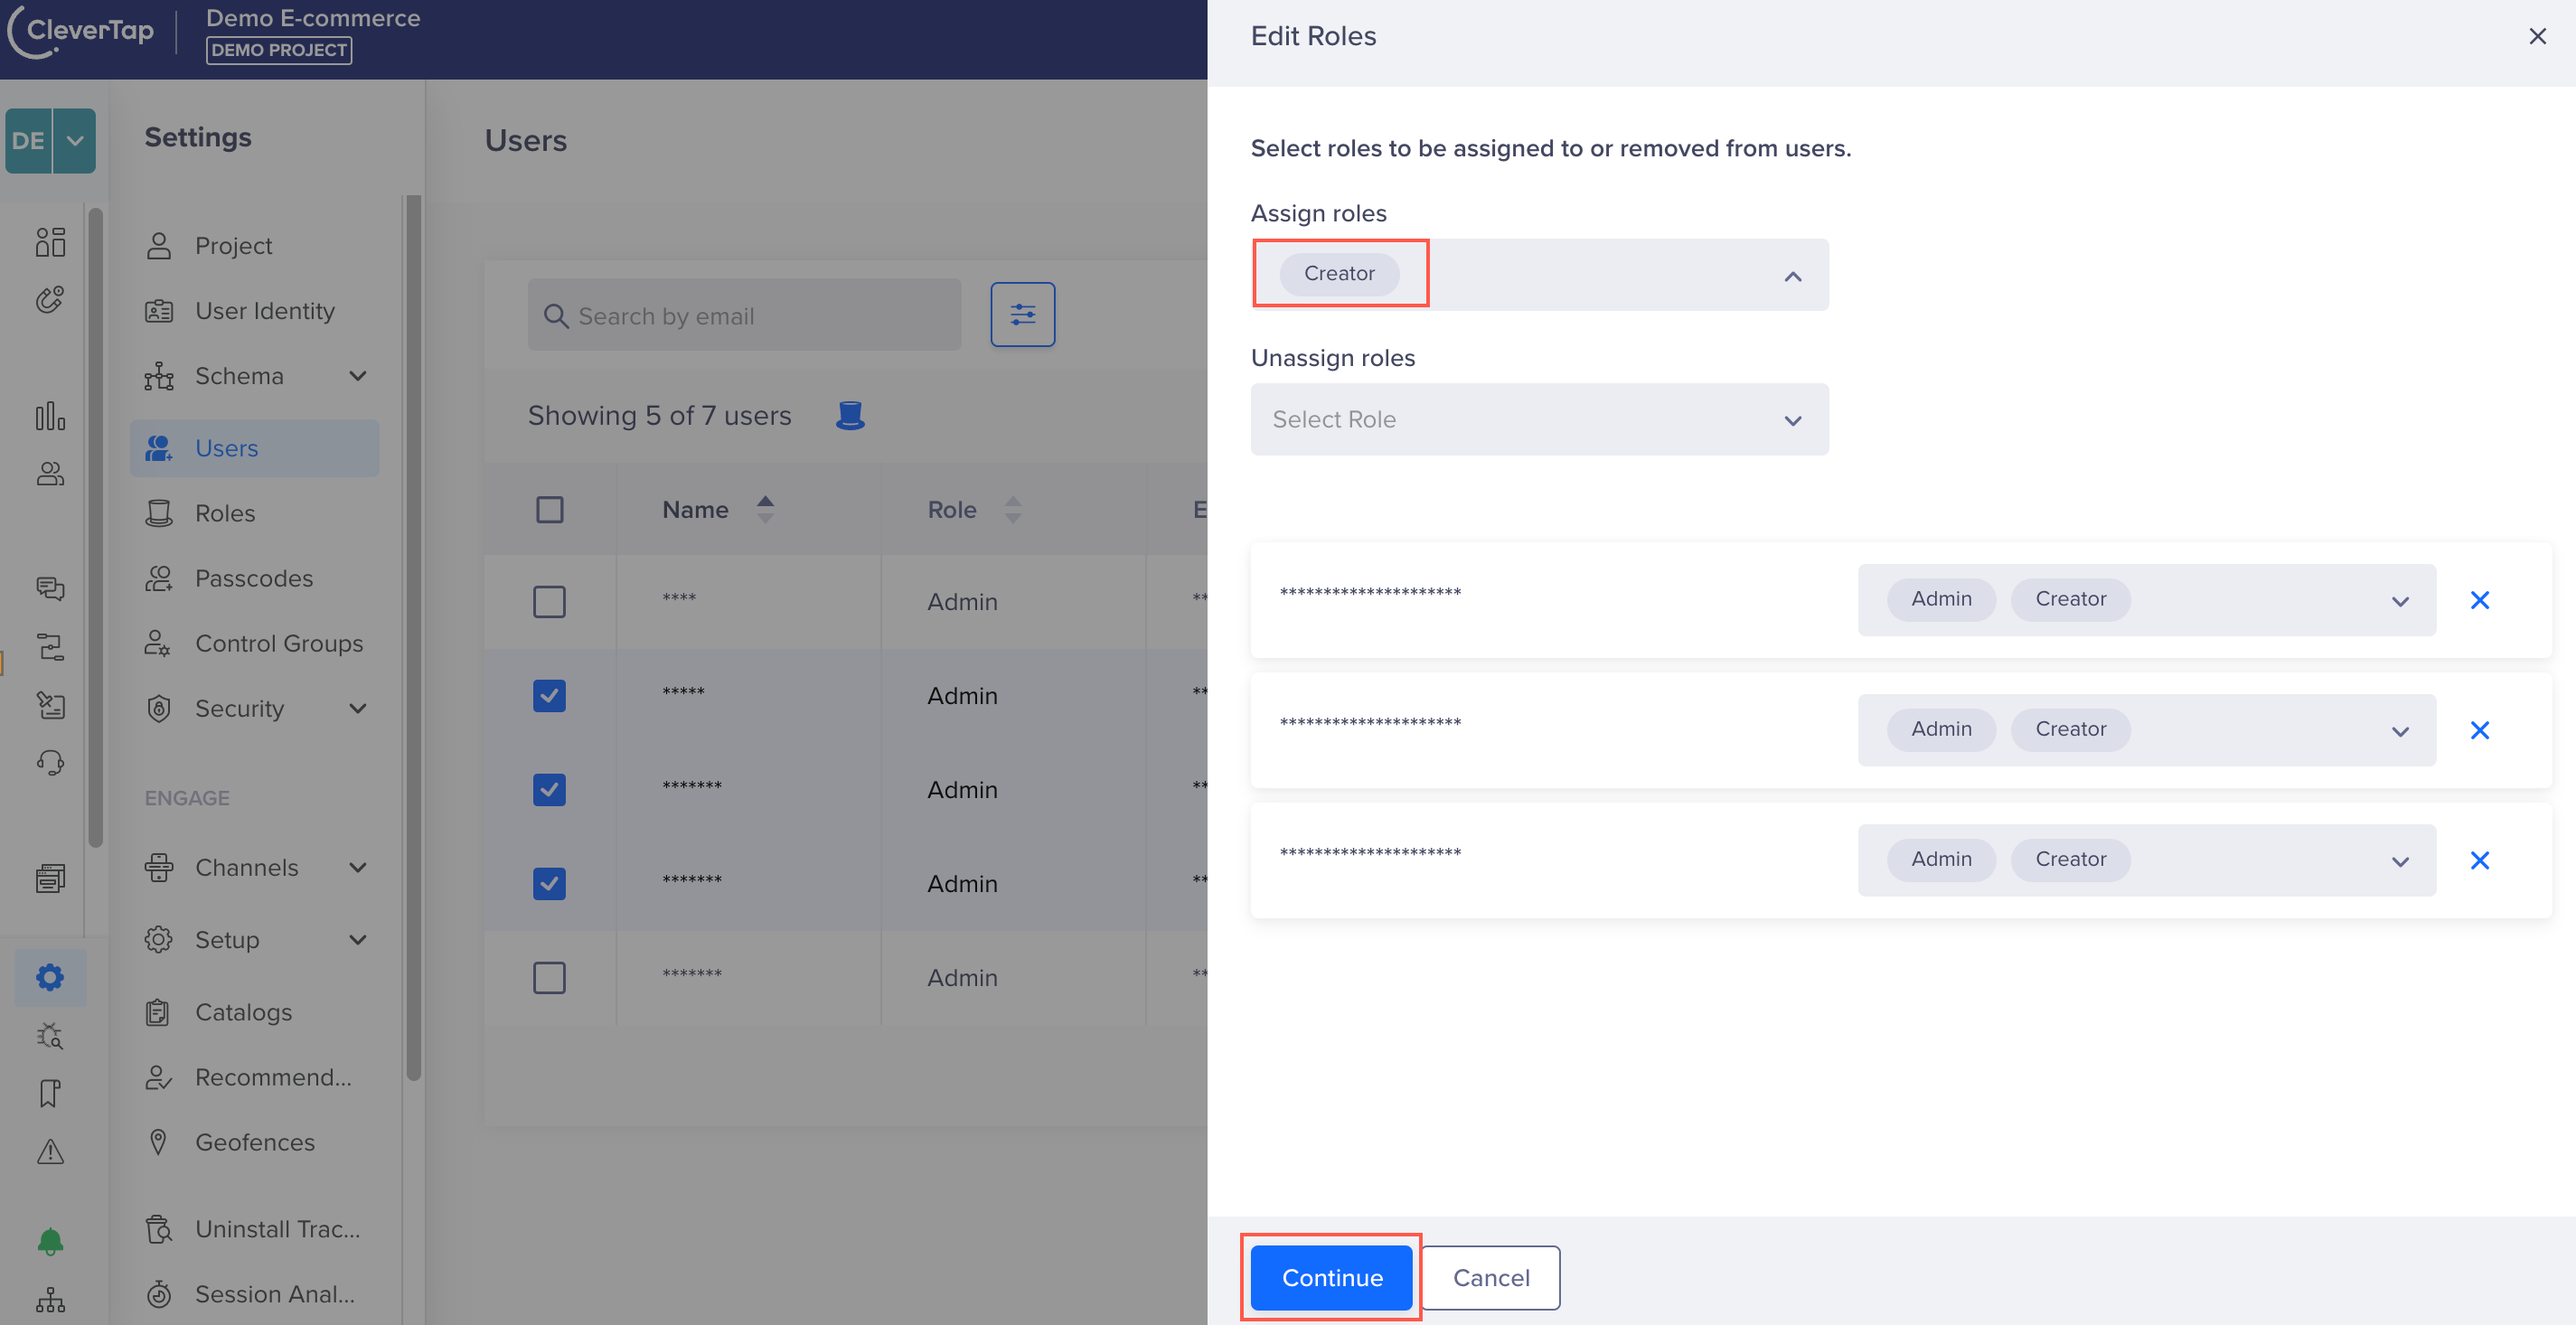
Save Bulk Actions
- Review the bulk changes in user roles and click Save.
Delete User
Admins can delete users from a project to ensure unauthorized users, such as former employees, can no longer access the CleverTap dashboard. This eliminates manual interventions, making user offboarding secure and seamless. Once deleted, the user loses access, and all deletions are recorded in audit logs for security and compliance. However, admins cannot delete themselves from a project; other admins can.
To delete a user:
- Click the
 icon against the required user and select Delete User.
 - Click Delete to confirm the action to permanently remove the user from the project.
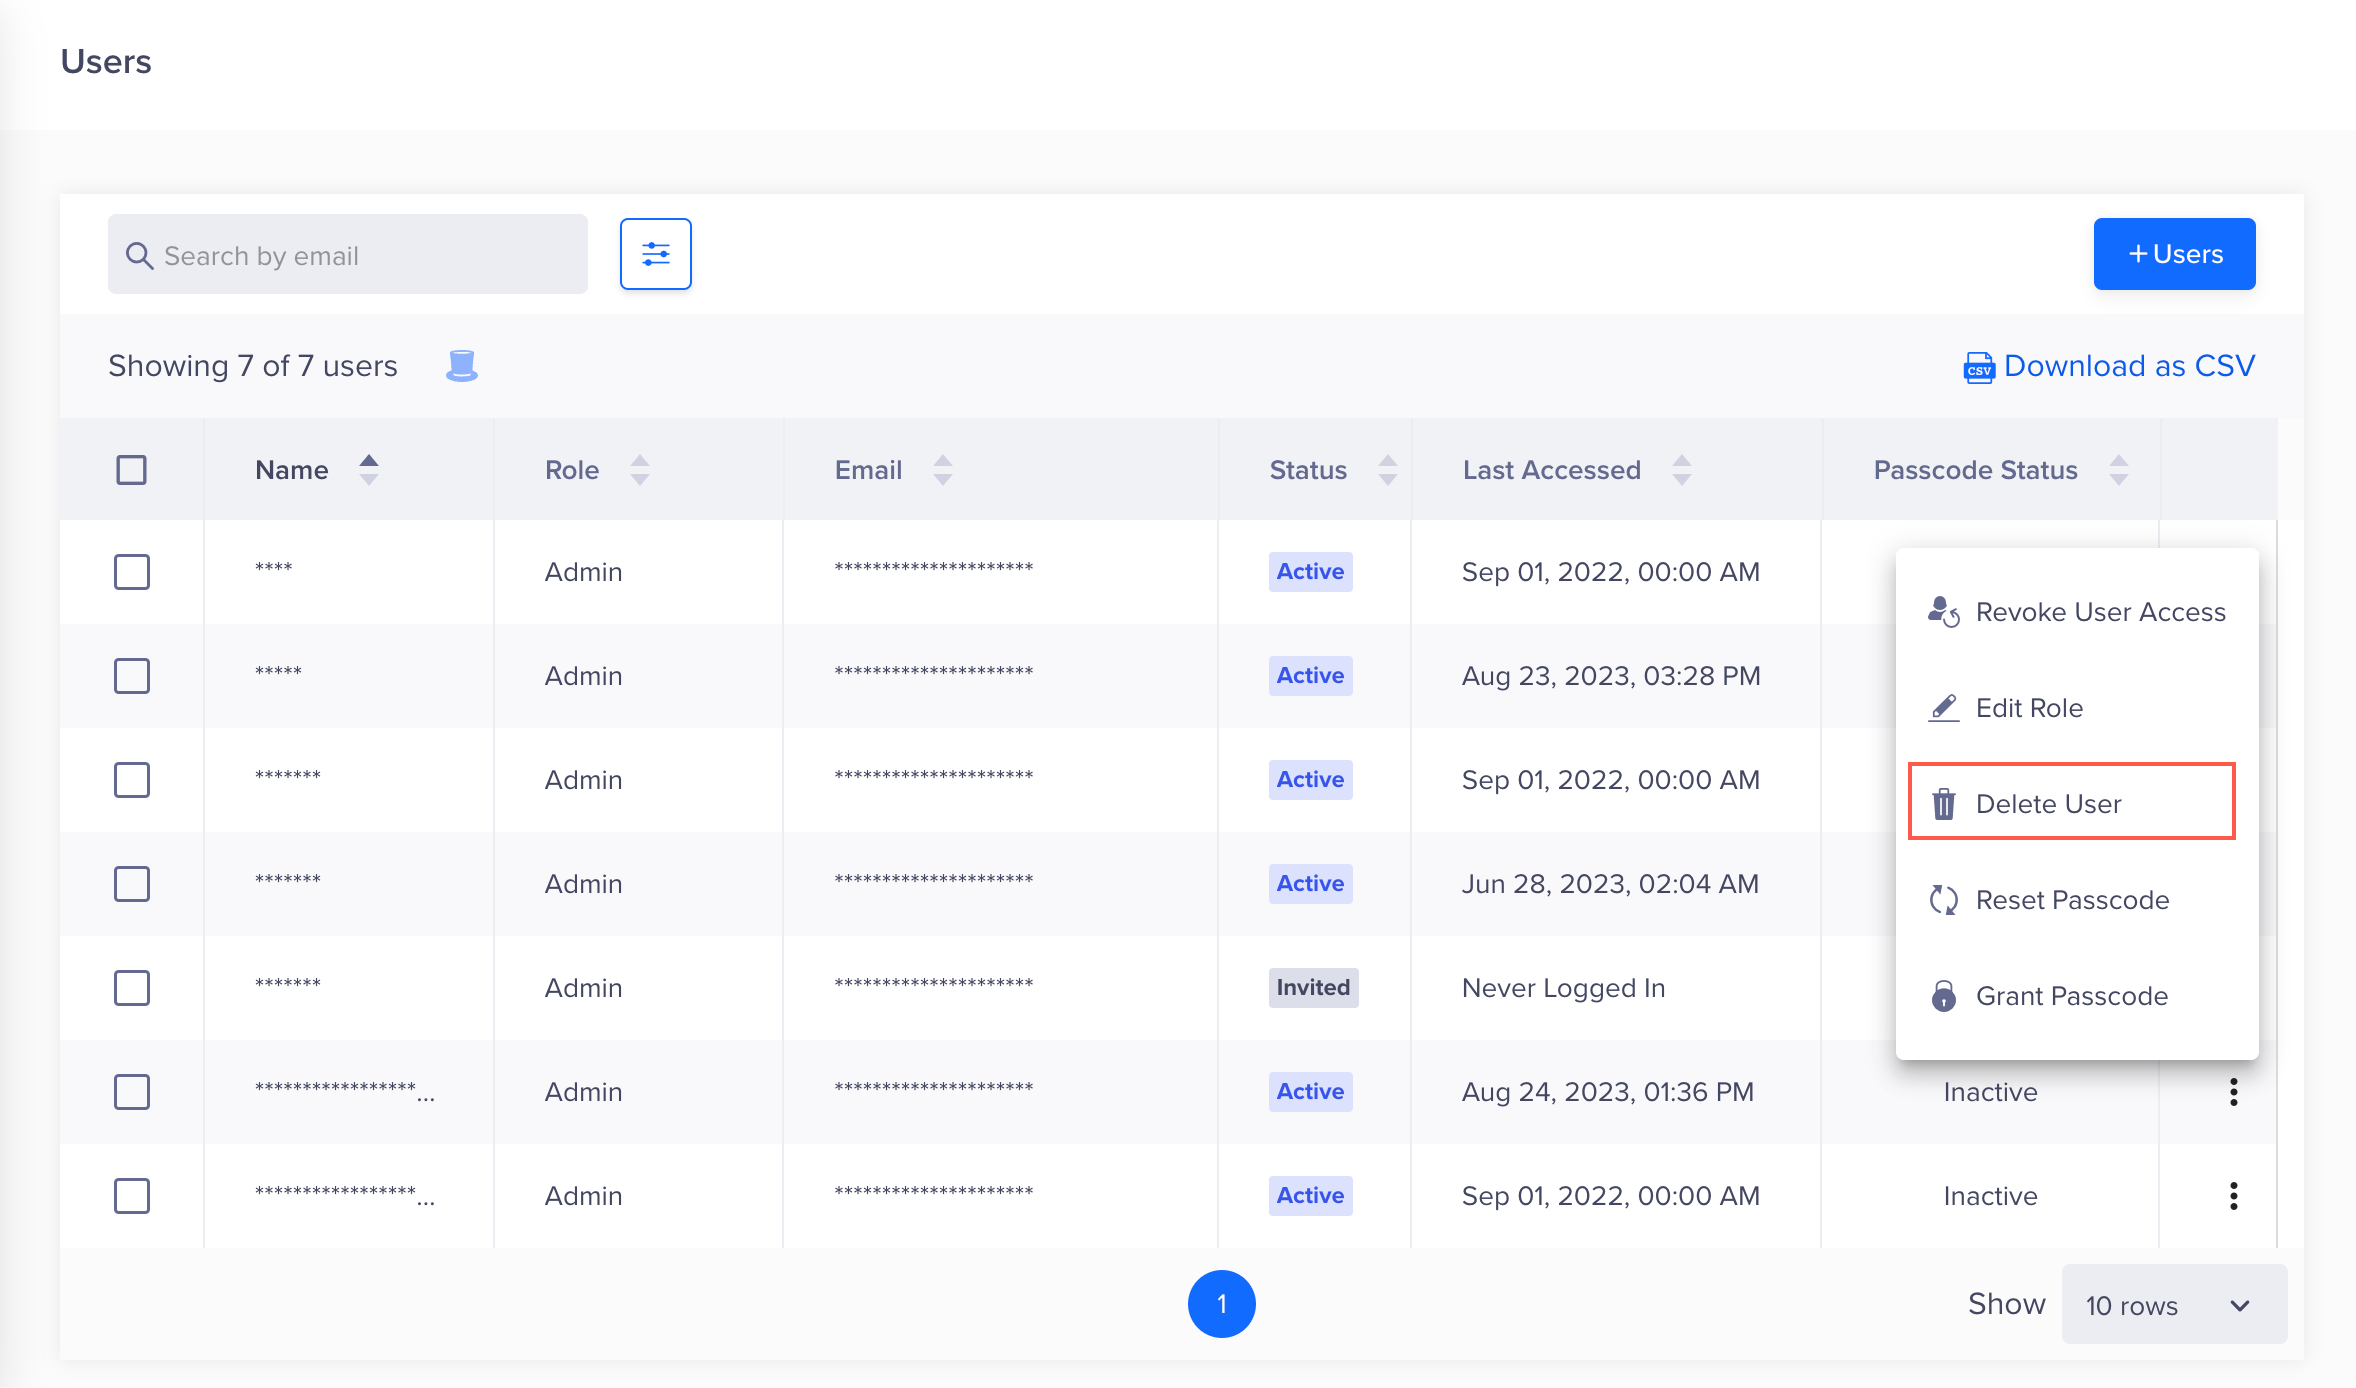
Delete a User
Reset Passcode
Reset Passcode generates a fresh new passcode for the user. Post resetting, the user must incorporate this passcode for the APIs. To reset the passcode, click the ![]() icon against the required user and select Reset Passcode from the list.
icon against the required user and select Reset Passcode from the list.

Reset Passcode
Grant User Passcode
Every CleverTap API call requires a passcode to authenticate the API calls. Granting a user passcode helps authenticate the user when making API calls. To grant a passcode, click the ![]() icon against the required user and select Grant Passcode from the list.
icon against the required user and select Grant Passcode from the list.

Grant Passcode
Select the tenure for which you want to grant the passcode and then click Grant to confirm your action.

Select Passcode Time
For more information about API authentication in CleverTap, refer to Authentication.
FAQ
Q. How to recover Admin access and assign it to a new user if the original Admin account is deactivated?
A. If your organization’s sole admin account has been deactivated and you no longer have access to it, you can still recover admin access and assign new admin privileges by following these steps:
-
Contact your organization’s IT administrator or domain owner to temporarily reactivate and grant access to the email account of the Project's admin.
-
Once the account is reactivated, use the Forgot Password option on the CleverTap login page to reset the password for that admin user account.
-
After resetting the password, log in to the account and assign admin access to an existing user within your Project or invite a new user with Admin access. This new admin will then have access to the CleverTap dashboard for that project.
-
(Optional) Revoke the former admin's access from the dashboard project.
To prevent similar issues in the future, CleverTap recommends assigning admin roles to at least two users. This ensures that if one admin leaves or becomes unavailable, the other can still manage the project and perform necessary administrative tasks.
Updated 7 months ago