Mandrill
Email Partner
Overview
Mandrill, a paid Mailchimp add-on, allows you to send data-driven emails, including targeted e-commerce and personalized one-to-one messages. With this integration, you can send email campaigns from the CleverTap dashboard through Mandrill.
Prerequisites for Integration
The following are the prerequisites:
- A Mandrill account with all the required setup and permissions to send email campaigns.
- A CleverTap account.
Integrate Mandrill into CleverTap
This process involves the following two steps:
Find Mandrill Project Details
To find Mandrill project details:
- Log in to your Mandrill account.
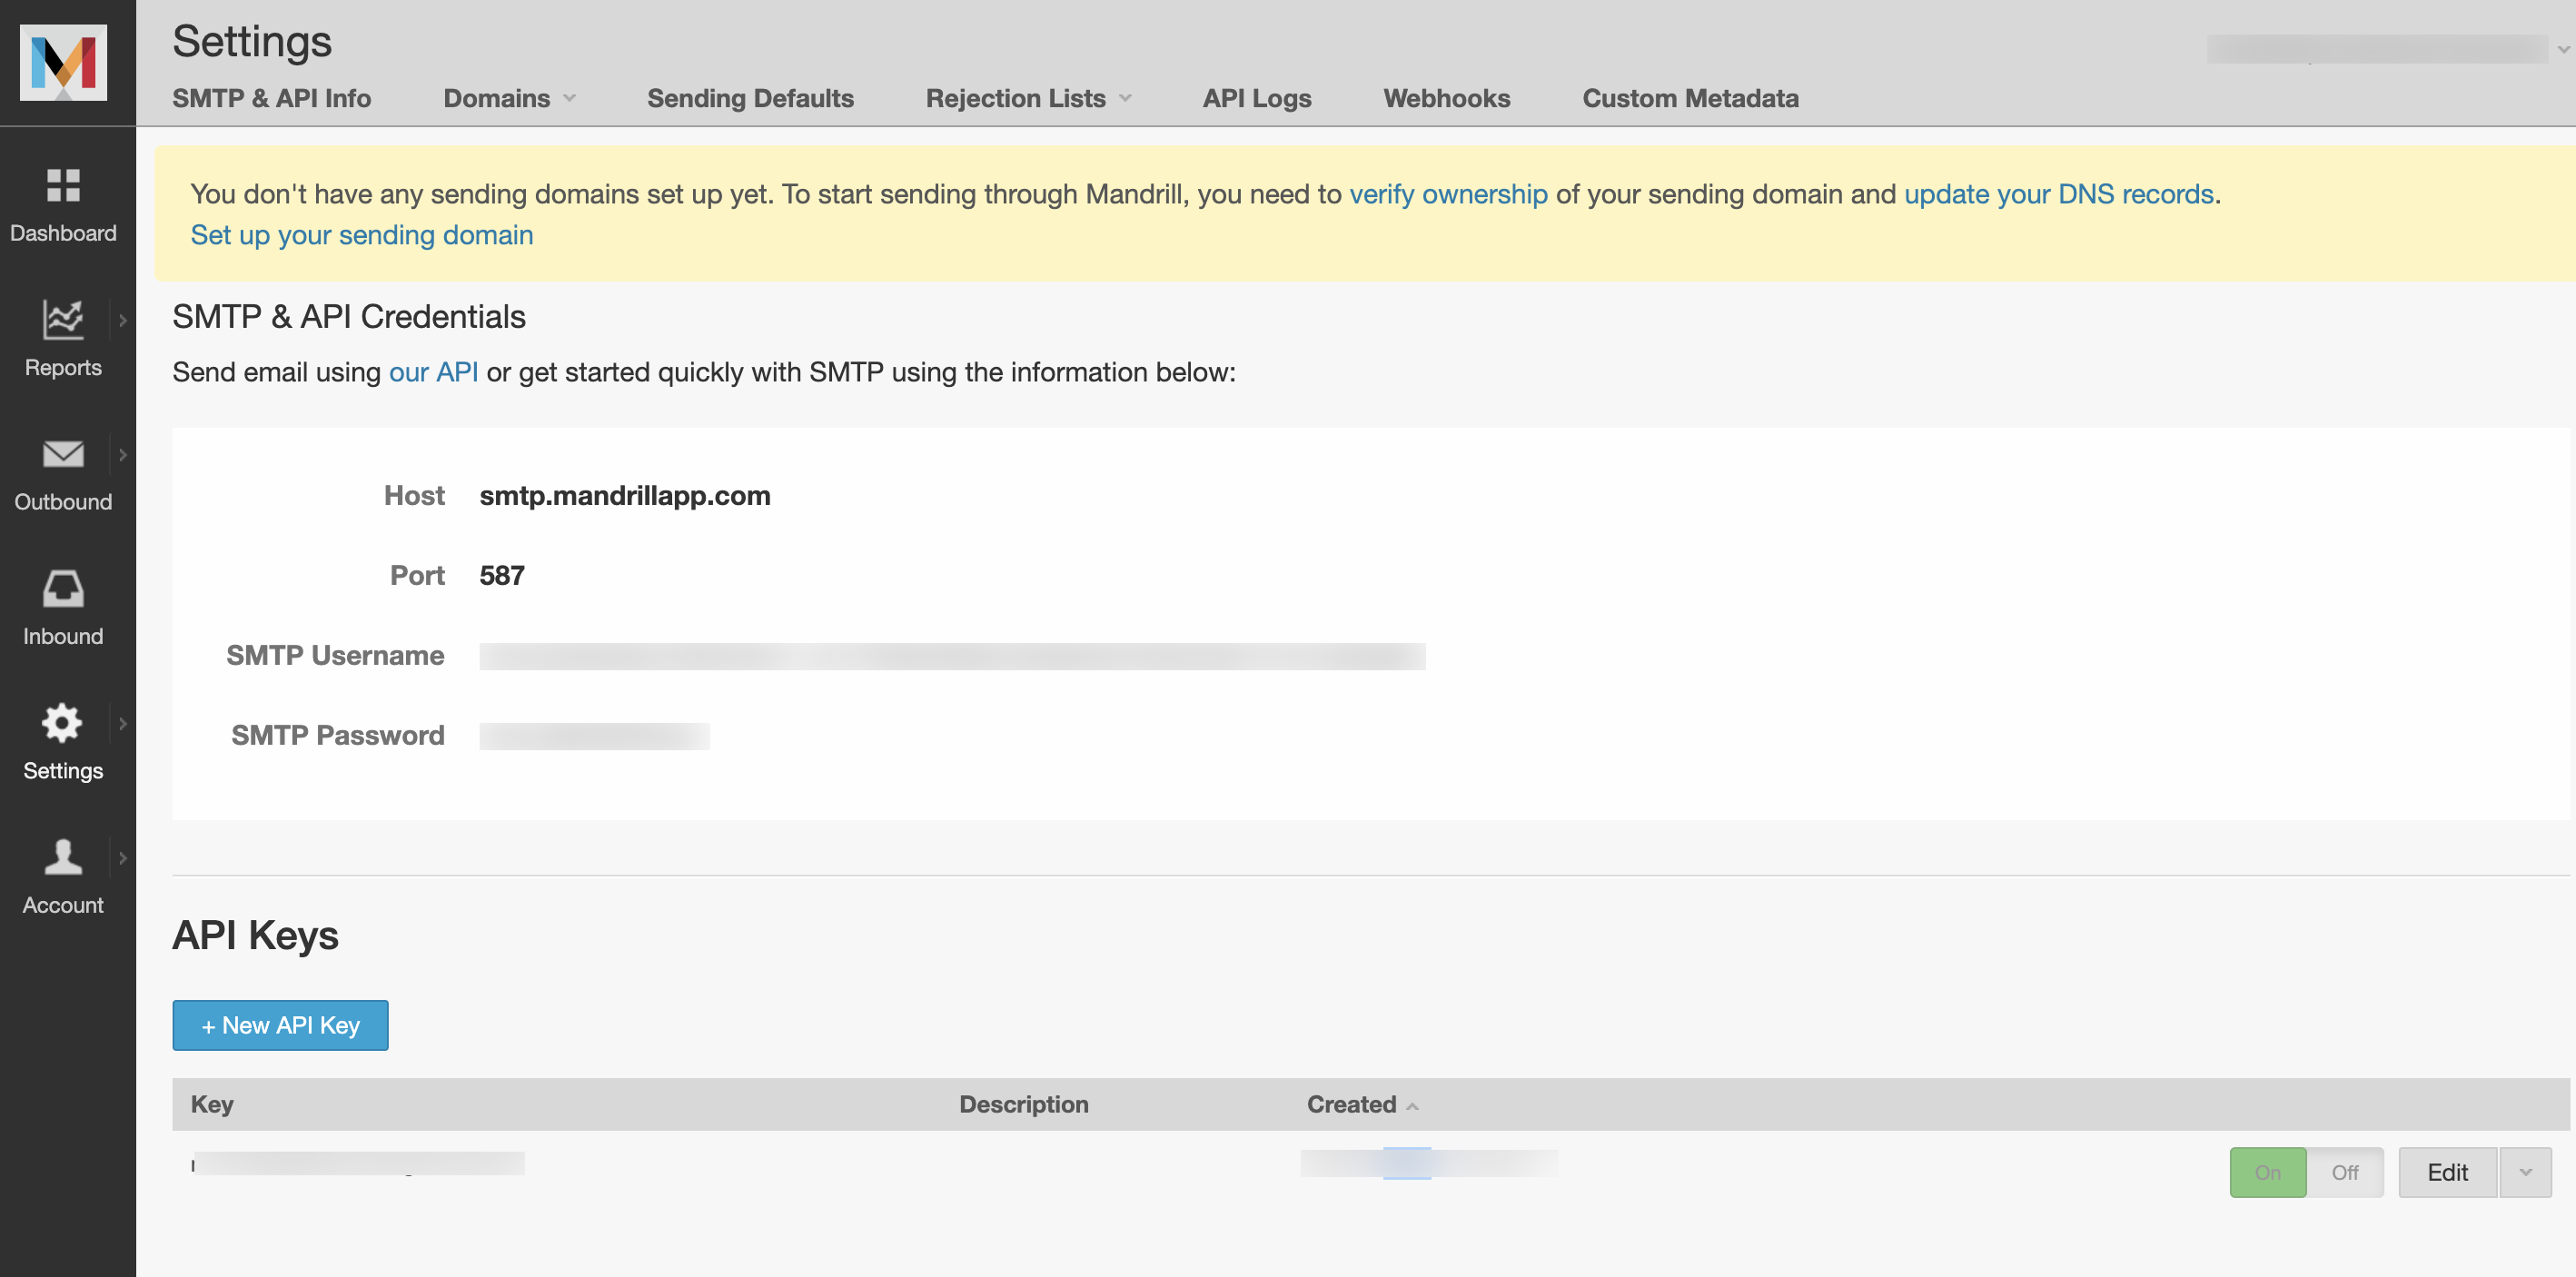
- Navigate to the Settings page from the Mandrill dashboard.
- Click SMTP & API Info to view the Mandrill project details.

SMS and API Details for Mandrill Project
NoteKeep the following details handy, as you will need them to configure the CleverTap dashboard:
- Host
- Port
- API Key
Configure Settings on CleverTap Dashboard
To configure the CleverTap dashboard:
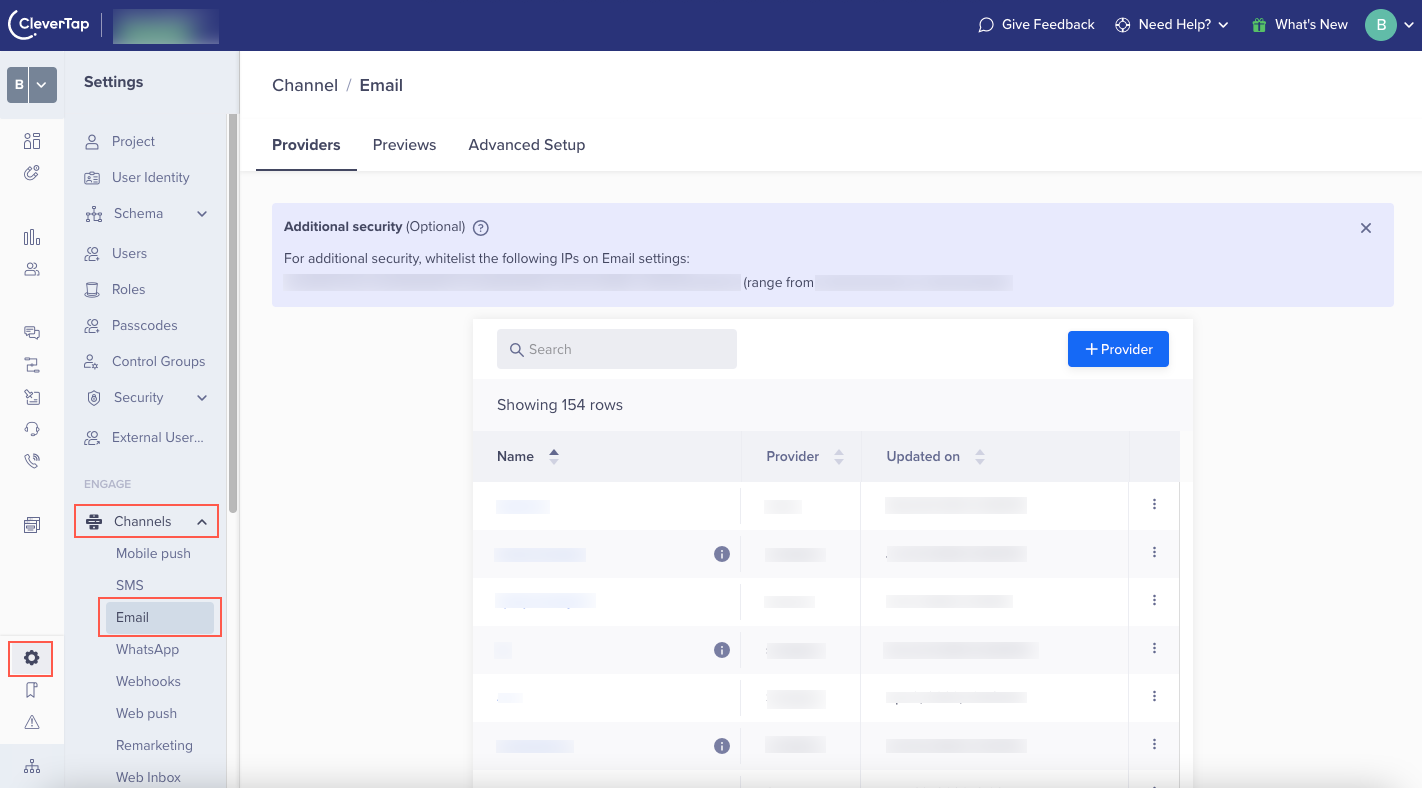
- Navigate to Settings > Channels > Email from the CleverTap dashboard.

Email Settings on CleverTap Dashboard
- Click + Provider. The Setup page opens.
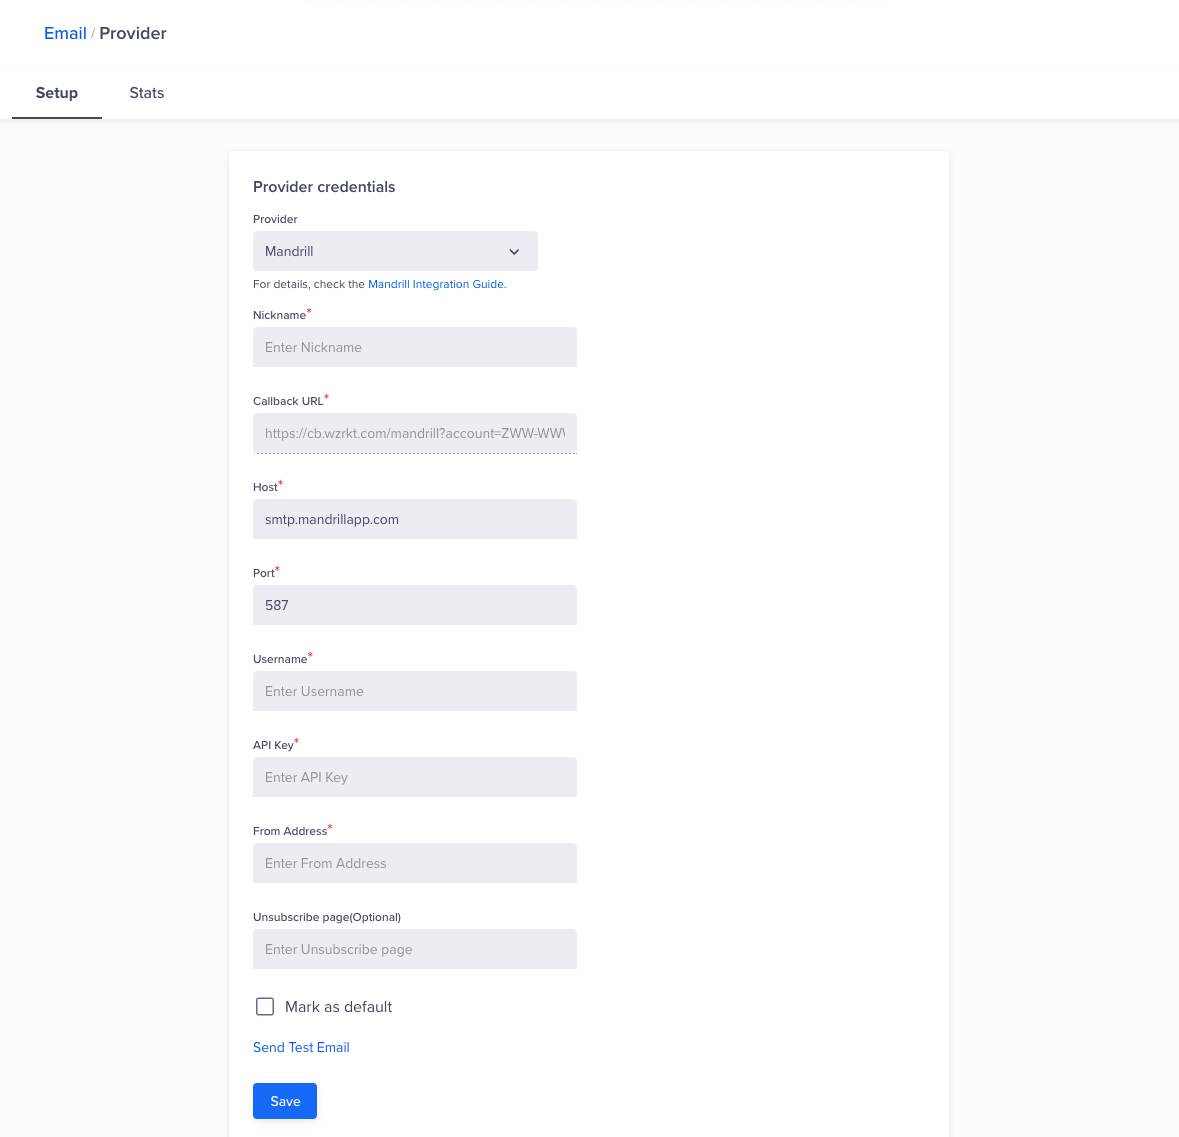
- Enter the following Provider credentials:
| Field | Description |
|---|---|
| Provider | Select Mandrill. |
| Nickname | Enter the Nickname to identify your saved provider uniquely. |
| Callback URL | Callback URL is used to get the bounce, rejection, and subscription information from Mandrill to CleverTap. This is a read-only field that is auto-populated with CleverTap's callback URL. |
| Host | Enter the Host value as smtp.mandrillapp.com. |
| Port | Enter the Port value as 587. |
| Username | Enter your Mandrill username in this field. |
| API Key | Enter your Mandrill API Key obtained after step 3 of Find Mandrill Project Details. |
| From Address | Enter the From email address. This is the same as the sender's email address. Most people will not open an email unless they recognize the sender. |
| Unsubscribe page (Optional) | Enter your custom Unsubscribe page URL. |
- Click Save to save the provider settings.

Setup Email Provider Credentials
API Key EncryptionCleverTap stores your credentials in an encrypted format. So, we recommend that you save the API Key somewhere. If you do not have this information, contact Mandrill support.
You can click Send Test Email and fill in your details to test the configuration details you have entered. Has it arrived in your inbox? If not, refer to Troubleshooting.
Handle Bounce, Rejection, Spam, and Unsubscriptions
When an email is classified as bounced or rejected or when a user unsubscribes or marks a particular email ID as spam, CleverTap must be notified so that it does not attempt any further deliveries to that mailbox. This is considered a good practice and helps improve your sender's reputation. A good sender reputation virtually guarantees better delivery rates.
To obtain such information, you need to create a webhook. To do so:
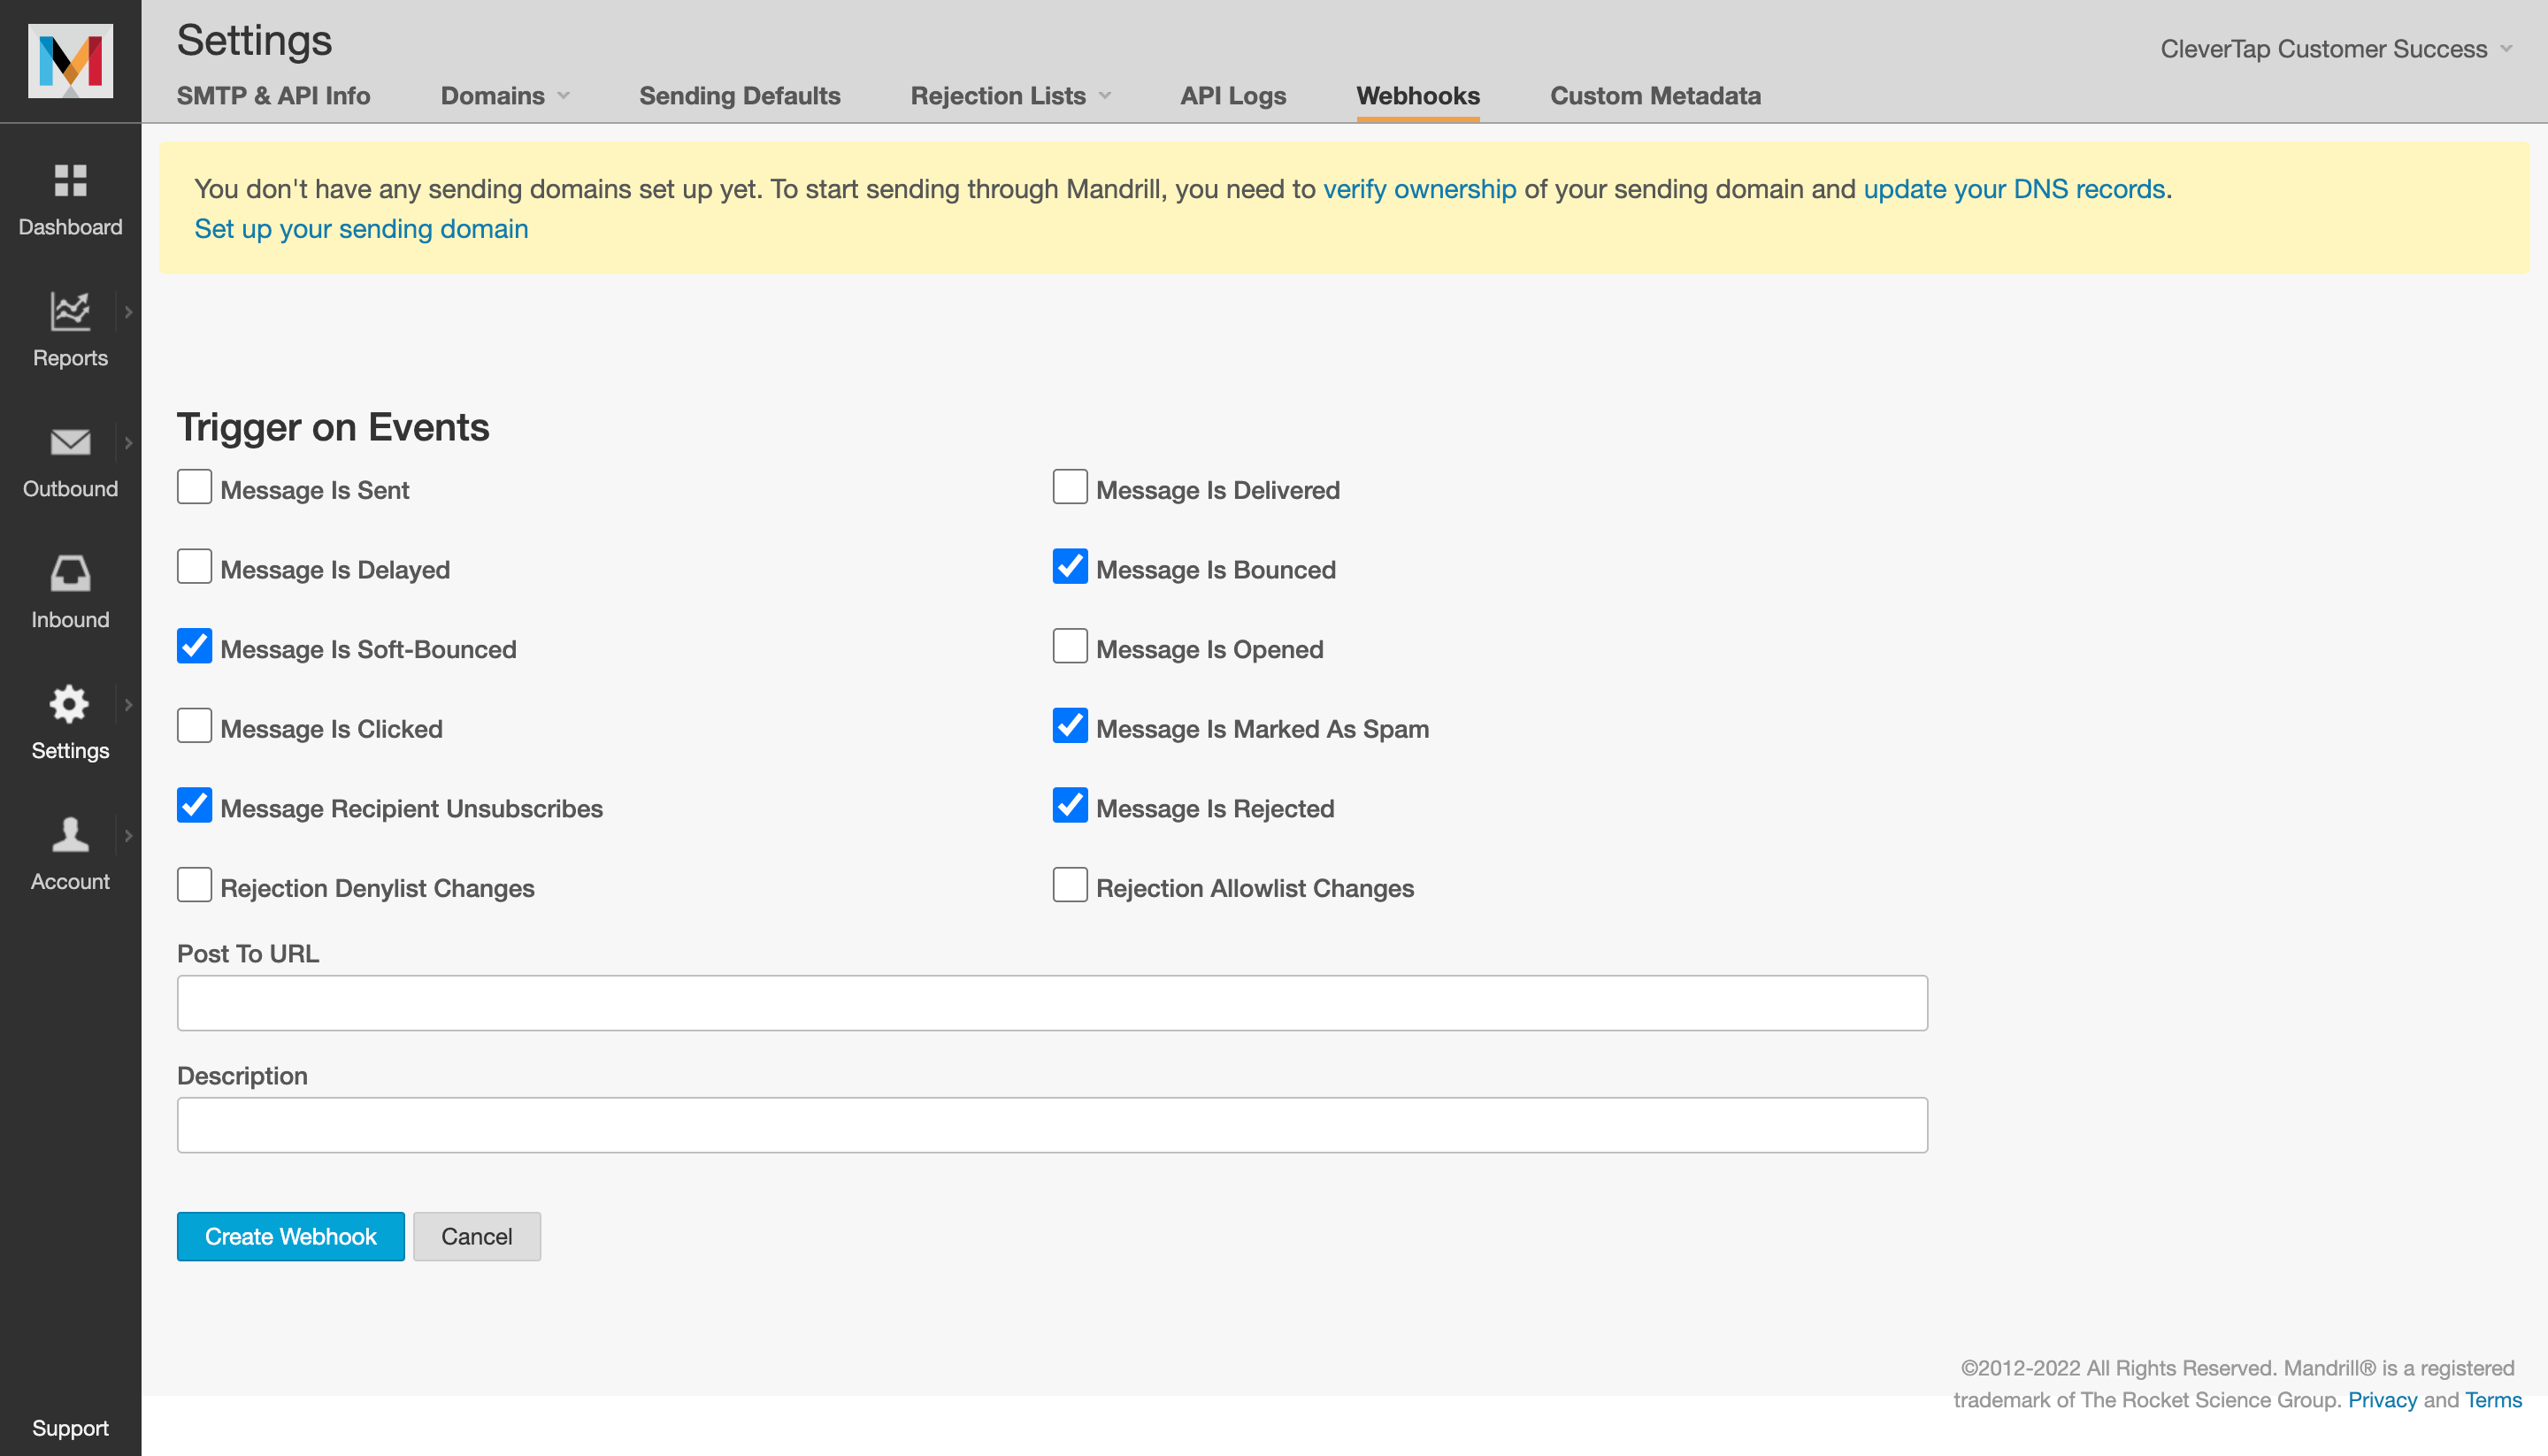
- Navigate to Settings > Webhooks from the Mandrill dashboard.
- Click Add a Webhook.
- Ensure to select the following from the available options:
- Message Is Soft-Bounced
- Message Recipient Unsubscribes
- Message Is Bounced
- Message Is Marked As Spam, and
- Message is Rejected.
- Enter the CleverTap callback URL (from your CleverTap Email Settings section) in the Post To URL field.
- Click Create Webhook.

Create a Webhook
Enable Unsubscribe Footer
Mandrill provides a default email unsubscribe template, which gives the email recipient an option to unsubscribe from the email list. When you select this option, the unsubscribe template is added at the bottom of all the outgoing emails.
Here is an example of the default unsubscribe footer of Mandrill:

Sample Unsubscribe Message on Footer
To enable adding the default Unsubscribe Footer:
- Navigate to Settings > Sending Defaults from the Mandrill dashboard.
- Select Add Unsubscribe Footer.
- Click Save.

Add Default Unsubscribe Footer
Troubleshooting
If you encounter an error when sending a test email, ensure the following:
- Check your SPAM folder to see if the message has been classified as SPAM by your email provider.
- IP address does not restrict your Mandrill API key.
- Your Mandrill API key is active.
Updated about 1 month ago
