Content Blocks - Standardize Messaging
Learn how to reuse content and standardize your messaging with content blocks.
Overview
A Content Block is a reusable part of content that can be used across different campaigns. It helps maintain a consistent experience for users as they view a consistent branding tone and colors across your messaging. This messaging can include text, images, or calls to action (CTAs) buttons that you can standardize across messages. Using standard messaging, marketers can maintain a clear tone and style, building trust and consistency in brand communications.
Public BetaThis feature is currently a Public Beta Release. If you want access to it, contact your CSM.
Content Blocks also allow marketers to reuse the same content for different campaigns, saving time and effort while matching the brand’s identity. For example, a Content Block can serve as a footer with clickable social media icons for users to follow the brand. Marketers can easily add or remove social media links as needed in a footer, making this change dynamically effective across all campaigns that use this Content Block. For example, if you are a travel app sending messages to users, an update to an email footer about an updated Instagram account can be repeated across footers sent in other campaigns.`
Supported ChannelsCurrently, you can use a content block for Email campaigns only. However, only Text Contet Block is supported for AMP for Email. You can stay tuned to our Release Notes and Changelog about frequent updates and enhancements.
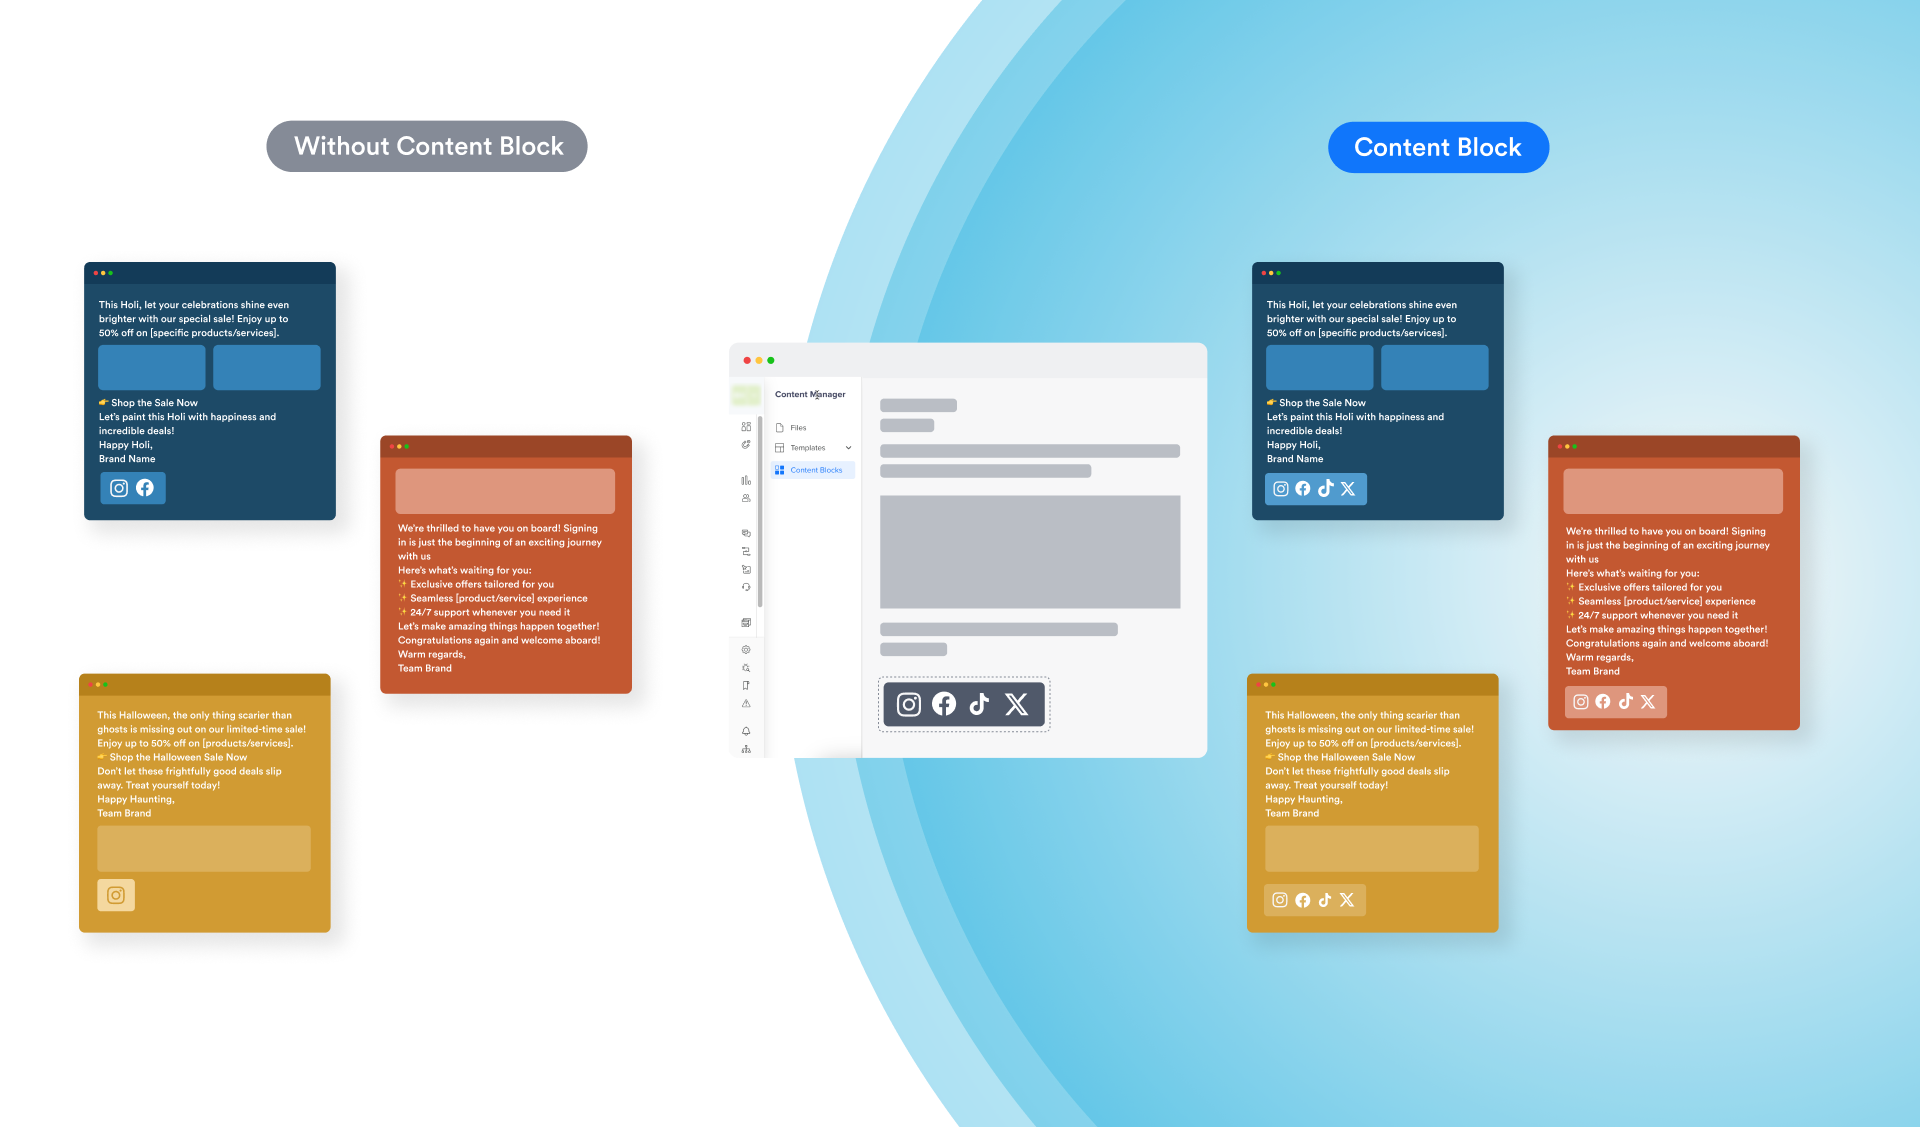
Footer Standardization with Content Blocks
Content Blocks Video Tutorial
Discover the video tutorial for an overview of Content Blocks and a sample use case.
Content Block Types
There are two types of content blocks:
- Text Content Block - Simple text-based messages mainly to communicate information, updates and so on.
- HTML Content Block - Engaging, dynamic messages to upsell and quickly engage the users.
You can select a content block based on your messaging requirements, whether you want to send a plain text message or an engaging, colorful message.
Text Content Block
This is a Text-based Content Block you can reuse for your messaging requirements. It is useful when you want to create a message quickly. The Inline personalization includes only profile personalization.
Text Block SpecificationsCurrently, we support up to 500 characters in a content block.
Here is a sample of a personalized Text Content Block that encourages the user to upgrade the plan for an OTT app. The Conditional Tags help deliver the message based on the current subscription plan of the user:
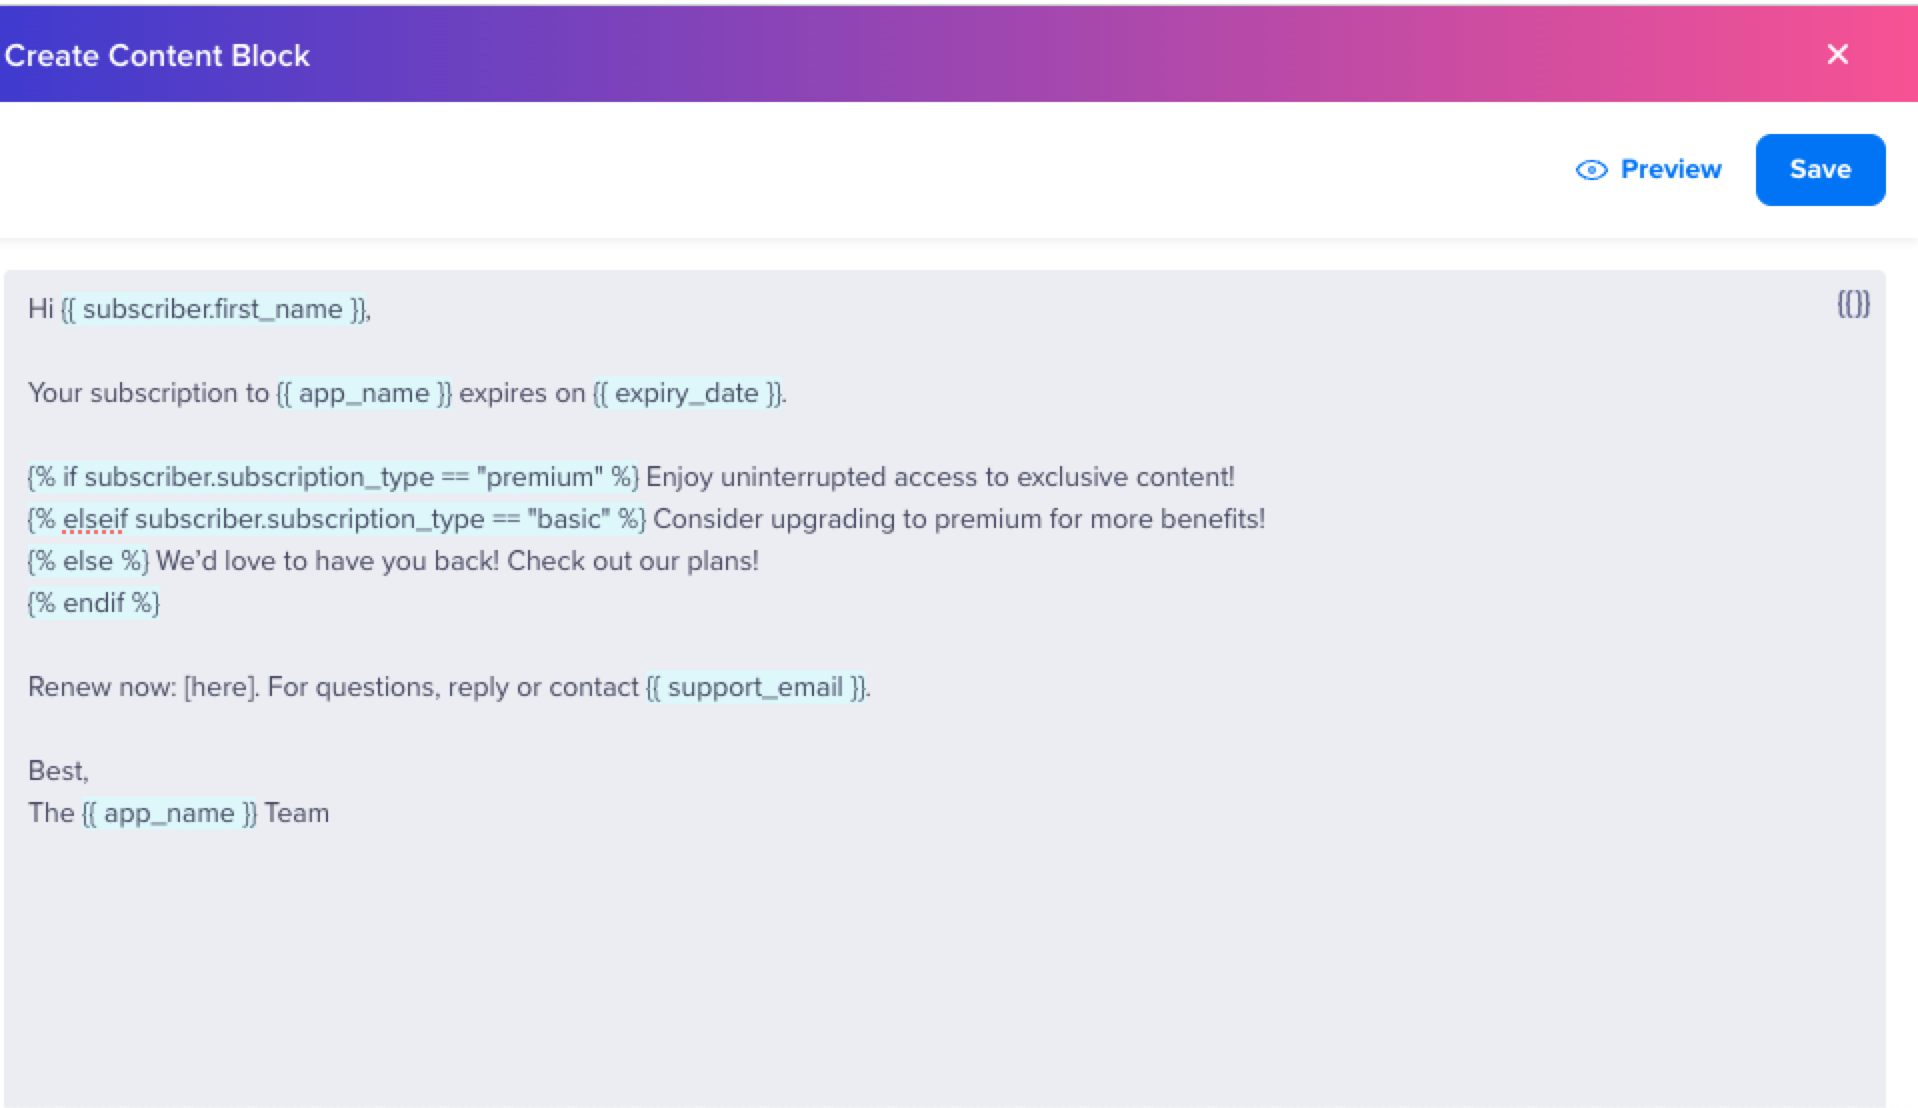
Sample Content Block - Text
HTML Content Block
The HTML Content Block allows you to create visually appealing and dynamic messages, allowing you to import and paste your HTML code. The HTML code helps design and customize your message’s layout, style, and interactivity, helping you deliver a more engaging experience for your audience.
Here is a sample HTML Content Block that nudges the user to upgrade the plan for an OTT app. The Conditional Tags help deliver the message based on the current subscription plan of the user:
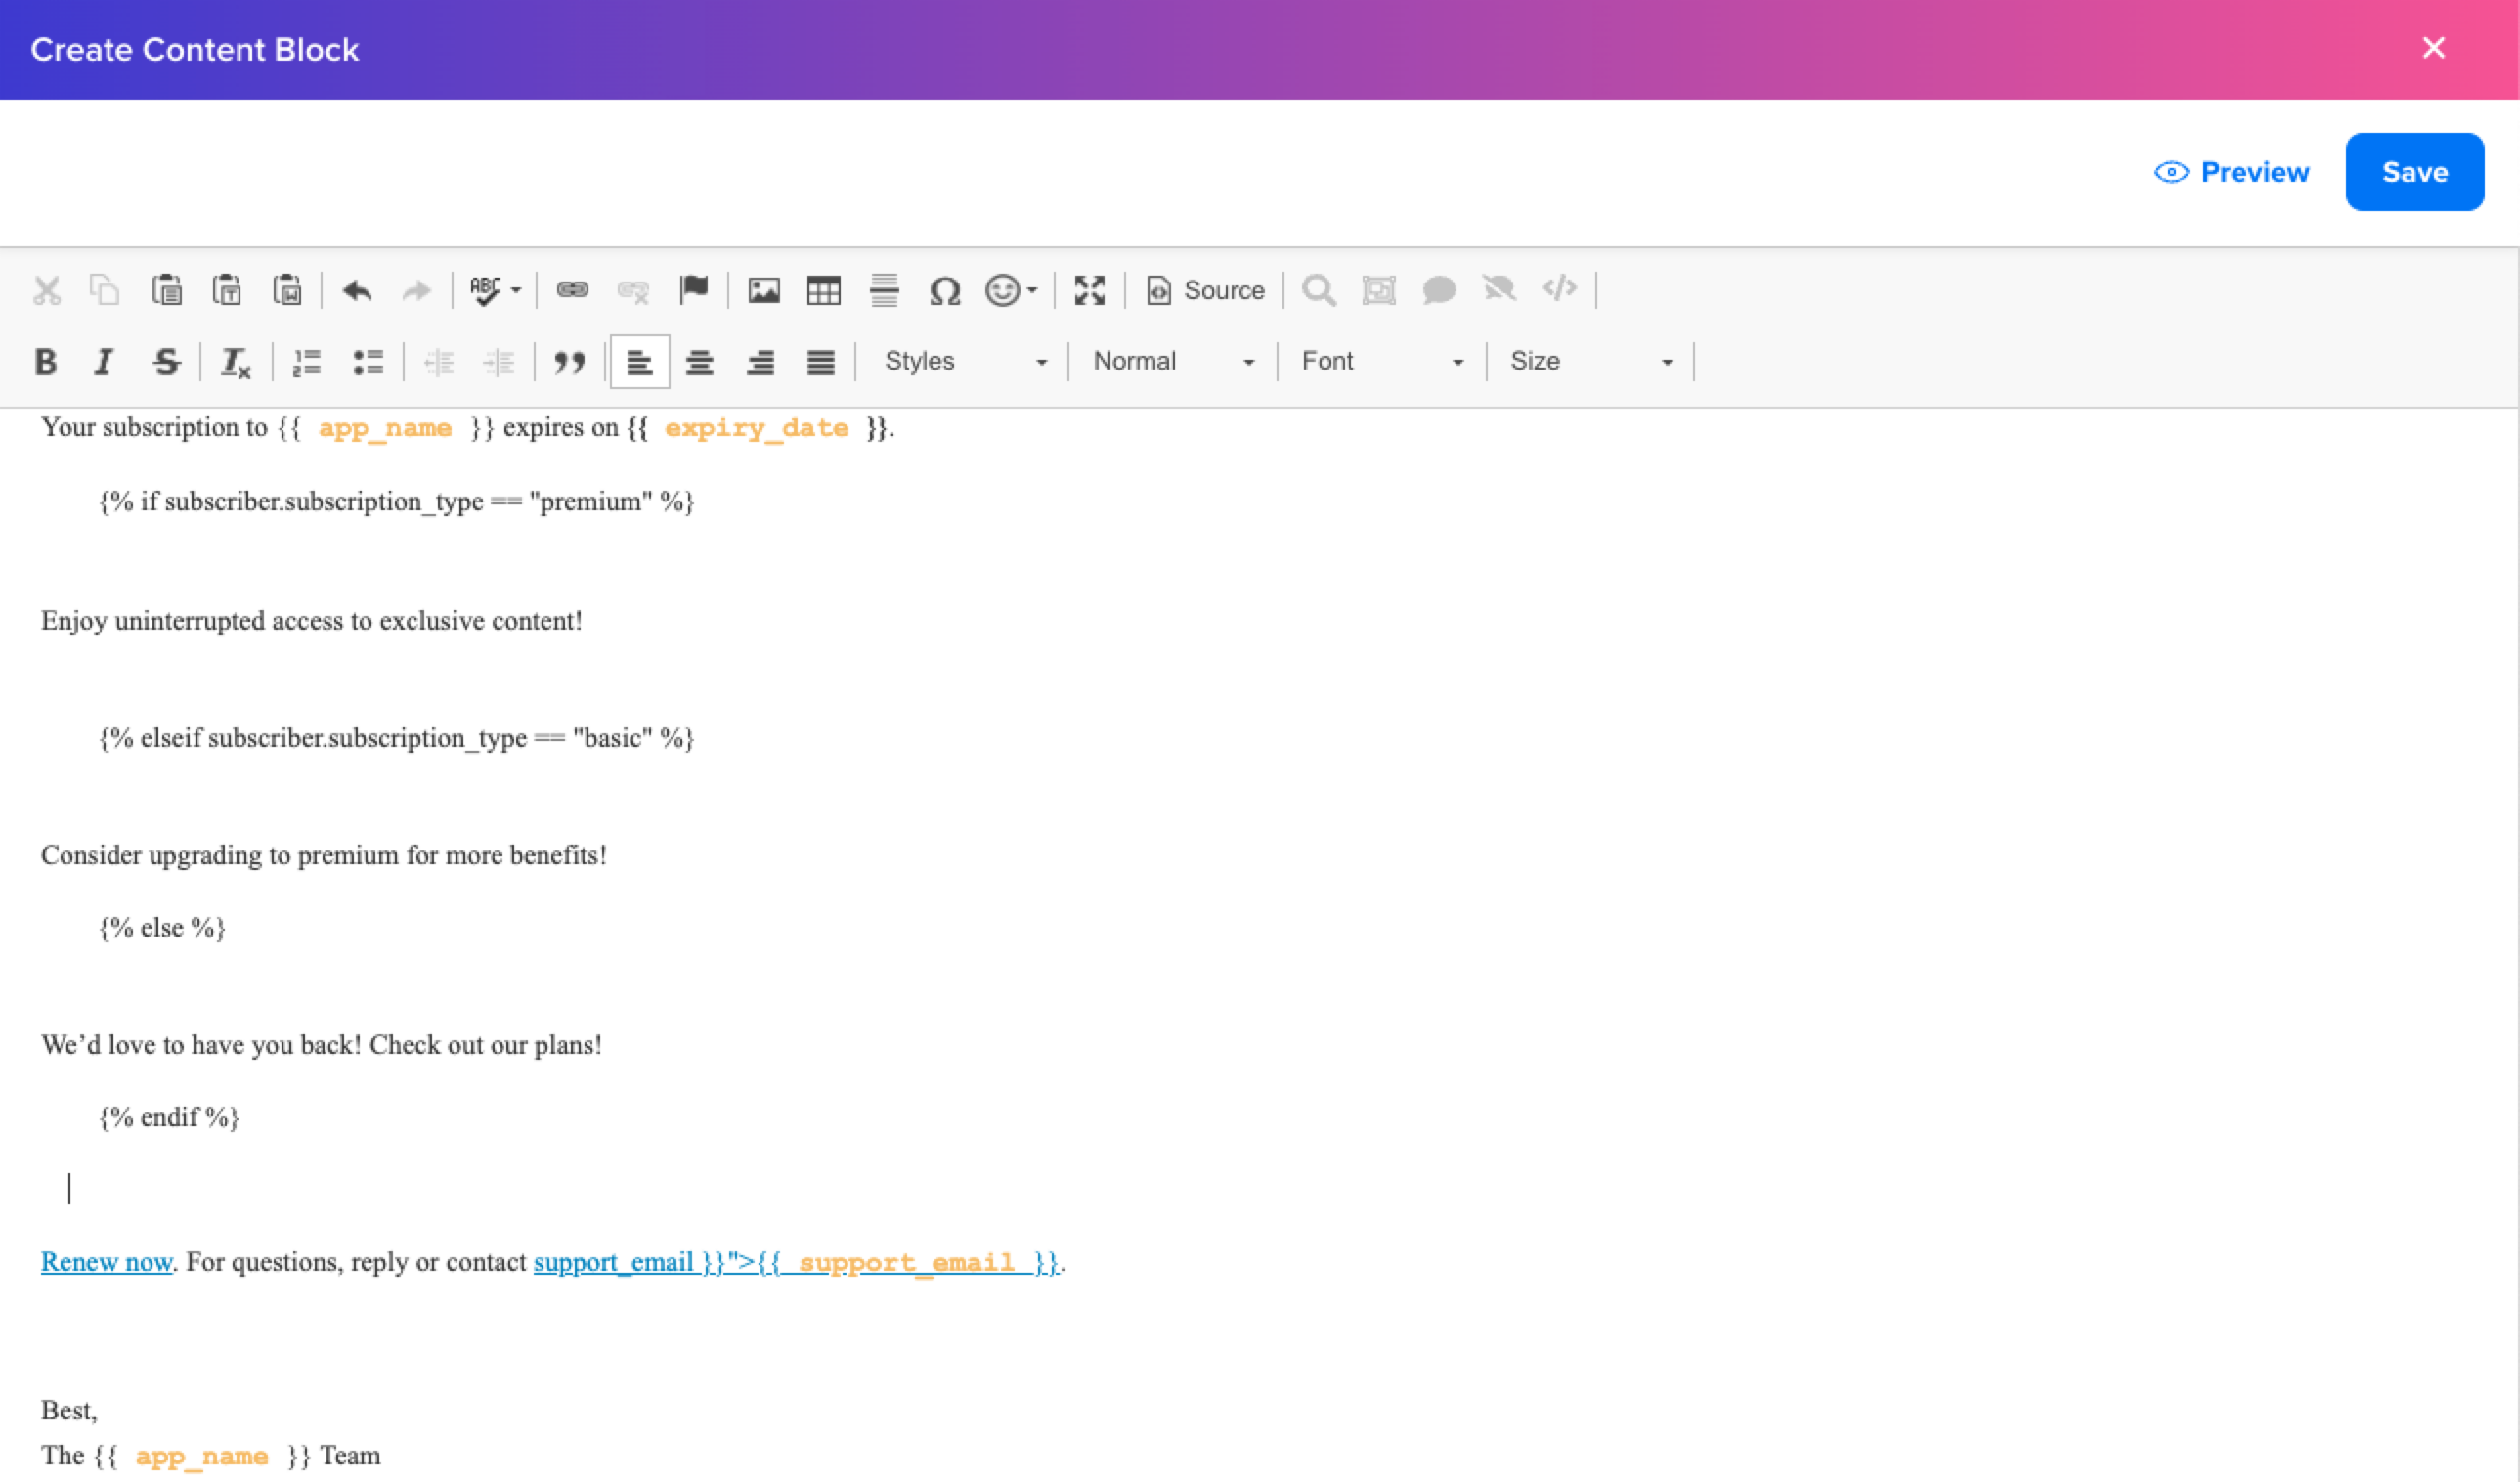
Sample Content Block - HTML
Create Content Blocks
You can create Content Blocks from the CleverTap Dashboard.
Content Blocks Via APIYou can also create and manage your Content Blocks via the CleverTap Content Blocks API when you want to update or create Content Blocks at scale.
Follow the steps to create a content block:
- Go to Content Manager > Content Blocks.
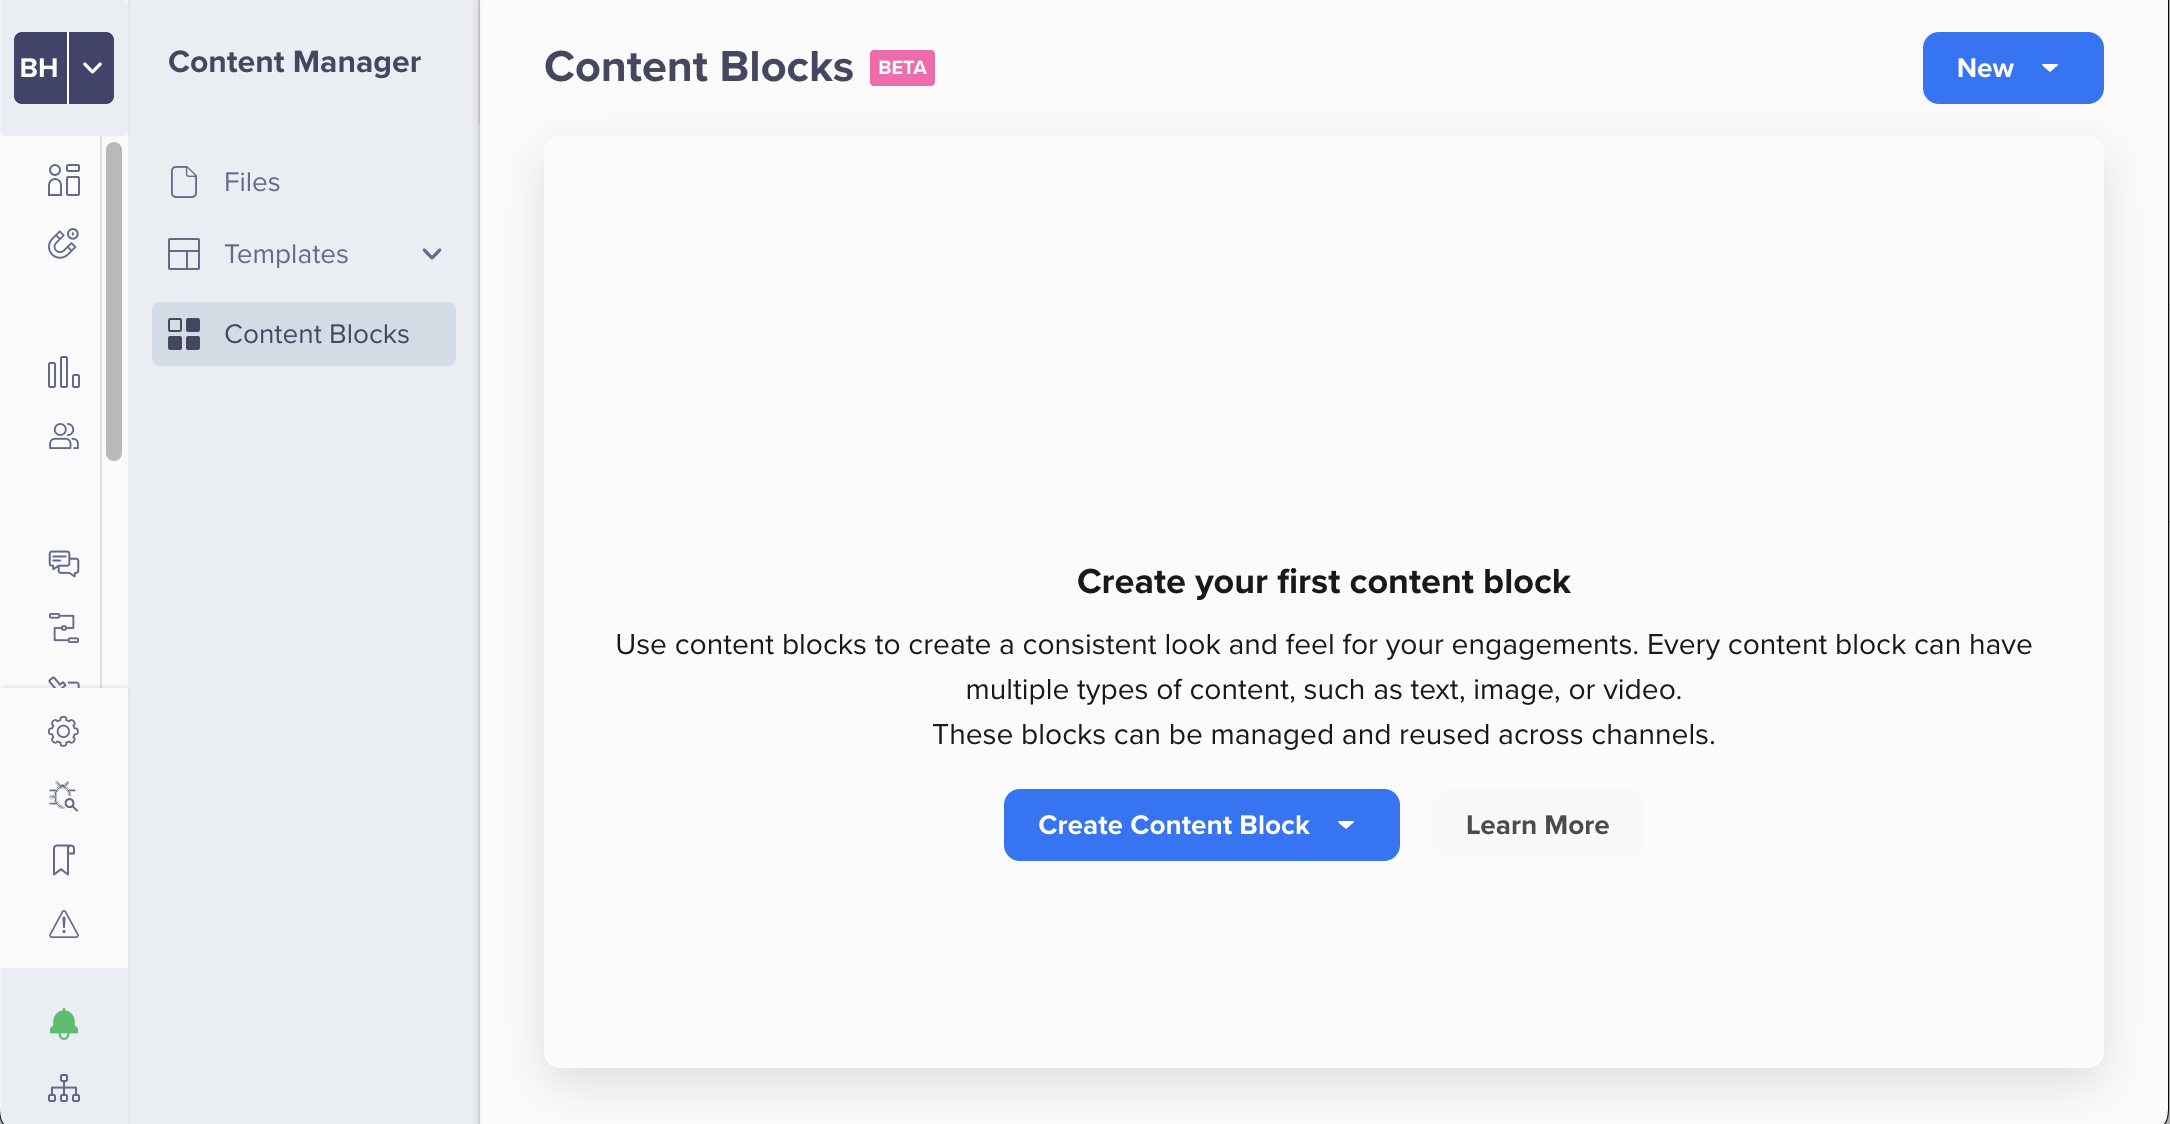
Create a Content Block
- Click New and select the type of Content Block Content Block.
- Select the type of Content Block, that is, Text or HTML.
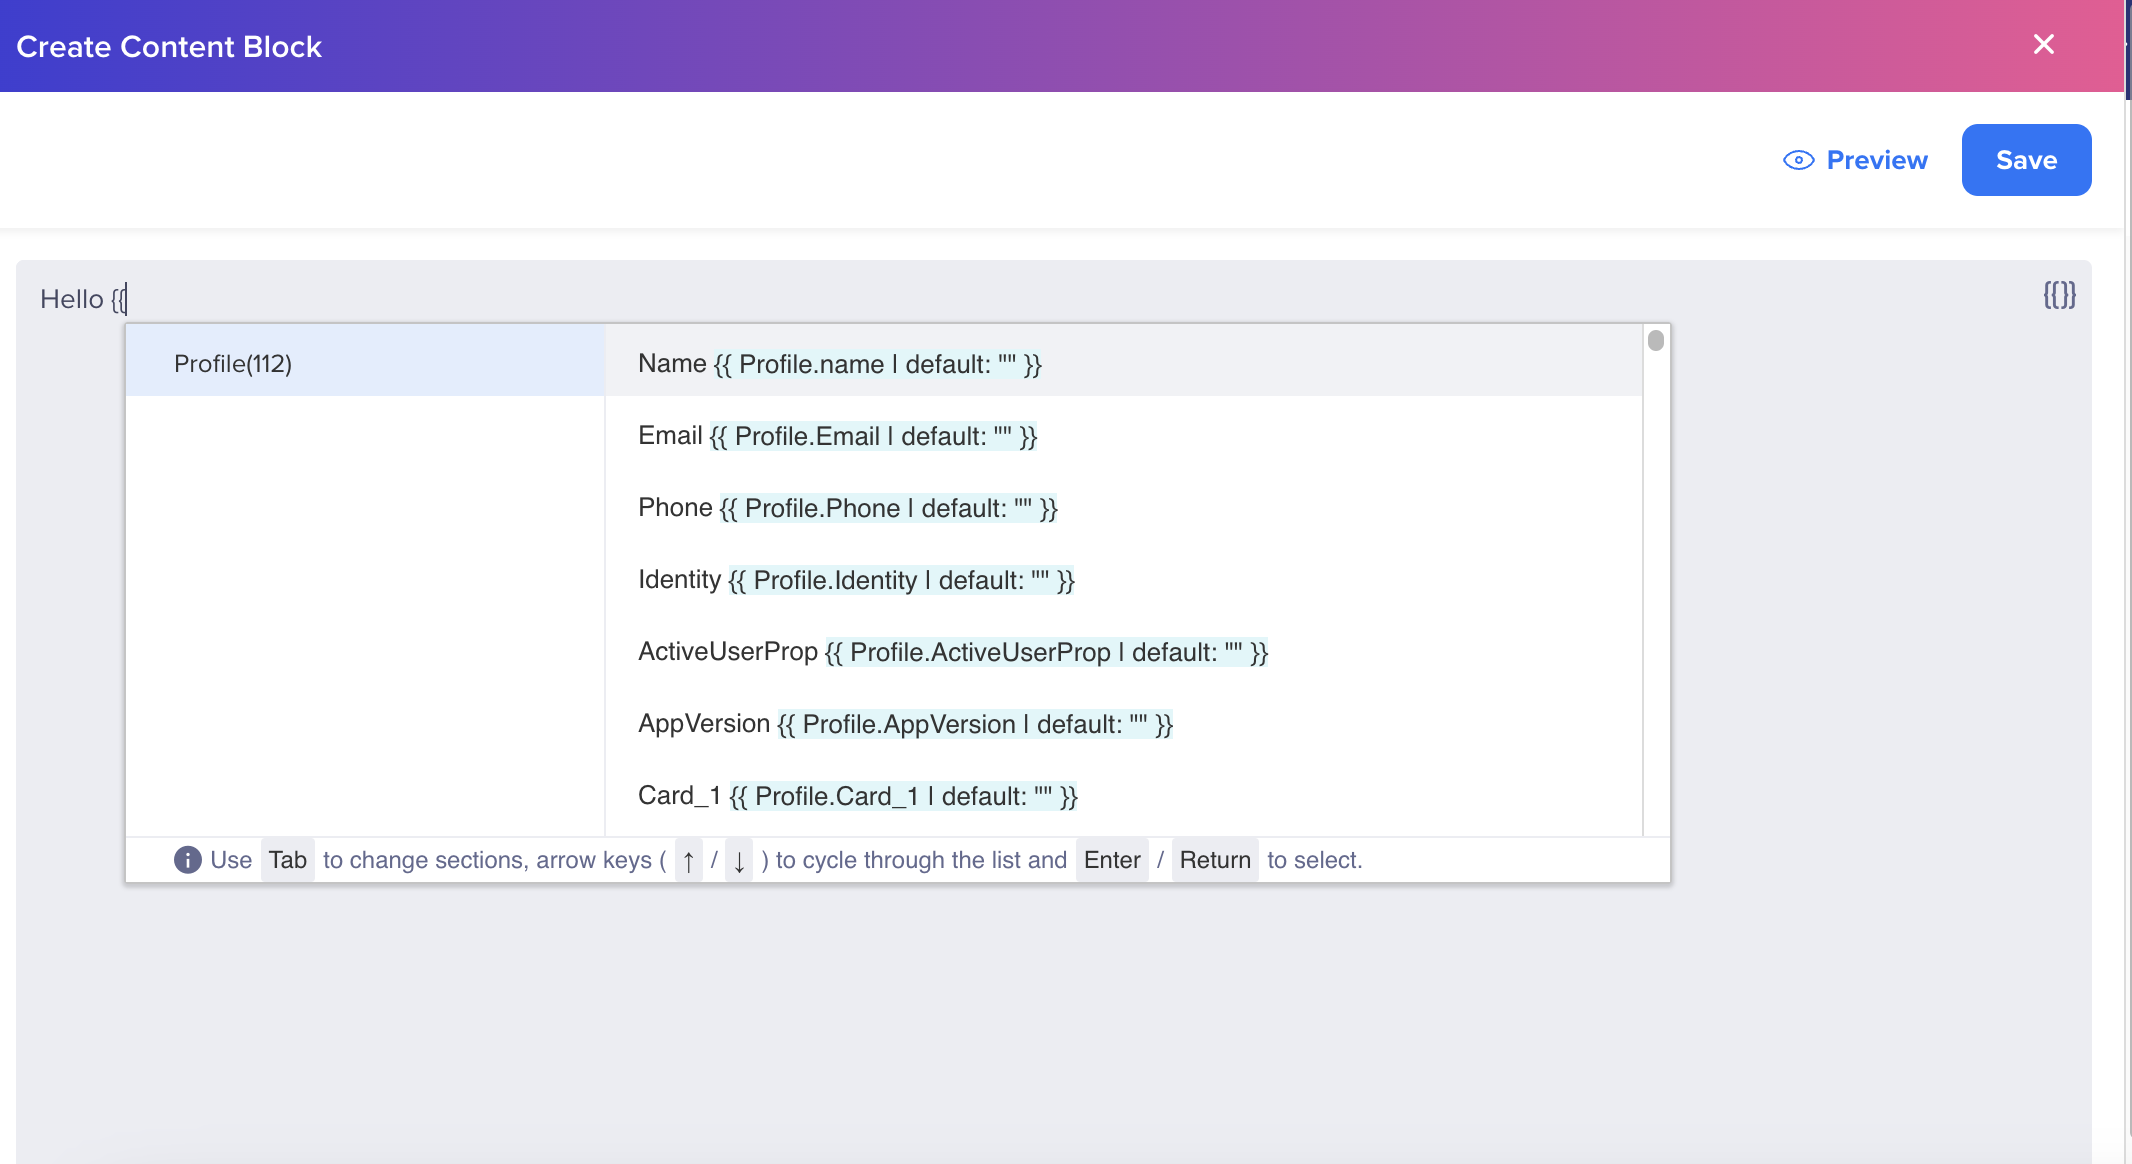
Content Block Editor
- From the editor, click {{}} to use inline personalization and Conditional Tags to personalize the Content Block.
- Click Preview to preview the content block.
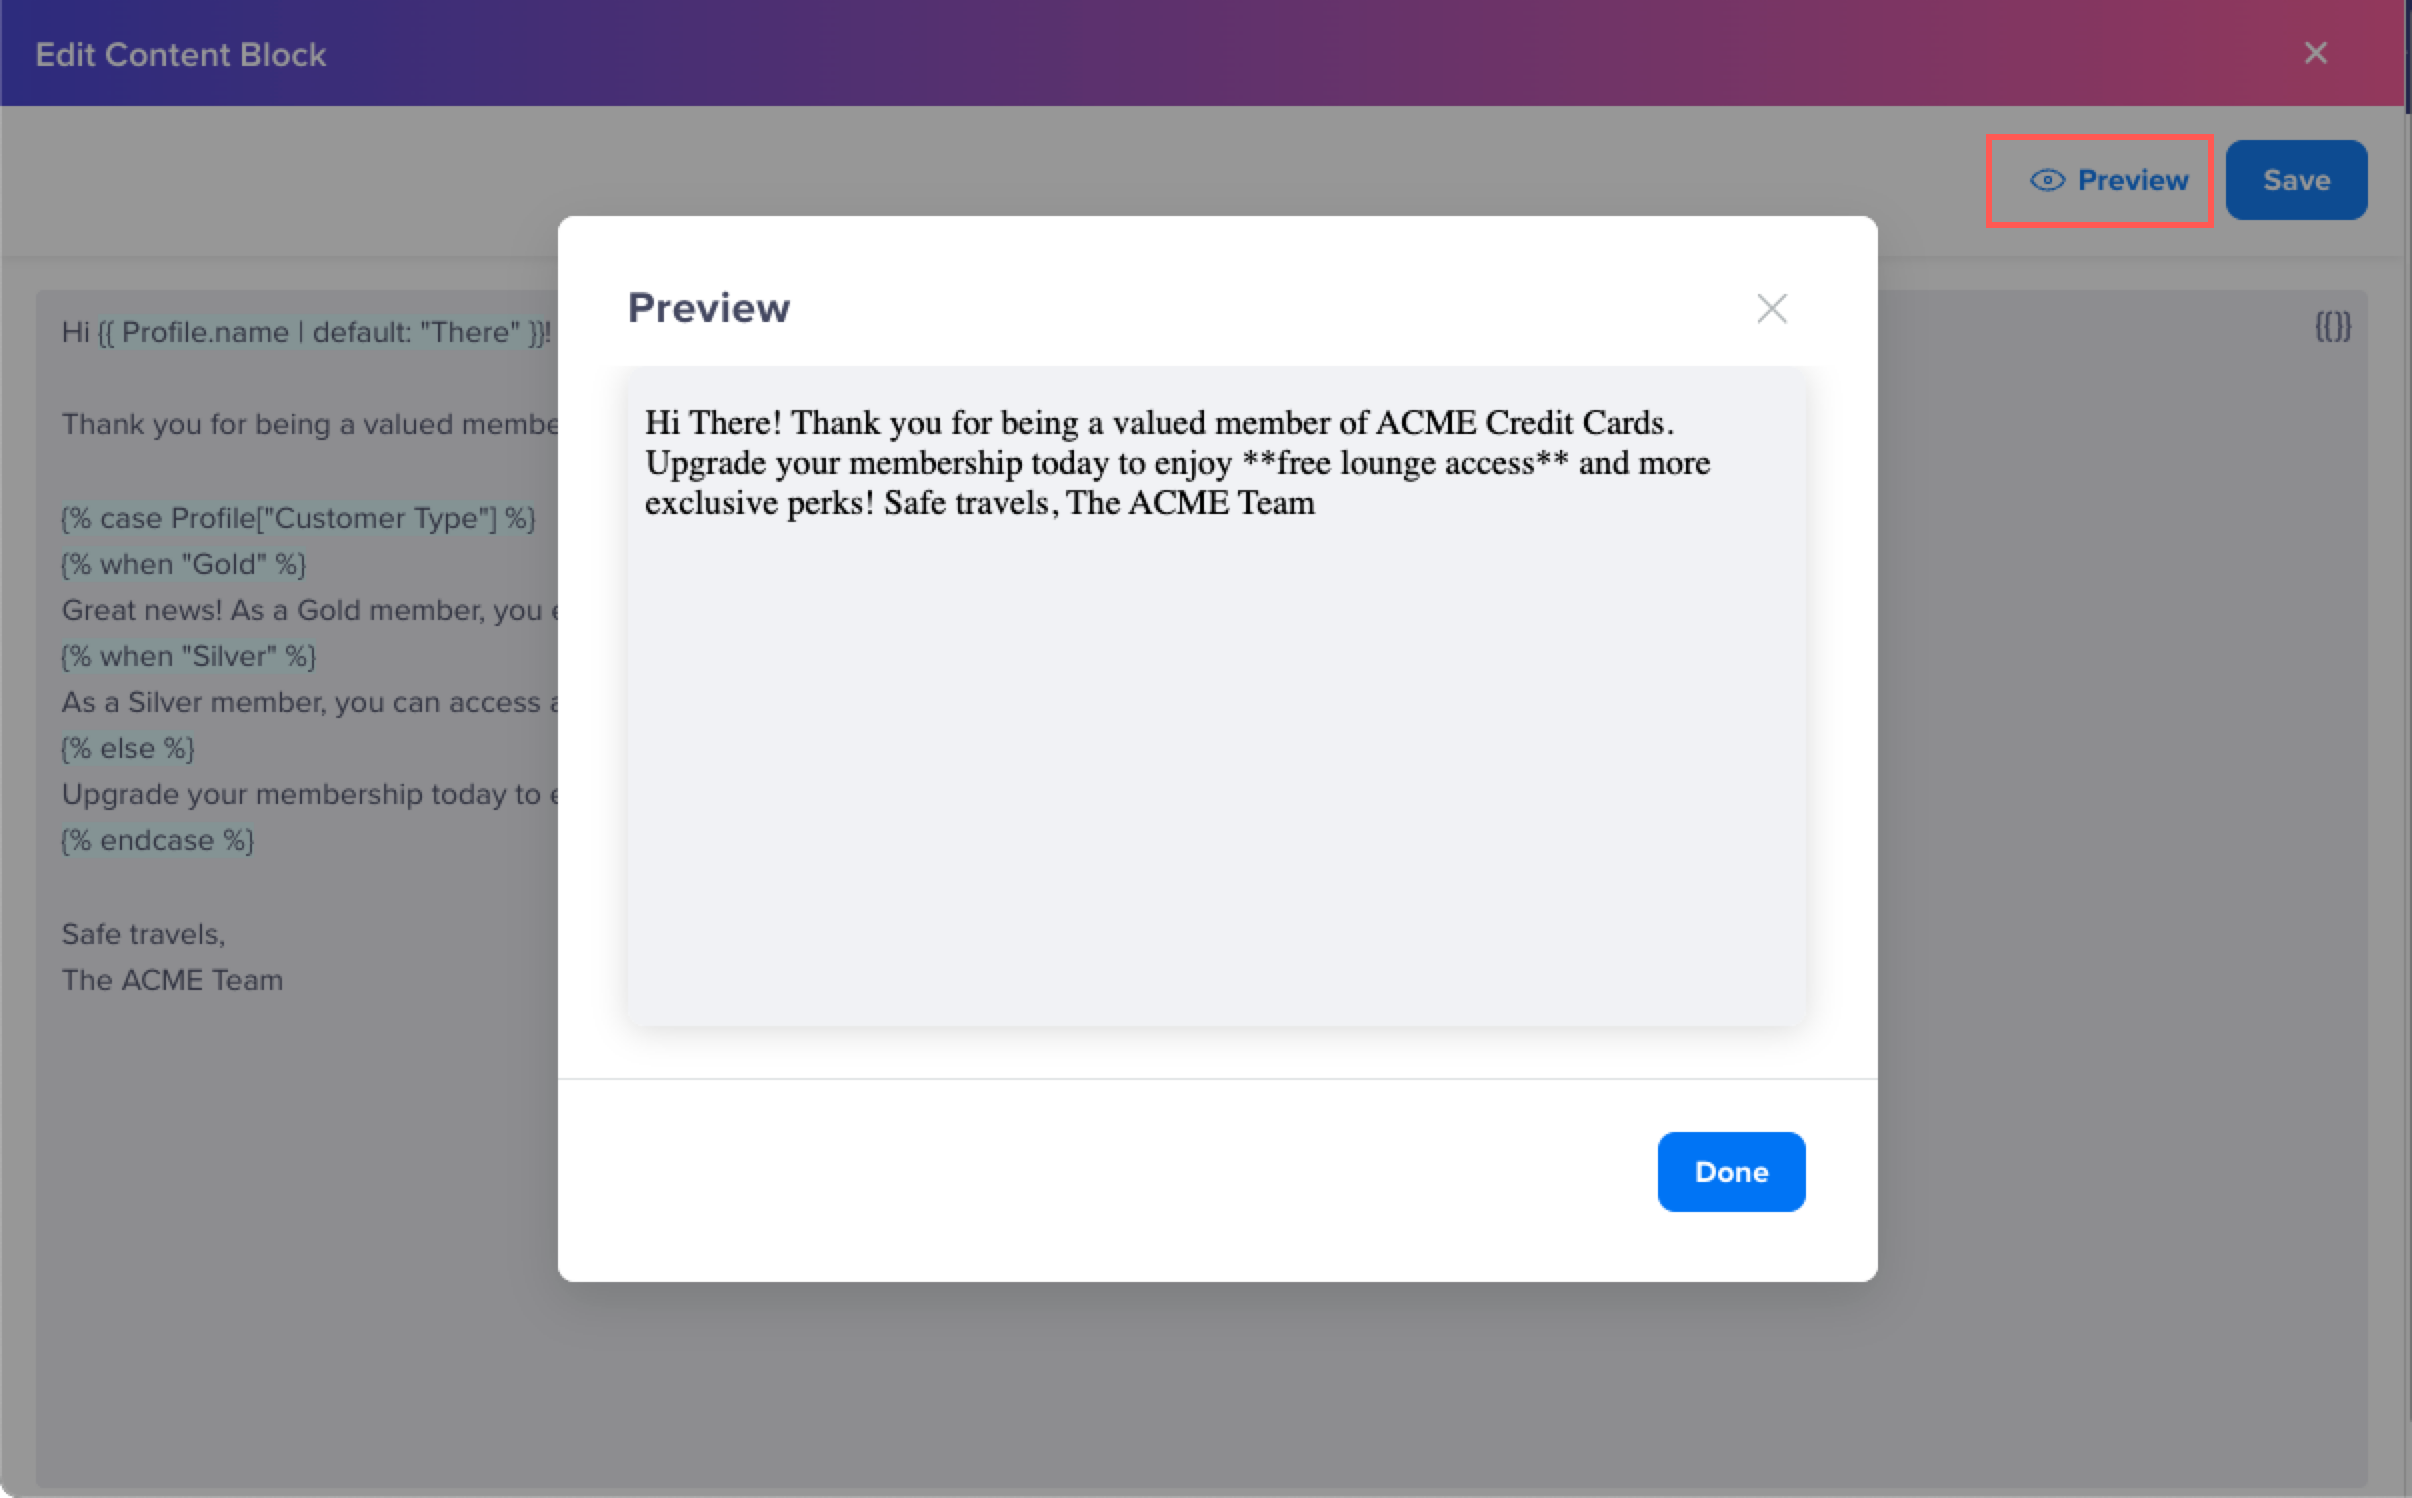
Preview Content Block
- Click Save to save your Content Block.
- Enter a name for your Content Block.
Content Block NameContent Block names can include letters, numbers (0-9), underscores (_), periods (.), hyphens (-), and spaces. The name must begin with a letter. Additionally, the Content Block name must be unique.
- From the list of labels, select the appropriate labels to organize and identify your content block.
- Click Done.
Preview Content Block
You can preview the Content Blocks from the Content Blocks page or during the Content Block creation process.
To preview a content block:
- Go to Content Manager > Content Blocks.
- Select a Content Block and double-click to preview it.
The content block displays information such as name, label, and so on.
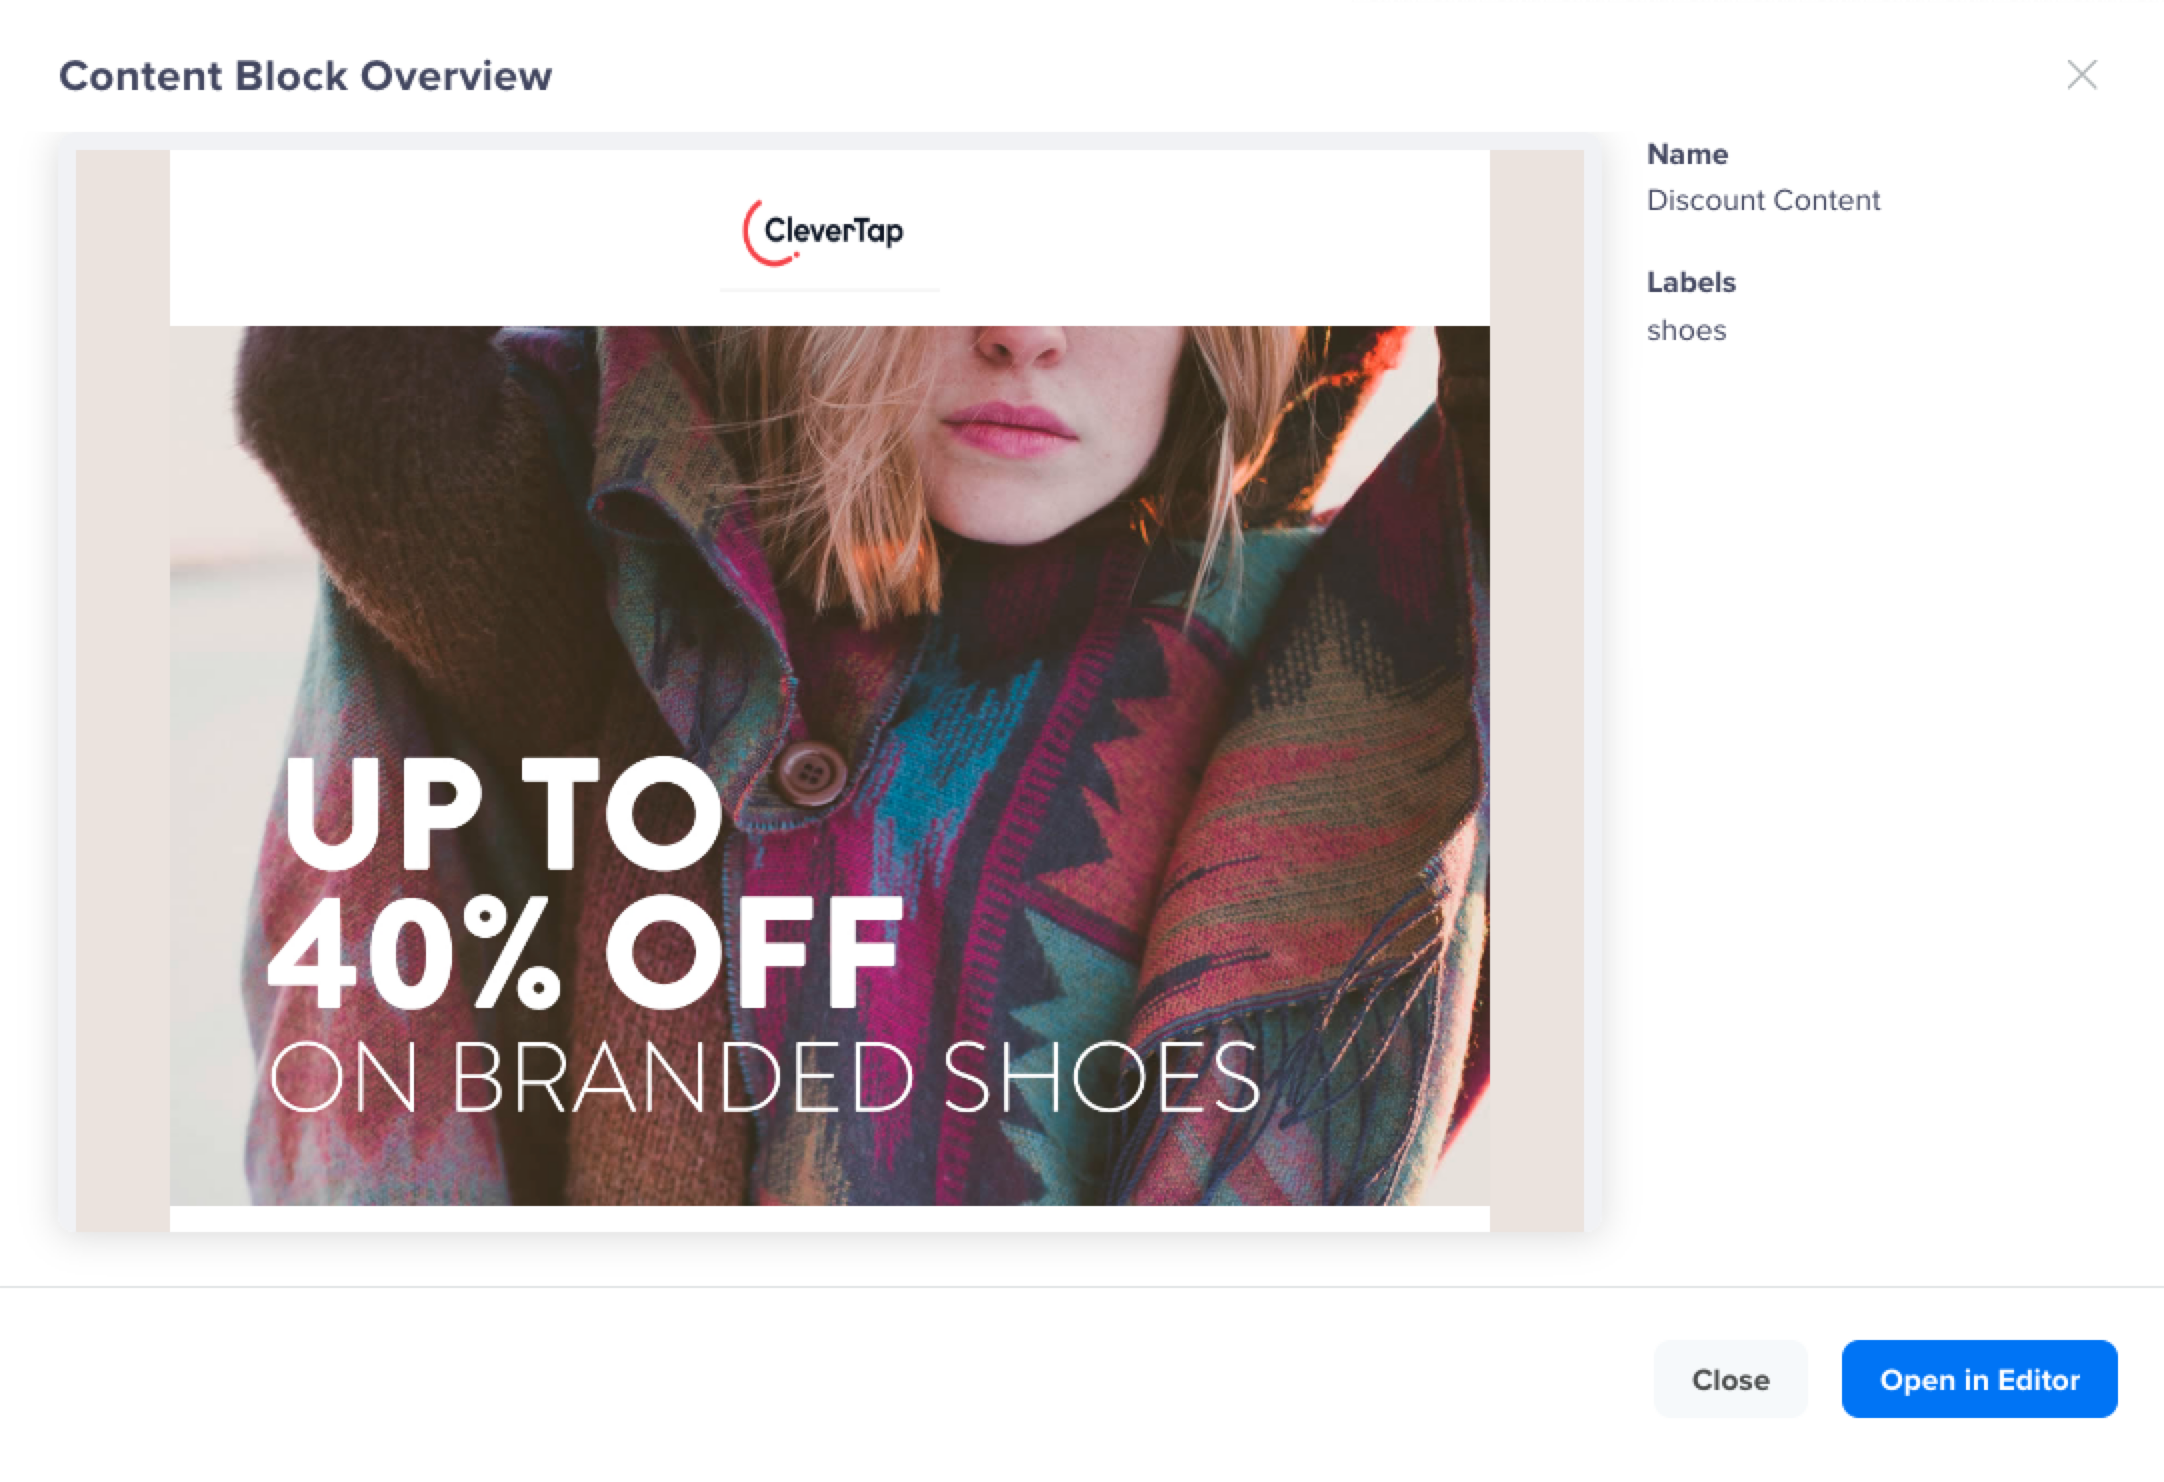
Content Block Preview
Use Content Block (in a campaign)
Currently, you can use a content block only in Email campaigns to standardize and reuse content in email messaging. Follow these steps to use a content block:
- From the dashboard, select Campaigns.
- Click + Campaign.
- From the Messaging Channels list, select the Email messaging channel—the Campaign page displays.
- From the What section on the Campaign page, select the message type and click Go To Editor.
- Select any template from the Basic Templates tab.
- In the editor, enter {{ to add the content block. Select the content block from the list.
Add a Content Block
- Continue with the campaign creation flow.
Personalization in Liquid Tags
When creating a campaign, you can further personalize content using content blocks with the help of Liquid Tag personalization. For example, you can email users tempting offers based on their food preferences. Using Liquid Tags, you can add multiple Content Blocks for each cuisine to ensure that end users receive the relevant menu options and images in their emails. Follow these steps to add liquid tags to content blocks:
- Select the message type from the What section on the Campaign page and click Go To Editor.
- Select any drag and drop template from the Basic Templates tab.
- Drag and drop a text block and double-click it to display the formatting options:
- Select Customize with Liquid tags from the More list in the toolbar.
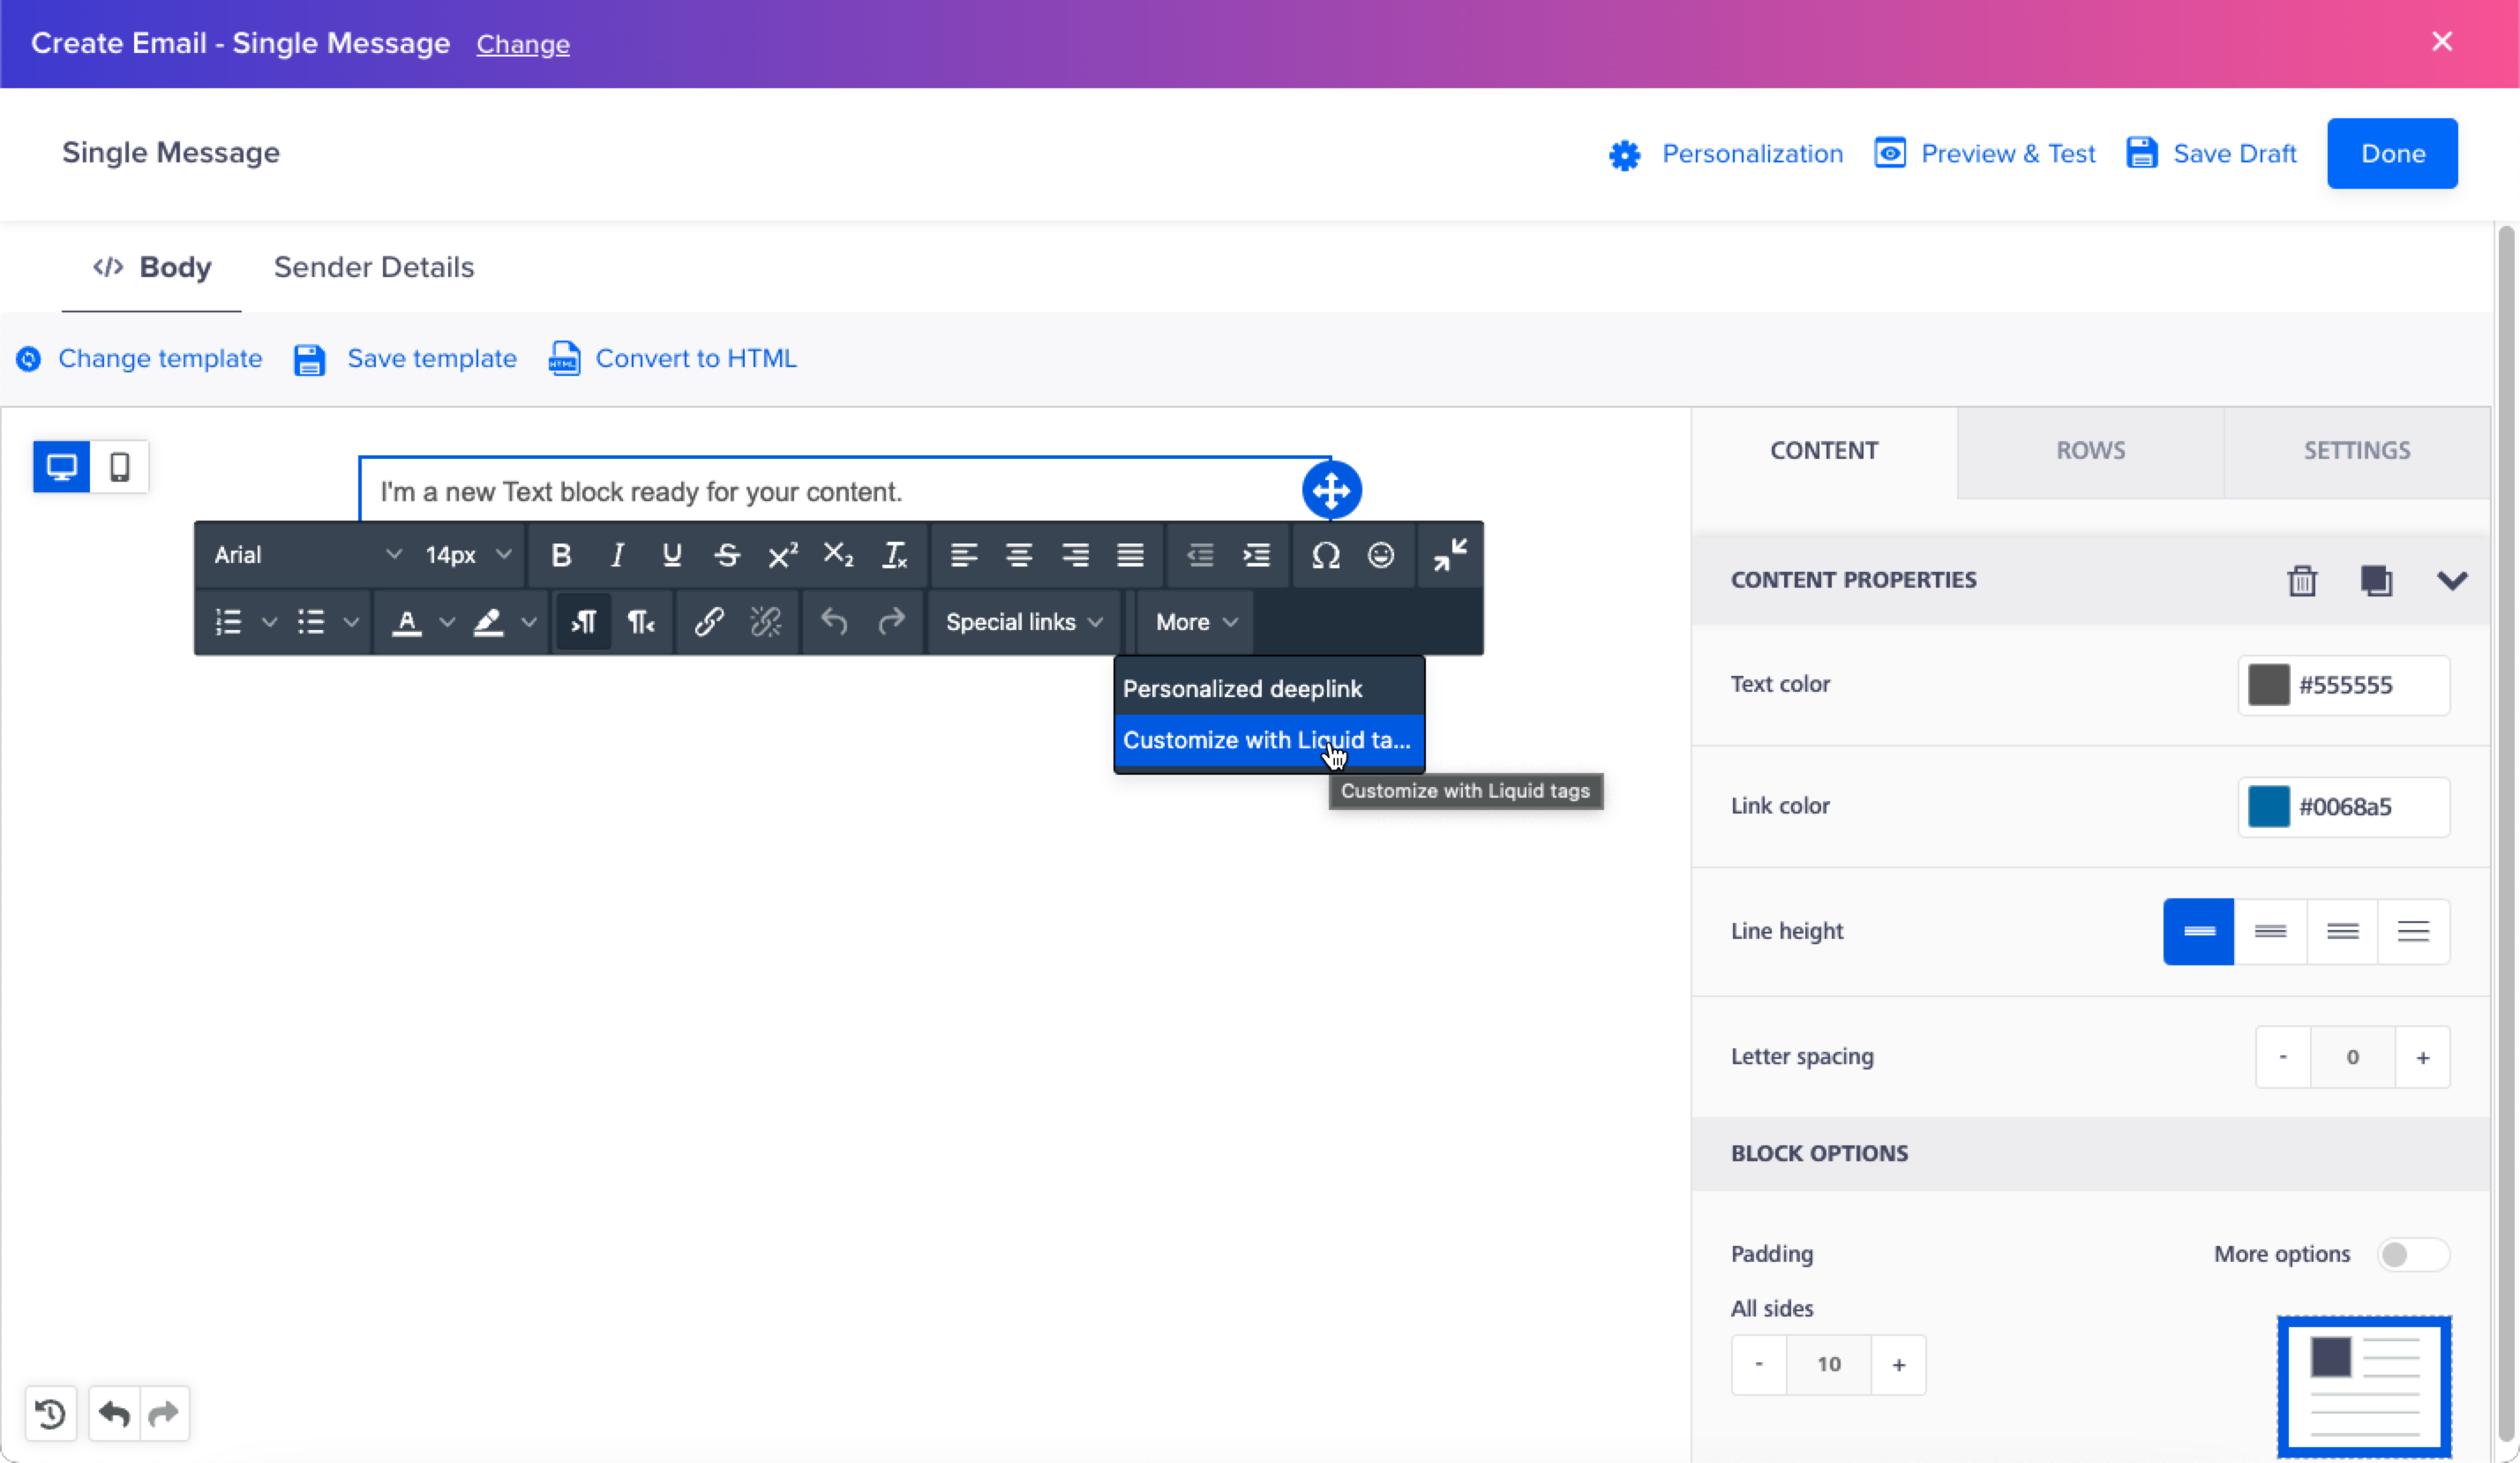
Customize Text Block Liquid Tags
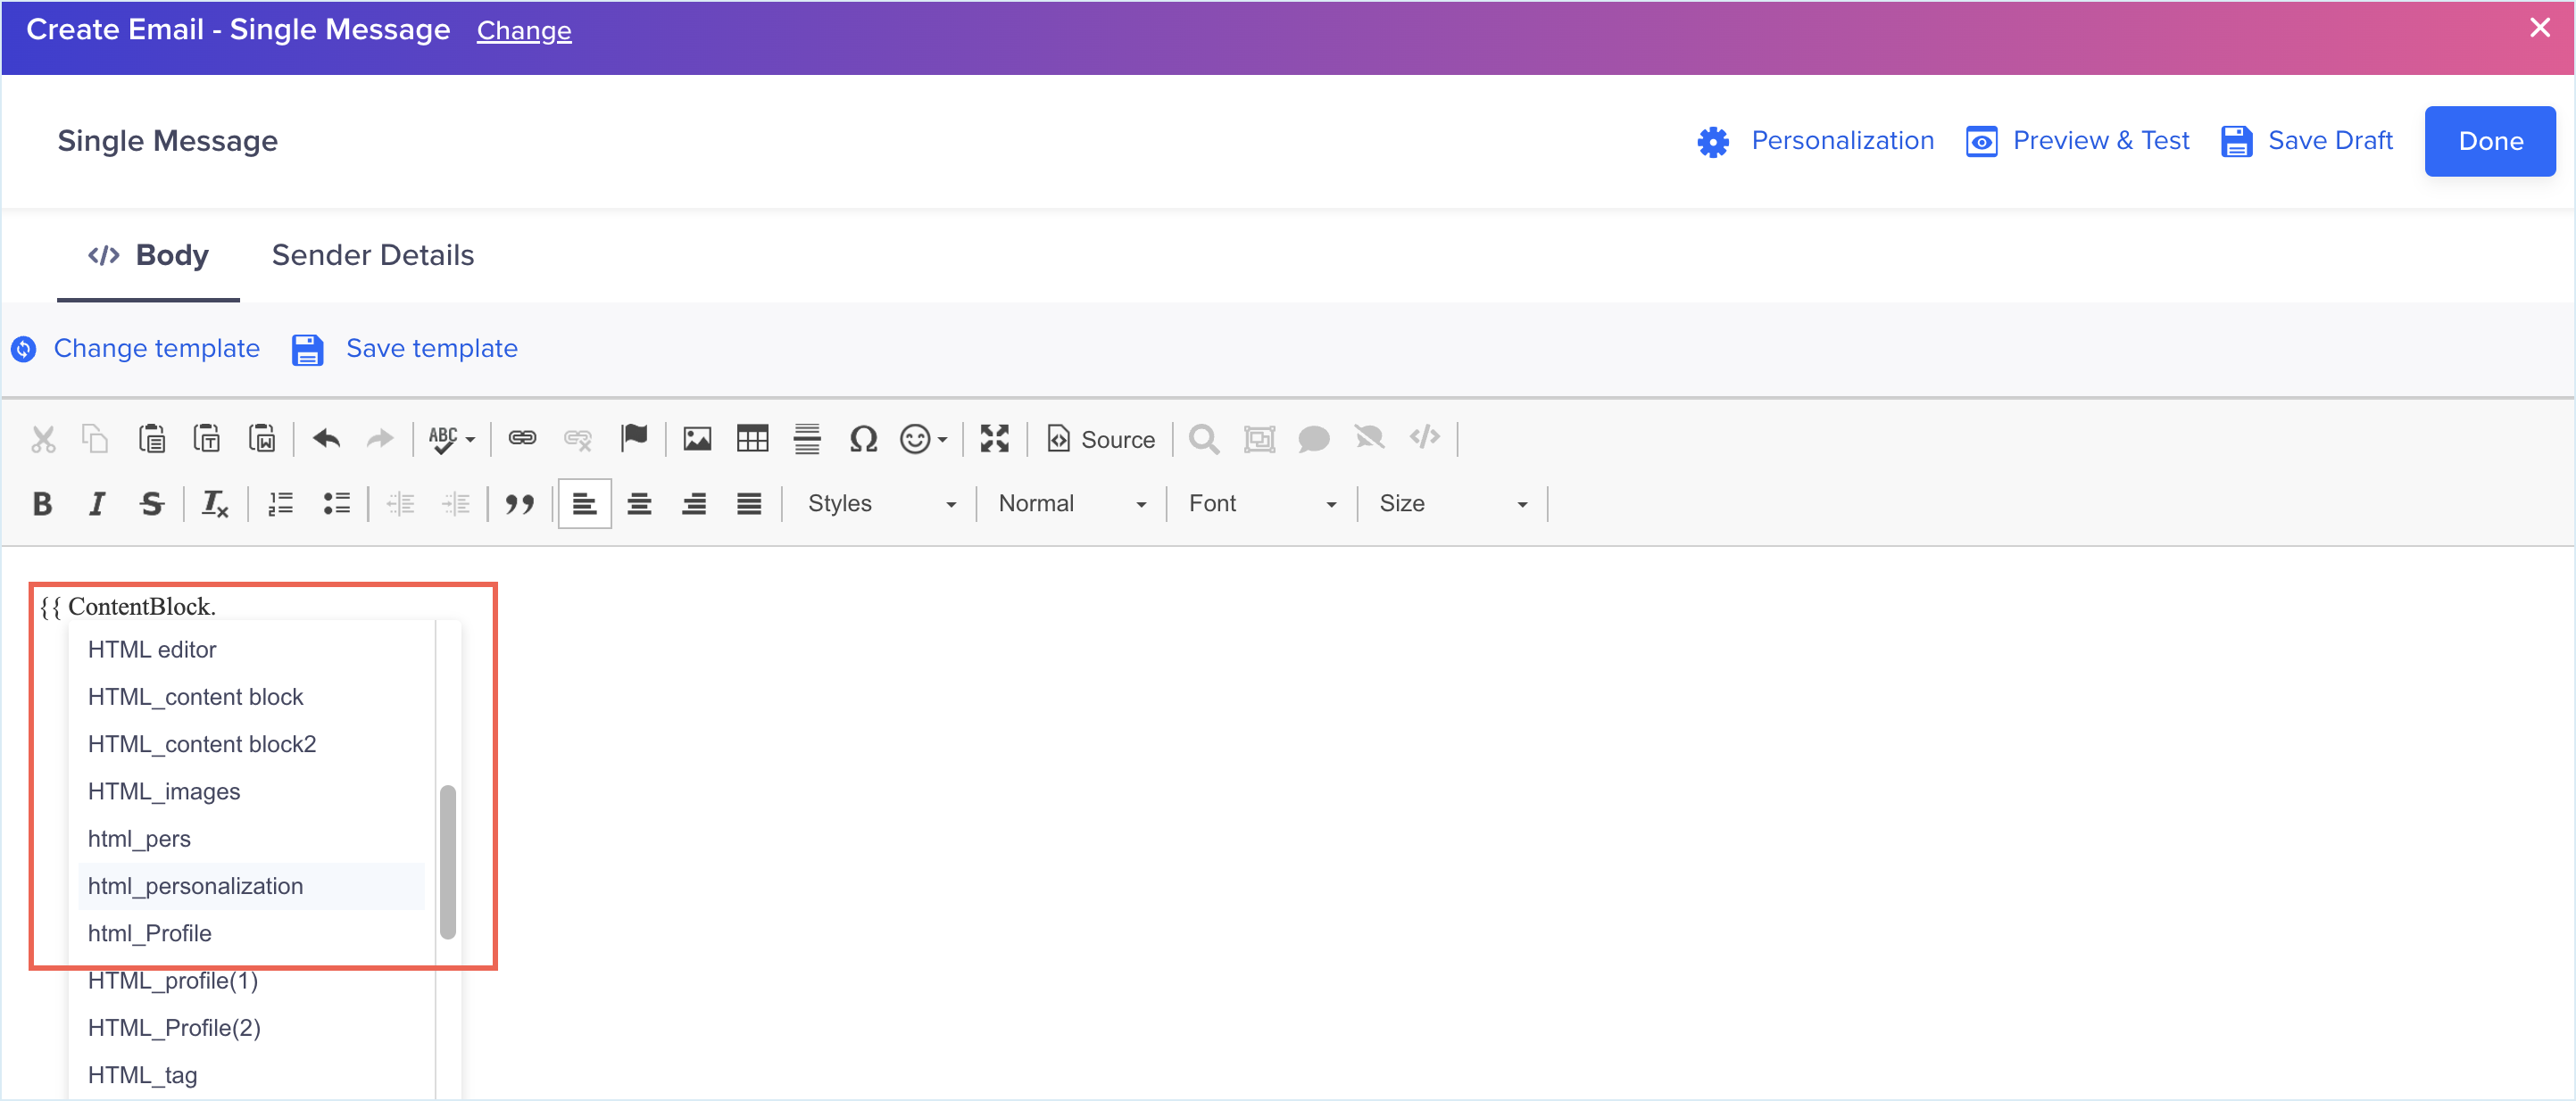
- Click the {{}} icon and select the required Content Blocks.
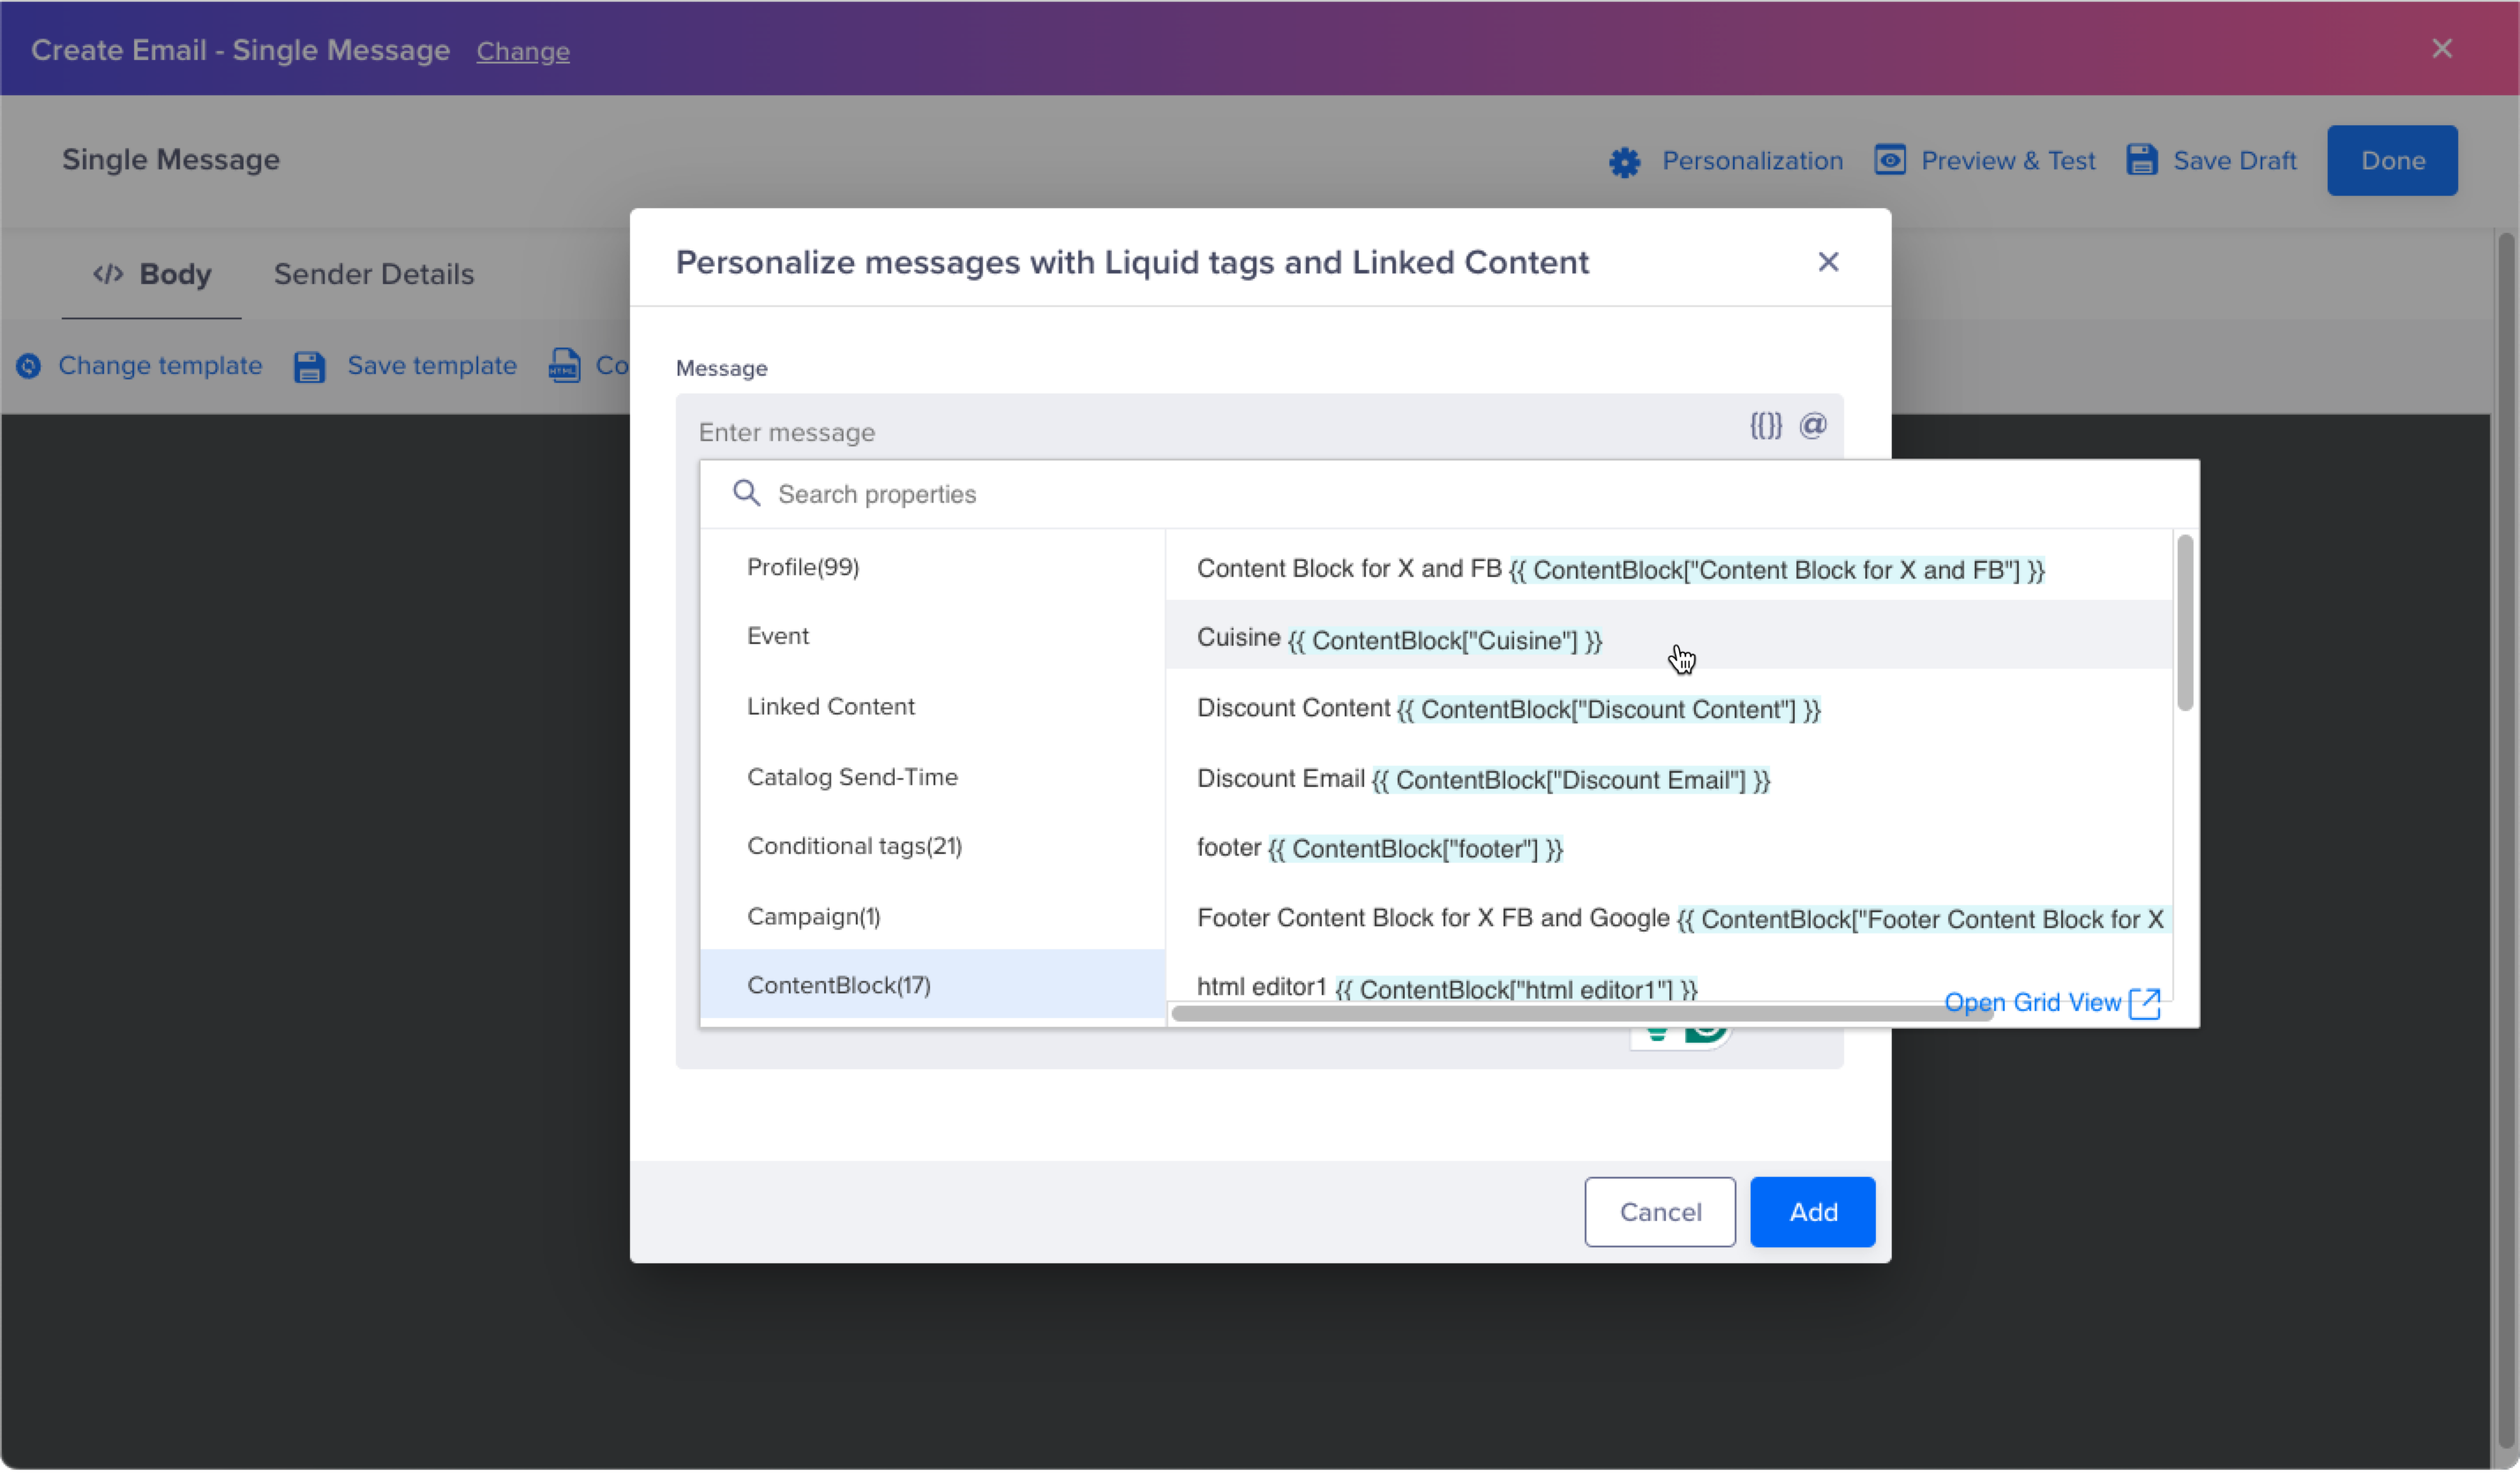
Personalization list with {{}}
Enhance PersonalizationYou can combine Content Blocks with additional personalization options provided by Clevertap. Click the {{}} icon to explore more personalization for your messaging.
- Add conditions based on your requirements using Liquid Tags.
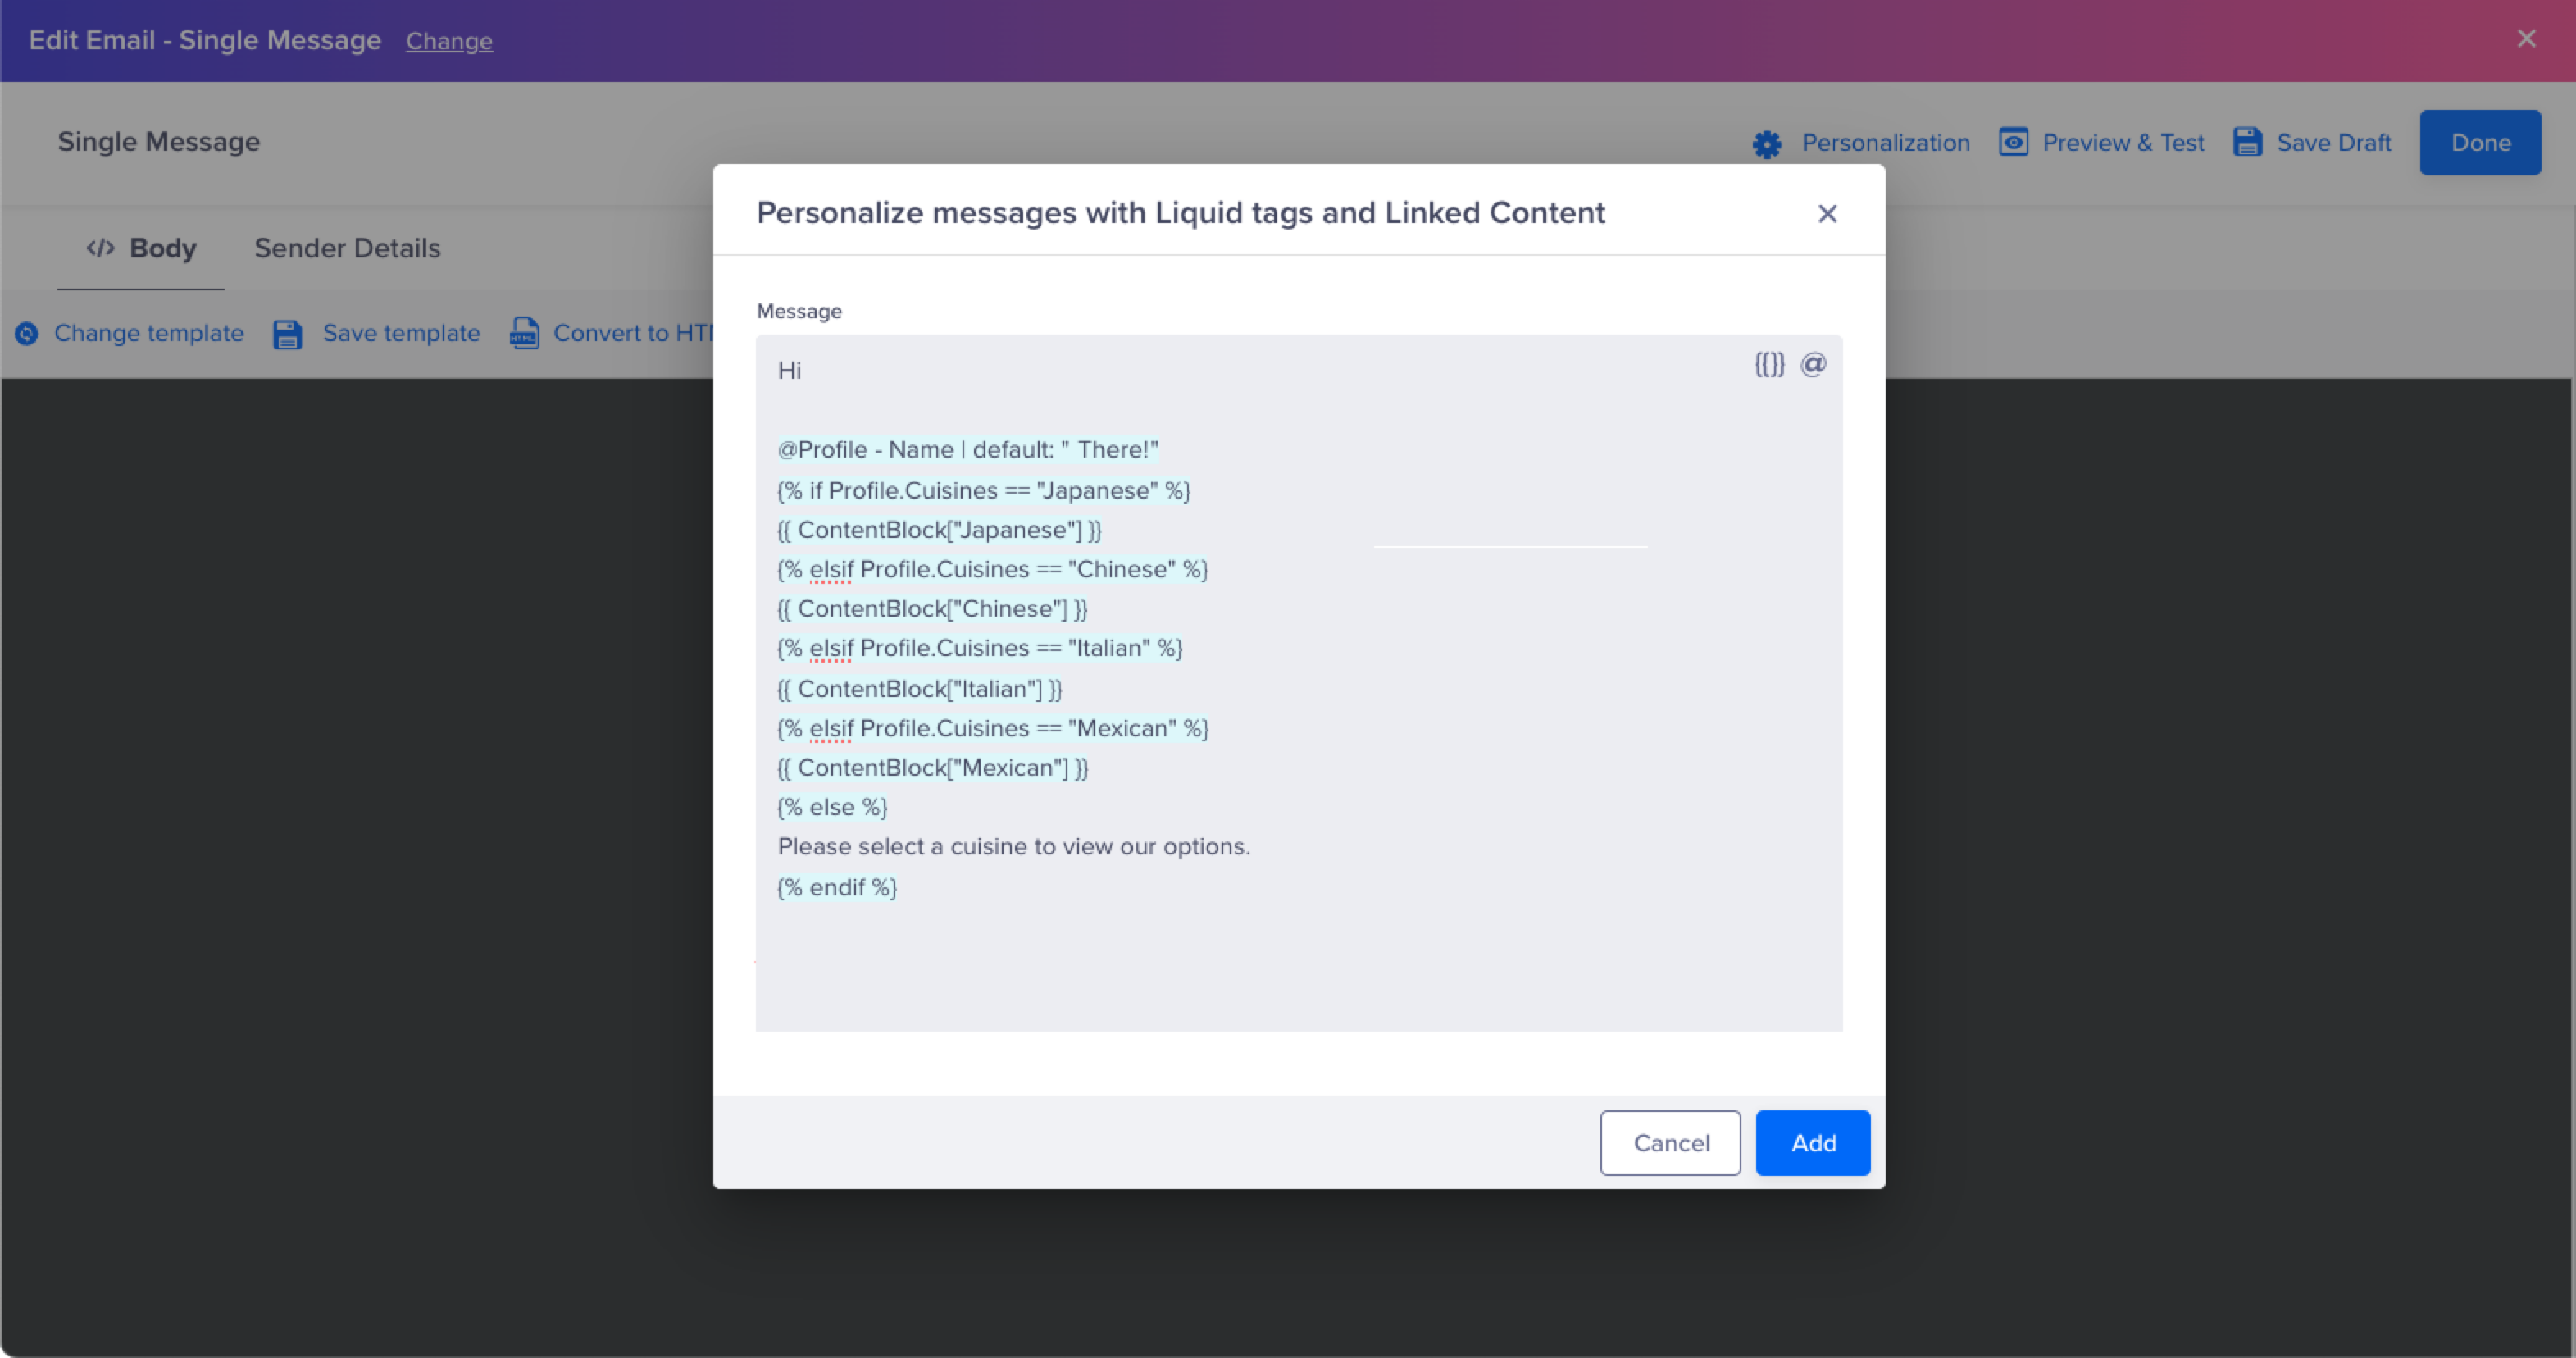
Add Multiple Content Blocks with Liquid Tags
- After adding the content, click Add to add the Content Block.
Preview the message and verify the content before sending it. The content will be displayed.
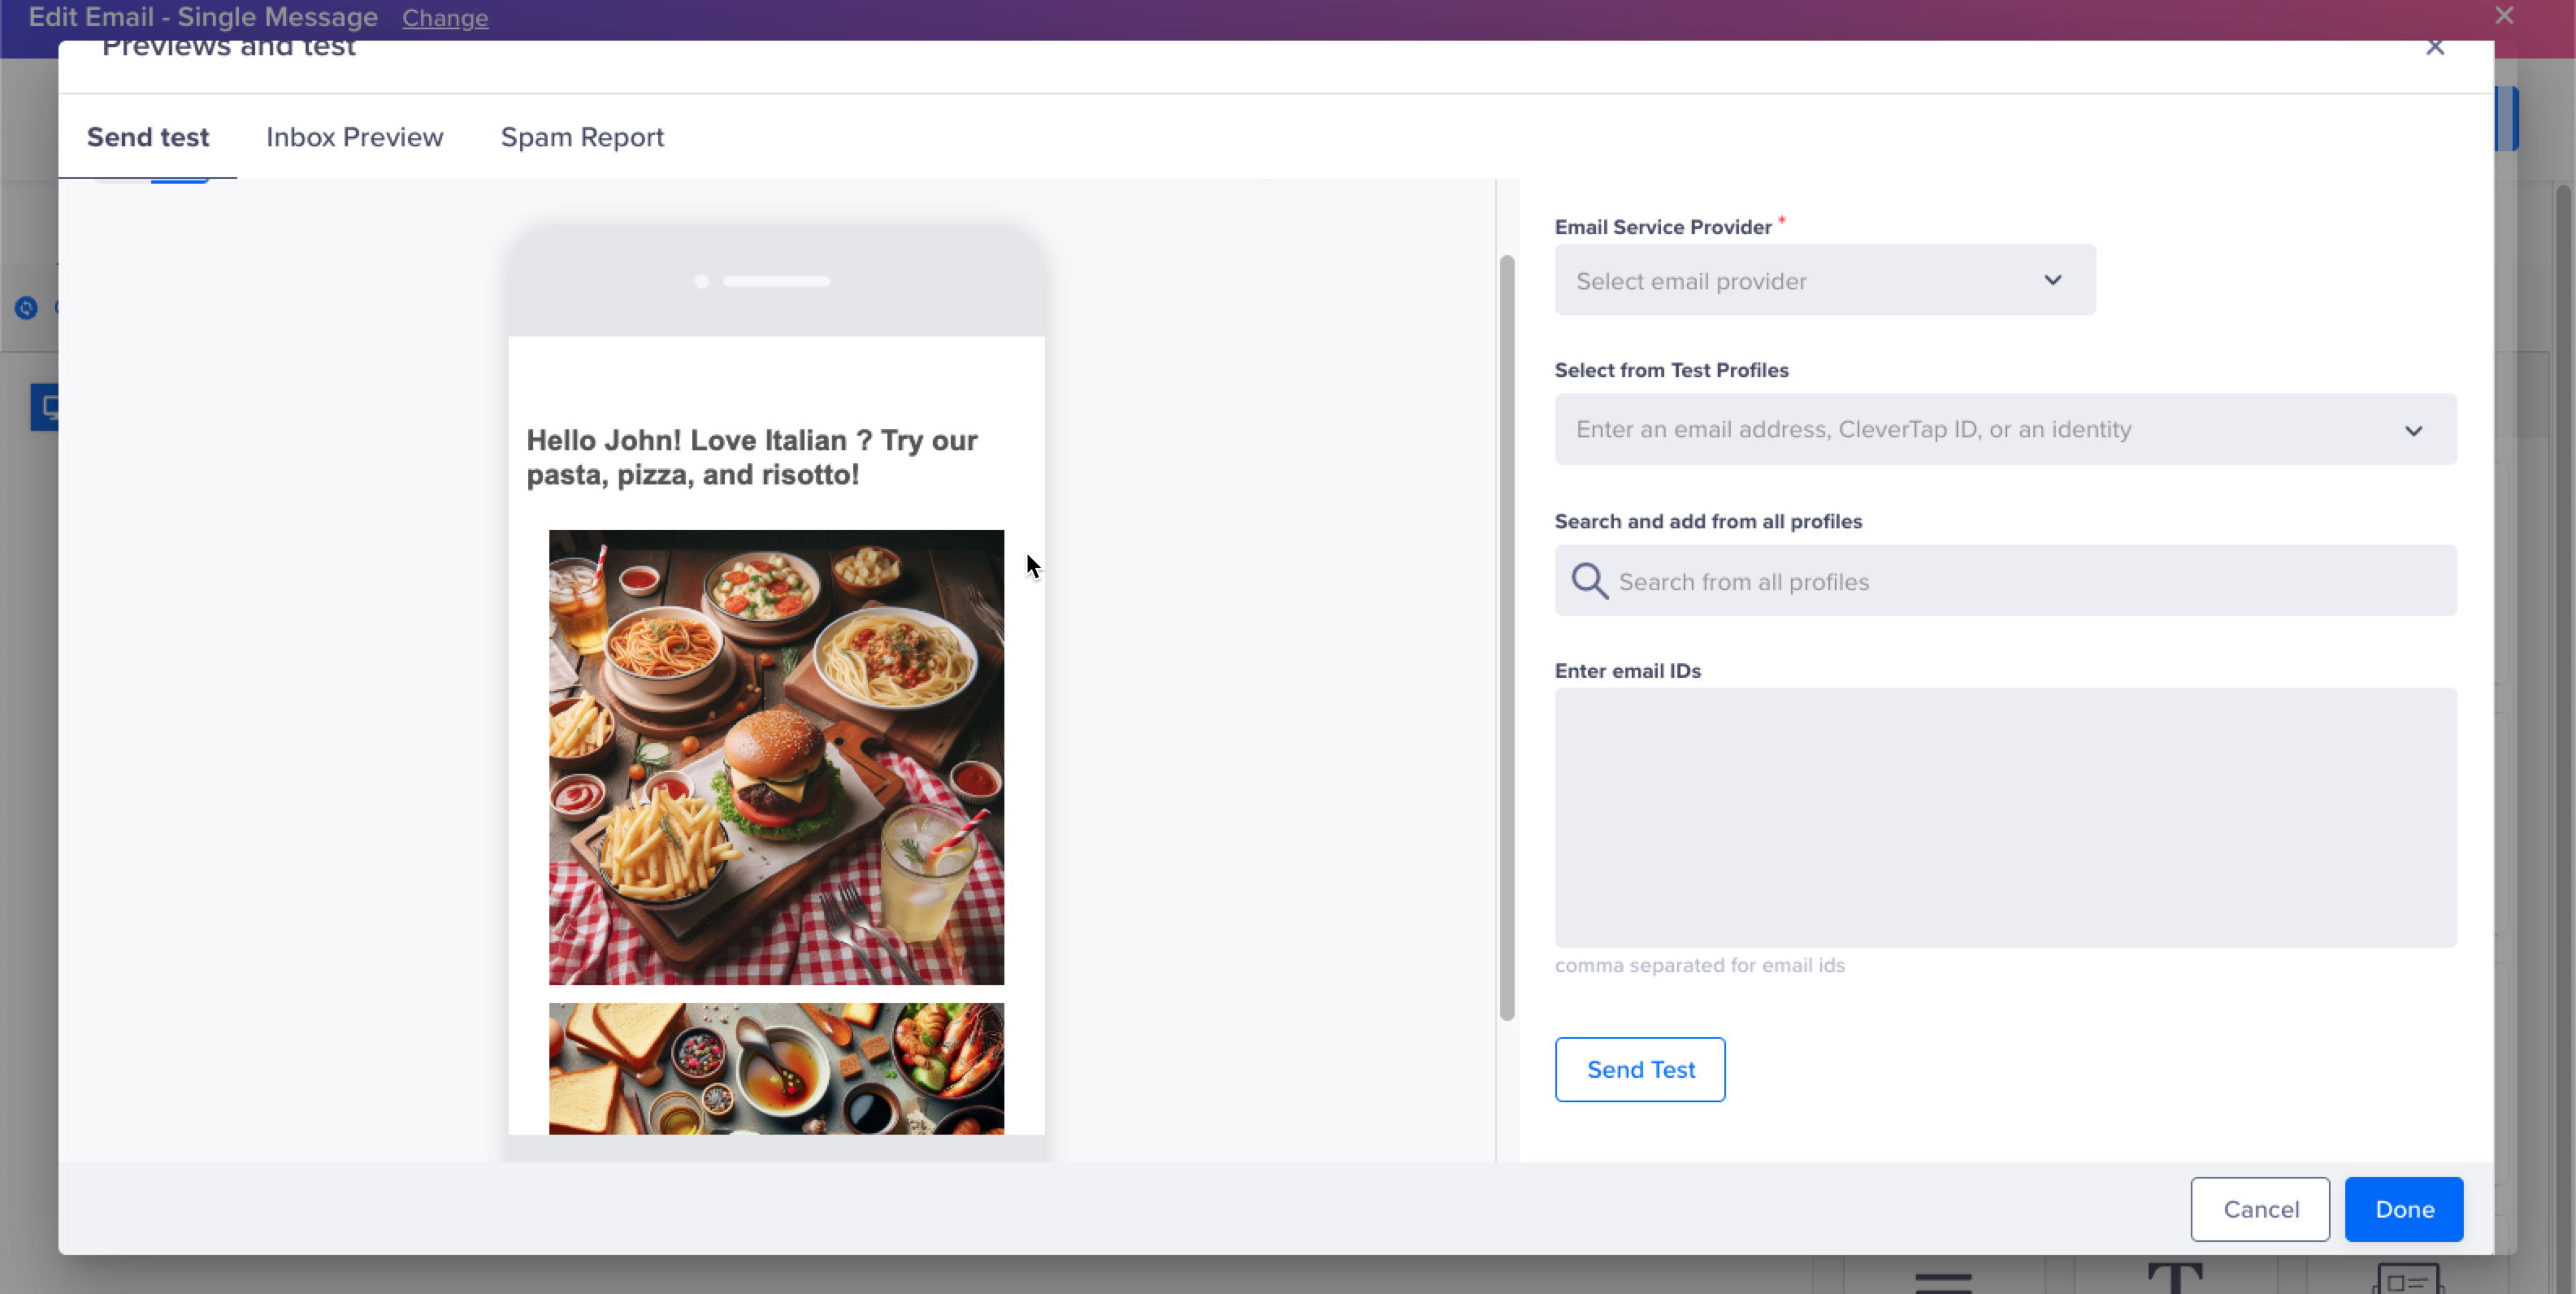
Content Block Rendered
Content Block Considerations
Check for the following considerations to optimally use Content Blocks in your messaging campaigns.
Content Block Specification
Before proceeding with creating content blocks, it is advisable carefully to review the specifications and considerations.
| Content Block Element | Specification |
|---|---|
| Name/Rename | Names can include letters, numbers (0-9), underscores (_), periods (.), hyphens (-), and spaces. The name must begin with a letter. Additionally, the content block name must be unique. |
| Content Size | Maximum of 50kB (kilobyte) for HTML Content Block. Up to 500 characters for Text Content Block. |
| Supported Channels | Content Blocks can currently be used only in the email channel. |
| Deletion | Deleting content blocks is currently not supported. |
Content Block Operations
You can edit, rename, and label the Content Blocks from the Content Block card. Follow these steps to manage the content blocks:
- Go to Content Manager > Content Blocks.
- Click the Content Block card to perform various operations.
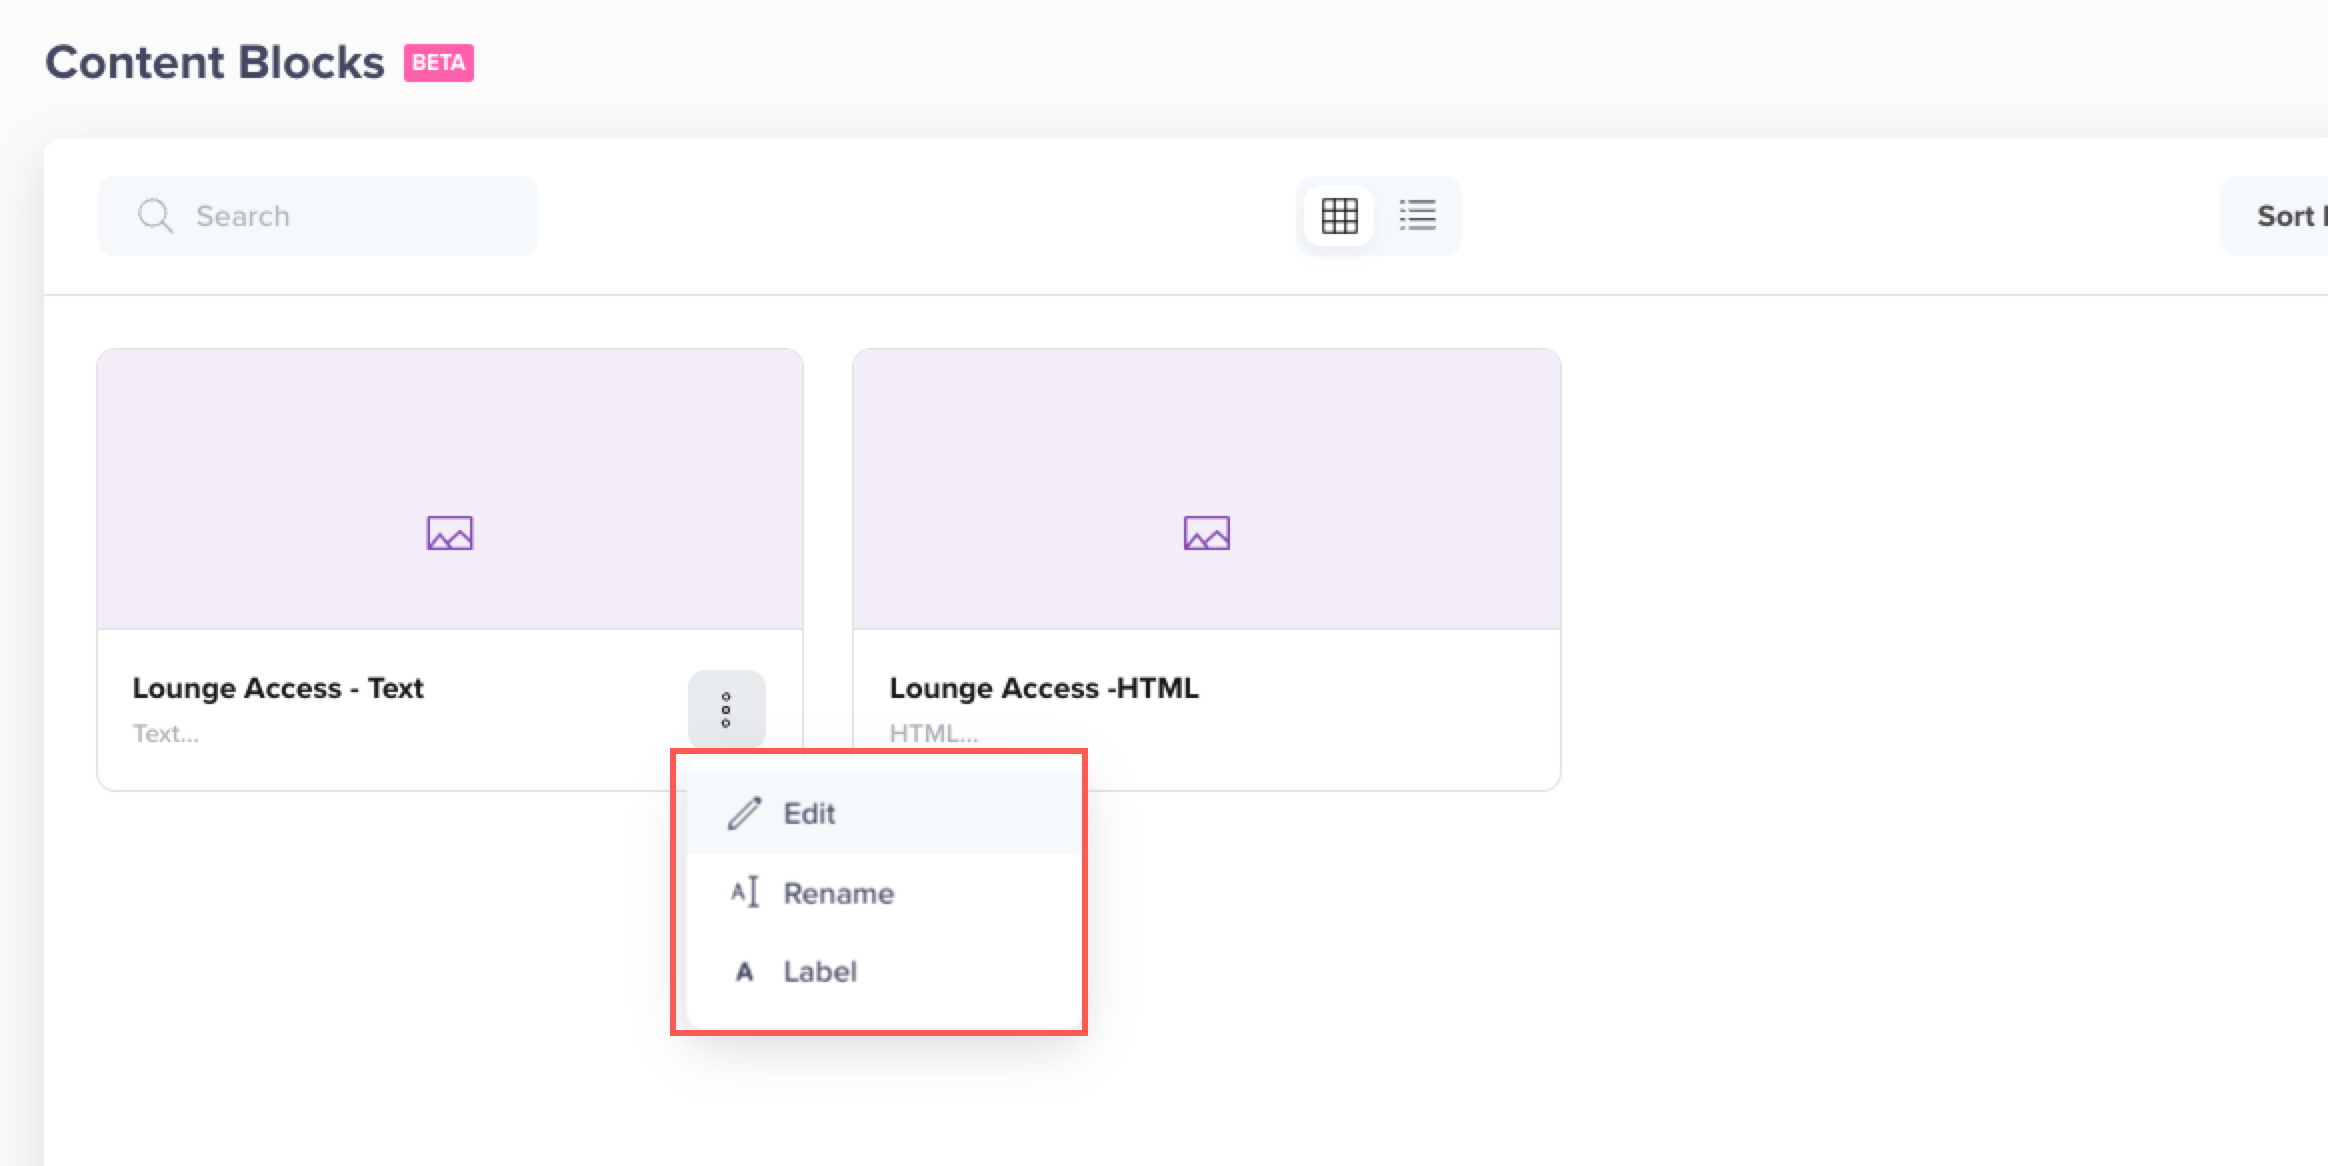
Content Block Operations
- Select from the following options:
- Edit: Select to edit the content block.
- Rename: Select to rename the folder.
- Label: Select to apply a label to the content block. It will help further identify or search the Content Block.
Supported Personalization
Before using Content Blocks, refer to these essential guidelines for supported personalization. These help you understand which personalization types are supported and how to use them effectively in your campaigns.
| Personalization Type | Supported (Yes/No) | Description |
|---|---|---|
| Inline Personalization | Yes | You can use profile attributes. |
| Conditional Tags | Yes | You can create a write once use multiple times message by adding conditional variations based on user attributes or behavior. For more information, refer to Liquid Tags. |
| Event | Yes | You can add event personalization tags. Note: Event Personalization for Content Blocks is currently in Private Beta. |
| Nested Objects | Yes | You can use nested personalization in content blocks. Note: Nested Personalization for Content Blocks is currently in Private Beta. |
| Reminders | Yes | You can add reminder personalization tags. Note: Reminder personalization for Content Blocks is currently in Private Beta. |
| Campaign | Yes | You can use campaign-level personalization attributes in Content Blocks. |
| Linked Content | No | |
| Catalog Send-Time | No |
Event Personalization
You can use event-based personalization in Content Blocks across campaigns and journeys. Event tags resolve automatically based on the associated user event data.
To add event-based personalization in an email Content Block, perform the following steps:
- Open the Content Block you want to edit (HTML or Text).
- Type the event tag, ensuring the correct syntax is used.
- Preview or test send to verify the tag.
- Publish the campaign.
Event Personalization
Syntax
Tags must be typed exactly as required. Use the following format to insert event-based values:
{{Event[“CT Source“] | default:”default”}}
{{Event.experiment | default:”default”}}
CleverTap validates that the Content Block’s event matches the event used in the campaign's trigger criteria (Who section). Any mismatches are automatically blocked during campaign publishing.
Example
You want to personalize the campaign based on the series they have previously watched. In this case, you can use both profile and event-based personalization.
Hello {{ Profile.name | default: "User" }},
You watched {{ Event.SeriesName | default: "your favorite series" }}
If either property is missing for the user in the CleverTap dashboard, the default values are rendered. This ensures the message displays correctly and does not disrupt personalization. The following is the rendered output if defaults are used:
Hello User,
You watched your favorite series
Nested Personalization
You can personalize campaign messages using nested objects within profile-based and event-based personalization for deeper data granularity in your campaigns. To use nested personalization, ensure that Nested Object Personalization is enabled for your account.
To add event-based personalization in an email Content Block, perform the following steps:
- Open the Content Block you want to edit (HTML or Text).
- Type the nested object, ensuring the correct syntax is used.
- Preview or test send to verify the tag.
- Publish the campaign.
Nested Event Personalization
Nested profile and event personalization are supported up to 3 levels. To add these to your Content Block, you can either type the Liquid tag manually or copy them from the "What" section of your campaign builder. Use the following format:
- Nested Profile Personalization:
{{ Profile.<property_name>.<level_1>.<level_2>.<level_3> | default: "Default" }} - Nested Event Personalization:
{{ Event.<property_name>.<level_1>.<level_2>.<level_3> | default: "Default" }}
Example
If you are sending an event that contains a nested object for traveler details, your Liquid tags would look like this:
{{ Event.Trip[0].Travelers[1].Email | default: "Hey there" }}This example retrieves:
- The first item in the Trip array (Trip[0])
- The second traveler in the Travelers array (Travelers[1])
- The Email property of that traveler
Invalid Index Prevents DeliveryWhen referencing array elements, ensure that the specified index exists within the array. Array indexing starts at 0. For example, if an array contains 7 elements, the valid index range is 0 to 6. If you reference an index outside the available range (for example, Trip[8] when only 7 elements exist), the campaign is not delivered to any users.
Reminder Personalization
To add reminder-based personalization in a Content Block:
- Create or open a Content Block (HTML or Text).
- Add reminder personalization tags, ensuring the correct syntax is used.
- Save the Content Block once validation passes.
- Insert the Content Block into a reminder campaign. For more information, refer to Create Campaign using Reminders.
- Publish the campaign.
Reminder Personalization
Syntax
Tags must be typed exactly as required. Use the following format to insert reminder-based values:
{{ Reminder.<reminder_entity>.<property_name> | default: "<fallback_value>" }}Example
You want to remind users about an upcoming flight booking. Use a Content Block to personalize the reminder message with reminder-specific properties such as the booking date and seat number.
If a reminder property is unavailable for a user, the default value is used so the reminder message renders correctly.
Your flight is scheduled on {{ Reminder.flight_booking.date | default: "your upcoming travel date" }}.
Seat number: {{ Reminder.flight_booking.seat_number | default: "to be assigned" }}
The following is the rendered output if defaults are used:
Your flight is scheduled on your upcoming travel date.
Seat number: to be assigned
Note
- Event matching:
- Check that the event used for personalization in the Content Block is the same as the event selected in the trigger criteria of the event-triggered campaign.
- A Content Block can be used in a reminder campaign only if the reminder entity in the block matches the reminder entity selected in the campaign.
- No mixed personalization: Reminder (
Reminder.*) and event (Event.*) tags cannot be used in the same Content Block.- Single reminder entity: A Content Block can reference only one reminder entity. For example,
Reminder.flight_bookingandReminder.hotel_bookingcannot be used together in the same block.- Nested blocks:
- For event personalization, the event used in a nested Content Block must be the same as the event in the parent Content Block. For example, if
App Launchedis used in the parent block, it must also be used in the nested block.- Personalization is supported up to a maximum of 3 levels.
- CleverTap validates the root property (the first level after
Event) to ensure it exists within the event schema. If the root property does not exist or is typed incorrectly, the block will fail validation. The system checks if the second level is a valid nested object.
- If the second level is identified as a valid nested structure, the system will not validate the contents inside. Check your property keys to prevent empty/invalid values or fallbacks.
- If the root or second-level structure is invalid, an error will be triggered during the saving or publishing process.
- Validation:
- While typing in the email editor, only compatible Content Blocks appear in the dropdown:
- Blocks with matching event personalization
- Blocks without personalization
- In reminder campaigns, the dropdown shows:
- Blocks with matching reminder personalization
- Blocks without personalization
- Blocks with event personalization or a different reminder entity are hidden.
Use Cases for Content Block
Content Blocks can be used in various ways to enhance communication across campaigns. From displaying personalized offers to embedding interactive elements such as forms or buttons, these versatile blocks ensure your messages are engaging and consistent. The following are some use cases where Content Blocks can effectively streamline your marketing efforts.
Multi-Language Support
Here is a simple example of personalization with a liquid tag for multi-language support. An OTT app offers subscription or membership plans tailored to the user's region and displayed in their preferred language.
{% if Profile.PREFERED_LANGUAGE == "Spanish" %}
  Elige tu plan: Plan Básico por €5/mes o Plan Premium por €15/mes.
{% elsif Profile.PREFERED_LANGUAGE == "Italian" %}
  Scegli il tuo piano: Piano Base per €5/mese o Piano Premium per €15/mese.
{% else %}
  Choose your plan: Basic Plan for $5/month or Premium Plan for $15/month.
{% endif %}
If the user's preferred language is Spanish, the greeting will appear in Spanish.
Elige tu plan: Plan Básico por €5/mes o Plan Premium por €15/mes.The greeting will appear in English if the user prefers English.
Choose your plan: Basic Plan for $5/month or Premium Plan for $15/month.Update Footer
You can change the footer in a running campaign to reflect new content. For example, a footer displays icons for various social media such as TikTok, Facebook, WhatsApp, and Instagram. You can change the footer in the outgoing messages by removing or adding icons in this footer. Once you change the icons, the change will be reflected in all outgoing messaging.
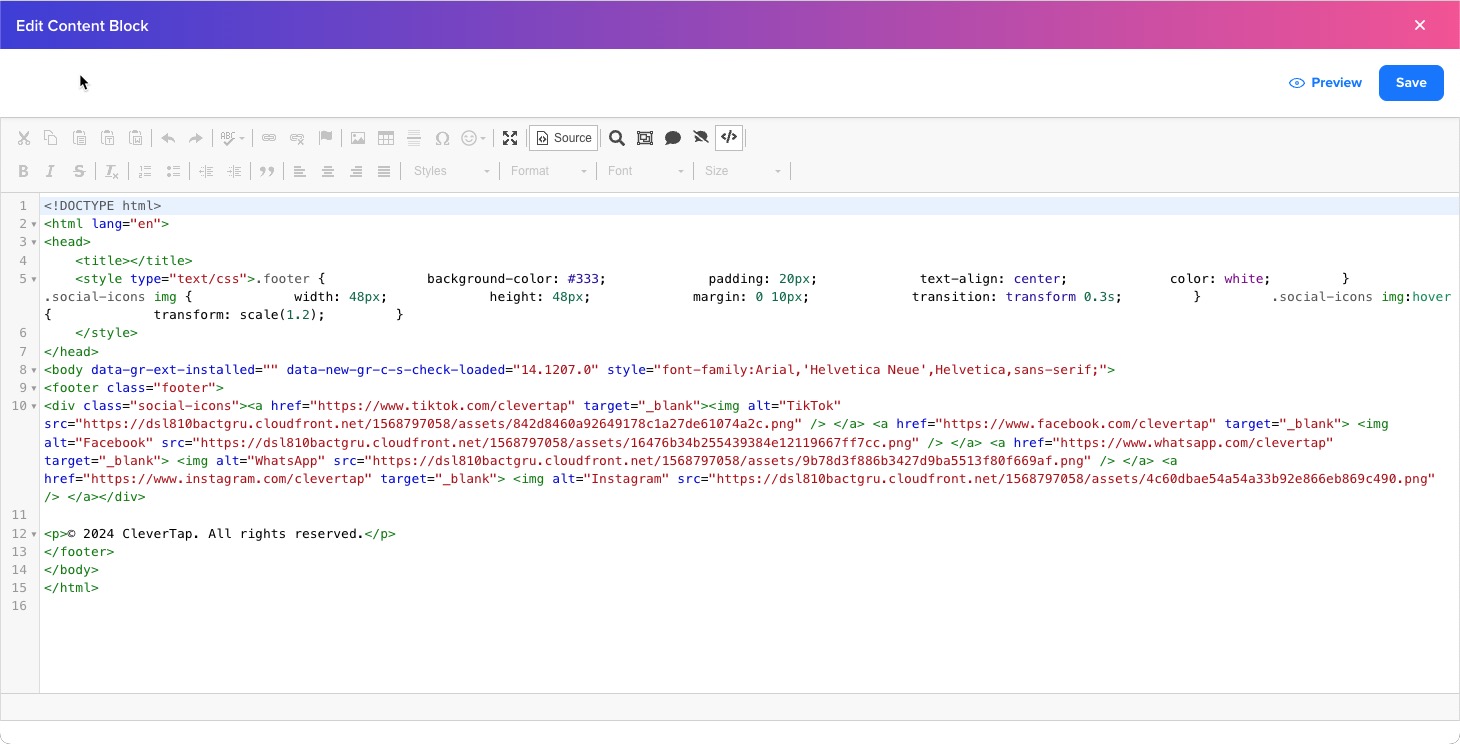
HTML Code for Footer
You can edit the HTML to remove or add an icon.
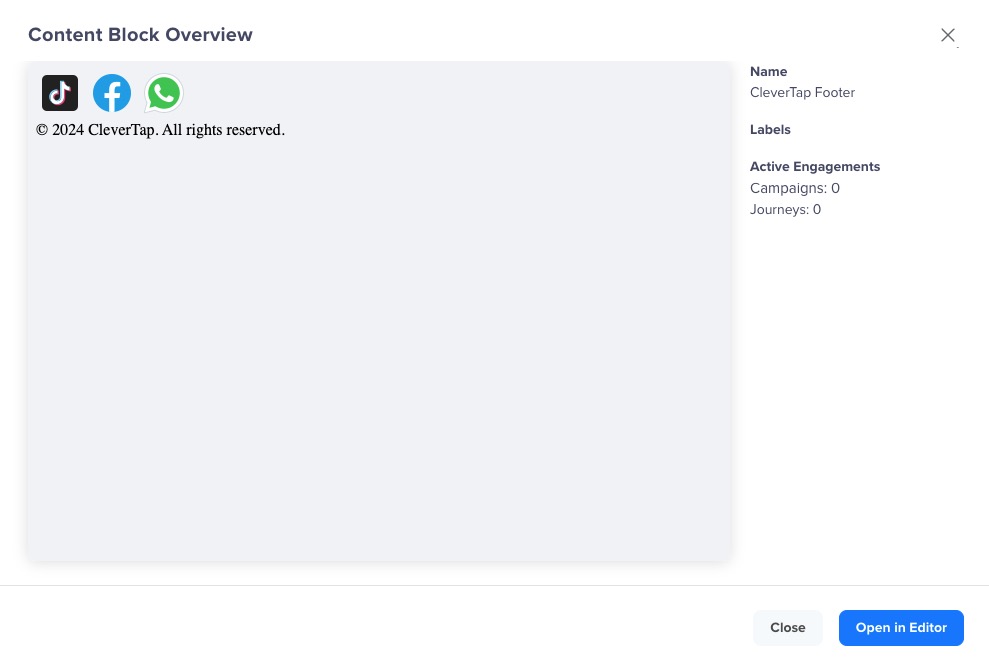
Footer without Instagram
The following is an example of an updated footer. Once the footer is updated, all campaigns using this Content Block will display the updated icons in the outgoing messages.
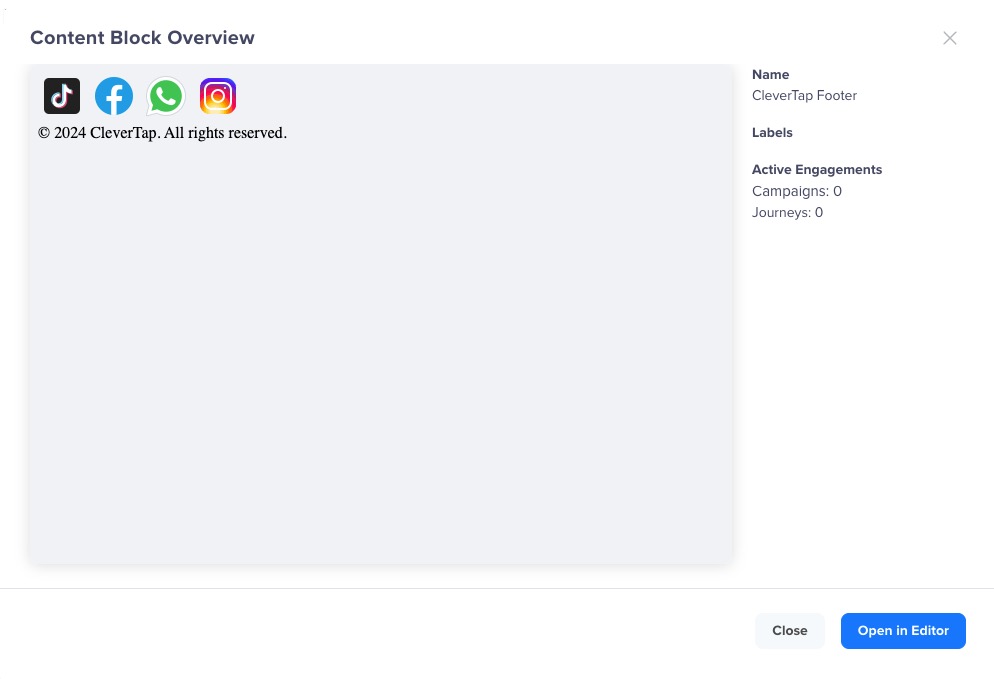
Footer with Instagram
Updated 4 months ago