Snowflake Export
Export data from CleverTap to Snowflake.
Overview
Integrating Snowflake with CleverTap enables you to automatically export user engagement and campaign interaction data from the CleverTap dashboard into your Snowflake data warehouse. This integration enables deeper analysis of engagement, behavioral, and campaign performance alongside business metrics such as revenue, retention, and support outcomes. Use this for long-term reporting, attribution, and cross-team analytics access.
This document provides step-by-step instructions to help you configure and manage exports tailored to your business needs. To export data from CleverTap to Snowflake, perform the following steps:
- Configure Snowflake Connection: Set up and authenticate your Snowflake database within the CleverTap dashboard.
- Create Export: Use the configured connection to define and initiate a data export from CleverTap to Snowflake.
- Export Table Creation: CleverTap automatically creates a table in Snowflake for each export, following a standardized naming convention.
Create Export
Once the Snowflake database is successfully connected to CleverTap, you can begin setting up data exports. To create an export, you need to select the target Snowflake connection, define the scope of the export (which includes the identity preferences and event selections), and specify the frequency at which the data should be sent.
To initiate exporting from Snowflake to CleverTap, perform the following steps:
-
Go to Settings > Partners > Export centre and click Create Export.
-
Select Snowflake from the Create Export window.
-
Choose the previously configured Snowflake connection name and select the required information based on your business use case.
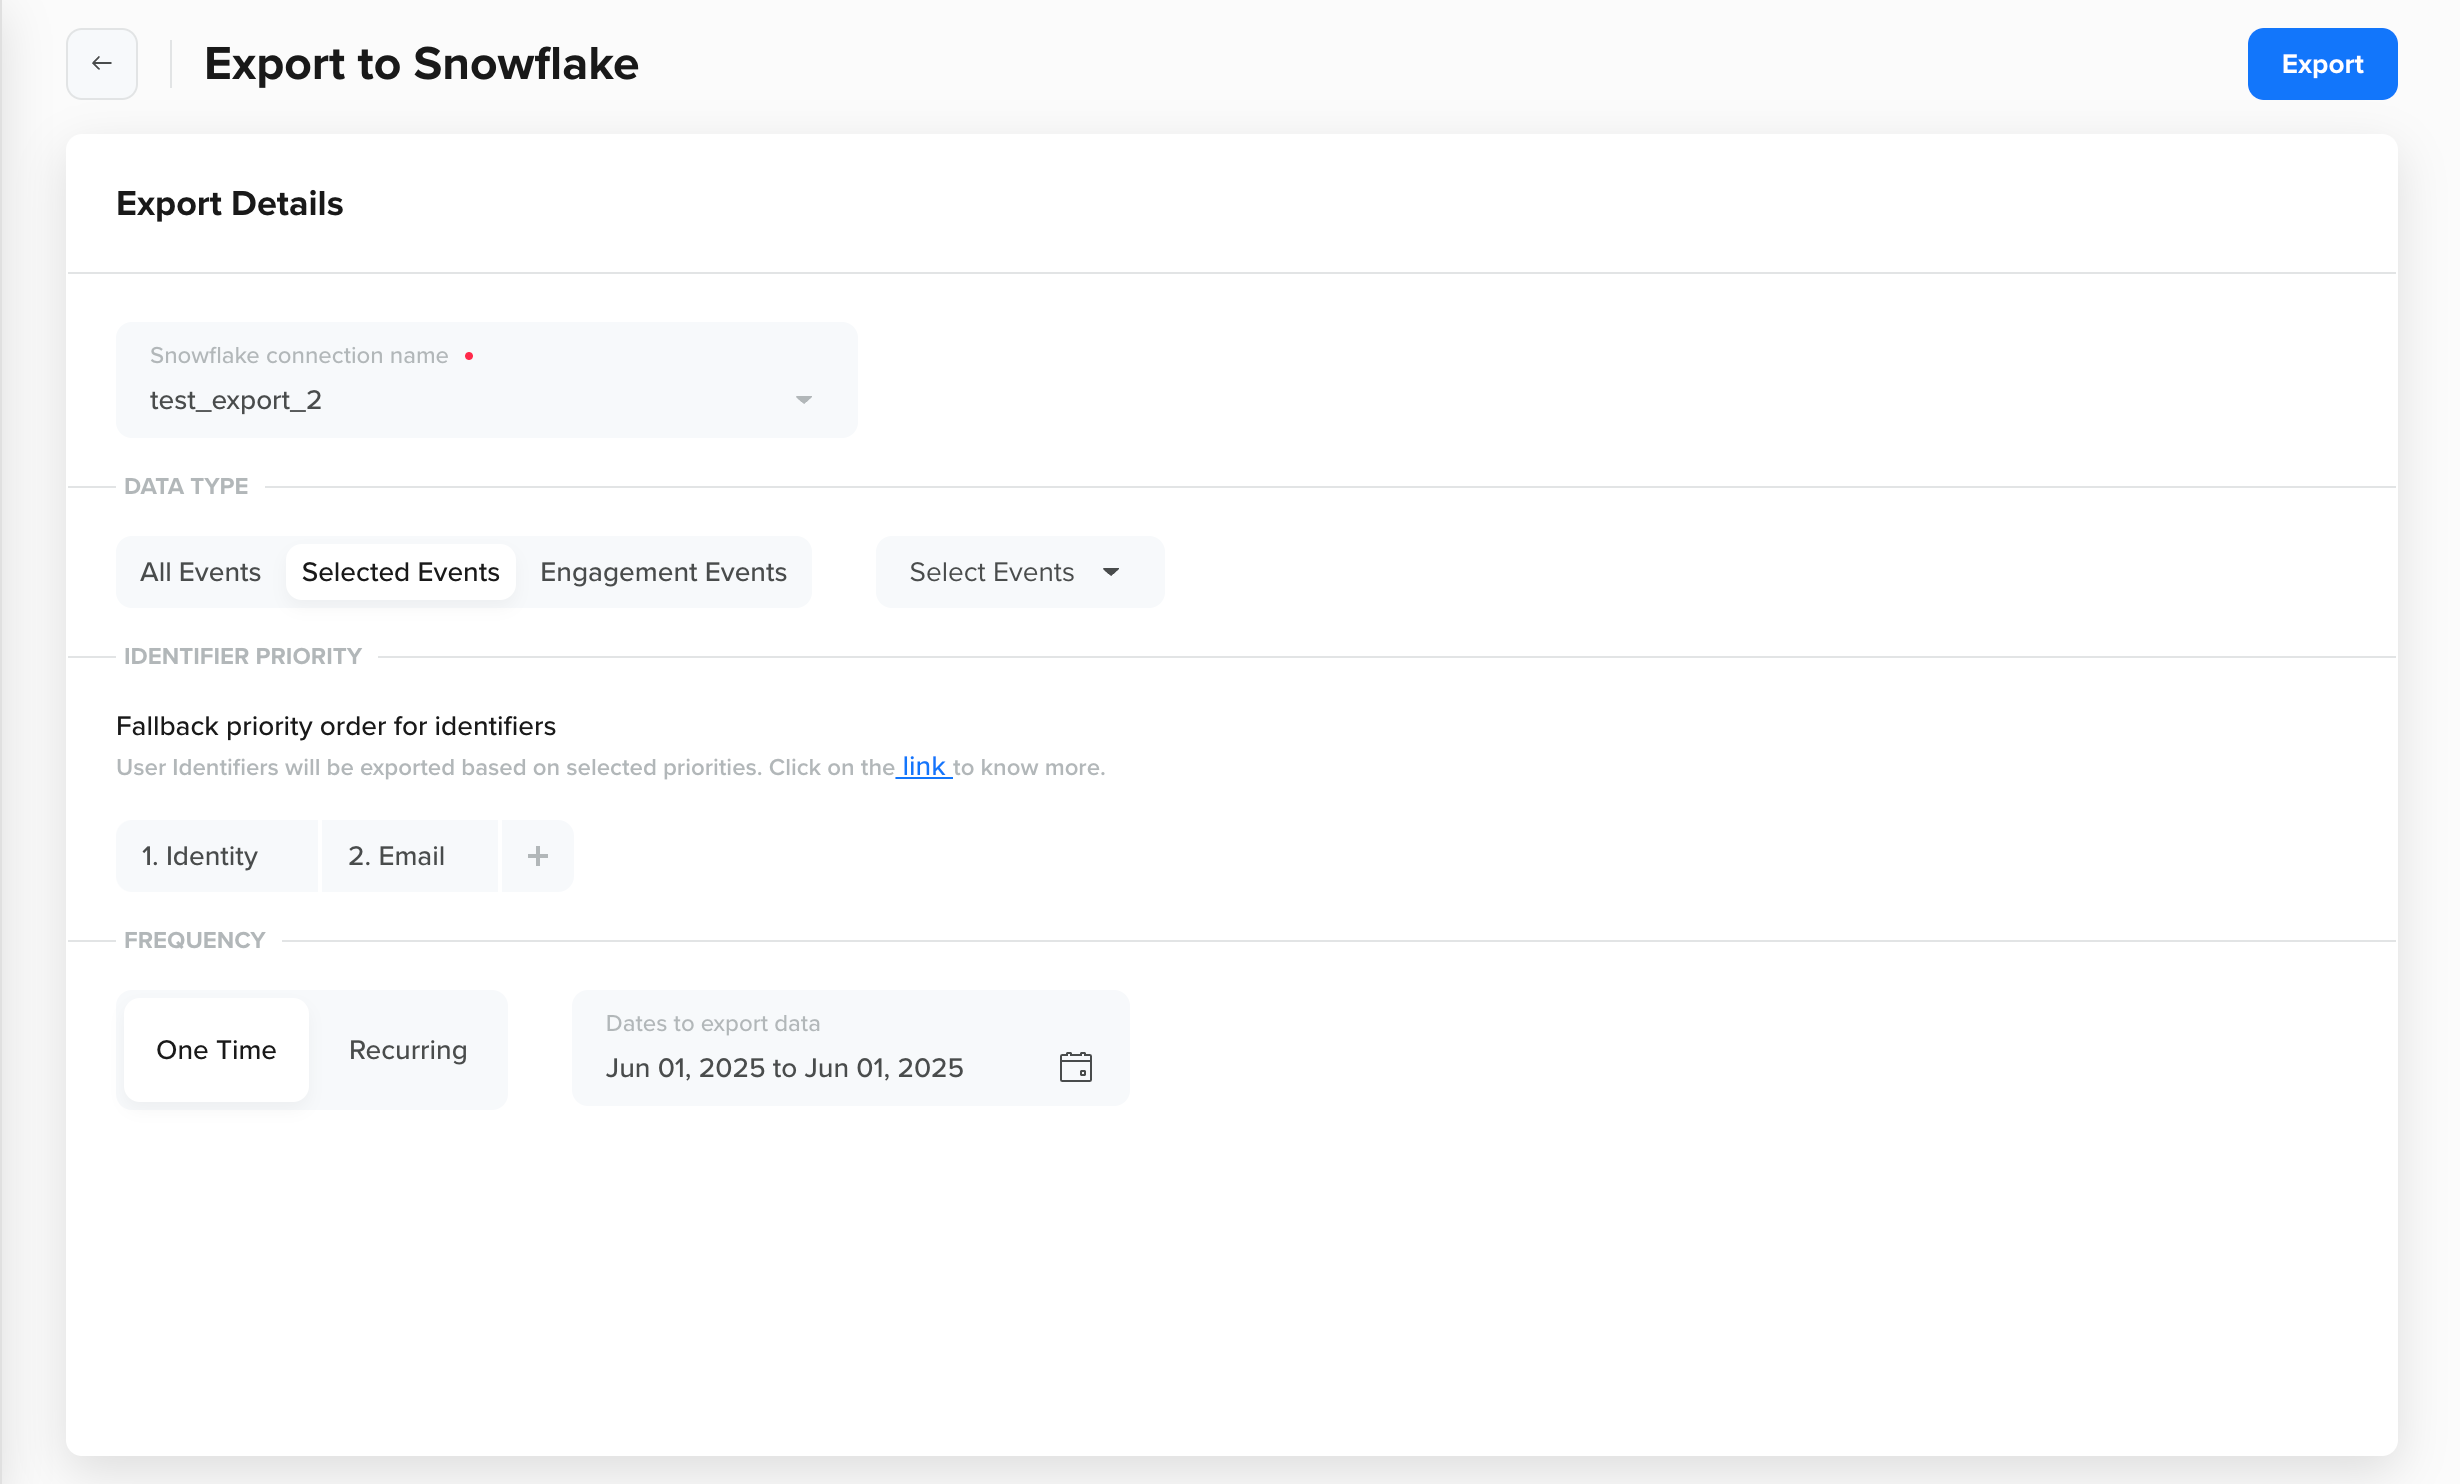
Export Details
- DATA TYPE: Select all the events, engagement events, or your specific set of events that you want to export to your Snowflake. For more information on the events available under All Events and Engagement Events, refer to Export Details.
- IDENTIFIER PRIORITY: User Identifiers are exported based on the selected priority. For more information, refer to Configure Identity Priority for Data Exports.
- Frequency: Select from one of the following options:
-
One time: Triggers a single export for the selected export type. You can export data for a specific day, a date range, the current month, the previous month, and similar periods.
NoteYou can export data up to the last 60 days. If you require data beyond this range, contact your Customer Success Manager or CleverTap Support.
-
Recurring: Set up a recurring export that exports all the new events captured in the last window. You can export data as frequently as every 4 hours and once every 24 hours.
-
-
Click Export. The Snowflake export has initiated message displays at the top of the Exports page.
You can now refer to the newly created Snowflake export on the listing page. The status for each recurring export is set to PENDING as soon as it is created. The status changes to RUNNING when processing starts and back to PENDING as soon as it is completed.
For a one-time export, the status changes to DONE when the export completes.
Configure Identity Priority for Data Exports
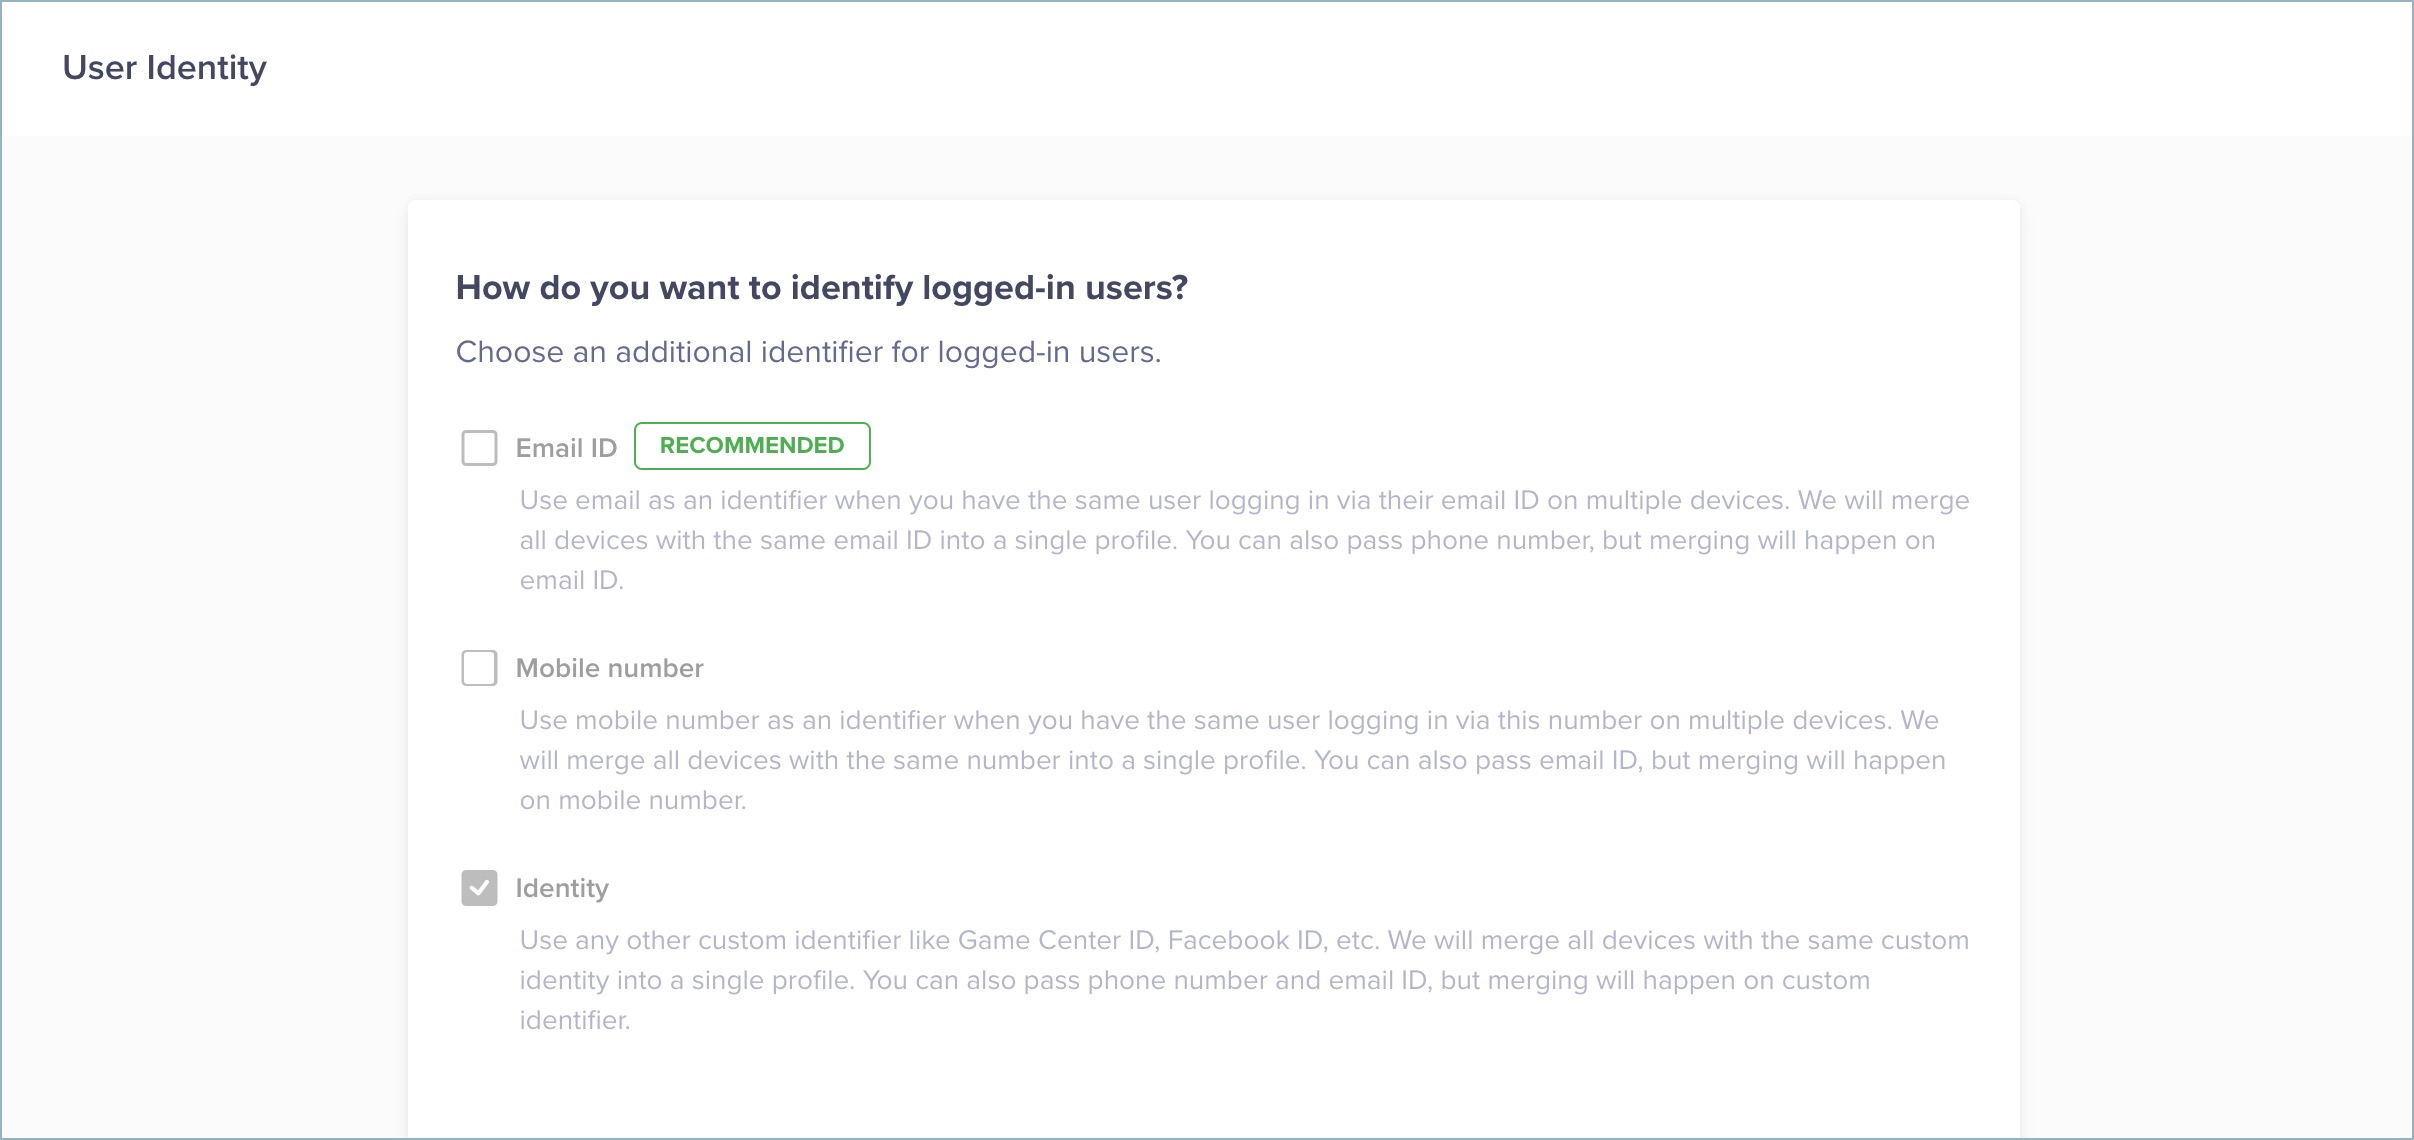
The export file includes an identity column with the user's Identity, Phone Number, or Email values. These values are set based on the identities configured in the CleverTap dashboard under the Settings > User Identity page. This feature lets you prioritize the identifier you want to export in the identity column.
Let us understand how the prioritization works based on the identities selected in the User Identity page:
-
If you select only Identity, the export file includes the identity value. If the identity column is unavailable, it is empty.
-
If you select multiple identifiers, you must set the priorities on the Export page. For instance, you set Priority 1 to Identity and Priority 2 to Email ID. When exporting data, the export prioritizes the Identity value for the identity column. If it is absent, the Email ID is exported under the identity column of the export file. If both are missing, the column remains empty.
Key Points to RememberIf you change the identity later, the export works according to the set priority. To prioritize the modified identities, edit your export.
To prioritize user identity for exports:
- Go to Partners > Exports.
- Hover over the required Snowflake export. Click the Edit button.
- Under Fallback priority order for identifiers, set up priorities 1, 2, and 3 for the required identities from the dropdown list.
- Click Update export.
Export Details
When creating an export, you can choose which event data to include. This allows you to tailor the export to your analytical or reporting needs. The following options are available:
-
All Events: Export data for all defined events, including System and Custom events.
-
Selected Events: Select the specific events to export from the dropdown.
-
Engagement Events: Export the following engagement events:
CleverTap Event Name Description
Notification Sent - The event is tracked when the notification is successfully sent from CleverTap to the communication channel you select for your campaign.
- This event is always recorded, even if the user does not open or click the message.
- This event is recorded for Email, Mobile Push, SMS, and Web Push campaigns.
- This event is available on the Event dashboard but not on the User Profile.
Notification Viewed - The event is tracked when a user views an email, in-app, or web notification sent from CleverTap.
- The event is available for Email, Web Push, In-App, Web Popup, and App Inbox.
Notification Clicked The event is tracked when a user clicks on a Mobile Push, In-App, Email, Web Popup, or Web Push message sent via the CleverTap dashboard or through the campaign API.
Push Impressions - After the Push Impression is implemented in the SDK, the toggle must be turned on from the CleverTap dashboard.
- This event is recorded whenever a push notification sent via CleverTap is delivered to the user’s device.
- The funnels on the Push campaign statistics page reflect the count for this event.
Notification Replied This event is tracked when the brand receives a reply from the user for WhatsApp.
Push Unregistered - This debug event is tracked when an existing mobile push token is removed for a profile.
- The event is tracked for a profile when:
- A user logs out of the device, and another user logs in. Applicable only if the onUserLogin() method is implemented.
- When a push token is removed using the
pushFcmRegisterationId("token",false)method. Applicable only for Android.
Control Group The event is tracked when a campaign is activated with a Control group.
Channel Unsubscribed The event is raised when an email is not acknowledged.
The following are the event properties:
- Campaign ID: This is the ID of
the campaign from which users are updating subscriptions.
Campaign Type: Currently only email. - Group: Group name from which the user unsubscribed/resubscribed.
- Identity: The user identity/email address.
- Variant Type: Valid values are bounced, dropped, and spam. Email IDs that bounce, drop or marked as spam are opted out from future emails
- Subscription Type: Account level and profile level. Profile level signifies that the user who qualified for the communication is opted out. Account level signifies that all users with the email address are opted out from future communications.
- Reason: Reason which was given by the email provider for the type of the error. For example: "smtp;550 5.1.1 The email account that you tried to reach does not exist. Please try double-checking the recipient's email address for typos or unnecessary spaces."
- Campaign ID: This is the ID of
Reachable By The event is tracked for a profile when: - Push token is added/changed.
- Email ID is added/changed.
- Phone number is added/changed.
Notification Delivered The event is tracked when the WhatsApp provider confirms that the notification has reached the end user (double-tick of WhatsApp).
AB Experiment Rendered The event is tracked when you are using the Product A/B Tests feature and the variant reaches the device.
AB Experiment Stopped The event is tracked when you are using the Product A/B Tests feature and the AB experiment is stopped.
AB Experiment Rolled Out The event is tracked when you are using the Product A/B Tests feature and the winner variant is sent to all the devices.
Geocluster Entered The event is tracked when you enable the geofence feature and your device enters a geofence.
Geocluster Exited The event is tracked when you enable the geofence feature and your device exits a geofence.
Partner Sync Event marking synchronization with a third-party partner system. Reply Sent The event is tracked against the user profile of the end-user when an agent (CleverTap user) replies to a WhatsApp message from the end user.
App Uninstalled The event is tracked when the user uninstalls the application.
There are three cases when this event is tracked multiple times for a single user:
- The first case is when a user installs your app, uninstalls it, and then reinstalls it.
- The second case is when a user clears the app's memory.
- The third case is when a user installs your app on multiple devices.
Webhook Delivered The event is tracked when a webhook campaign is delivered successfully.
State Transitioned - The event is tracked whenever a user transitions from one state to another or from an unmapped state to one of the states in the lifecycle optimization framework.
UTM Visited - The event is tracked when a user clicks on a link from a marketing campaign that has a UTM parameter defined on it.
- The event is also tracked when a CleverTap-integrated attribution platform, such as Branch or Apsalar, sends this information to CleverTap.
AB Test Enter Triggered when a user enters an A/B test group. AB Test Exit Triggered when a user exits an A/B test group.
Table Name Structure
CleverTap generates a corresponding table in the configured Snowflake account when a data export is created. Each table follows a consistent naming convention that allows easy identification and traceability of exports.
Clevertap_<App_Project_ID>_<ExportID>Each export table follows a standardized schema, ensuring consistency in structure and interpretation across all exported datasets.
| Column | Type | Description |
|---|---|---|
| App [Project Id] | VARCHAR | Unique identifier for the CleverTap project (App ID). |
| Export ID | VARCHAR | Unique ID representing the export batch. |
| Timestamp | TIMESTAMP_NTC | The event timestamp is recorded in the yyyy-MM-dd HH:mm:ss.SSS format. The timestamp reflects the time zone configured at the account level in CleverTap. |
| CleverTap ID | VARCHAR | It is a system-generated, unique ID for each profile |
| Identity | VARCHAR | Primary identifier based on the configured priority (for example, Identity, Email). |
| All Identities | VARIANT | JSON object containing all associated user identifiers. |
| Event Name | VARCHAR | The name of the exported event, which was triggered by the user |
| DeviceInfo | VARIANT | JSON object capturing device attributes (OS, model, browser, etc.). |
| Control Group | VARCHAR | Indicates if the user is part of a control group for experimentation. |
| Event Properties | VARIANT | JSON object with additional custom properties associated with the event. |
Updated 3 months ago