n8n
Workflow Automation
Overview
n8n is a powerful no-code or low-code workflow automation tool that enables you to connect a wide range of applications through visual workflows. With the CleverTap and n8n integration, you can trigger workflows based on any app supported by n8n and send user or event data directly to CleverTap, without writing any custom code or handling the API manually.
With this integration, you can:
- Automatically send form submissions from tools such as Typeform or Google Forms to CleverTap for real-time user segmentation.
- Trigger CleverTap events when a deal is marked as won in CRM tools such as HubSpot.
- Ingest webhook data (for example, payment confirmations, support tickets) into CleverTap for timely, personalized engagement.
This document explains how to send Form responses or data from other apps into CleverTap using n8n’s HTTP Request node.
Prerequisites for Integration
Ensure you have the following before starting the integration:
- A CleverTap account with a valid Account IDand Passcode.
- An active n8n account
Integrate n8n with CleverTap
To integrate n8n with CleverTap, perform the following three major steps:
Create Trigger Node in n8n
Use this integration to automatically capture user details from form submissions, such as feedback, registration, or sign-up forms, and send them to CleverTap as user profiles for real-time personalization, segmentation, or campaign targeting. Create a workflow using a Form Submission trigger in n8n to collect user data.
To do so, perform the following steps on the n8n dashboard:
- Log in to your n8n account and create a New Project.
- Click Add First Step and select a trigger node. For this example, select Form Submission.
Set Up Form Submission Trigger Node in n8n to Collect User Input.
- Design and configure your Form as per your use case.
- Test the Form submission and check that the data is captured correctly.
Submit Form to Test and Capture User Data.
- Save the trigger node once verified.
Set Up HTTP Request Node for CleverTap
Capture Form data and send it to CleverTap using an HTTP Request node. This step defines where and how you send the data. To do so, perform the following steps on the n8n dashboard:
-
Add a new node by clicking the + symbol.
-
Search and select the HTTP Request node.
-
Set the HTTP Method to
POST. -
Use the following CleverTap endpoint to upload user profile data:
<https://<Region Value>.api.clevertap.com/1/upload>Replace
<Region Value>with your CleverTap region. To identify the region of your account, refer to CleverTap Regions -
In the Headers section, add the following key-value pairs:
Key Value X-CleverTap-Account-IdYour Account ID X-CleverTap-PasscodeYour Passcode Content-Typeapplication/json
To find your CleverTap Account ID and Passcode, refer to Create Account Passcode.
Configure HTTP Request Node with CleverTap Endpoint and Headers.
Map Form Fields to CleverTap API Keys
In the HTTP Request node, you must map the Form fields collected in n8n to the required CleverTap API keys to ensure the data is sent correctly. Depending on your use case, refer to Upload/Update User Profile or Upload Events.
To map form fields, perform the following steps on the n8n dashboard:
- Set the Body Parameters to Raw JSON.
- Use dynamic variables from the Form trigger node to populate the payload.
Example Payload for Uploading User Profile
{
  "d": [
    {
      "objectId": "={{$json['email']}}",
      "type": "profile",
      "profileData": {
        "Name": "={{$json['name']}}",
        "Email": "={{$json['email']}}",
        "Phone": "={{$json['phone']}}"
      }
    }
  ]
}- Once mapped, click Execute Node to test if data is sent successfully.
Map Form Fields to CleverTap’s User Profile Payload Using Dynamic Variables
Test and Activate Workflow
Run the workflow and validate the results in CleverTap. After testing, activate the workflow to make it live. To do so, perform the following steps:
- Go to your CleverTap dashboard and check if a user with the provided email has been created or updated. Open User Profiles in the CleverTap dashboard to confirm successful record creation.
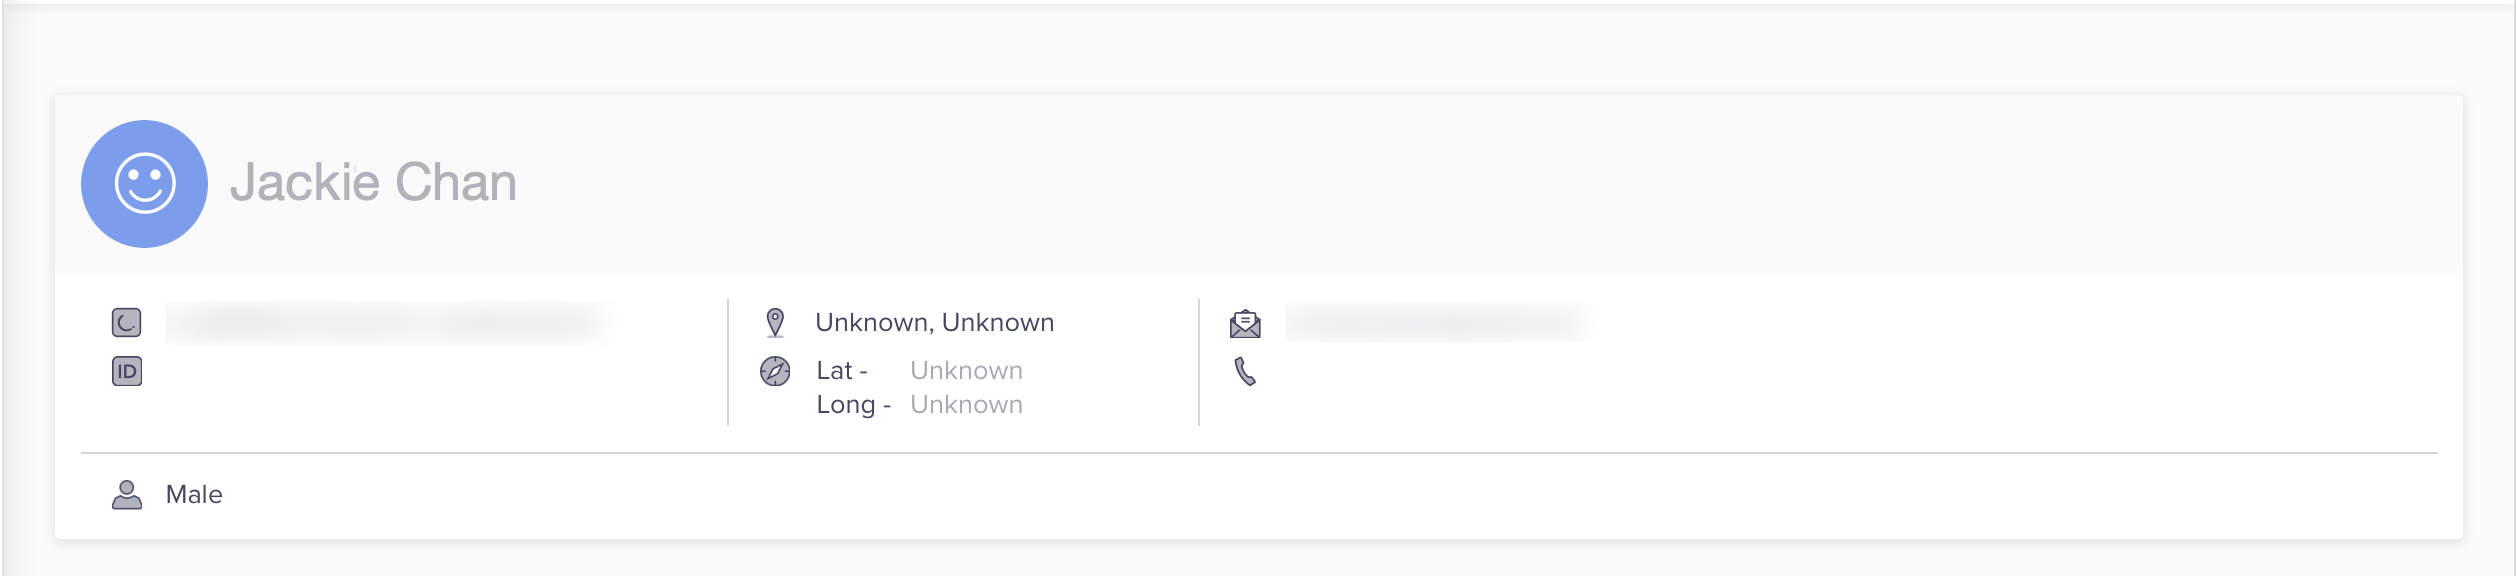
Verify User Profile on CleverTap Dashboard After Submission
- If successful, enable the Activate workflow in n8n.
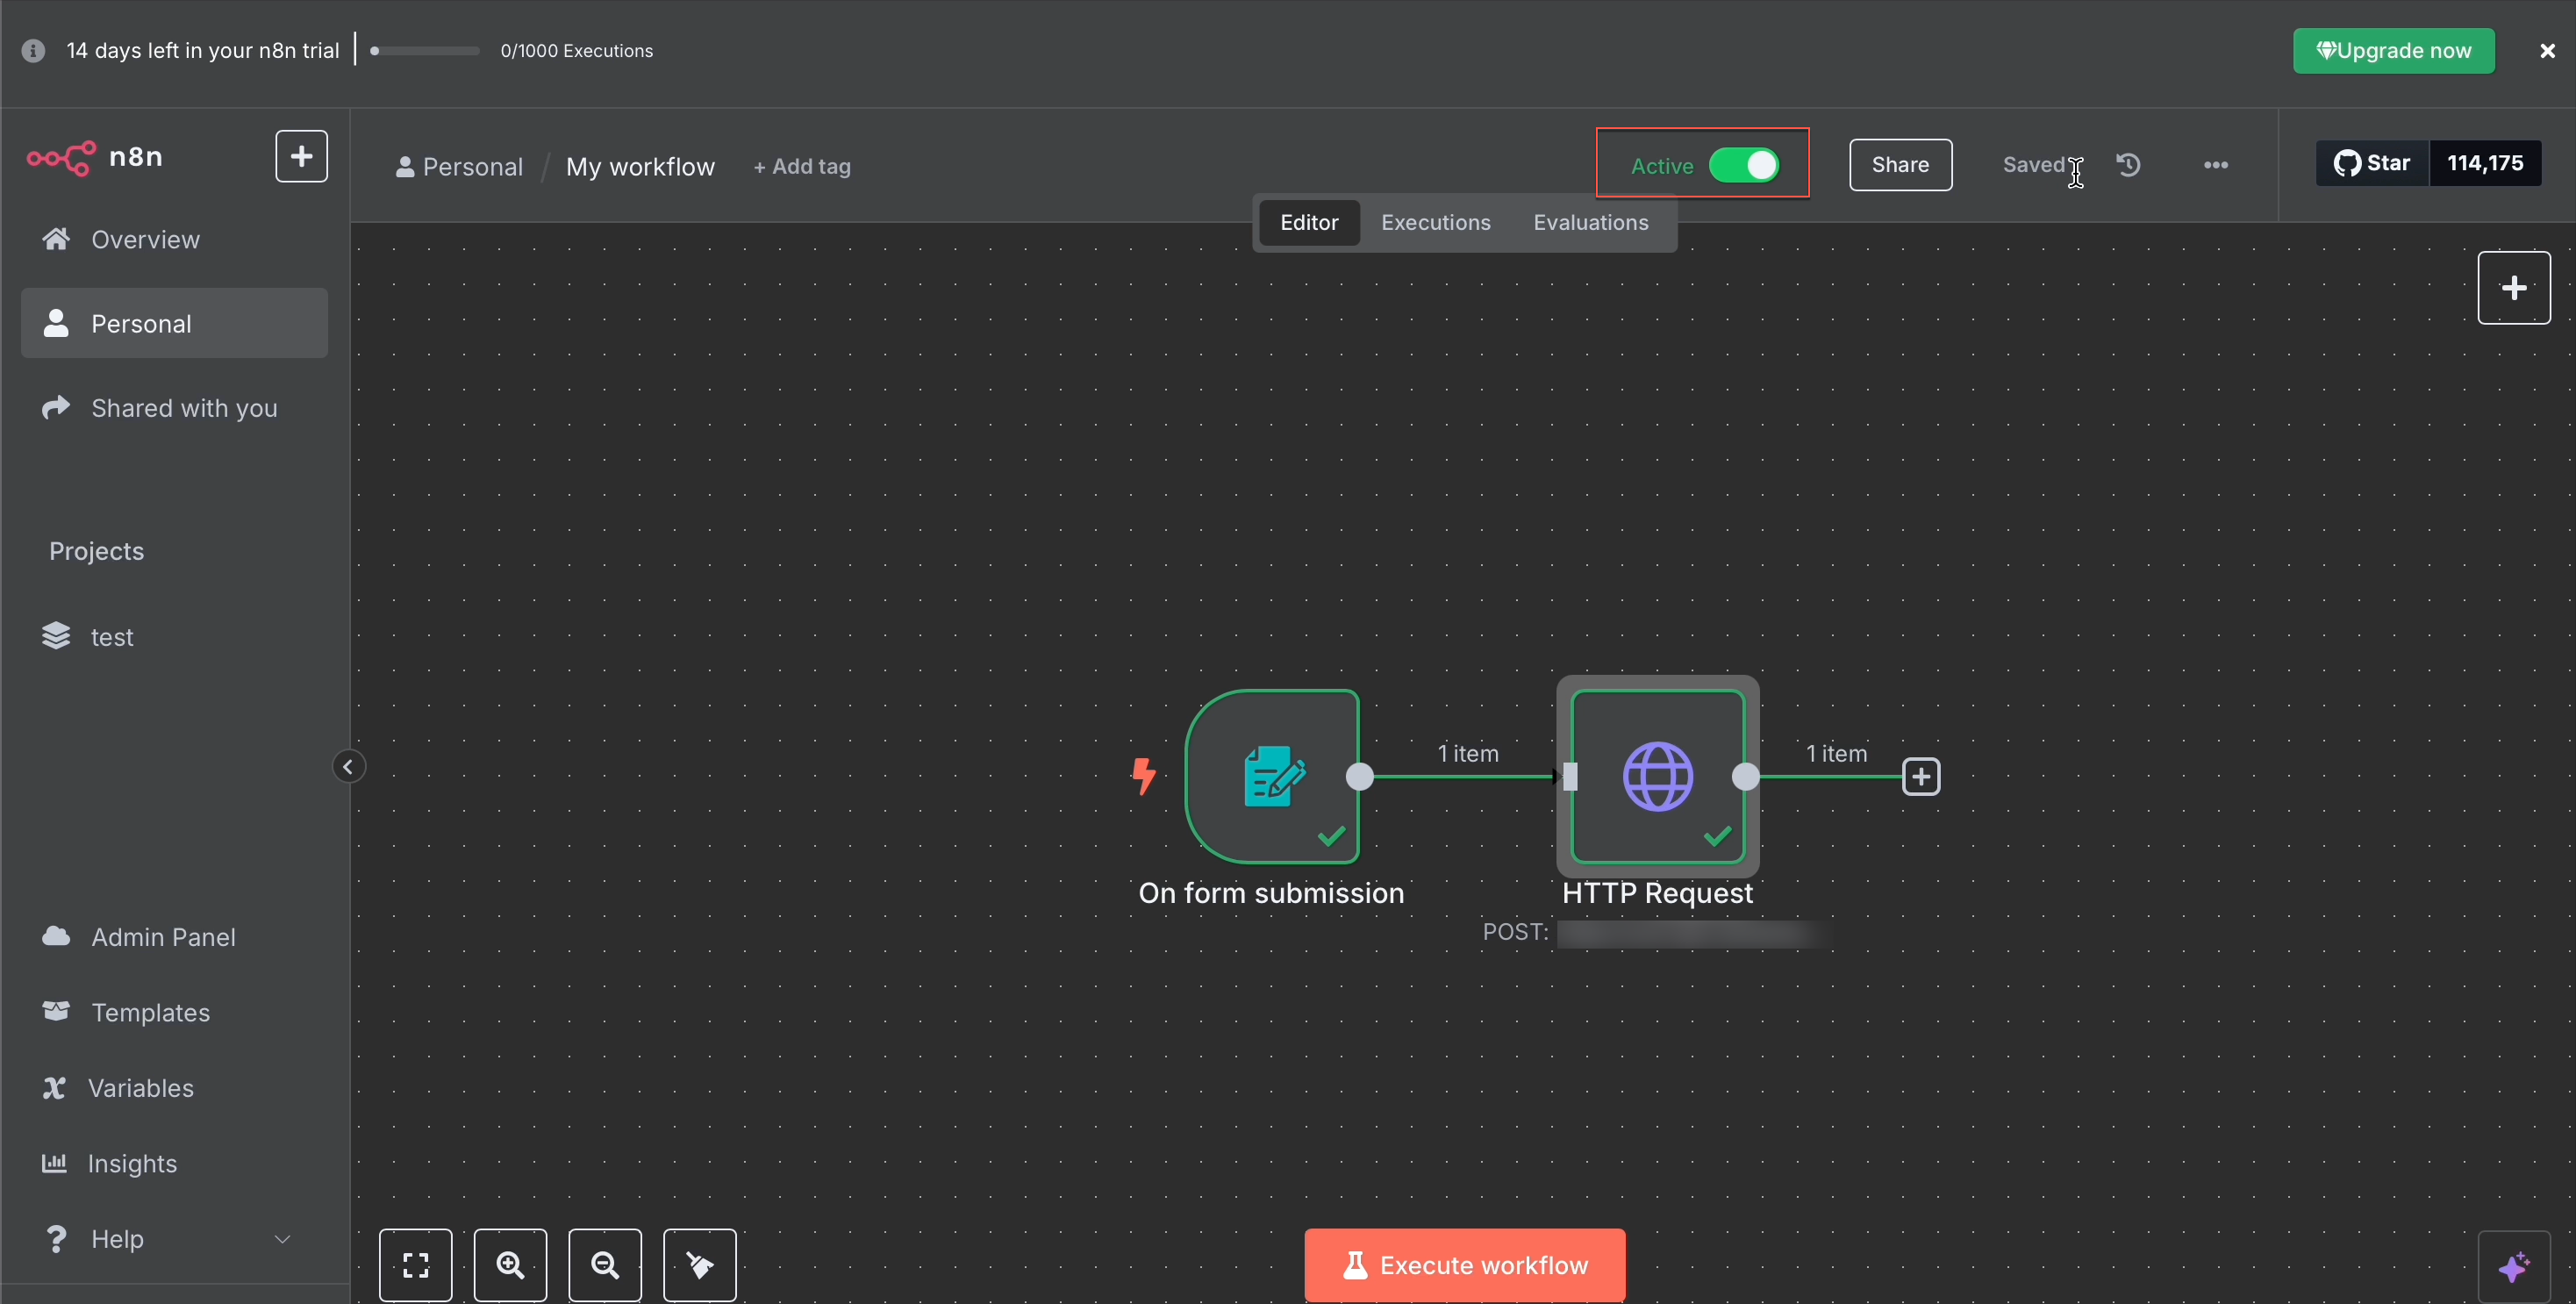
Activate Workflow in n8n to Sync Data with CleverTap
Every time the Form is submitted, the corresponding user data is synced with CleverTap. You can review Recent API Calls to troubleshoot or monitor the integration.
This integration allows you to automate user onboarding or event tracking using any app supported by n8n, without writing or maintaining any code.
Updated 8 months ago