Create Message
Learn how to create a WhatsApp campaign using the CleverTap dashboard.
Create a New Campaign
Create a campaign to deliver your WhatsApp message. Follow the steps below to create a new WhatsApp campaign:
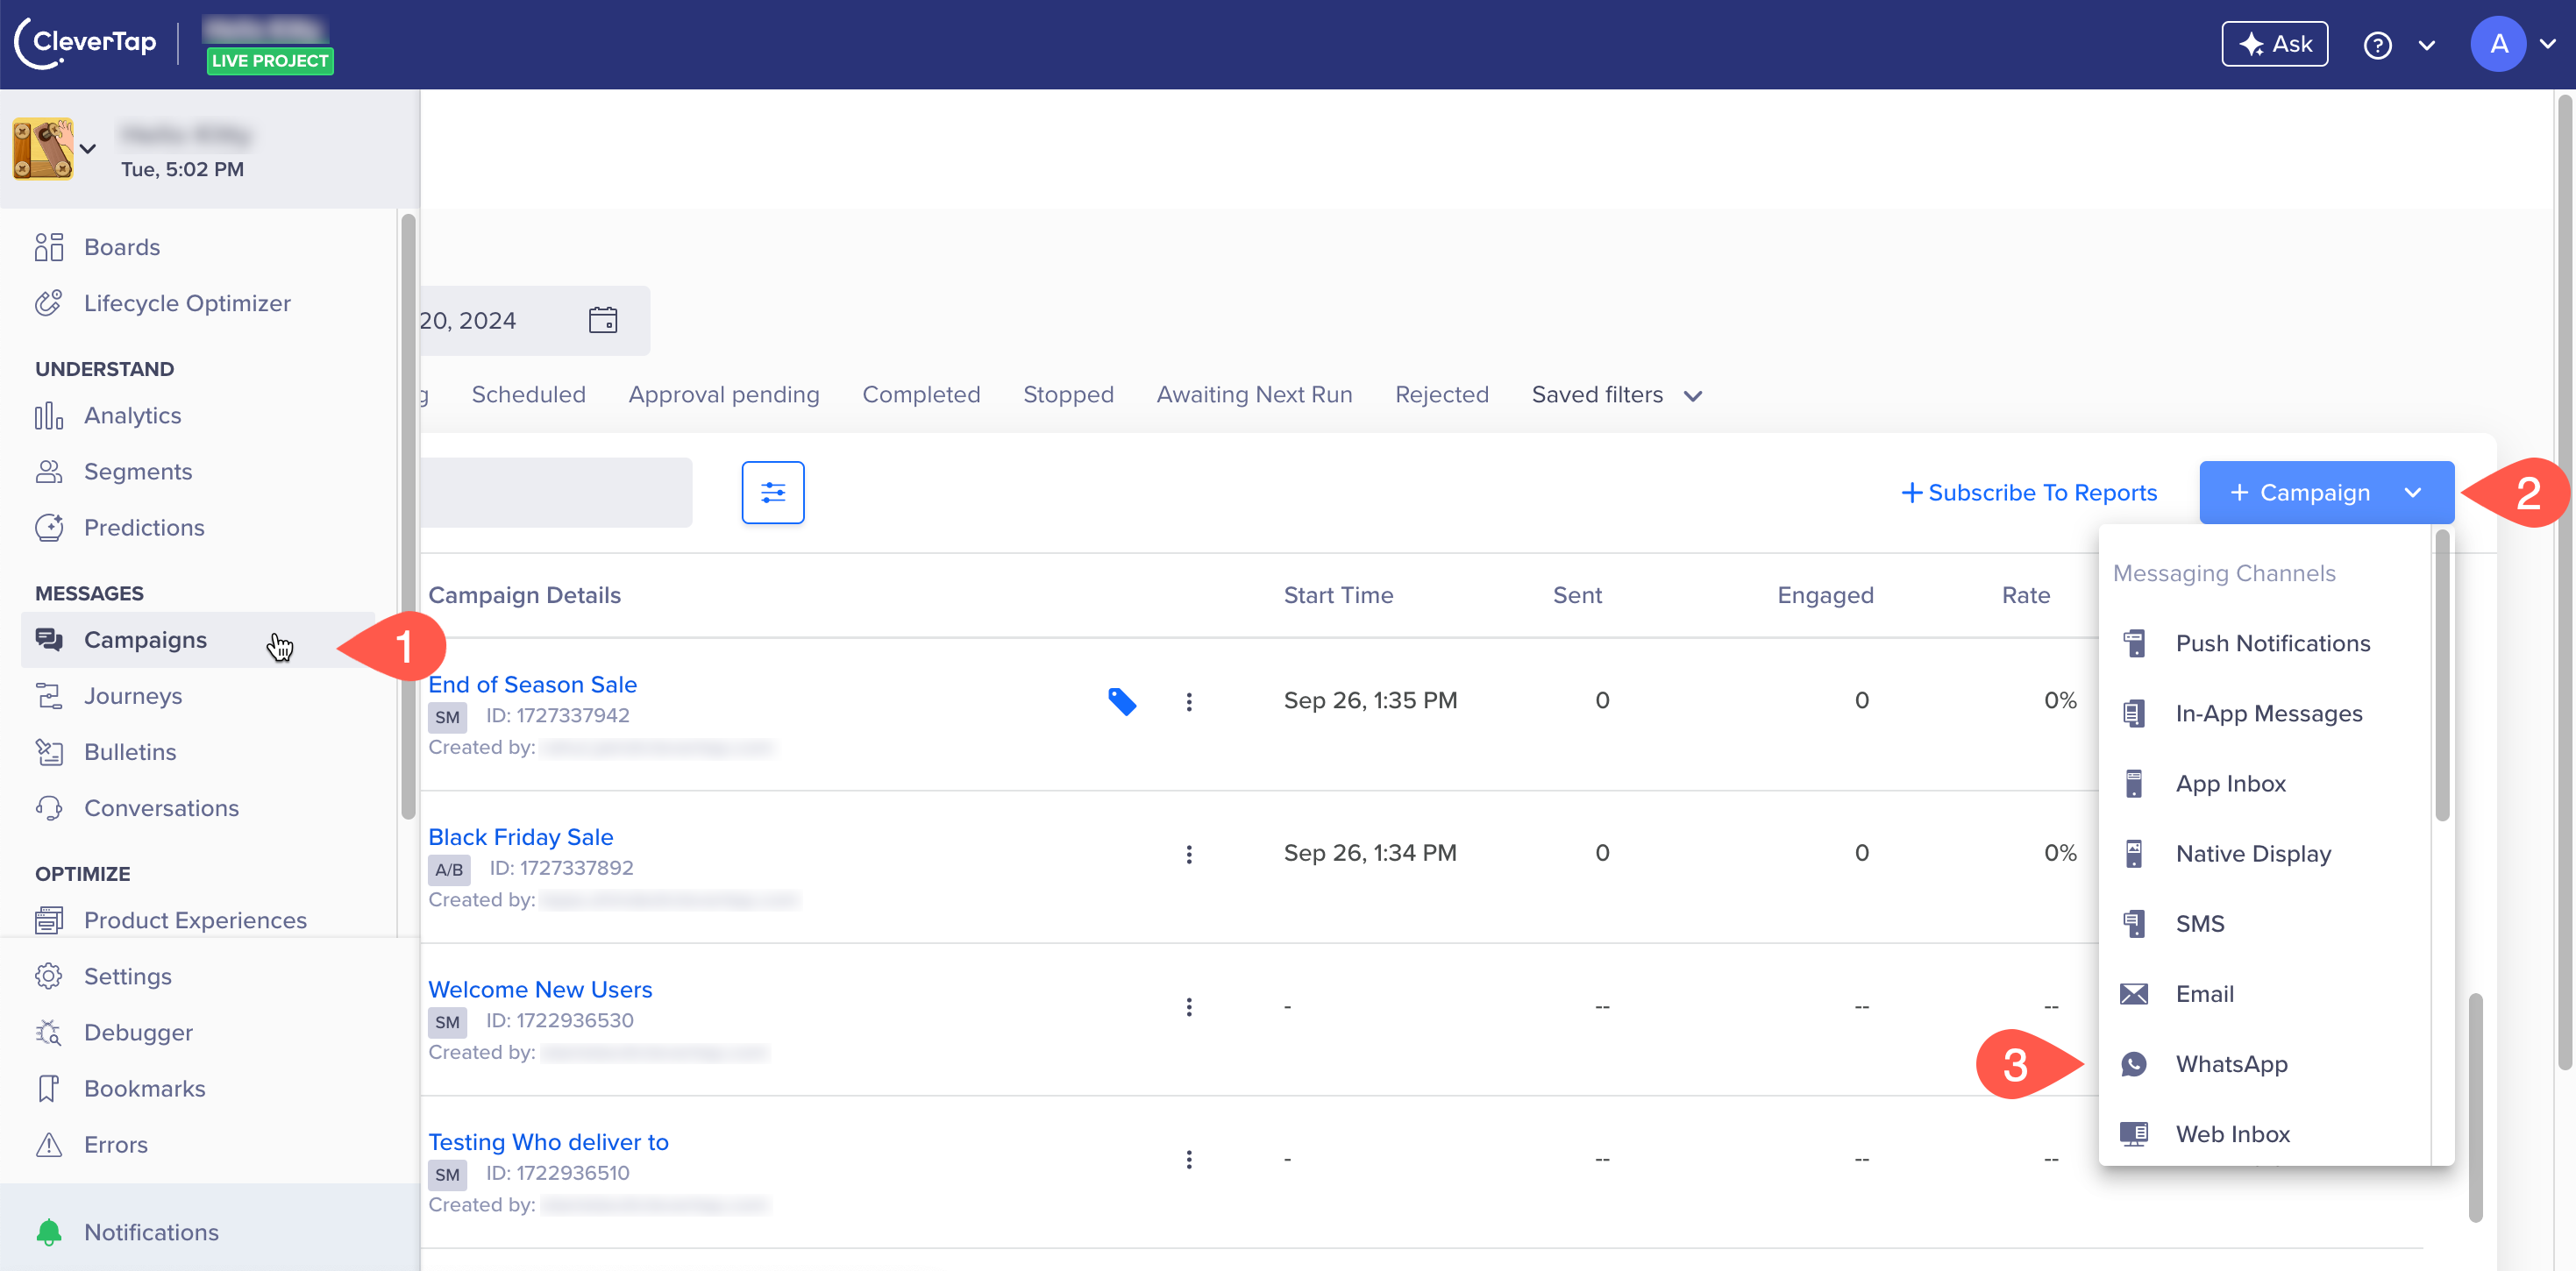
- From the CleverTap dashboard, select Campaigns.
- Click + Campaign.
- From the Messaging Channels list, select WhatsApp.
Create a New WhatsApp Campaign
The campaign page displays.
WhatsApp Campaign Configuration Page
Define all the sections and publish the campaign.
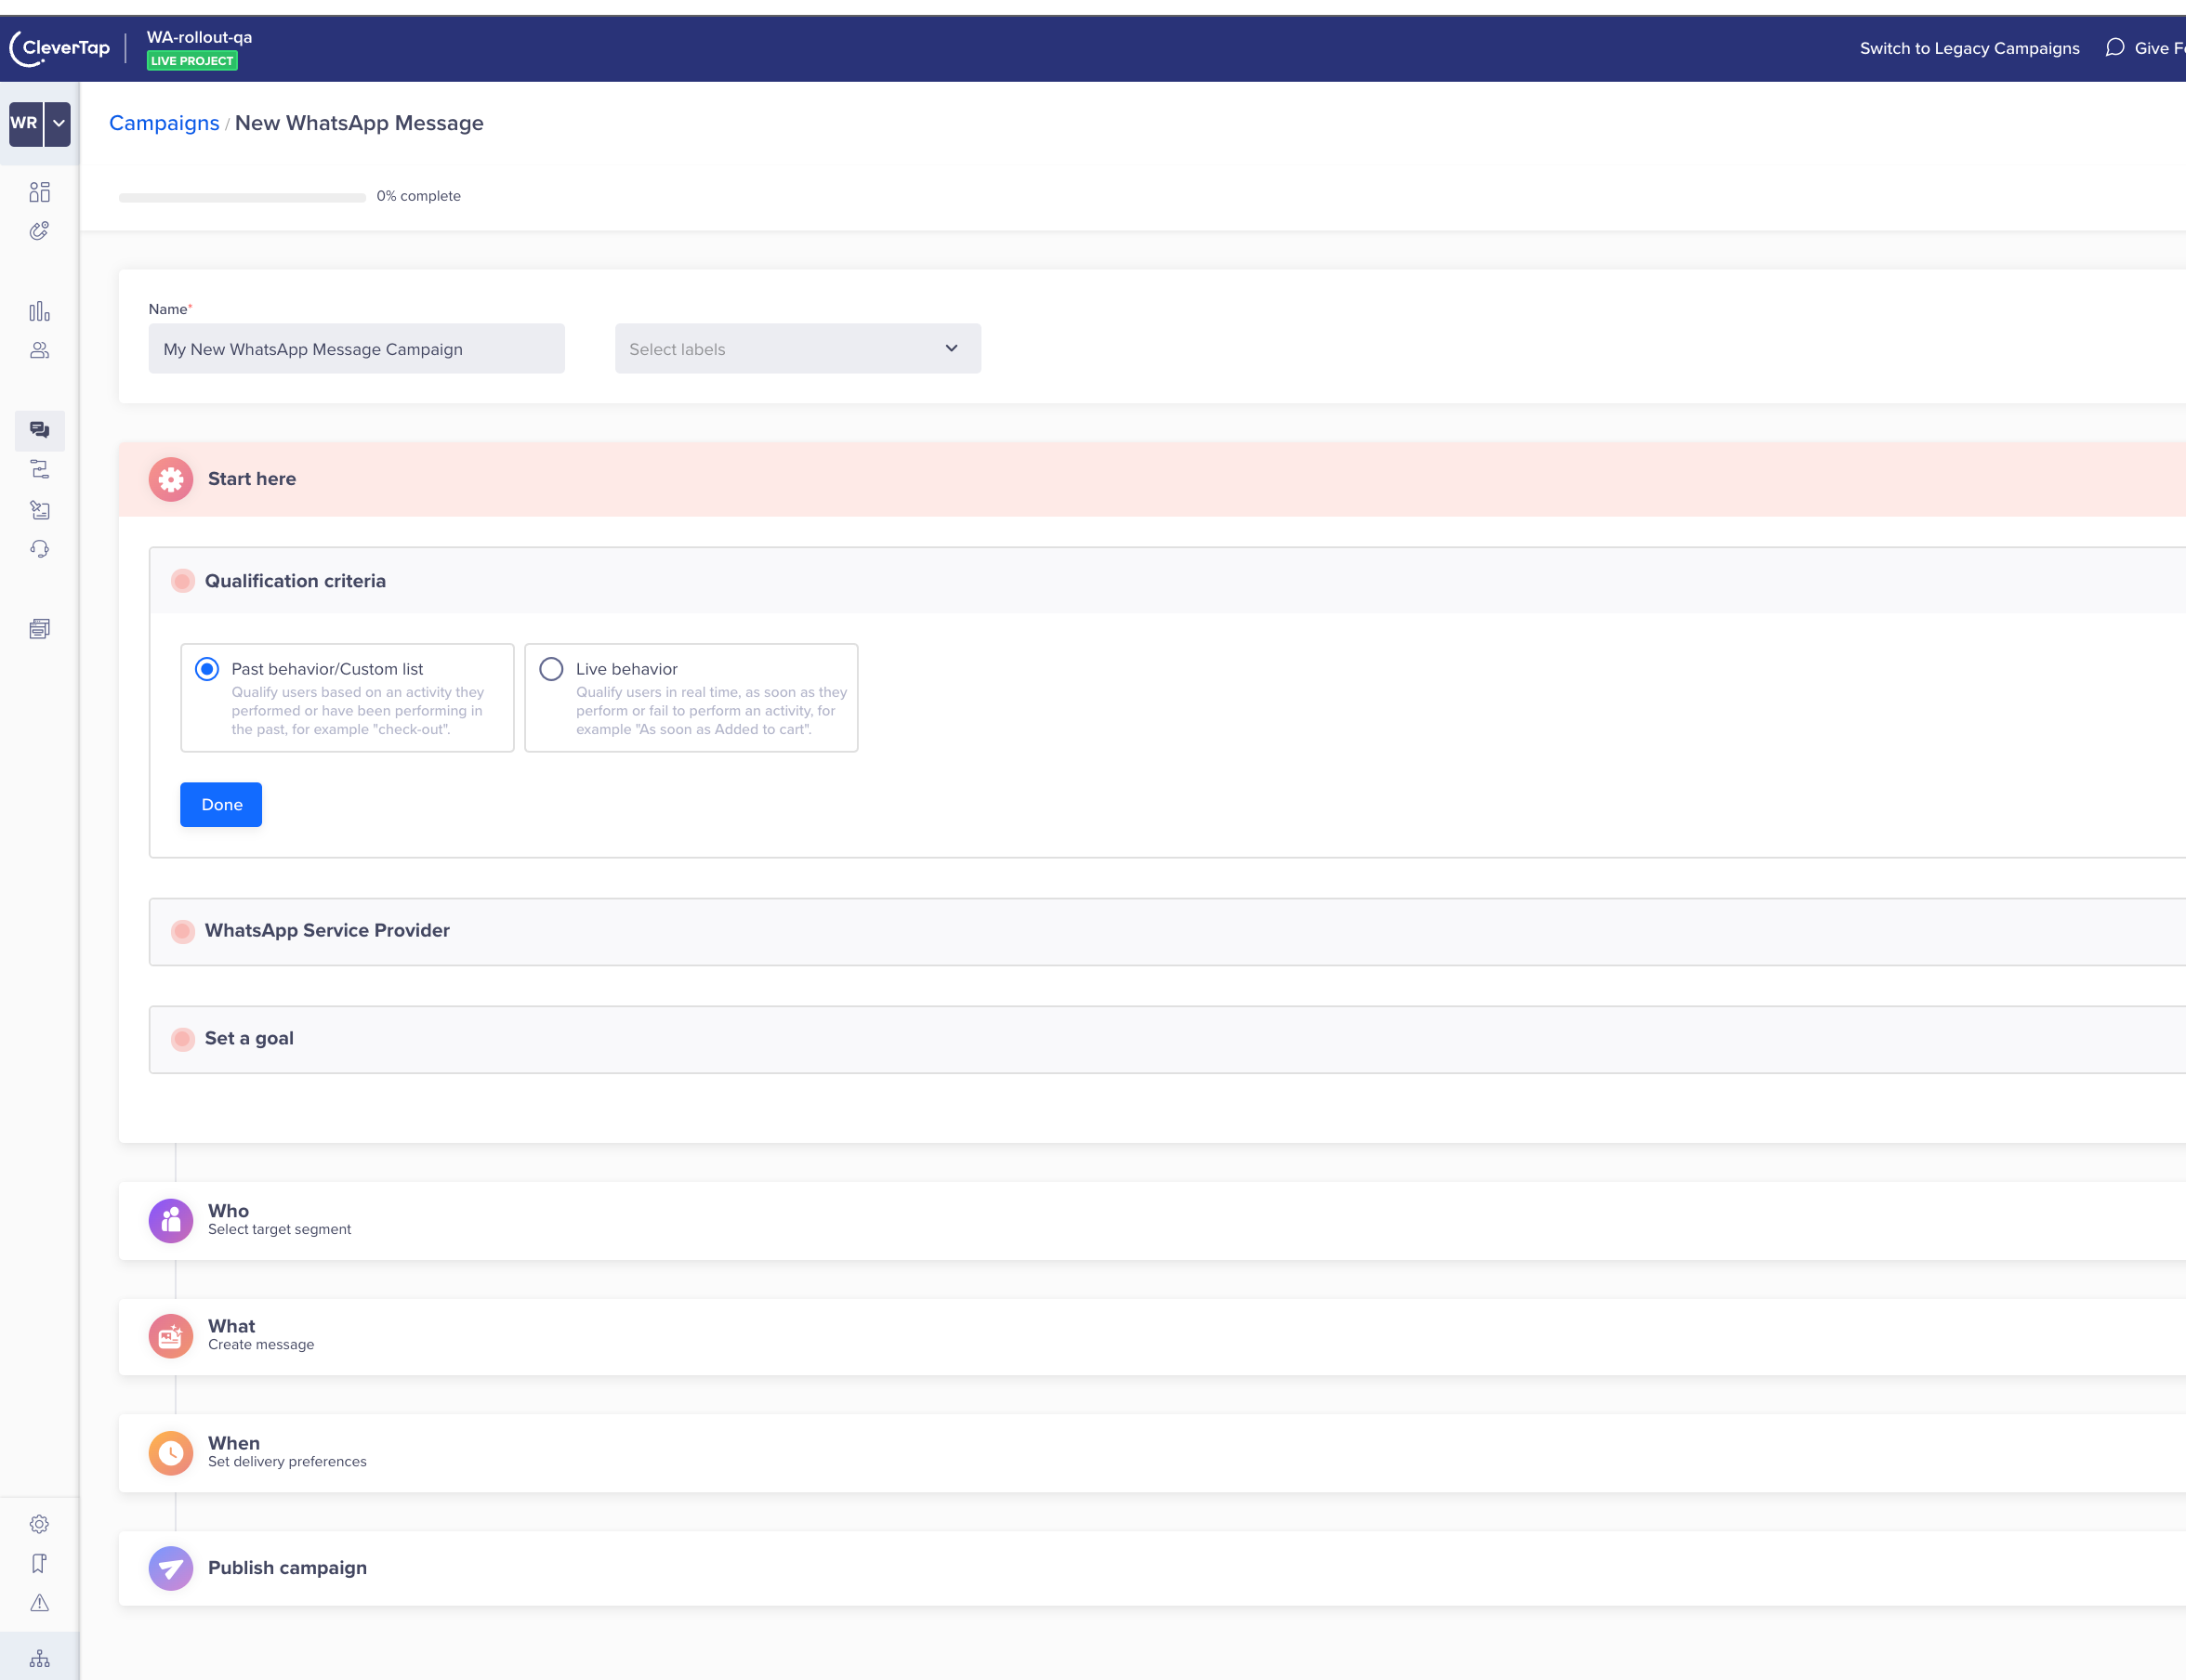
Start Campaign Setup
The Start here section displays the setup information.
This section has the following parts:
- Start here: Check that the required platforms are integrated and ready for campaigns.
- Qualification criteria: Deliver the notification based on Past behavior, Custom list, or Live behavior For more information about segmenting users, refer to Segments.
- WhatsApp Service Provider: Select the available WhatsApp service provider from the list.
- Set a goal: Tracks your campaign conversions by setting a goal. This step is optional, but it helps you measure how effectively your campaign meets its goal.
You can define your conversion goal by selecting the Event and specifying the Conversion Time. The Conversion Time field accepts any numeric value along with a time unit such as Minutes, Hours, Days, Weeks, or Months. This allows you to define conversion windows such as 10 days, 72 hours, or 2 months. The value can range from a minimum of 1 minute to a maximum of 5 months.
For example, if you set the conversion time to 5 Minutes, the system counts conversions within 5 minutes of the goal event.
Your campaign goal can be as broad or as specific as you want. For example, you can answer questions such as: How many users were influenced to purchase an X amount? or How many first-time visitors purchased red shoes worth at least X and blue jackets worth at least Y?
Set Conversion Time
Define the Audience
You must indicate the target audience for your WhatsApp campaign. You can target your WhatsApp campaign to a new user segment by clicking on the Target Segment section. Here, you can create a new segment or use a previously saved user segment from the segment list.

Segment Your Target Audience
You can create the target based on past user behavior and user properties or live (ongoing) user behavior. The latter is helpful to send out real-time, triggered campaigns.
Delay > 24 HoursWe recommend creating a Past Behavior campaign for all campaigns where the delay is greater than 24 hours for a live inaction campaign.
For instance, you can create a live Inaction within time campaign that targets users as soon as they add a product to their cart but do not finish transacting within 10 minutes; the golden window within which most users transact on online platforms.
Deliver Action Based WhatsApp Notifications
You can trigger a WhatsApp message to users when they perform a specific action. This makes notifications more contextual and increases conversion. For example, sending a cab booking link to customers who have just booked a hotel or flight.
Deliver WhatsApp Notifications based on Past Behavior (PBS)
You can also target users basis their past behavior. For example, you might want to target customers who have purchased a specific product in the past.
Filter by User Properties
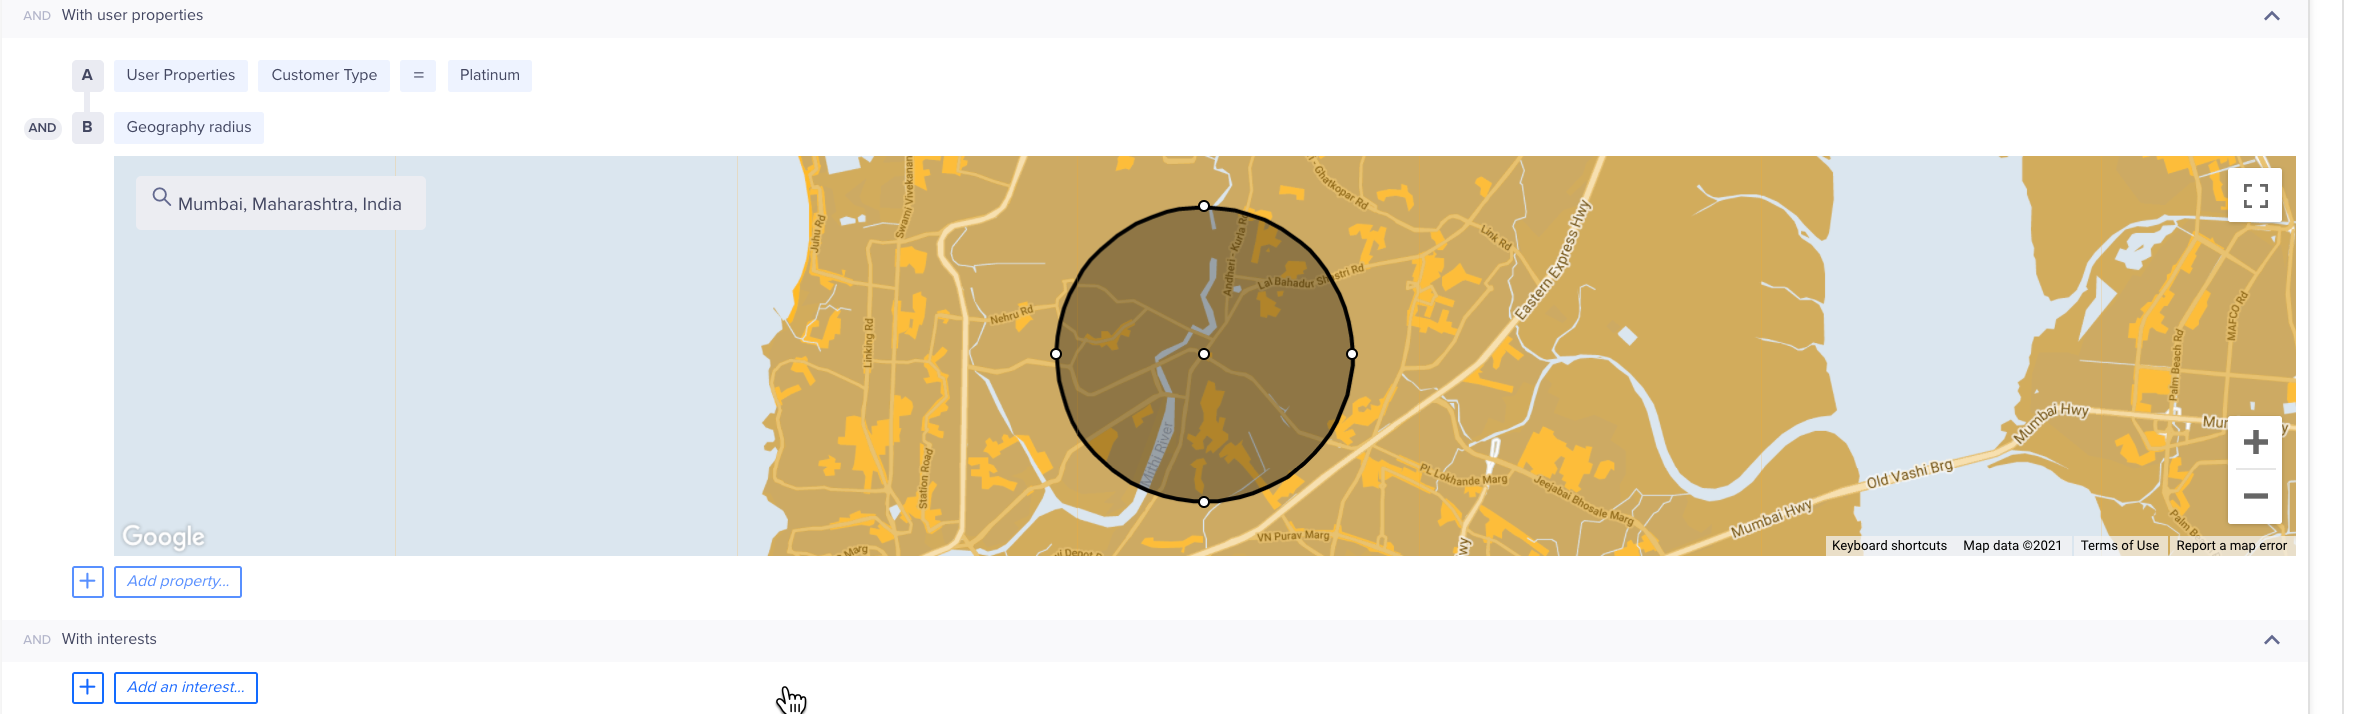
Using the With user properties filter in the Who section, you can segment your campaign to reach users who meet specific criteria.
For example, you can send a WhatsApp notification to all the customers from Mumbai who are currently subscribed to Platinum membership.
Filter by User Properties
The following table explains the various property types:
| Property Type | Description | Example |
|---|---|---|
| User Properties | Custom user profile properties that you define and send to CleverTap. | Customer Type = Platinum |
| Demographics | Demographics filters include Age and Gender. | Age = 25 to 40 years Gender = Female |
| Geography | User's coarse location. Filters include Country, Region, and City. CleverTap's SDK can automatically detect this from the user's IP address. | Country = United States State = California City = San Francisco |
| Geography Radius | User's exact location. You can select a city, and then define the target radius. You can also select multiple cities. You can send this information using CleverTap's SDK. For more information, refer to the iOS and Android developer guides. | Locations = San Francisco, USA; Paris, France |
| Reachability | Reachability filters include Has email address, Has phone number, Unsubscribed email, and Unsubscribed SMS. | Unsubscribed email = No |
| App Fields | App fields filters include App Version, Device Make, Device Model, OS Version, and CleverTap SDK Version. This information is sent by CleverTap's SDK for each device that has your app which means a single user can have multiple devices associated with their user profile. | OS Version = 10 |
To know more about what segments can be used, see Segments.
Constant event property
You can also hold a property constant across the selected events. For more information, see Constant Event Property.
Calculate Estimated Reach
The Estimated Reach option allows you to preview how many users meet your targeting criteria in an online trigger campaign before publishing it. This helps you validate audience size and adjust filters to ensure the campaign reaches the intended users.
Estimated Reach is particularly useful when you select the Filter on past behavior and user properties option. You can view both the estimated user count and device count.
To calculate the estimated reach, perform the steps below:
- Select Filter on past behavior and user properties.
- Click Calculate in the right panel. The result shows the estimated number of users or devices for that segment. You can view the following:
- Total Users: The number of users that match the filters.
- Breakdown by Platform and Devices: The users count on Android, iOS, or both, and on different devices.
- Visual Indicator: A chart summarizing the share by operating system.
The estimate, based on the latest available event data, updates each time you apply or modify filters. It reflects stored event data and is not a real-time count. This helps you plan and refine your audience before sending the campaign.
Calculate Estimate Reach
Control Group
You can define the control group to compare and measure the results of your campaign. For more information, refer to Control Groups.
Control Group Editor
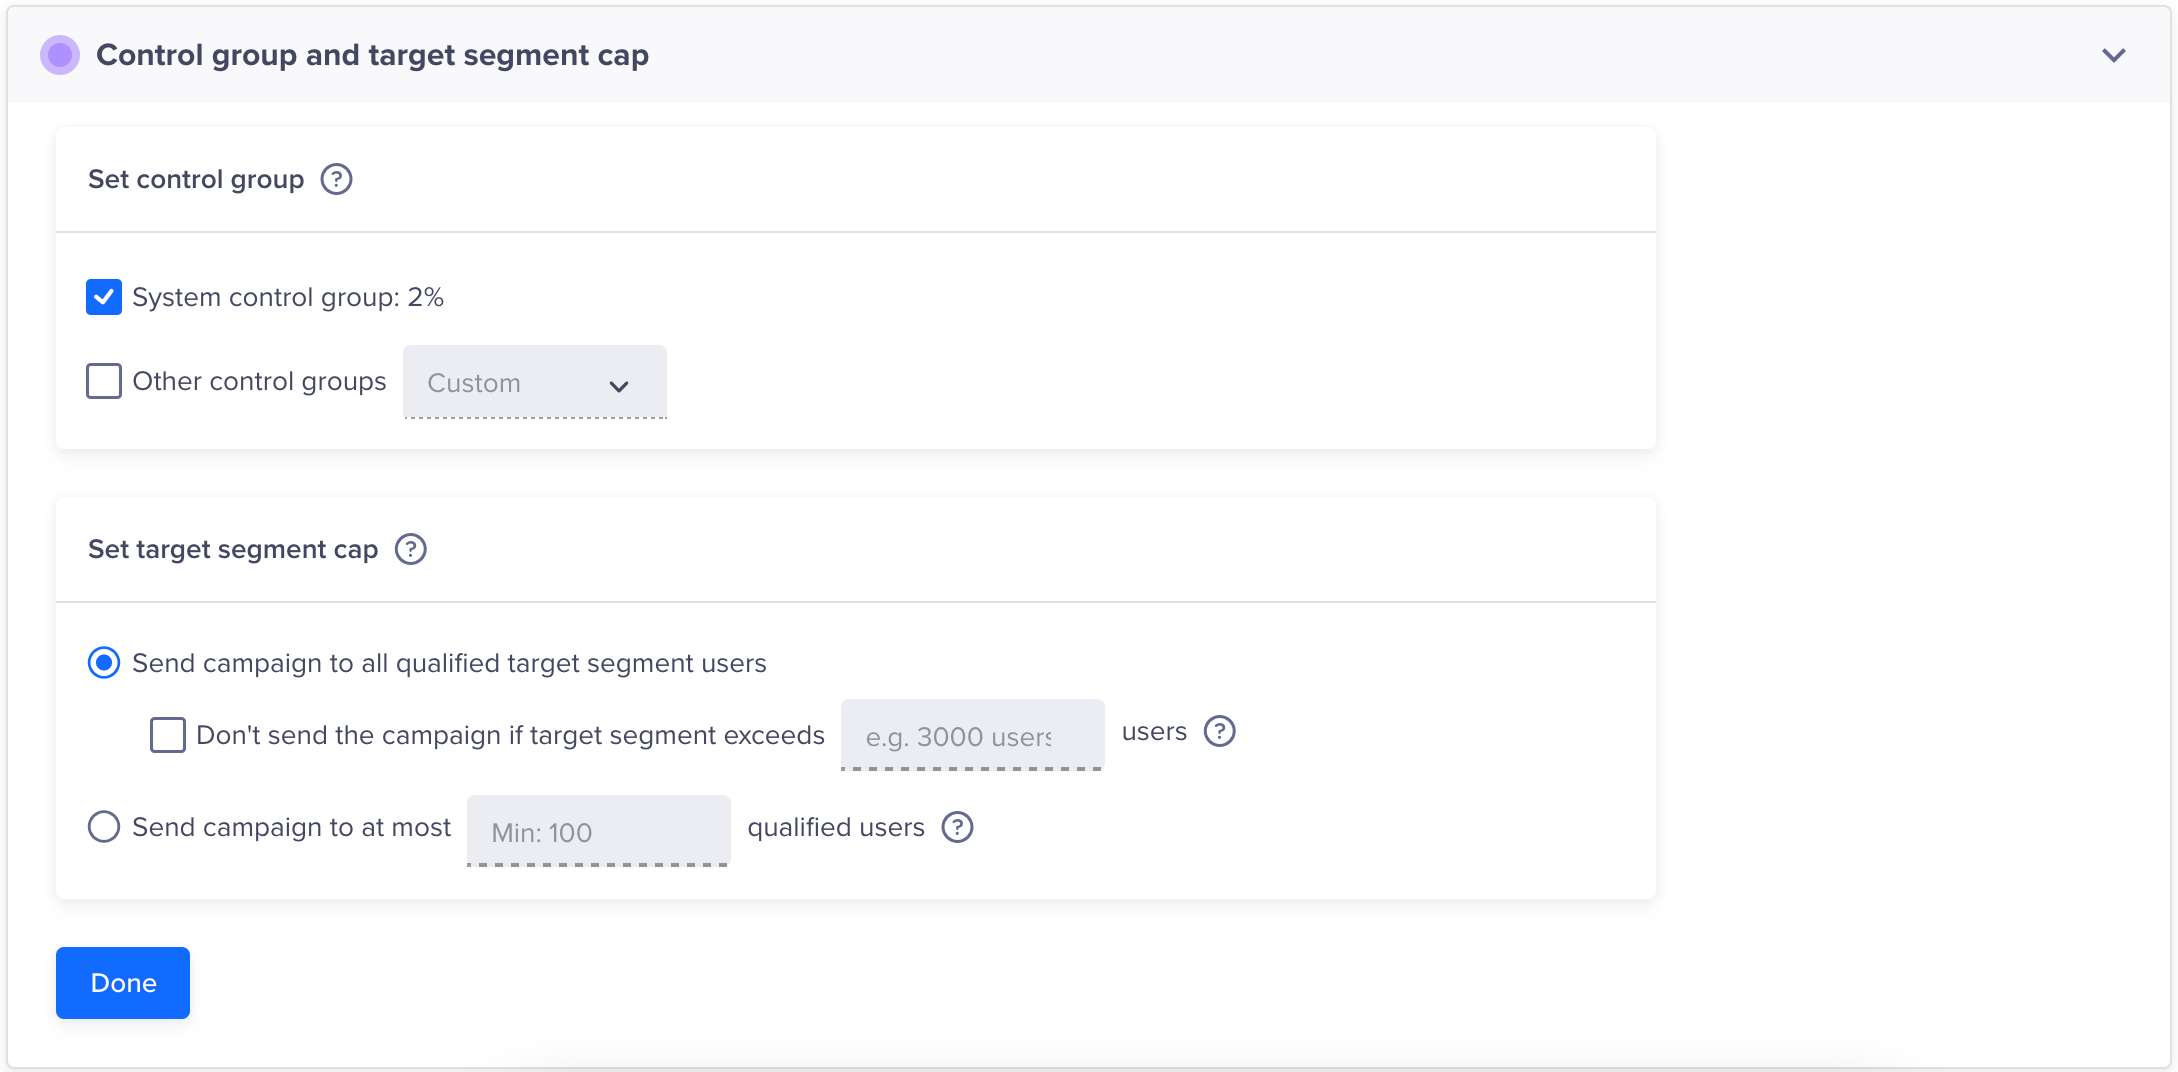
Targeting Cap
In certain cases, you may need to send a message to only a subset of the qualifying audience (Target Reach) for a campaign or avoid sending it if the number of qualified users exceeds the specified number.
A relevant use case is a limited offer where you want to send a fixed number of coupon codes you want to distribute. If the total reach for your campaign exceeds the number of coupon codes you can distribute, you can limit the number of users who will receive the message to exactly the number of coupons you want to distribute.
Campaign LimitEnsure that you set up a limit of 100 or more, regardless of the qualified user segment size. If the limit specified is less than 100, an error occurs.
WhatsApp Message Types
You can create the following types of messages in your WhatsApp campaign:
- Single Message
- A/B Test
- Split Delivery
- By User Property
Single Message
In this campaign, a standard message is sent to all users who qualify as your target audience. This message type is best for broadcast messages and for applications that do not vary campaign communication based on differences between properties such as language, geography, or any other user properties.
A/B Testing
A/B testing helps you understand what type of message copy works best to get clicks from users.
You can test up to three message variants on a test group.
WhatsApp A/B Tests
Winning VariantThe variant that gets the most views is declared the winning variant and is automatically sent to the rest of your target audience.
When you create multiple variants (max: 3 variants) for a campaign, you can also auto-copy the content present in the current variant. Further, let us understand A/B Test delivery for Live user segments.
A/B Test Delivery To Live User Segments
With campaigns sent to live user segments (triggered campaigns), messages are delivered immediately when a user’s activity matches the criteria you have selected. For example, you can send a message when the user has completed a booking or purchase. Since it is not possible to determine the reach of triggered campaigns upfront, you need to decide how many total messages to send for A/B testing before a winner is declared.
Triggered Campaign ExampleIf you select 500 users as your test audience, we will alternate delivery of Variant A and Variant B as users qualify for the campaign. After a total of messages are sent (Variant A – 250 and Variant B – 250), we then decide the winner based on the number of views and continue only with this winning message for the duration of the campaign.
Deciding on a test audience for A/B testing triggered campaigns requires some estimation. We recommend you check the total messages that were sent for similar triggered campaigns in the past to get a sense of how many users may qualify. If you select a test audience that is too small such as 25 users, you will get a statistically insignificant sample. If your test group size exceeds the total number of users who ultimately qualify for that campaign, then no winner will be declared and each message variant will be alternatively delivered for the duration of the campaign.
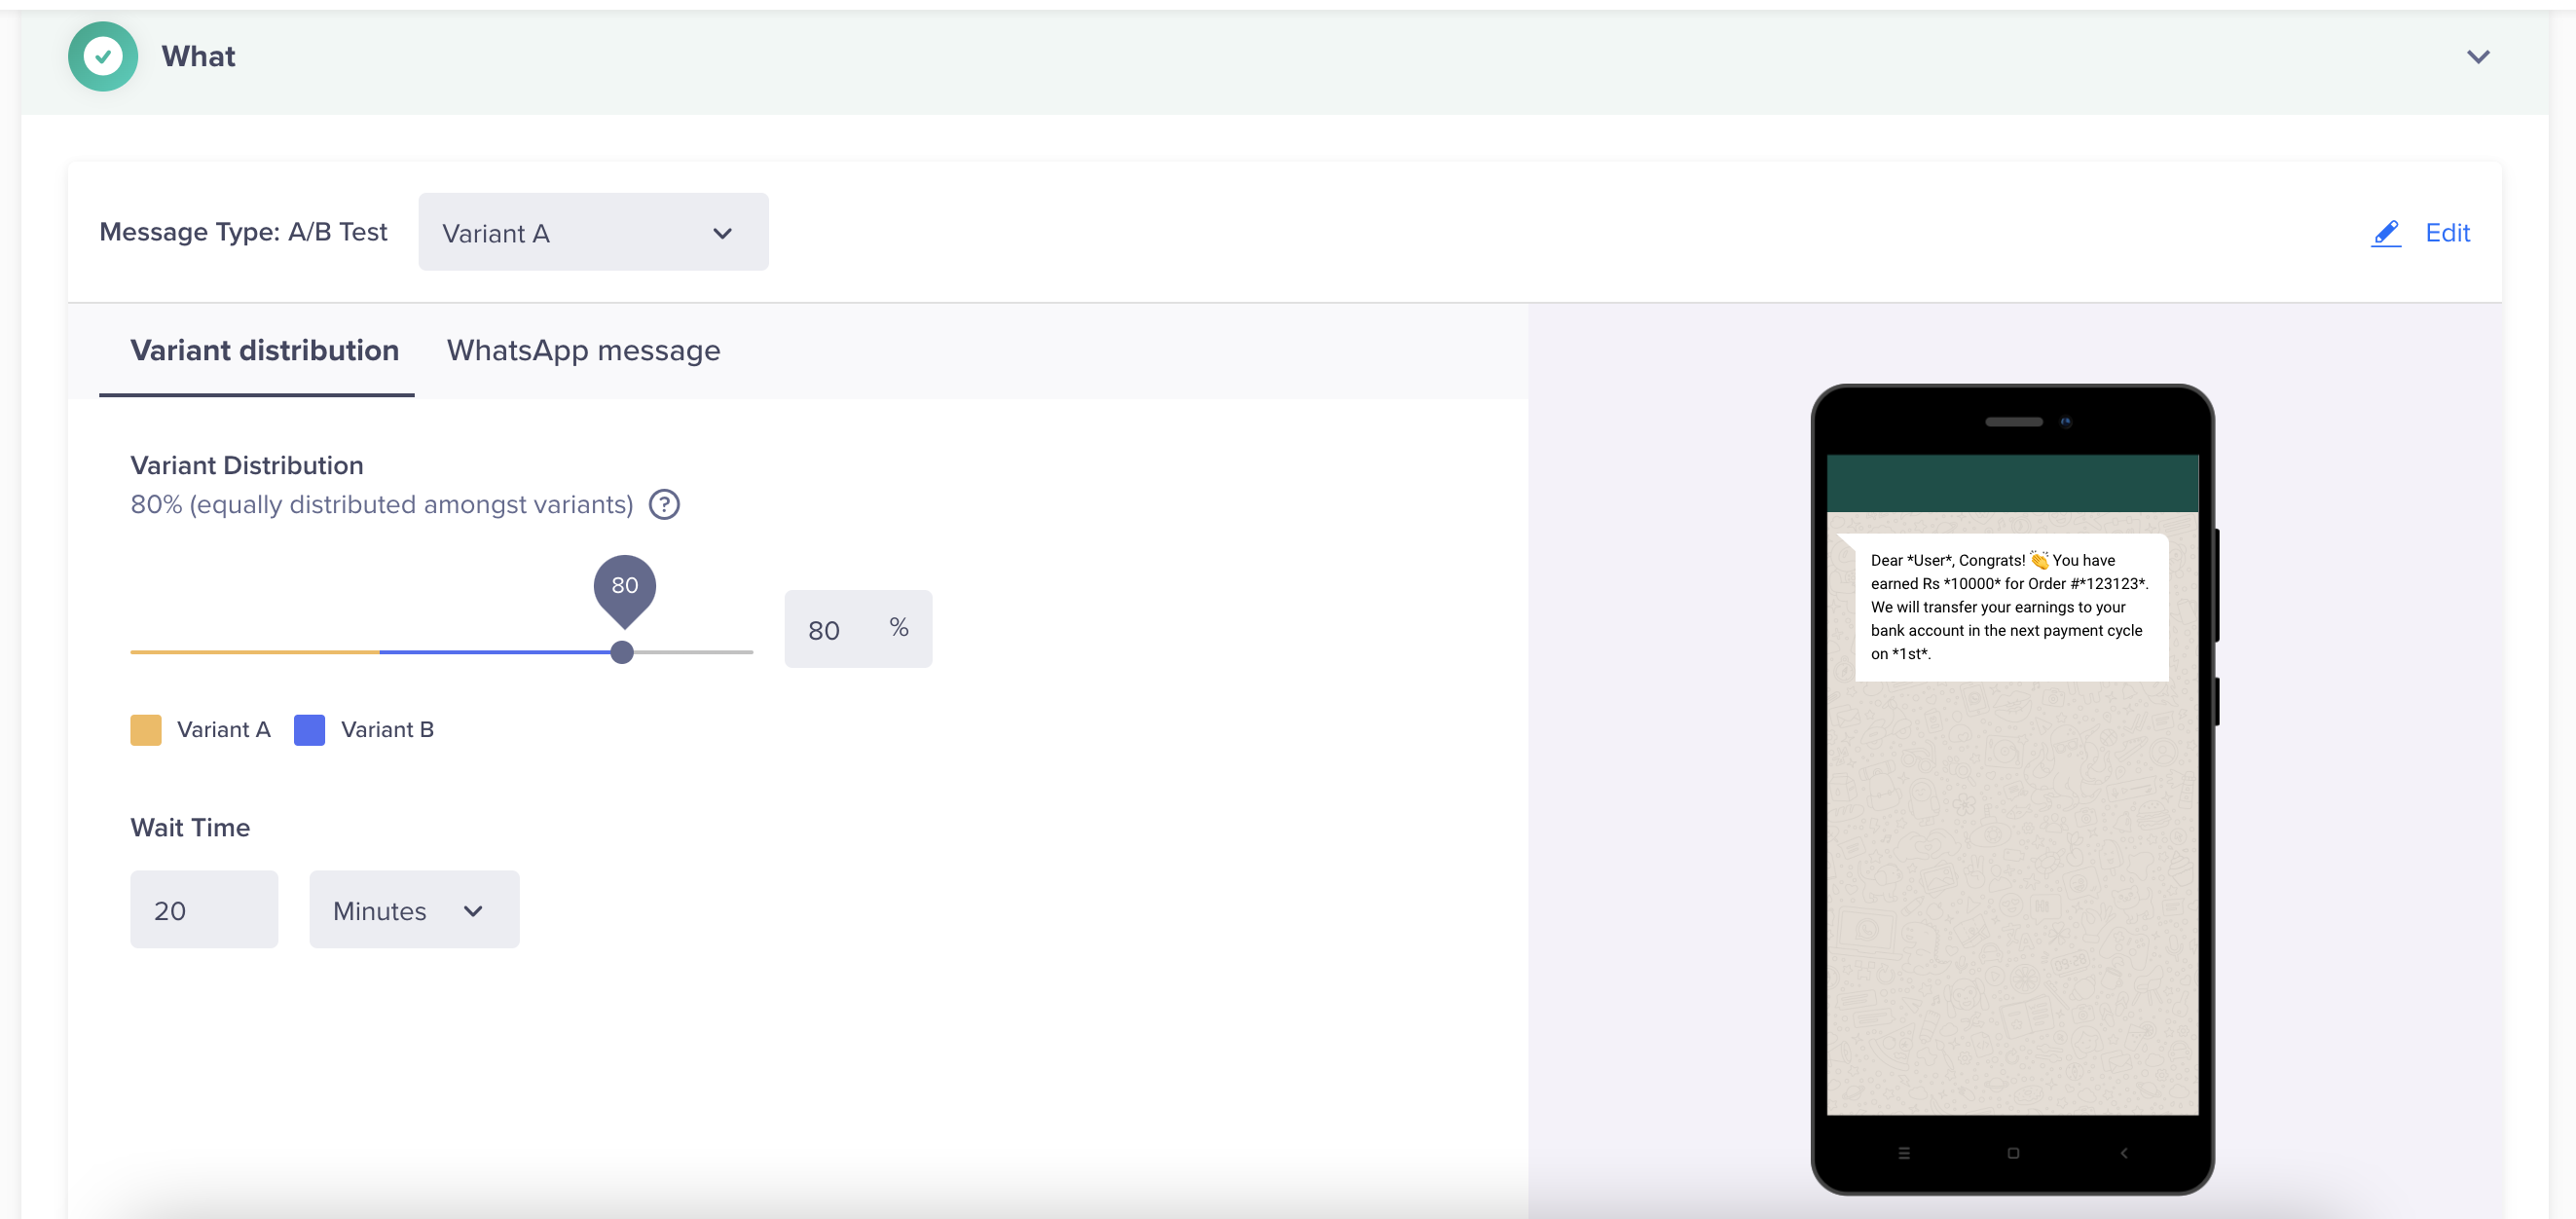
Split Delivery
With split delivery, you can decide what percentage of your audience receives each message variant for the duration of the campaign.

WhatsApp Split Delivery
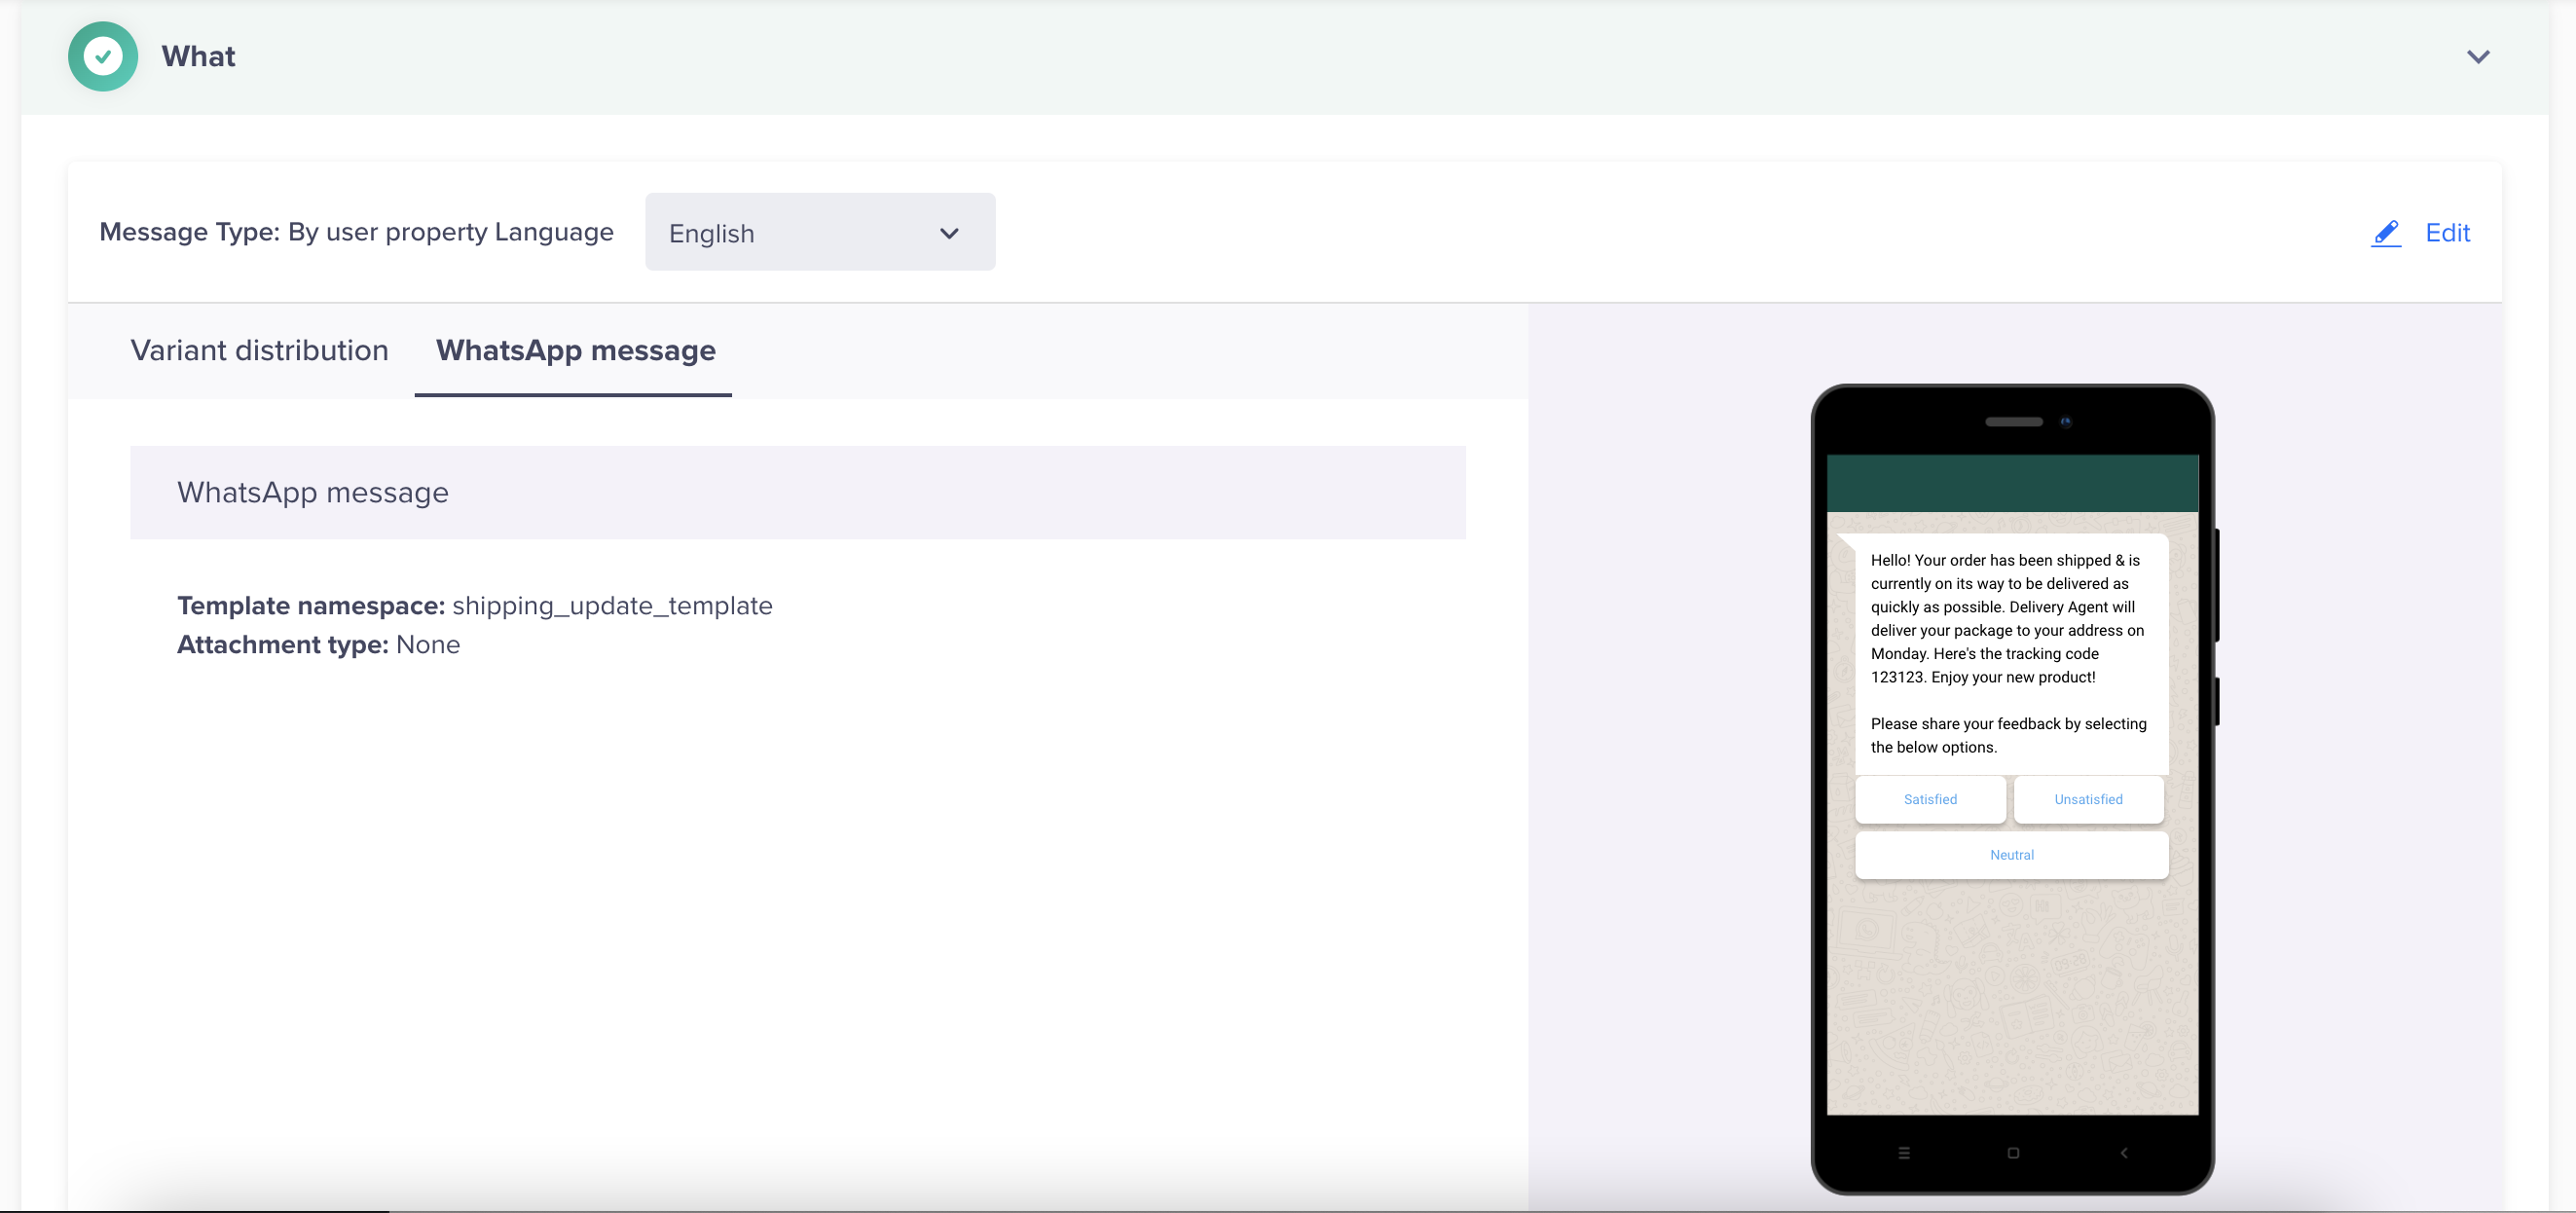
By User Property
If you would like to send different message variants to your target audience based on the user properties they possess, this campaign type is your best bet. A good example would be when you want to send a localized update to people based on their preferred language.
Similar to creating A/B test variants, you can use the +Variant button to add multiple variants based on a user property value. In the example below, we have used the Language user property so users with different language preferences will receive corresponding copies of the campaign in their preferred language (English, Hindi, etc.)
Targetting Based on User Property
Define the Message Content
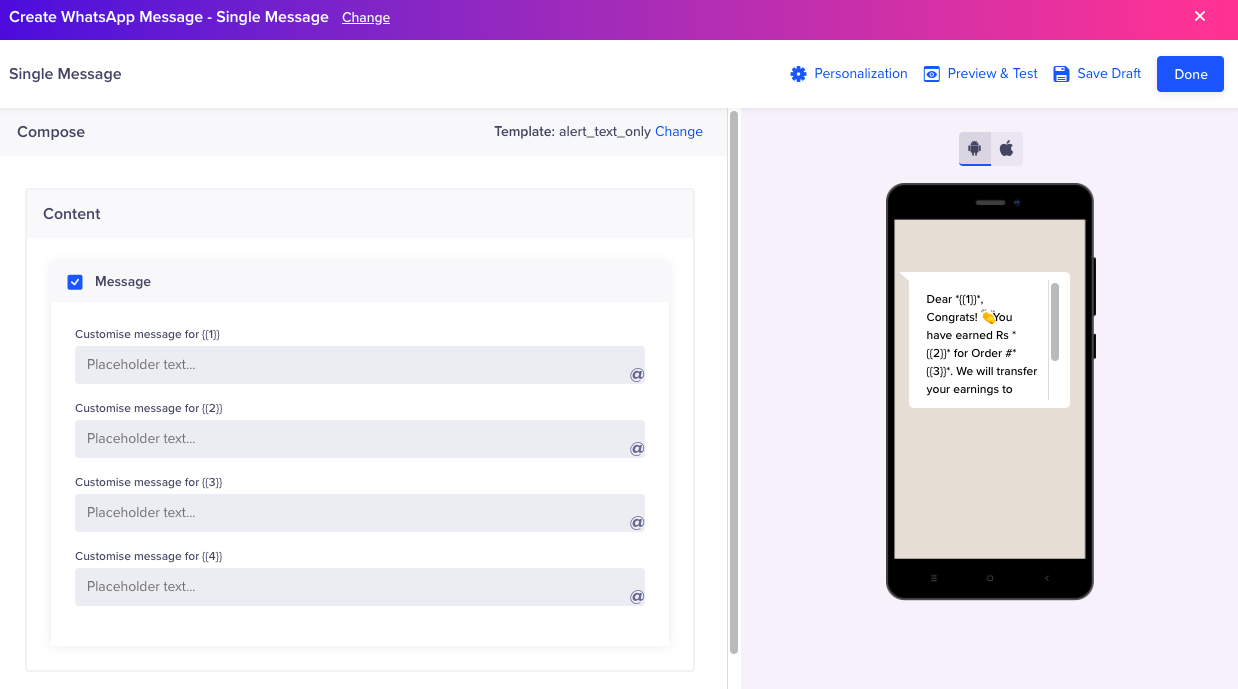
Now, you need to set up the What section where you have to define the content for the WhatsApp campaign Click Go To Editor to create your message.
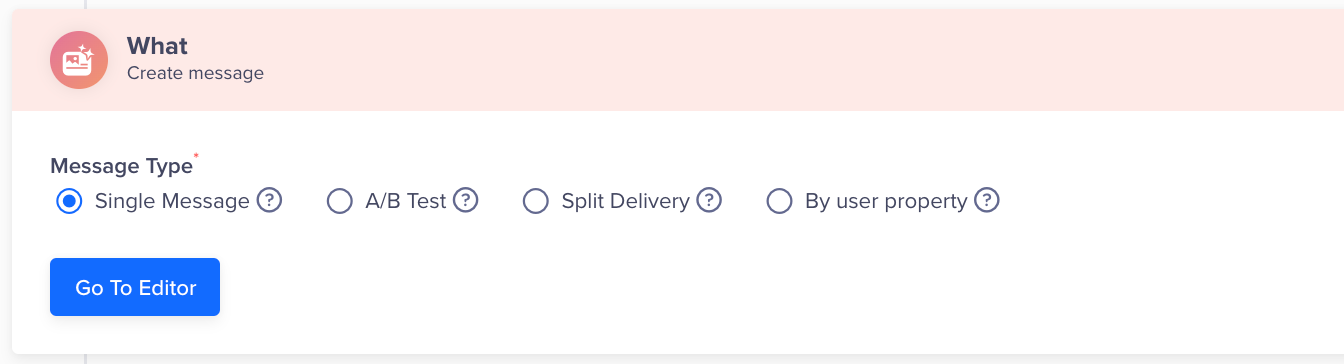
Define Message Type
WhatsApp Editor
Select from the approved templates.
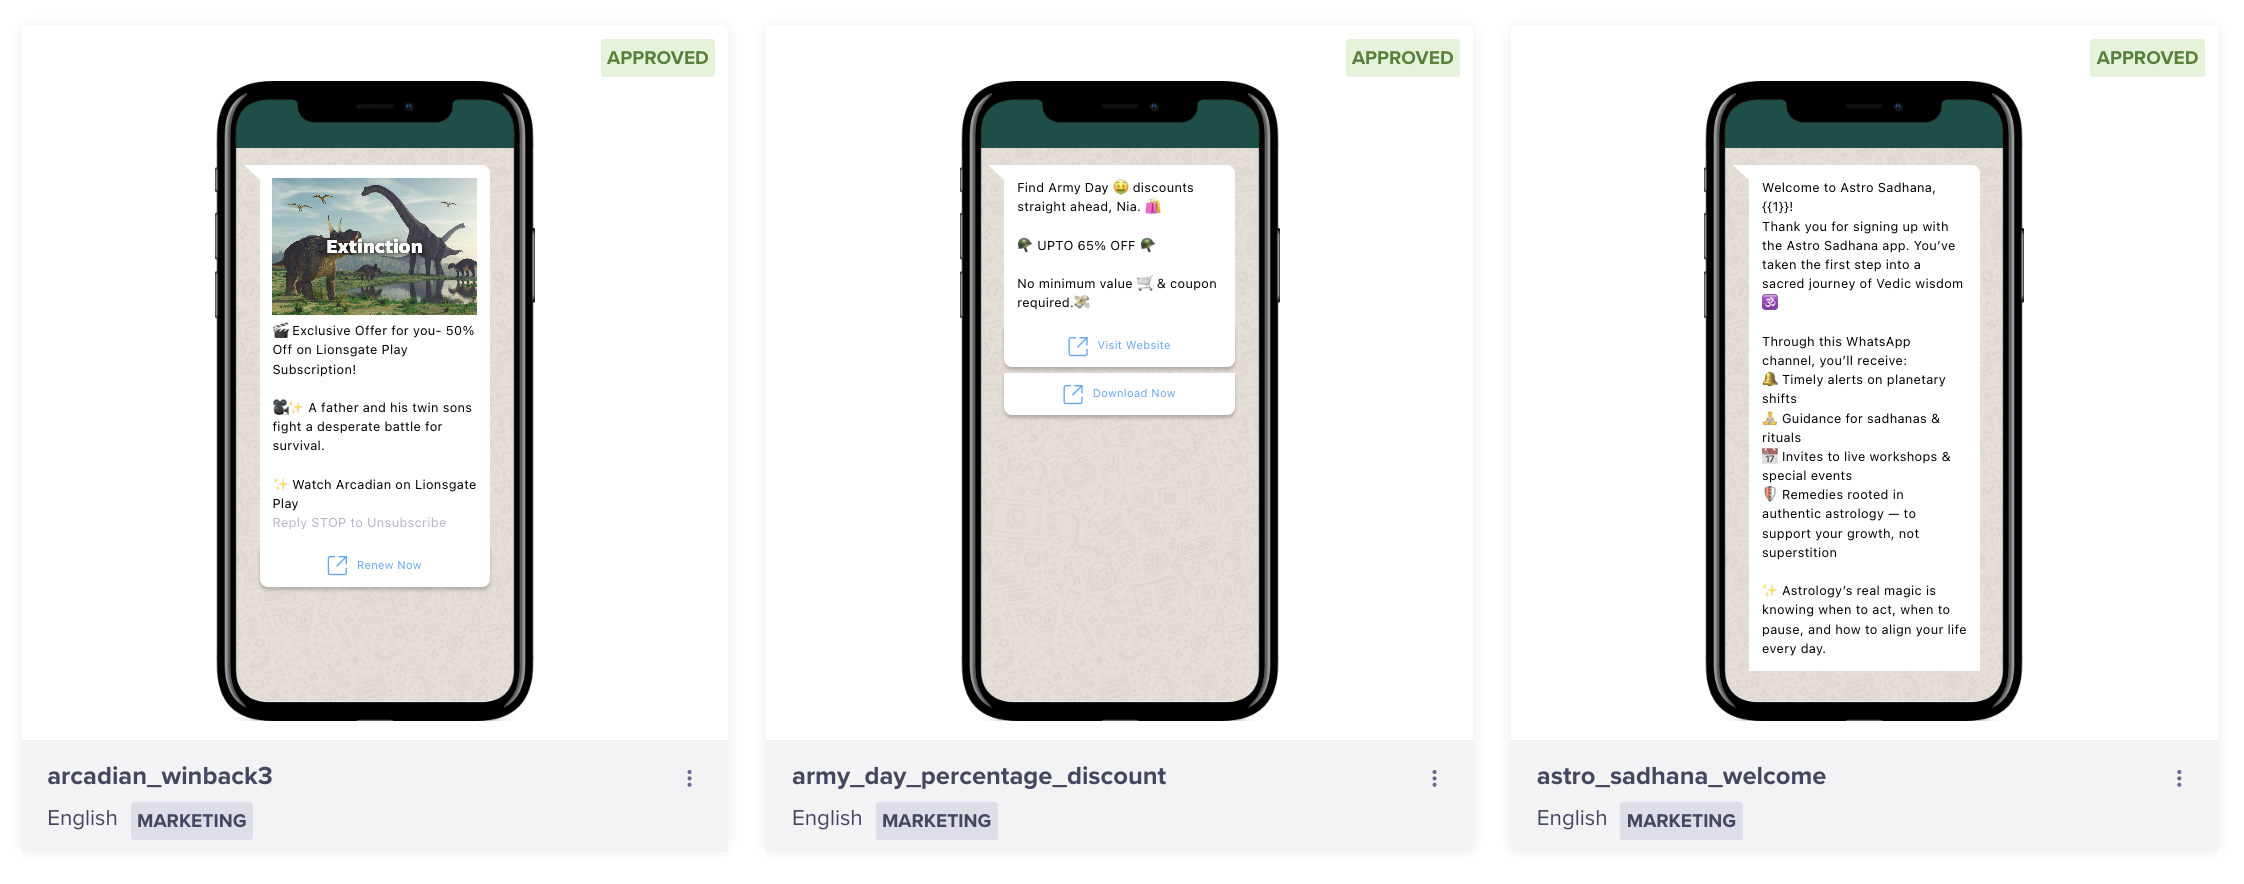
Select a Template
Fill in the details and click Done. For information about using WhatsApp editor, refer to WhatsApp editor.
Personalizing Message
Custom Key-Value Pair
Marketers utilizing Generic integration can leverage custom Key-Value pairs to transmit additional data within the message payload.
Generic Integration SupportThe Custom Key-Value feature support is currently supported for Generic WhatsApp Integrations.
Preview & Test
Once you are all done setting up the content of your campaign in the What section, you can send a test notification to any CleverTap user profile you have marked as a Test profile.
Click the Preview & Test button from the message editor to test a message.
Import Templates
Template Import Limitations for External ProvidersImporting templates is exclusive to CleverTap BSP, and for other providers, you must recreate templates separately within their interfaces.
You can also import templates when creating a new message.
- Click Go To Editor to create your message.
- From the message editor, click Import Templates. A window for Import Templates displays.
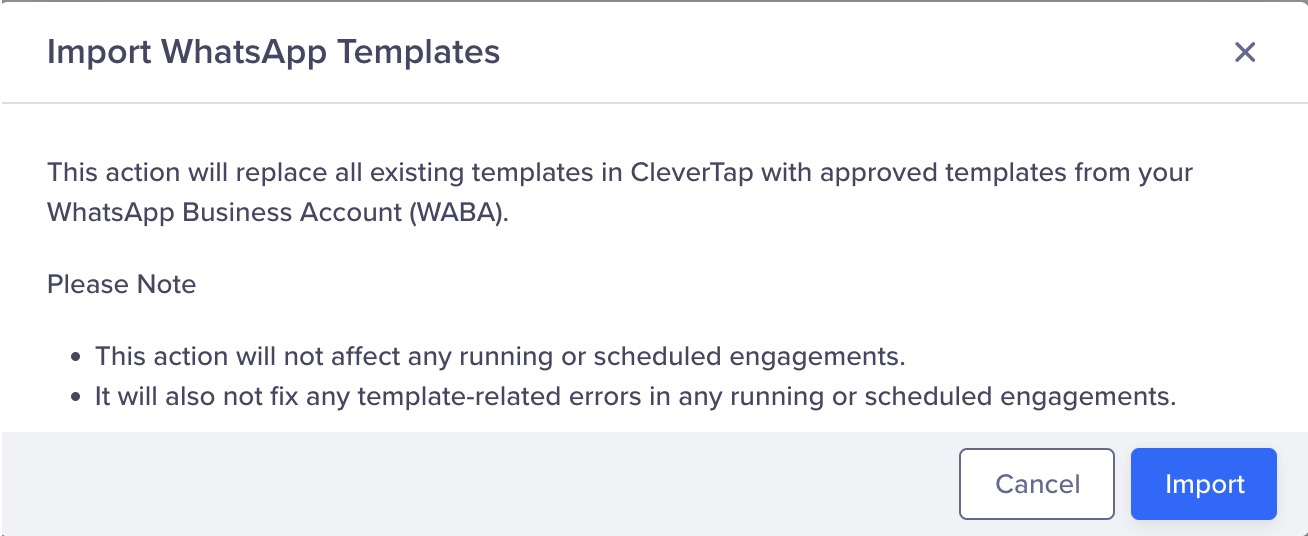
Add or Replace Templates
- Click Import to replace all the templates on your CleverTap dashboard.
- Click Continue to replace templates. The CleverTap dashboard shows the new templates. Your previous templates are mailed to your email account.
Template Import Impact on Failing WhatsApp CampaignsImporting templates will not automatically resolve errors or issues related to the existing WhatsApp campaigns or journeys. These campaigns and journeys will continue to fail until you manually update the imported template in the affected campaign's What section.
To address campaign failures resulting from template-related errors, please follow the below steps:
- Identify the specific campaign or journey that is encountering the error.
- Access the What section of the campaign or the specific journey node.
- Edit the campaign or journey and select the specific imported templates.
- Save and publish the changes, and check that the campaigns and journeys use the updated templates.
Quick Reply Button with Custom Payload
CleverTap's Quick Reply feature lets you easily collect user information, track responses, and trigger chat workflows using custom payloads.
Key-Value Pair
The custom payload Marketers utilizing Generic integration can include custom attributes with the Quick Reply button in the Quick Reply templates when creating campaigns. These custom attributes are not visible to the end user. The purpose of these attributes is to track end-user responses when interacting with specific Quick Reply buttons.
To send a leverage custom payload from the Quick Reply button, you can utilize the WhatsApp Editor provided by CleverTap. When users reply Key-Value pairs to the Quick Reply, the custom payloads are returned along with their responses. These custom payloads can trigger chat workflows and enable further actions based on the user's reply.
To send a custom payload from the WhatsApp Editor, select a Quick Reply template and then select Add Custom Payload.
Add a custom payload. You can also personalize transmit additional data within the custom message payload.
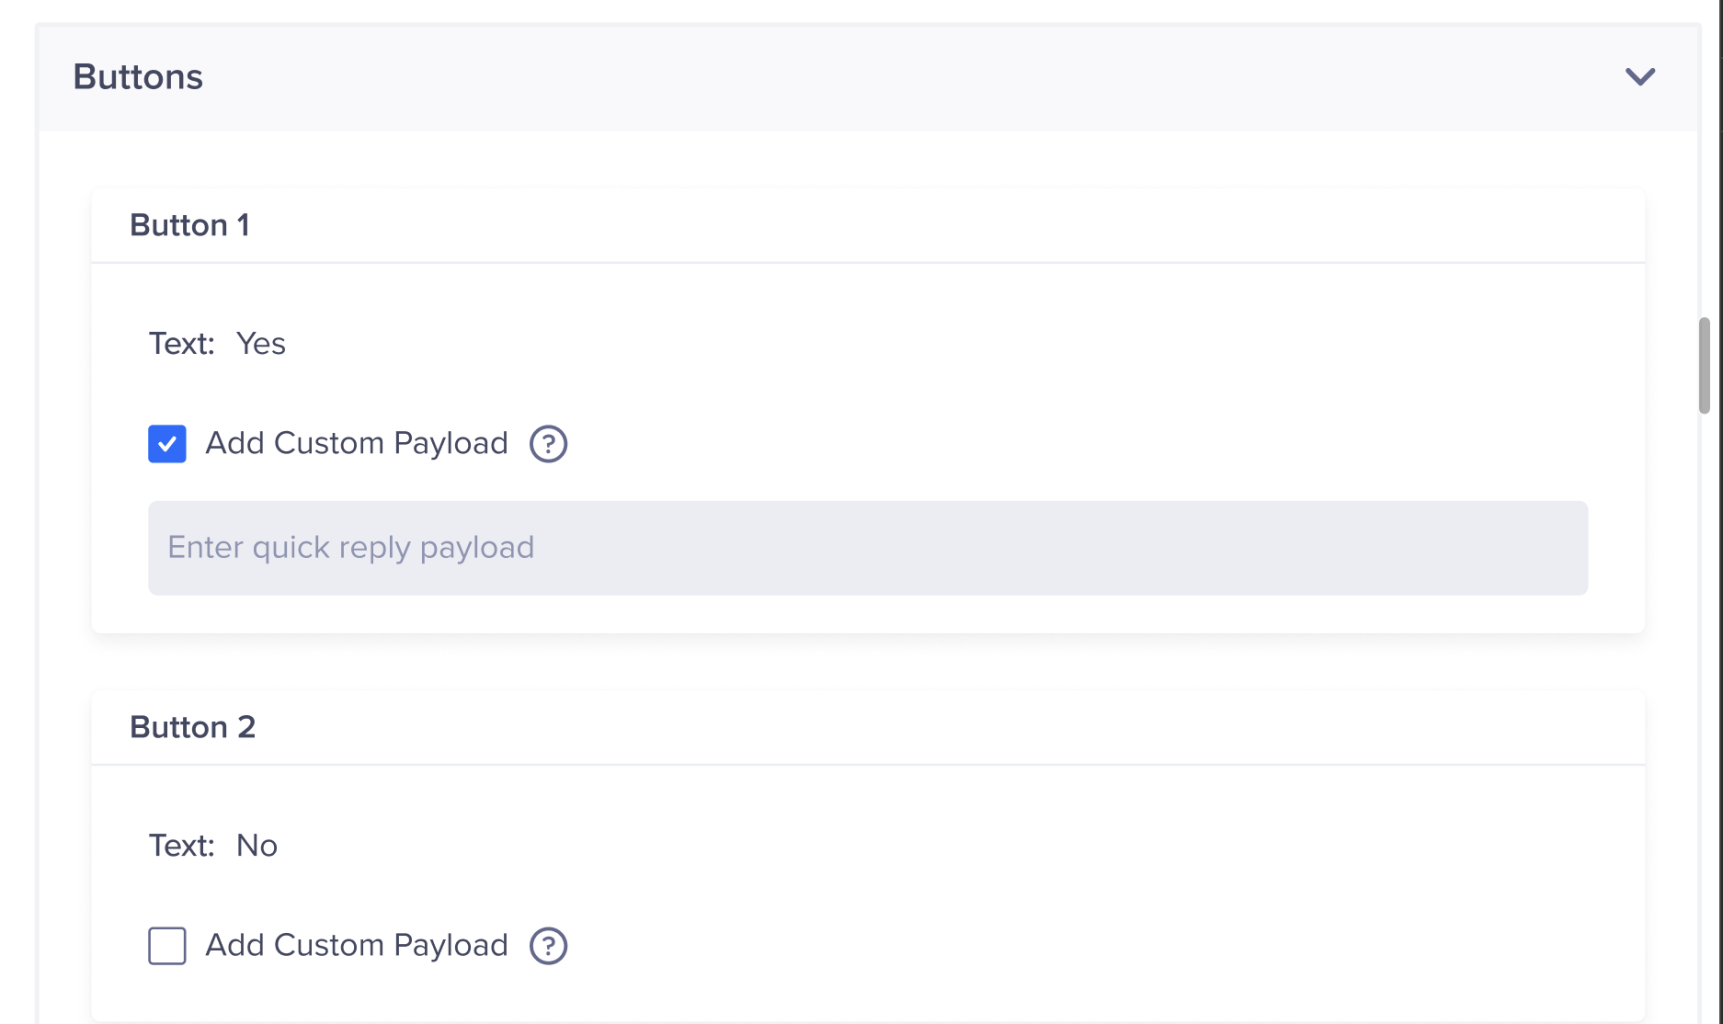
Add a Custom Payload
Character Limit for Custom Payload🚧 Generic Integration Support
Check that your custom payload is under 128 characters to ensure deliverability. Although CleverTap does not restrict characters in a custom payload, WhatsApp limits it to 128 characters.
For example, a bus service called ACME operates within a city. ACME wants to make it easy for regular passengers to confirm their daily bus rides. To do this, ACME sends reminder notifications in the evening and morning, matching each user's typical travel schedule.
When a passenger receives the notification, they see a Confirm Ride button. This button enables them to quickly respond and indicate their intention to travel with the bus service immediately. Now, depending on how ACME sets up its system, there are two possible scenarios:
- Without Custom Payload: If ACME does not use a custom payload when a user clicks on the Confirm Ride button, the user's response is sent directly to ACME's WhatsApp phone number. However, it is unclear to which specific notification the user is responding. For example, ACME does not know whether the user is confirming their ride for today's notification or a previous one. In this case, ACME needs more information, such as the ride details and route, to generate a payment link and complete the transaction.
- With The Custom Payload - When ACME sends the WhatsApp notification, it includes personalized information about the user's route and timing. There is also a Confirm Ride button with a unique identifier attached as a custom payload. This allows ACME to distinguish between different notifications and campaigns. The response and custom payload are captured when the user clicks the Confirm Ride button. This means ACME knows the exact notification that received a user response. ACME can now directly share the payment link with the user to complete the transaction.
The custom payload Key-Value feature simplifies the process for ACME and its passengers. It eliminates the need for additional confirmation workflows and ensures users receive the correct payment link for their intended ride. Ultimately, this helps ACME provide its customers with a smoother and more efficient experience.
Track Clicks in WhatsApp Campaigns
The WhatsApp click tracking feature in Meta Dashboard allows you to track the clicks on the CTA (Call To Action) included in your WhatsApp messages. By enabling click tracking, you can gain valuable insights into user engagement and optimize the performance of your WhatsApp campaigns.
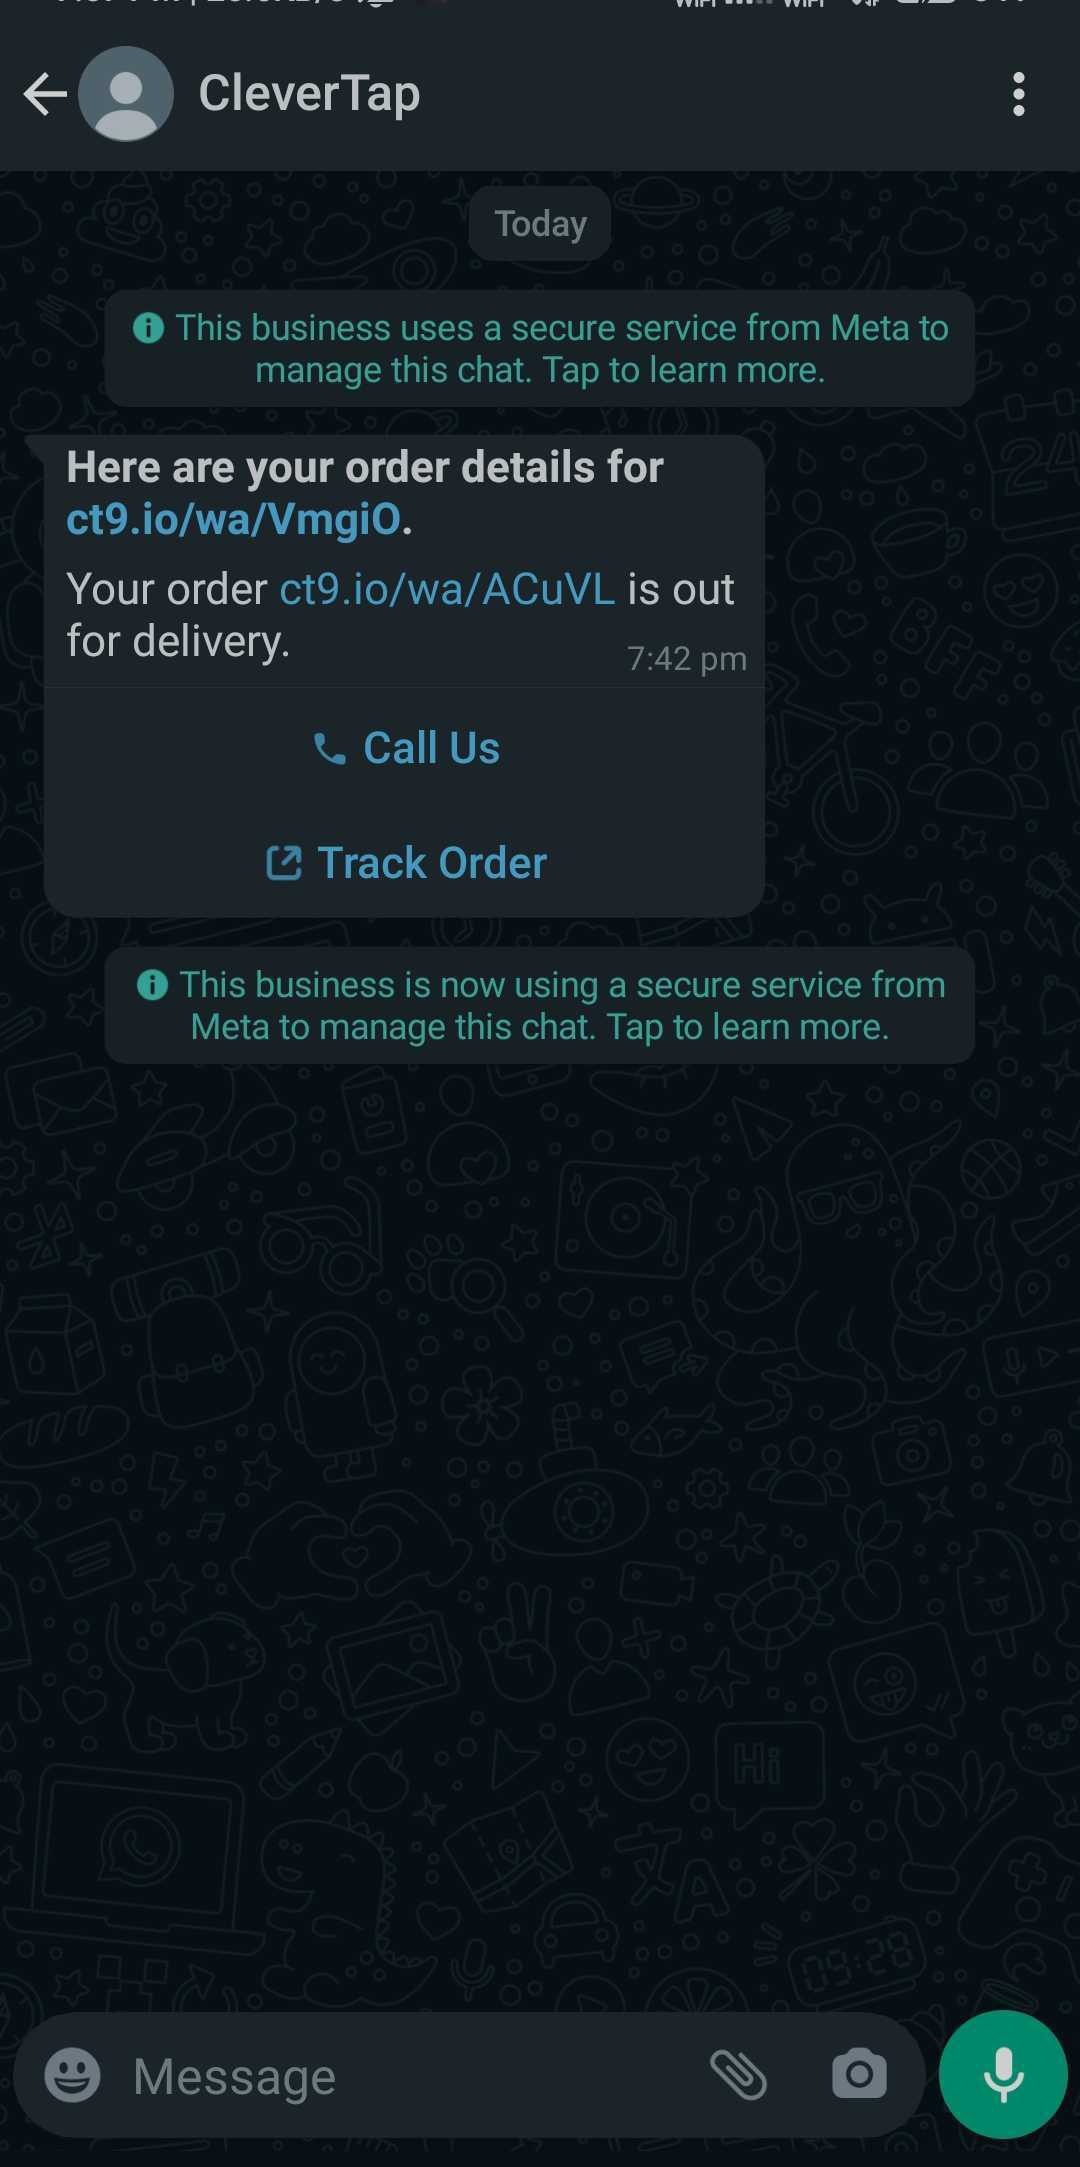
WhatsApp Click Tracking Message
Branded Domain (Optional)
A branded domain is a custom domain name that replaces CleverTap’s default short URL domains (like ct3.io) in your messages. It allows you to display your own company-branded link, improving brand visibility and customer trust.
When Track Links is enabled, CleverTap shortens your URLs using a default regional domain. To maintain brand identity and improve user trust, you can configure a branded domain for these links. Once configured, all shortened links in your WhatsApp messages will use your custom domain instead of the default.
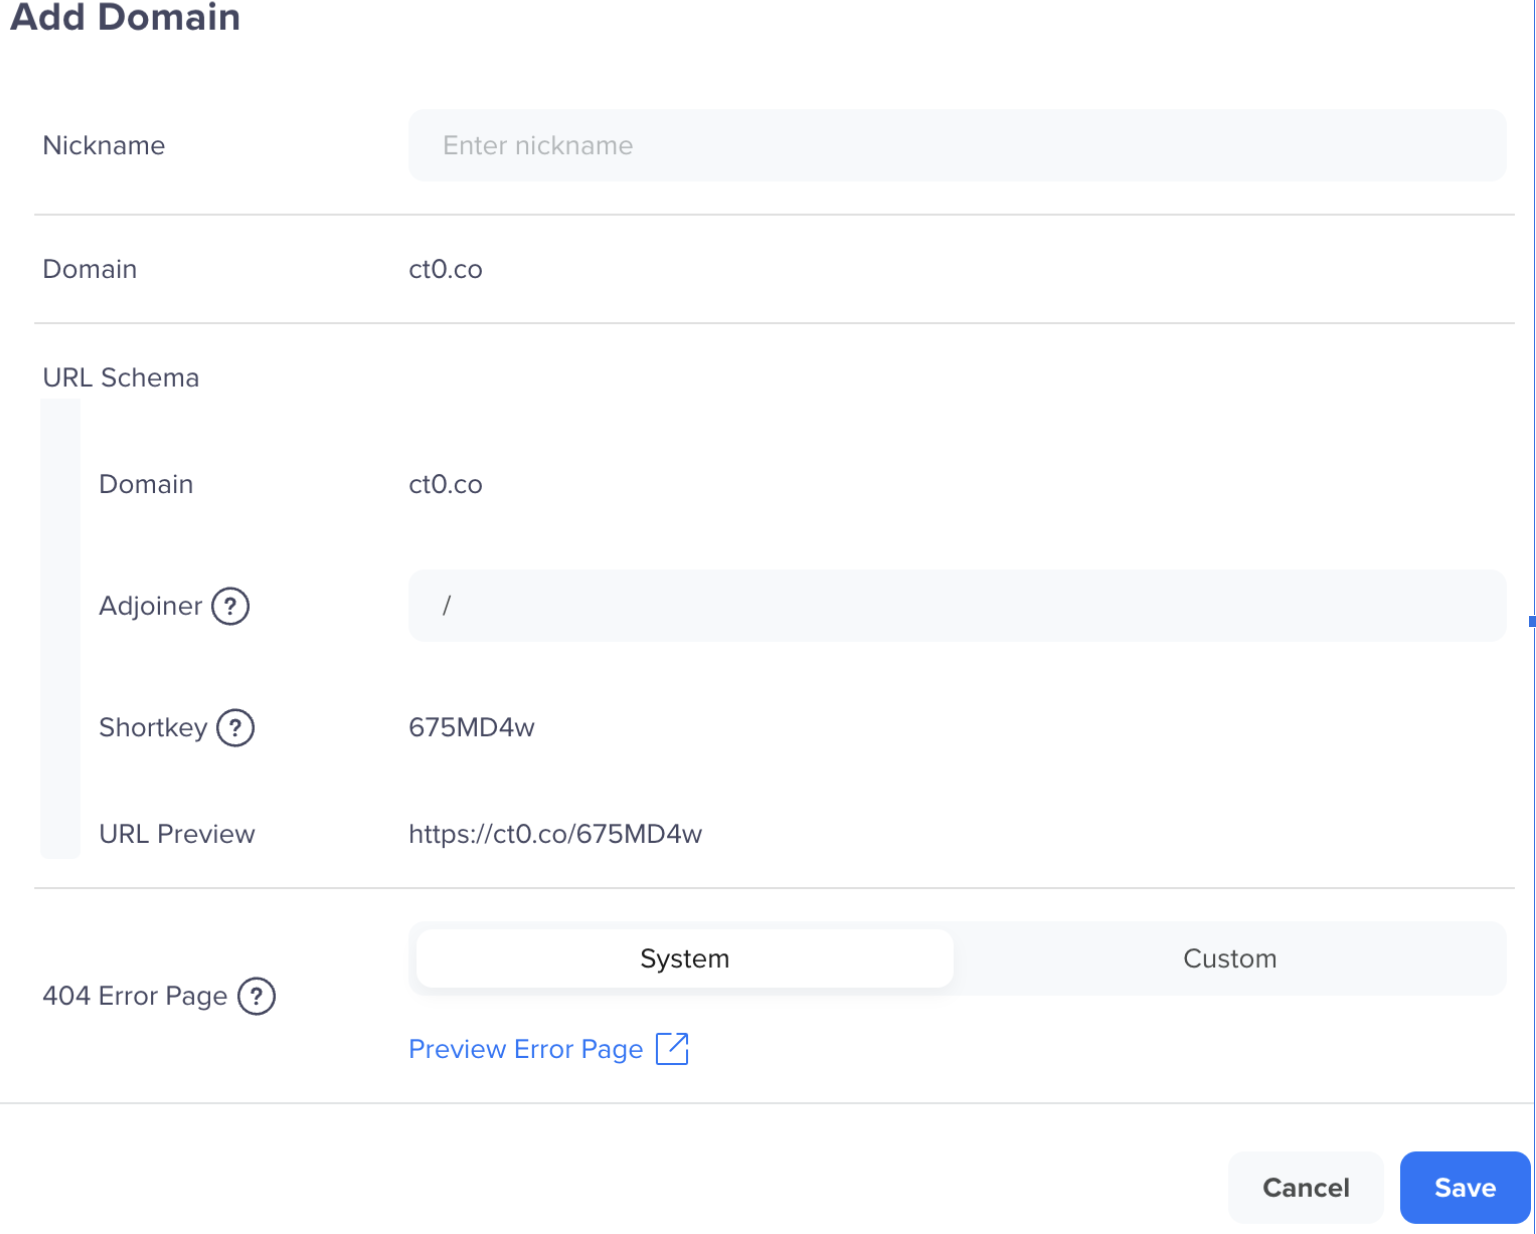
System Domain Creation
To set up your branded domain, follow the steps in the Branded Domain documentation.
NoteIf you send messages to Indian users, ensure your branded domain is also whitelisted on your DLT platform to comply with TRAI regulations.
Key Points to Remember
Let us understand how to track a click for various template fields in WhatsApp campaigns.
Headers
- Click tracking support is available only for text headers.
- When using custom variables (for example, {{1}}) in text headers, the system automatically detects URLs in the input box and provides an option to enable click tracking.

Click Track Text Header
- Example: If you enter a URL such as https://example.com in a custom variable, the system will automatically detect it and give you the option to enable click tracking. The link will be wrapped (for example, https://ct1.io/8eytiry), capturing click information before redirecting the user to the actual URL.
Body
- When using custom variables (for example, {{1}}) in the message body, the system automatically detects URLs in the input box and provides an option to enable click tracking.
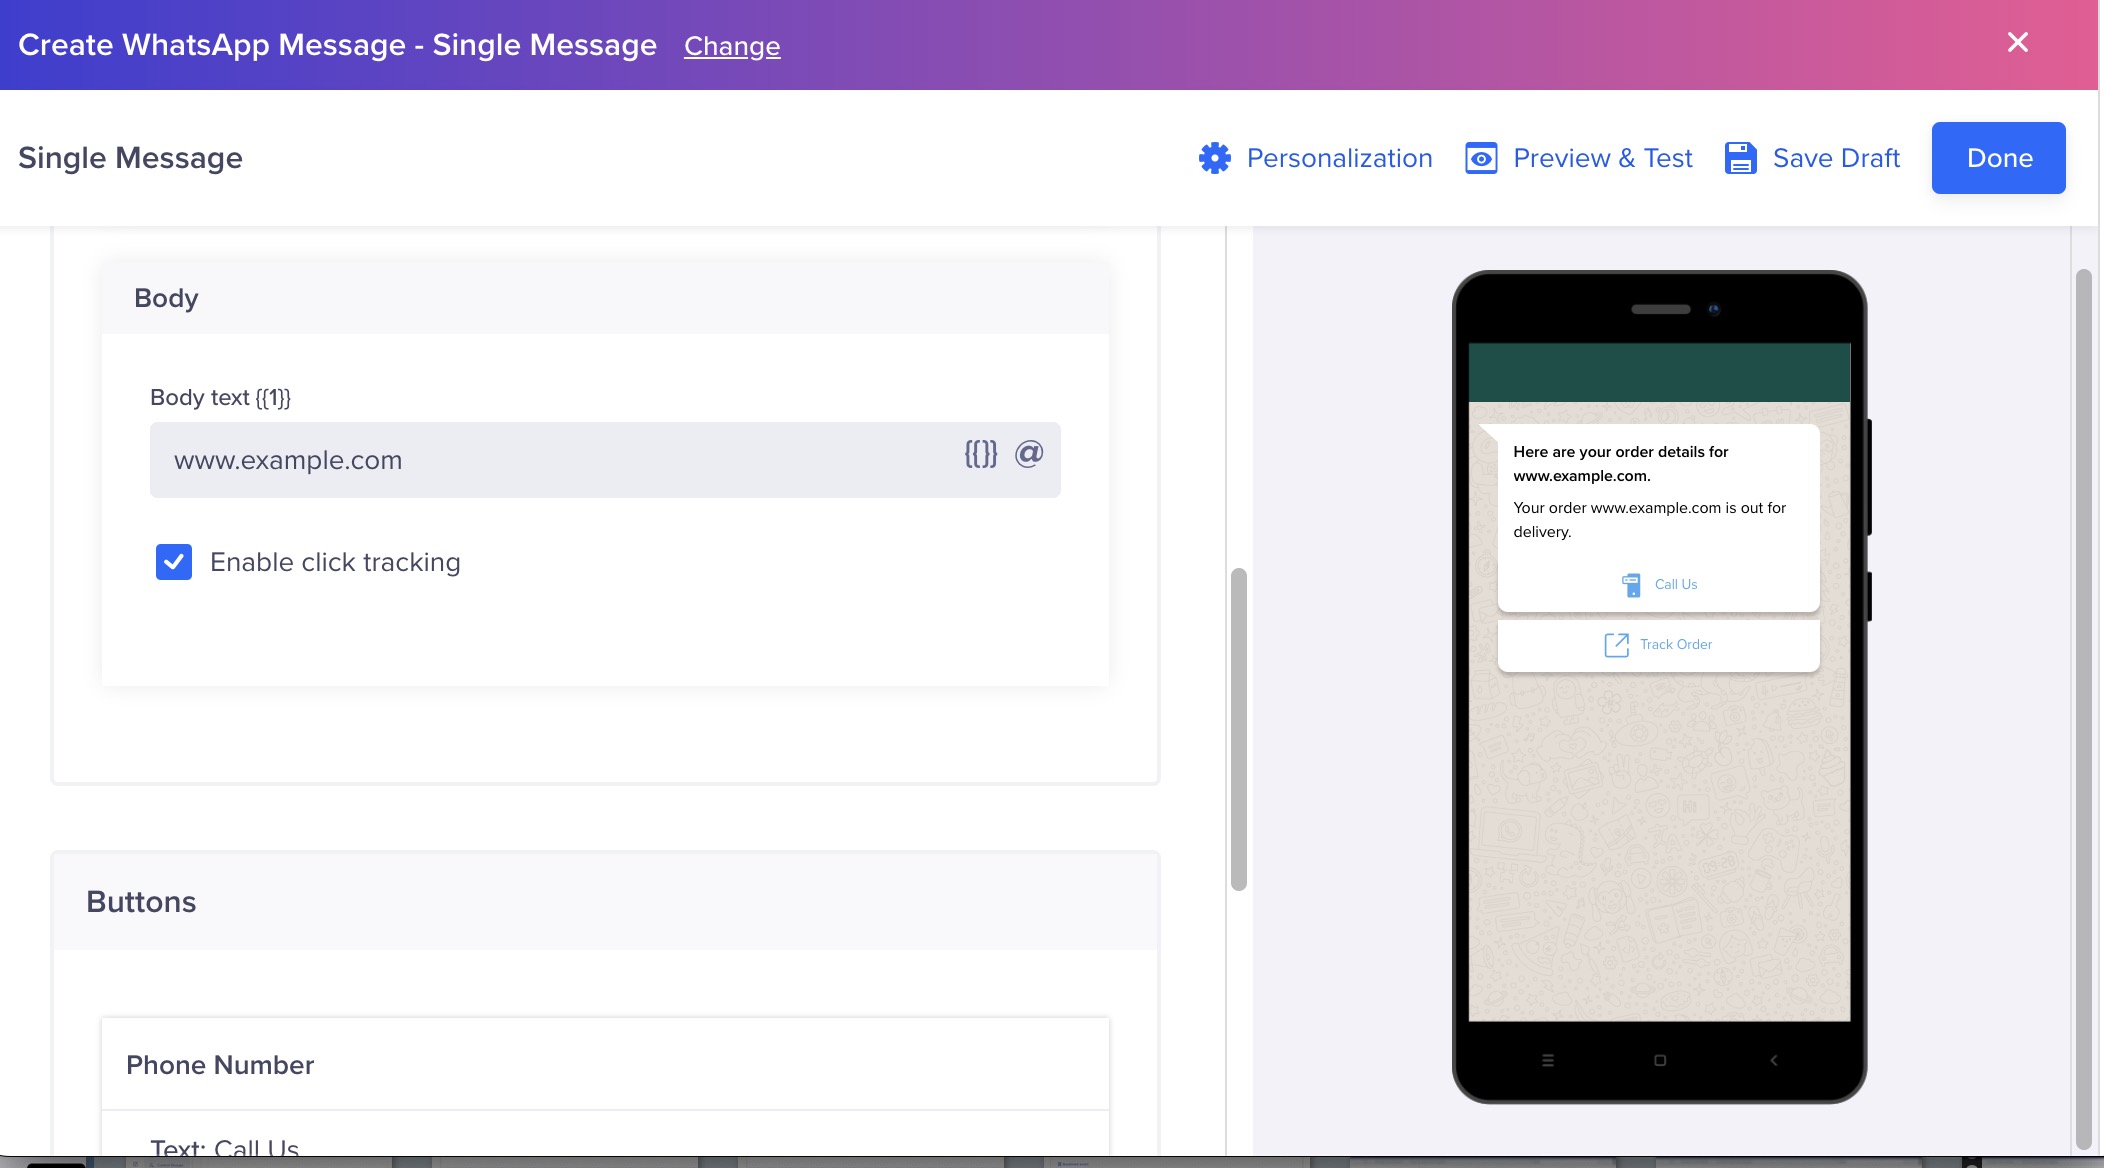
Click Track Message Body
- Example: If you include a URL like https://example.com in a custom variable input box, the system will detect it and allow you to enable click tracking. The link will be wrapped (for example, https://ct1.io/8eytiry), capturing click information before redirecting the user to the actual URL.
Footer
Click tracking is not currently supported for footers because footers cannot be dynamic.
CTAs
- To track clicks on CTAs within WhatsApp templates, you must create Dynamic URL type CTA templates with CleverTap tracking domains in the Generic WhatsApp Account Manager.
- Save these templates as CleverTap click tracking type templates in the CleverTap dashboard.
- Example: To track clicks on a Visit Website CTA, create a template with the CTA set as a CleverTap click tracking type. Enter the complete redirection URL in the What section during the campaign creation. The link will be wrapped (for example, https://ct1.io/8eytiry), capturing click information before redirecting the user to the actual URL.
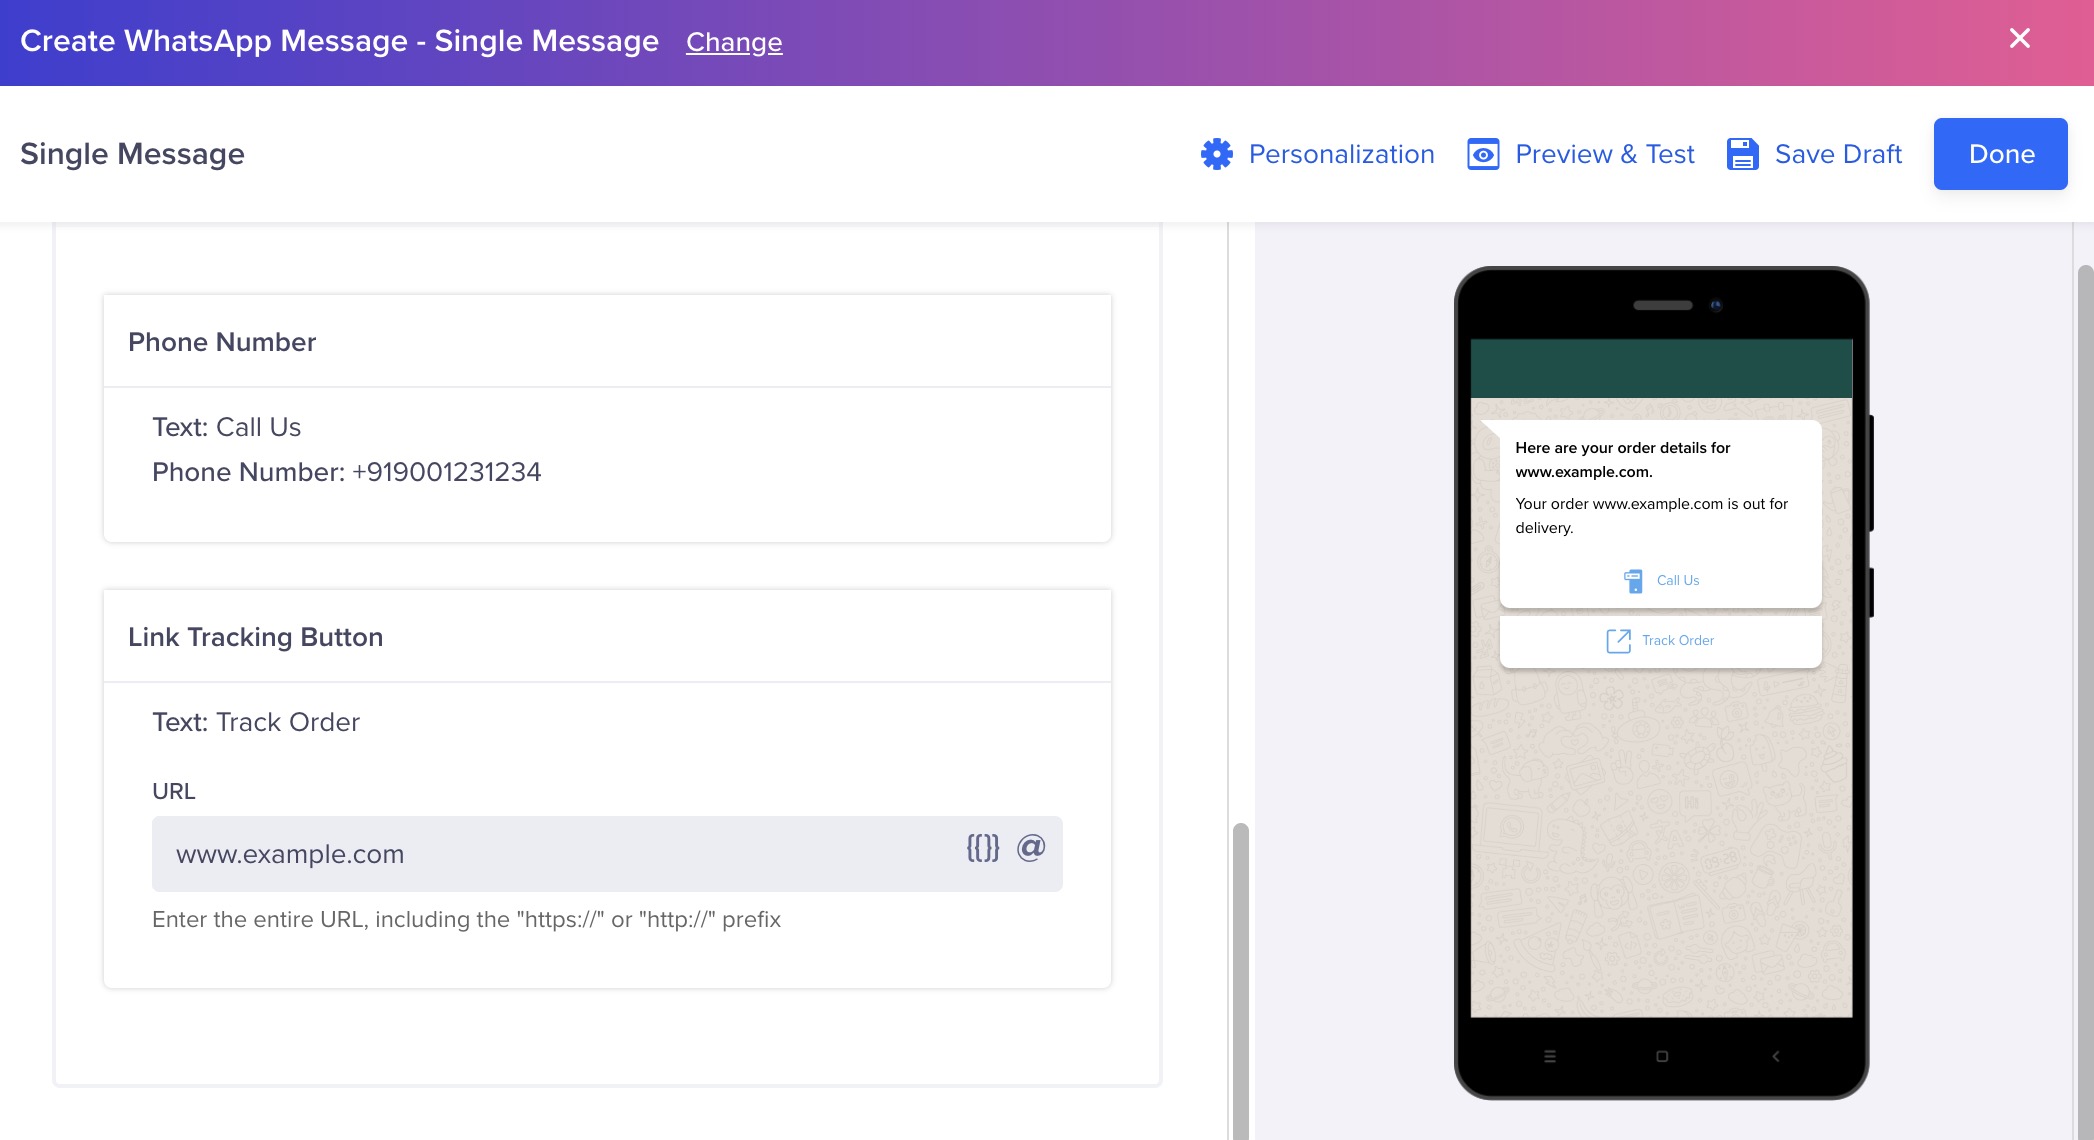
Click Track CTA
Define the Campaign Schedule
The WhatsApp message campaign needs to be scheduled to run actively for a specific timeline. To define the schedule for your WhatsApp campaign, you need to specify the Start date and time and End date and time under the When section. You also have the option to start a campaign immediately by selecting Now. Besides, you can also define a delay (by seconds, minutes, hours, or days) once a user qualifies for the target segment. Once you define the schedule and click on Done, the campaign will be triggered and terminated as per the defined timings.

Define The Campaign Schedule
Delivery preferences
In certain scenarios, you might not want a campaign to run actively on a particular day and time. In such cases, you can set the frequency for that particular campaign.
You can select the Do Not Disturb (DND) hours during which messages from this WhatsApp campaign are prevented from going out, either by discarding them or delaying delivery after DND hours complete, such as 9 PM to 9 AM.
If you want your campaign to adapt delivery times according to the user’s timezone, check the Timezone checkbox. For more information, refer to Delivery in User’s Timezone.
Additionally, you can check the Cut-Off checkbox to avoid sending messages to users after a set cut-off time. This is important for time-sensitive campaigns, for example, live events.
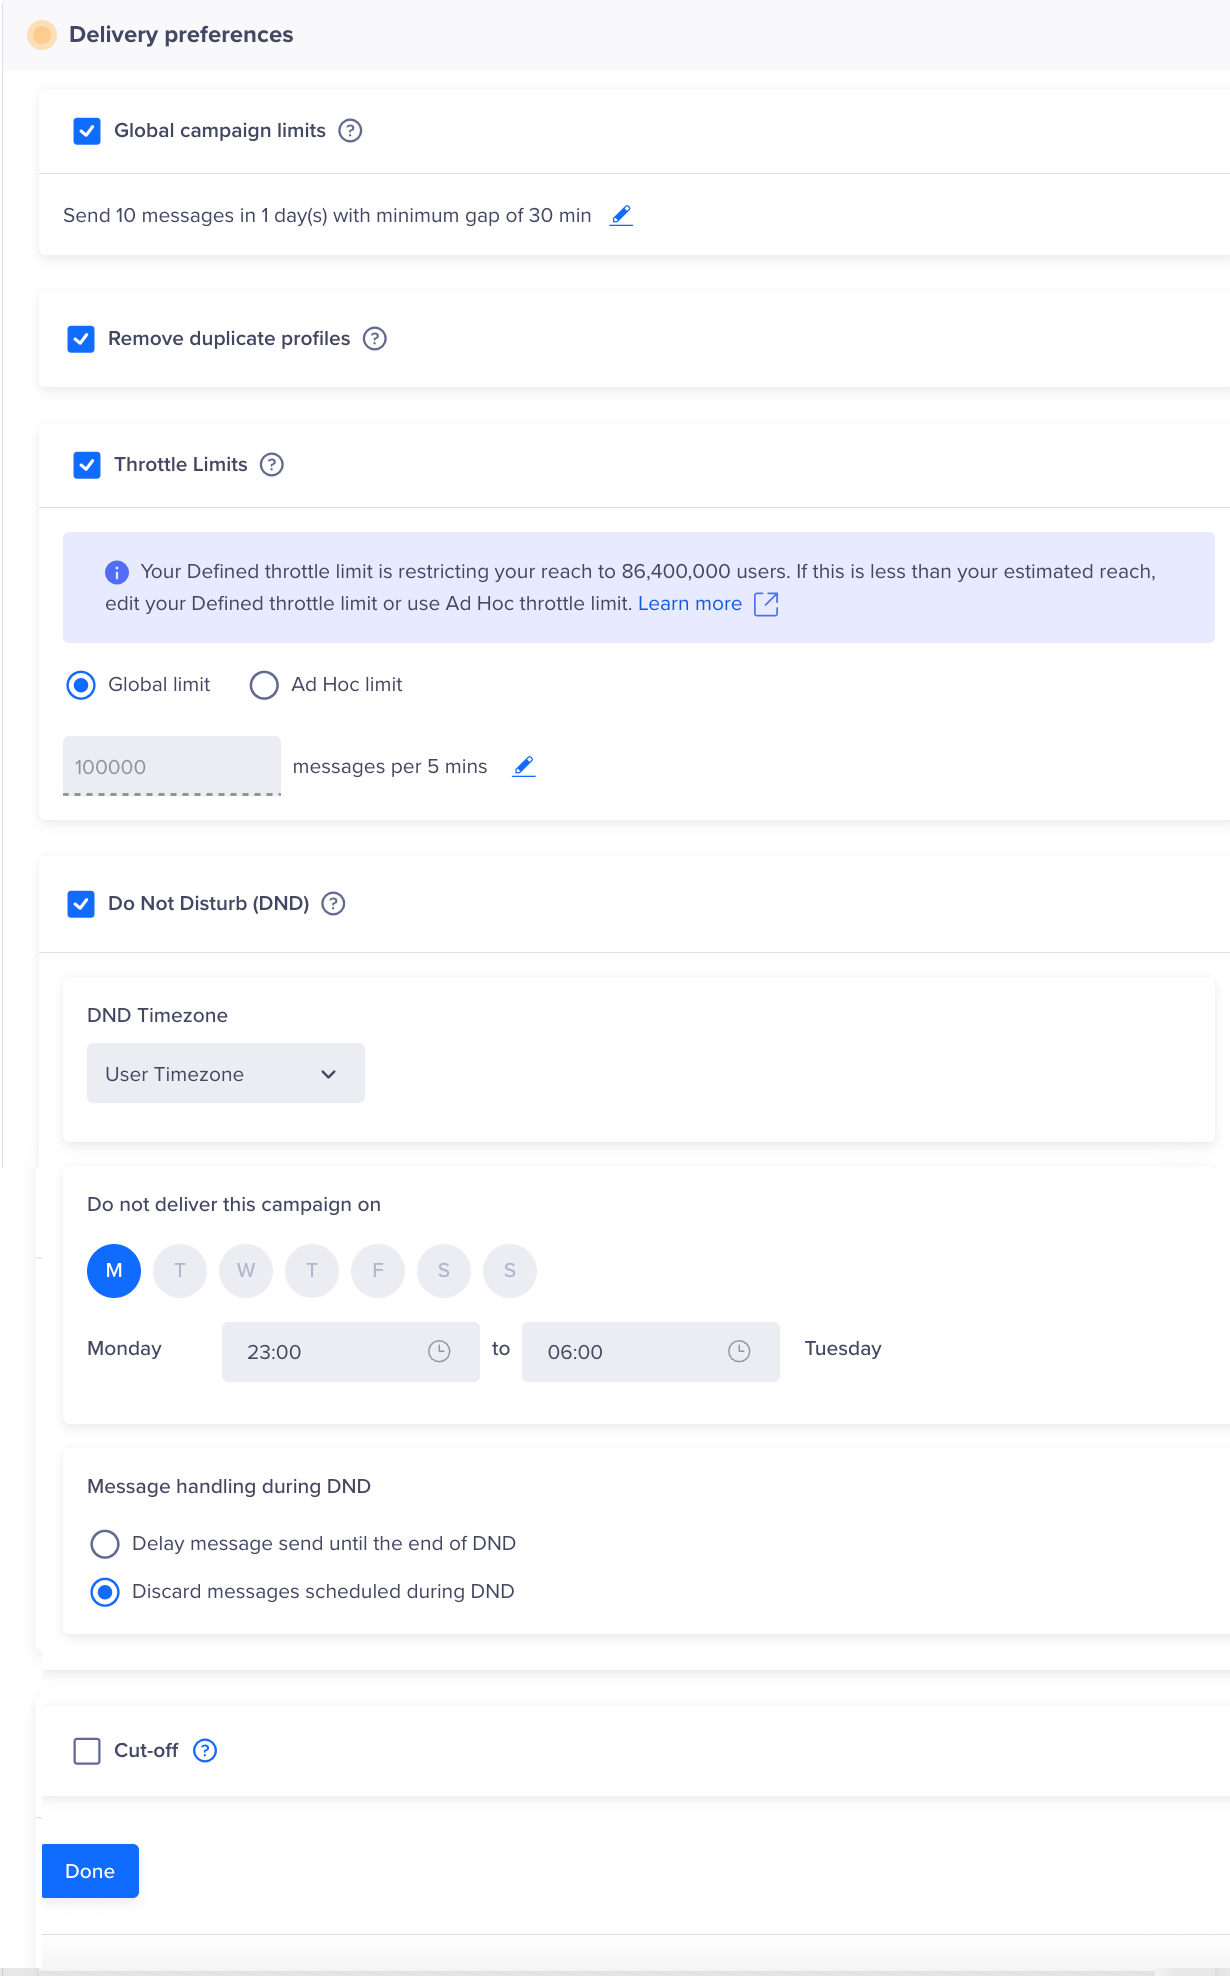
WhatsApp Delivery Preferences
Remove Duplicate Profiles
Private BetaThis feature is currently released in Private Beta. If you want to enable this feature for your account, contact Customer Success Manager.
CleverTap offers the Remove duplicate profiles option for Past Behavior WhatsApp campaigns to prevent sending the same WhatsApp message to multiple qualified user profiles that share the same phone number. When enabled, CleverTap sends the message to only one profile per unique phone number.
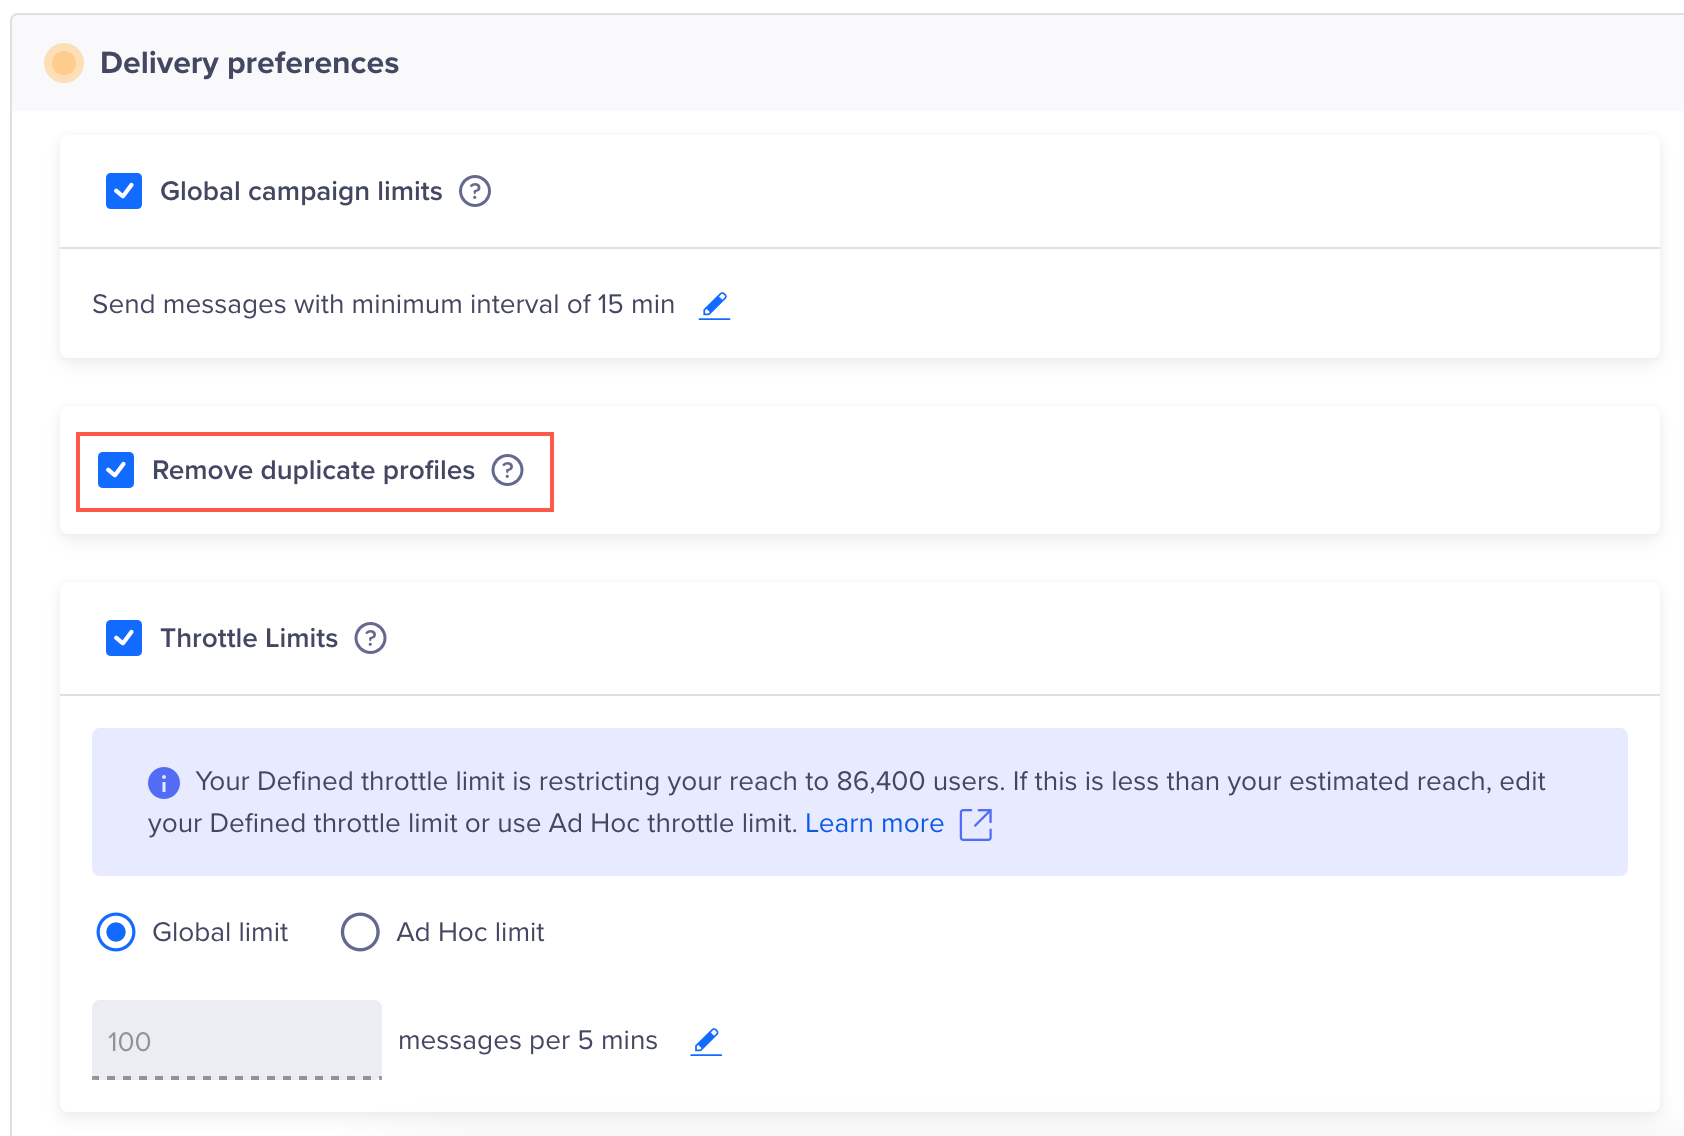
Remove Duplicate Profiles
If multiple profiles with the same phone number qualify for the campaign, only one will receive the WhatsApp message, while the others are reported as errors under Duplicates excluded.
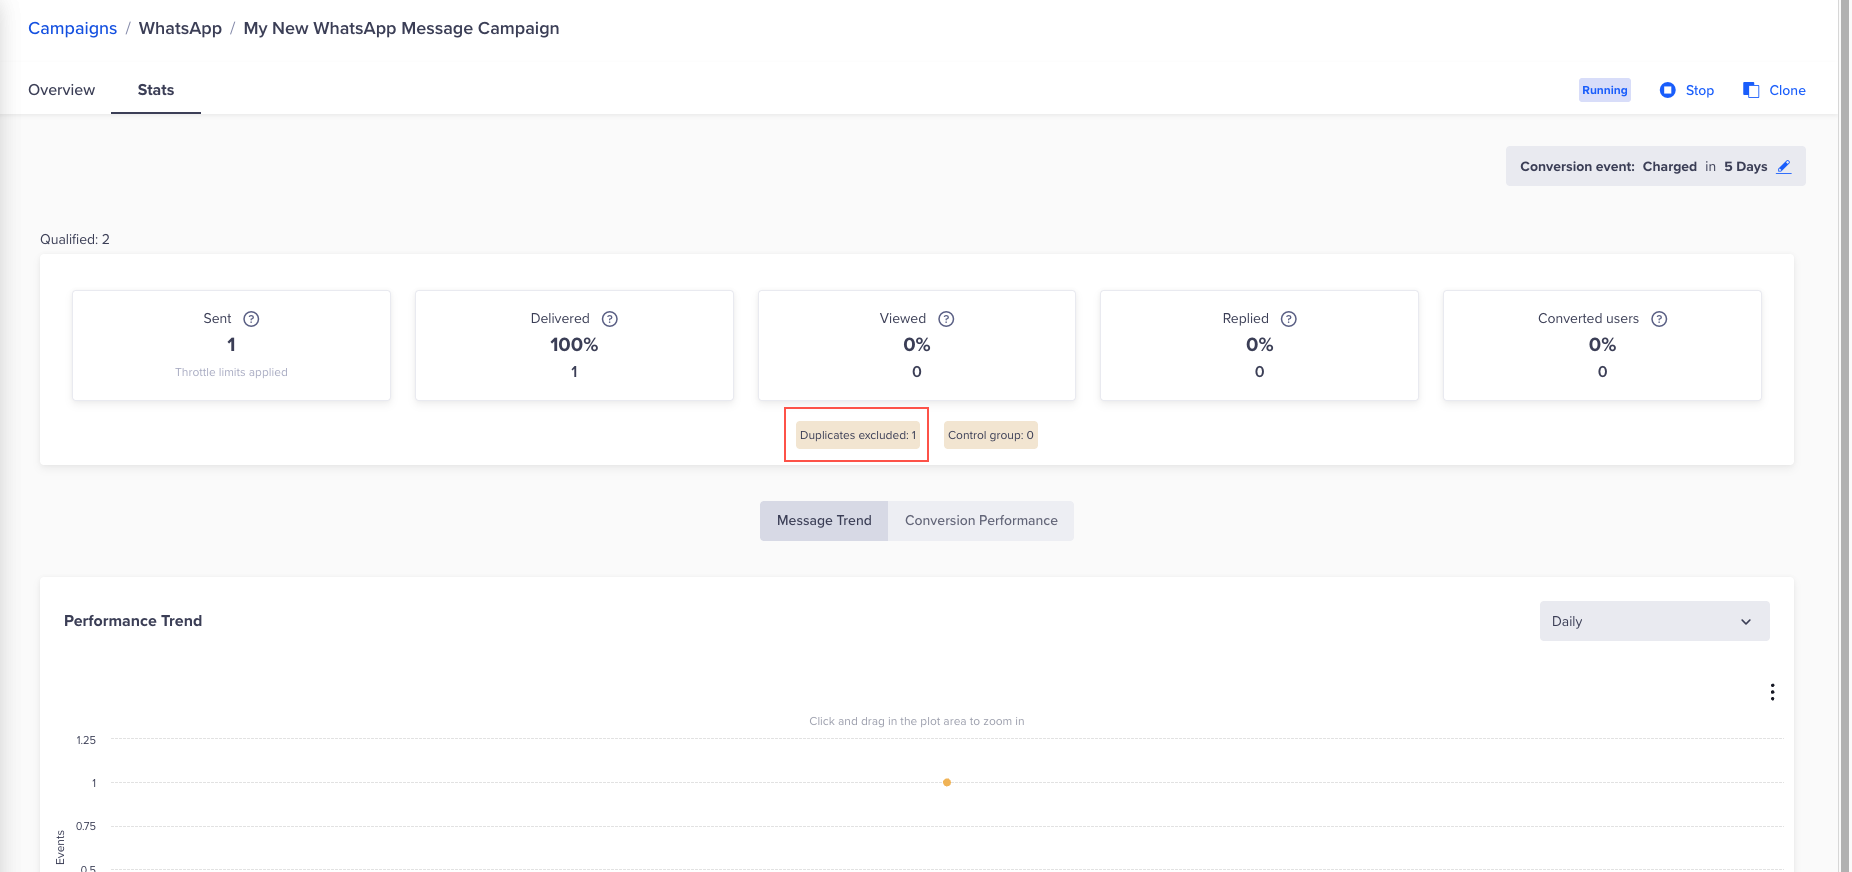
Duplicates Excluded
Publish Campaign
After previewing the appearance of your overall campaign, finalize your campaign by clicking Publish Campaign.
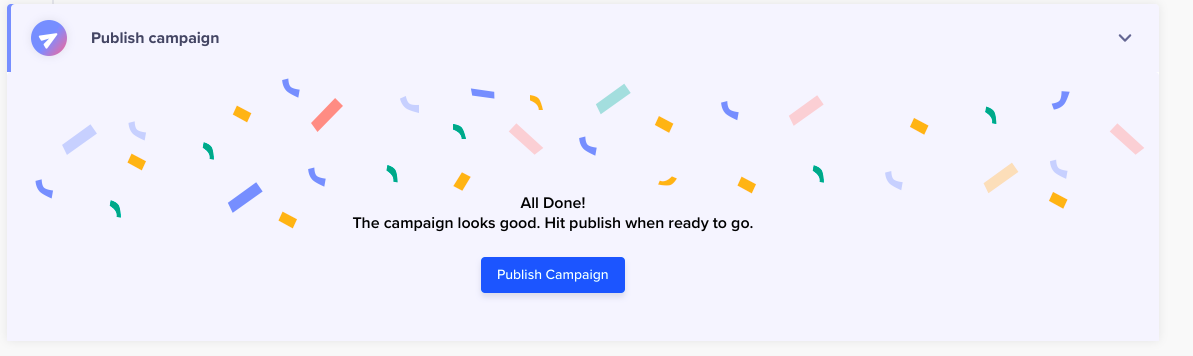
Publish Campaign
Updated about 1 month ago
What’s Next
Refer to the pages listed below to learn more about the following WhatsApp sections: