Define Journey Path
Overview
You can connect the Segment, Engagement, and Controller blocks from the Journey canvas to define how your users must move through the Journey.
Create a Journey
The first step is to define your target users. Drag the Segment block from the palette to the canvas.

Segment Node for Journey
Click the Segment node to define the qualifying criteria for your users. Define your qualifying criteria and click Continue.
View the details and Save & Close.

Select Target Segment
Next, decide the type of engagement to send to the qualified users.

Select Engagement Type

Select the Message Type
Add more nodes to plan for scenarios where the user does or does not respond. For example, you want to send an additional nudge if the user does not buy a product or a thank you note if the user does purchase the product. You can decide the level of details for your Journey.
NoteYou can apply campaign limits in a Journey. However, global throttling is not supported in Journeys.
Connections
Drag and drop blocks from the palette to the canvas to create connections.
Connect Segment & Engage Blocks
Once you have defined a segment of users, you can choose to communicate with the segment by dragging and dropping a channel of communication from the palette on the right-hand side. This communication could go to users who match the segment criteria specified by you, or to the rest of the users i.e. the users who don’t match your segment criteria.
Tip on Duplicating SegmentsTo duplicate a specific segment, use the copy/paste function by hovering over a segment, then perform the following:
- MacOS: Alt + mouse click
- Windows: Ctrl + mouse click

Connect Segment and Engage Blocks
Connect Engage & Segment Blocks
After a user receives a message, you can add a segment after that to ensure that only users who meet the criteria specified by you are taken further in the Journey.
Example: After users receive a push notification, wait for 1 day, check if users have transacted, for the people that have transacted, send them down path A, and for those who haven’t send them down path B.

Connect Engage and Segment Blocks
Connect Engage & Engage Blocks
After a user receives a message, you can follow it up immediately, or with a delay with another message on a channel of communication of your choosing.
Example: After a user receives a push notification, you can wait for 3 days, and send another push notification.

Connect Engage with Engage Blocks
Connect Segment & Segment Blocks
After a user has been segmented, you can follow it up with another segment to further refine your Journey.
Example: If someone has not transacted in the last 30 days, send users who qualify for this segment down path A, and if one of these users adds an item to their cart, and doesn’t buy within 15 mins, send them down a specific path.

Connect Segment and Segment Blocks
User Flow in Journeys
Your users perform one action in a Journey and then move on to the next action. However, there may be instances when they do not move forward in the Journey if not handled correctly.
We will walk through various combinations to ensure all users' participation in journeys.
Users Waiting at Segment Node
In scenarios where the next node in a Journey is a Segment Node, the Users will wait till they qualify for the node or exit via Journey Timeouts or Goals.
For instance, you have shown the Users a Welcome message In-app and are now waiting for them to qualify for the next Segment Node, Redeem Offer. In this case, you’d want to set a time limit based on which the users should move down a different path if they don’t qualify for the Segment. This will allow you to nudge the Users to Redeem their offer in this example, and then they can join the main journey again.

Users Waiting at Segment Node
Set the Qualifying Window
Click the hexagon on the Segment node to set the qualifying window for the users.
The qualifying window must be set up in combination with the drawing of the Node Timeout connector. The users will not move if the Node Timeout is not connected to another node.

Set Qualifying Window
Connect to Another Node
Connect the Node Timeout connector to another node. After the qualifying window is complete, the user automatically moves to the next node through this timeout connector.

Node Timeout Connector
NoteThe yellow indicator on your segment node is a reminder that you may need to plan for Waiting users on this node in the Journey.
Users Waiting at Engage Node
There may be another instance where the users have received a message but they may still wait for action. If the users do not click the message, then they are waiting for the next action. It means that when you created the Journey, the node following the Engage node is connected with a Viewed or Clicked connector. When you draw a Viewed or Clicked connector, a Phantom node with a node timeout will appear automatically. You can set the qualifying window from this Phantom node to move the users further.

Users Waiting at Engage Node
Using User Profile Update Node
The User profile update node is a controller node that allows you to update user properties in a Journey. It updates the user profile details based on the events triggered in the preceding segment or engagement node. Consider an action segment node followed by a user profile update node. For example, when a user subscribes to an OTT channel, the Channel Subscribed event is triggered. The user profile update node tracks this event and updates the latest property values, such as subscription plan name, price, validity, billing interval, etc.
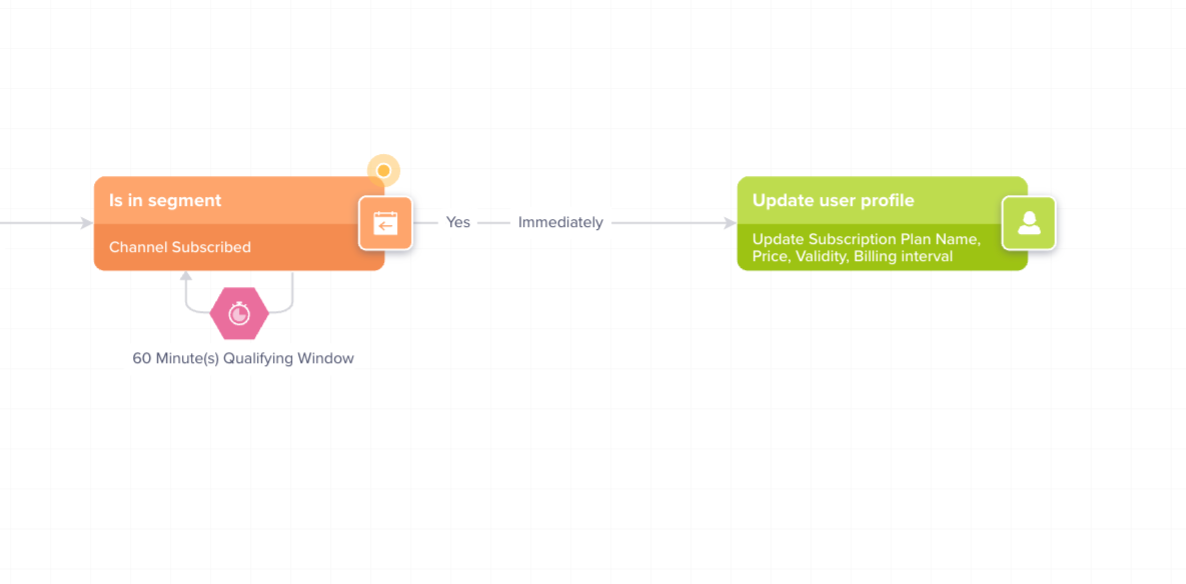
User Profile Update Node
You can add conditional logic to your live behaviour Journeys using Liquid Tags, which can reference events from the previous segment. This enables you to retrieve event properties and use them to update user profile details.
User Profile Update Node Video Tutorial
Discover the video tutorial for the User Profile Update node in Journeys.
To define the user profile update node:
-
Drag and drop the User profile update node and connect it to the desired segment node.
-
Click the User profile update node. The Controller - User profile update window appears.
-
Enter the controller name.
-
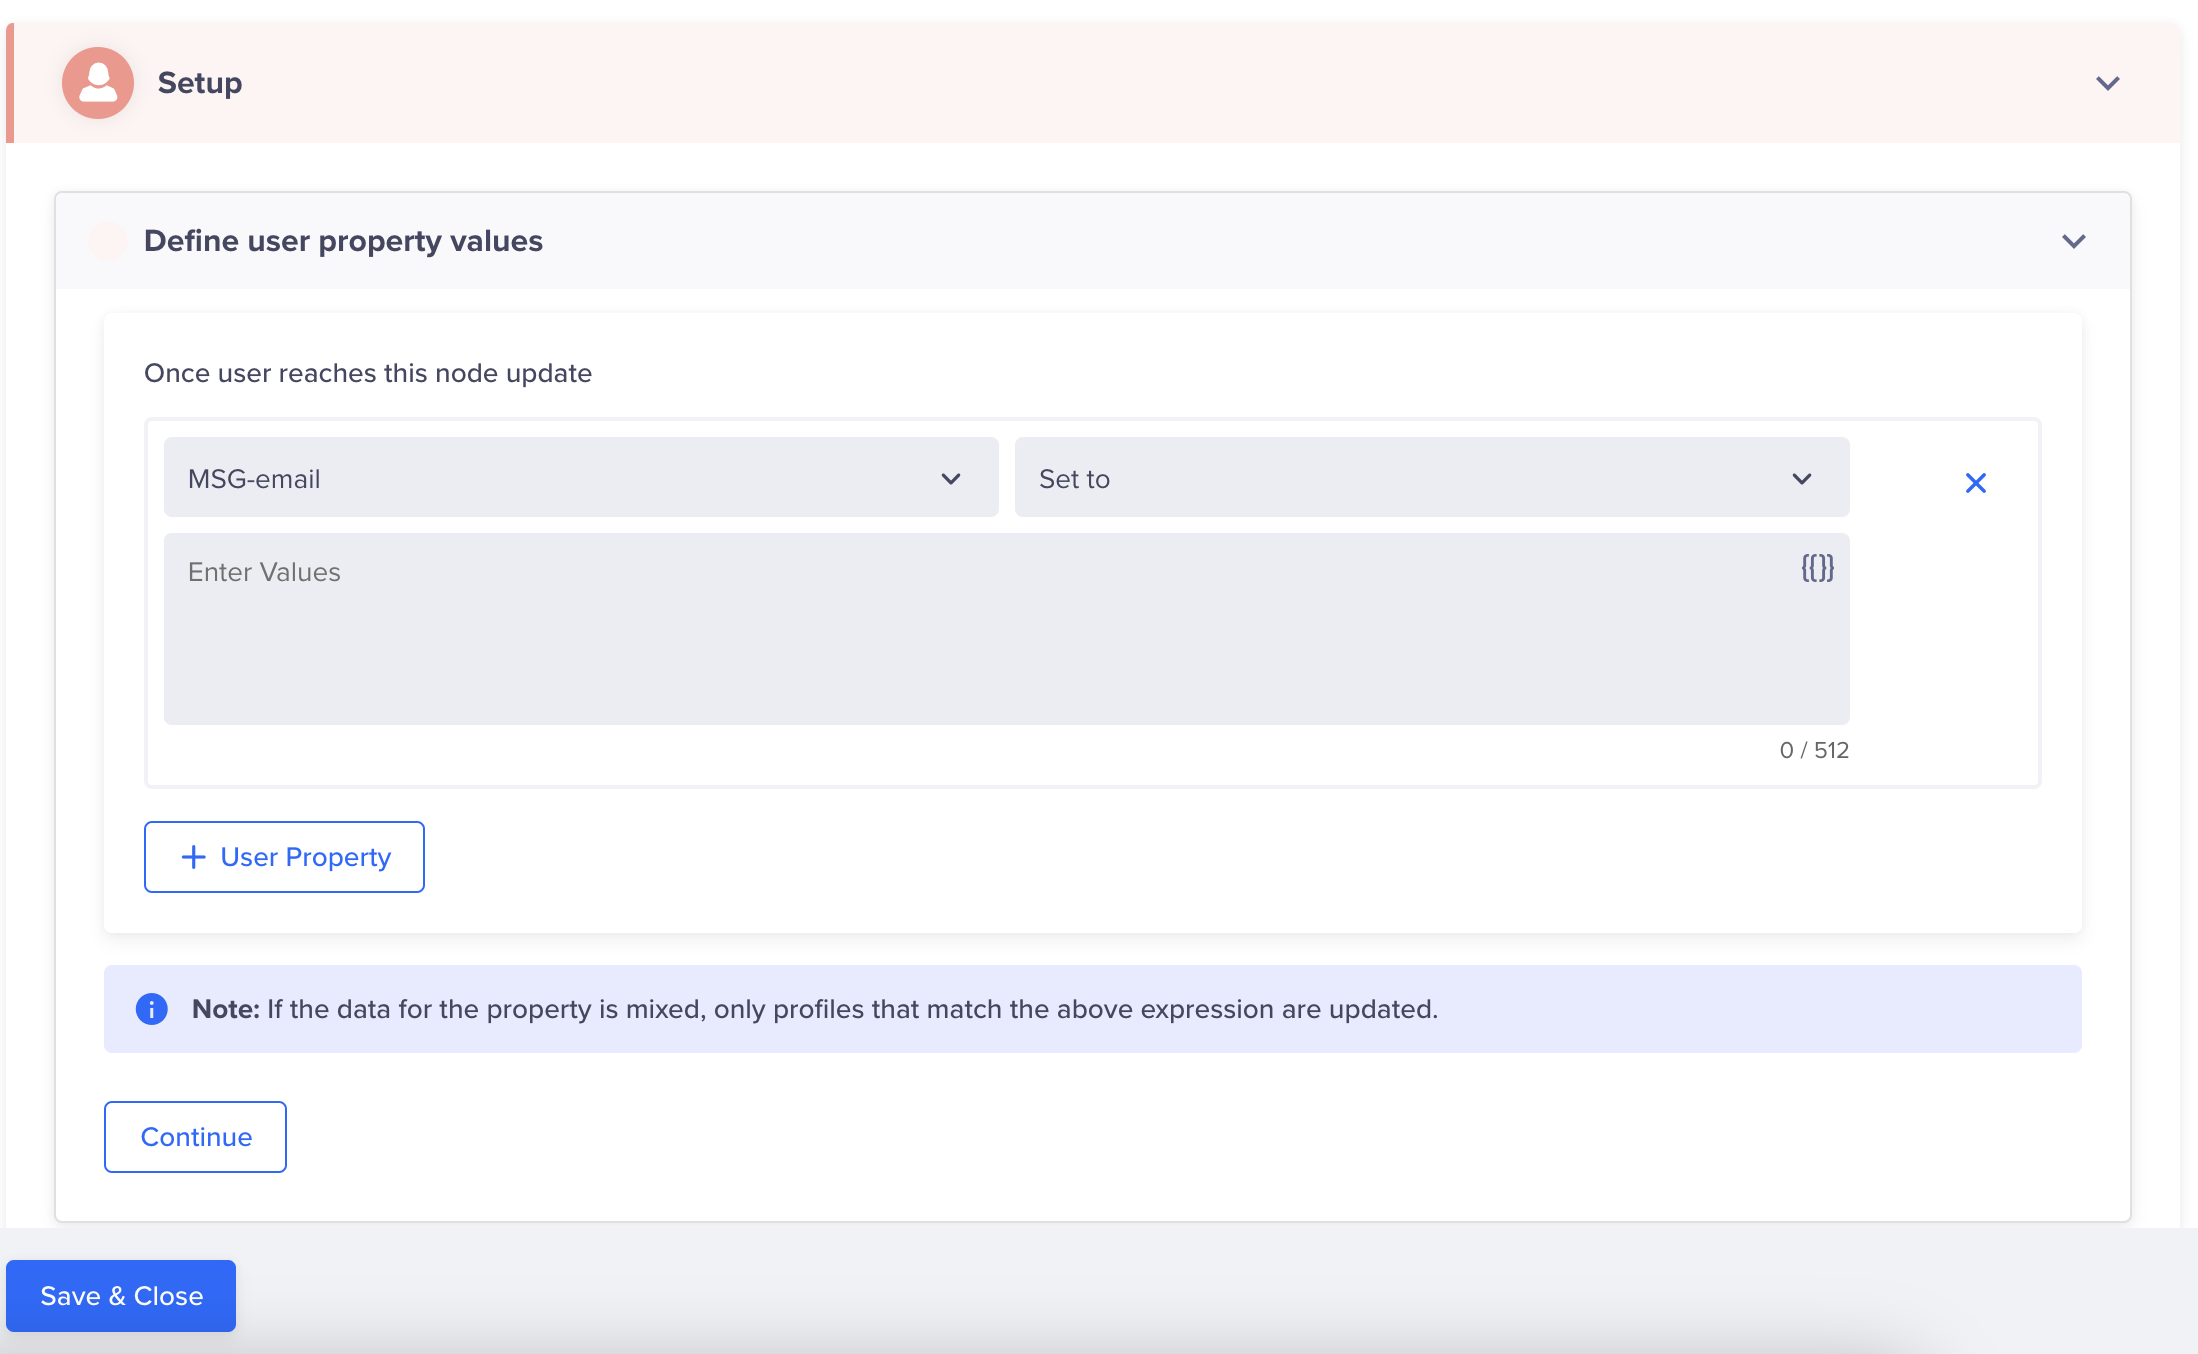
Under Setup, click + User Property and define the user property values. The following UI elements appear. For more information, refer to the Define User Property section.
- Click Continue and Save & Close.
Define User Property Values
This section describes how to define user property values.
| UI Elements | Description |
|---|---|
| User Property | From the drop-down list, you may choose the following two categories of user properties to update: |
| Operator | From the drop-down list, you may choose one of the following operators to set values to the user properties: |
| Text Box | Depending on the type of user property and operator you choose, you can enter the values in the following formats: |
| Apply as a single value | This is enabled for Add to array and Remove from array operators: |
Updating User Properties using Liquid Tags
This section explains how to update user properties using the user profile update node and liquid tags.
Use Case 1: Update User's Preferred Movie According to User Ratings
This use case lets you update a user's preferred or favorite movie based on the ratings the user provided for a movie. You can reference the Movie Rated event property in the conditional logic to update the Favorite Movie user property. The following is a sample conditional logic:

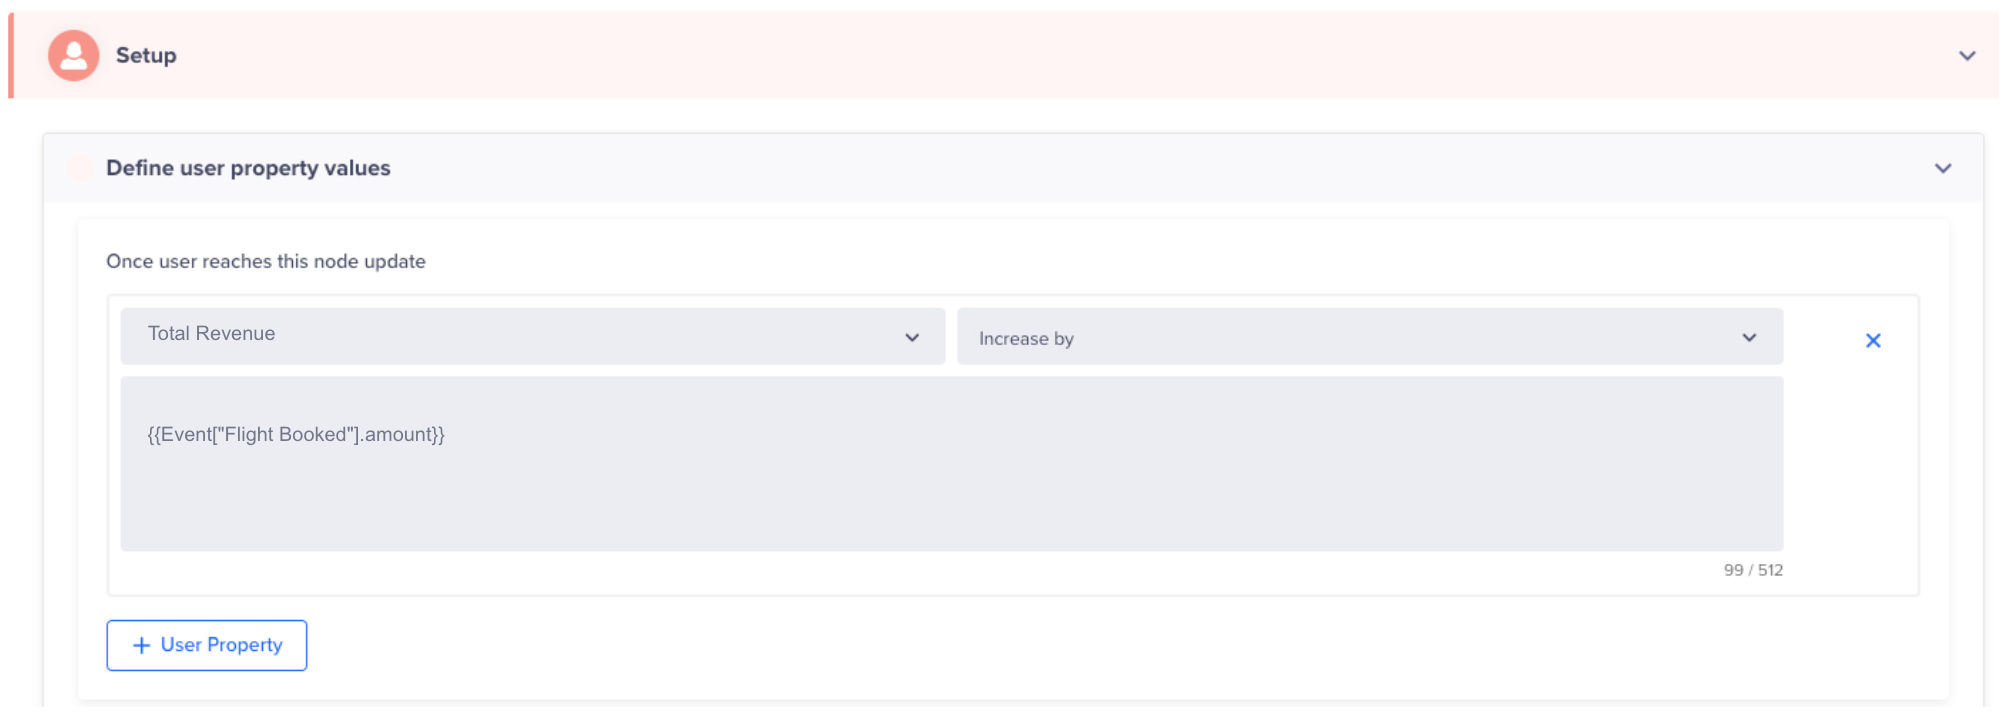
Use Case 2: Total Customer Revenue Based on Yearly Flights Booked per User
In this use case, you can keep track of a customer's total revenue for the year by adding up all their flight booking amount. For example, if a user booked flights worth $1000 by September 14th and then booked another flight for $500 on September 15th, an event is triggered with this new booking information. You can reference the Booking Amount event property in the liquid logic and add it to the Total Revenue user property, resulting in a total revenue of $1500 for the year.
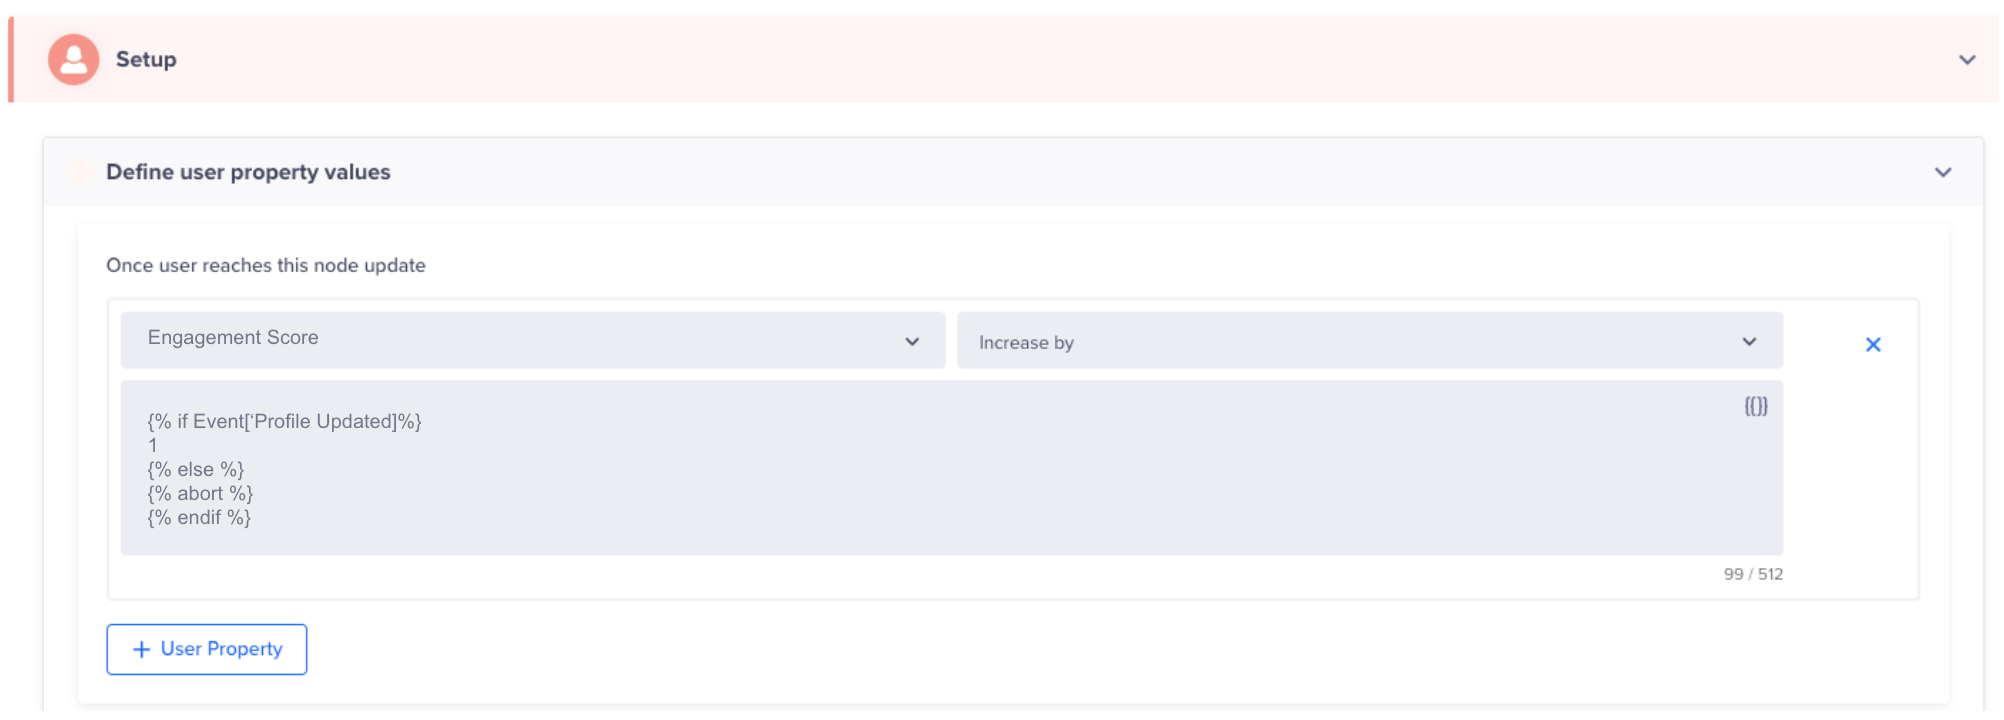
Use Case 3: Score a Customer Using Triggered Segment Journey
This use case lets you identify certain user behaviors, assign the users a score based on their activity, and segment them later for targeted marketing campaigns. For instance, when users update their profile, such as adding a picture or status on social media, their engagement score goes up by 1. The following is a sample logical condition:
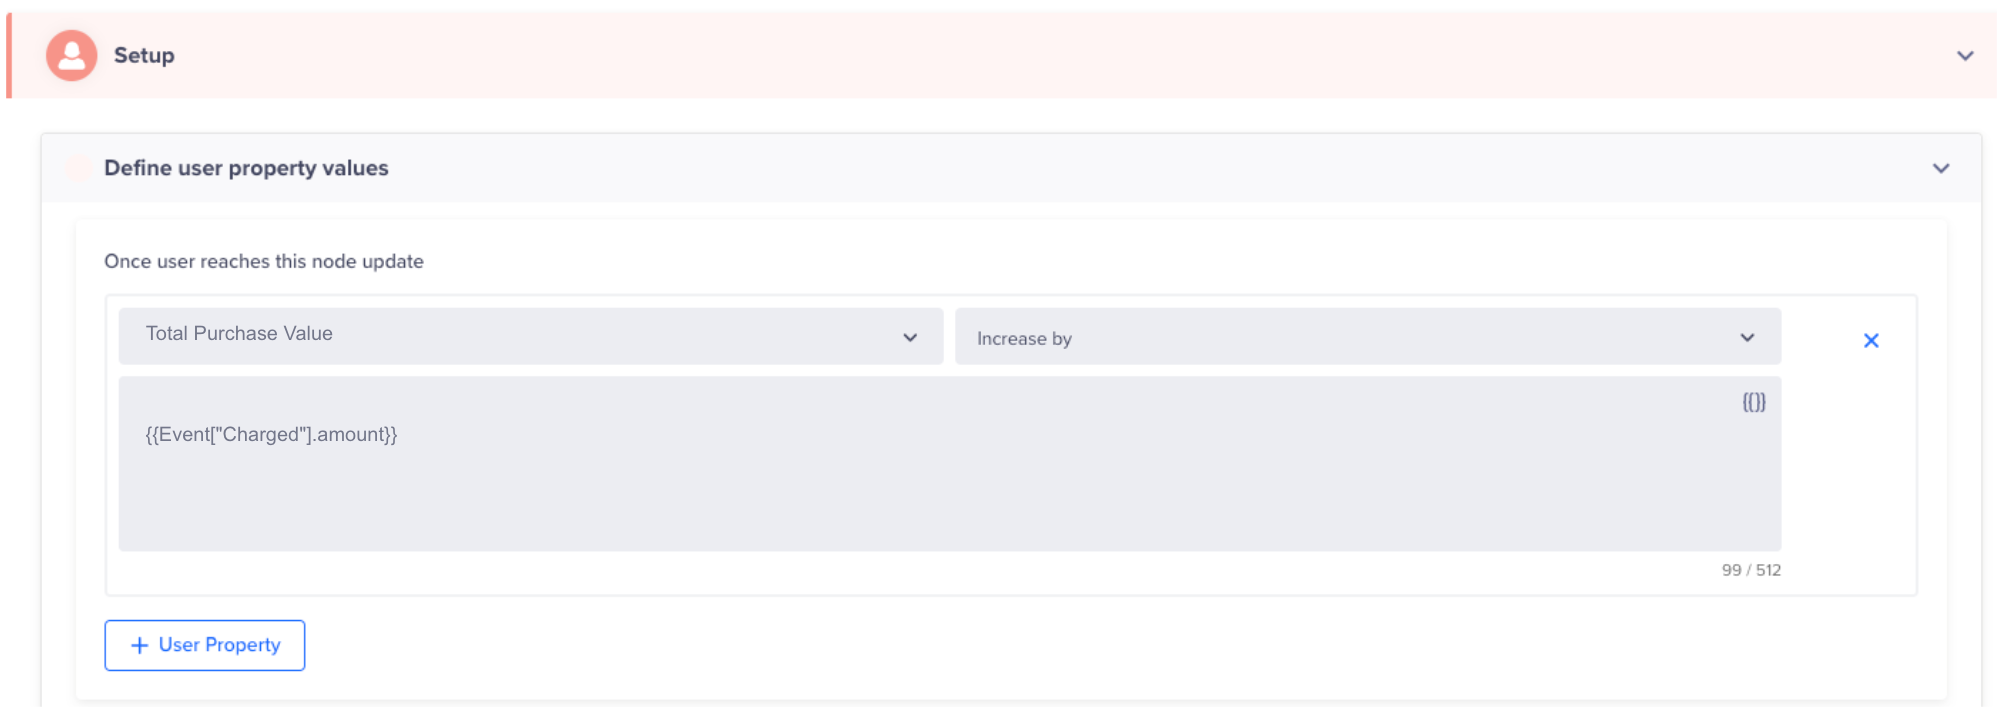
Use Case 4: Calculate the Total Purchase Value for a User when a Charged Event is Recorded
This use case tracks a user's total purchase value by adding up the amounts of their purchases recorded through a Charged event and updates it when a product is returned. For instance, if a customer buys groceries costing $50, $100, $30, and $75, the total value of their groceries purchased is $255. The following is a sample logical condition:
Points to Remember
- Only event properties can be used in liquid tags for user profile update node.
- You can update a specific user property only once.
- Irrespective of whether the update fails or succeeds, user moves ahead via the Updated path.
- If the user property for the user does not exist in the profile, then the property is created for that user profile.