Create Message
Learn how to create an In-App campaign using the CleverTap dashboard.
Create a New Campaign
Create a campaign to deliver your message.
To create a new campaign:
- From the dashboard, select Campaigns.
- Click + Campaign.
- From the Messaging Channels list, select the messaging channel.

Select Messaging Channel
The Campaign page displays.

Create Campaign
Define all the sections and publish the campaign.
Start Campaign Setup
The Start here section displays the setup information.
This section has the following parts:
- Set a goal: Tracks your campaign conversions by setting a goal. This step is optional, but it helps you measure how effectively your campaign meets its goal.
You can define your conversion goal by selecting the Event and specifying the Conversion Time. The Conversion Time field accepts any numeric value along with a time unit such as Minutes, Hours, Days, Weeks, or Months. This allows you to define conversion windows such as 10 days, 72 hours, or 2 months. The value can range from a minimum of 1 minute to a maximum of 5 months.
For example, if you set the conversion time to 5 Minutes, the system counts conversions within 5 minutes of the goal event.
Your campaign goal can be as broad or as specific as you want. For example, you can answer questions such as: How many users were influenced to purchase an X amount? or How many first-time visitors purchased red shoes worth at least X and blue jackets worth at least Y?
Set Conversion Time
Define the Audience
You must indicate the target audience for your campaign. You can specify your target audience from the Target segment section. Here, you can create a new segment or use a previously saved user segment from the segment list.

Define Target Segment - Who
Source Event PropertyThe CleverTap source event property is not supported for web pop-up and mobile in-app campaigns.
You can also create the target based on past user behavior and user properties or live (ongoing) user behavior. The latter is useful to send out real-time, triggered In-App campaigns.
In-App Delay and InactionWhen creating an In-App campaign, we recommend keeping the delay to less than 20 minutes.
For instance, you can create a live Inaction within time campaign that targets users when they add a product to their cart but do not finish transacting within 10 minutes.
Deliver Action Based Messages
You can trigger a message based on an action. Users receive messages when they perform an action in the app instead of waiting for the next app launch. It makes the messages more contextual and increases conversion.
Ad-hoc Segment
You can create an ad-hoc segment by specifying the live (ongoing) user behavior that will trigger the in-app message in real-time (e.g. App Launched). You can also segment your campaign to only reach users who meet specific criteria on the basis of past behavior and user properties. For example, you can trigger the in-app for only English-speaking female users who live in the United States.

Filter by User Properties
Saved Segment
You can also select a pre-defined Live user segment if you have already created one in the Segments dashboard and use it directly or further enrich it with additional filters in the campaign. Refer to Live Segments to learn more.
Calculate Estimated Reach
The Estimated Reach option allows you to preview how many users meet your targeting criteria in an online trigger campaign before publishing it. This helps you validate audience size and adjust filters to ensure the campaign reaches the intended users.
Estimated Reach is particularly useful when you select the Filter on past behavior and user properties option. You can view both the estimated user count and device count.
To calculate the estimated reach, perform the steps below:
-
Select Filter on past behavior and user properties.
-
Click Calculate in the right panel. The result shows the estimated number of users or devices for that segment. You can view the following:
- Total Users: The number of users that match the filters.
- Breakdown by Platform and Devices: The users count on Android, iOS, or both, and on different devices.
- Visual Indicator: A chart summarizing the share by operating system.
The estimate, based on the latest available event data, updates each time you apply or modify filters. It reflects stored event data and is not a real-time count. This helps you plan and refine your audience before sending the campaign.
Calculate Estimate Reach
Control Group
You can define the control group to compare and measure the results of your campaign. For more information, refer to Control Groups.

Control Group
Define the Message Content
Now, you need to set up the What section to define the campaign content, with four different options:
- Single Message
- AB Test
- Split Delivery
- By User Property
- Legacy
Click Go To Editor to create your message.
In-App Editor
Select the templates and create the In-App message. For more information, refer to In-App Editor.
Preview & Test
Once you are all done setting up the content of your campaign in the What section, you have the option to send a test notification to any CleverTap user profile you have marked as a Test profile
Click the Preview & Test button from the message editor to test a message.
Message Types
You can create the following types of messages:
- Single Message
- AB Test
- Split Delivery
- By User Property
Single Message
In this campaign, we send the same message to all users who qualify as your target audience. This message type is best for broadcast messages and for applications that do not vary campaign communication based on differences between properties such as language, geography, or any other user properties.
A/B Testing
A/B testing helps you understand what type of message copy works best to get clicks from users.
You can test up to three message variants on a test group, and the variant that gets the most clicks is declared the winning variant and is automatically sent to the rest of your target audience.
When creating multiple variants for a campaign, you can also auto-copy what is already present in a current variant.
Split Delivery
With split delivery, you can decide what percentage of your audience receives each message variant for the campaign duration. You can test up to three message variants.

Split Delivery Variant Distribution
Split Delivery to Live User Segments
With campaigns sent to live user segments (triggered campaigns), messages are delivered immediately when a user's activity matches the criteria you have selected. For example, you can send a message when the user has completed a booking or purchase. Since it is not possible to determine the reach of triggered campaigns upfront, you need to decide how many total messages to send for A/B testing before a winner is declared.
Triggered Campaign ExampleIf you select 500 users as your test audience, we will alternate delivery of Variant A and Variant B as users qualify for the campaign. After a total of messages are sent (Variant A – 250 and Variant B – 250), we then decide the winner based on the number of clicks and continue only with this winning message for the duration of the campaign.
Deciding on a test audience for A/B testing triggered campaigns requires some estimation. We recommend you check the total messages that were sent for similar triggered campaigns in the past to get a sense of how many users may qualify. If you select a test audience that is too small such as 25 users, you will get a statistically insignificant sample. If your test group size exceeds the total number of users who ultimately qualify for that campaign, then no winner will be declared, and each message variant will be alternatively delivered for the duration of the campaign.
By User Property
If you would like to send different message variants to your target audience based on the user properties they possess, this campaign type is your best bet. A good example would be when you want to send a localized update to people based on their preferred language.
Similar to creating A/B test variants, click + Variant to add multiple variants based on a user property value. You can send up to 50 message variants to different users based on a user property. In the example below, we have used the Customer Type user property so users with different customer type property values will receive corresponding copies of the campaign based on their different levels (Silver, Gold, or Platinum).
Legacy
Allows you to create and send a single campaign to users on both old and new versions of the application.
Legacy message type is for customers whose entire audience has not updated their app to support the native in-app capability.
Post releasing the app update, there will be users on both old and new app versions. In this case, to send a campaign to both your user base, follow the below steps.
NoteYou will not be able to use the A/B test and message on user property with this option.
Based on your SDK version, use one of the following steps to create in-app campaigns:
New Version (SDK 3.3.0 and Above)
To create In-App campaigns with the new version of the SDK:
- Go to Message Type > Legacy and click Go to Editor.
- Select New In-app.

Templates for New SDK (3.3.0 and Above)
- Create your message and click Save Draft.
Legacy Version (SDK 3.2.0 and Below)
To create In-App campaigns with the older version of SDK:
- Go to Message Type > Legacy and click Go to Editor.
- Select Legacy In-app.

Templates for Legacy SDK (3.2.0 and Below)
- Create your message and click Save Draft.
Define the Campaign Schedule
Each In-App campaign needs to be scheduled to run actively for a specific timeline. To define the schedule for your campaign, you need to specify the Start date and time and End date and time. You also have the option to start a campaign immediately by selecting Now. Once you define the schedule and click on Done, the campaign will be triggered and terminated as per the defined timings.

Set Message Schedule
Delivery preferences
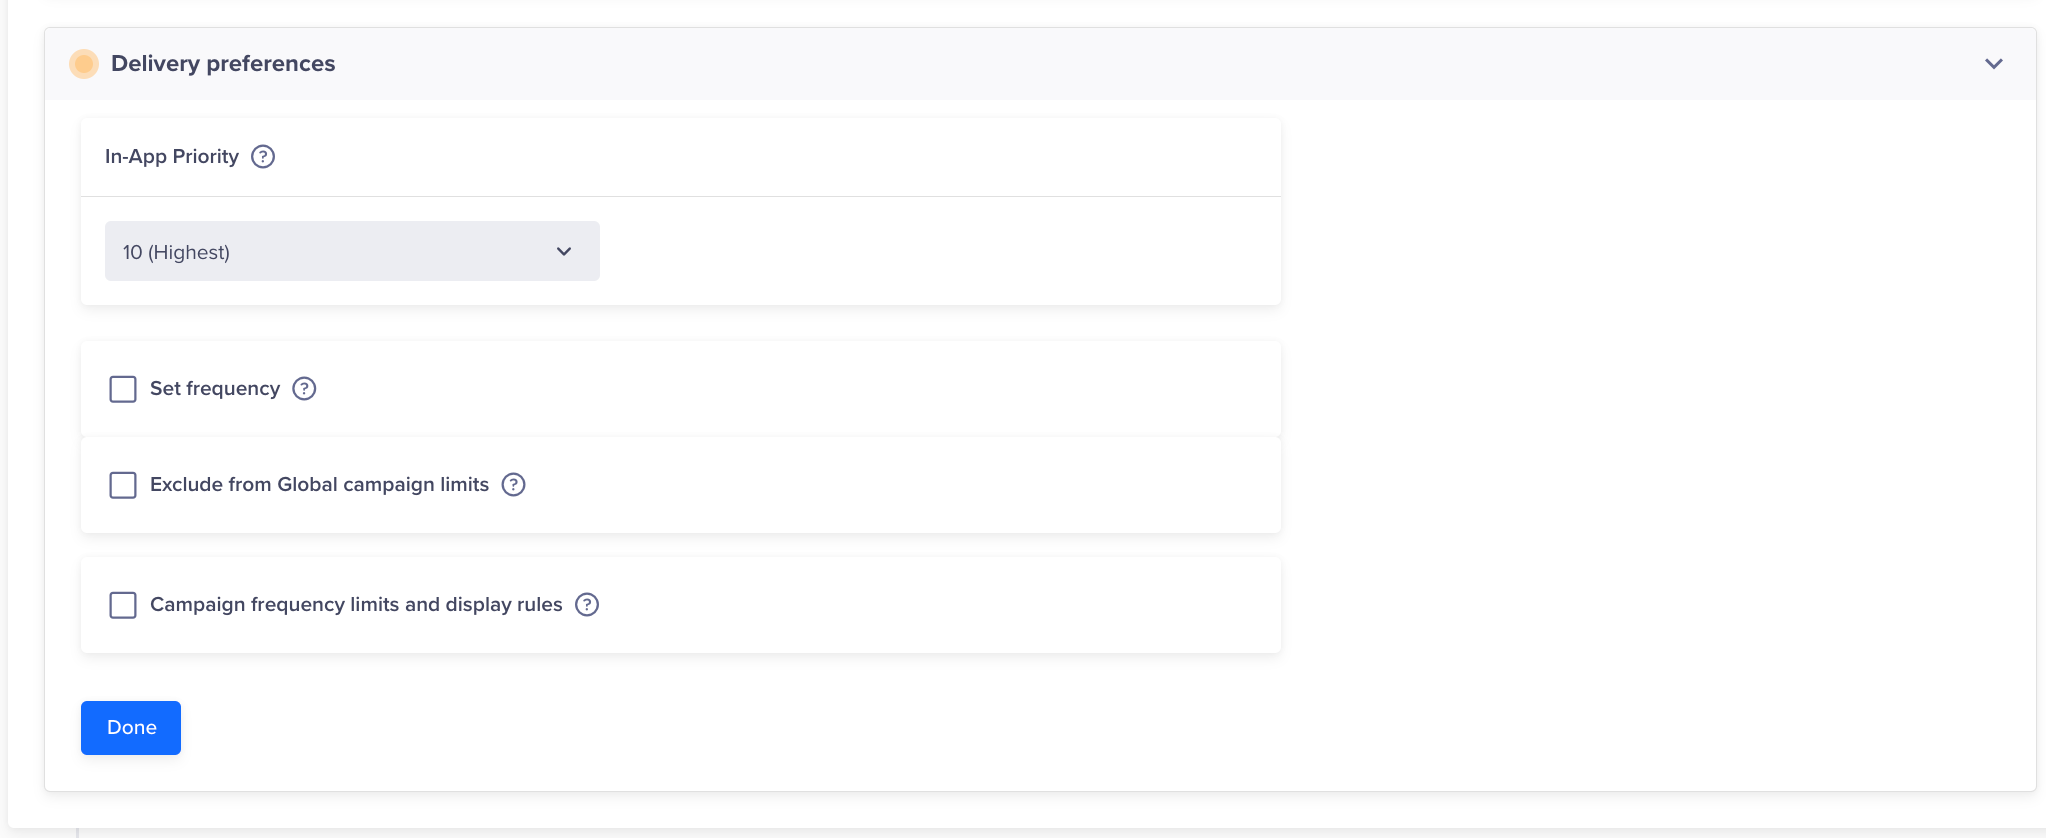
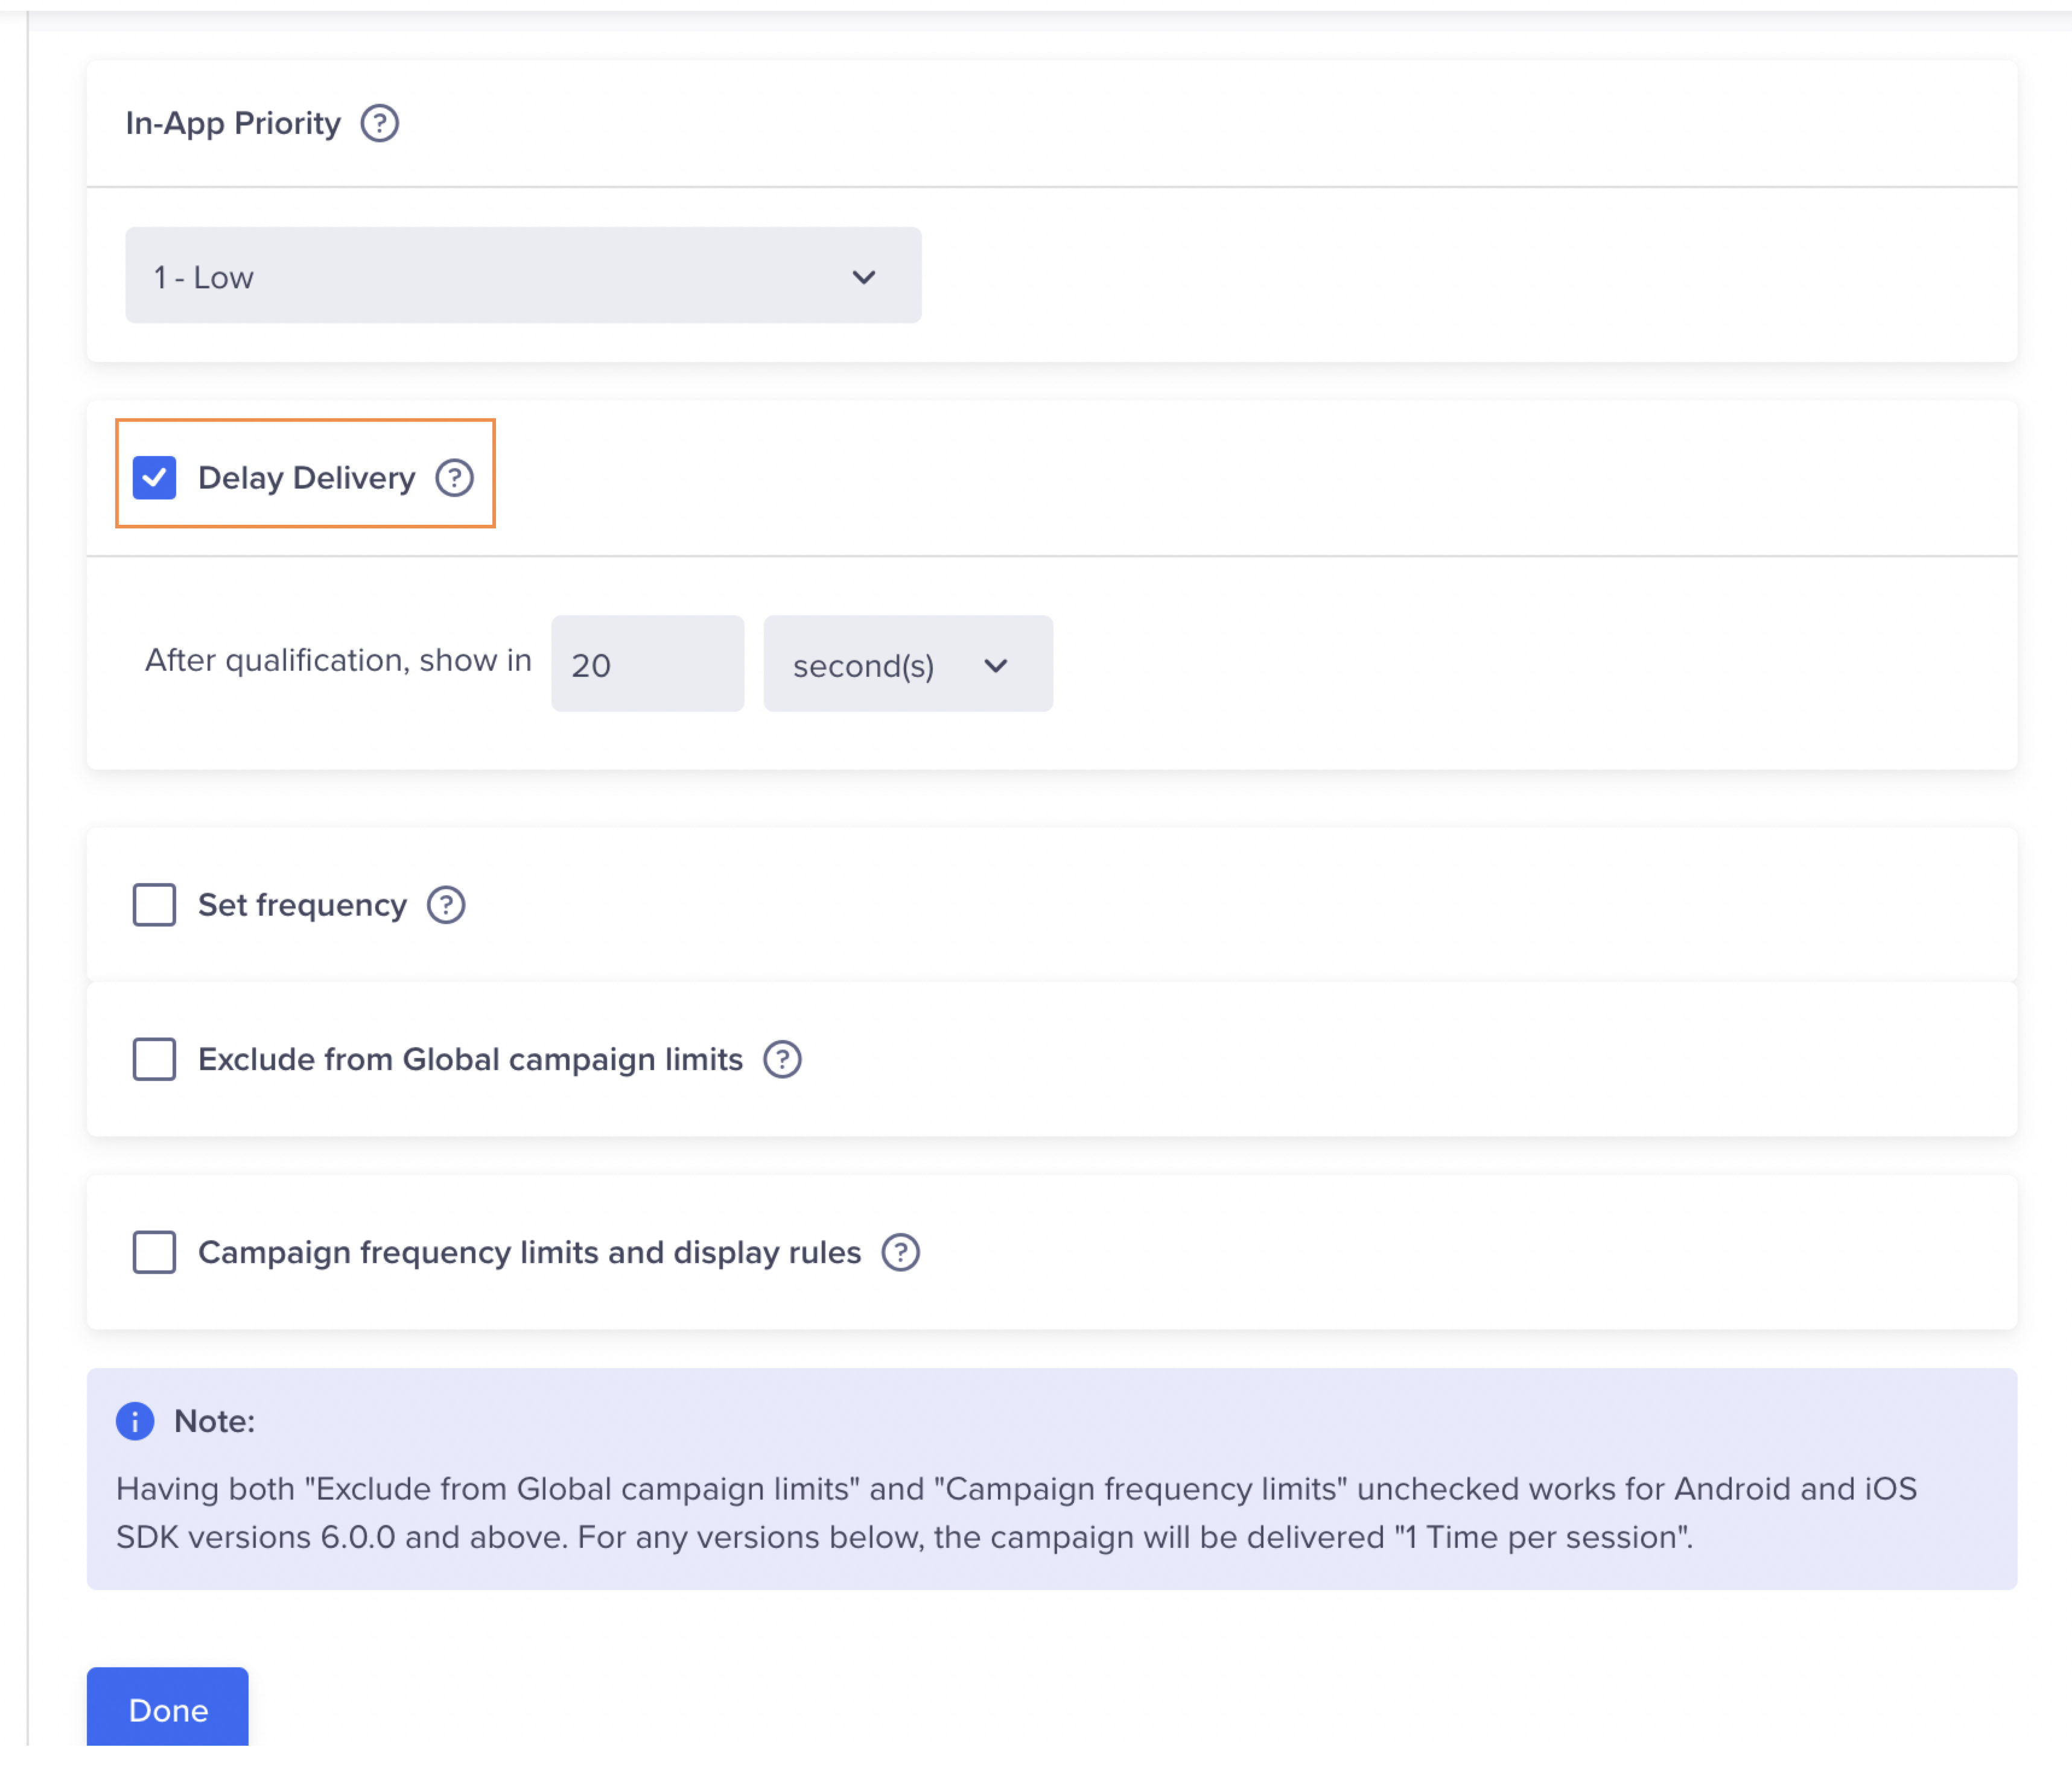
Set In-App Priority
In-App Priority
The In-App Priority dropdown allows you to set the priority levels from 1 (lowest) to 10 (highest), with 1 being the default priority. Configuring the In-App priority allows you to prevent priority conflicts, particularly for campaigns configured on the same triggers.
Example:
Consider a scenario where the two In-App campaigns are triggered on the App Launched event - campaign A with priority 8 and campaign B with priority 10. Both campaigns qualify as per the defined trigger, however, end users will receive campaign B as the priority level is higher.
In-App Campaign with Same PriorityIn cases where two campaigns have the same event trigger and In-App priority, the campaign created initially takes the precedence and is displayed to end users.
Set Frequency
You can define the preferred days in a week and the time frame to deliver your campaign. Select Set frequency and mark the days on which you want to deliver the campaign.
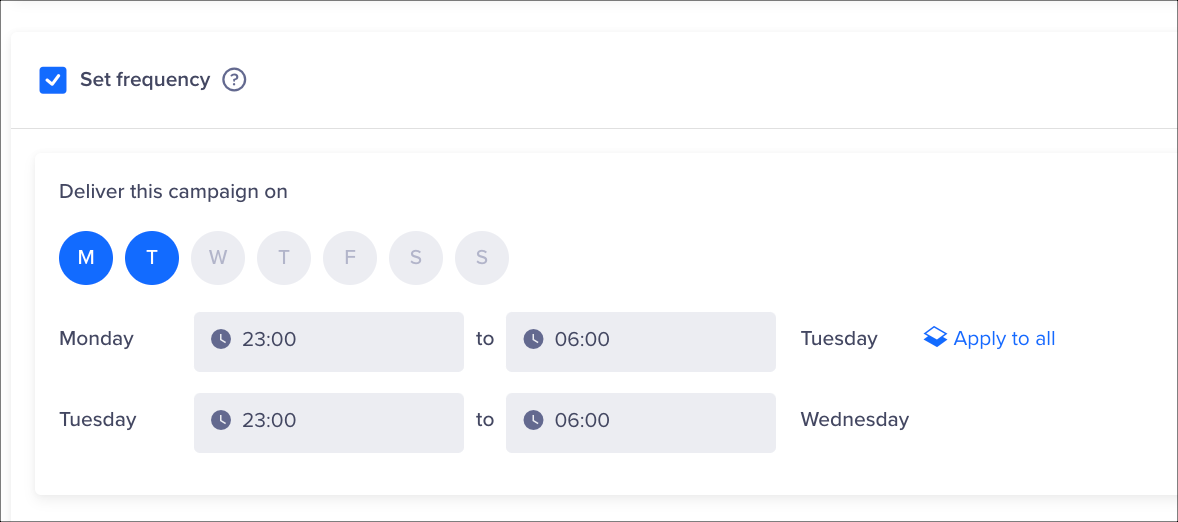
Set Delivery Frequency
If you want to deliver the campaign in the same time frame for the selected days in a week, click the Apply to all option available adjacent to the configured time of the first selected day, as shown in the above image.
Exclude from Global Campaign Limits
Global campaign limits are limits you can apply to determine how many In-App messages each app user receives per day in each session. You can ensure the successful delivery of your campaign even if it surpasses the global limits set for your environment. You can do so by selecting Exclude from Global campaign limits, marking your campaign as an exception to the global campaign limits.
If you do not select this checkbox, the global limits defined will be applicable along with the specific campaign-level limits.

Exclude from Global Campaign Limits
Campaign frequency limits and display rules
This feature offers the additional flexibility of specifying the frequency at which the campaign is delivered based on a defined trigger count.
Consider a scenario where you want to configure a campaign to deliver a message twice per session and once per week to qualified end users. Additionally, you want to ensure that the campaign is displayed a maximum of 10 times throughout its duration.
This can be accomplished by selecting Campaign frequency limits and display rules as shown below:
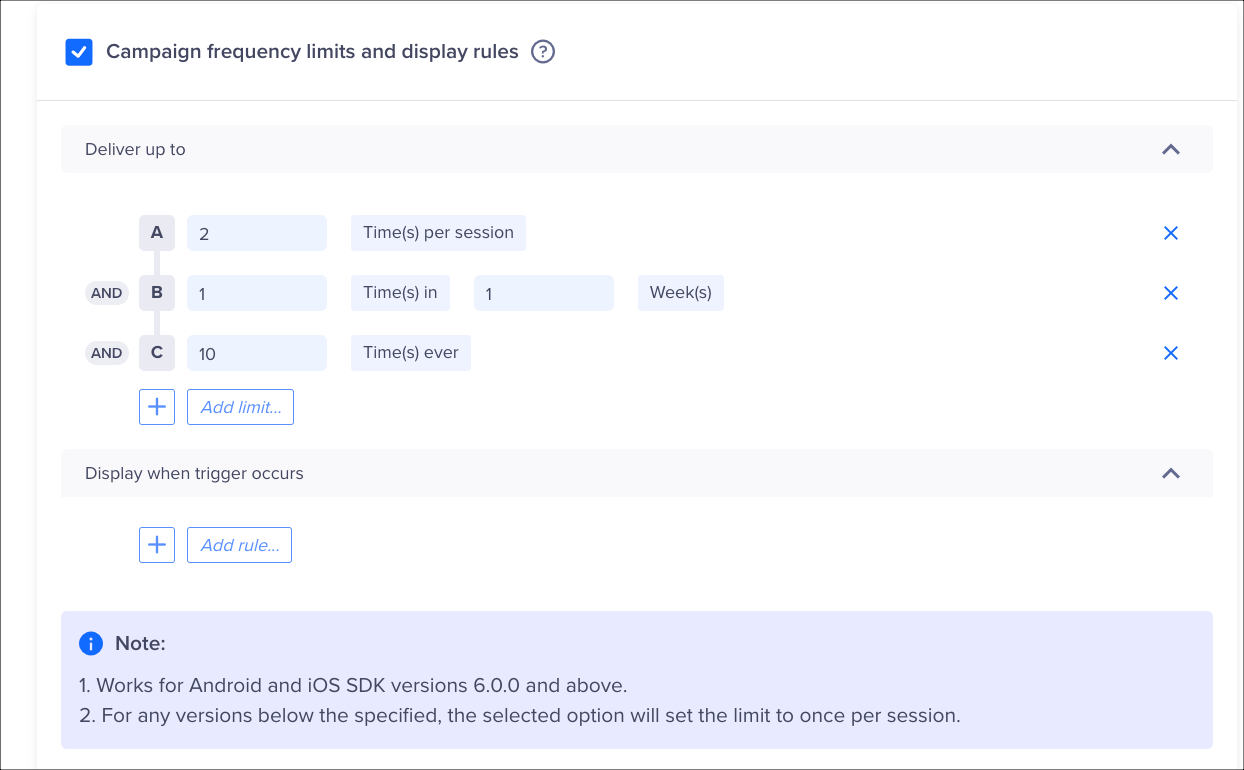
Campaign frequency limits
The campaign message is delivered twice in a session and once per week. The message will be displayed only 10 times during the entire campaign duration.
Display rules for Times In FrequencyIf the times in frequency is defined in days or weeks, it will be displayed according to the calendar day or week. For example, if a message is scheduled to be displayed today at 11:55 PM, it can also be displayed tomorrow at 12:01 AM. There is no requirement for a 24-hour wait time between the display of messages.
Additionally, seconds, minutes, and hours are calculated based on the total number of seconds.
Suppose the gaming app wants to send a rewarding In-App message to its user after completing every three levels. In that case, this can be achieved by configuring the Display when a trigger occurs condition, as shown in the image below. Configuring the Display rule allows you to define the Trigger conditions in which the campaign needs to be displayed to a qualified end user.
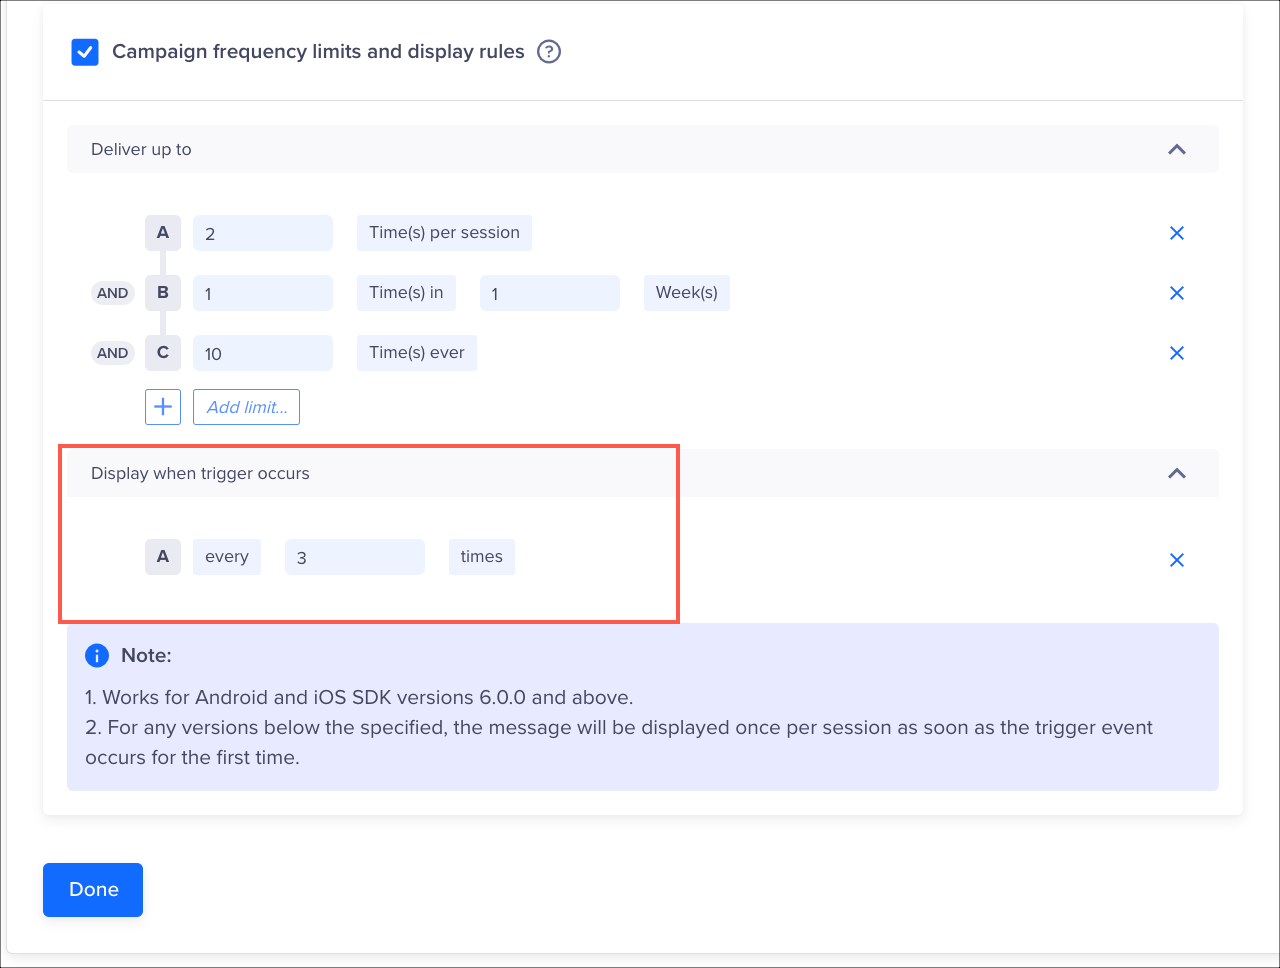
Display Trigger.
Alternatively, you can display the campaign exactly when the user completes three levels. You can select the every or exactly display conditions based on your business use case.
SDK Prerequisites
- The Campaign frequency limits and display rules functionality is supported on Android and iOS SDK versions 6.0.0 and newer, as well as on Unity SDK version 3.0.0 and newer. For SDK versions below 6.0.0, "once per session", "once per day", "once per user for the duration of the campaign" continue to work as expected. However, if you choose one of the newly added advanced configurations the Frequency limit will be set to once per session and the message is displayed every time the trigger event occurs.
In-App Delay
The campaign is triggered after a specified delay once the user meets the qualification criteria. You can set the number of seconds (maximum 1200) to wait before showing the popup.
Private Beta
In-App Delay is available in Private Beta. To enable this feature, contact your Customer Success Manager or raise a support ticket.
In-App Delay
Publish Campaign
After testing and once you are satisfied with the appearance of your campaign, finalize your campaign with the following steps:
- Click Continue to view your campaign summary. The overview page displays.
- View your campaign summary, and then click Publish Campaign.

Publish Campaign
Updated 3 months ago