Push Primer
Prompt the user to grant push notification permissions.
Overview
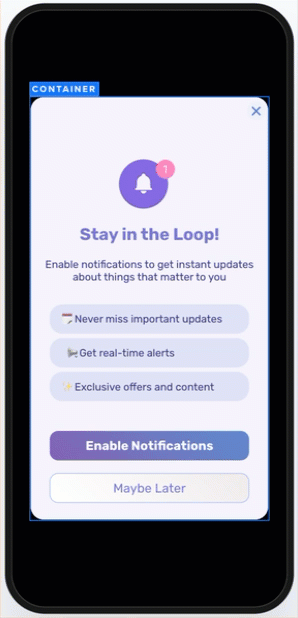
Push Primer is an In-App message that introduces the benefits of push notifications before invoking native OS permissions. It acts as a reversible, pre-permission layer that sets expectations and builds trust by helping users understand the value of enabling notifications, such as receiving timely updates or exclusive offers. By offering this context, Push Primer can improve opt-in rates and re-engage users who have yet to grant permission.
Push Primer using CleverTap
Create Push Primer Campaign
To create a push primer campaign, create a regular In-App message. Set the element (button, media, or container) action to Request Push Permission, and CleverTap automatically recognizes it as a push primer and displays the system prompt to request notification permission.
Note
- If the users have previously denied push permission, tapping the prompt will redirect them to the app settings,
- On iOS, the system-level push primer prompt is shown only once and cannot be triggered again.
Push Primer campaign can be created using any native In-App templates. Following is an example of how to create a Push Primer campaign using the Advanced In-App Builder:
- Go to the Campaigns page and select In-App Messages from the messaging channels list.
- In the Who section, select only the trigger event, such as Charged. You do not need to specify a segment in this step.
NoteThe campaign automatically excludes users who have already granted push permission allowing you to focus on new users and those who need to be re-engaged.
- In the What section, select the Advanced In-App Builder. For more information, refer to Advanced In-App Builder.
- Add a button element to the layout. Create your In-App campaign.
- Set the On Tap Container action of the button element to App Function.
- Select Request Push Permissions from the Action list.
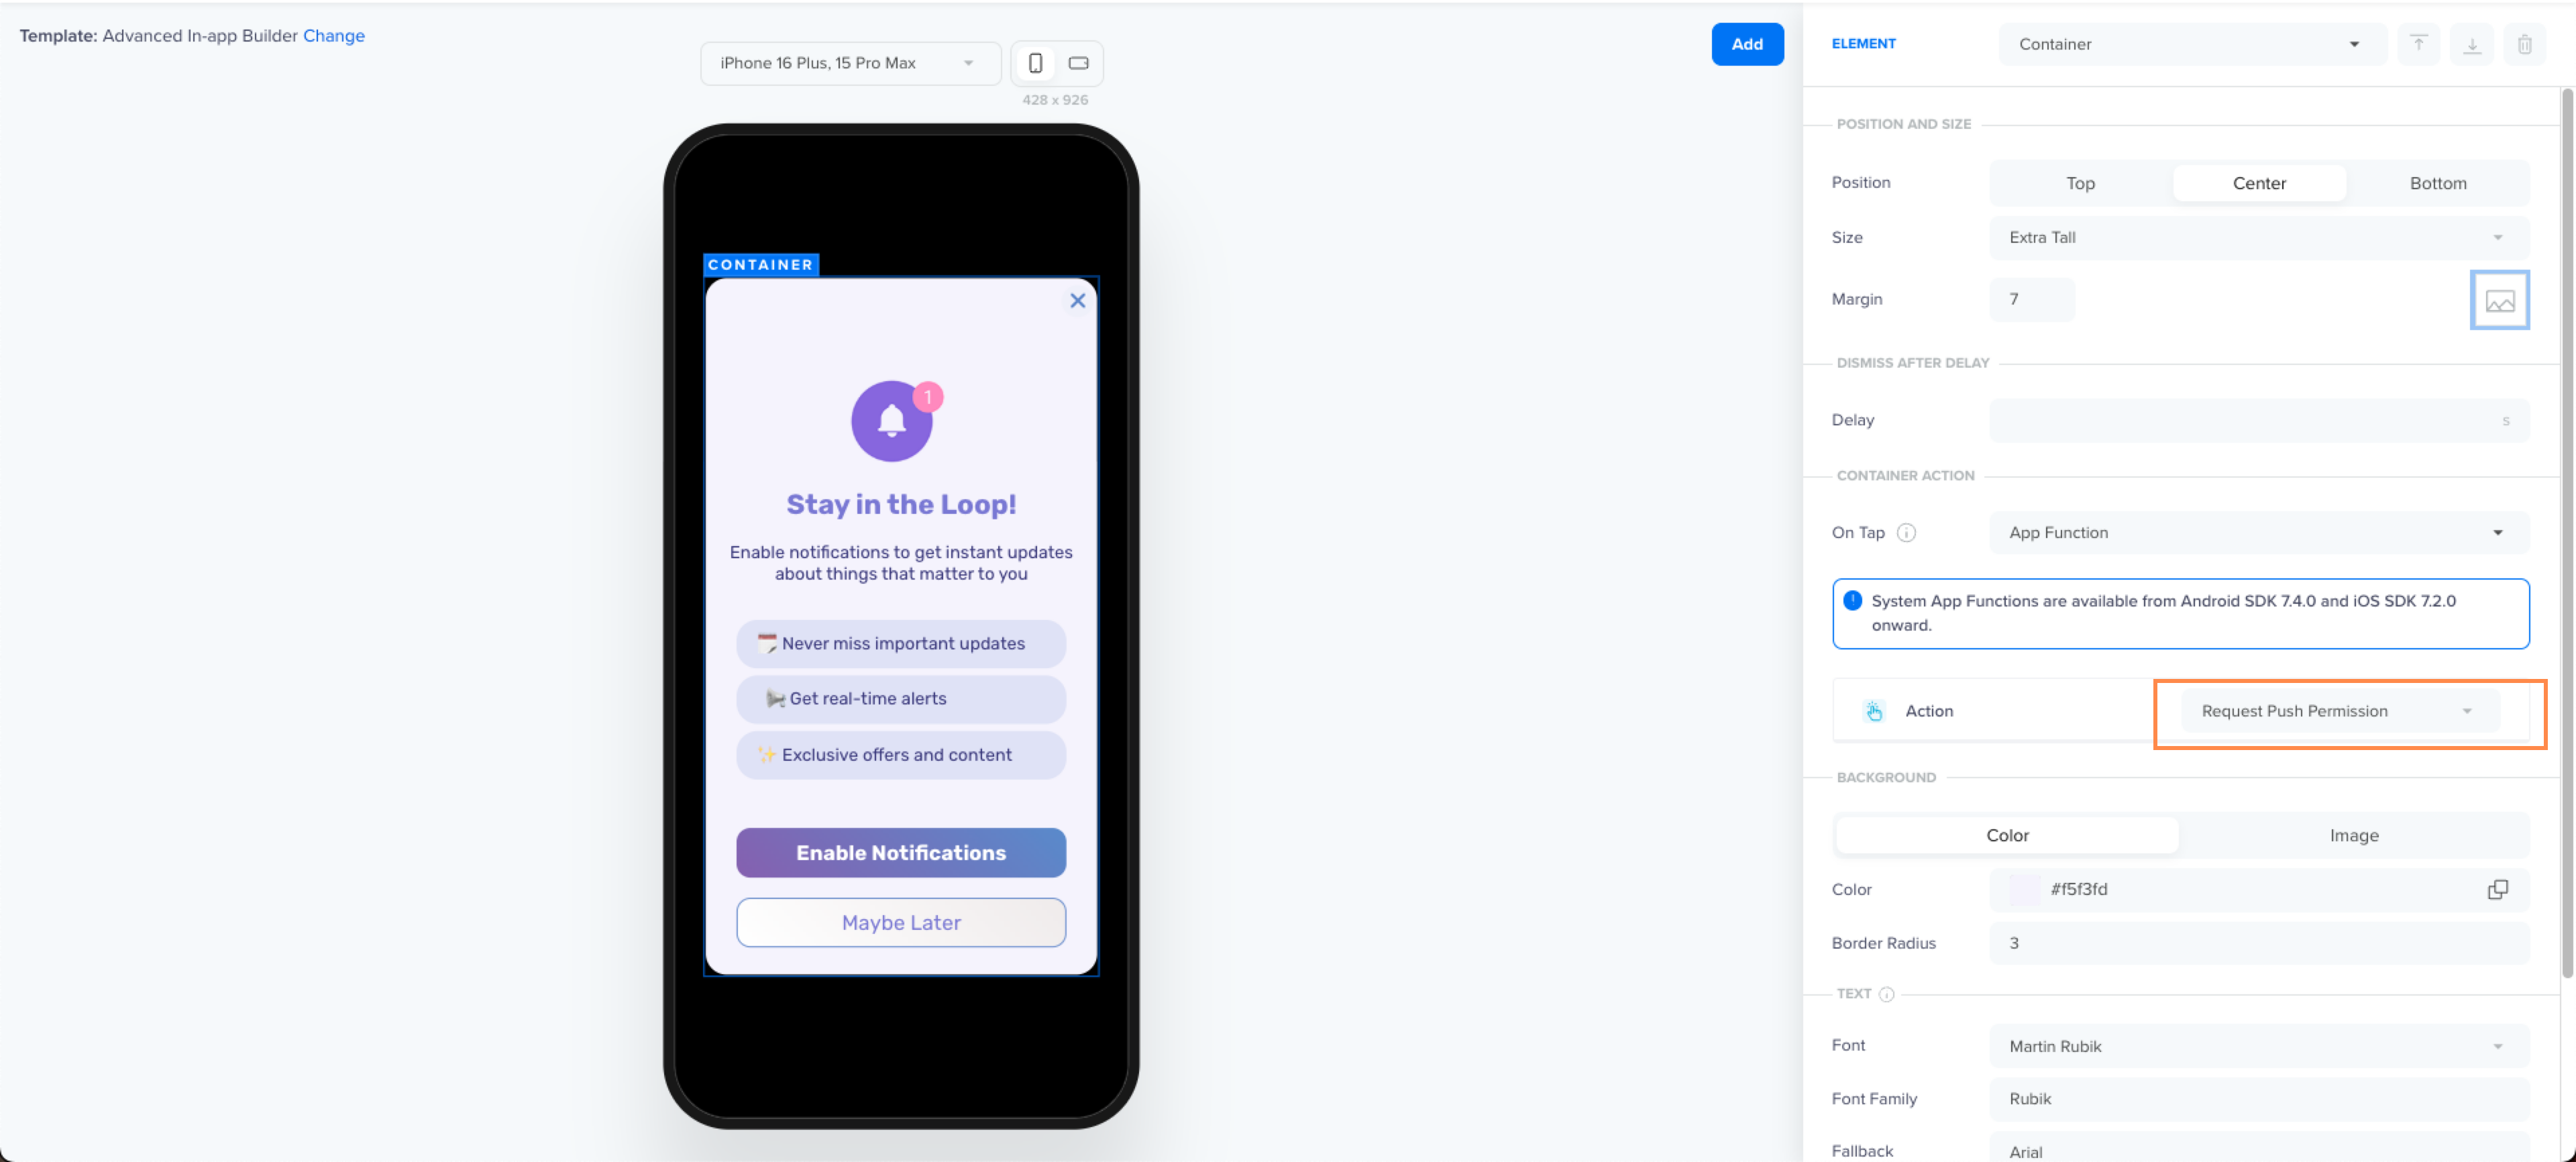
Push Primer Campaign
- In the When section, select the campaign frequency and display rules to avoid overwhelming users. For example, users who reject the notification or opt for Maybe Later.
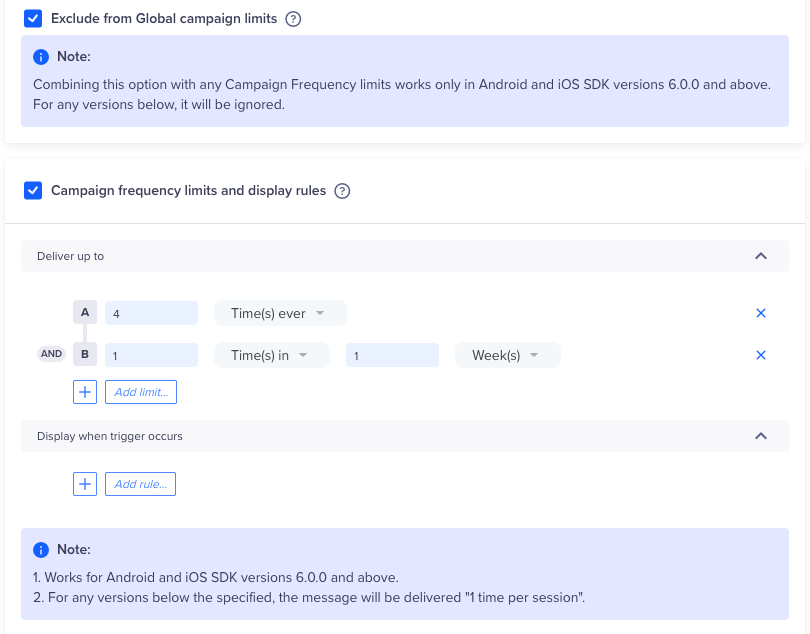
Manage Frequency Caps
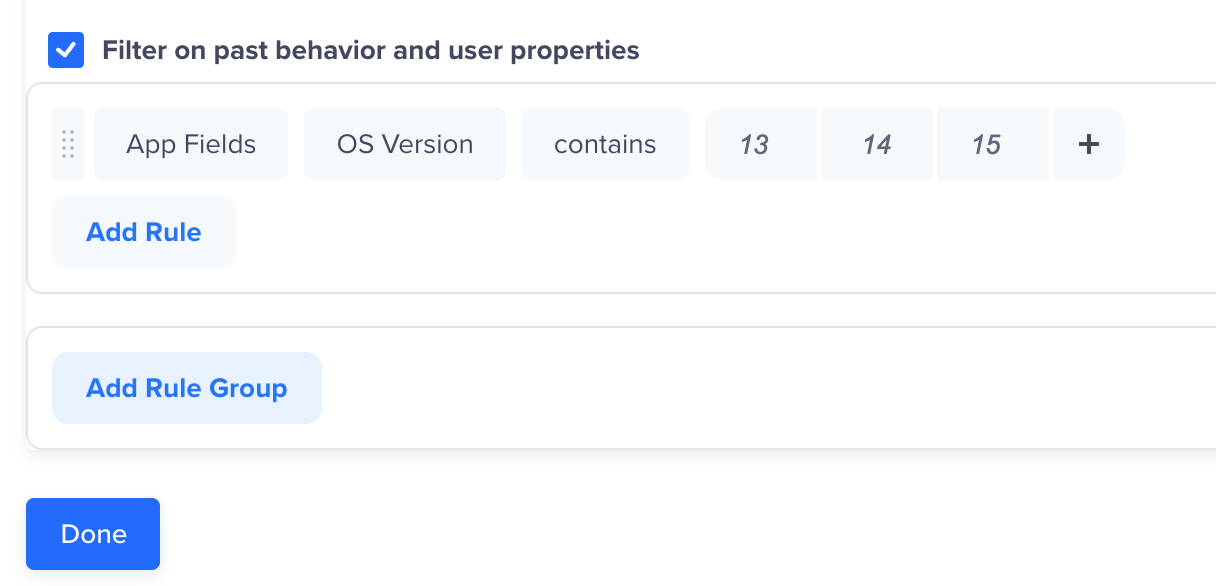
Create a Segment for Users Based on Android VersionCreate a separate segment for Android users who use android 13 and above. Filter with the App Field > OS Version > contains > (Android Versions such as 13,14,15). This ensures that Push Primer messages are shown only to users on devices where notification permission is required on runtime.
This will avoid sending the campaign to users on Android 12 and below, where the notifications do not require any permission and it is granted on app install itself.
To do so, in the In-App Campaign, go to the Who section and, under Target Segment, add filters for the app field OS Version that contain values such as 13, 14, and so on.
- Publish the campaign.
Push Primer Best Practices
Push primers are one-time prompts to request user consent for notifications. A well-timed and clearly worded primer significantly improves opt-in rates and long-term user engagement.
-
Display Only Once at a Strategic Moment: Trigger the Push Primer after a high-value event (for example, completing onboarding or a first purchase), when users are more receptive to receiving notifications. Contextual timing can almost triple push opt-ins compared to first-launch prompts.
-
Delay Until Value is Understood: Let users experience the core features before prompting. Value recognition increases the likelihood of opt-in. Average opt-in rates can rise by 45% when shown after the third session.
-
Communicate Clear Benefits: Use specific, value-driven language such as:
- Track your delivery in real-time
- Get notified of price drops instantly
Avoid vague text such as Enable notifications to stay updated.
-
Trigger After Intent-Driven Events: Display primers after meaningful user actions such as Added to Cart, Search Completed, or Onboarding Finished. These events correlate with higher intent and perceived utility of notifications.
-
Keep Messaging Short and Actionable: Use a concise headline and a one-line benefit statement.
For example: _Want delivery updates? Enable push alerts now._ - Stick to plain language and avoid any technical jargon.
- Use compelling visuals and clear reasons why the user should opt in.
- Provide Clear, Non-Coercive Choices: Always include two obvious options, such as Allow Notifications and Not Now. Avoid dark patterns or forced opt-ins.
- A/B Test Message Copy and Timing: Continuously test variations in CTA labels, tone, and trigger moments to determine what performs best for your audience.
Updated 3 months ago