Campaign Approval Workflow
Learn about the campaign workflow management
Overview
Campaign Approval is a security feature that provides increased control over who can send campaigns within your organization.
Within your marketing team, you might have one person responsible for creating campaigns in CleverTap, and another who reviews and approves them before they can be published. The approver feature enables this workflow in CleverTap by requiring approval before a campaign is published. The campaign can be reviewed in the segment, time, and campaign copy.
As part of this feature, Approver, a new system role, has been introduced. Users in this role can approve campaigns created by users in the creator role. After enabling the Approver role for your account, a creator cannot publish a campaign unless the Approver approves it.

Add Campaign Approvers
How to Enable/Disable Campaign Approval Feature
To enable the Campaign Approval process, navigate to Settings > Security > Campaign Approval from the CleverTap dashboard. You can toggle ON/OF the Enable Campaign Approval on the Dashboard to enable or disable the feature.

Enable or Disable Campaign Approval Feature
Assign Approver Access to Users
After enabling the Campaign Approval feature, a new Approver role is also activated. You can assign this Approver role to a particular user.
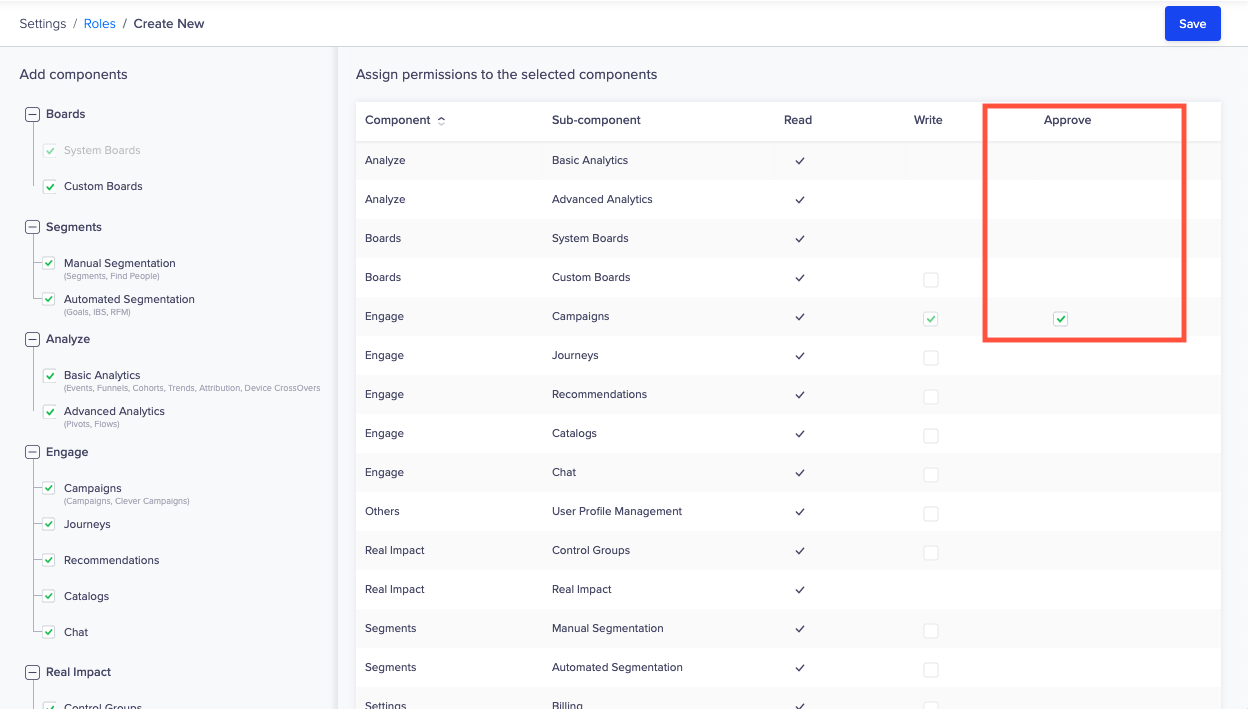
One can also create custom roles with approver access basis the requirements to limit access to certain features for a particular user.
Note:It is important to note that Admins are by default Approvers.
Campaign Approval Workflow
After enabling the Campaign Approver feature for your account, a new workflow is enabled to send campaigns. It involves the following steps:
- The creator creates a campaign in CleverTap.
- The creator requests approval to send the campaign. For this, an email is sent to the admin or approver (including any custom role with approver access) to review the campaign and decide whether or not to approve the campaign.
The following are some of the key points to remember for the campaign approval workflow:
- The campaign is sent if the approver or admin approves the campaign. If the campaign is rejected, the campaign is not sent. For example, a marketer creates a promotional SMS campaign for a new product launch. The campaign is submitted for approval by the team lead.
If the team lead approves the campaign, it is sent to the intended audience. If the team lead rejects the campaign due to incorrect content, the campaign is not sent to the subscribers. - The creator schedules the campaign at a particular time, and if the approver does not approve the campaign by then, the campaign is marked as expired. If the approver still wants to send the campaign, they have to clone the campaign and schedule it accordingly. For example, a marketing manager plans a flash sale campaign for the weekend. The campaign is scheduled to be sent on Saturday morning. The manager submits the campaign for approval by Friday evening. If the approver does not approve the campaign by Saturday morning, the campaign is marked as expired and does not get sent. If the marketing manager still wants to run the campaign, they must clone the expired campaign, make any necessary edits, and schedule it for a later time.
- For recurring campaigns, after approval and completion of a few runs, the creator can only update the message copy, and the campaign moves back to the Pending for approval state. For example, a non-profit organization runs a weekly donation reminder campaign. The campaign has been approved and successfully sent out for a few weeks. After a couple of successful runs, the campaign creator decides to update the message copy to make it more engaging. The campaign is automatically moved back to the Pending for approval state after the updates. The approver reviews the changes, and either approves the updated campaign to continue its recurring schedule or suggests further improvements.
- If the creator creates a campaign using the Send Now option, then the When section is not editable for the approver. If they still want to modify the When section, they can do so by cloning the campaign and then updating the When section of the campaign.
Note:If campaigns are pending approval, and you disable the Campaign Approval feature, then those campaigns are approved automatically.
FAQs
Q. What happens with rejected campaigns?
A. The campaign creators are notified about the rejected campaigns via email. They can edit and send the campaign for approval again.
Q. Where can creators check comments for campaign rejection?
A. Creators can check the comments in the campaign rejection email.
Q. Is it possible to edit a campaign that is submitted for approval?
A. Yes, the creator can edit and resend a submitted campaign for approval.
Q. Why is the reachability for my campaigns so low?
A. When you create a segment, you can view the reachability of this segment across all channels such as, Web Push, Mobile Push, SMS, Email, and Audiences. This helps you check your campaigns reachability even before you create them.
Navigate to Segments > Segments, then choose the Segment name.
Some of the reasons that may affect Mobile Push reachability include:
- Token Not Present: One of the key reasons for low reachability is that the push token is unavailable in the user profile.
- User Unsubscribe: The user may have unsubscribed from your app and does not want to receive push notifications.
- Token Not Generated: The token did not generate on the first app launch.
- App Uninstall: The user has uninstalled the app.
Updated about 1 month ago
