Create Campaigns using Recommendations
Overview
Once the recommendations have been published, you can use them in your engagement workflow by creating personalized and contextual recommendations for your user base.
NoteRecommendations are supported for all channels.
Access Recommendations Within a Campaign
During the campaign creating in the What section, access recommendations with the following steps:
- Type the @ symbol to personalize your message.
- Click Recommendations.
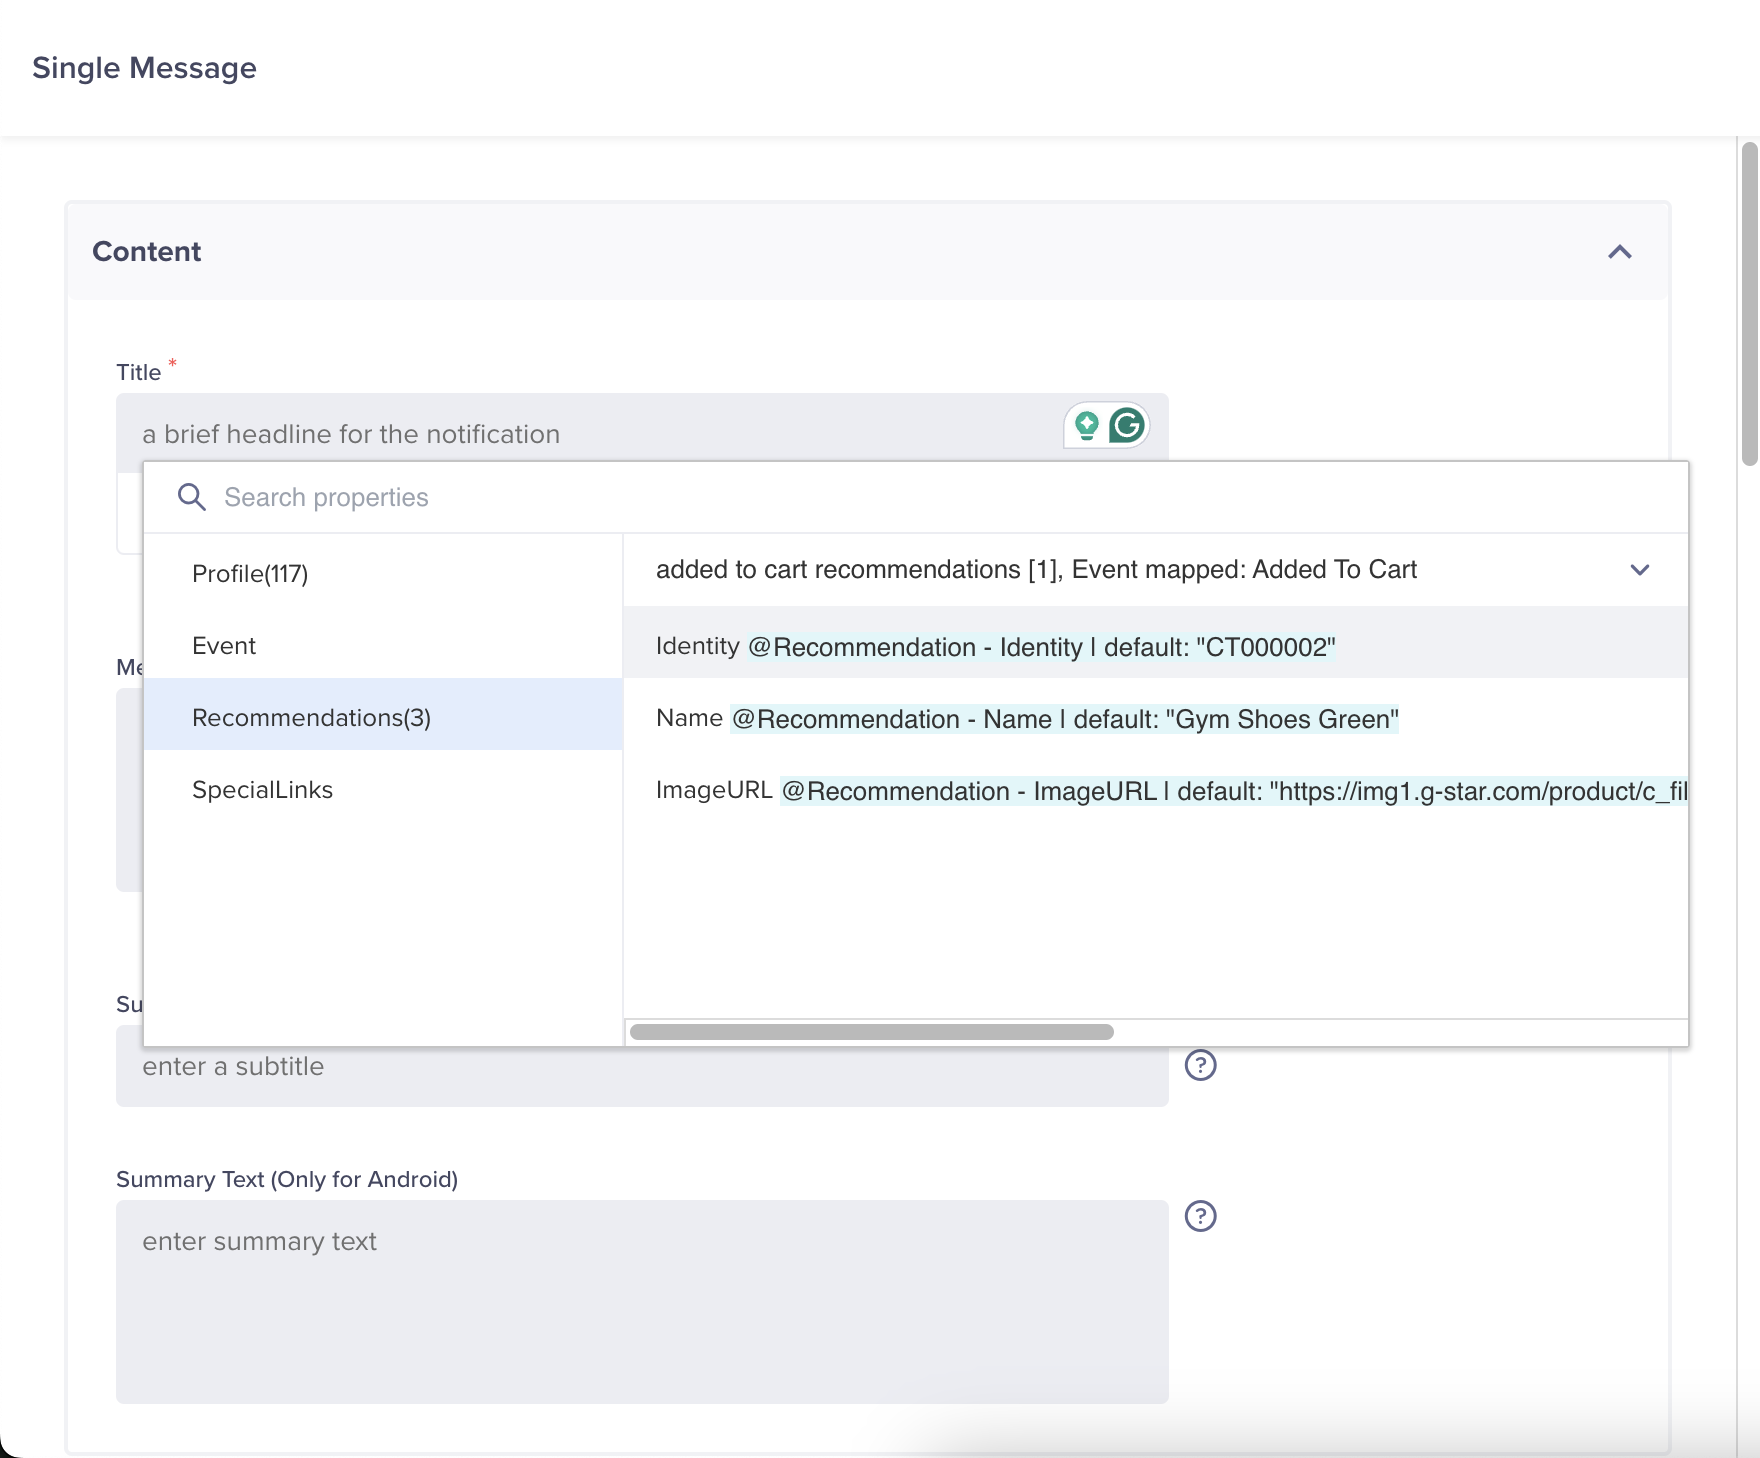
Create Recommendation Content
Create Recommendation Content
To create recommendation content, perform the following steps:
- Select a recommendation from a list of recommendations that have already been published and the event that you want to trigger the recommendation.
Event SelectionYou can only select events you mapped to the catalog on which the chosen recommendation is running.
- (Optional) Filter recommendations by event:
- Click + Filter by event.
- Select whether you want to include or exclude an event and categories.
- Add more events if required.
How the Filter by Event WorksThe filter by event takes precedence over recommended items and selected events matching. It provides the capability to include and exclude all recommended items when an item in the product catalog column matches a defined event property.
- (Optional) Filter recommendations by location:
- Click + Filter by location.
- Select a product location catalog and a radius.
- Add more locations if required.
How the Filter by Location WorksThe filter by location takes precedence over the location of the recommended items which are fetched from the location catalog. Items in a defined range are looked up with the associated product location catalog and matched with the user's last known location to be included in the filter.
- Decide the sequence of items to be served up to the user out of the list of items that can be recommended (for example, serve up the first item from the list of recommended items).
- Click Create.
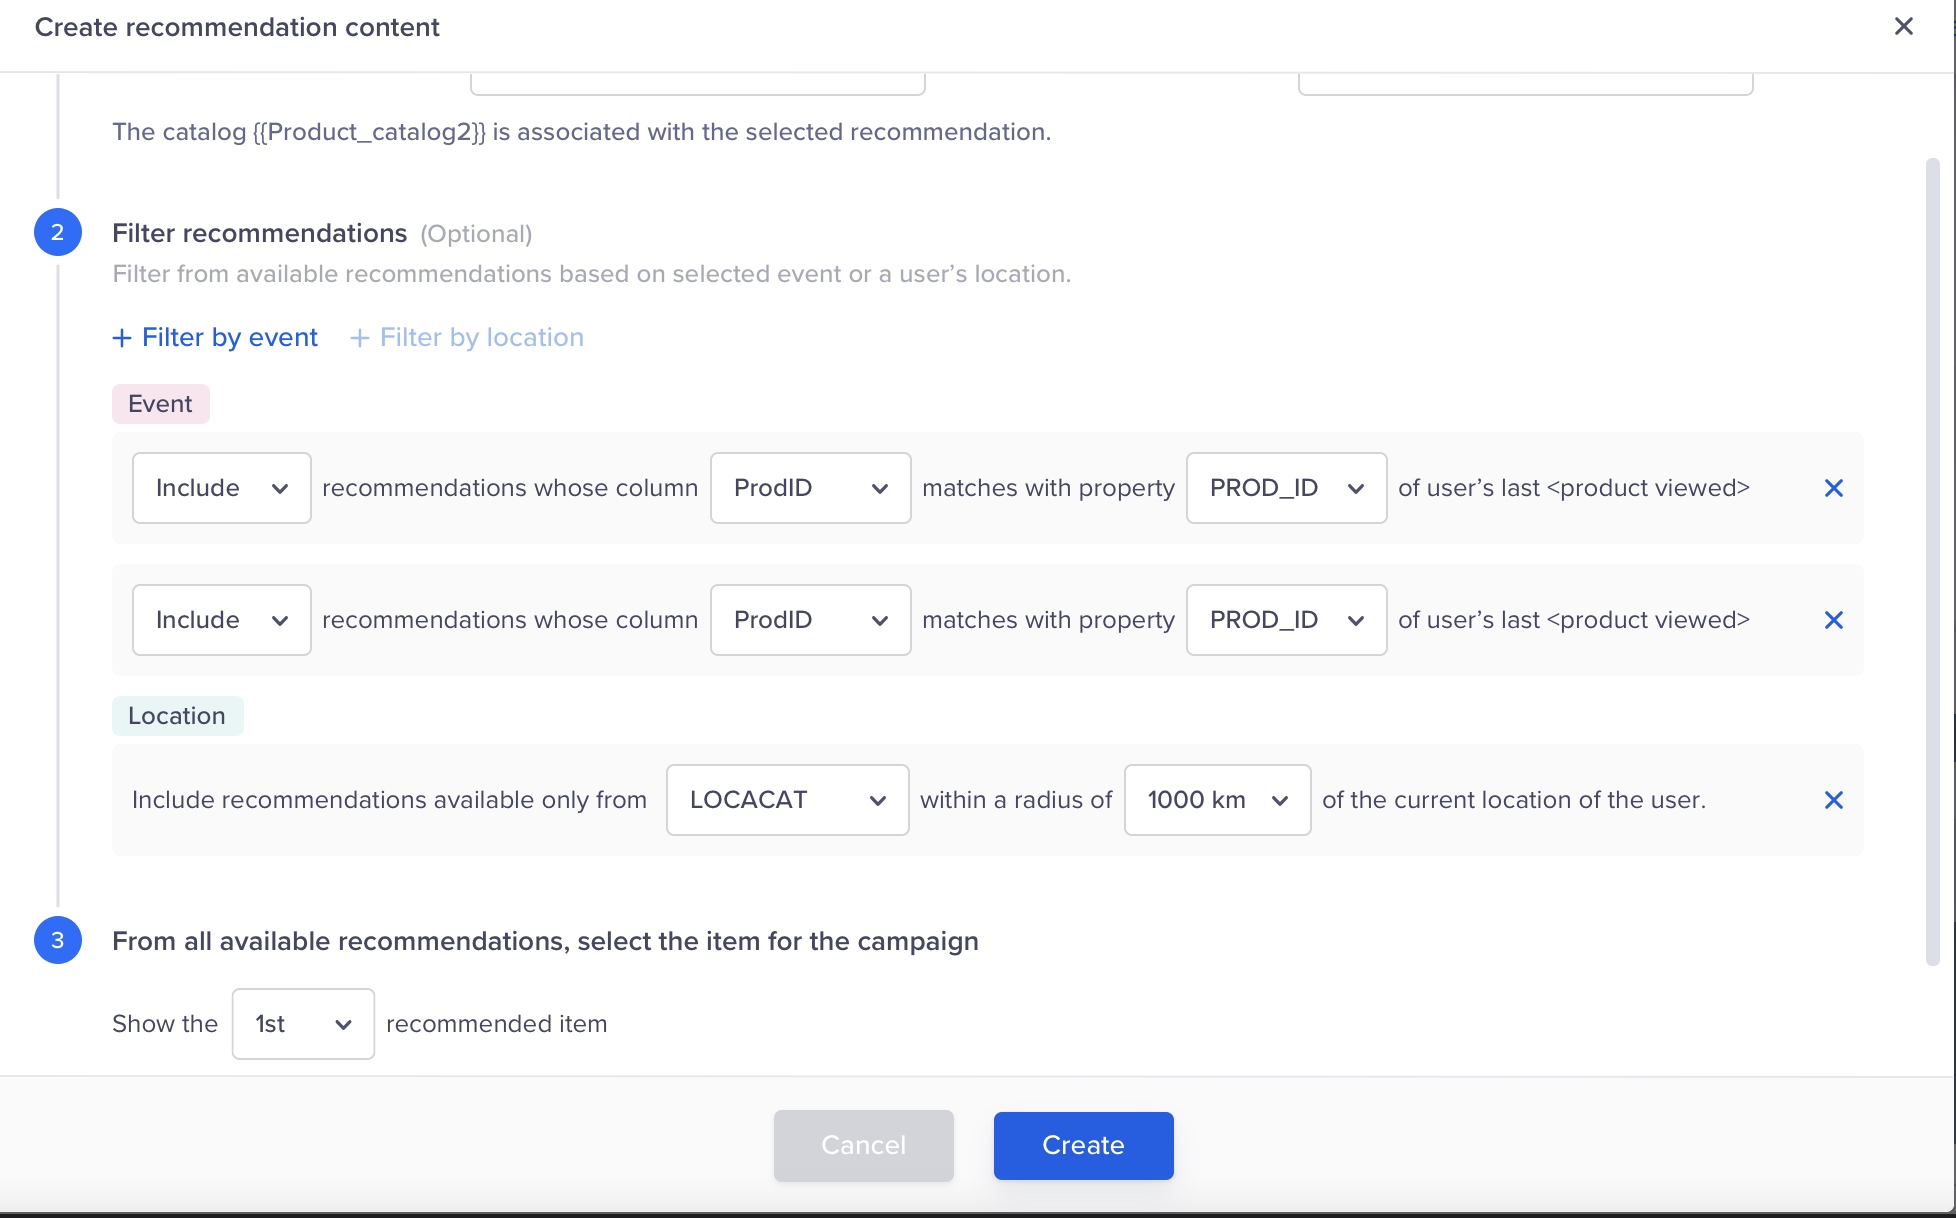
Enhance the Recommendations with both Catalogs
Web Popup Campaign PreviewIn case of Web Popup campaign preview, CleverTap does not support recommendations.
Choose the Fields to Personalize your Message
Now that you have created a recommendation, use the following steps to finalize your content:
- Choose the particular fields from the catalog that you want to use in your personalized message.
- Enter your content in the title and message.
When the campaign is sent out, the fields will be replaced and the message will contain the personalized fields for each product.
Video ExampleYou can send out a recommended video to the user with the video name and thumbnail image based on the last videos a user has watched.
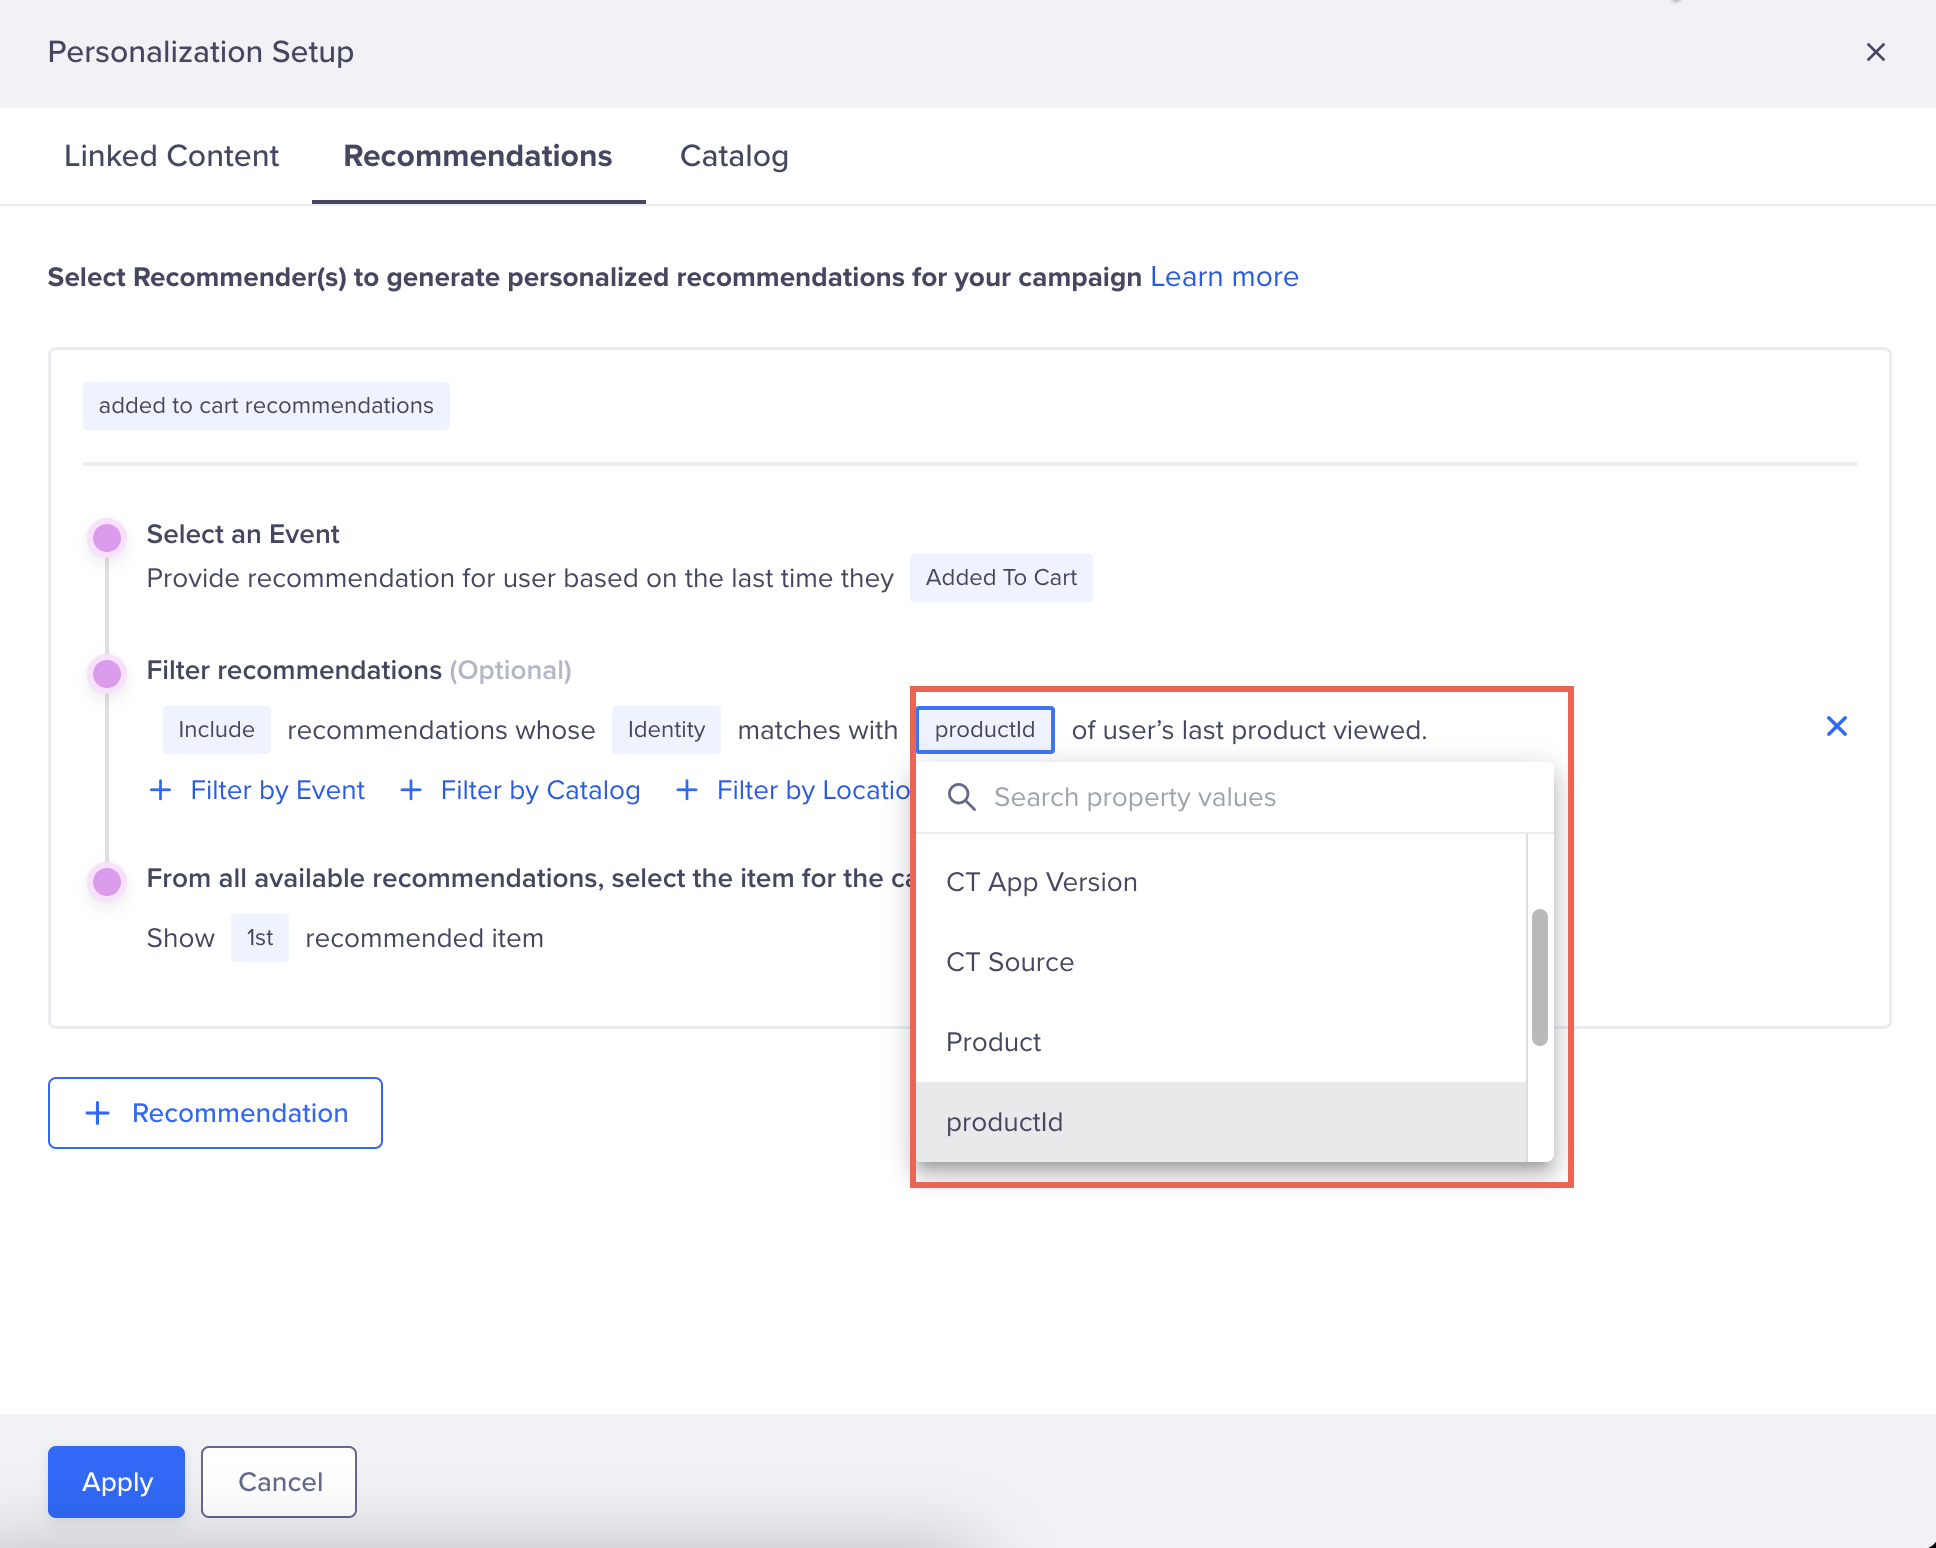
Select Catalog Field to Map
- Send a test campaign to yourself to see the look and feel of the campaign. The test message will show the first item in the recommendation list.
- Once you are done testing, publish the campaign.
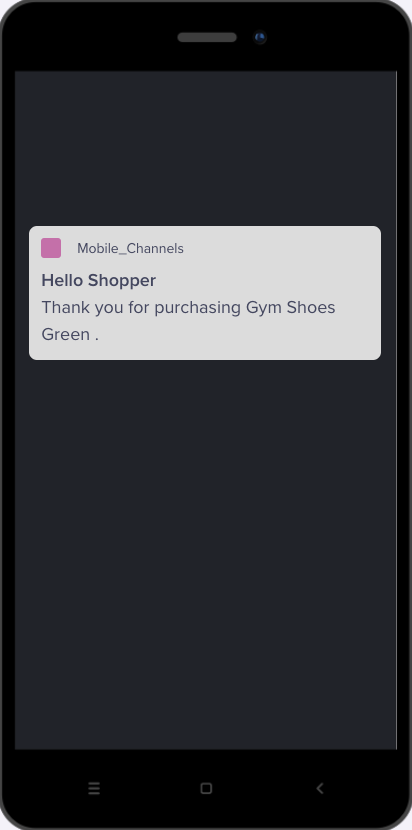
Preview the Campaign
Email Campaigns with Recommendations
You can create email campaigns with recommended content by invoking recommendations within the email messages. Beyond this part, all the steps are the same as the generic ones described in the sections above.
You can create emails using:
- New email with rich media
- Templates
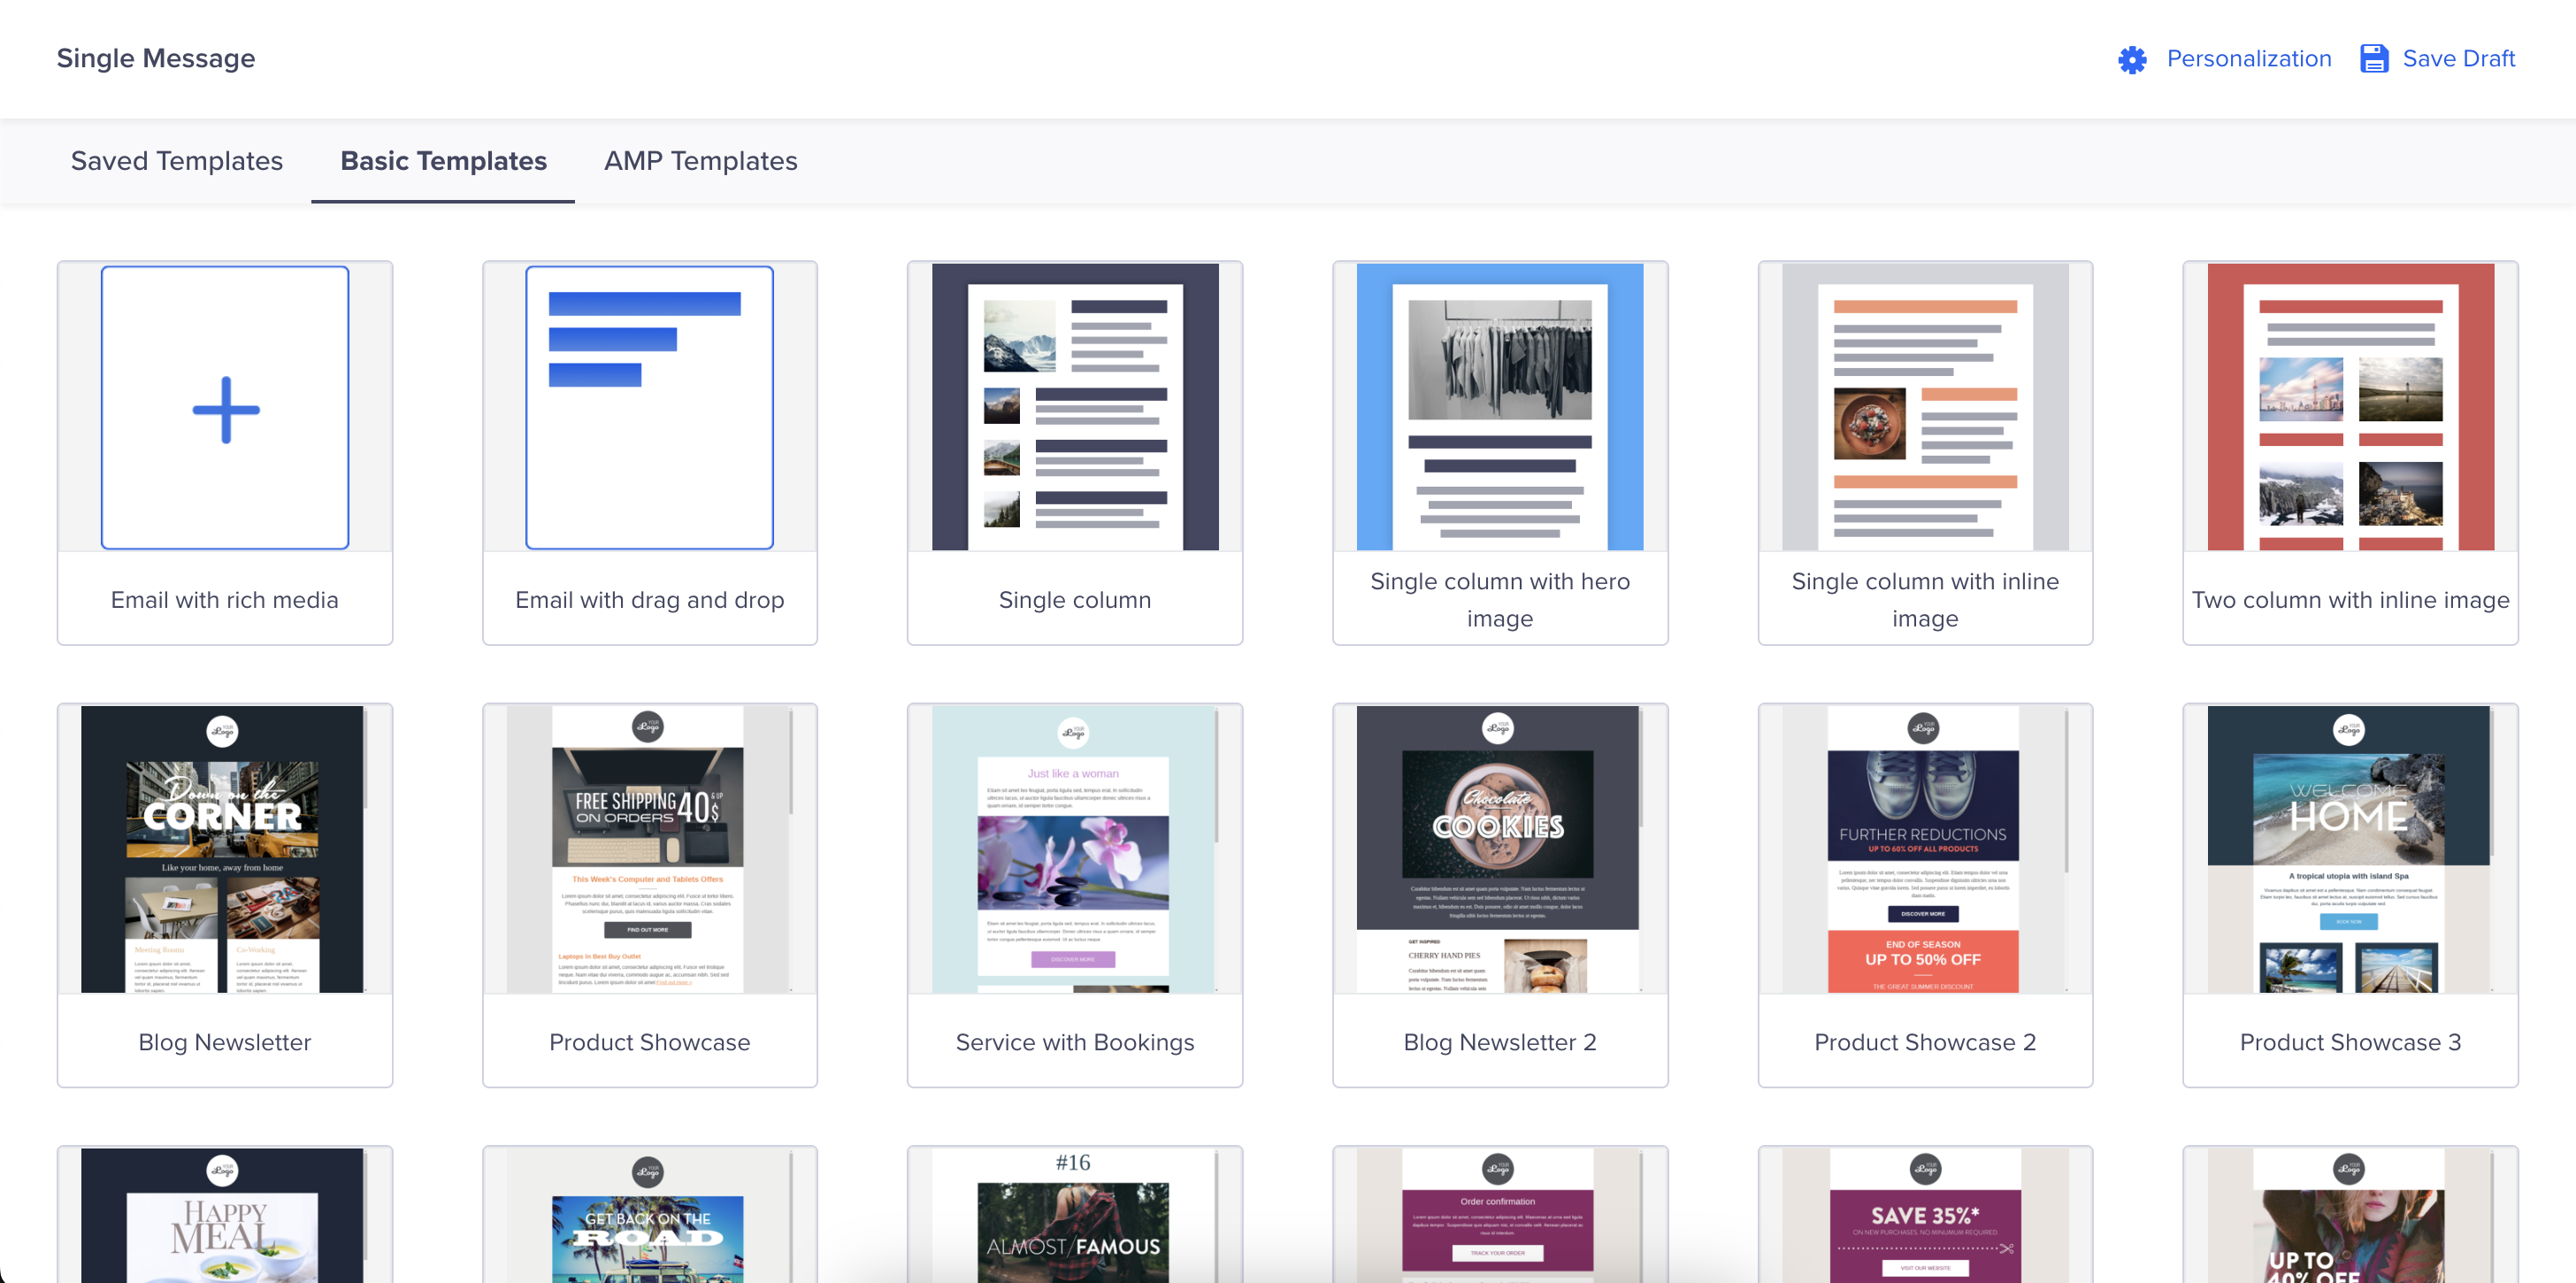
Create Email Campaigns with Recommendations
Recommendations using a New Email with Rich Media
You can create personalized recommendations using a new email with media with the steps below.
Link with Recommendations
You can add recommendations within links with the following steps:
- Click on the link icon to add a link to your email message.
- Type the @ symbol to personalize the link using recommendations in the display text and the URL fields.
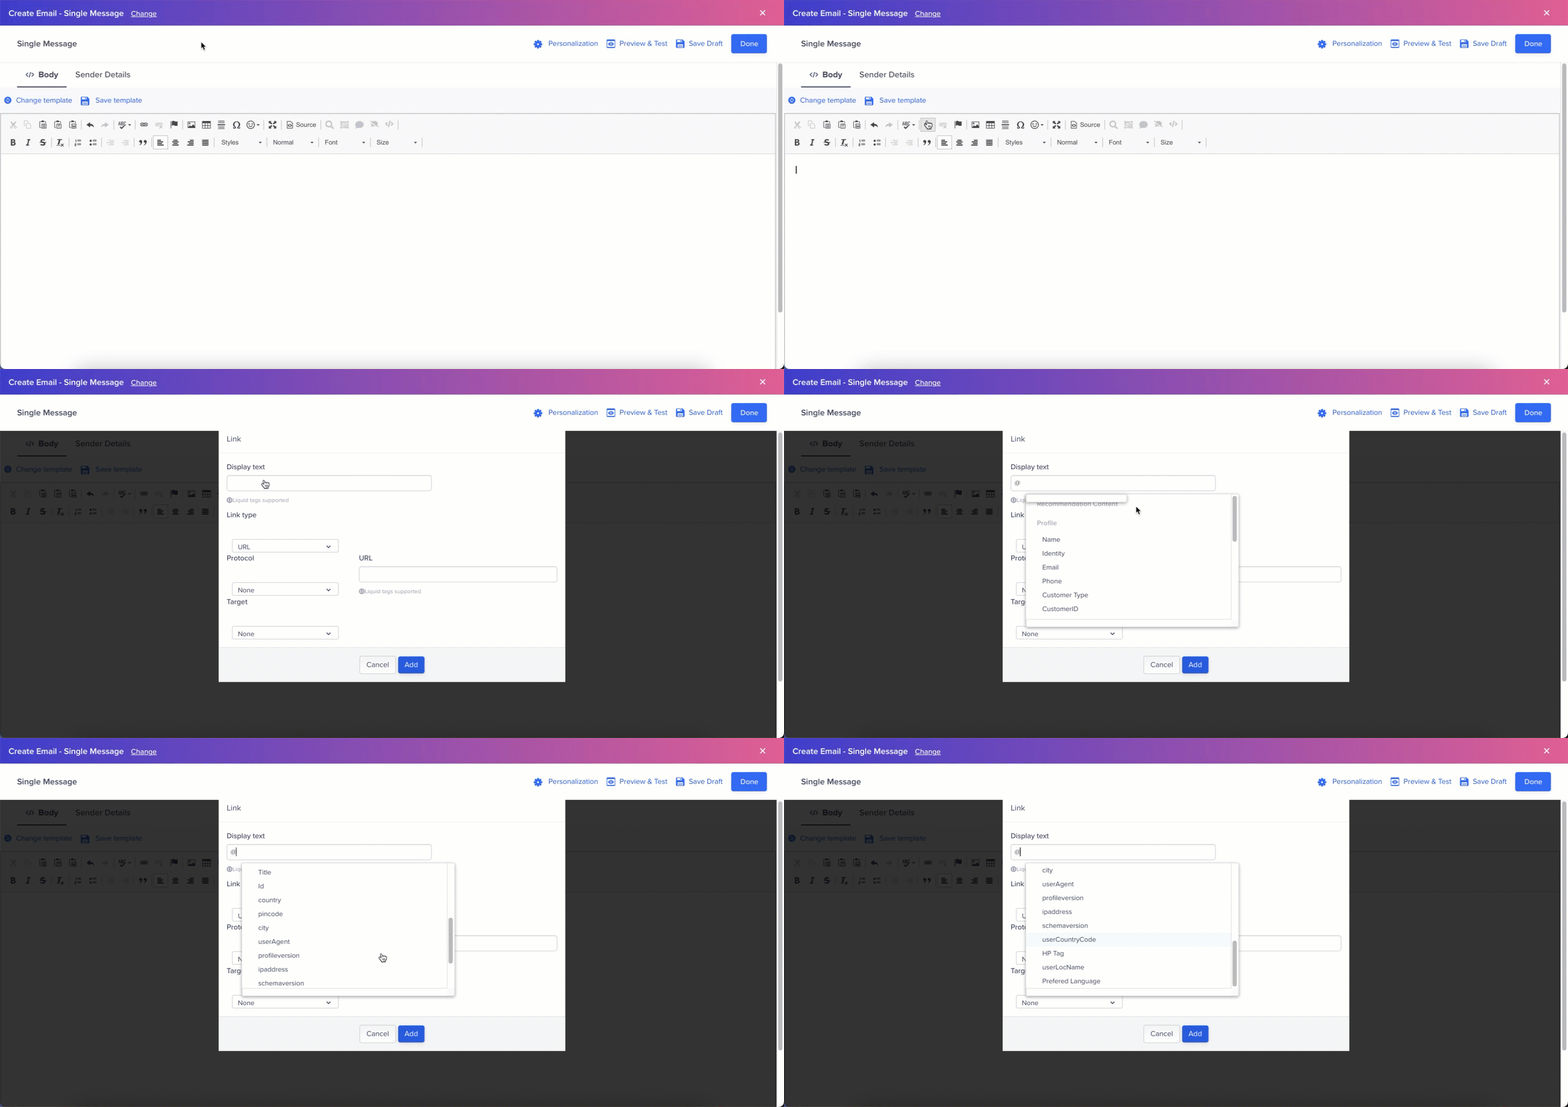
Create Link with Recommendations
Image with Recommendations
You can also add recommendations within images with the following steps:
- Click on the image icon to add an image to your email message.
- Type the @ symbol to personalize the link using recommendations in the URL and the alternative text fields.
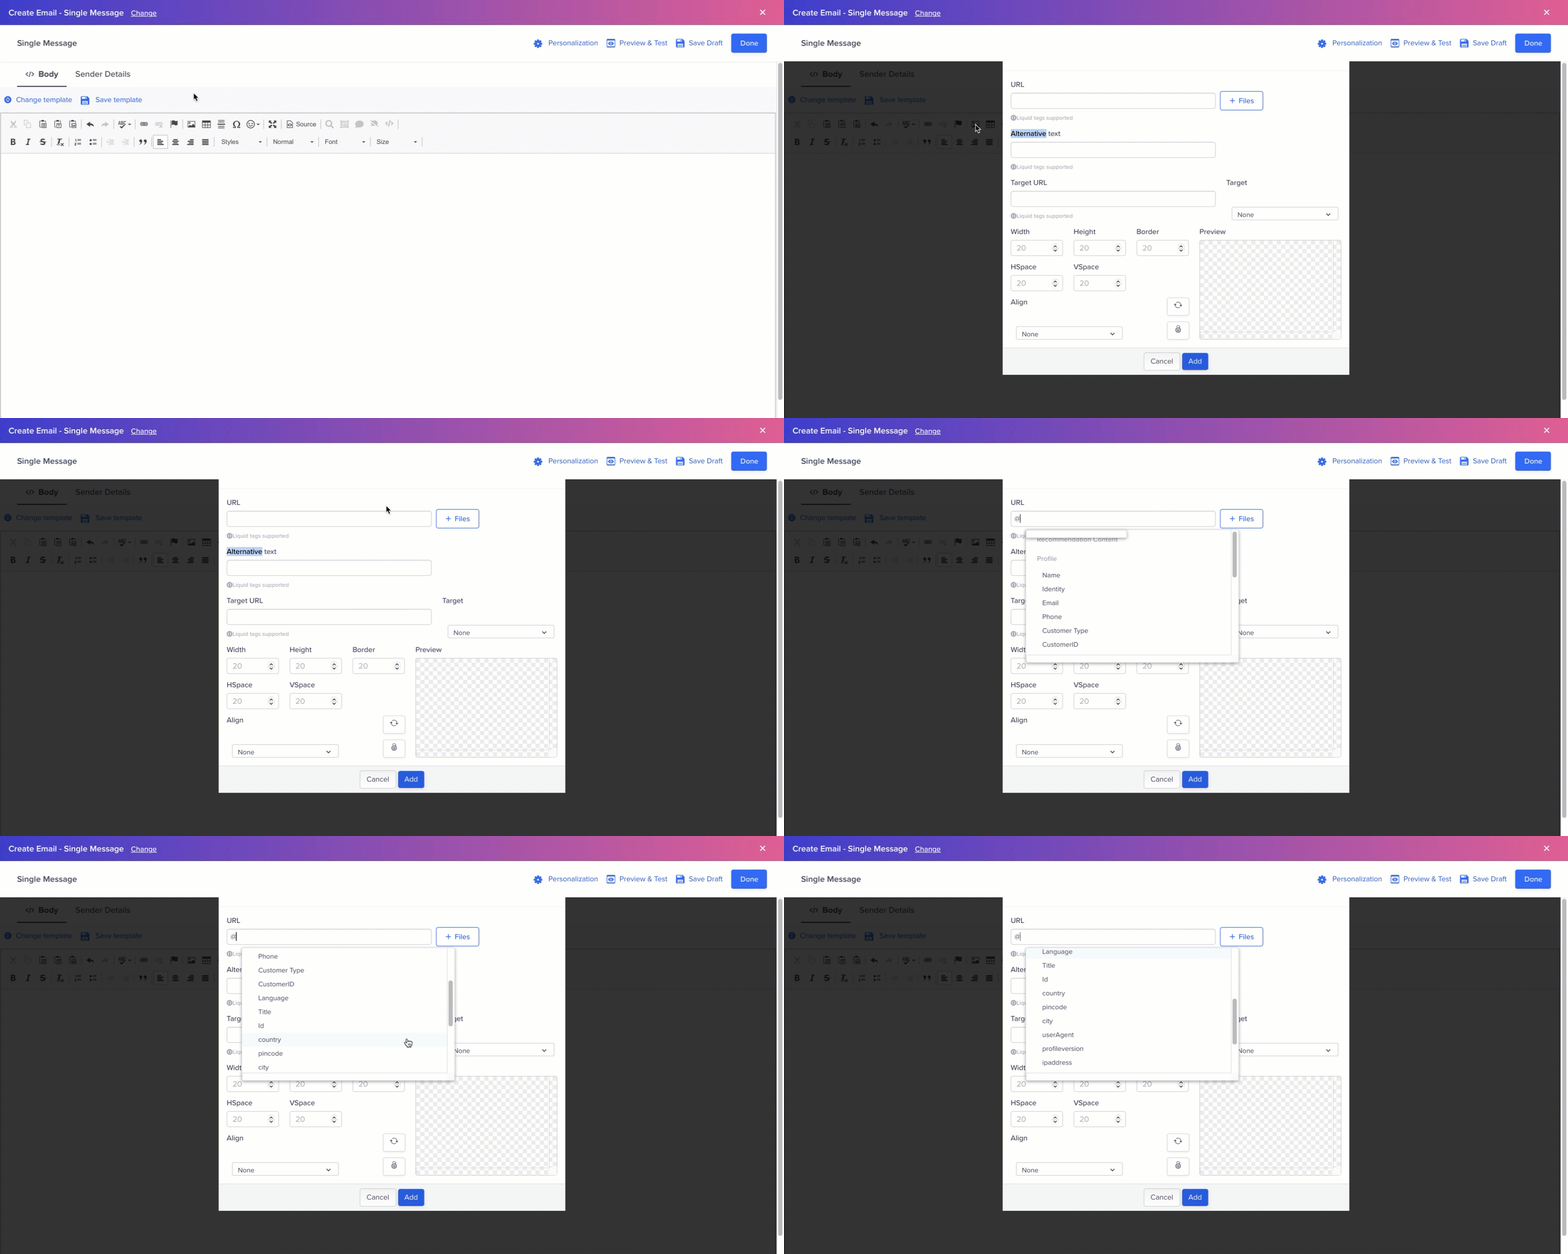
Create Image with Recommendations
The remainder of the steps is the same as any other campaigns as explained in the sections above.
Recommendations in Template Emails
You can create personalized recommendations using template emails with the steps below.
Links, Images, Deeplinks, and Custom HTML with Recommendations
You can add recommendations within links, images, deeplinks, and custom HTML with the following steps:
- Drag and drop the Dynamic Content block into the content box in the center of the email body.
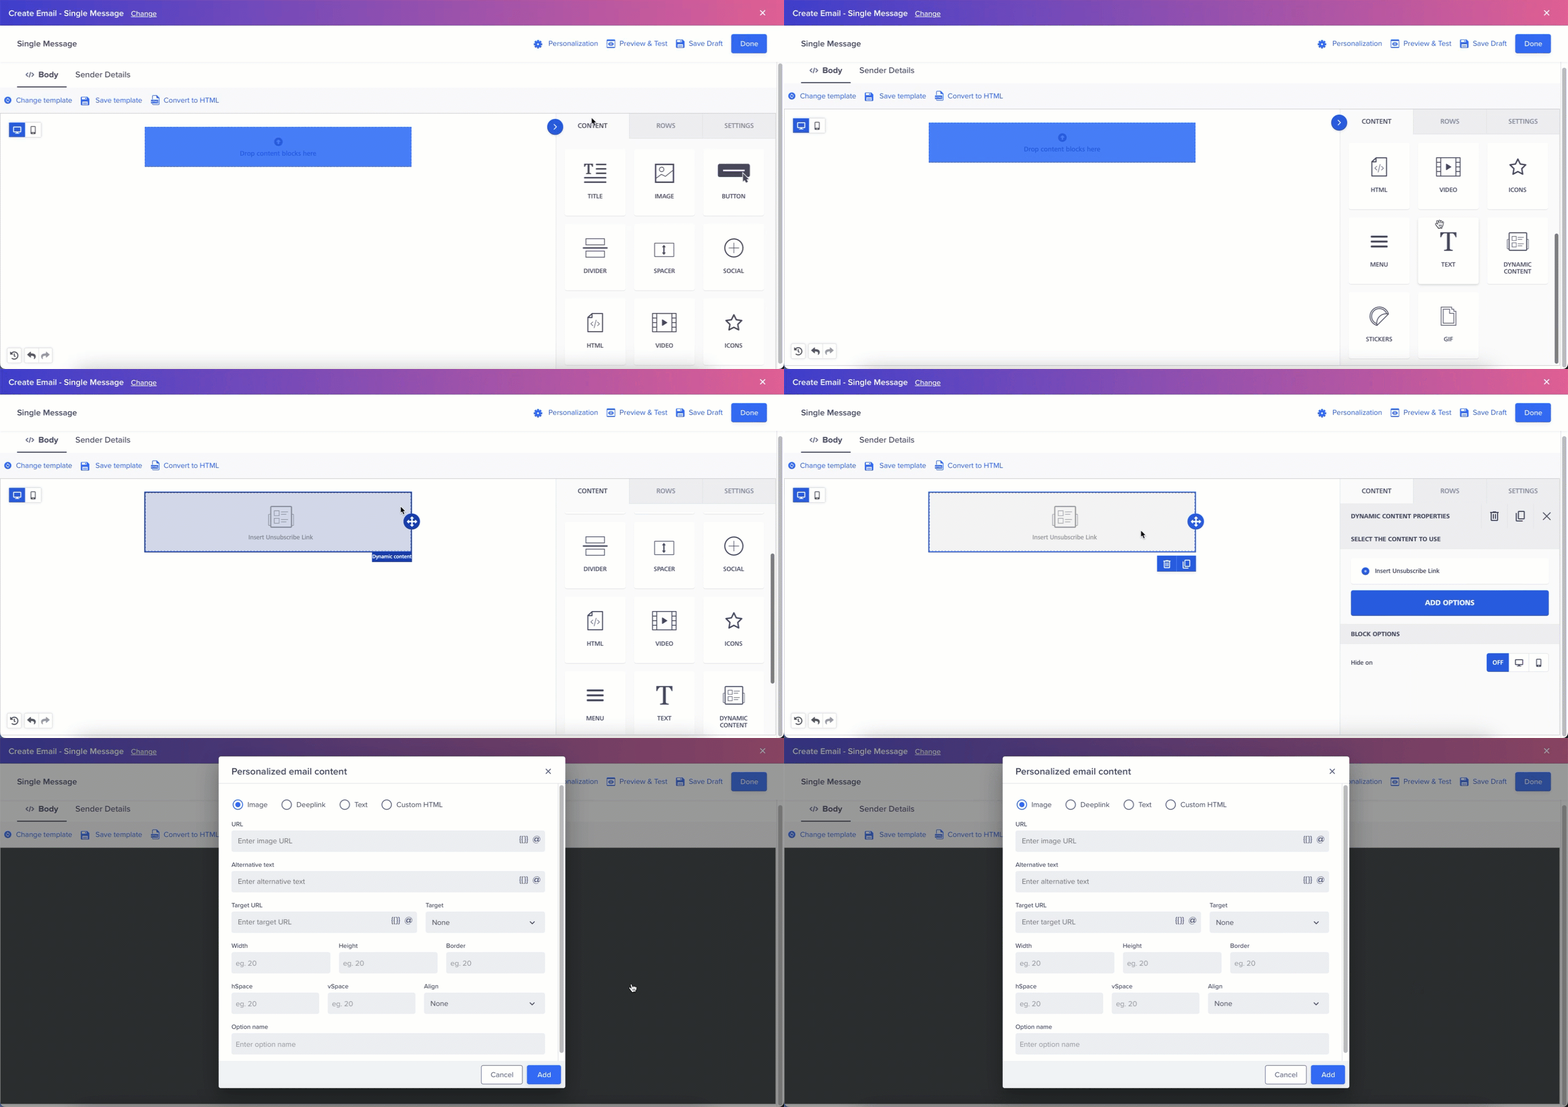
Add Recommendations within Links, Images, Deep-links, and Custom HTML
- Click on the new content box to display the menu on the right.
- Click on the Add options button to access the dynamic content options.
- When the window pop-up displays, select one of the following options:
- Image
- Deeplink
- Text
- Custom HTML
Option Name RequiredWhen you create a dynamic block, the option name is mandatory. Also, these dynamic blocks can be re-used if required.
Image with Recommendations
Type the @ symbol to personalize the image content using recommendations in the URL, alternative text, and target URL fields.
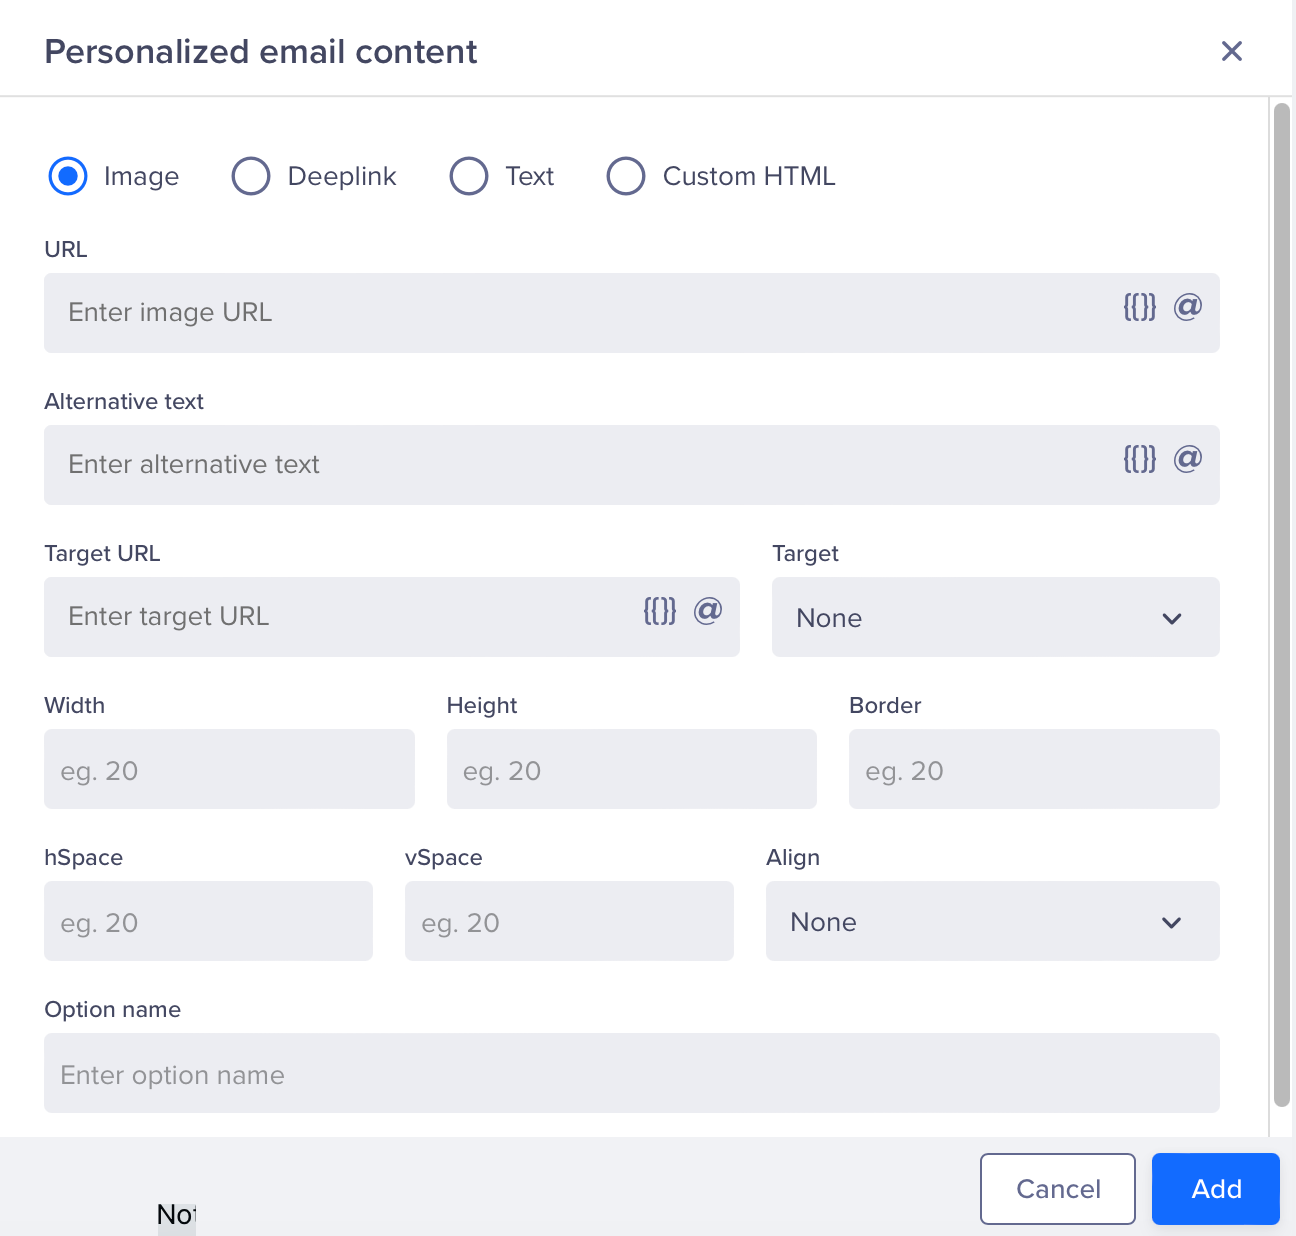
Personalize Image Content using Recommendations
Deeplink with Recommendations
Type the @ symbol to personalize the deeplink content using recommendations in the display text and URL fields.
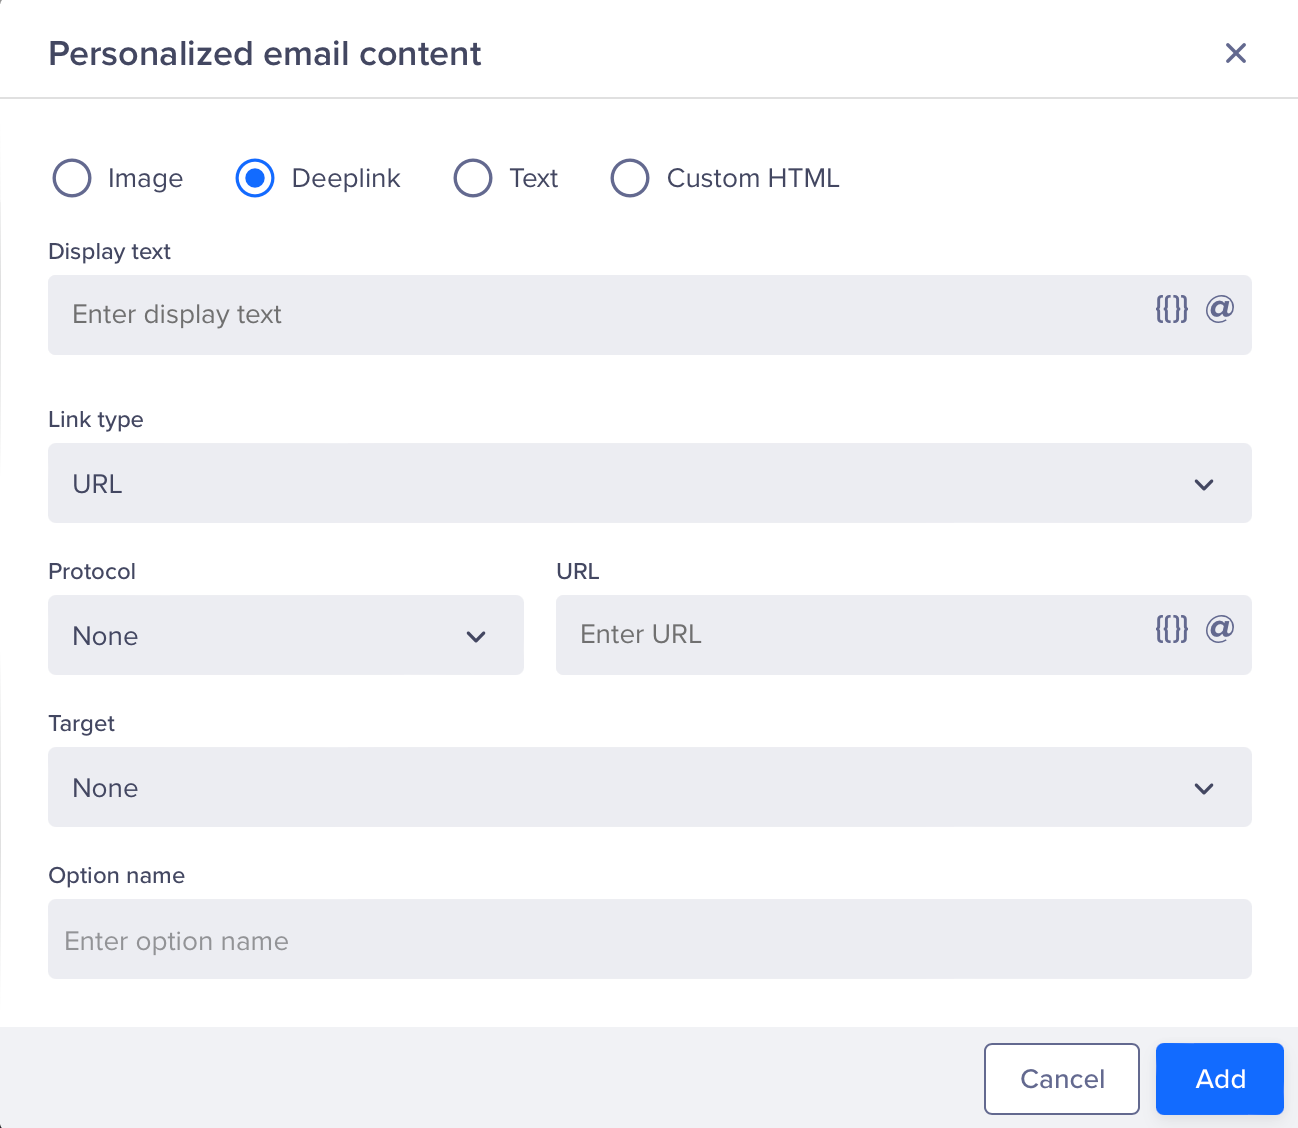
Personalize Deeplink Content using Recommendations
Text with Recommendations
Type the @ symbol to personalize the text content using recommendations in the text field.
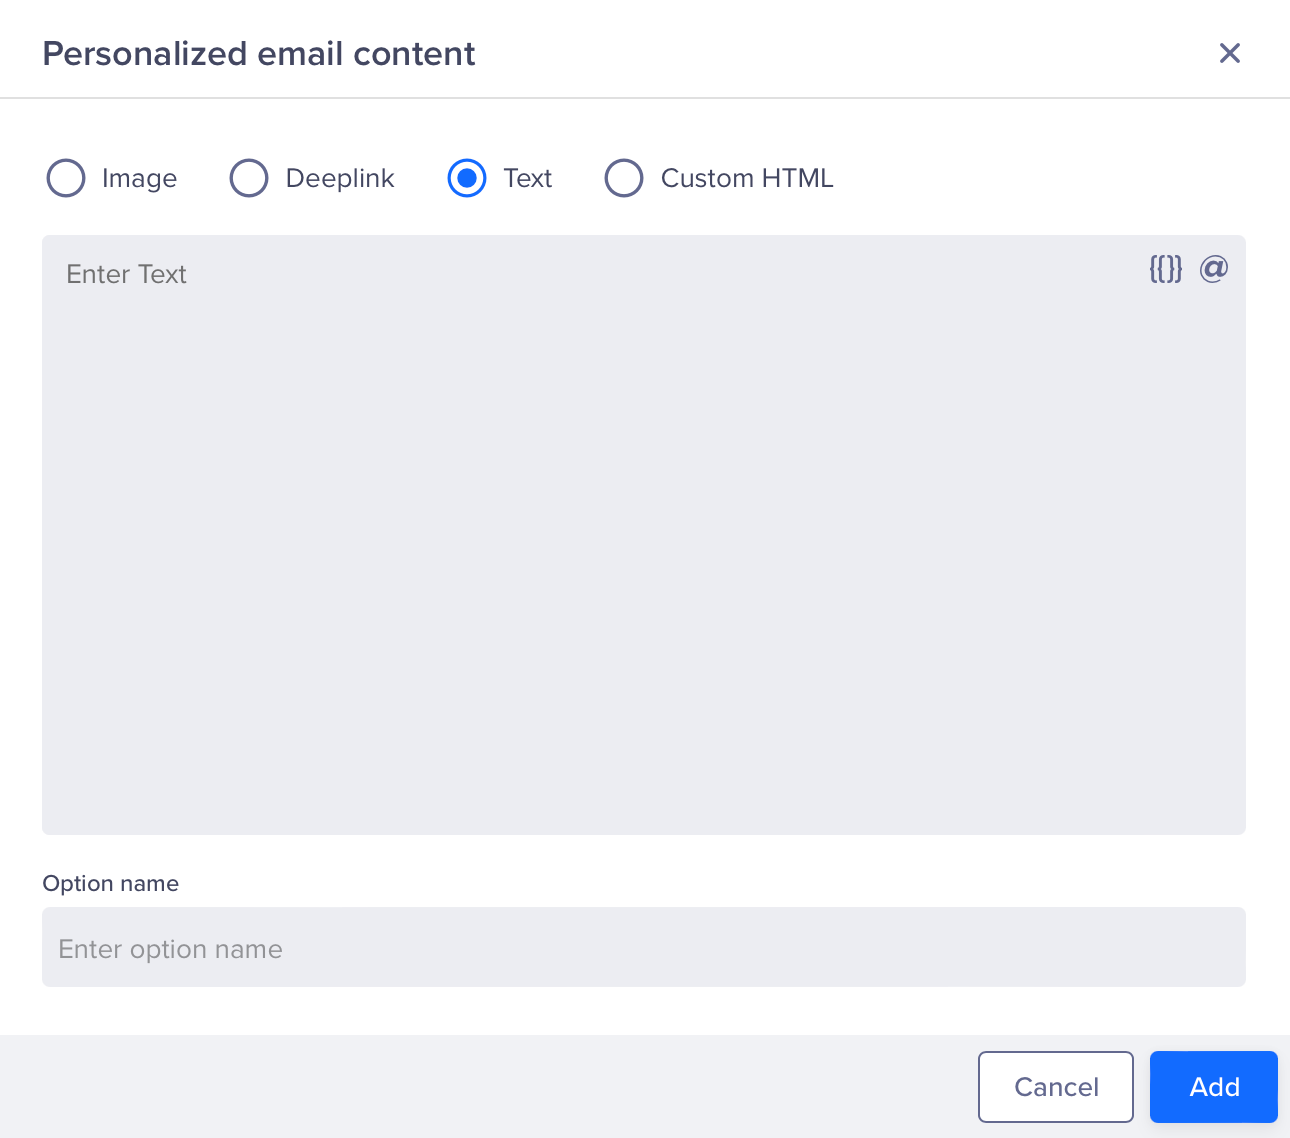
Personalize Text Content using Recommendations
Custom HTML with recommendations
Type the @ symbol to personalize the custom HTML content using recommendations in the custom HTML code box.
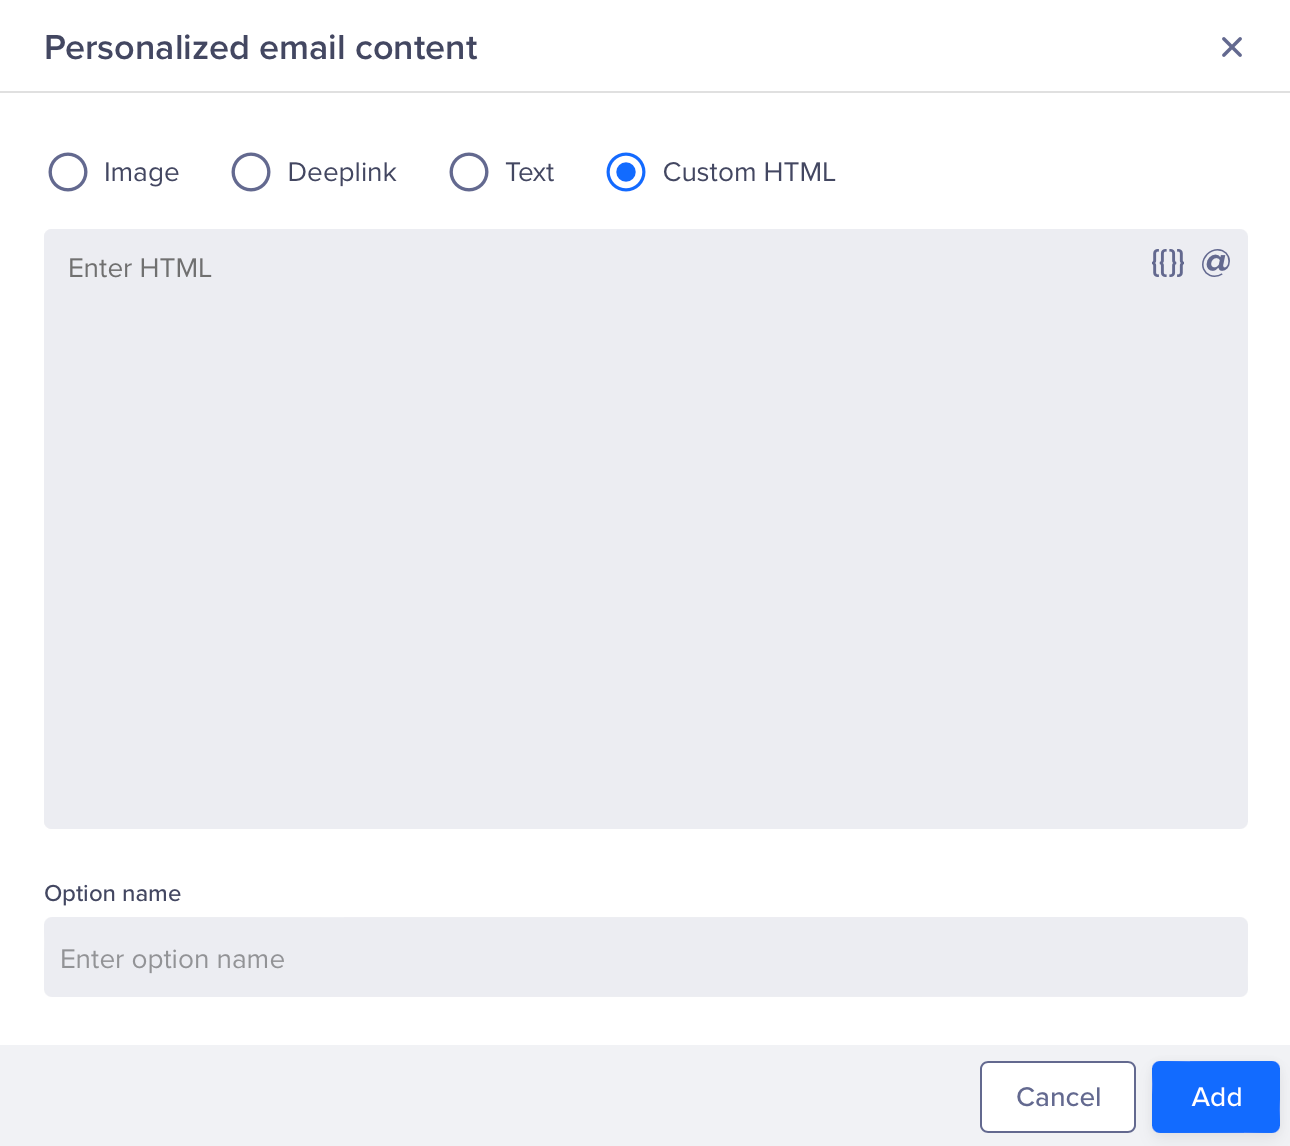
Personalize Custom HTML Content using Recommendations
Existing Text Content Type in the Template Containing Deeplinks with Recommendations
You can access recommendations within the existing text content type with the following steps:
- Drag and drop the Text block into the content box in the center of the email body.
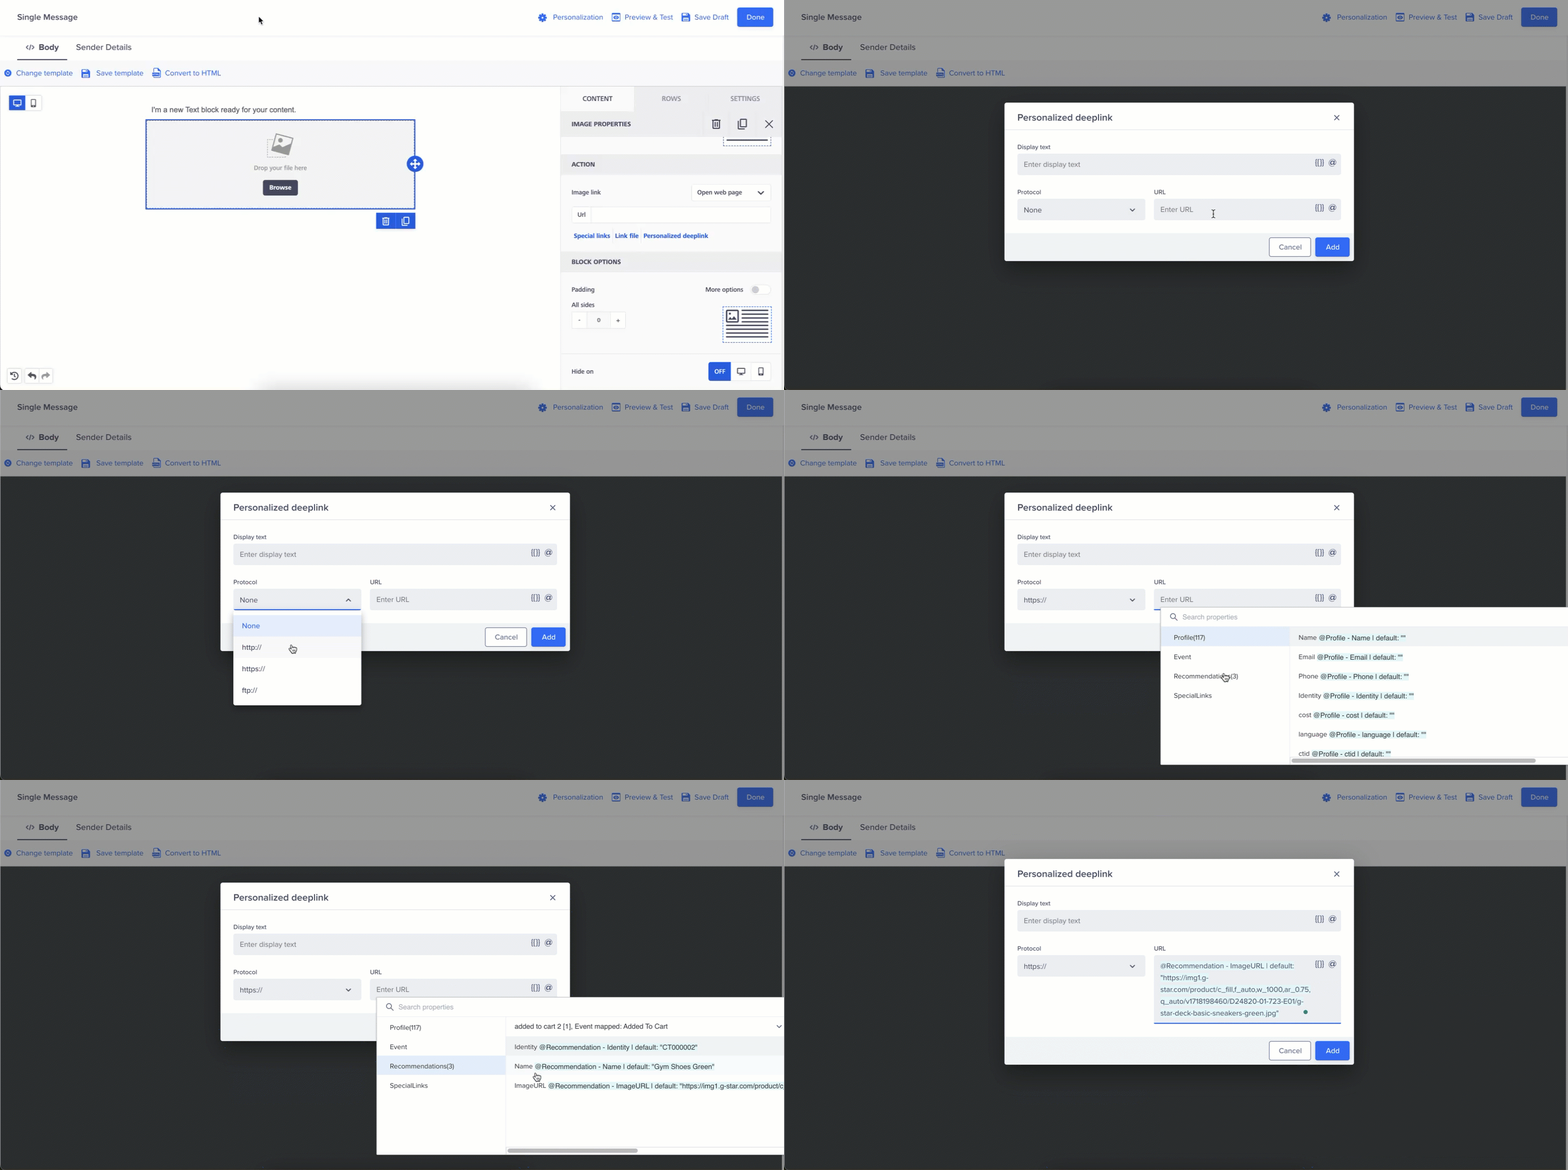
Create Personalized Deeplinks
- Click on the content box to display the menu.
- Click More > Personalized Deeplink.
- Type the @ symbol to personalize the deelink content using recommendations in the display text and URL fields.
Maximize your Location-Based Marketing with best practices and strategies to deliver targeted messages to users based on their physical location.
Updated about 2 months ago
