AccuWeather
Contextual Location Partner
Overview
AccuWeather offers global weather forecasting services through APIs that provide accurate, location-based data. With the CleverTap and AccuWeather integration, marketers can enhance campaign relevance by tailoring messages based on local weather conditions.
With this integration, you can:
- Recommend products based on local forecasts (for example, sunscreen during sunny weather)
- Send alerts when severe weather is predicted in a user's area
- Personalize content dynamically using user location and current conditions
Prerequisites for Integration
Ensure the following before starting the integration:
- Ensure you have access to your CleverTap account.
- Ensure you have access to your AccuWeather account.
- Obtain your AccuWeather API key from the AccuWeather account manager.
Read more on the AccuWeather API here.
Integrate CleverTap with AccuWeather
To integrate AccuWeather with CleverTap, perform the following two major steps:
Set Up AccuWeather APIs in CleverTap
Use Linked Content in CleverTap to connect to AccuWeather APIs and personalize campaign content dynamically. Configure the following APIs:
- Get Location Key: Retrieves a location key based on the user’s city or postal code.
- Get Weather Conditions: Returns current weather data for the specified location key.
For a complete list of available APIs and capabilities, refer to the AccuWeather API.
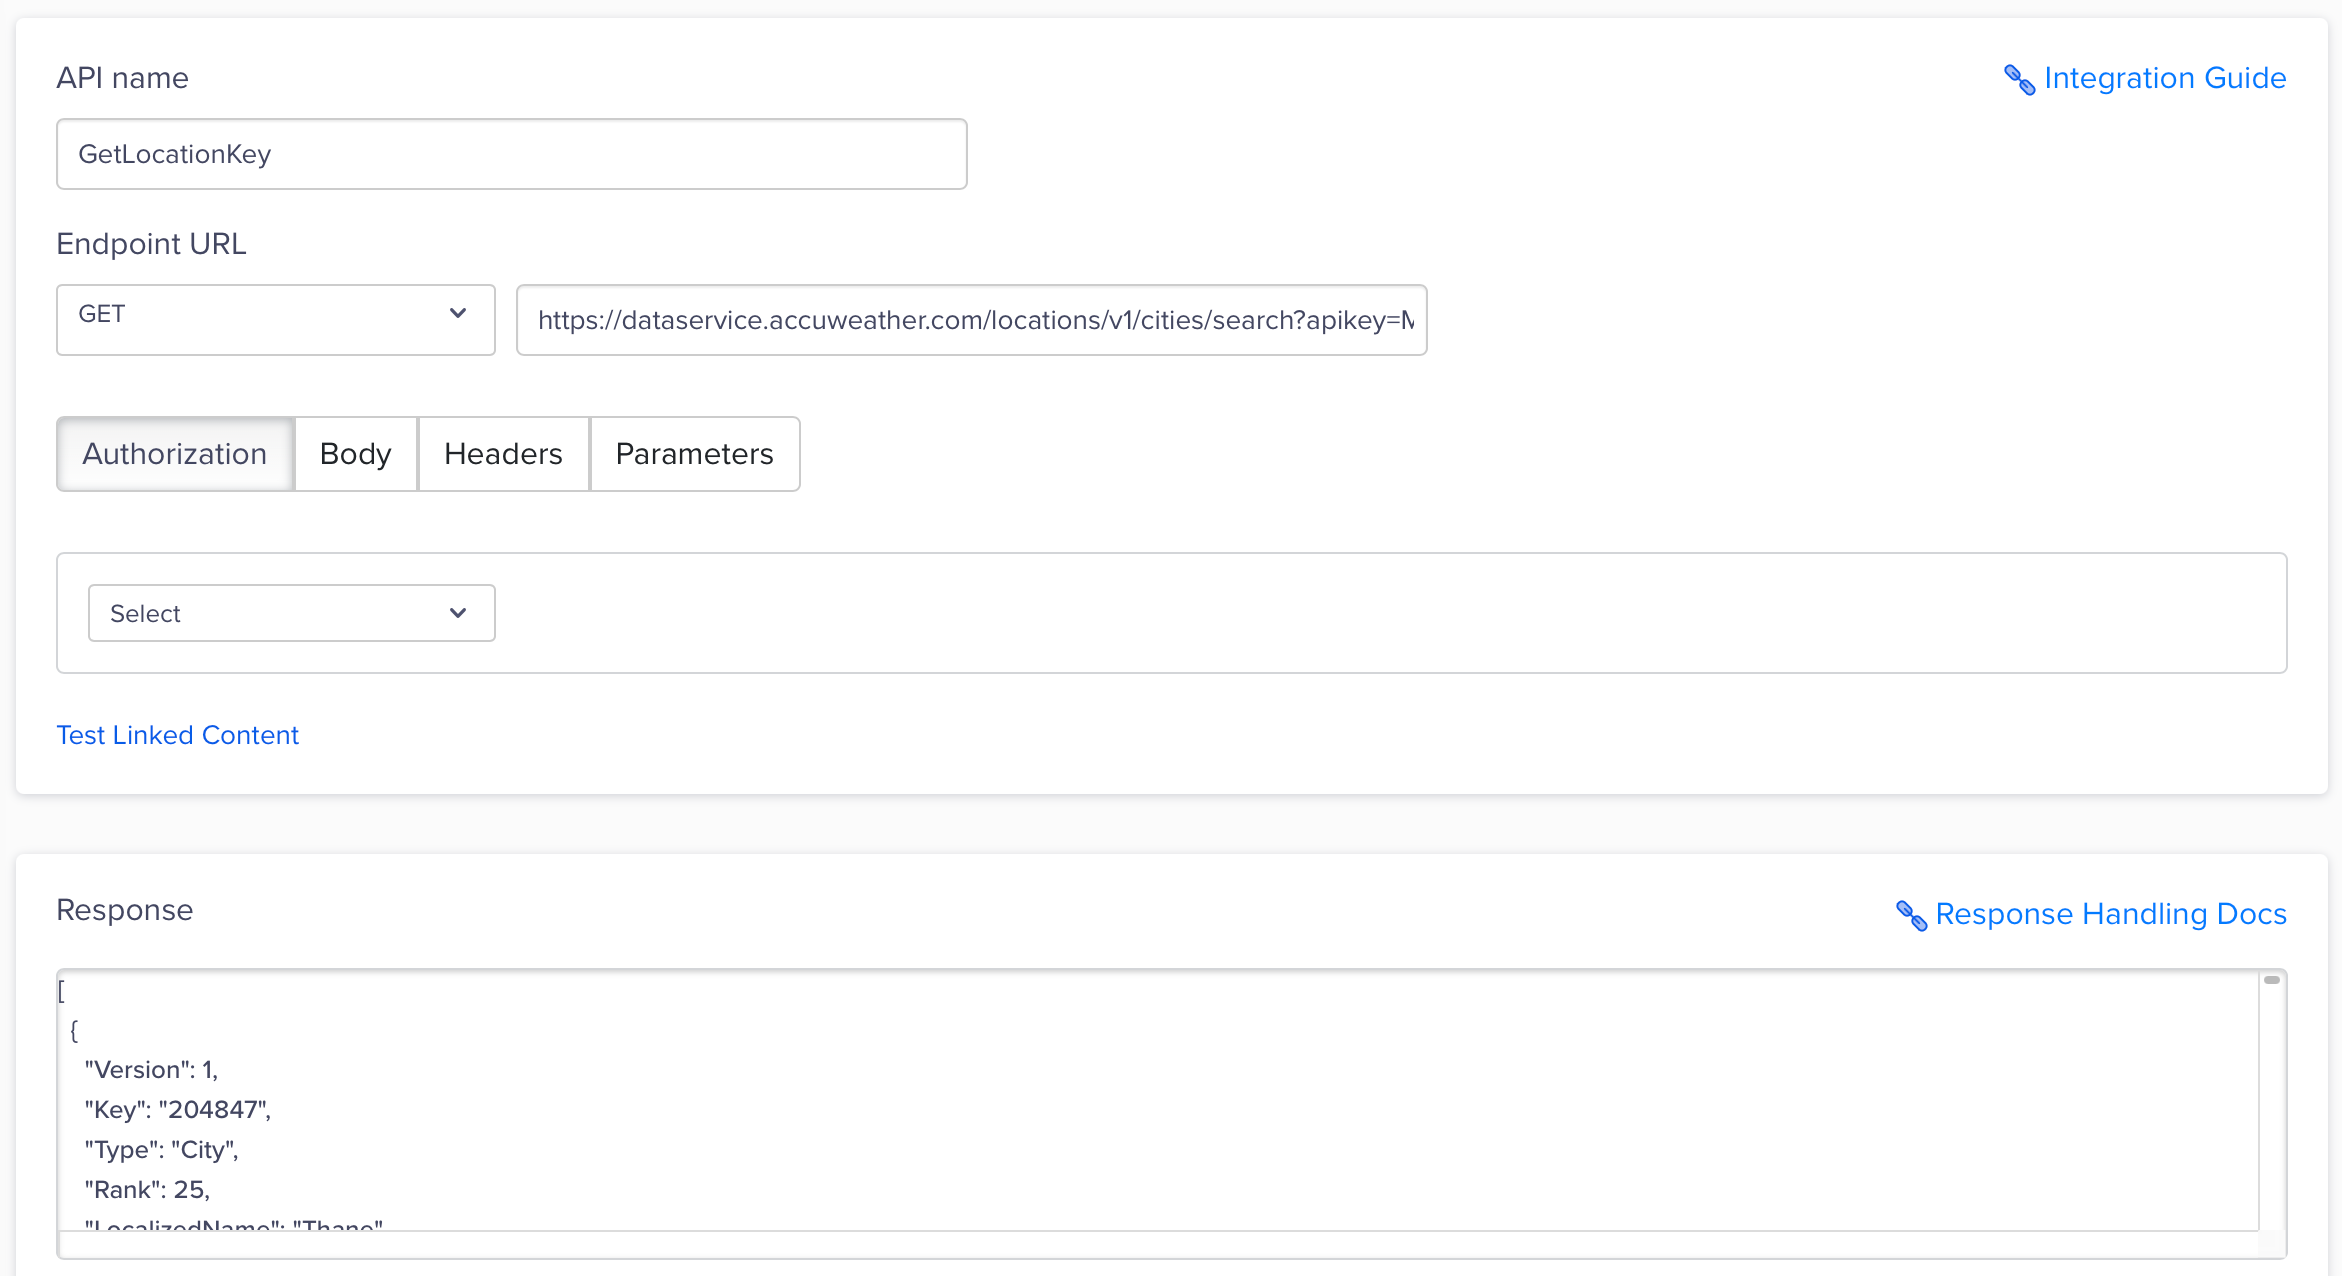
Get Location Key from AccuWeather
Map a user’s city or postal code to an AccuWeather location key. This key is required to fetch weather data in Create Personalized Campaign Using Linked Content.
To configure this API in CleverTap, perform the following steps:
- Go to Settings > Setup > Linked Content in CleverTap.
- Click + Add Linked Content.
- Set the method to
GETand enter the following endpoint URL:
https://dataservice.accuweather.com/locations/v1/cities/search?apikey=<API KEY>&q={{city/pincode}}&top=0- Replace
{{city/pincode}}with a custom parameter:{{ Profile.city | default: "-" }}. - Click Test Linked Content. You should get the following response:
[{
        "Version": 1,
        "Key": "204847",
        "Type": "City",
        "Rank": 25,
        ...
    }]
Add Linked Content
- Click Test and Save Changes.
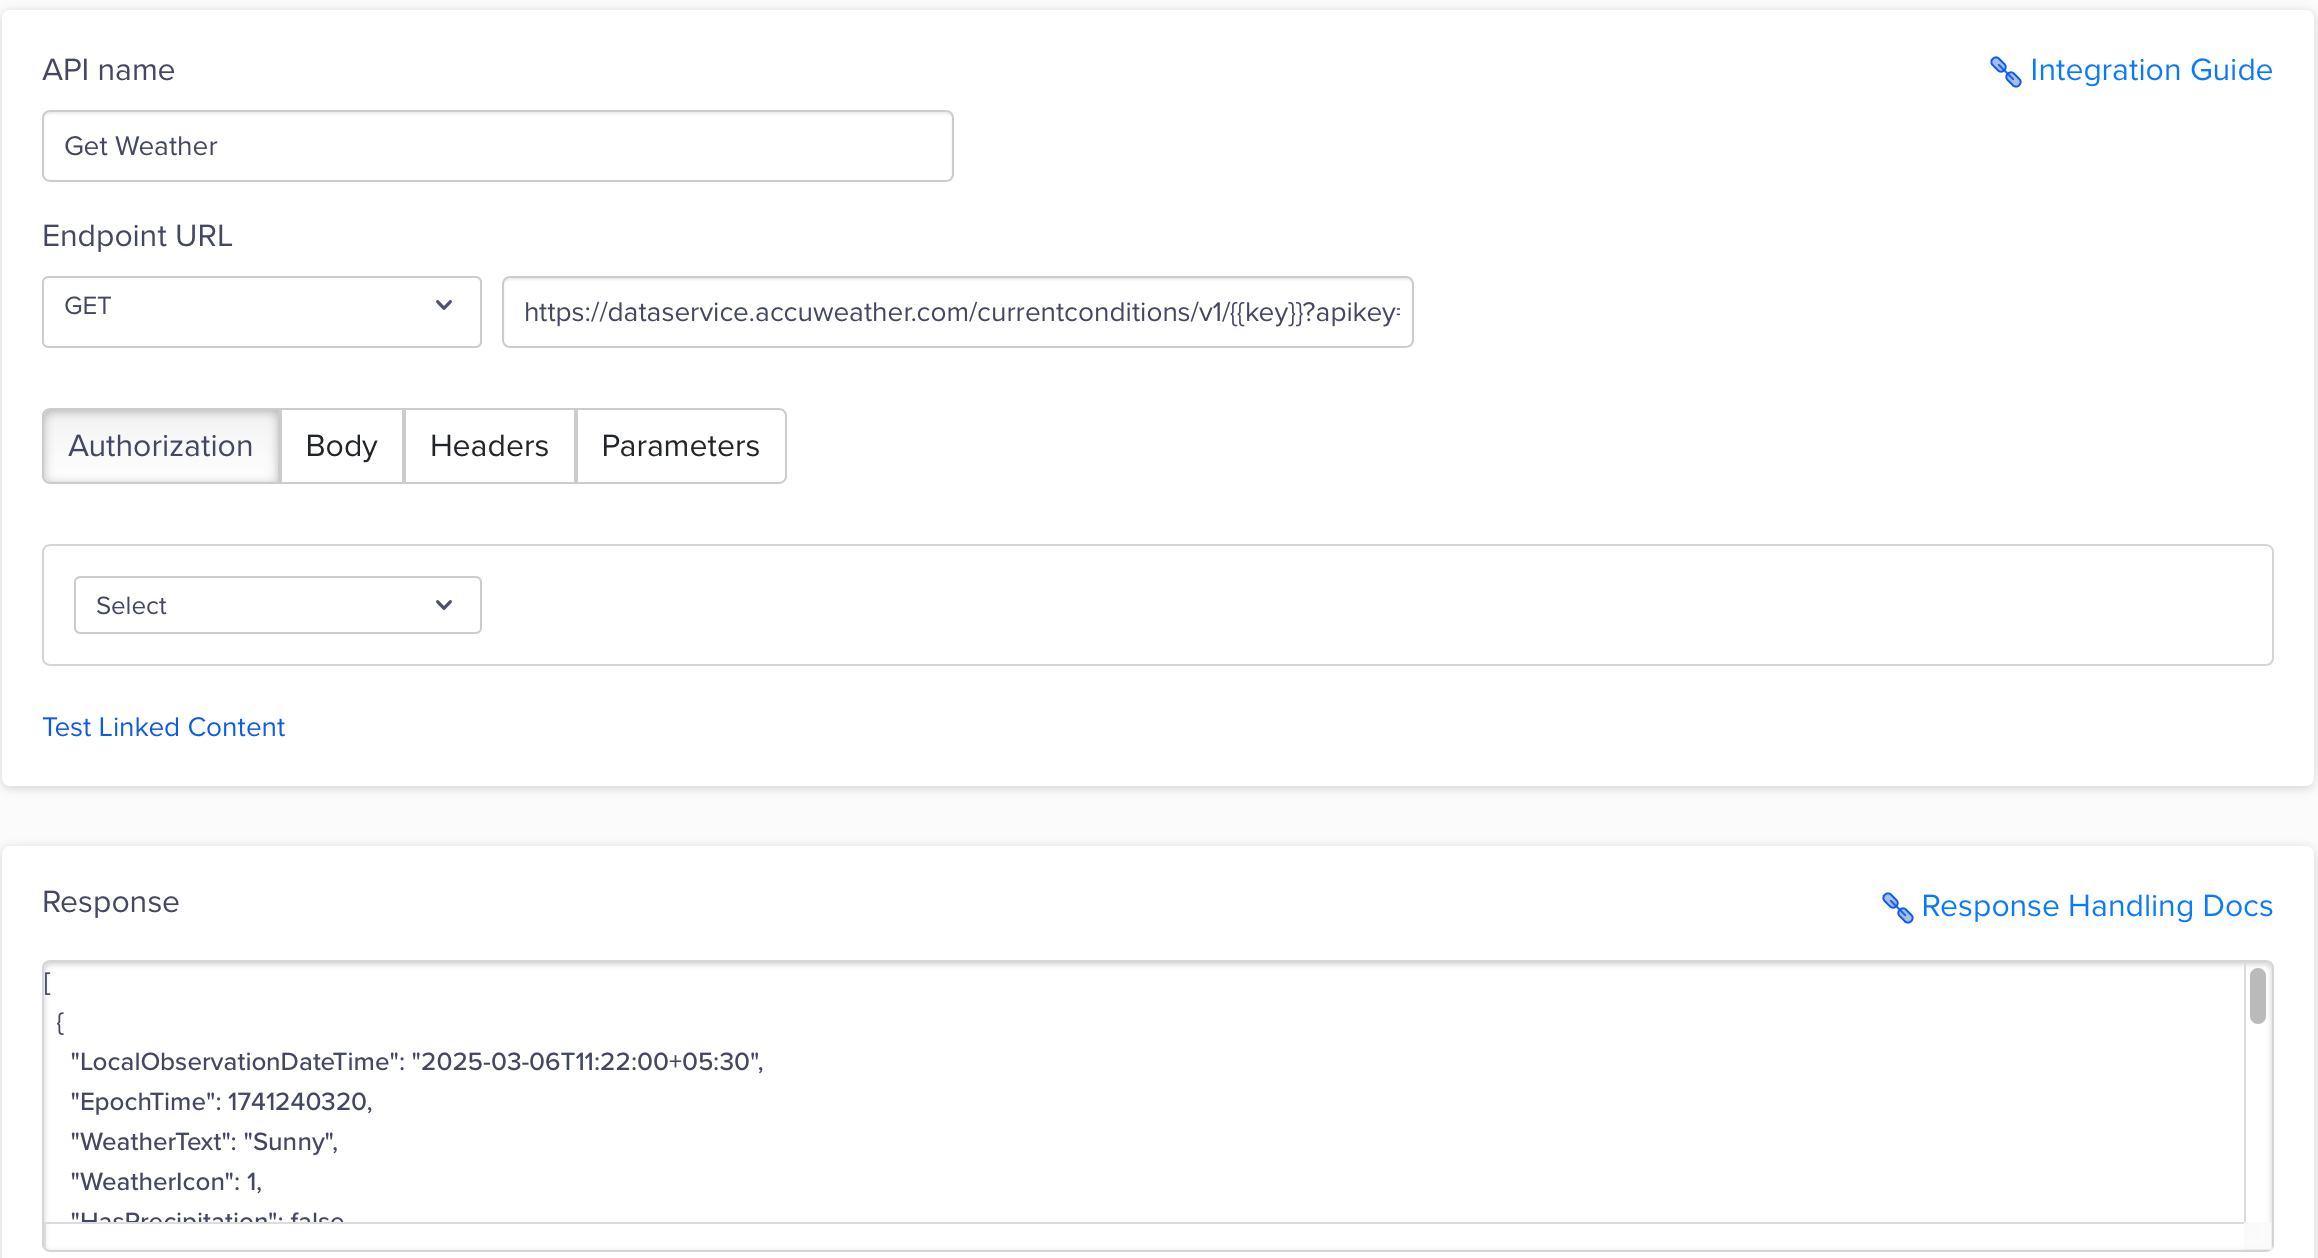
Get Weather Conditions Using Location Key
Use this API to fetch the current weather condition for the user’s location based on the AccuWeather location key.
To configure this API in CleverTap, perform the following steps:
- Go to Settings > Setup > Linked Content in CleverTap.
- Click + Add Linked Content.
- Set the method to
GETand enter the following endpoint URL:
https://datxaservice.accuweather.com/currentconditions/v1/{{key}}?apikey=<API KEY>- Replace
{{key}}with a custom parameter:{{ Linked["Get Location Key"].json[0].Key | default: "-" }} - Click Test Linked Content. You should get the following response:
[
    {
        "LocalObservationDateTime": "2025-03-06T11:22:00+05:30",
        "EpochTime": 1741240320,
        "WeatherText": "Sunny",
        ...
]
Add Linked Content
- Click Test and Save Changes.
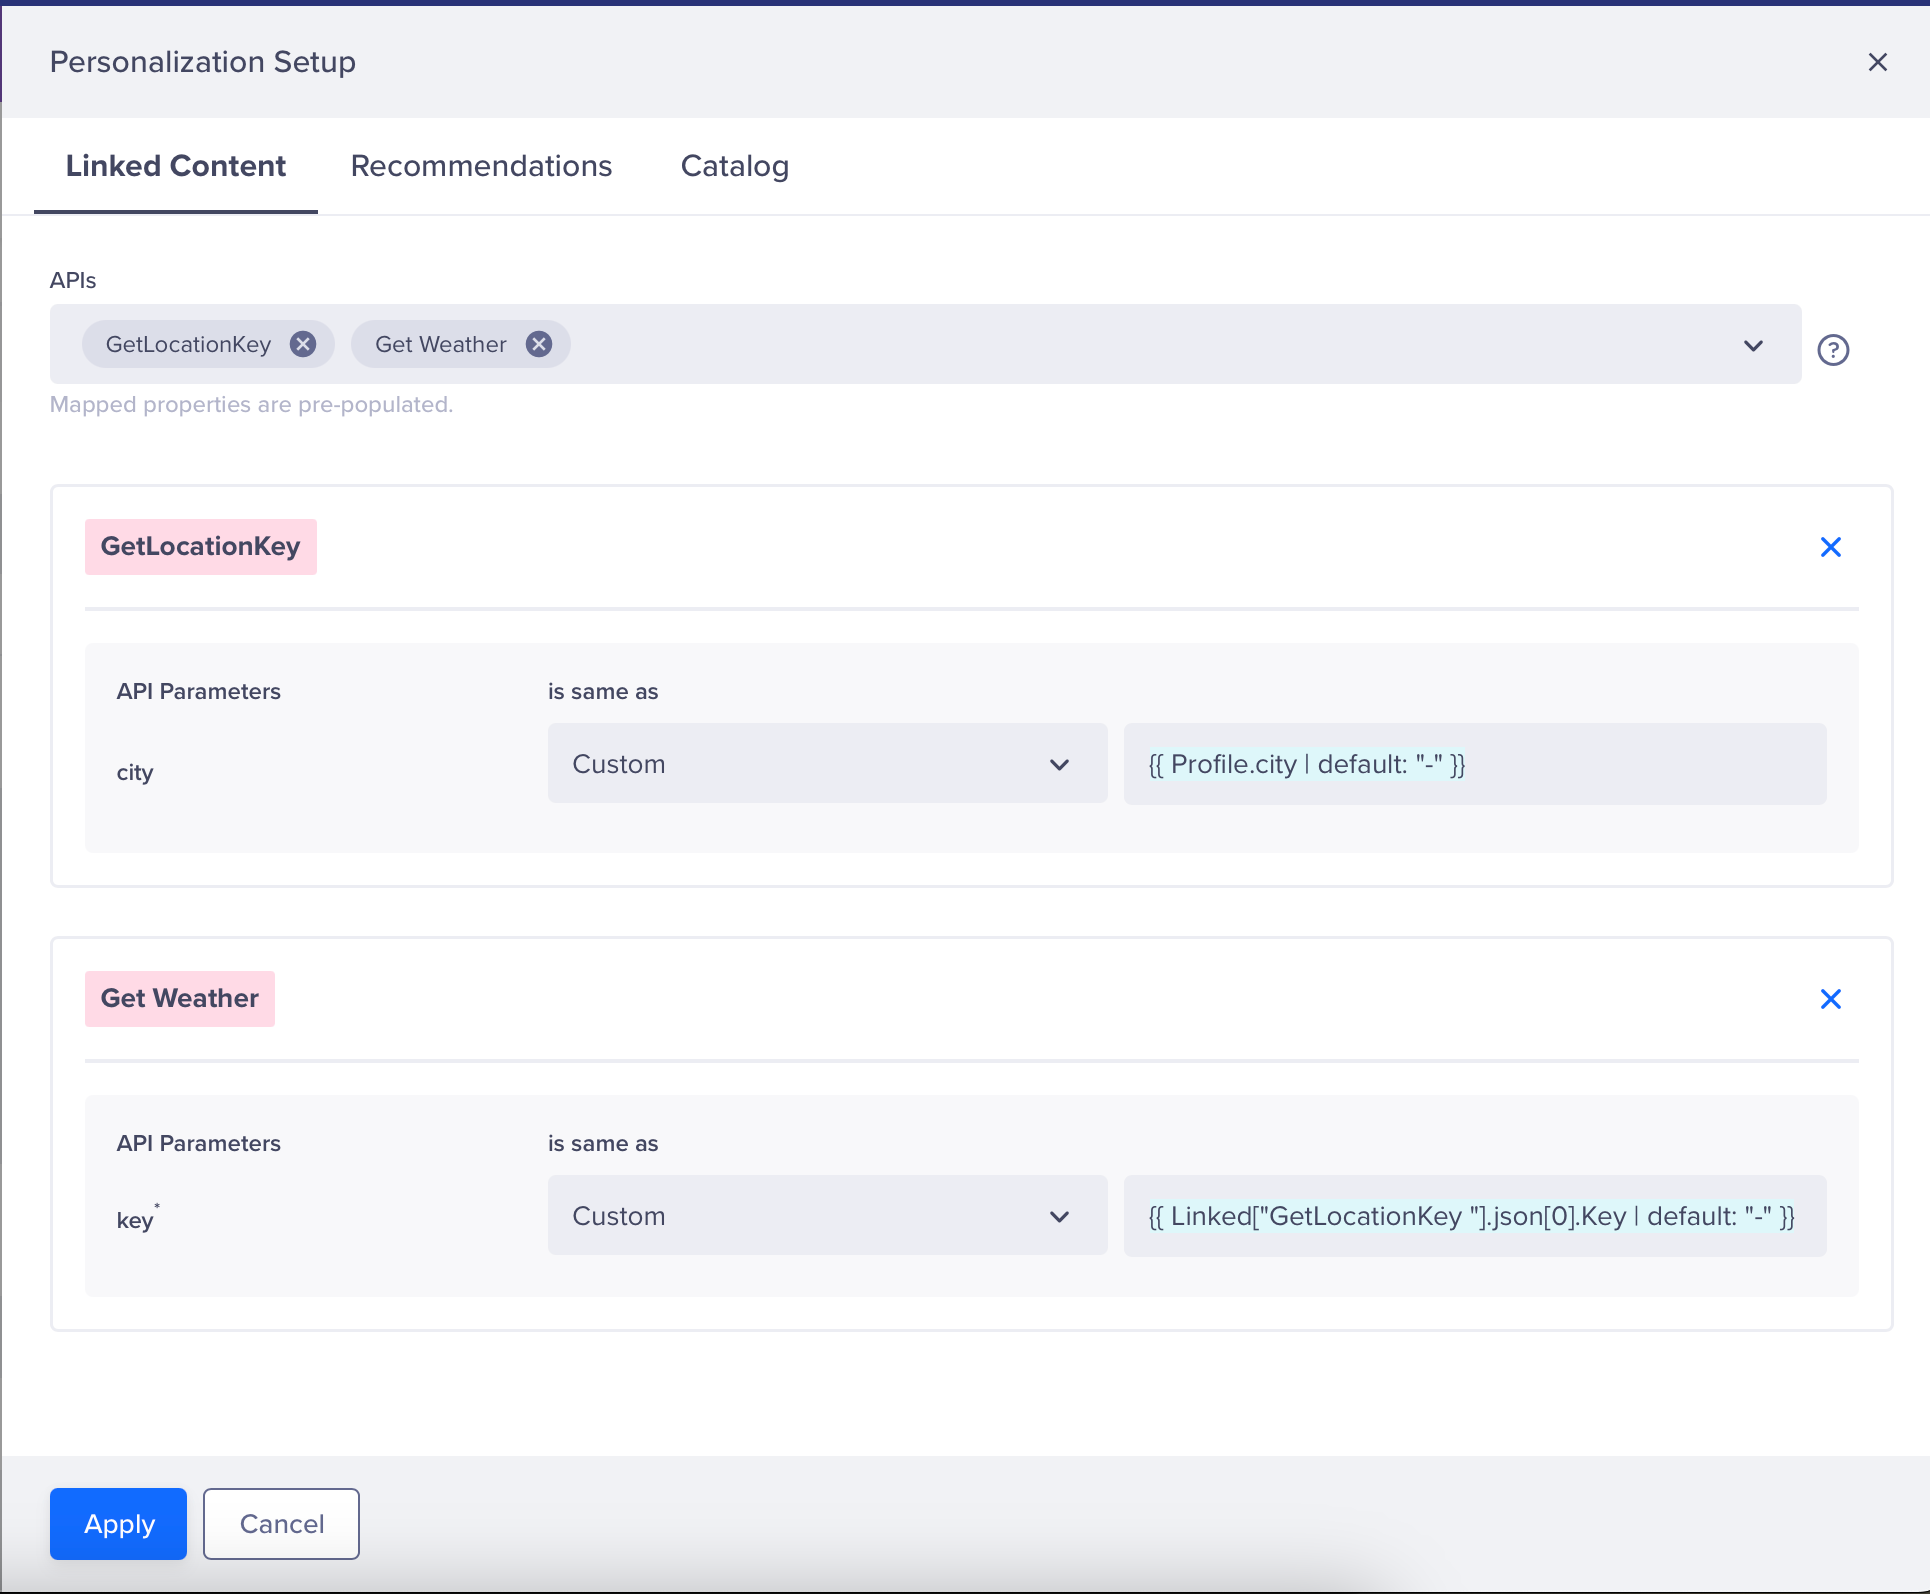
Create Personalized Campaign Using Linked Content
With AccuWeather connected to CleverTap via Linked Content, you can now add weather-based personalization to your campaigns. For this example, let us create a short, personalized push notification.
To do so, perform the following steps:
-
Go to Campaigns from the CleverTap dashboard and click + Campaign.
-
Select Push Notification from the Messaging Channels list.
-
Configure your campaign settings and navigate to the What section.
-
Click Personalization, then select both Linked Content entries:
- Set the
city/pincodeparameter for Get Location Key API to Custom and enter:{{ Profile.city | default: "-" }} - Set the
keyparameter for Get Weather API to Custom and enter:{{ Linked["Get Location Key"].json[0].Key | default: "-" }}
- Set the
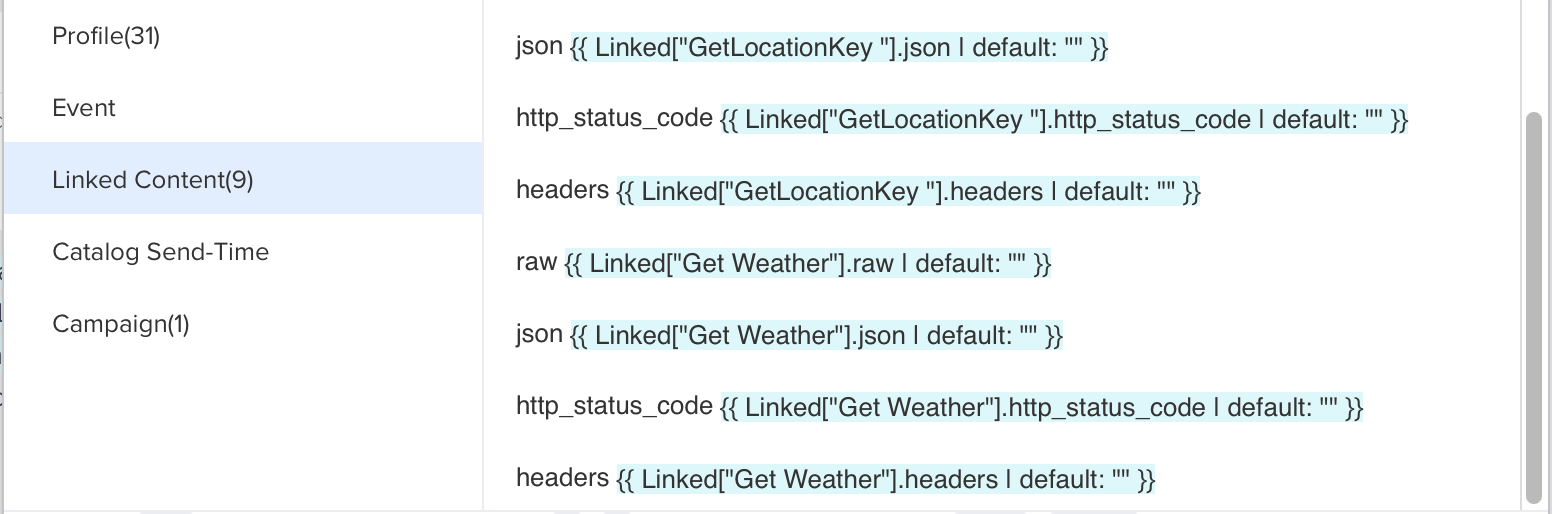
Personalization
- Type
{,{{, or@to view available personalization options. For more information about how to personalize a message using Linked Content, refer to CleverTap Liquid tag.
Create Personalized Message Using Linked Content
For this example, we will use the Linked Content Liquid tag below to iterate through the Get Weather API’s JSON response to get the Weather Text.
{{ Linked["Get Weather"].json[0].WeatherText | default: "NULL" }}We will also use conditional tags, like assign and if-else, to personalize the response according to the weather conditions. Here is a simple example we will be using. Refer to CleverTap Liquid tag.
It's {{ Linked["Get Weather"].json[0].WeatherText | default: "NULL" }}
{% assign weather = Linked["Get Weather"].json[0].WeatherText %}
{% if weather == "Sunny" %}
Get 15% off on Sunscreen
{% else %}
Get 10% off on Umbrella
{% endif %} 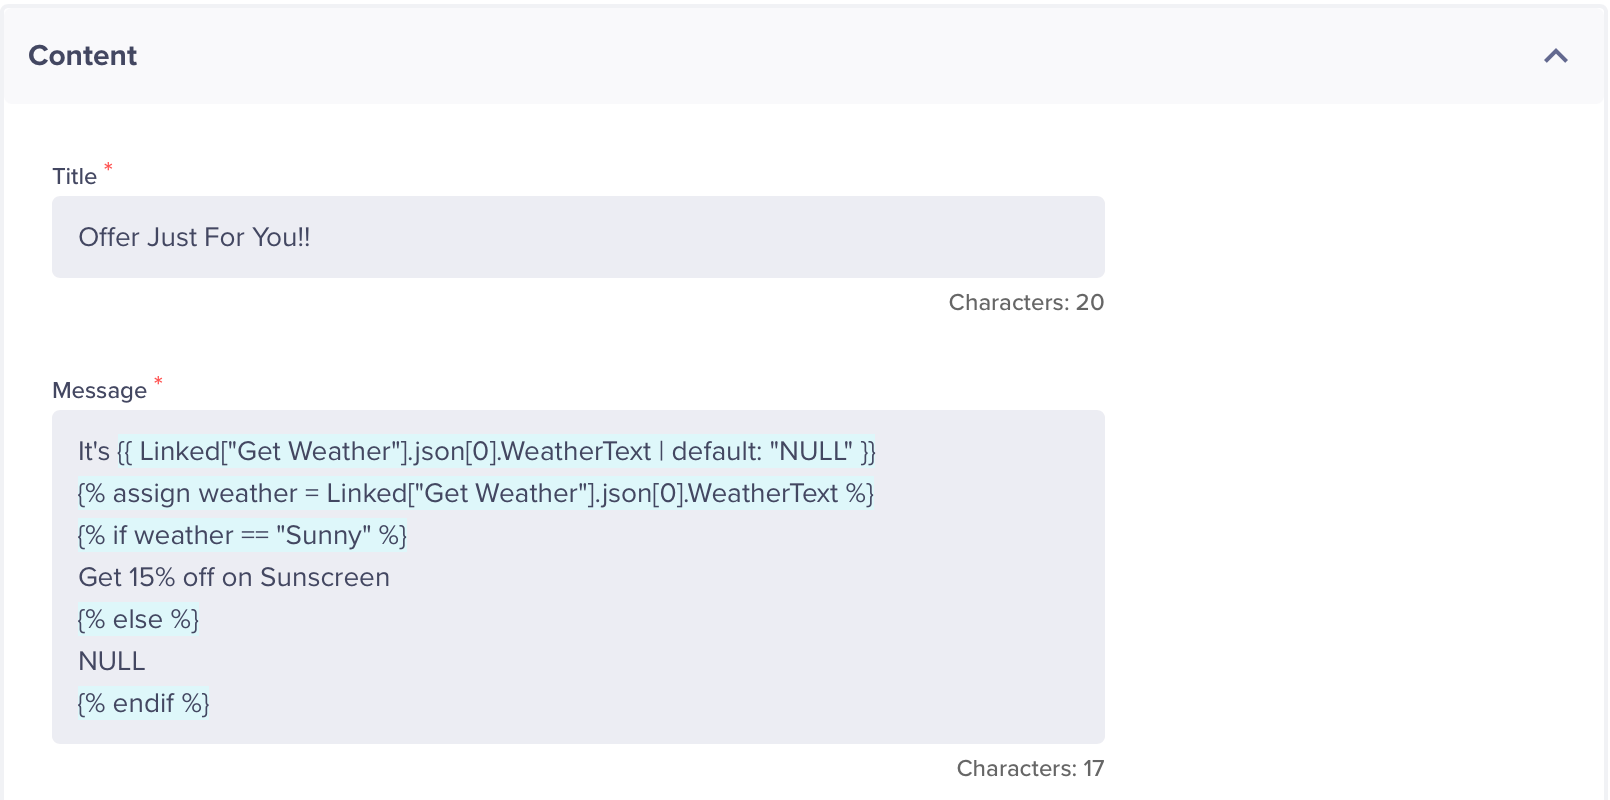
Preview and Test
- Click Preview and Test to confirm that fallback and weather-specific values render correctly.
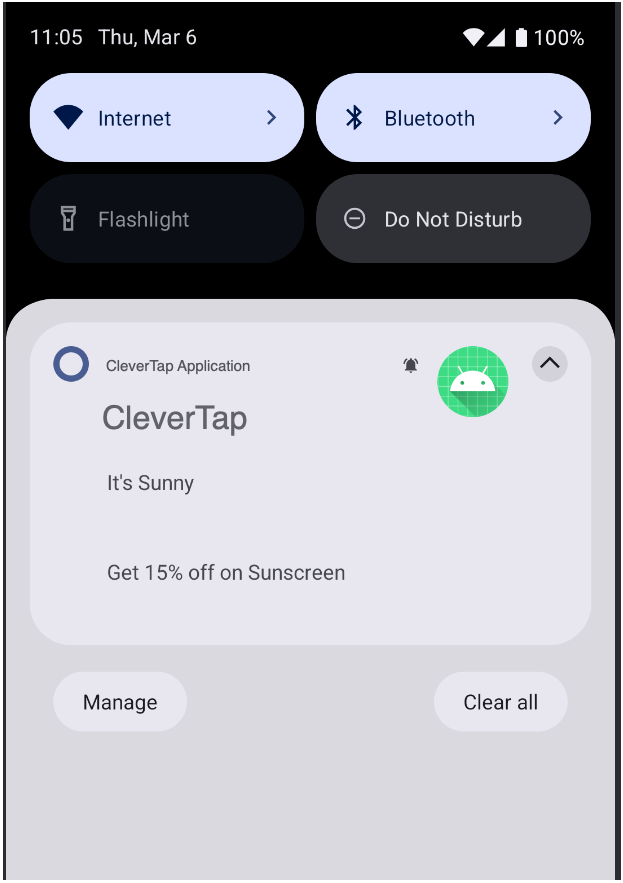
Push notification
- Click Publish to send the campaign.
Once live, users will receive highly contextual push notifications tailored to their local weather conditions.
By integrating AccuWeather with CleverTap, you can automate hyper-contextual marketing experiences across campaigns like Push Notifications, Email, In-App Messages, or Web Pop-ups.
Updated 7 months ago