LeadSquared Import
Learn how to import lead data from LeadSquared to CleverTap.
Overview
LeadSquared lets you export lead data into CleverTap, enabling automated journey triggers and enriched user profiles.
Support for IntegrationThis integration is managed and continuously improved by LeadSquared. The CleverTap and LeadSquared integration has undergone stringent testing to ensure seamless functionality. For any questions or issues, contact LeadSquared for support and resolution.
Import Lead Data from LeadSquared to CleverTap
To automate pushing lead data from LeadSquared into CleverTap. To do so, follow these steps:
- Install the Push Data to CleverTap Connector
- Generate a Webhook URL in LeadSquared
- Create Automation in LeadSquared
Install the Push Data to CleverTap Connector
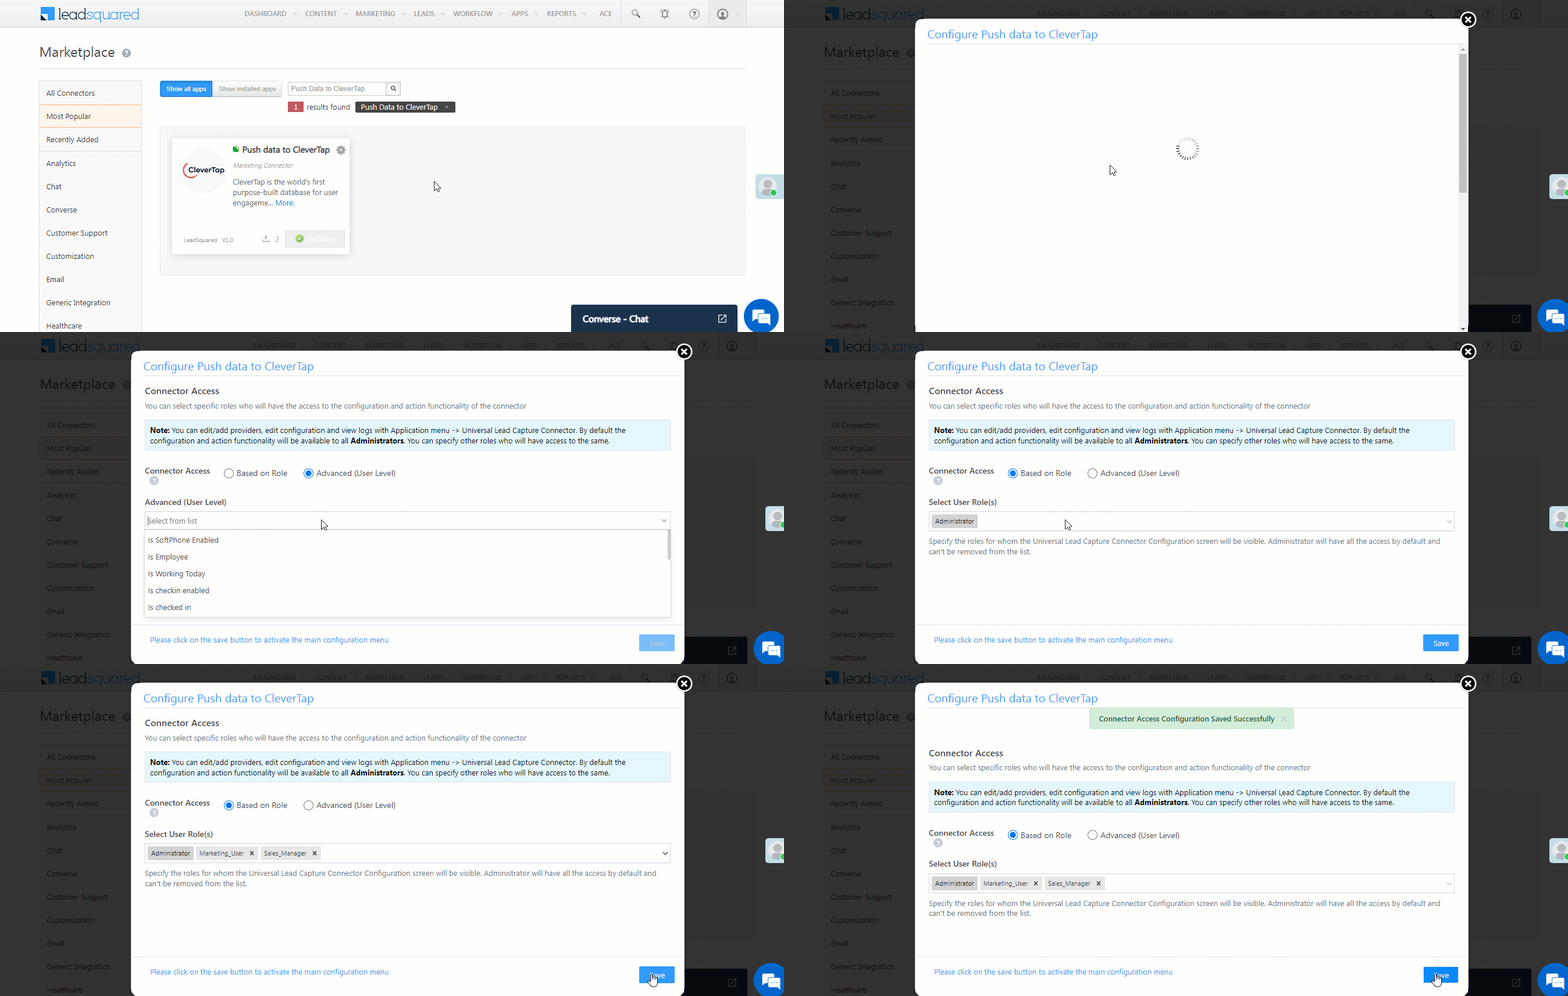
Install the Push Data to CleverTap connector to send lead data from LeadSquared. To do so, follow these steps:
-
Go to Apps > Apps Marketplace in LeadSquared.
-
Search for Push Data to CleverTap and click Install.
-
Click Configure and set access:
- By user roles or advanced user-level logic.

User-level settings
- Click Save Details.
Generate a Webhook URL in LeadSquared
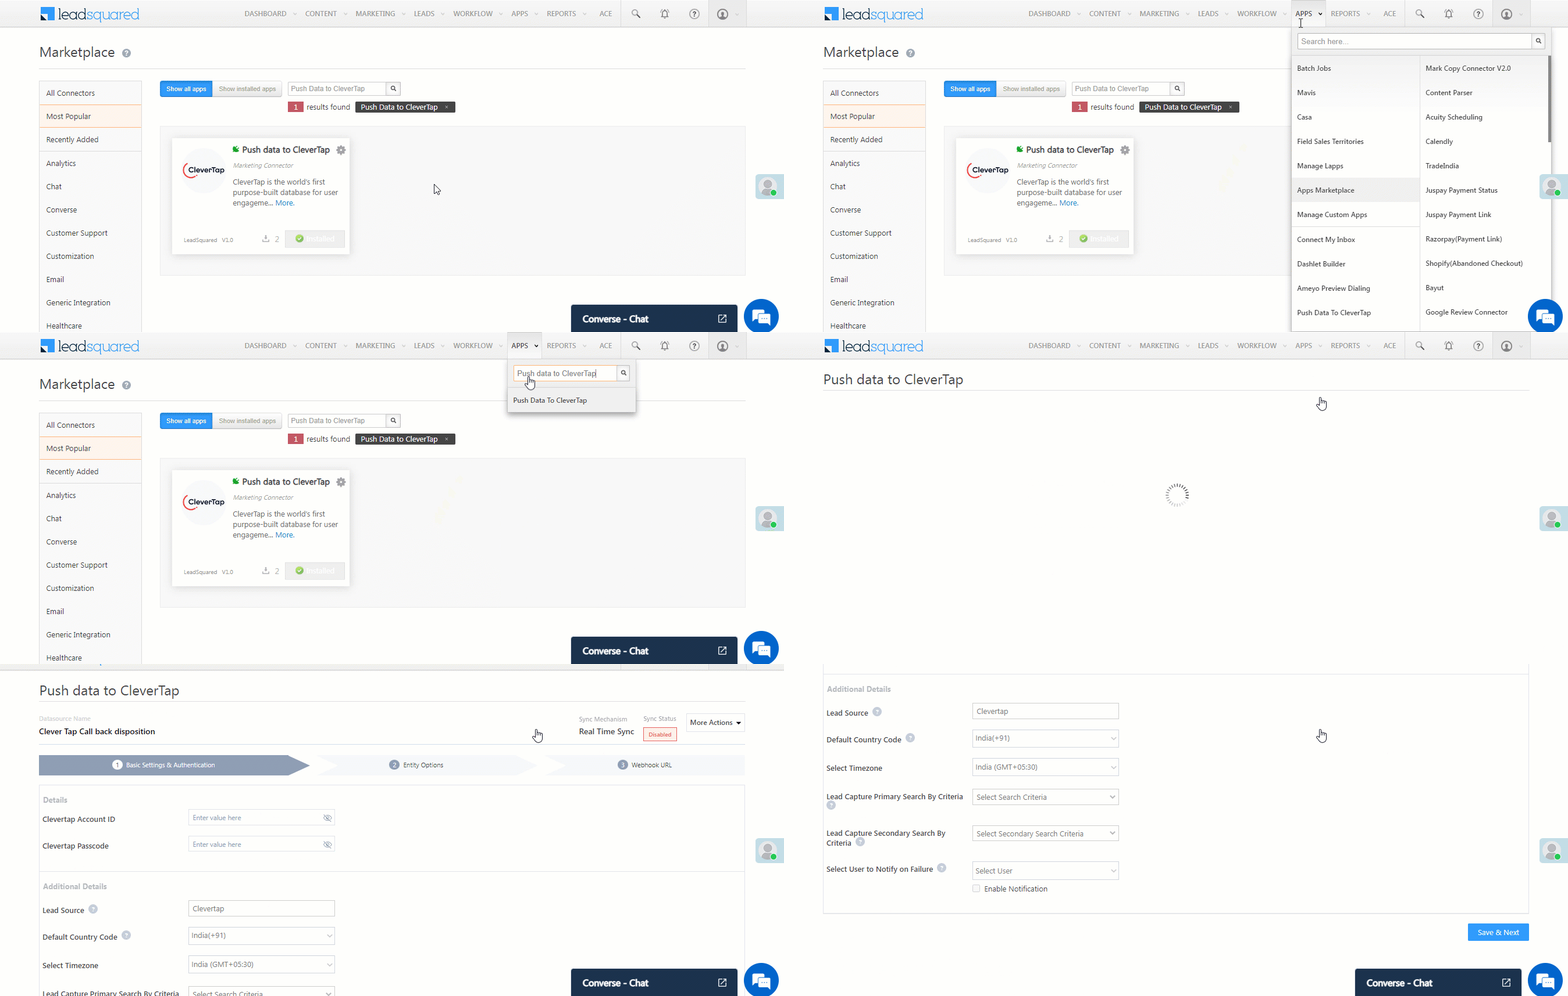
Generate a webhook URL in LeadSquared to send lead data to CleverTap during automated workflows. To do so, follow these steps:
- Go to Apps > Push Data to CleverTap.

Push Data to CleverTap
- Configure basic settings:
| Property | Description |
|---|---|
| CleverTap Account ID | Locate the Project ID under Settings > Project from the CleverTap dashboard. |
| CleverTap Passcode | Locate the Passcode under Settings > Project from the CleverTap dashboard. For more information, refer to Account Passcode. |
| Lead Source | Origin of leads (for example, email campaign). |
| Unique Search Criteria | Key identifier for de-duplication. |
| Default Country Code | Default country prefix for phone numbers. |
| User to Notify on Failure | Contact for sync issues. |
| Enable Notification | Enable email alerts. |
-
Click Save & Next.
-
On the Mapping screen:
- Review and update default mappings.
- Set defaults where necessary.
- Mark key fields and add custom ones if required.
-
Click Save & Next.
-
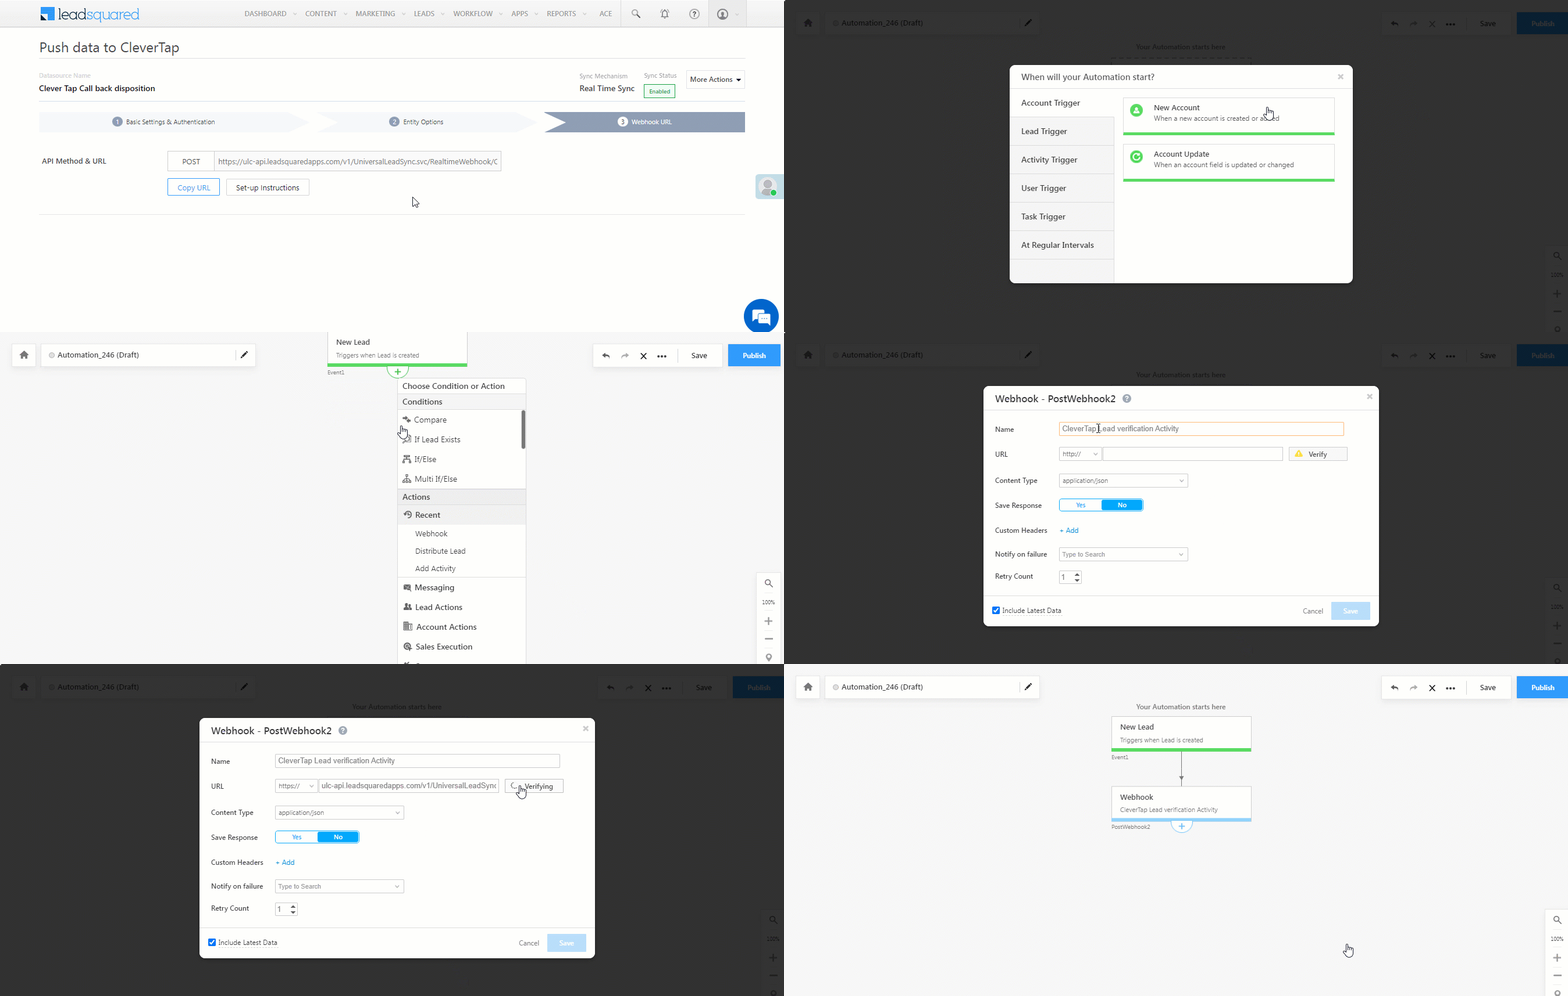
Copy the generated webhook URL.
NoteSync behavior is set to "Do Nothing" by default. It is recommended not to change it.
- Go to More Actions > Enable Sync Job to start data flow.
Create Automation in LeadSquared
Set up automation workflows in LeadSquared to sync leads with CleverTap based on triggers. To do so, follow these steps:
- Go to Workflow > Automation.
- Create a new automation and set a trigger (for example, New Lead).
- Add a Webhook action and enter the following details:
| Field | Description |
|---|---|
| Name | For example, "CleverTap Lead Verification" |
| URL | Paste the URL copied in Step 6 of Generate a Webhook URL in LeadSquared. (remove https:// if instructed) |
| Content Type | application/json |
| Save Response | Optional |
| Notify on Failure | Select the user to notify |
| Retry Count | Set the number of retry attempts |

Create Automation in LeadSquared
- Click Save and Publish.
Once published, the automation will ensure that lead data is pushed from LeadSquared to CleverTap based on the configured trigger.
Updated about 1 month ago
