Remote Config
Learn how you can remotely customize your app experience for segments of your user base using variables.
Introduction
CleverTap's Remote Config feature enables you to modify your application's functionality and appearance without mandating users to download an updated version of your application using variables.
Variables are the building blocks of the Remote Config feature. Any element or functionality within your app (such as a CTA text, a new welcome page layout, game difficulty level, and so on) can be defined as a variable that can be controlled remotely via the CleverTap dashboard.
Key Capabilities of Remote Config
Remote Config allows you to:
- Deliver customized in-app experiences for specific segments of your user base. For example, highlight the registration section on your application's home screen for new users.
- Change elements of your app in real-time without requiring an update to be pushed to the app stores. For example, switch on a special discount offer and specify the discount percentage for non-paying users (users who have not yet converted).
- Streamline your messaging campaigns with the in-app user experience for maximum engagement. For example, switch on a special event in your game via Remote Config for a selected segment and notify the segment about the event via a push and an in-app campaign.
- Test & release new features securely with the option to revert back in case of any issues.
Create Remote Config Variables
CleverTap Remote Config offers two ways to set up your variables:
- Create them manually from the Dashboard
- Define them in the code and sync them to the Dashboard
Create Variables from the Dashboard
Variables can be created from the Add button in the Remote Config page.
Each variable requires the following information:
- Name (required)
- Description (optional)
- Value (required)
Variables created through the interface do not have a default value similar to the variables synced from code. This means that the value you set in the Dashboard is immediately applied to all users.
To create a Remote Config Variable, go to Product Experiences > Remote Config. Click Add to add a variable.
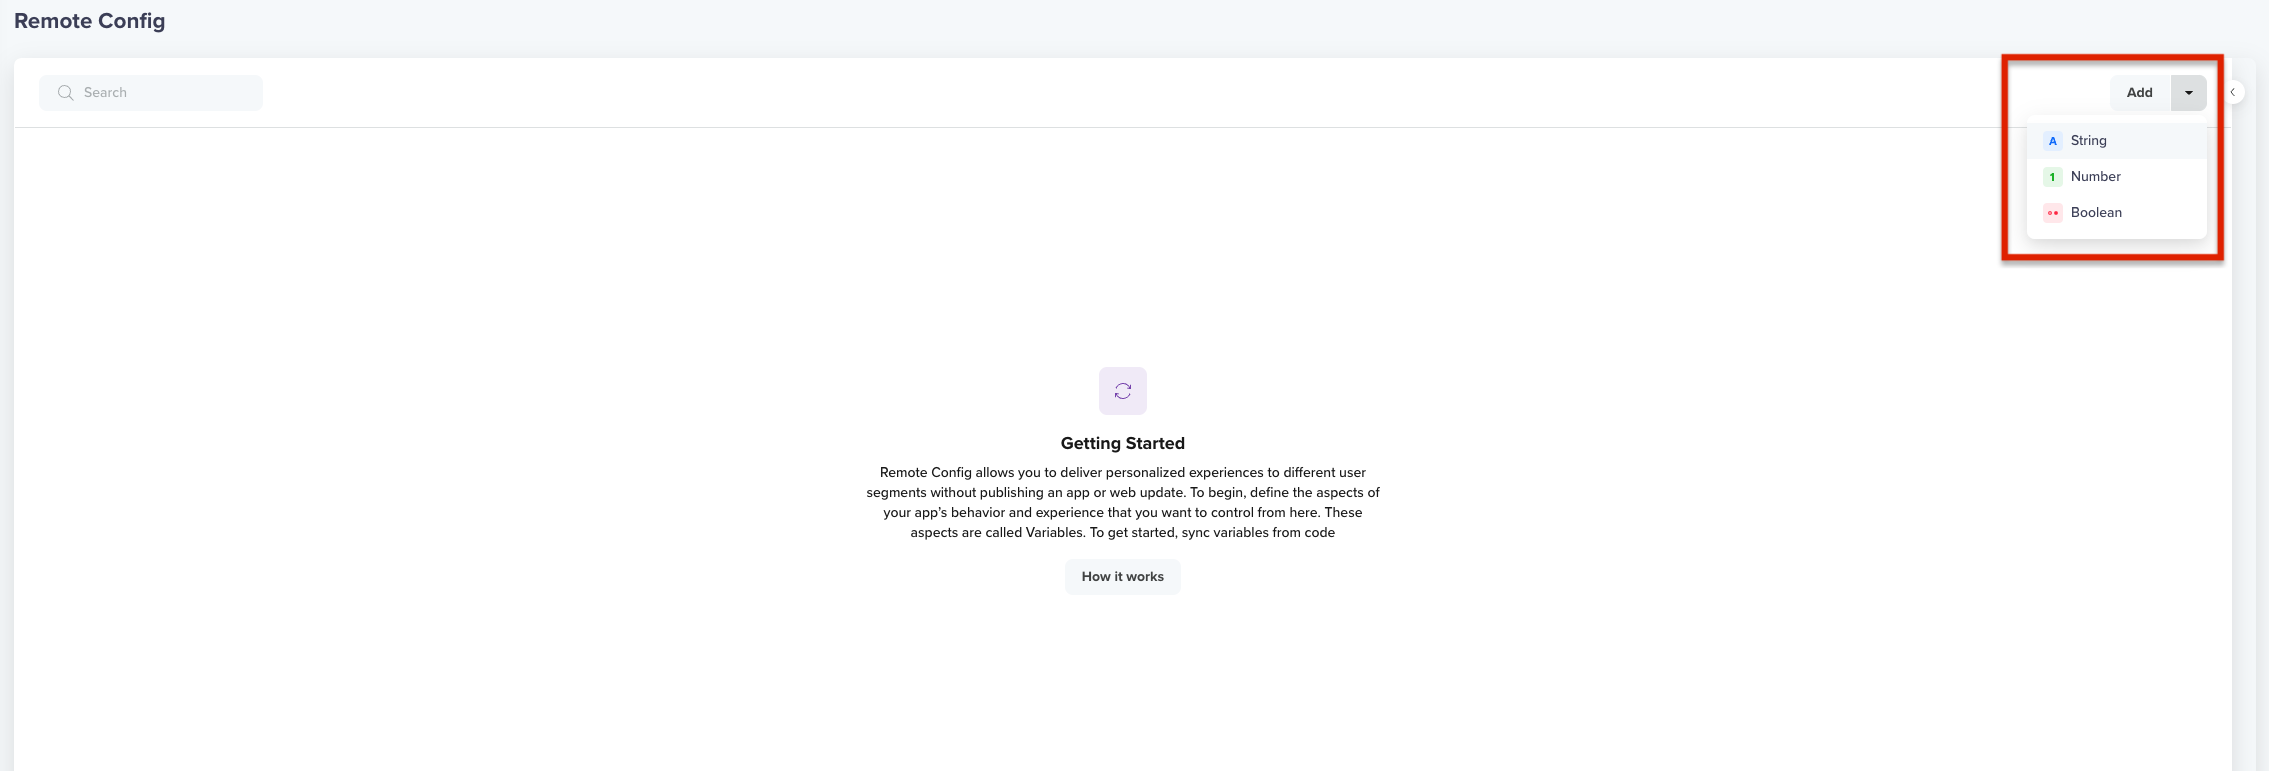
Add Remote Config Variable
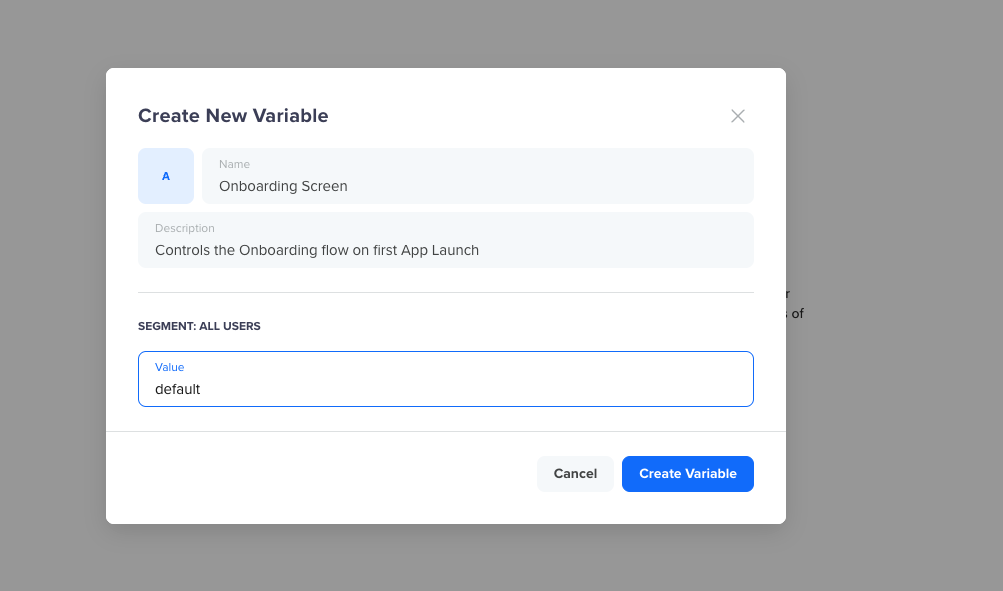
Create Remote Config Variable
Creating File Type Variables.Creating File type Variables are currently not supported to be created from the Dashboard. They must be synced from the code.
Define and Sync Variables from Code
To define which elements of your app you want to control, you need to integrate CleverTap SDK and follow the respective developer guide for Android and iOS to sync your variables to the dashboard. After doing so, you can start adding override values for your variables from the CleverTap dashboard for all app users or specific segments of your user base.
CleverTap supports creating the following variable data types:
- Number
- String
- Boolean
- File type
PrerequisiteTo get a complete view of your application’s variables, you must integrate the requried CleverTap’s SDK and sync your defined variables with the CleverTap dashboard. After the sync, you must publish the newly-created variables from the Remote Config page of the CleverTap dashboard.
In your app's code, any functionality defined as a variable has a default value or state. For instance, every time you add a new feature, it is initially always hidden with a visibility value of false. After syncing the variables to CleverTap, you can view these default values on the Remote Config page. After the initial publish, you can decide whether to override the default values for an existing one or create a new segment and define a new variable value.
The following sections provide information about defining and updating a variable value for a particular segment
Override Variable Value for New Segment
To override a variable value for a new segment:
- Search for the required variable from the search bar or select the required variable from the variable list displayed under the Remote Config page.
- Click Override dropdown and scroll down to the end of the list.
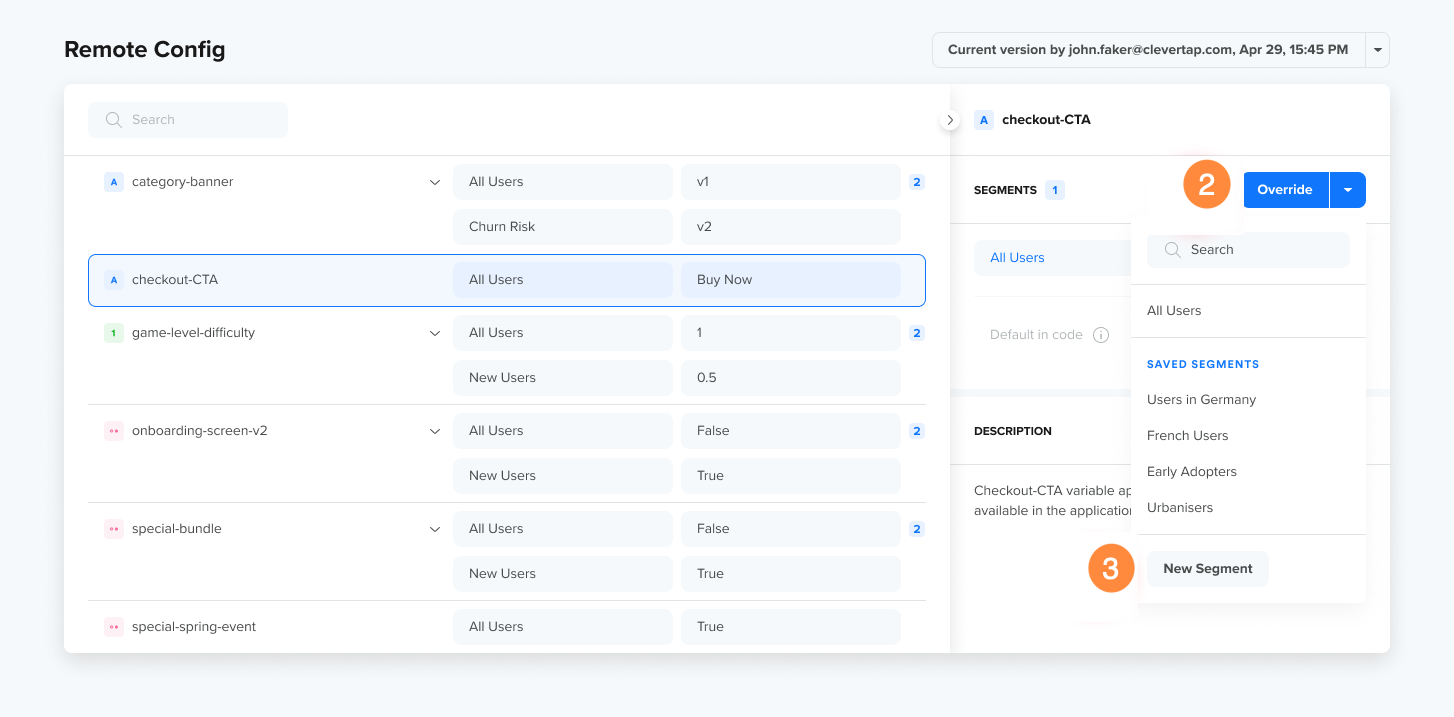
- Select New Segment from the dropdown. The Create New Segment popup opens.
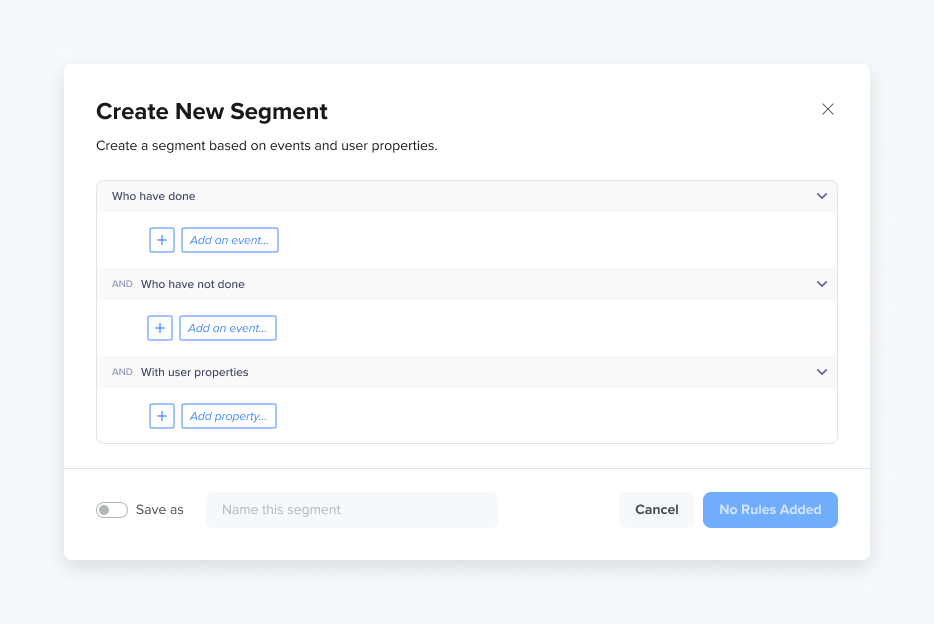
Segment Builder
- Enter the criteria for your target audience. Consider the example where your target audience would be users who reside in India and have performed the Added to cart event but did not charge (see figure below).
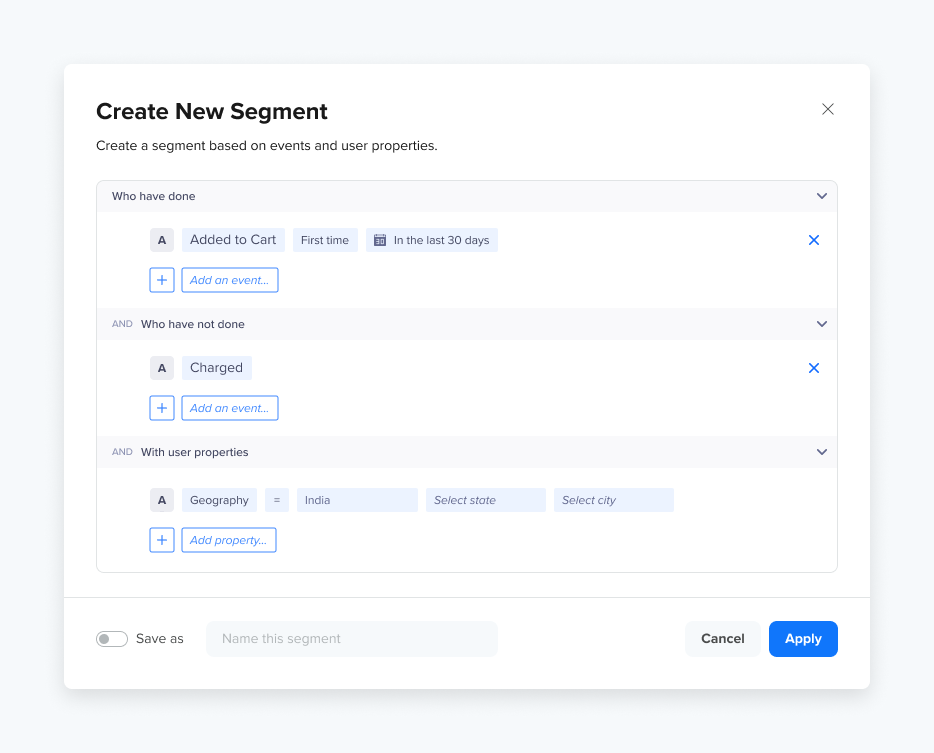
Enter Segment Criteria
-
Toggle ON Save As if you want to save the segment for future use. Keeping the toggle off does not save the segment.
-
Click Apply to save the segment. The newly-created segment is now visible under the list of segments on the right side of the screen.
Remote Config SegmentsThe segments that are created and saved on the Remote Config page can only be seen and reused within that particular page. These segments will not be visible in other areas of the dashboard such as Segments or Campaigns. Similarly, any user segments created in the Segments section will not be visible in Remote Config. However, this is only a temporary limitation that will be removed in the future
-
Edit the variable value for the selected segment in the right-side panel and click Publish. After you click Publish, the variable update is displayed under the Live tab, as shown in the following figure:
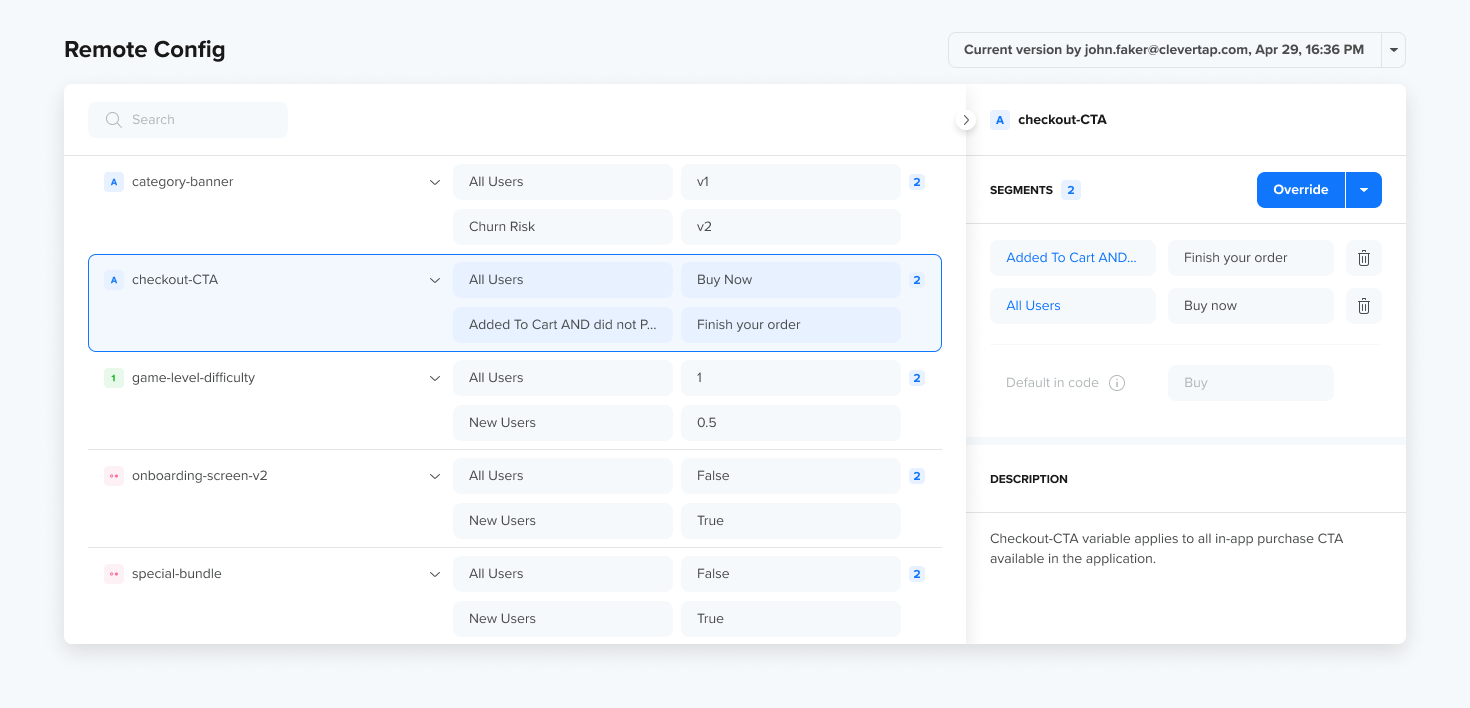
Variables in Published State
All the changes you make to the Remote Config page are, by default, saved as a draft and are highlighted in light yellow color in the table, as shown in the following figure. If you want to discard the current draft, click the Discard button.
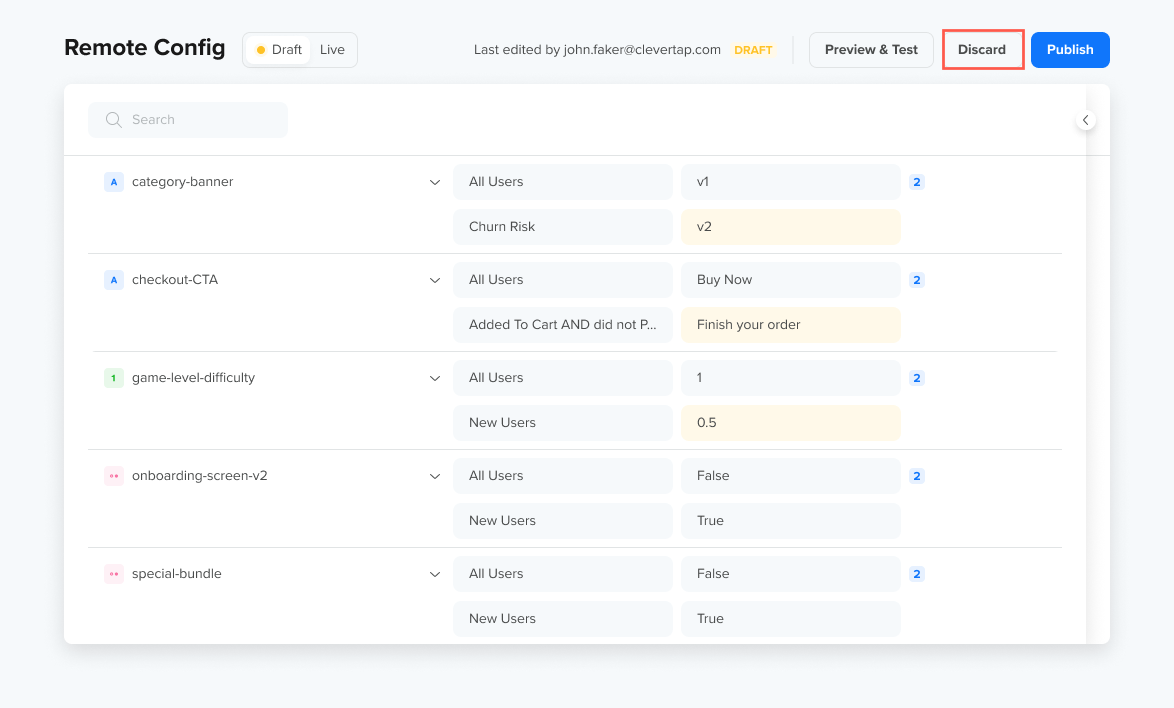
Draft Mode in Remote Config.
NoteThe draft in the Remote Config page is shared with all the dashboard users within your app account for everyone to contribute. The changes you make are visible to the rest of the dashboard users.
To avoid overriding or discarding someone else’s changes, verify who made the latest changes to an existing draft from the top right corner of the Remote Config page.
Override Variable Value for an Existing Segment
To define the variable behavior for an existing segment:
- Search for the required variable from the search bar or select the required variable from the variable list displayed under the Remote Config page.
- Select an existing segment from the Override dropdown (for example, a segment of German users) and update the variable value to modify the behavior as required.
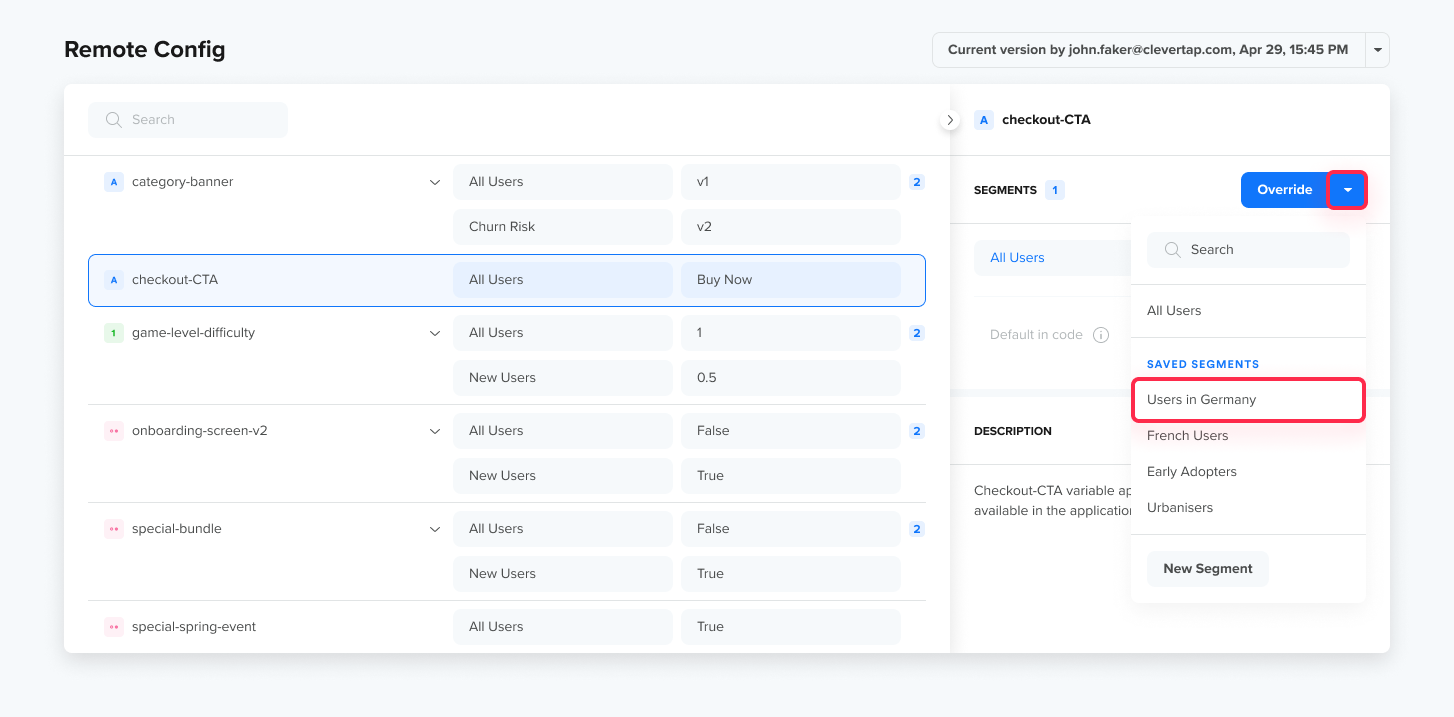
- Click Publish to make these changes live on your application.
You can also test your application's variable behavior in the draft version using the Preview & Test feature. For more information, refer to Preview and Test Remote Config.
Key Points to Remember
- The change in variable behavior reflects in the live application only after the draft is published.
- During application startup, CleverTap verifies the user's eligibility for different segments and retrieve the corresponding variables. Later on during the session, it may be necessary to retrieve values if there are any signification milestones in the application where users are expected to transition between segments. For example, if there is a value override for certain variables for the Paying users segment, it would be good to fetch them again at the time of purchase within the app.
User Profile Personalization
User Profile Personalization is available only for variables of type String.
Value personalization is based on User Properties and is supported for String Variables. This allows you to personalize the Variable Value that will be returned and used by your application based on your users' unique properties.

Select Personalized Value
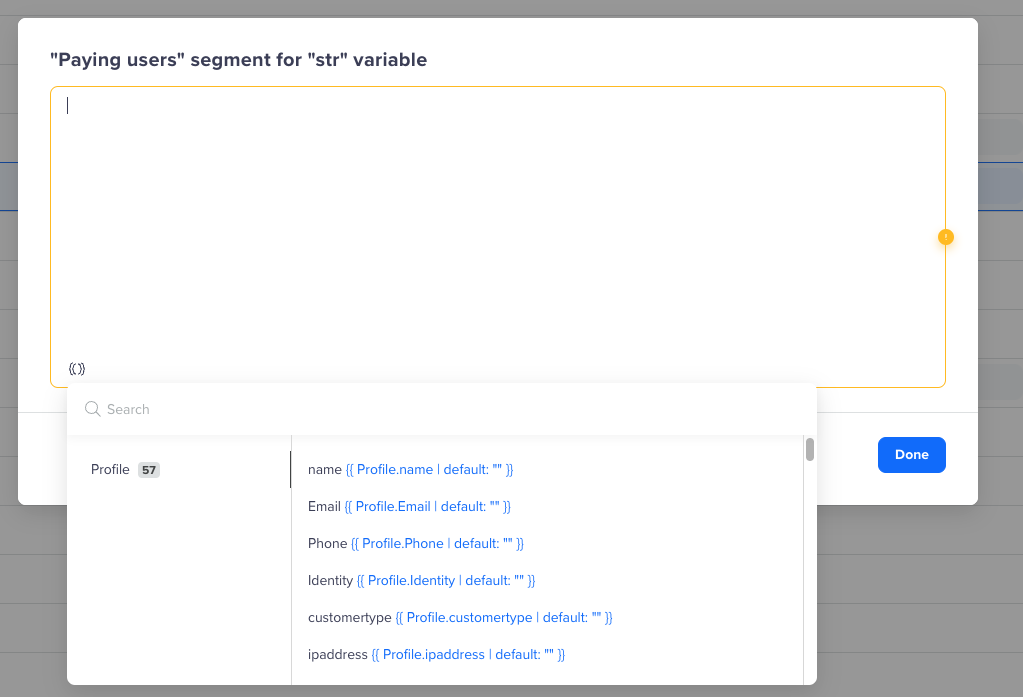
Set the value from User Profile Property
Segment Prioritization
When there are multiple segments, and a user meets the criteria for more than one segment, the default segment (All users) is assigned the lowest priority, and the segment that appears at the top of the list is given the highest priority.
Let us consider an example. If a user qualifies for two segments - Paying Users and All Users, in this case, the user sees the variable value defined for the New Users segment as shown below.
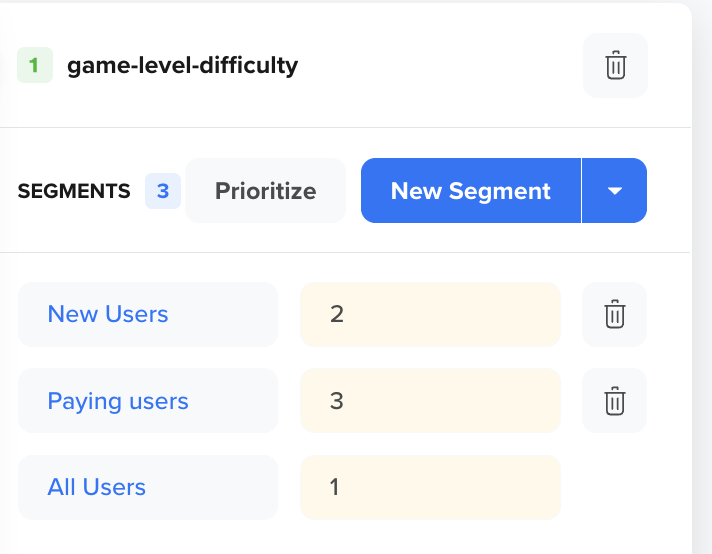
Multiple Segments
To change the priority, click Prioritize and drag and drop the segment to change the priority.
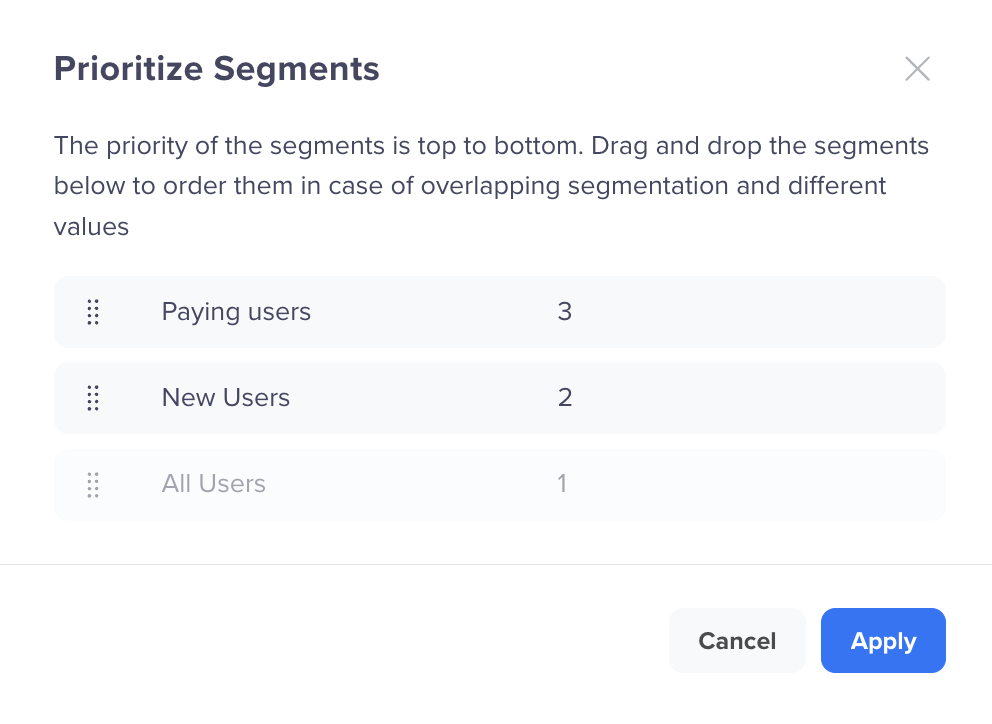
Change Segment Priority
Remote Config Version History
After a Remote Config draft version is published, all the previous live versions are stored along with the following corresponding metadata: created by and the timestamp when the version was published. Each version can be restored when needed. To view the version history and restore a specific version:
- Navigate to Published versions.
- From the Published version history, select the version of your choice.
- Click RESTORE (see figure below).
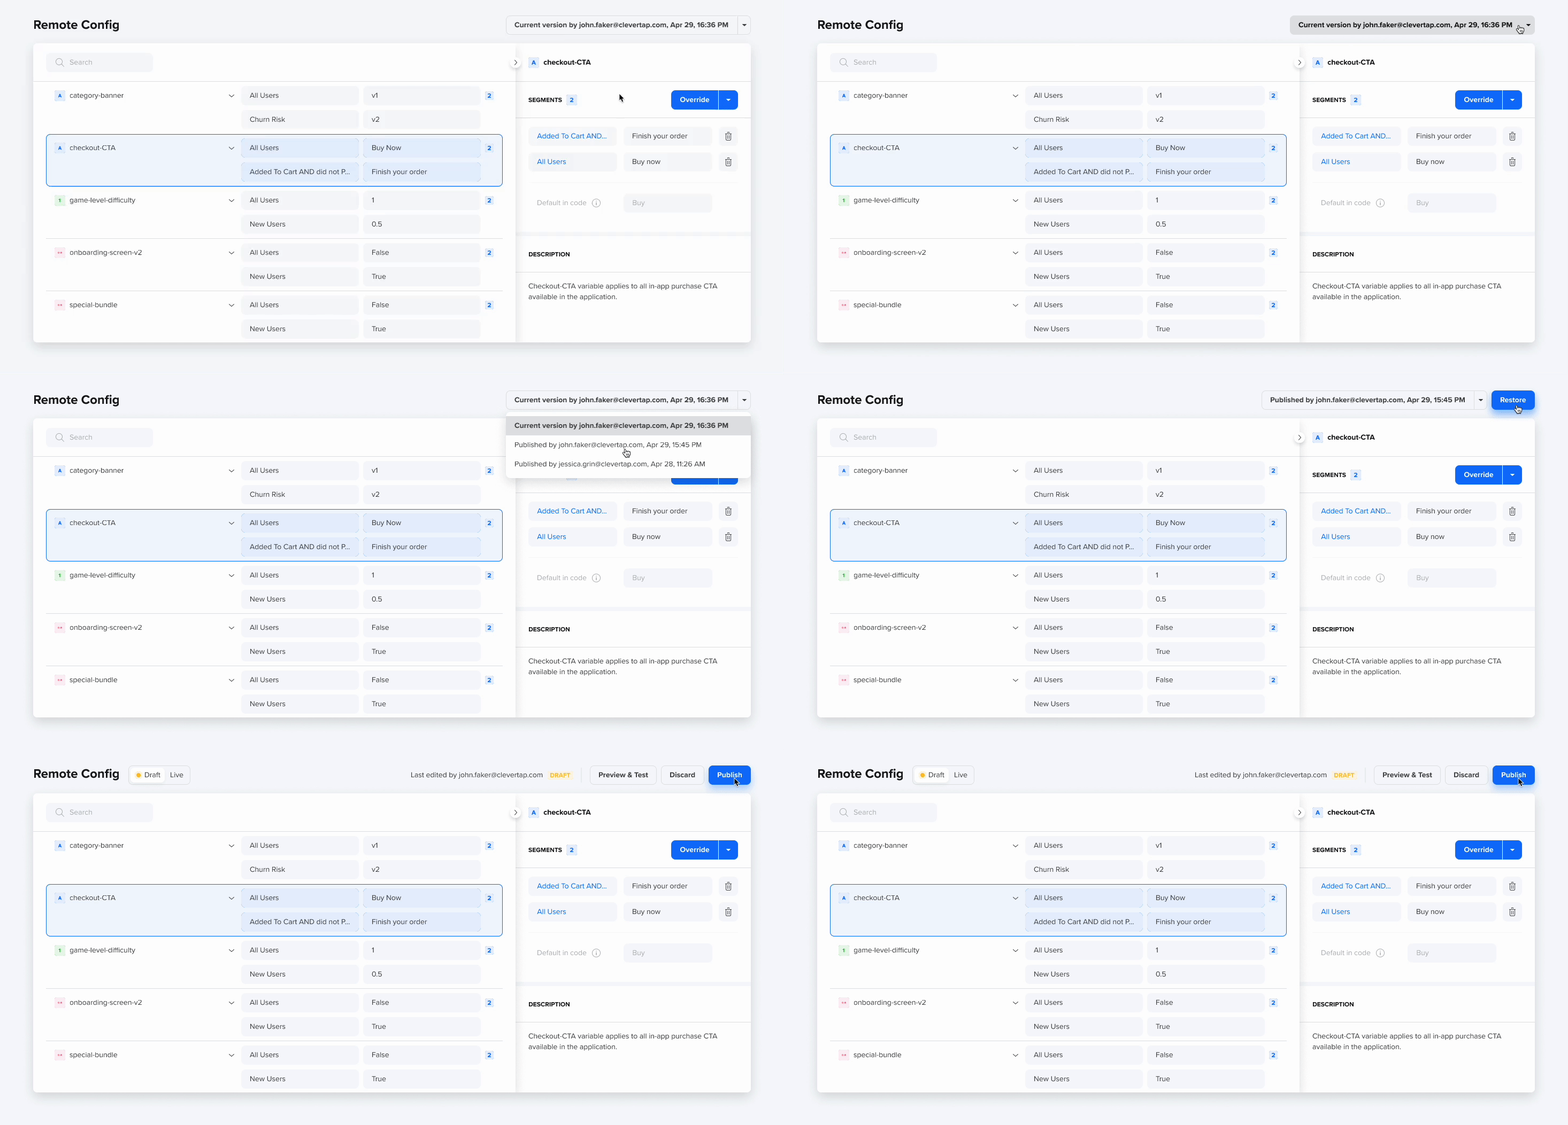
Preview and Test Variables
For all the variable updates made in the draft mode, you can test their behavior on a device using the Preview & Test feature. By clicking Preview & Test, you enable the variable values from your unpublished draft for all profiles marked as test profiles for your app and the associated devices.
Mark Test ProfilesFor testing the behavior of variables in draft mode, it is a prerequisite to mark certain profiles as Test profile. It is also imperative for the test profiles to qualify for the specific segment to be able to view the variable changes.
Let us consider the following example to understand this better:
If you make changes to a variable value for a segment of Indian users and want to preview them on your test device, you need to log in to your app on your device with an Indian user profile that is marked as a test profile to qualify for the segment and view the specific changes. Logging in as a user in the US, for instance, will not allow you to see the changes you made.
Updated about 1 month ago
