Create Message
Create a message for your webhook.
Create a New Campaign
Create a campaign to deliver your Webhook. To create a new campaign
- From the CleverTap dashboard, select Campaigns.
- Click + Campaign.
- From the Messaging Channels list, select Webhooks.

Create a New Webhook Campaign

Webhook Setup
Define all the sections to publish the campaign.
Start Campaign Setup
The Start here section displays the setup information.
This section has the following parts:
- Qualification criteria: Deliver the notification based on Past behavior/Custom list, Live Behavior, or External Trigger.
- Webhook: Select from the available Webhooks. Alternatively, you may create a new webhook.
- Set a goal: You can track your campaign conversion by setting up a goal. Setting a goal allows you to measure your campaign effectively against what you want to achieve with the campaign. This selection is optional. Define the conversion period by selecting the Conversion Time. You can define your conversion goal further by filtering an event by event properties. For more information on event properties, refer to Events.

Enable Conversion Tracking
Define the Audience
You need to indicate the target audience for your Webhook campaign. You can target your Webhook campaign to a new user segment by clicking on the Target segment section. Here, you can create a new ad-hoc segment or use a previously saved user segment from the segment list.

Define the Target Audience
You can create the target based on past user behavior and/or user properties, or live (ongoing) user behavior (the latter is useful to send out real-time, triggered Webhook campaigns).
Delay > 24 HoursWe recommend creating a Past Behavior campaign for all campaigns where the delay is greater than 24 hours for a live inaction campaign.
For instance, you can create a live Inaction within time campaign that targets users as soon as they add a product to their cart but do not finish transacting within 10 minutes, the golden window within which most users transact on online platforms.
Deliver Action Based Webhook Notifications
You can trigger a Webhook notification based on an action. Users receive Webhook notifications when they perform a certain action. This makes notifications more contextual and increases conversion. The instant Webhook message is not triggered for campaigns with delays or when the app inbox is coupled with a Webhook message.
Filter Webhook Notifications based on Past Behavior
You can also target users basis their past behavior. For past behavior campaigns, you also have the option to calculate estimated reach to view:
- Number of users that qualify for the campaign criteria.
- Number of users that are reachable via Webhook.
Filter by User Properties
Using the With user properties filter in the Who section, you can segment your campaign to only reach users who meet specific criteria.
For example, you can send webhook notifications only for female users who live in the United States. The image below represents a sample target segment that is filtered using specific user properties to target the required audience.

Target Audience Based on User Properties
Control Group
You can define the control group to compare and measure the results of your campaign. For more information on control groups, see Control Groups.
Note
The control group for Webhook campaigns is enabled only if the Webhook Delivered system event is available for your account. To enable the Webhook Delivered event, contact your Customer Success Manager.

Define Control Group
Targeting Cap
Sometimes, you want to send a message to only a subset of the qualifying audience (Target Reach) for a campaign or avoid sending it if the number of qualified users exceeds the specified number.
A relevant use case is a limited offer where you want to send a fixed number of coupon codes you want to distribute. If the total reach for your campaign exceeds the number of coupon codes you can distribute, you can limit the number of users who will receive the message to exactly the number of coupons you want to distribute.
Campaign LimitEnsure that you set up a limit of 100 or more, regardless of the qualified user segment size. If the limit specified is less than 100, an error occurs.
NoteThe maximum reach for the target segment may be less than the limit specified in Targeting Cap.
Define the Webhook Content
Now, you can set up the What which is the Webhook campaign content. Click Go To Editor to create your message.

Webhook Editor
Webhook Editor
From the Webhook Editor:
- Add query parameters in the URL key-value pairs section.
- Select the content type (JSON or plain text).
- Add the webhook content to send or receive the data.

Webhook Setup
You can either use Profile Variables & custom key value pairs or Custom Body. You have the option to send/receive an email, identity, objectId (CleverTap ID), profileData (custom profile variables), event properties (applicable only for Live behavior), and push_token for each user.

Define the Webhook Content
You can also choose a custom payload.

Custom Payload in Webhook
The preview for your payload is displayed on the right side of the pane.

Preview Webhook Payload
Sample Payload
Following is a sample webhook payload containing all possible fields for profile variables. The targetId corresponds to the webhook campaign ID for which you receive the payload.
{
  "targetId": 1659684581,
  "key_values": {
    "SomeKey1": "SomeValue1"
  },
  "profiles": [
    {
      "key_values": {
        "SomeKey1": "SomeValue1"
      },
      "email": "[email protected]",
      "identity": "[email protected]",
      "all_identities": [
        "[email protected]"
      ],
      "objectId": "__Webhook227",
      "phone": "+917872483227",
      "systemProfileData": {
        "webPushSubscription": "Unsubscribed",
        "mobilePushSubscription": "Unsubscribed",
        "emailSubscription": "Subscribed",
        "smsSubscription": "Subscribed",
        "whatsappSubscription": "Subscribed",
        "timezone": "Eastern Standard Time",
        "country": "Unknown",
        "region": "Unknown",
        "city": "Unknown",
        "latitude": 19.16670036315918,
        "longitude": 72.84851837158203,
        "age": "2 years 1 months"
      },
      "profileData": {
        "customer type": "gold",
        "customer id": 11384938,
        "language": “english”,
        "last score": 308,
        "high score": 308,
        "replayed": true,
                "multi": [
          "foo",
          "bar"
        ],
        "ts": 1586937505801
      },
      "name": "Nick",
      "event_properties": {
        "zip-code": "0500",
        "Product Id": 1,
        "test prop 2": 100,
        "prop1": 19.16670036315918,
        "prop2": 72.84851837158203,
        "Make": "random make",
        "Model": "s",
        "SDK Version": 30200,
        "OS Version": "9.1.11111",
        "Version": 6.55,
        "date": "$D_1664890781",
        "ct_sdk_version": 30700,
        "ct_latitude": 19.16670036315918,
        "ct_longitude": 72.84851837158203,
        "ct_os_version": "9.1.11111",
        "ct_app_version": 6.55,
        "CT Source": "Mobile"
      },
      "session_props": {}
    }
  ]
}
Response Formats
The following are the two types of response formats sent by CleverTap when creating a webhook campaign:
Broadcast Message:
A message is termed as Broadcast when the following four conditions are met:
- User selects JSON from the Webhook content format dropdown
- User selects Profile variables& custom key value pairs as the message body
- Webhook URL does not include any personalization component
- Key-value pairs do not include any liquid tags. However, the message still qualifies as a broadcast message if the key-value pairs use @Personalization.
For broadcast messages, the payload includes an array of profile variables. The following is a sample webhook payload containing all possible fields for profile variables. The targetId corresponds to the webhook campaign ID for which you receive the payload.
{
    "targetId": 1472124953,
    "key_values": {
        "PromoCode": "MT50",
        "PowerUser": "true"
    },
    "profiles": [
        {
            "Email": "[email protected]",
            "Identity": "foo",
            "ObjectId": "-g55b74fb1030740e4a4931910a8abb862",
            "ProfileData": {
                "Last Score": 308,
                "High Score": 308,
                "Replayed": true
            },
            "Event_properties": {
                "Score": 1200,
                "Game Mode": "Practice",
                "Rating": 1
            },
            "Push_token": "19403aa5d3bb376769a8101c9cbf22159cb1836117659cc684a71243589982ea"
        },
        {
            "Email": "[email protected]",
            "Identity": "bar",
            "ObjectId": "__g09c9bf3b0d374a259c86f5b855ec9b19",
            "ProfileData": {
                "Last Score": 309,
                "High Score": 309,
                "Replayed": true
            },
            "Event_properties": {
                "Score": 500,
                "Game Mode": "Tournament",
                "Rating": 2
            },
            "Push_token": "fiCjRO_opjw:APA91bH0yzS_eBj1Xx8TcakMzz4yTc3id29A79GOjnaaMtIQLrjztNfzzRz7slqWmNzndECx_hHh7qiL0LZJOkGwzr9Zp_g1mC9B6BVuEbsjrMFoxXX830zMRuvxtU_AhFTC0JPHejZh"
        }
    ]
}
Non-broadcast Message
The messages other than broadcast messages are termed Non-broadcast messages. The following is a sample webhook payload containing all possible fields for profile variables. The targetId corresponds to the webhook campaign ID for which you are receiving the payload.
{
    "targetId": 1472124953,
    "key_values": {
        "PromoCode": "MT50",
        "PowerUser": "true"
    },
    "profiles":
        {
            "Email": "[email protected]",
            "Identity": "foo",
            "ObjectId": "-g55b74fb1030740e4a4931910a8abb862",
            "ProfileData": {
                "Last Score": 308,
                "High Score": 308,
                "Replayed": true
            },
            "Event_properties": {
                "Score": 1200,
                "Game Mode": "Practice",
                "Rating": 1
            },
            "Push_token": "19403aa5d3bb376769a8101c9cbf22159cb1836117659cc684a71243589982ea"
        }
Define the Campaign Schedule
Each webhook campaign needs to be scheduled for a specific timeline. To define the schedule for your webhook campaign, you need to specify the Start date and time and End date and time. You also have the option to start a campaign immediately by selecting Now.
Besides, you can also define a delay (by seconds, minutes, hours, or days) once a user qualifies for the target segment. Once you define the schedule and click Done; the campaign will be triggered and terminated as per the defined timings.

Define the Campaign Schedule
Delivery preferences
Global frequency caps operate on a per-channel basis and let you specify the message cadence, dwell time between messages, and throttle limits (delivery rates). To control the maximum number of messages users receive for a given channel of communication, select Global campaign limits. And, to control the delivery rates for your campaigns, select Global throttle limits. For more information about Global campaign limits and Global throttle limits, refer to Messaging Frequency Caps.
For both Past Behavior and Live Campaigns, you can also set the Do Not Disturb (DND) hours during which notifications from the campaign are prevented from going out, either by discarding them or delaying delivery until after DND hours are complete, such as 9 PM to 9 AM.
For Past Behavior Campaigns, if you want your campaign to adapt delivery times according to the user’s timezone, check the Timezone checkbox. For more information, refer to Delivery in User’s Timezone.
Since past behavior campaigns can have scheduled times, you have the option to stop a campaign delivery after a certain cut-off time or even deliver at the specified time in the user’s timezone. For more information, refer to Delivery in User’s Timezone.
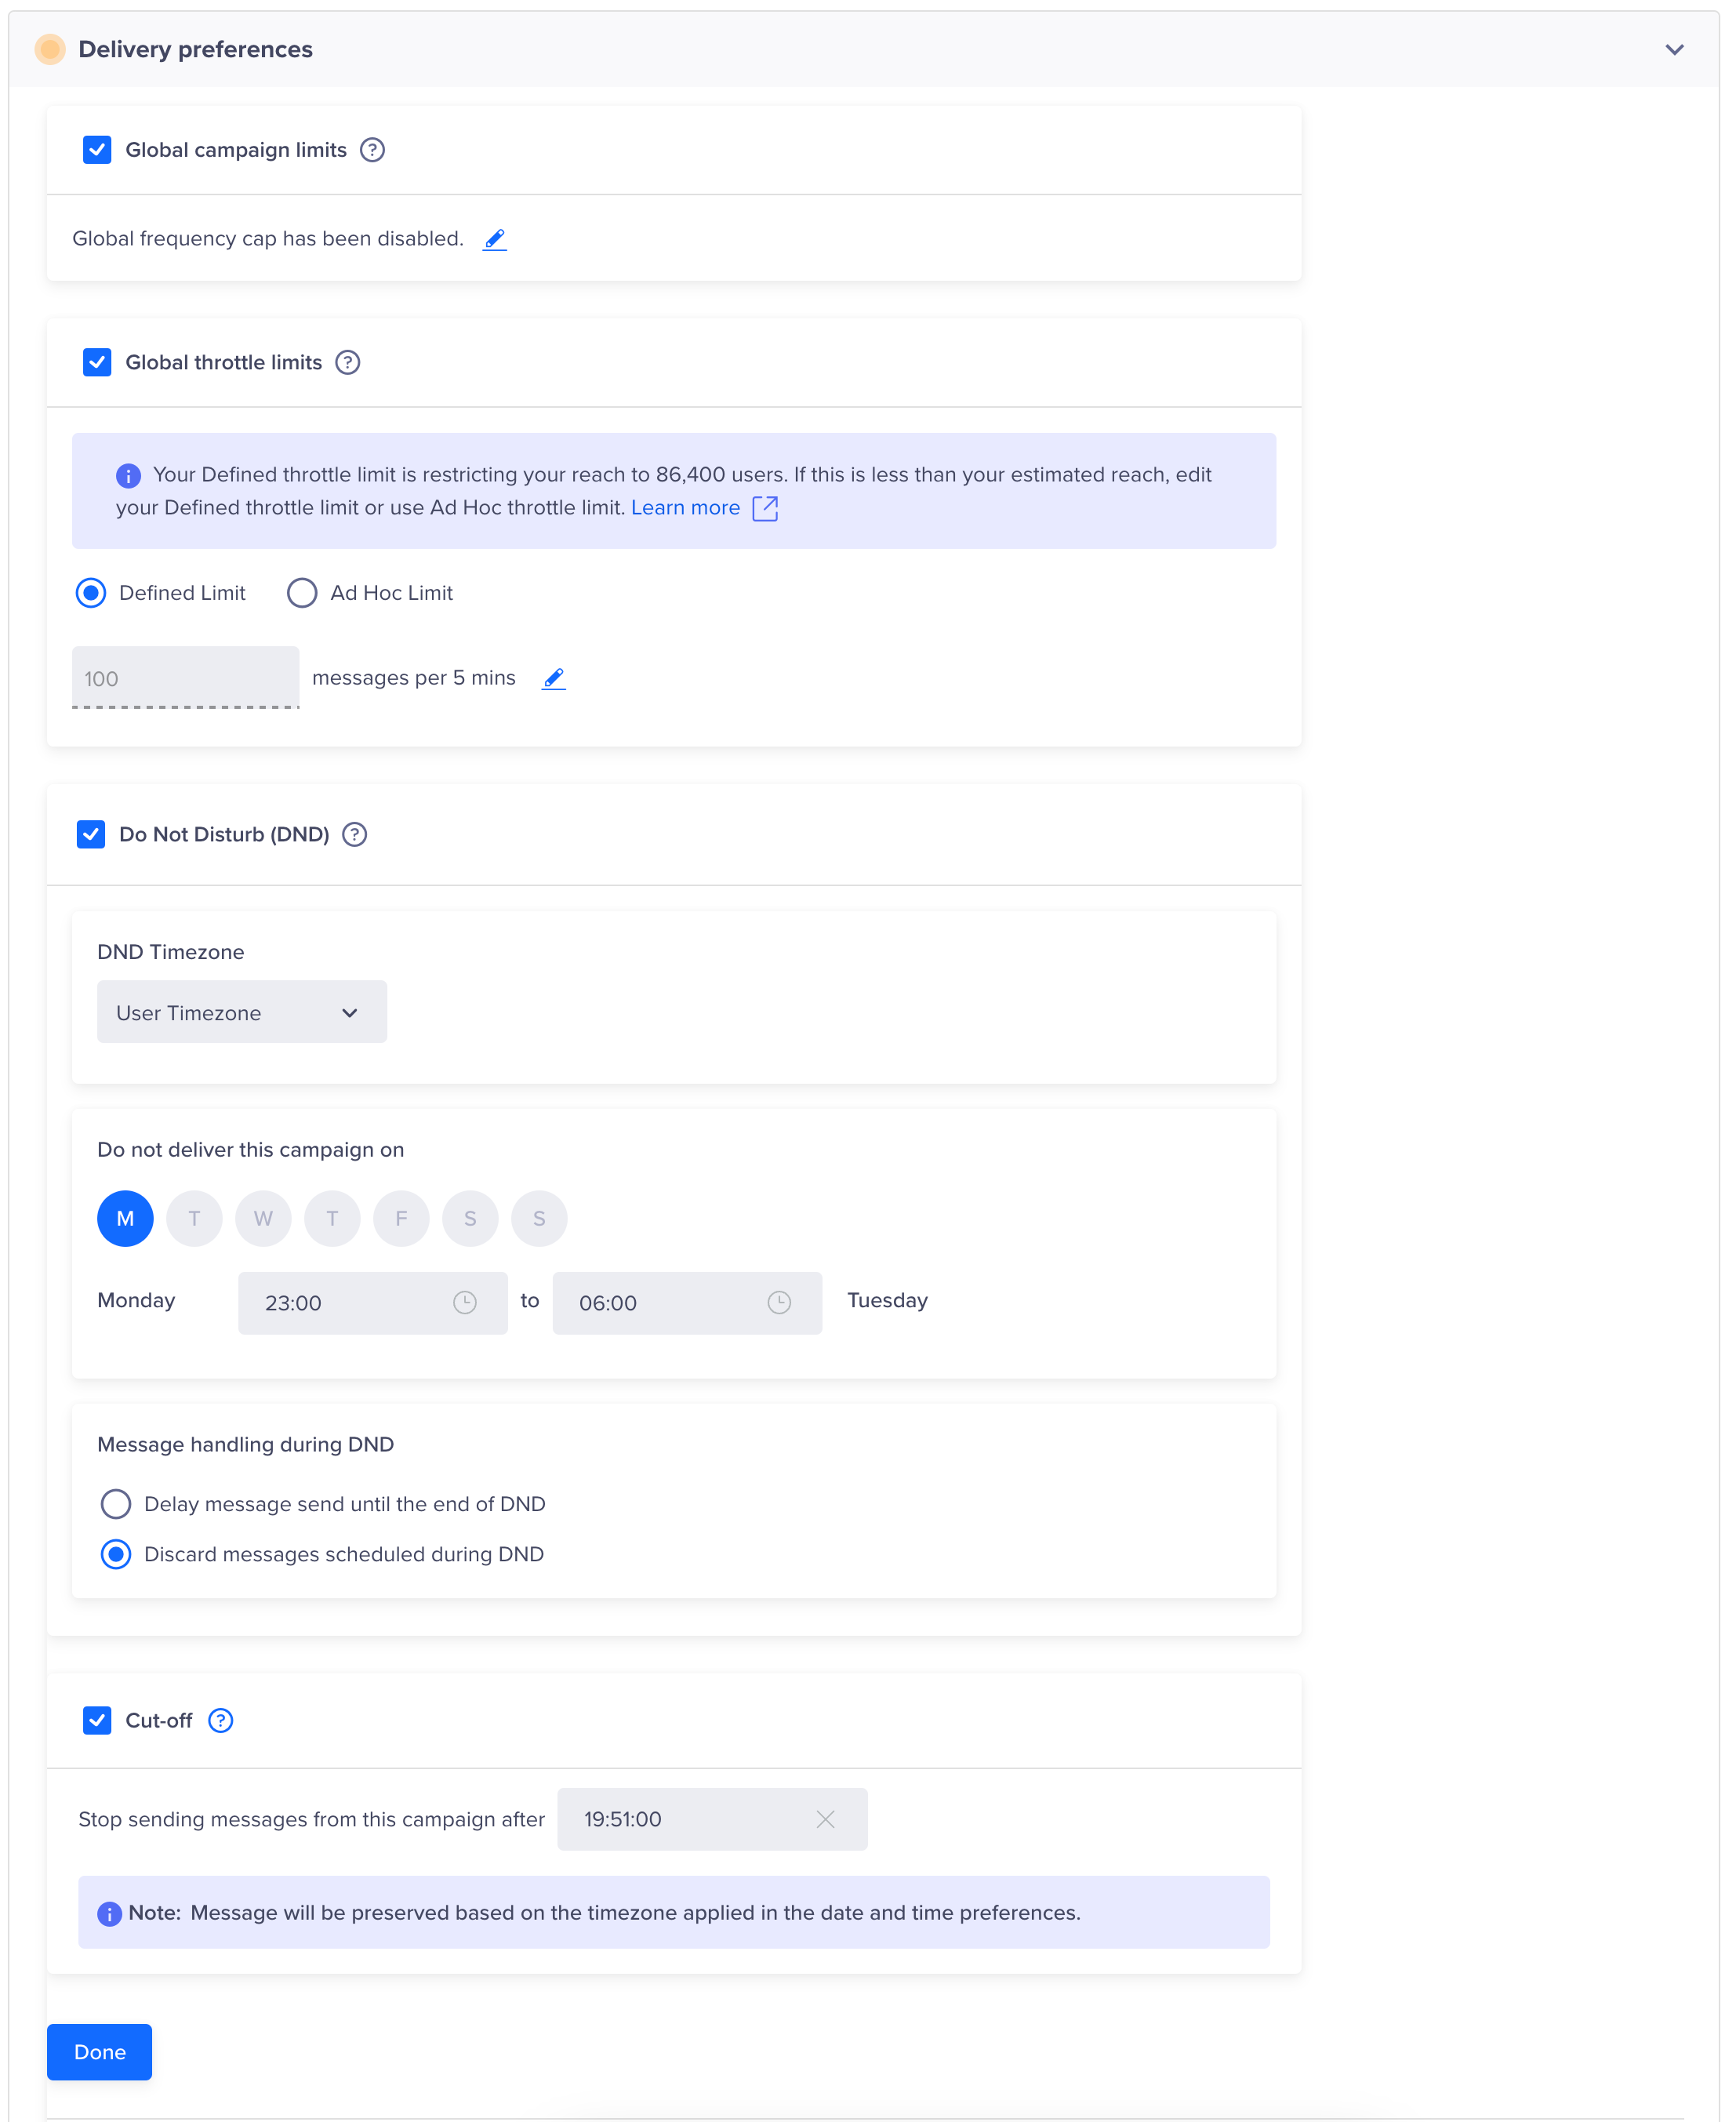
Delivery Preferences
DND Feature Not Supported in JourneysWebhook currently supports the Do Not Disturb (DND) feature exclusively in Campaigns, not in Journeys.
Publish Campaign
After previewing the appearance of your overall campaign, finalize your campaign by clicking Publish Campaign.

Publish the Campaign
Updated 7 months ago