Voucherify
Loyalty Partner
Overview
The Voucherify integration with CleverTap enables seamless data transfer between the platforms, allowing you to inform customers about promotions and deliver personalized coupons efficiently. By combining CleverTap campaigns with Voucherify, you can automate the distribution of unique coupons and gift cards based on customer actions or special occasions, ensuring timely and targeted engagement.
With this integration, you can,
- Bulk delivery: Send codes to a specific customer segment in one go.
- Segment updates: Automatically deliver codes when a customer enters or exits a defined segment.
- Event-based responses: Send codes in reaction to an outstanding order or any custom event.
This integration enhances your ability to connect with customers and drive meaningful engagement through personalized promotions.
Prerequisites
Before setting up the integration, ensure you have the following details readily available:
- Campaign ID: Retrieve it from the Campaign tile in the Campaign List from the Voucherify dashboard or by calling the GET campaign endpoint.
- API URL: Navigate to Application Information section > API endpoint > Project Settings to find your API URL on your Voucherify dashboard.
- App ID and App Token: Navigate to Project Settings on the Voucherify dashboard to obtain App ID and App Token after setting up the CleverTap integration.
TroubleshootingFor any queries or assistance required with integrating CleverTap and Voucherify, contact the Voucherify Support team.
Setup Integration on the Voucherify Dashboard
To enable seamless communication between CleverTap and Voucherify, follow these steps to set up the integration on the Voucherify dashboard:
-
Navigate to Project Settings and scroll to Integration Keys in the General tab.
-
Click the + on the right.
-
Fill in the Name for your key.
-
Choose your Role from the Role drop-down list.
-
Choose CleverTap from the Integration drop-down list.
-
Click the Create Integration API Key button. App ID and App Token will be generated after successful integration.
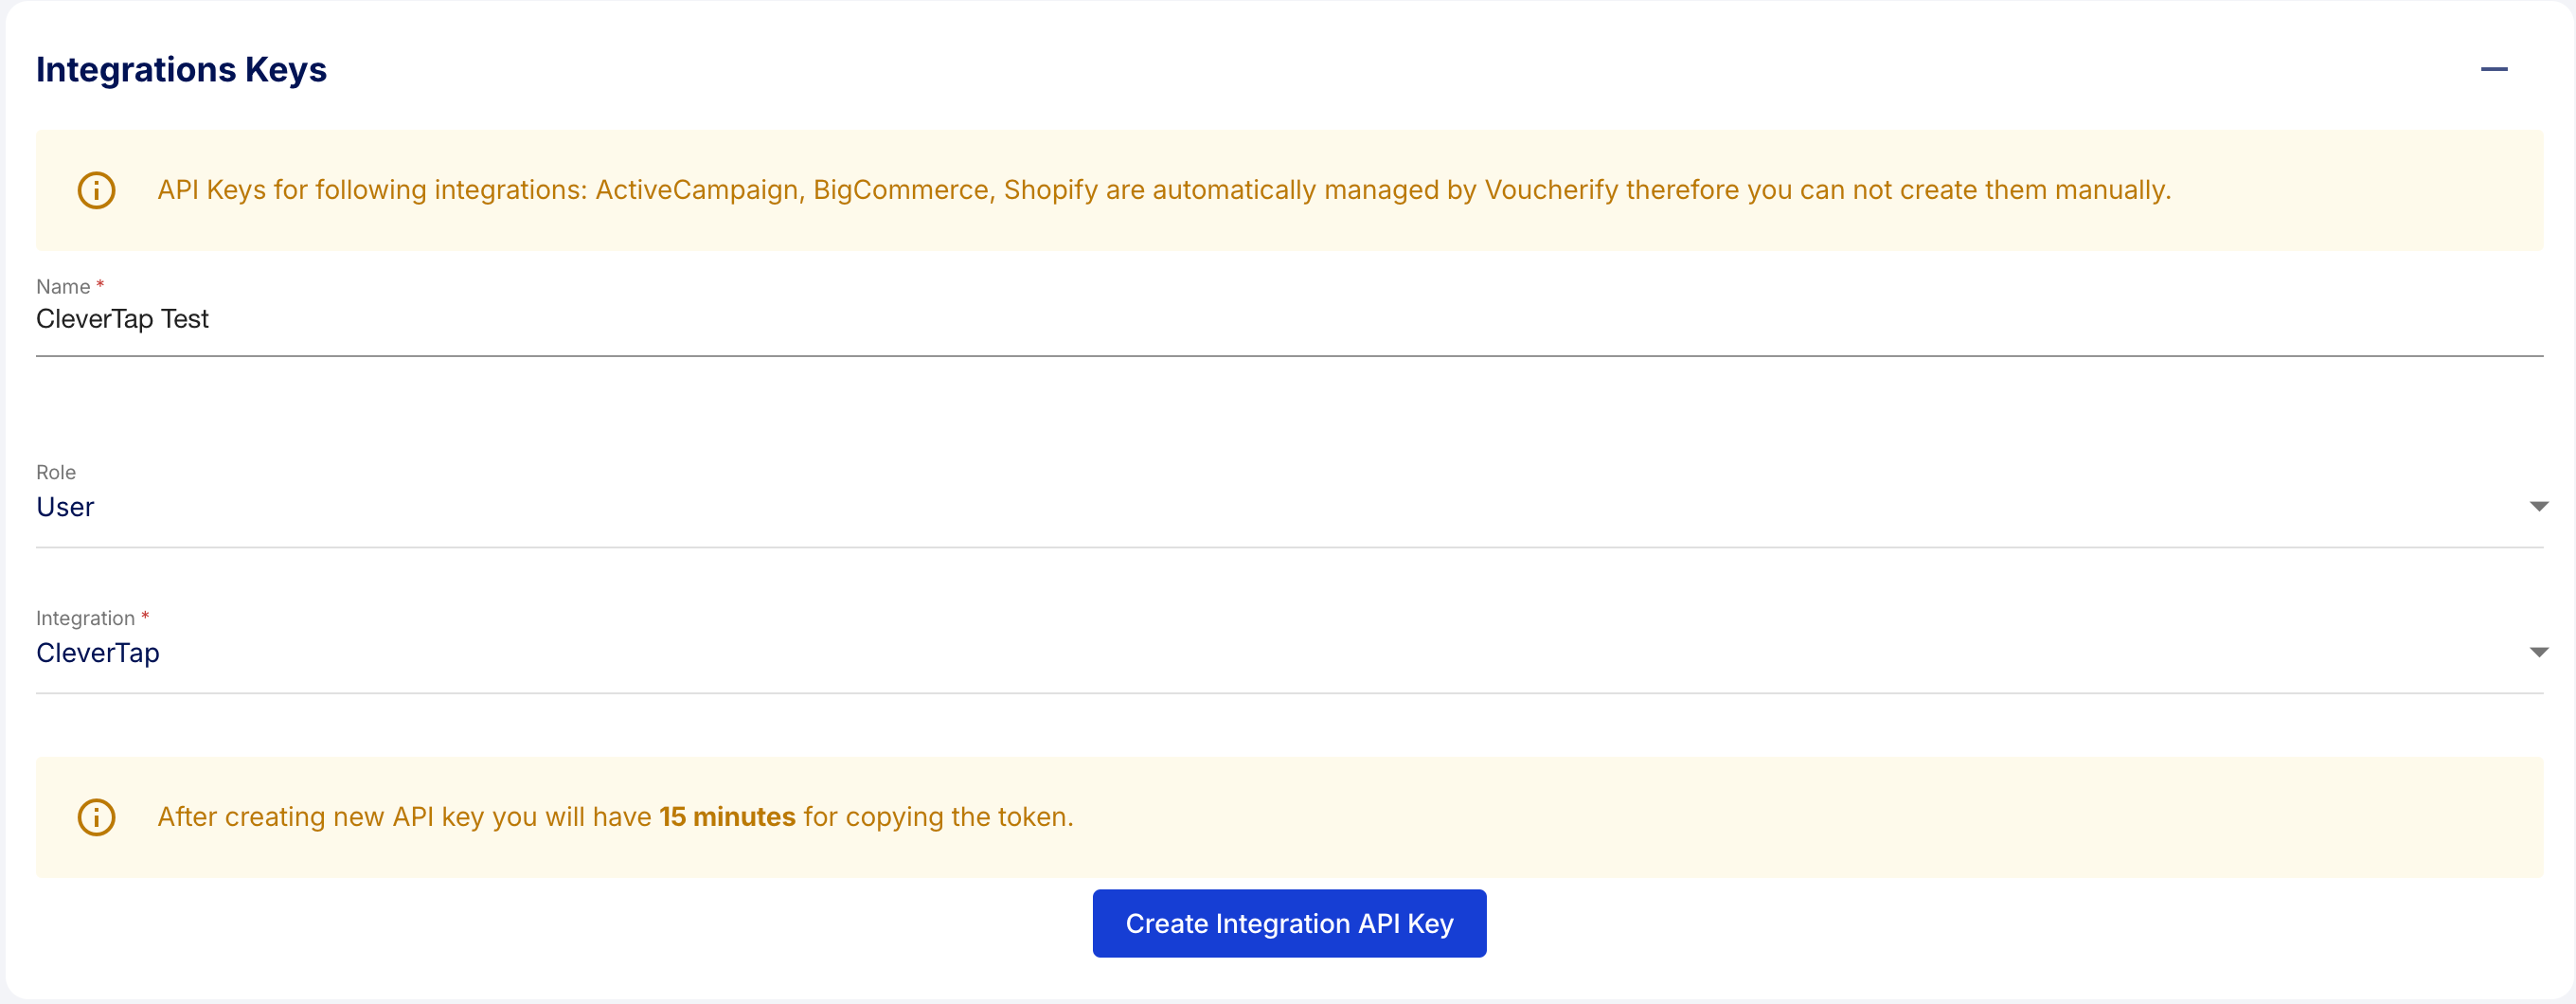
Setup CleverTap Integration on Voucherify Dashboard
Scenario 1: Distribute Voucherify unique coupons with CleverTap
Boost customer engagement by distributing Voucherify's unique coupon codes through CleverTap. This integration allows you to automate campaigns, track redemptions, and personalize offers to suit your audience with the following steps.
Prepare a Voucherify Campaign to Engage Inactive Customers
To re-engage inactive customers, a unique coupon campaign can be configured in Voucherify. For example, a "Customer Reactivation" campaign can be created to offer a 20% discount on the entire cart, capped at a maximum discount value of $100.
Key Configuration:
Enable the "Customers will be allowed to join the campaign only once" option to control code distribution:
- When Enabled: Each customer receives a single code from the campaign. If they request another, the system will provide the same code they were originally issued.
- When Disabled: A new coupon code is generated each time a request is made.
This setting allows you to decide whether customers can access multiple reactivation codes or just one, depending on your campaign strategy.
Campaign IDCopy the Campaign ID at this stage to configure the Endpoint on the CleverTap Dashboard while setting up Linked Content for the campaign.
Configure Linked Content on the CleverTap Dashboard
To publish a new code from the CleverTap campaign, configure Linked Content on the dashboard as follows:
-
Navigate to Settings > Setup > Linked Content and select the + Linked Content. A Linked Content form will appear.
-
API Name: Enter a name for the Linked Content endpoint. For example, "New Reactivation Voucher" represents voucher code distribution from the Customer Reactivation campaign.
-
API URL: Specify the URL of the Create Publications endpoint:
**{{API_URL}}/v1/publications/create?campaign=[Voucherify campaign ID]&customer={{customersourceid}}**. -
Headers tab:
-
Add the X-App-Id and X-App-Token headers you generated during setting up integration on Voucherify.
-
Set Content-Type header to
**application/json**.
-
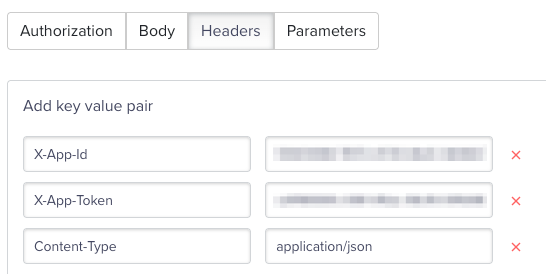
Linked Content Headers on CleverTap
-
-
Parameters Tab: A parameter named customersourceid will appear. Enable the Mark mandatory checkbox to ensure the customer ID is provided, as it is required to assign a coupon to the customer.
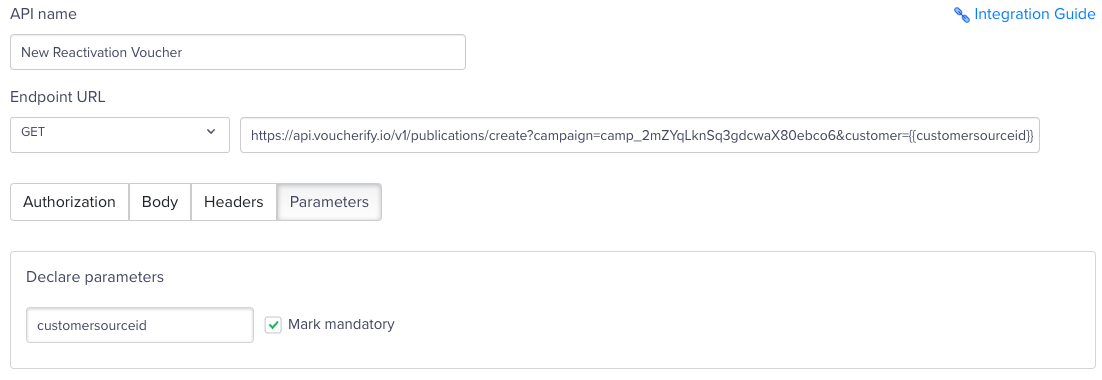
Setup Linked Content on CleverTap - Voucherify
- Click Test Linked Content. If the configuration is correct, Voucherify's response will be displayed.
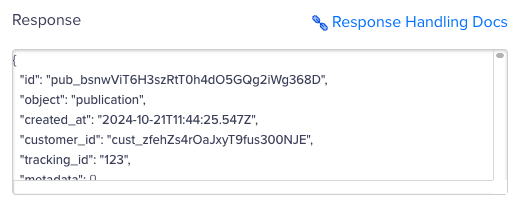
Testing for Response on CleverTap - Voucherify
-
Click on Auto-Fill Objects with Response to automatically populate objects present in the response. For this example, only the voucher.code field will be needed – it contains the published coupon code.

Auto-Fill Objects with Response on CleverTap - Voucherify
-
Click Save & Test Changes.
Refer to Linked Content for more details.
Use Linked Content Endpoint and Create a Campaign on CleverTap
Create a new campaign in CleverTap. For this example, configure a one-time email outbound campaign targeting customers who last visited the e-commerce site 30 days ago.
-
Navigate to Campaigns and select Email under + Campaign.
-
Under the What section, Go to Editor and select Personalization.
-
Select the relevant API from the drop-down menu. For this example, select New Reactivation Voucher and click Apply.
-
Specify the field to be used as the request parameter for the endpoint and map the properties and values.
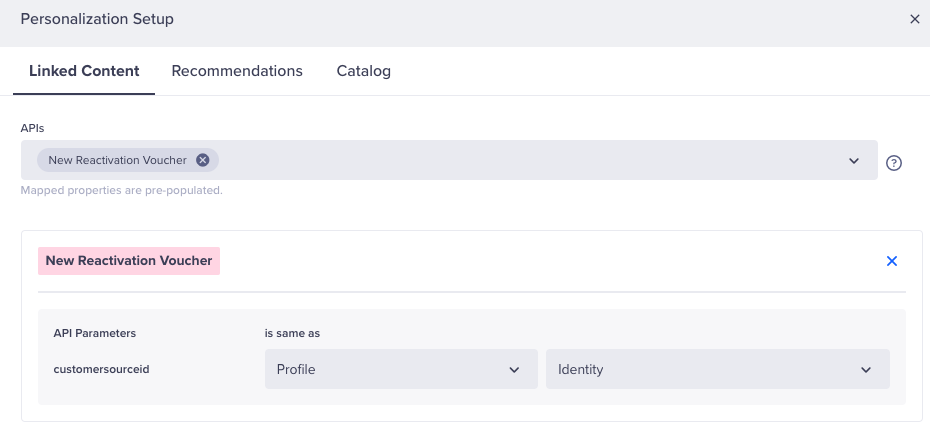
Personalization Setup in CleverTap Campaigns - Voucherify
-
Select Apply.
-
In the place where you want the coupon code to be displayed, choose Customize with Liquid tags and choose the code field from the Linked Content endpoint created during configuring Linked Content. For this example, Add the
**{{Linked{"New Reactivation Voucher"].[code] | default: "contact us"}}**which has been set during configuring Linked Content.
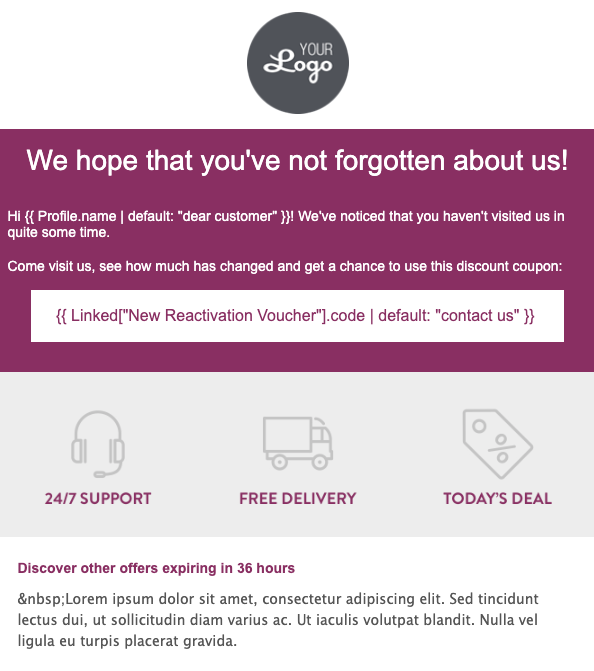
Linked Content in CleverTap Email - Voucherify
- Click Preview & Test to view how the message will appear for a specific customer.
Delivery PreferencesEmail throttling can be configured within the campaign's delivery settings to regulate the message delivery rate. Ensure that the throttling rate is adjusted to remain within the minute limit defined in your Voucherify plan.
-
Upon publishing the campaign, messages will be delivered either at the scheduled time or immediately. Each message will be personalized for the recipient and will contain the voucher code allocated to them.
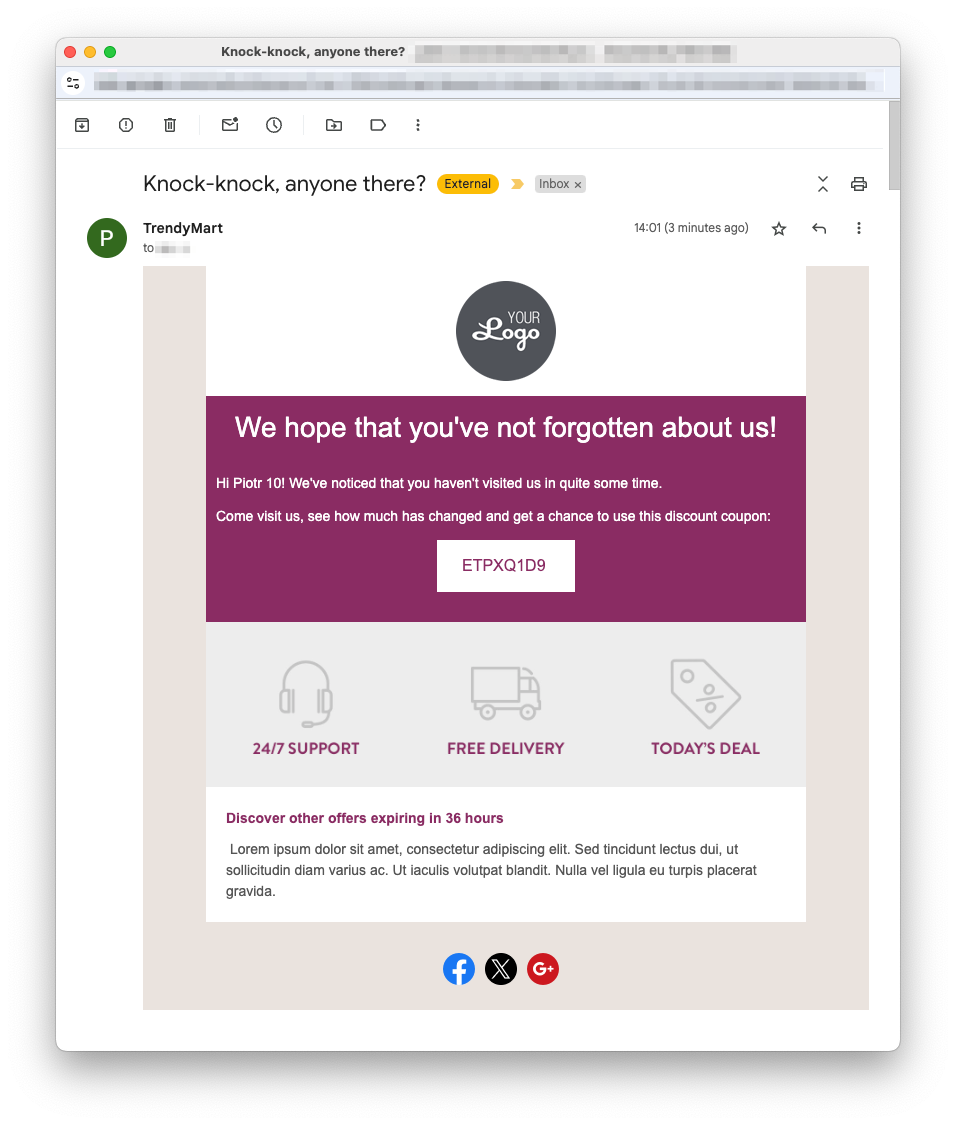
Personalized Discount Code with CleverTap Email Campaign - Voucherify
You can see each publication call made during the email send-out in the Audit Log in your Voucherify Dashboard with the URL
**/v1/publications/create**.You can also view the generated codes in the selected campaign dashboard in the Vouchers tab.
Scenario 2: Referral code and loyalty card publication
The process of assigning a referral code or loyalty card is similar to the steps outlined above. Simply update the campaign name parameter to reference the specific referral or loyalty campaign you have created.
In this example, the customer's code is retrieved from the referral program with the ID camp_f0bKCWIYyTfOept56g2UMLY7.
Suppose the Customer is allowed to join the campaign only once (the option is enabled in the referral program configuration), a customer will receive their previously assigned referral code. If a referral code has not yet been assigned to the customer, a new code will be generated and included in the response.
- Configure the Linked Content endpoint:
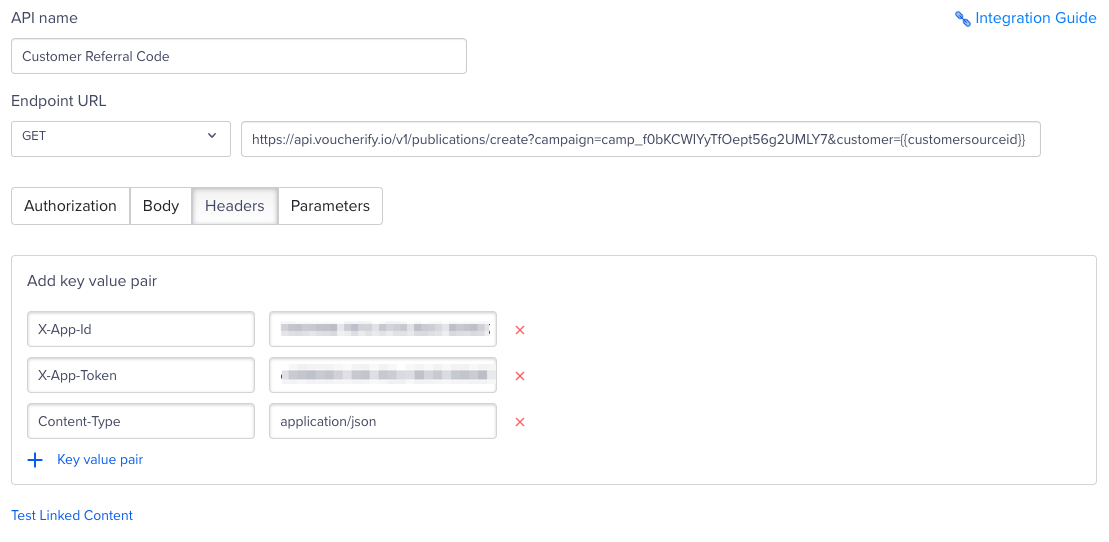
Linked Content - Voucherify
- To retrieve the loyalty card, use the following code:
{{ Linked["Customer Referral Code"].code }}.
The customer can share their referral code with a friend. When they use it during a purchase, the referrer will be awarded the gift you have set up in the Voucherify Dashboard.
Updated about 1 month ago
