Taxi for Email
Overview
Taxi for Email, a collaborative platform, streamlines the design and coding of email campaigns, enabling teams to create consistent, high-quality emails without the need for extensive coding knowledge. CleverTap integrates with Taxi for Email to:
- Design, code, and manage email templates using Taxi for Email, which also enables collaborative editing, live previews, approval workflows, template management, and version control, ensuring compatibility across email clients.
- Segment audiences, personalize content, and execute campaigns on the CleverTap dashboard, effectively targeting the right users with tailored messages.
Enable CleverTap Connector on Taxi For EmailTo activate the CleverTap connector for Taxi For Email, contact the Taxi For Email support team or your account manager directly from the platform or send an email to [email protected] to submit a request.
Prerequisites for Integration
The following are the prerequisites:
- A Taxi for Email account with all the required setup and permissions to export email templates.
- A CleverTap account.
Steps for integration
The integration involves the following three main steps:
- Configure Taxi for Email Dashboard.
- Set Up Personalization.
- Export Email Templates from Taxi For Email Dashboard to CleverTap.
Configure Taxi for Email Dashboard
Add CleverTap credentials on the Taxi for Email dashboard:
- Navigate to Integrations > ESP Connectors from the dashboard and click Add New.
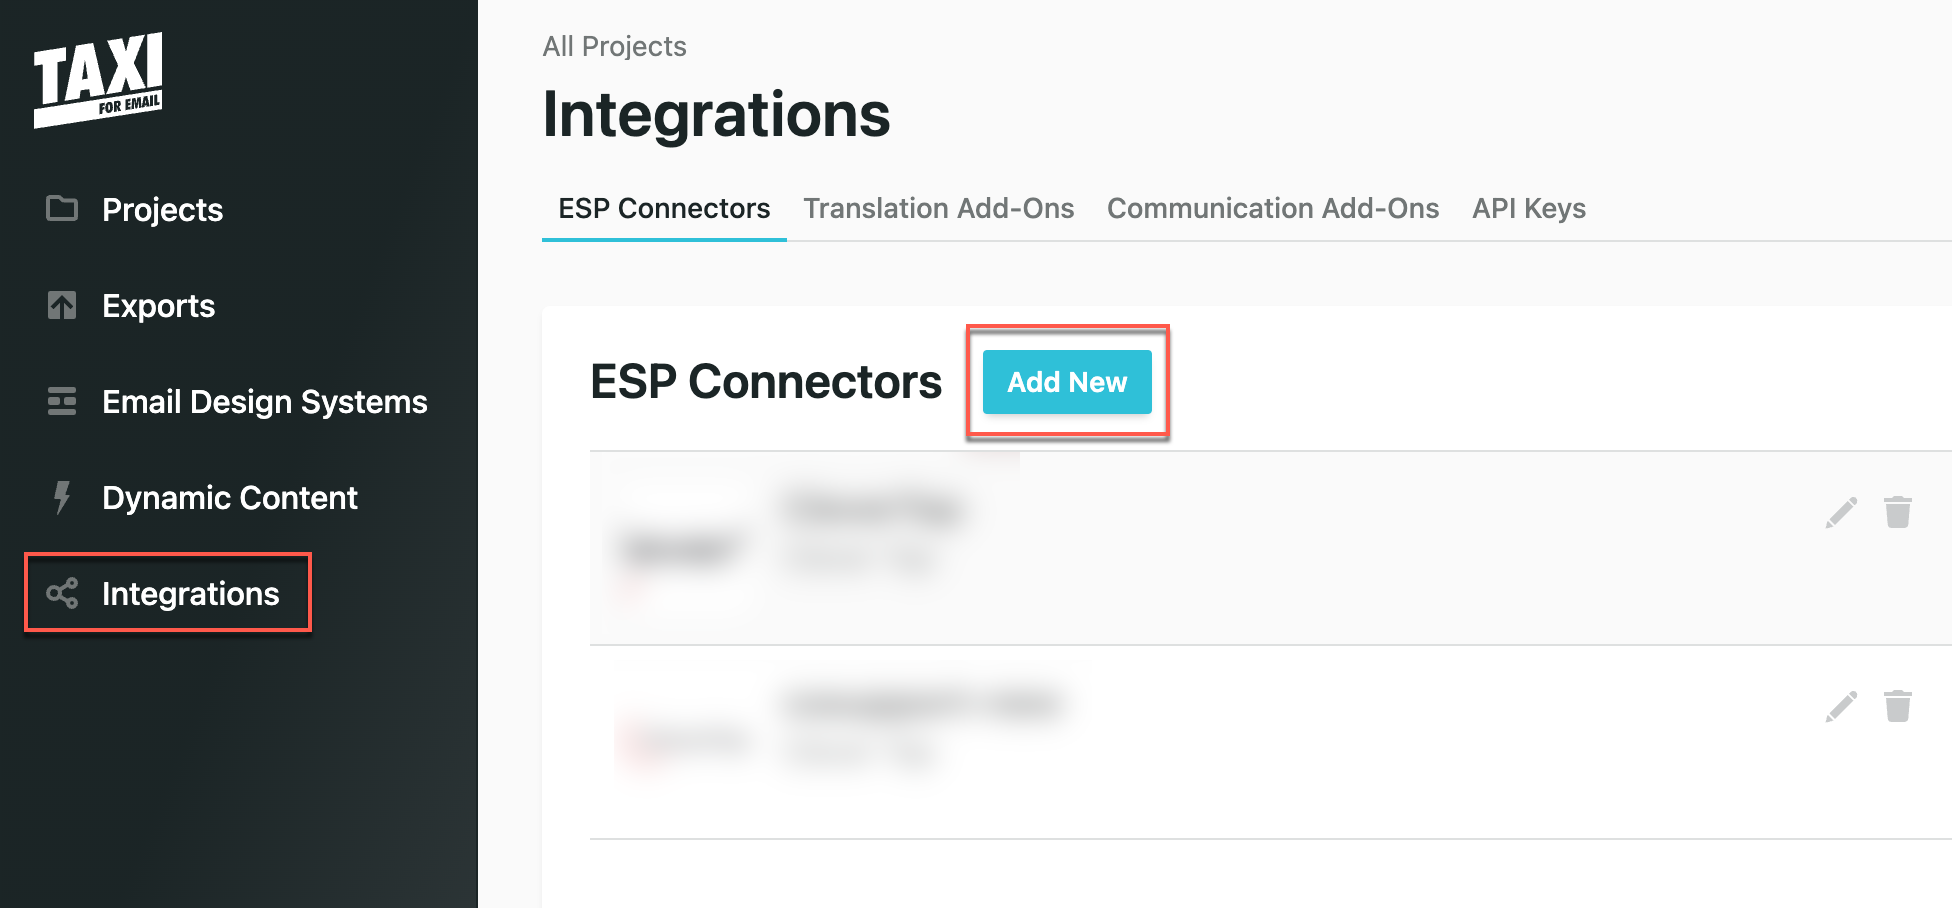
Add New Connector
- Select CleverTap from the Connector type dropdown.
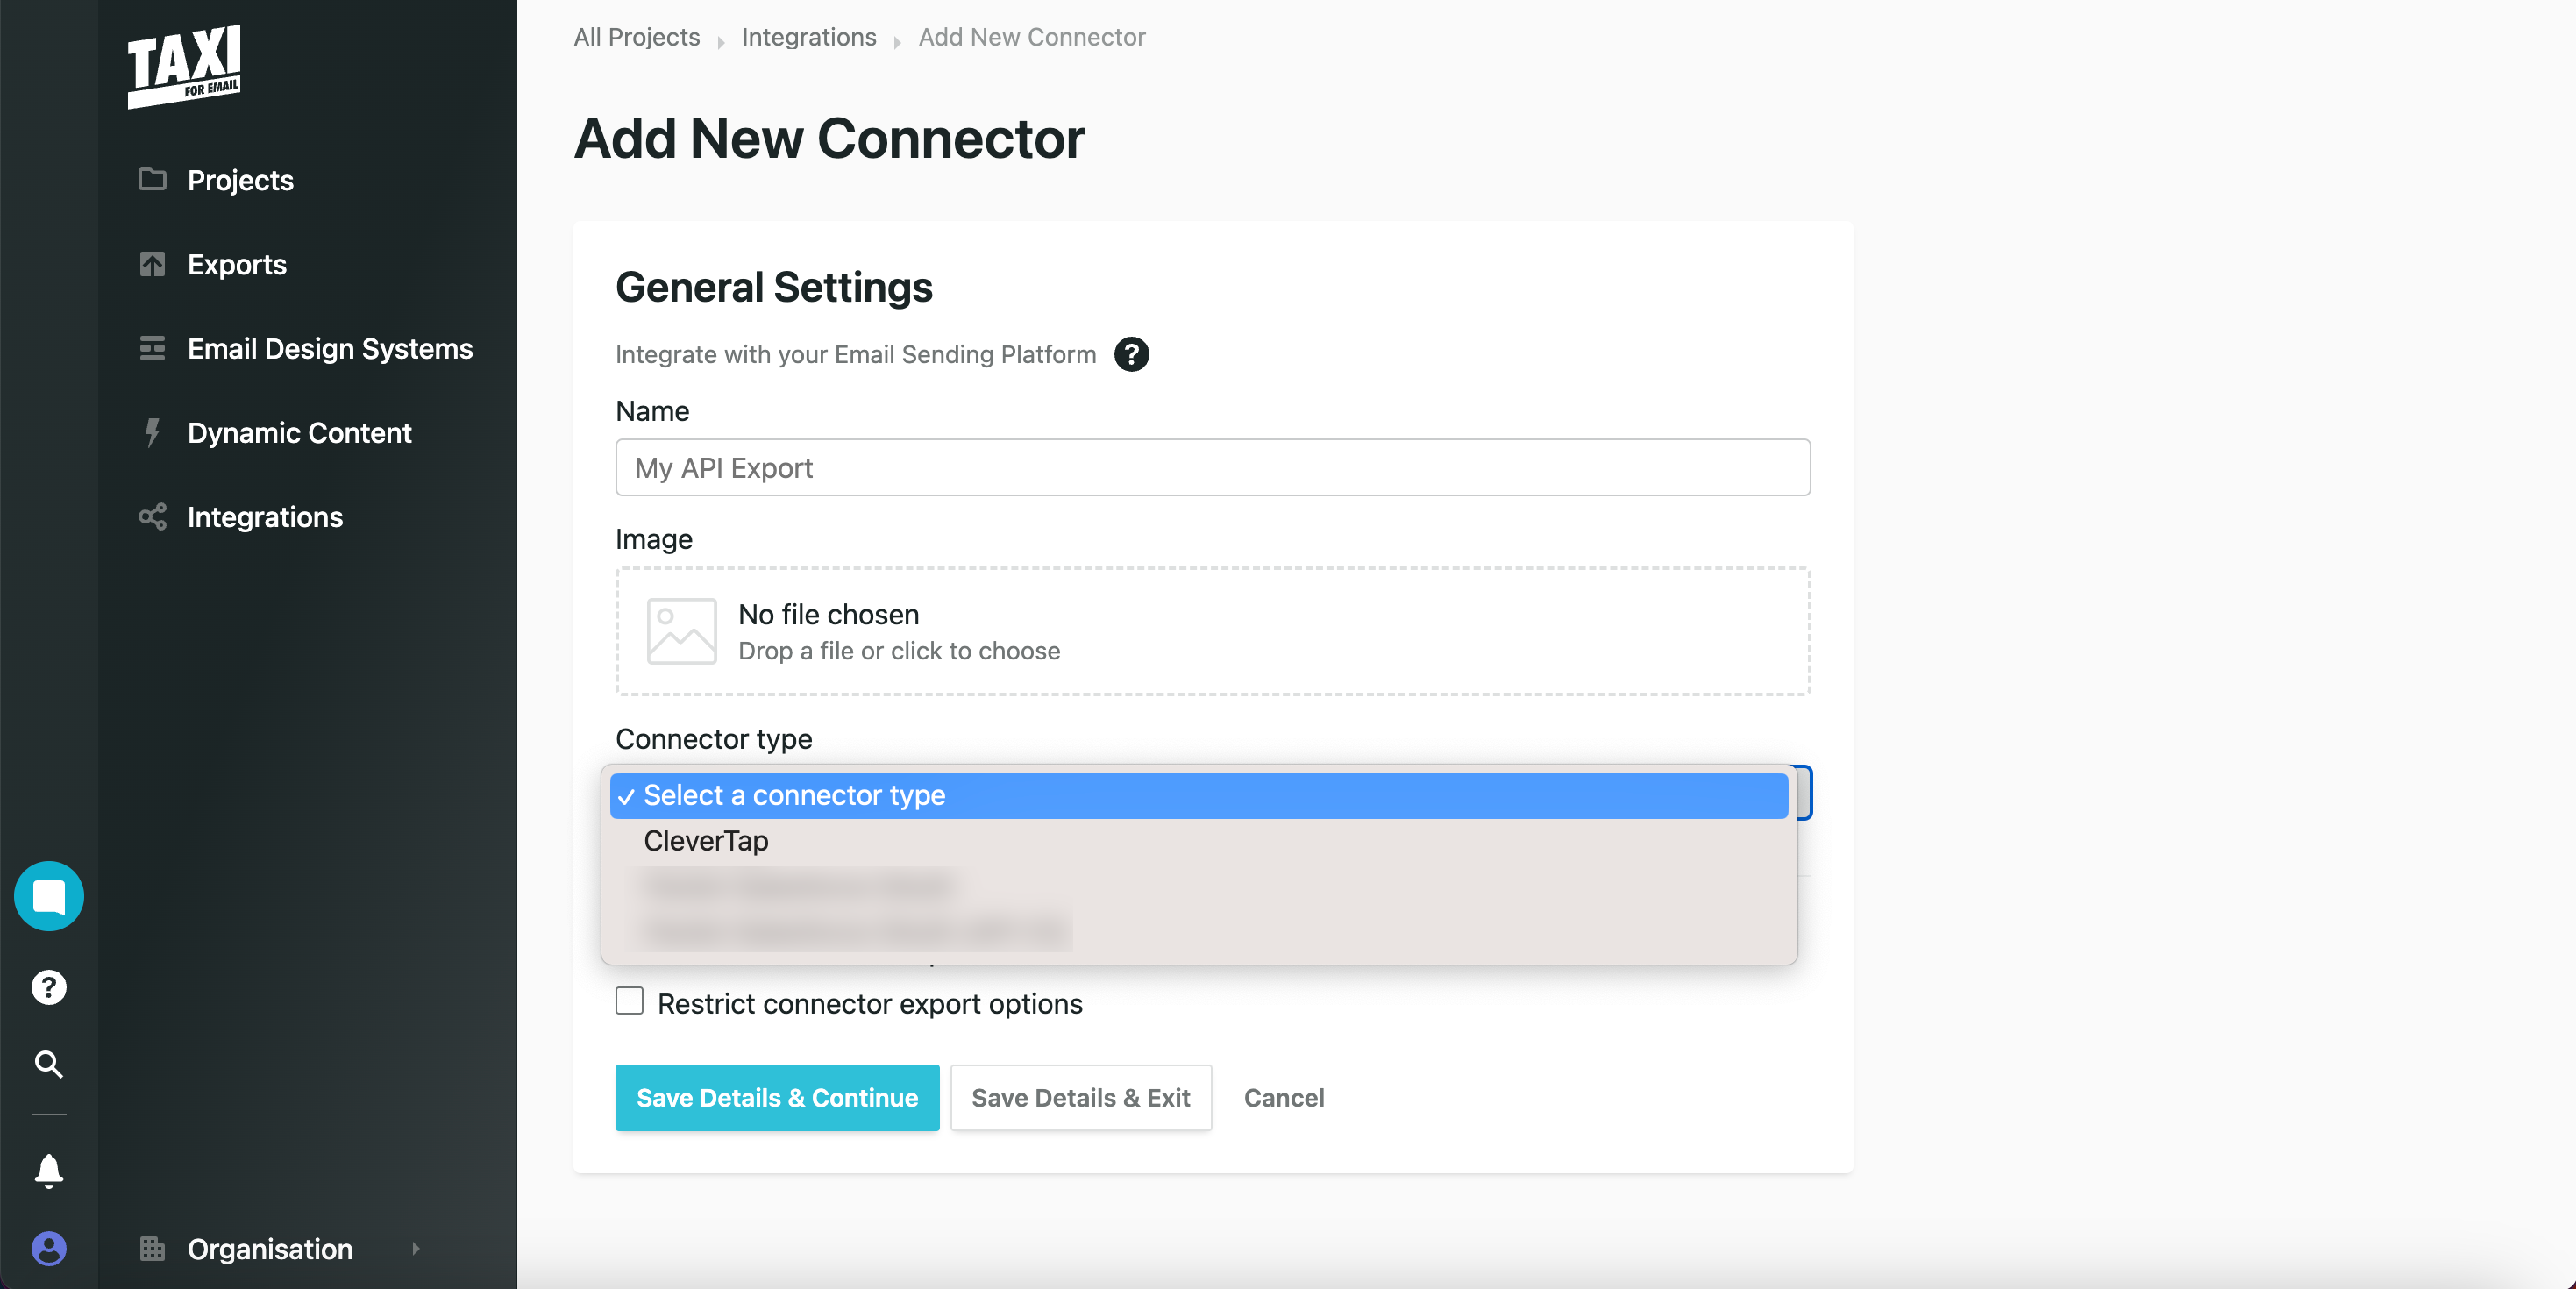
Select Connector Type
- Enter the following details:
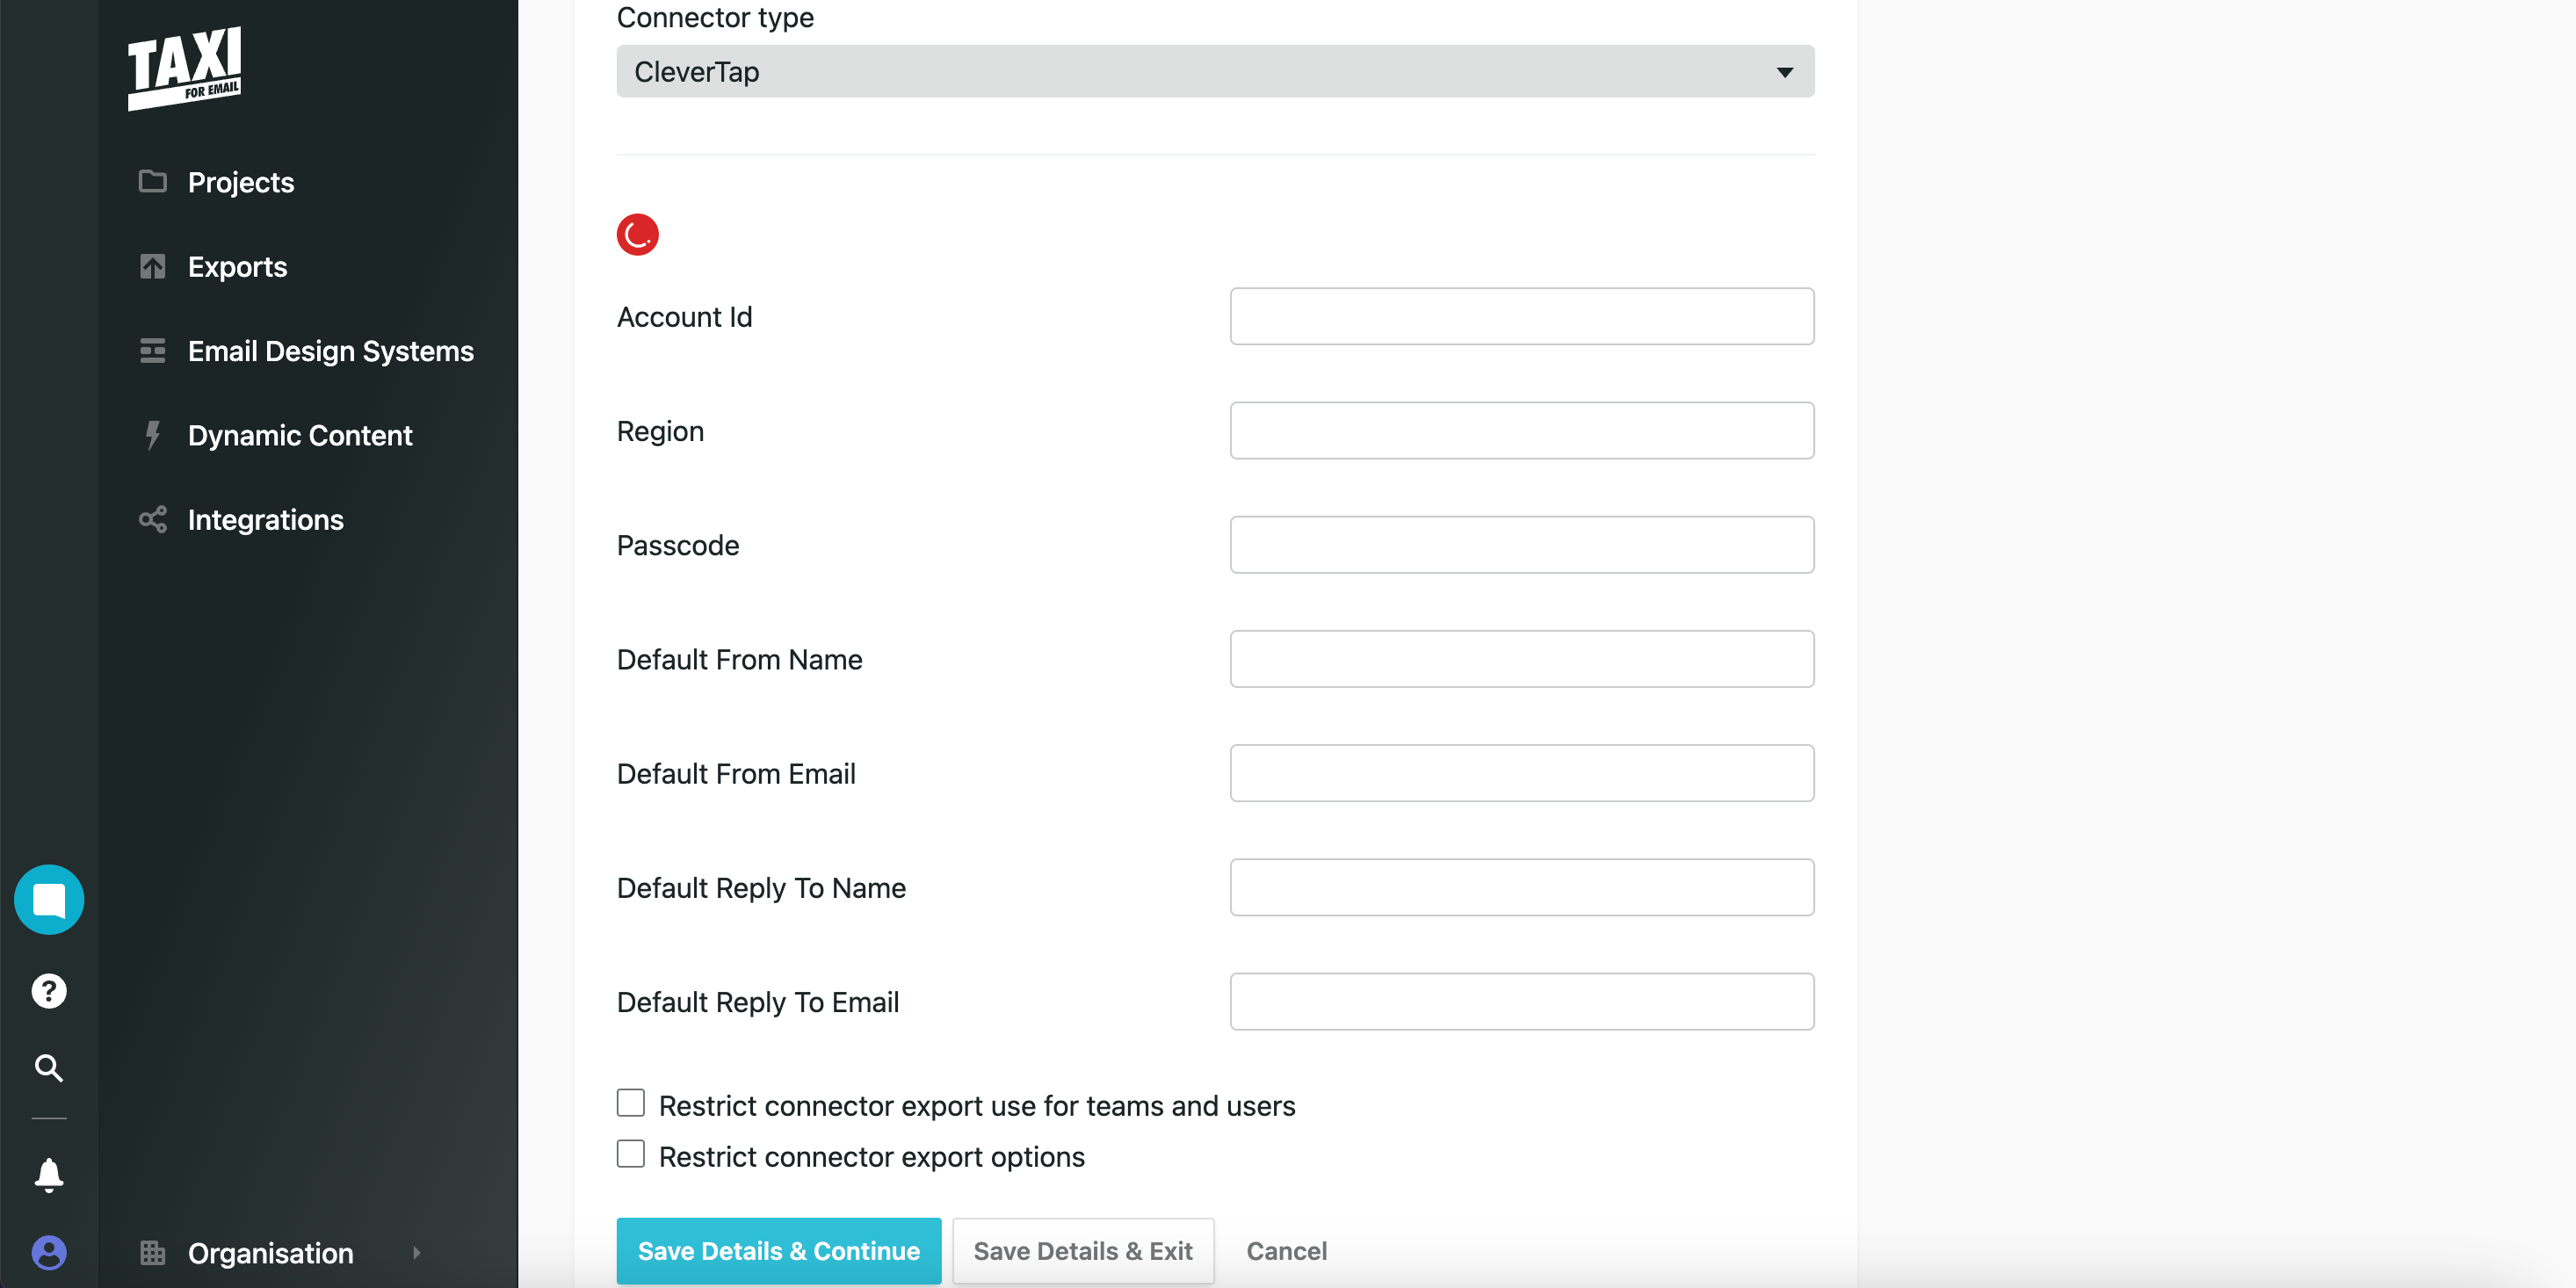
Integrate CleverTap Connector
- Account ID : Locate the Project ID under Settings > Project from the CleverTap dashboard.
- Passcode: Locate Passcode under Settings > Project from the CleverTap dashboard. To know more, refer to Account Passcode.
- Region: Locate Region for the API endpoint you want to select under Settings > Project from the CleverTap dashboard. To identify the region for your account, refer to the following table:

Locate Project ID and Region on CleverTap Dashboard
- Default From Name and Email: Adding a default From Name and Email address ensures recipients can recognize your emails easily. You can also change this information while exporting the email templates to CleverTap.
- Default Reply To Name and Email: Adding a default name and email address for replies ensures that your emails always have the correct details, saving time and preventing mistakes by automatically populating these fields.
NoteCurrently, we do not save Reply to Name and Email address. CleverTaps sends the email as per the settings configured under the Provider Setup page.
- Click Save Details & Continue.
Set Up Personalization
CleverTap supports personalization using Liquid tags. To use Liquid tags for personalization in CleverTap, you must first set up personalization in Taxi for Email:
- Navigate to Dynamic Content > Personalization from the Taxi for Email dashboard, and select Add Field.
- Map the labels to the API default values saved in step 1. For example, the Label can be mapped to a Default Value of ABC, which can be mapped to CleverTap's Liquid Tag, that is,
{{ Profile.name | default:"ABC" }} - Select the project to which the personalization must be added, add the mapped Label in the template with the appropriate text, and click Save Changes.
NoteIf a tag does not have the required personalization information, Taxi for Email sends a default value to CleverTap.
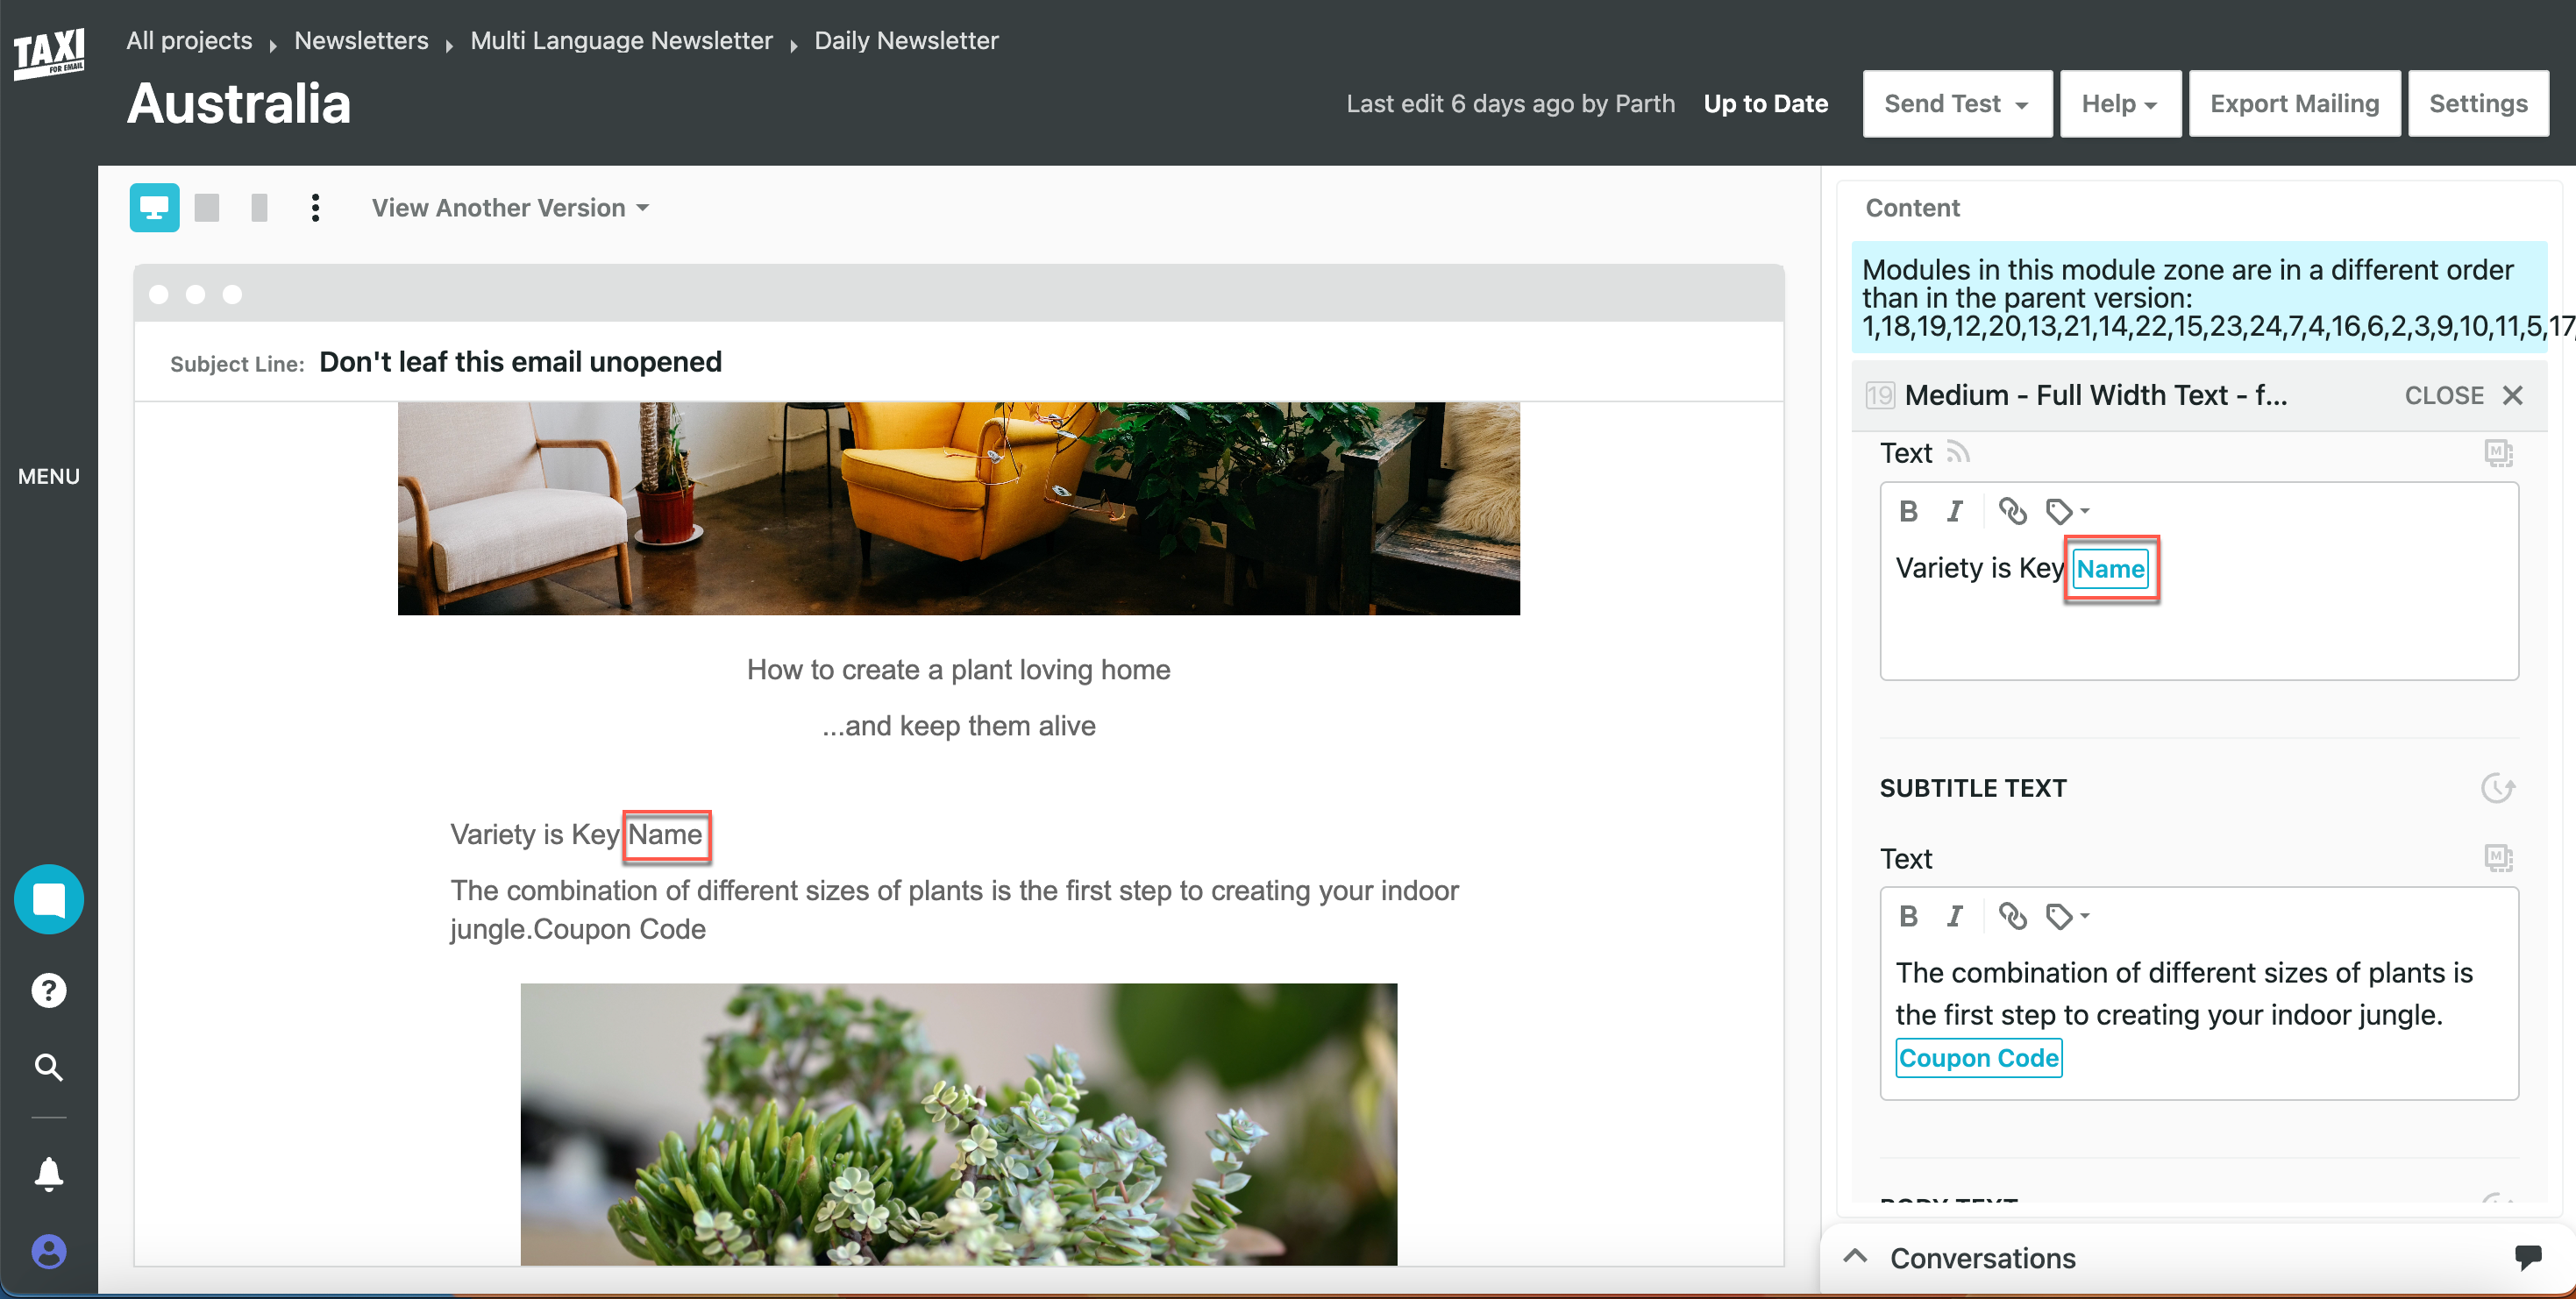
Adding Personalization
- Select Export Mailing and the personalization reflects under the email editor on the CleverTap dashboard.
Export Email Templates to CleverTap
After setting up the template on the Taxi for Email, you can export the email templates to CleverTap:
- Select the version of the Template to be exported to the CleverTap dashboard and click Export Mailing.
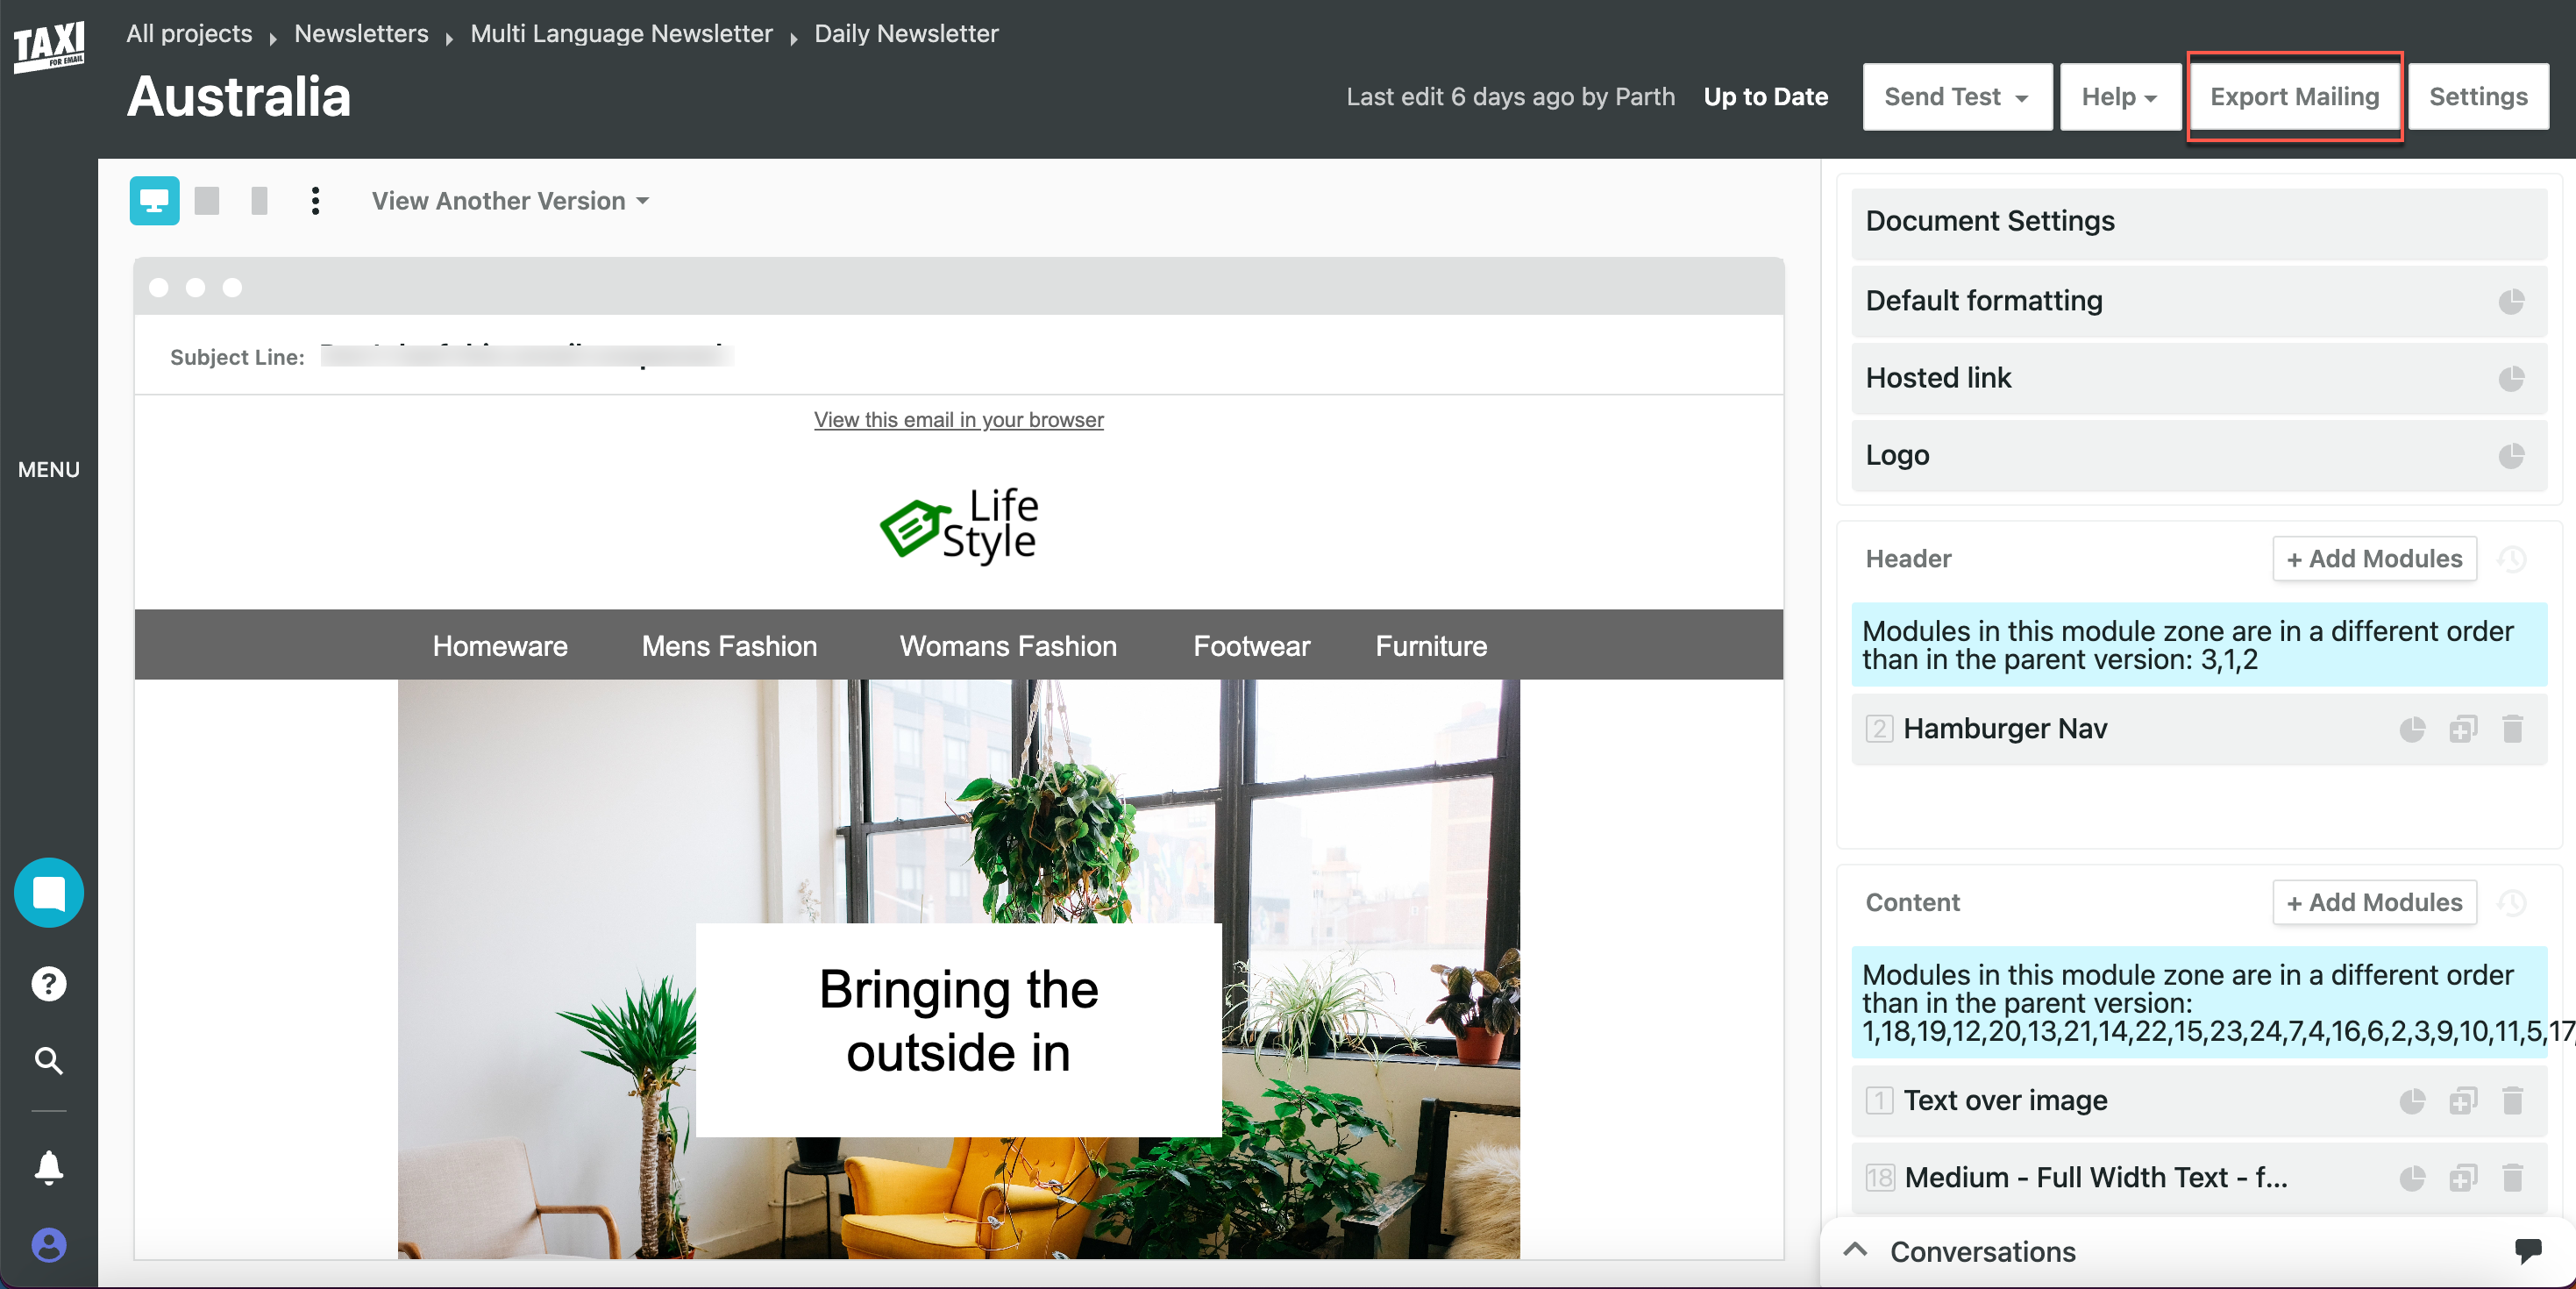
Export Mailing
- Select the API name provided in step 1 under ESP Connectors.
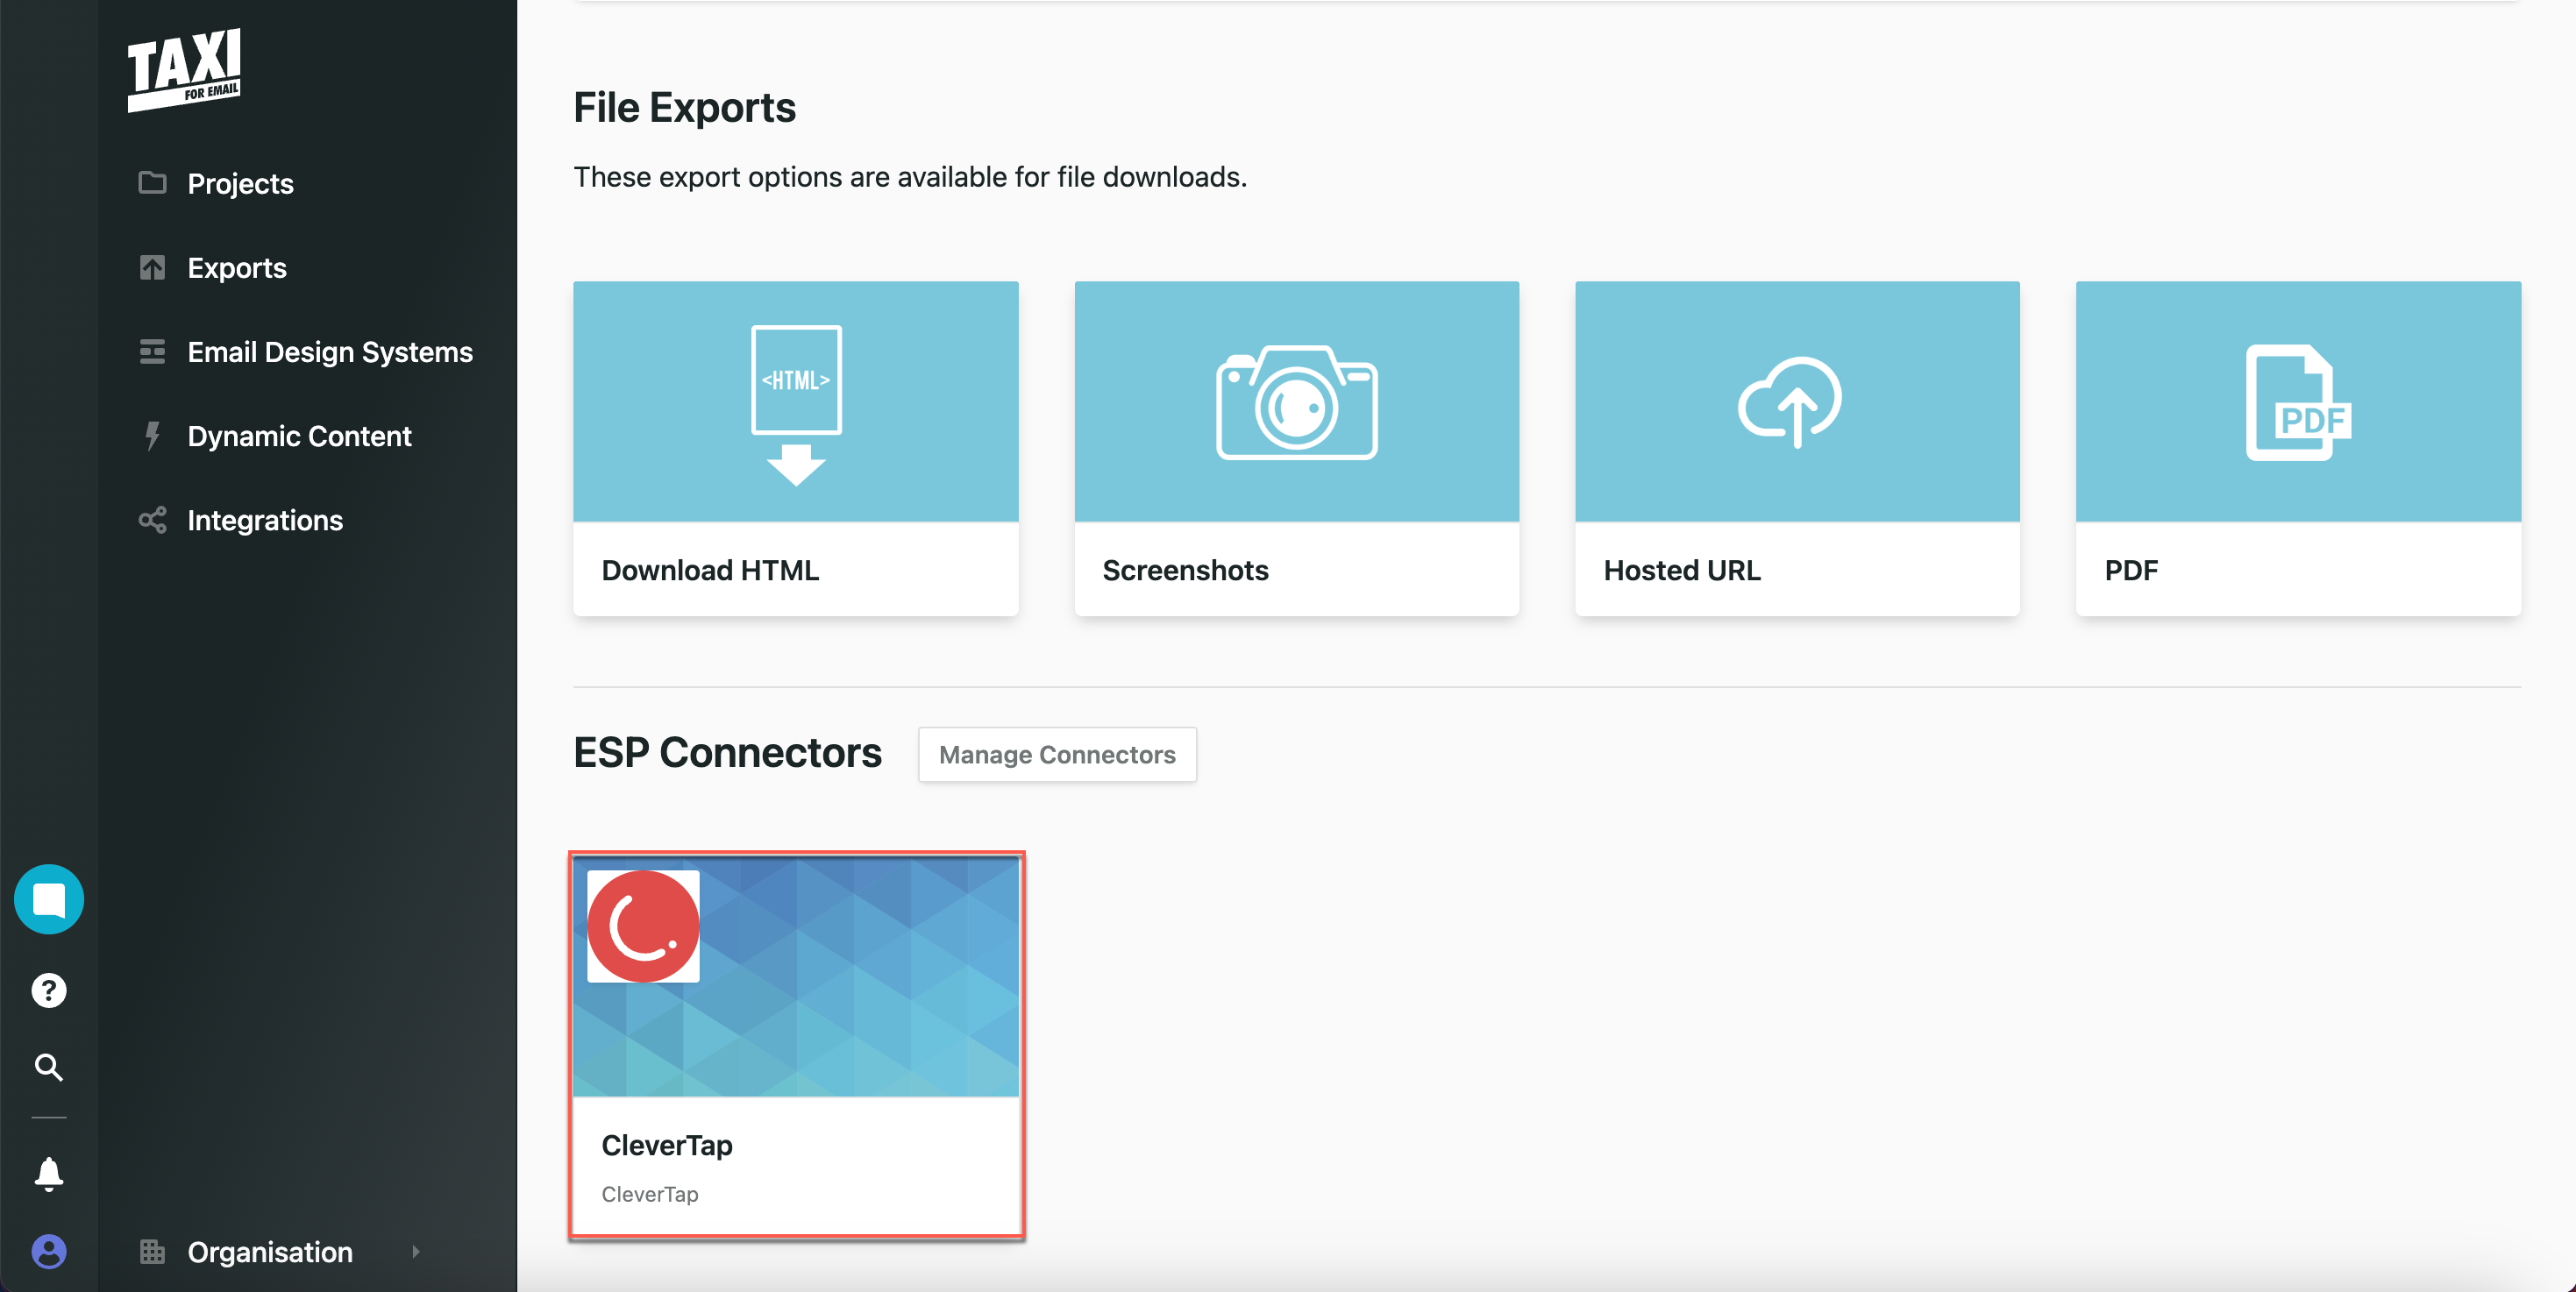
ESP Connector
After selecting the ESP connector, a new window opens for you to select the template type.
- Select Create a new template to export a new template to CleverTap. To update an existing CleverTap template, select Update an existing template and select a template from the drop-down menu.
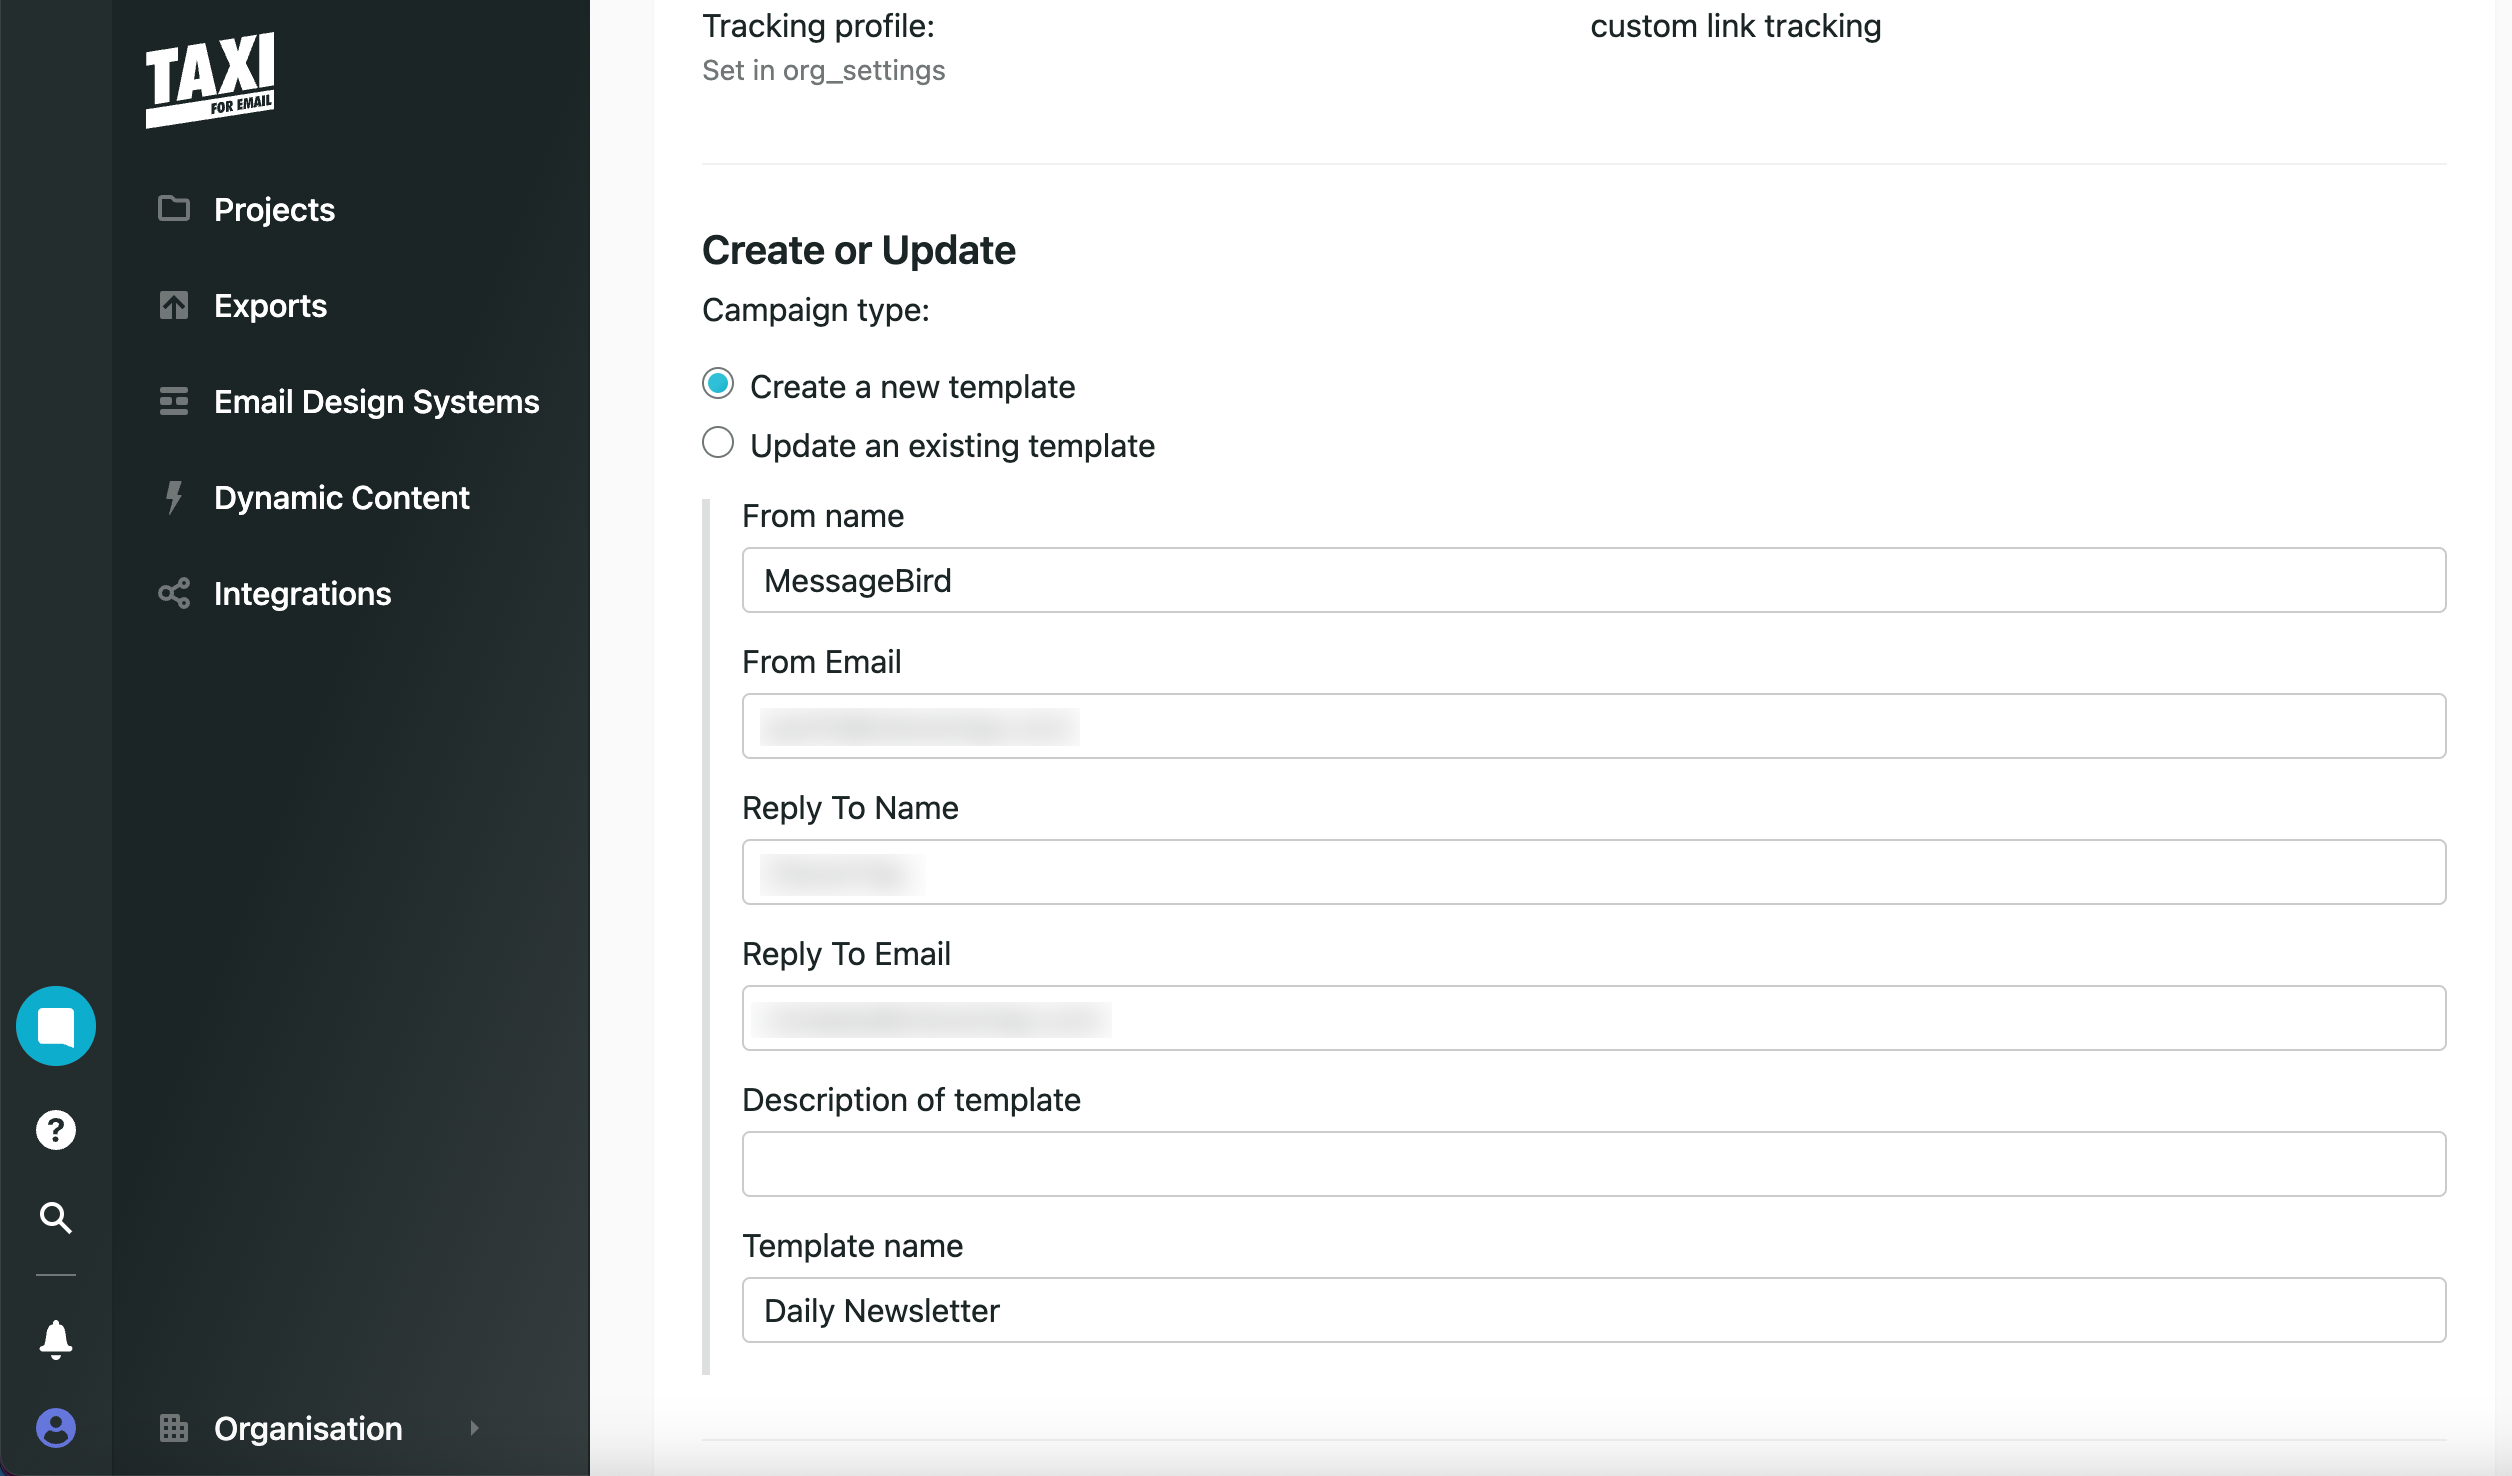
Create a New Template
ImportantEnsure that the Template Name is unique when exporting new templates to avoid errors.
- Under Segmentation, select the version(s) that needs to be exported.
- Send one version: Choose to export only a single version of the content.
- Create (or update) a template for each version: Generate or modify templates for each selected version.
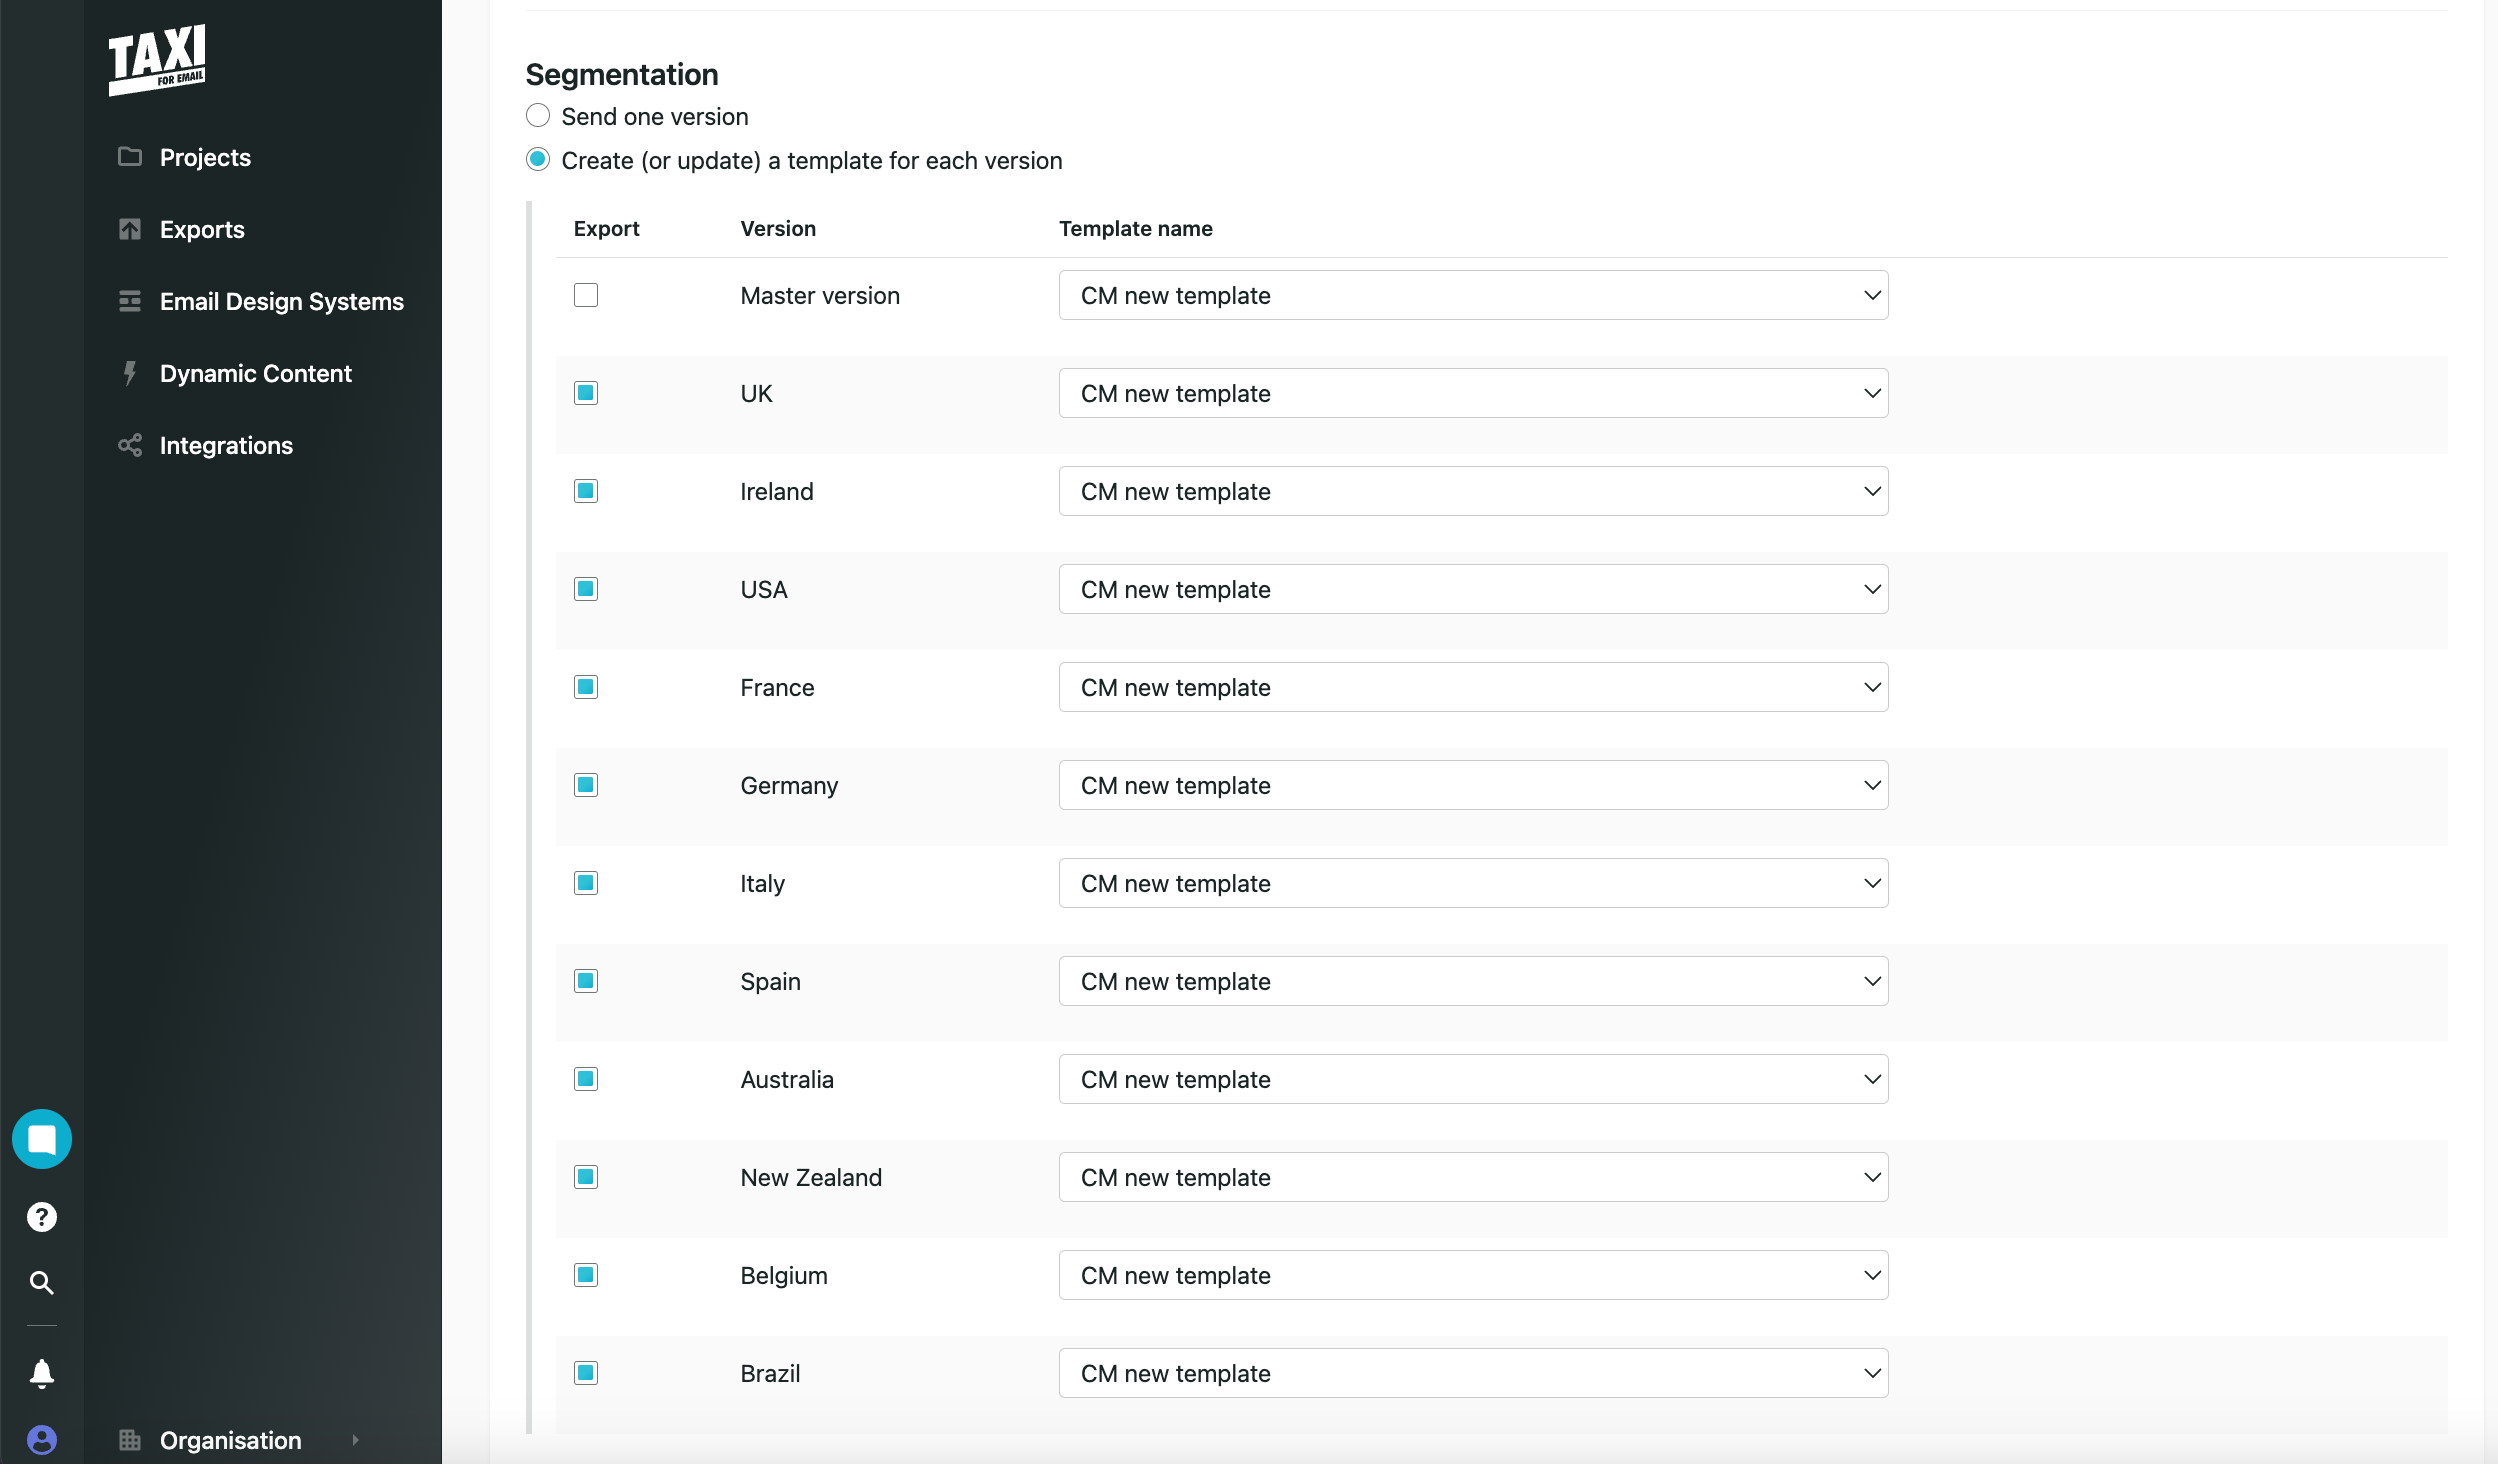
Export or Create (or Update) a Particular Template Version
- Click Start Export to export the email template to the CleverTap dashboard.
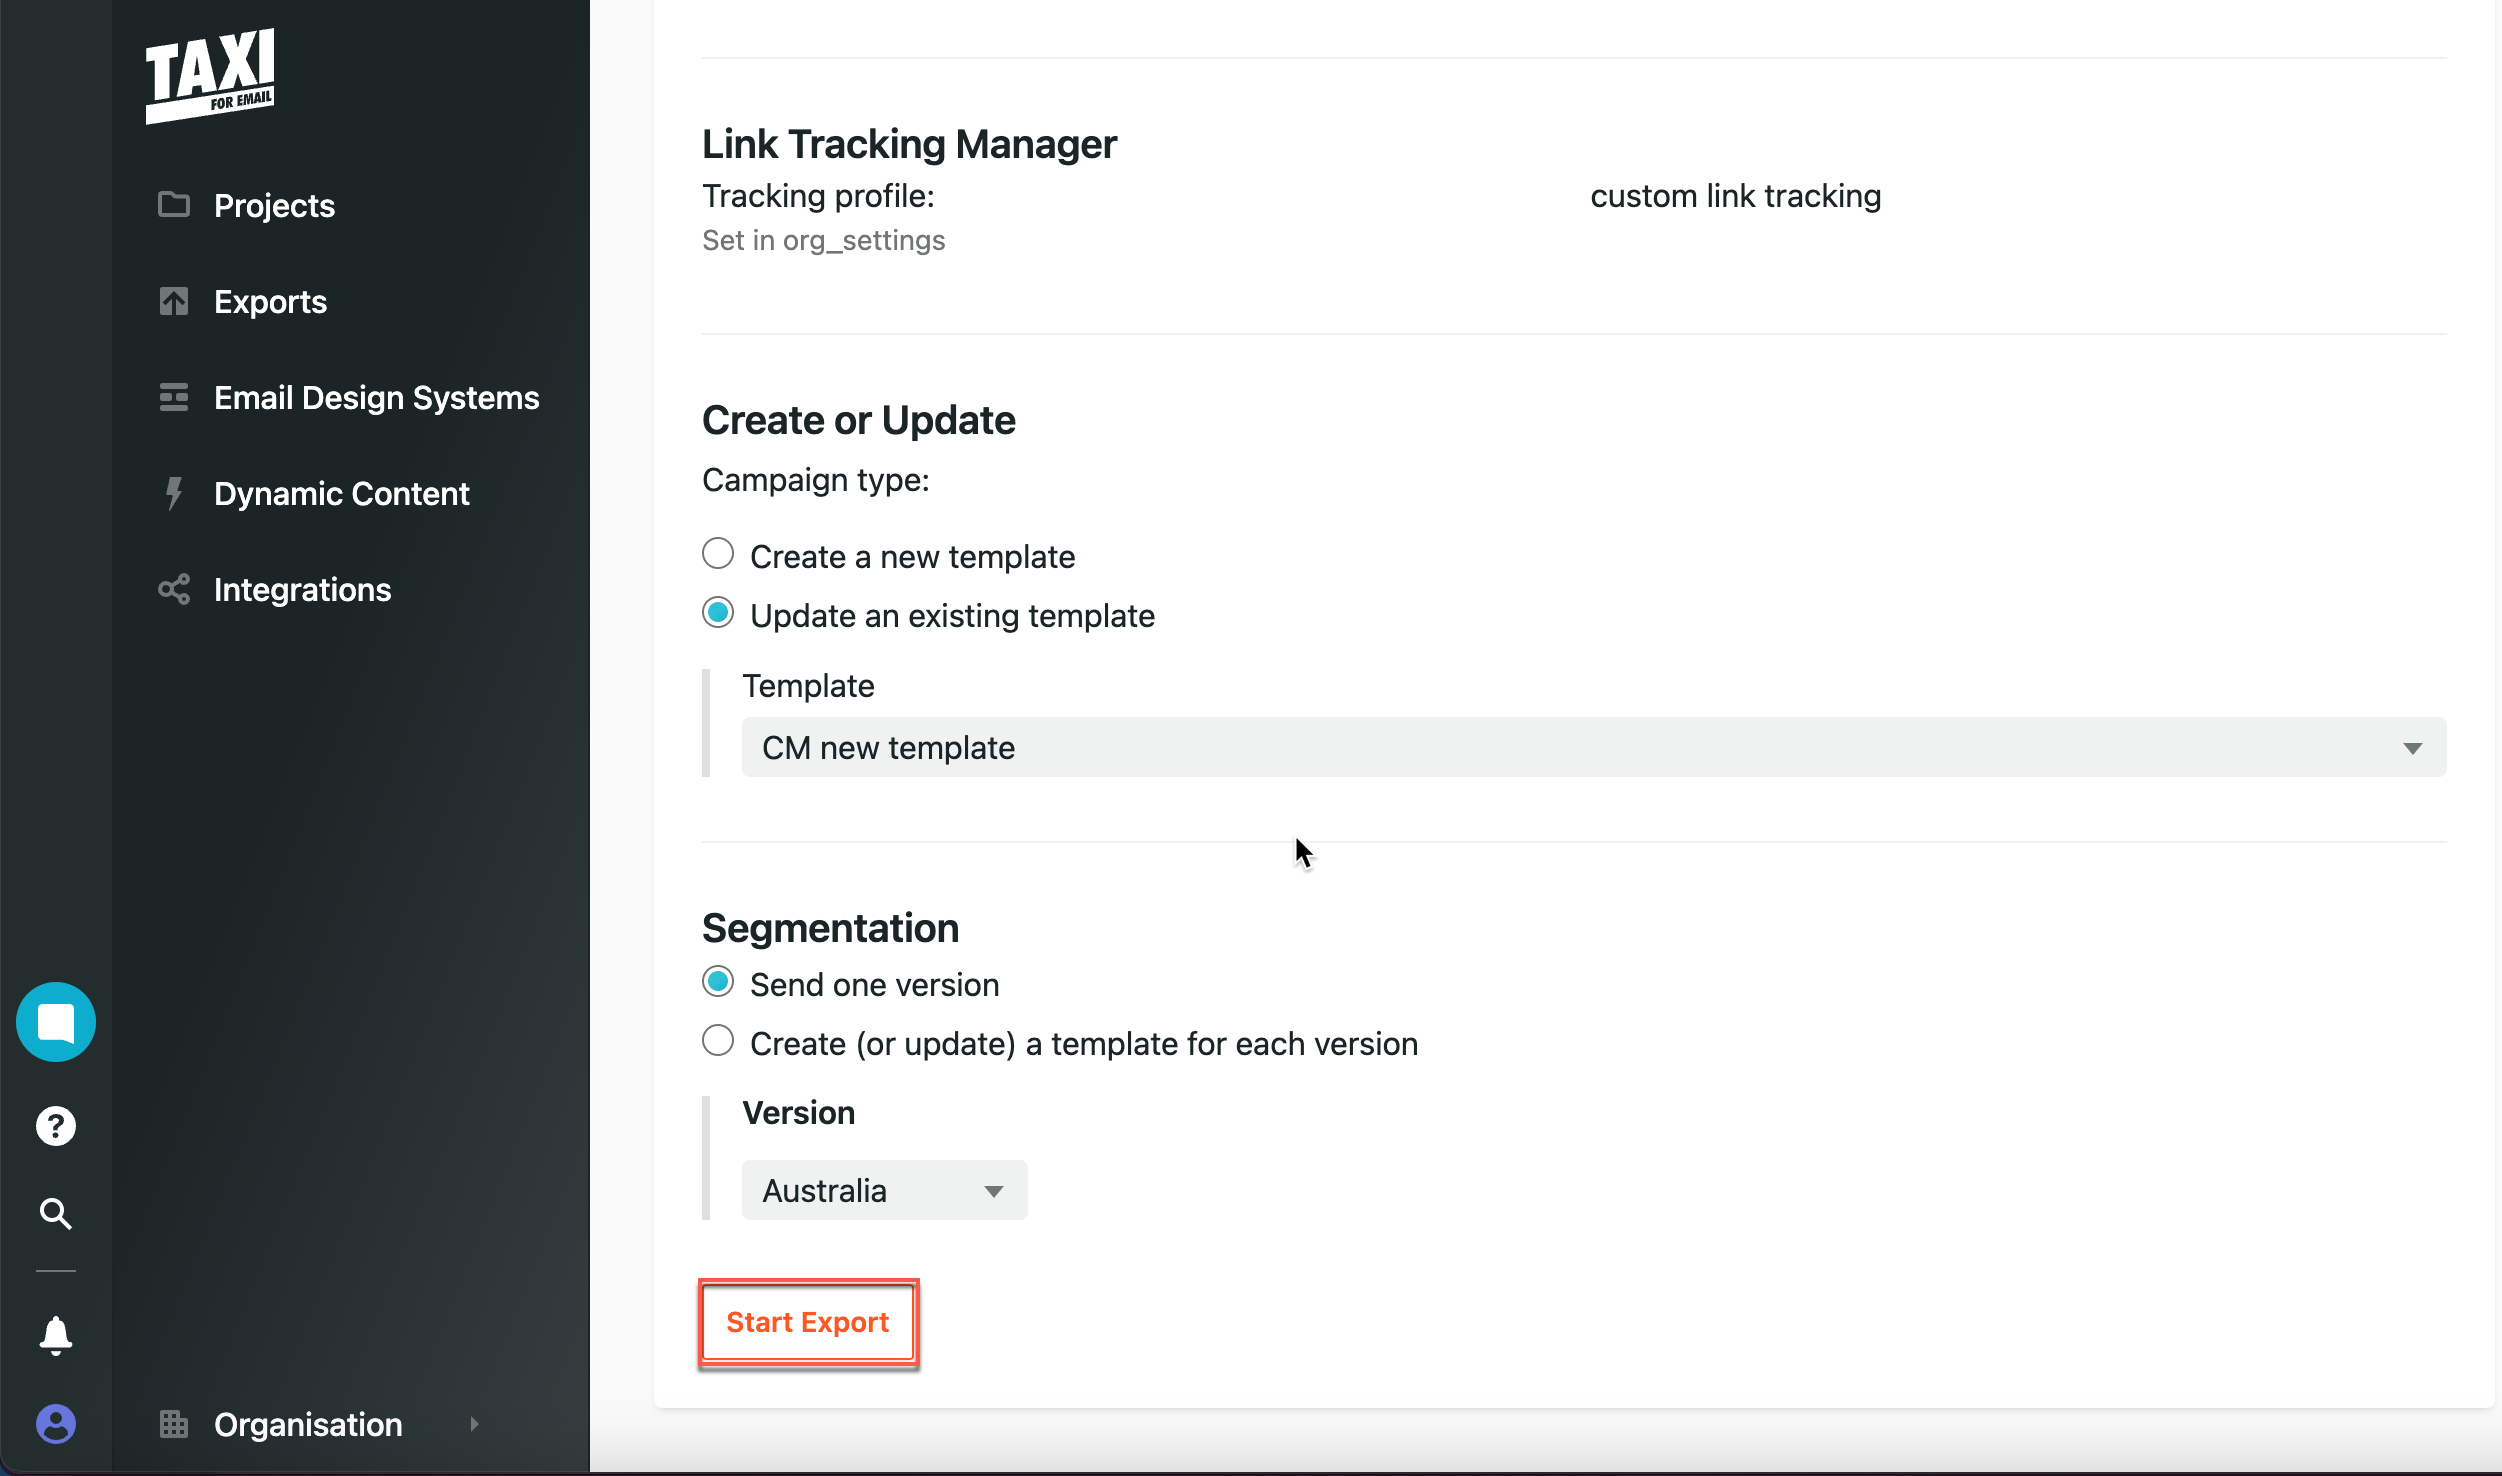
Start Export
Create a Campaign on CleverTap Using Taxi for Email Template
To create an email campaign on CleverTap using the Taxi for Email template:
- Navigate to the Campaigns page, click + Campaign, and select Email from the list of messaging channels.
- Click Go to Editor under the When section and select Saved Templates.
- Select the template you exported from the Taxi for Email dashboard.
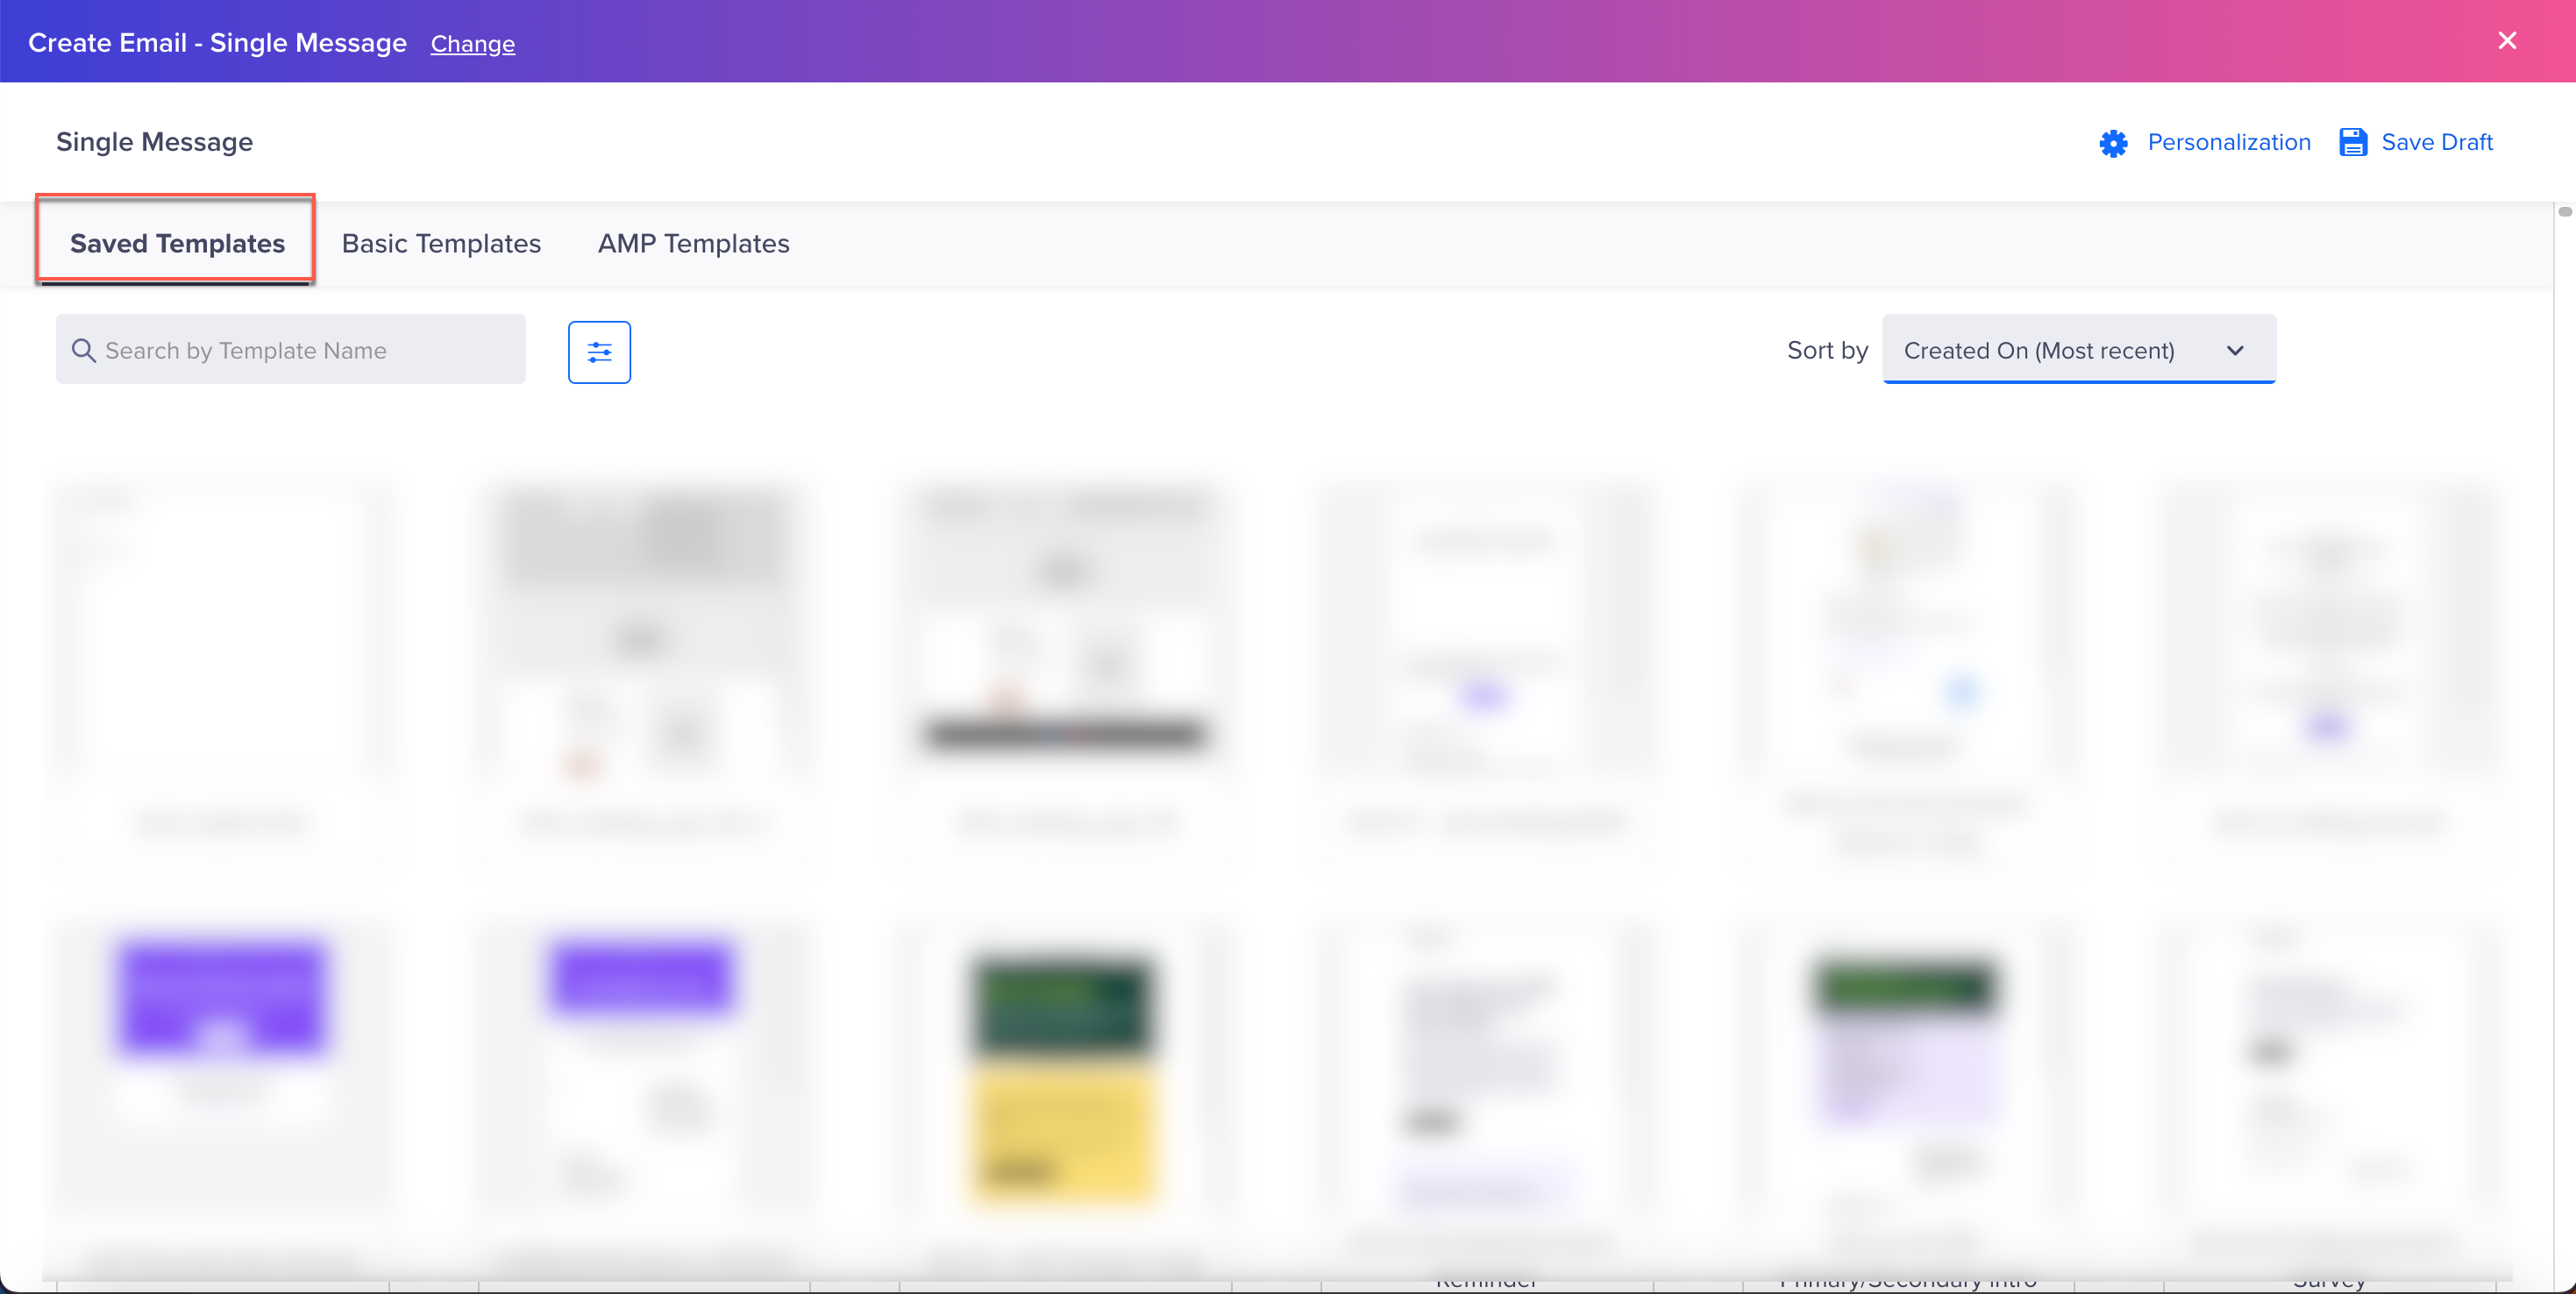
CleverTap Saved Email Templates
Once you create a campaign on the CleverTap dashboard, follow the remaining steps listed under the Create Email Campaign section and publish the campaign.