Zendesk
Support Partner
Overview
Zendesk Support Suite (ZSS) allows businesses to have natural conversations with their customers through omnichannel support using email, webchat, voice, or social messaging applications. Zendesk offers a streamlined ticketing system that tracks and prioritizes interactions, allowing businesses to have a unified historical view of their customers.
This integration helps you to create a support ticket using a CleverTap webhook. For example, you send out a CleverTap Rating In-app campaign, and the customer provides negative feedback. CleverTap can create a support ticket on Zendesk for this feedback automatically, which allows your support team to follow up with the customer.
Prerequisites for Integration
The following are the prerequisites for this integration:
- You must have a Zendesk Admin account and an API token to send requests from CleverTap to Zendesk for creating tickets.
- You must have an account with CleverTap.
Integrate CleverTap with Zendesk
This integration involves the following two major steps:
Set up Webhook
Set up a webhook to send HTTP API requests with all the information. To set up a webhook:
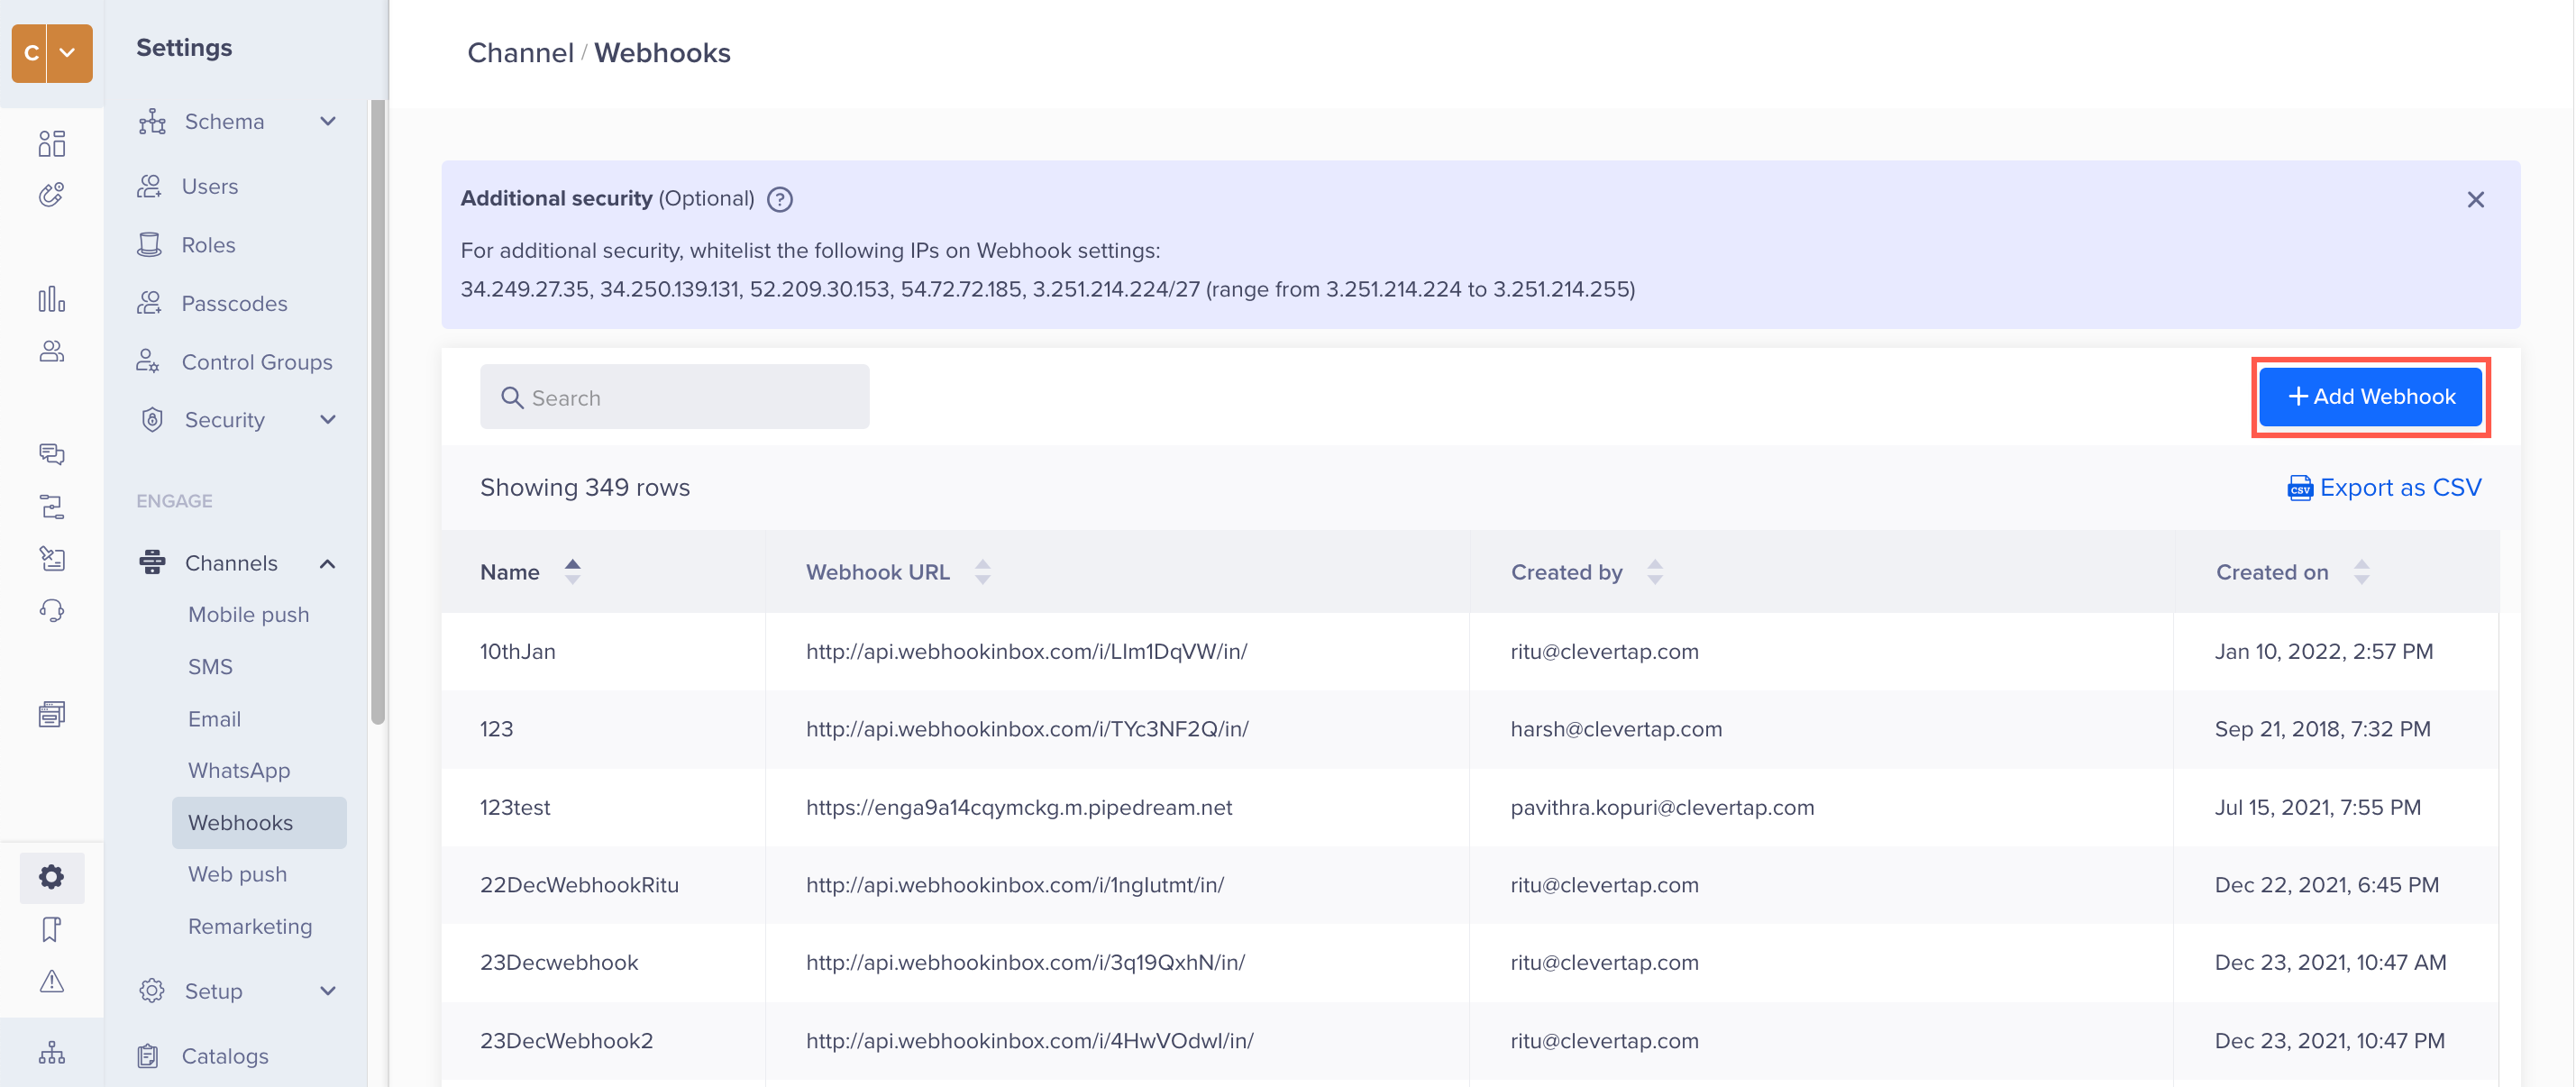
- Navigate to Settings > Engage > Channels > Webhooks from the CleverTap dashboard.
- Click + Add Webhook.

Set Up a Webhook from the CleverTap Dashboard
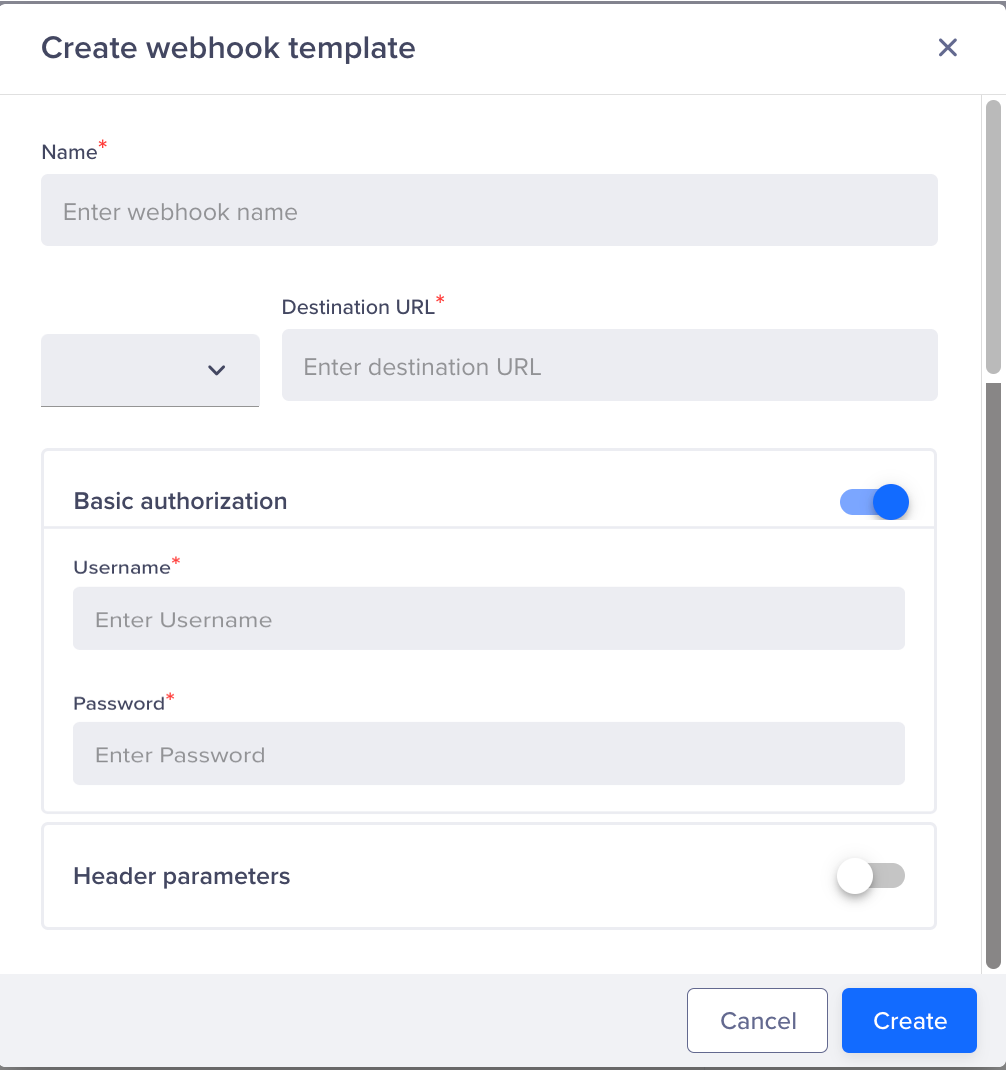
- Configure the webhook template by adding the following details:
Field | Description |
|---|---|
Name | Enter the nickname for your webhook to uniquely identify the webhook. |
Destination URL | Enter the following URL: |
Method | Select the POST method from the dropdown. |
Basic Authorization | Enable this option. |
Username | Enter the username as follows: |
Password | Enter the password as <API Token>. To obtain the API token, refer to Generating a new API token. |

Create a Webhook Template
Create a Webhook Campaign
To create a webhook campaign:
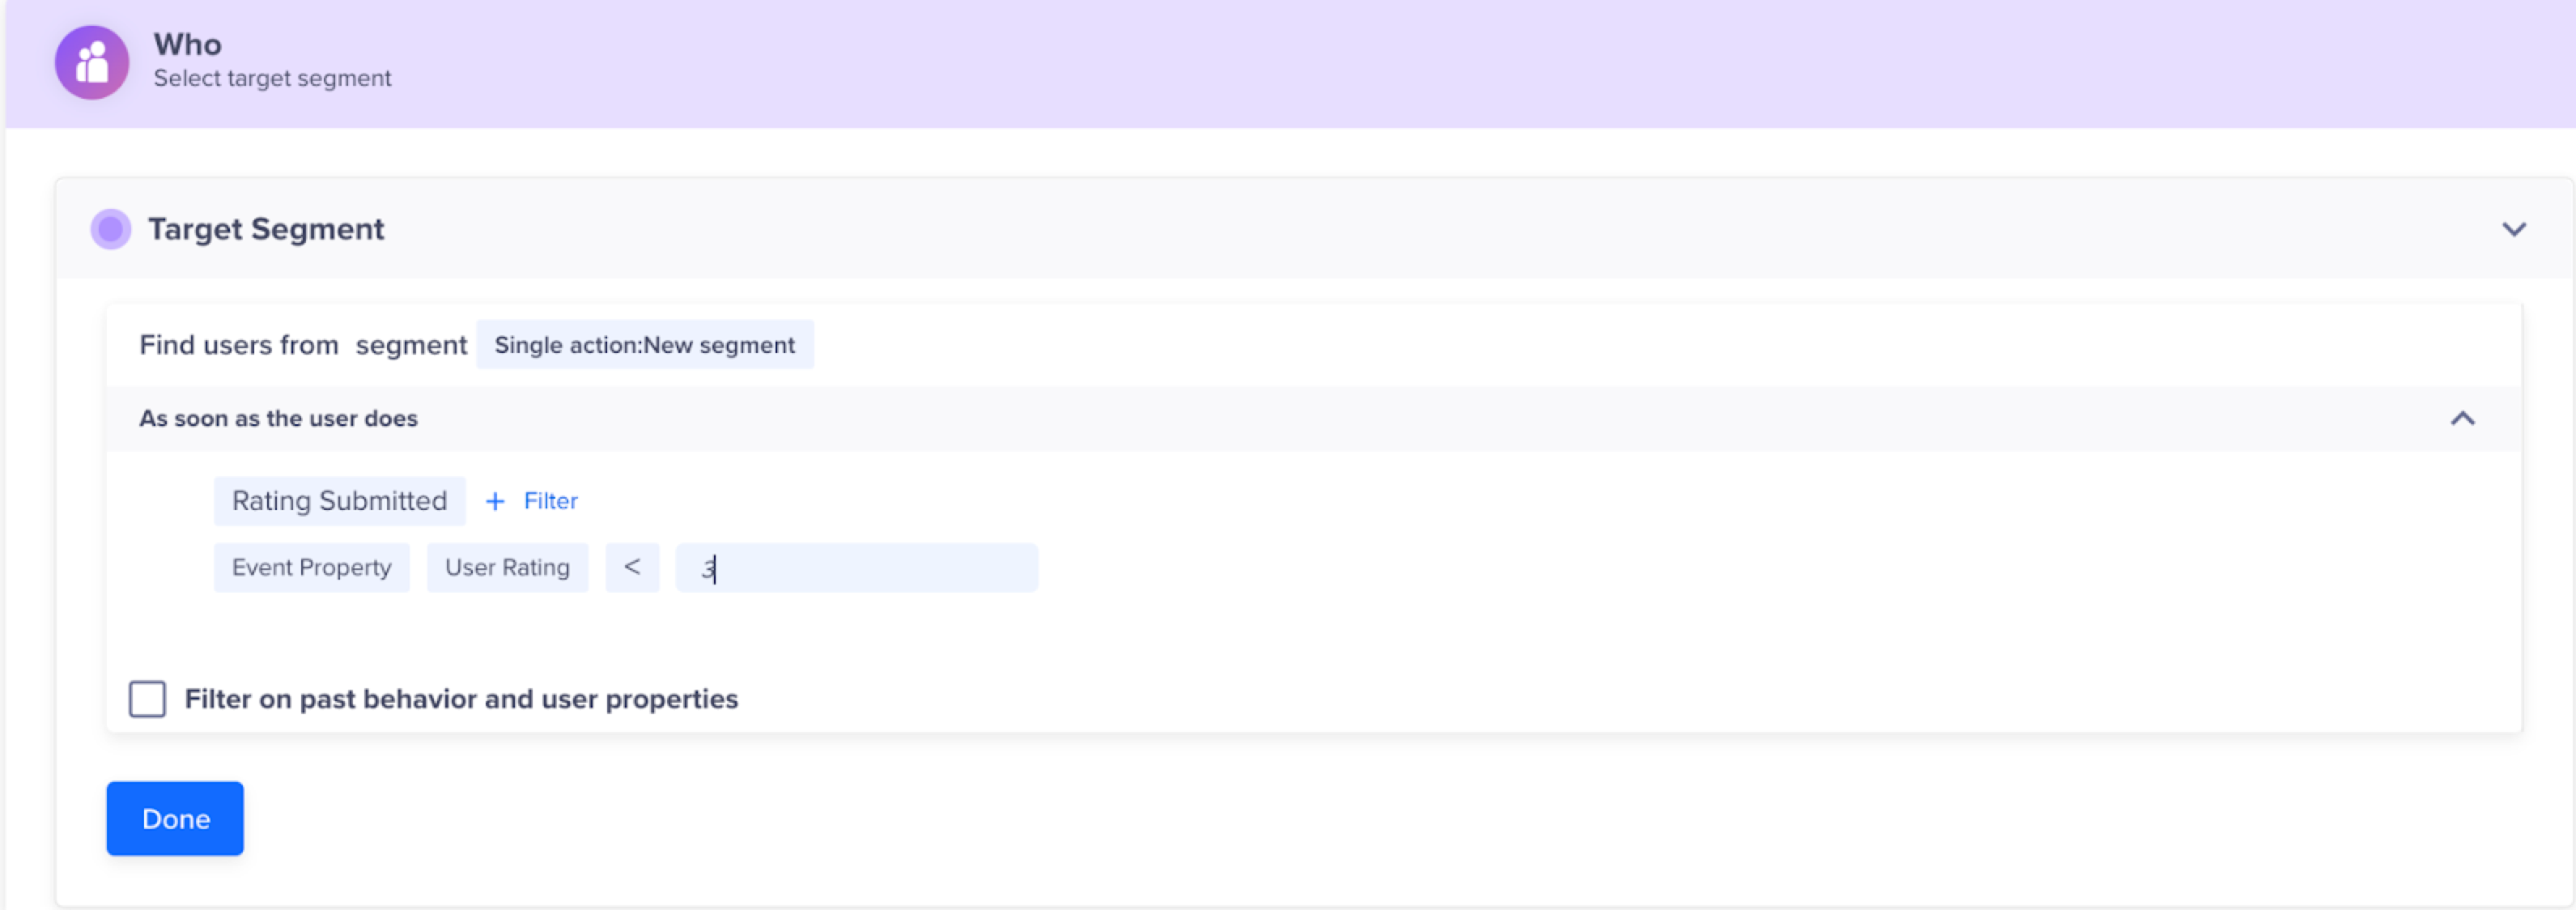
- Define the audience.
The Rating Submitted event is raised when a user submits their feedback through NPS Campaign. The campaign targets users who give ratings of less than 3.

Define Target Audience for Webhook Campaign
- Define the campaign content.
a. Click Go To Editor to create your message.
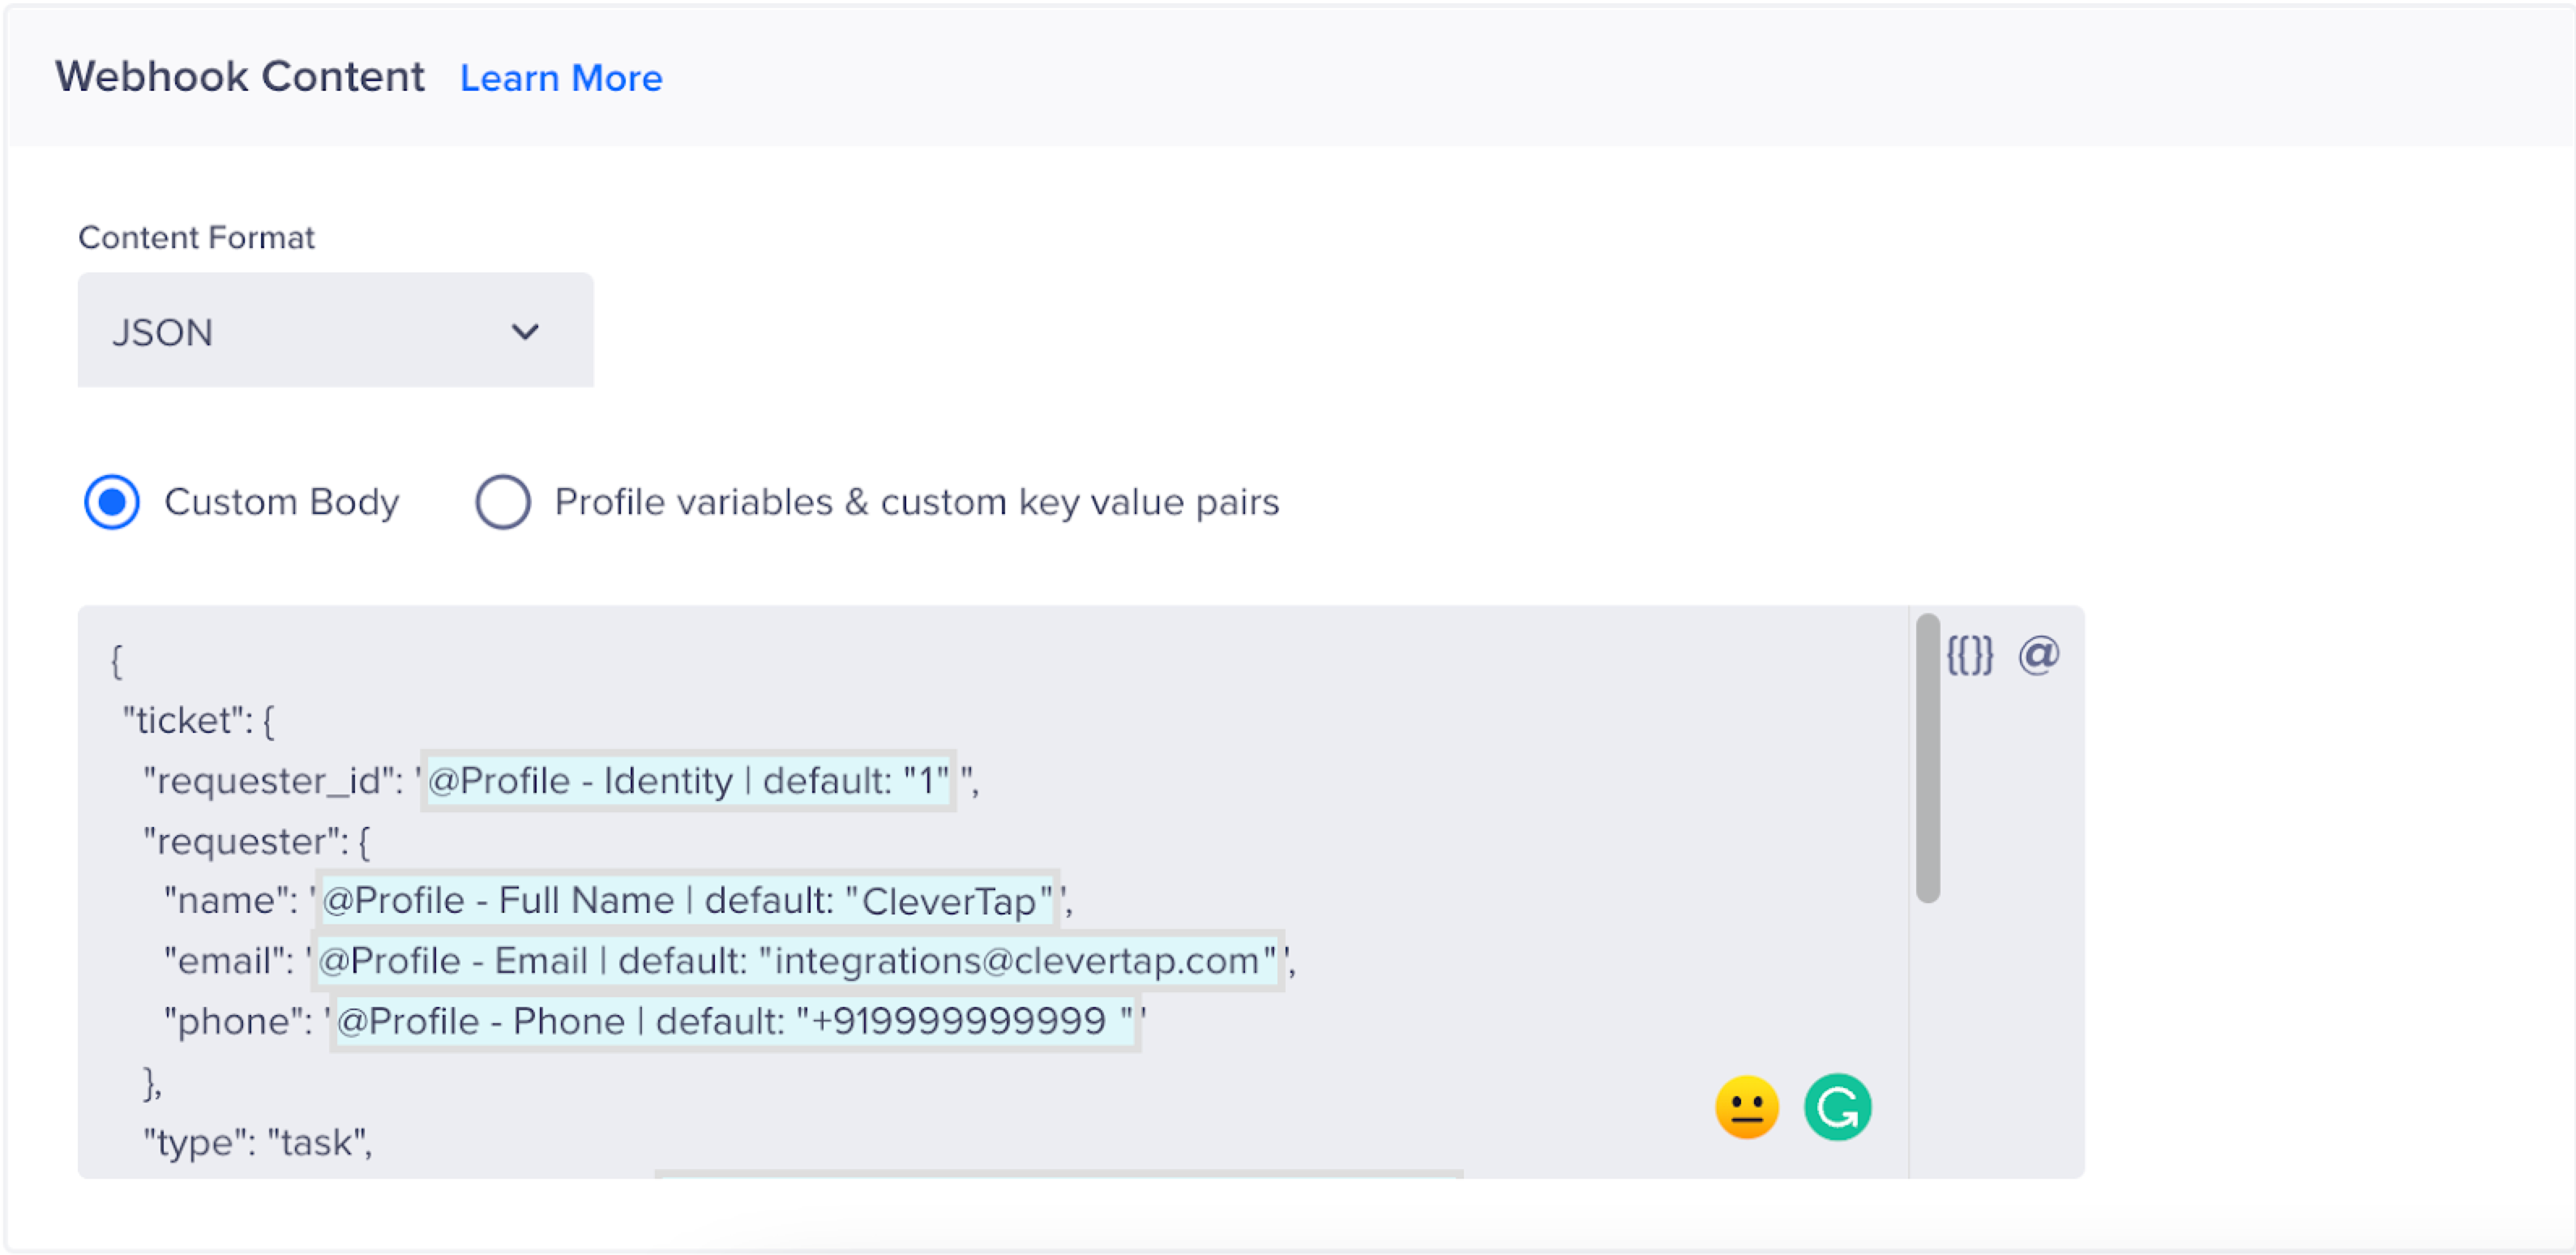
b. Select Custom JSON Body and use the following example to help structure your payload and enter the desired fields:
{
 "ticket":{
   		"requester_id": "@Profile - Identity | default:"1"",
   		"requester": {
    			 "name": "@Profile - Full Name | default: "CleverTap"",
    			 "email": "@Profile - Email | default: "[email protected]"",
    			 "phone": "@Profile - Phone | default: "+919999999999""},
   			"type": "task",
   			"subject": "Rating Submitted - @Rating Submitted - User Rating | default:"3"",
   			"comment": {
     				"body": "@Rating Submitted - Comment | default:"Rating submitted""
   			},
   			"priority": "urgent",
   			"status": "new"
 		}
}
Custom Body for Webhook Campaign
Ticket details are extensible and customized based on the Zendesk ticket API. To learn more about creating a webhook, refer to Create a Webhook Campaign.
Common Identifier
If you have a common identifier between CleverTap and Zendesk, we recommend using this identifier as the requester_id. This helps unify the two sets of users. Alternatively, if this is not the case, we recommend passing a group of identifying attributes such as name, email address, phone number, or others.
Updated about 1 month ago
