Infobip
Introduction
CleverTap users can now leverage the WhatsApp capabilities of Infobip to communicate with their customers:
- Sending just-in-time offers to customers to drive purchases
- Gathering feedback about services
- Keeping customers informed and more
Support For IntegrationThis integration is completed by Infobip, and they are dedicated to maintaining and enhancing it. The CleverTap and Infobip integration has undergone stringent testing to ensure seamless functionality. For any questions or issues, contact Infobip for support and resolution.
Prerequisites for Integration
The following are the prerequisites:
- You must enable a WhatsApp Connect add-on on the Clevertap account in addition to the essentials price plan.
- The WhatsApp onboarding must be completed for the phone number to be used with CleverTap.
- You must have Infobip's user credentials.
- The Infobip API endpoint - https://clevertap-whatsapp.ibintegrations.com/api/sendmessage.
Integrate Infobip with CleverTap
This process involves the following three steps:
Find Infobip Details
We recommend that you keep the API endpoint and Login Credentials handy before starting with the configuration on the CleverTap dashboard:
To find these credentials:
- Navigate to your Infobip dashboard.
- Create a new user from Account > User profile.
We recommend creating a separate user for the Infobip-CleverTap WhatsApp integration. Use these user credentials to authenticate the Infobip API and provide basic authentication on the CleverTap dashboard. For more information about user management, refer to Manage Infobip Users.

Infobip Dashboard
- Navigate to Channels and Numbers > WhatsApp > Senders tab to find the WhatsApp number.
- Copy the WhatsApp phone number and keep it handy for further use.

Copy WhatsApp Phone Number
Configure CleverTap Dashboard
To configure the CleverTap dashboard:
- Navigate to Settings > Channels > WhatsApp > WhatsApp Connect from the CleverTap dashboard.
- Click + Add Provider and Login to Facebook.
Add a WhatsApp Provider
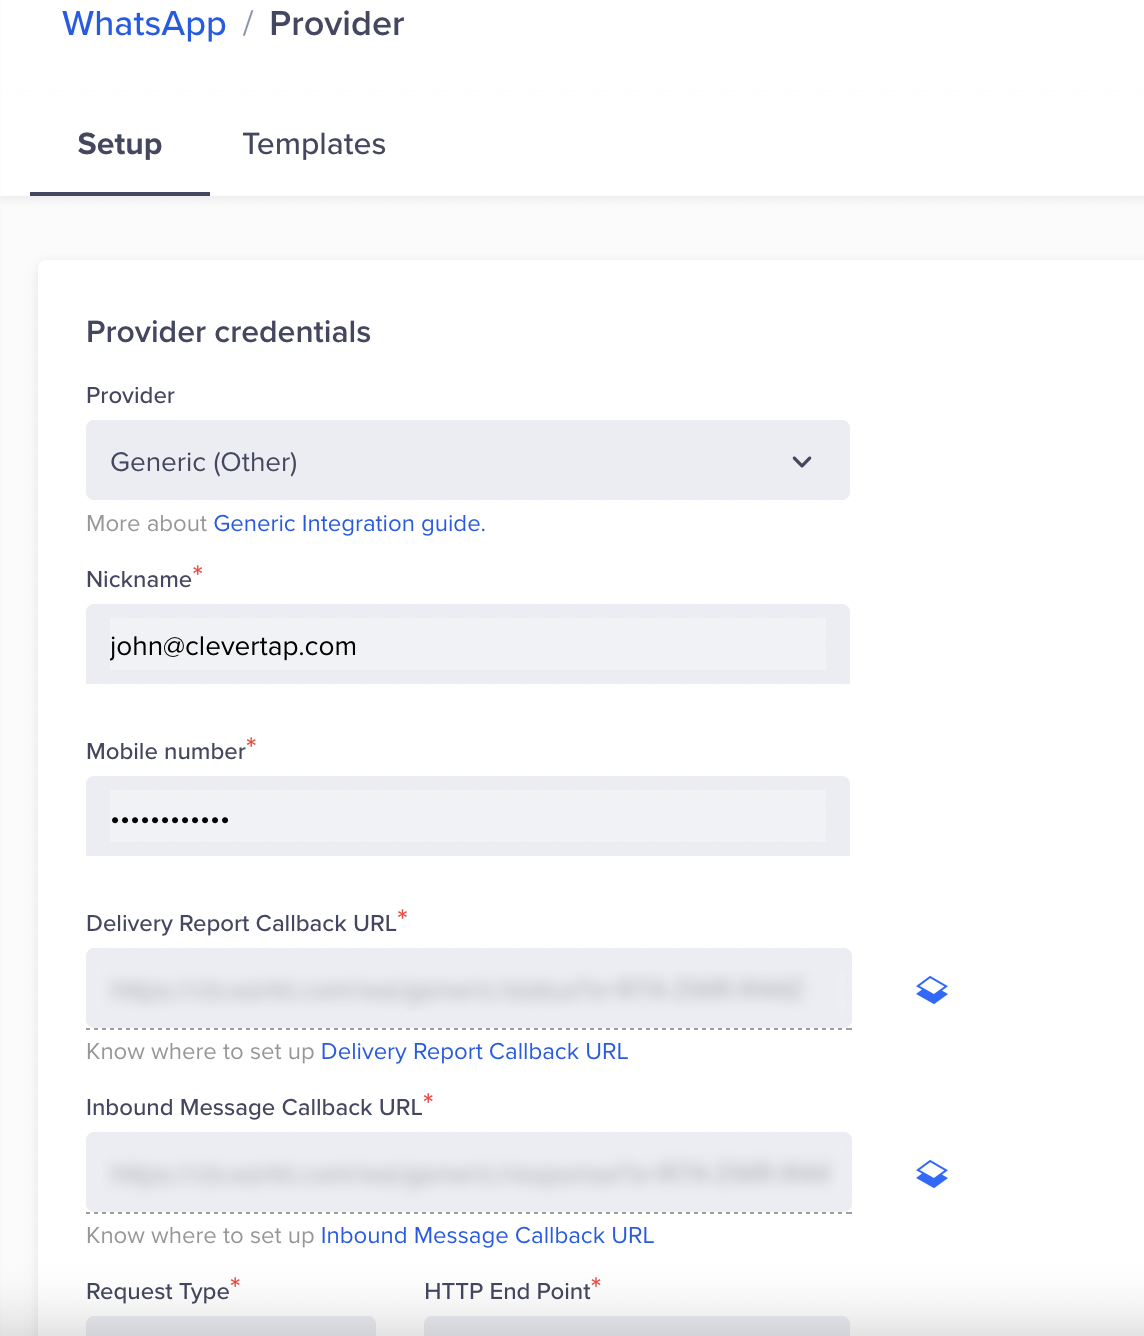
- Enter the following details:
| Field | Description |
|---|---|
| Provider | Select Other (Generic) from the dropdown list. |
| Nickname | Enter the nickname as Infobip or Infobip <10-digit phone number> for easy reference. |
| Mobile Number | Enter your phone number onboarded to WhatsApp API by Infobip. |
| Request Type | Ensure the Request Type is Post. |
| HTTP Endpoint | Enter HTTP Endpoint as the following: https://clevertap-whatsapp.ibintegrations.com/api/sendmessage |
| Authentication | Select Basic Authentication and enter the Username and Password for the user. |
| Delivery Report Callback URL | This URL is generated automatically. Share the URL with your Infobip account manager. |
| Inbound Message Callback URL | This URL is generated automatically. Share the URL with your Infobip account manager. |
- (Optional) Select Mark this as default to make this service provider the default provider to send a WhatsApp message.
- (Optional) Select Set auto-reply for users not tracked on CleverTap to automatically reply to users who message on WhatsApp but are not tracked on the CleverTap dashboard.
- (Optional) You can set the Maximum Concurrent API requests anywhere between 30 to 1000 requests. Consider your requirement and the provider's limitations to define this value.
- Click Save to save the details.
Set Up CleverTap Callbacks in Infobip
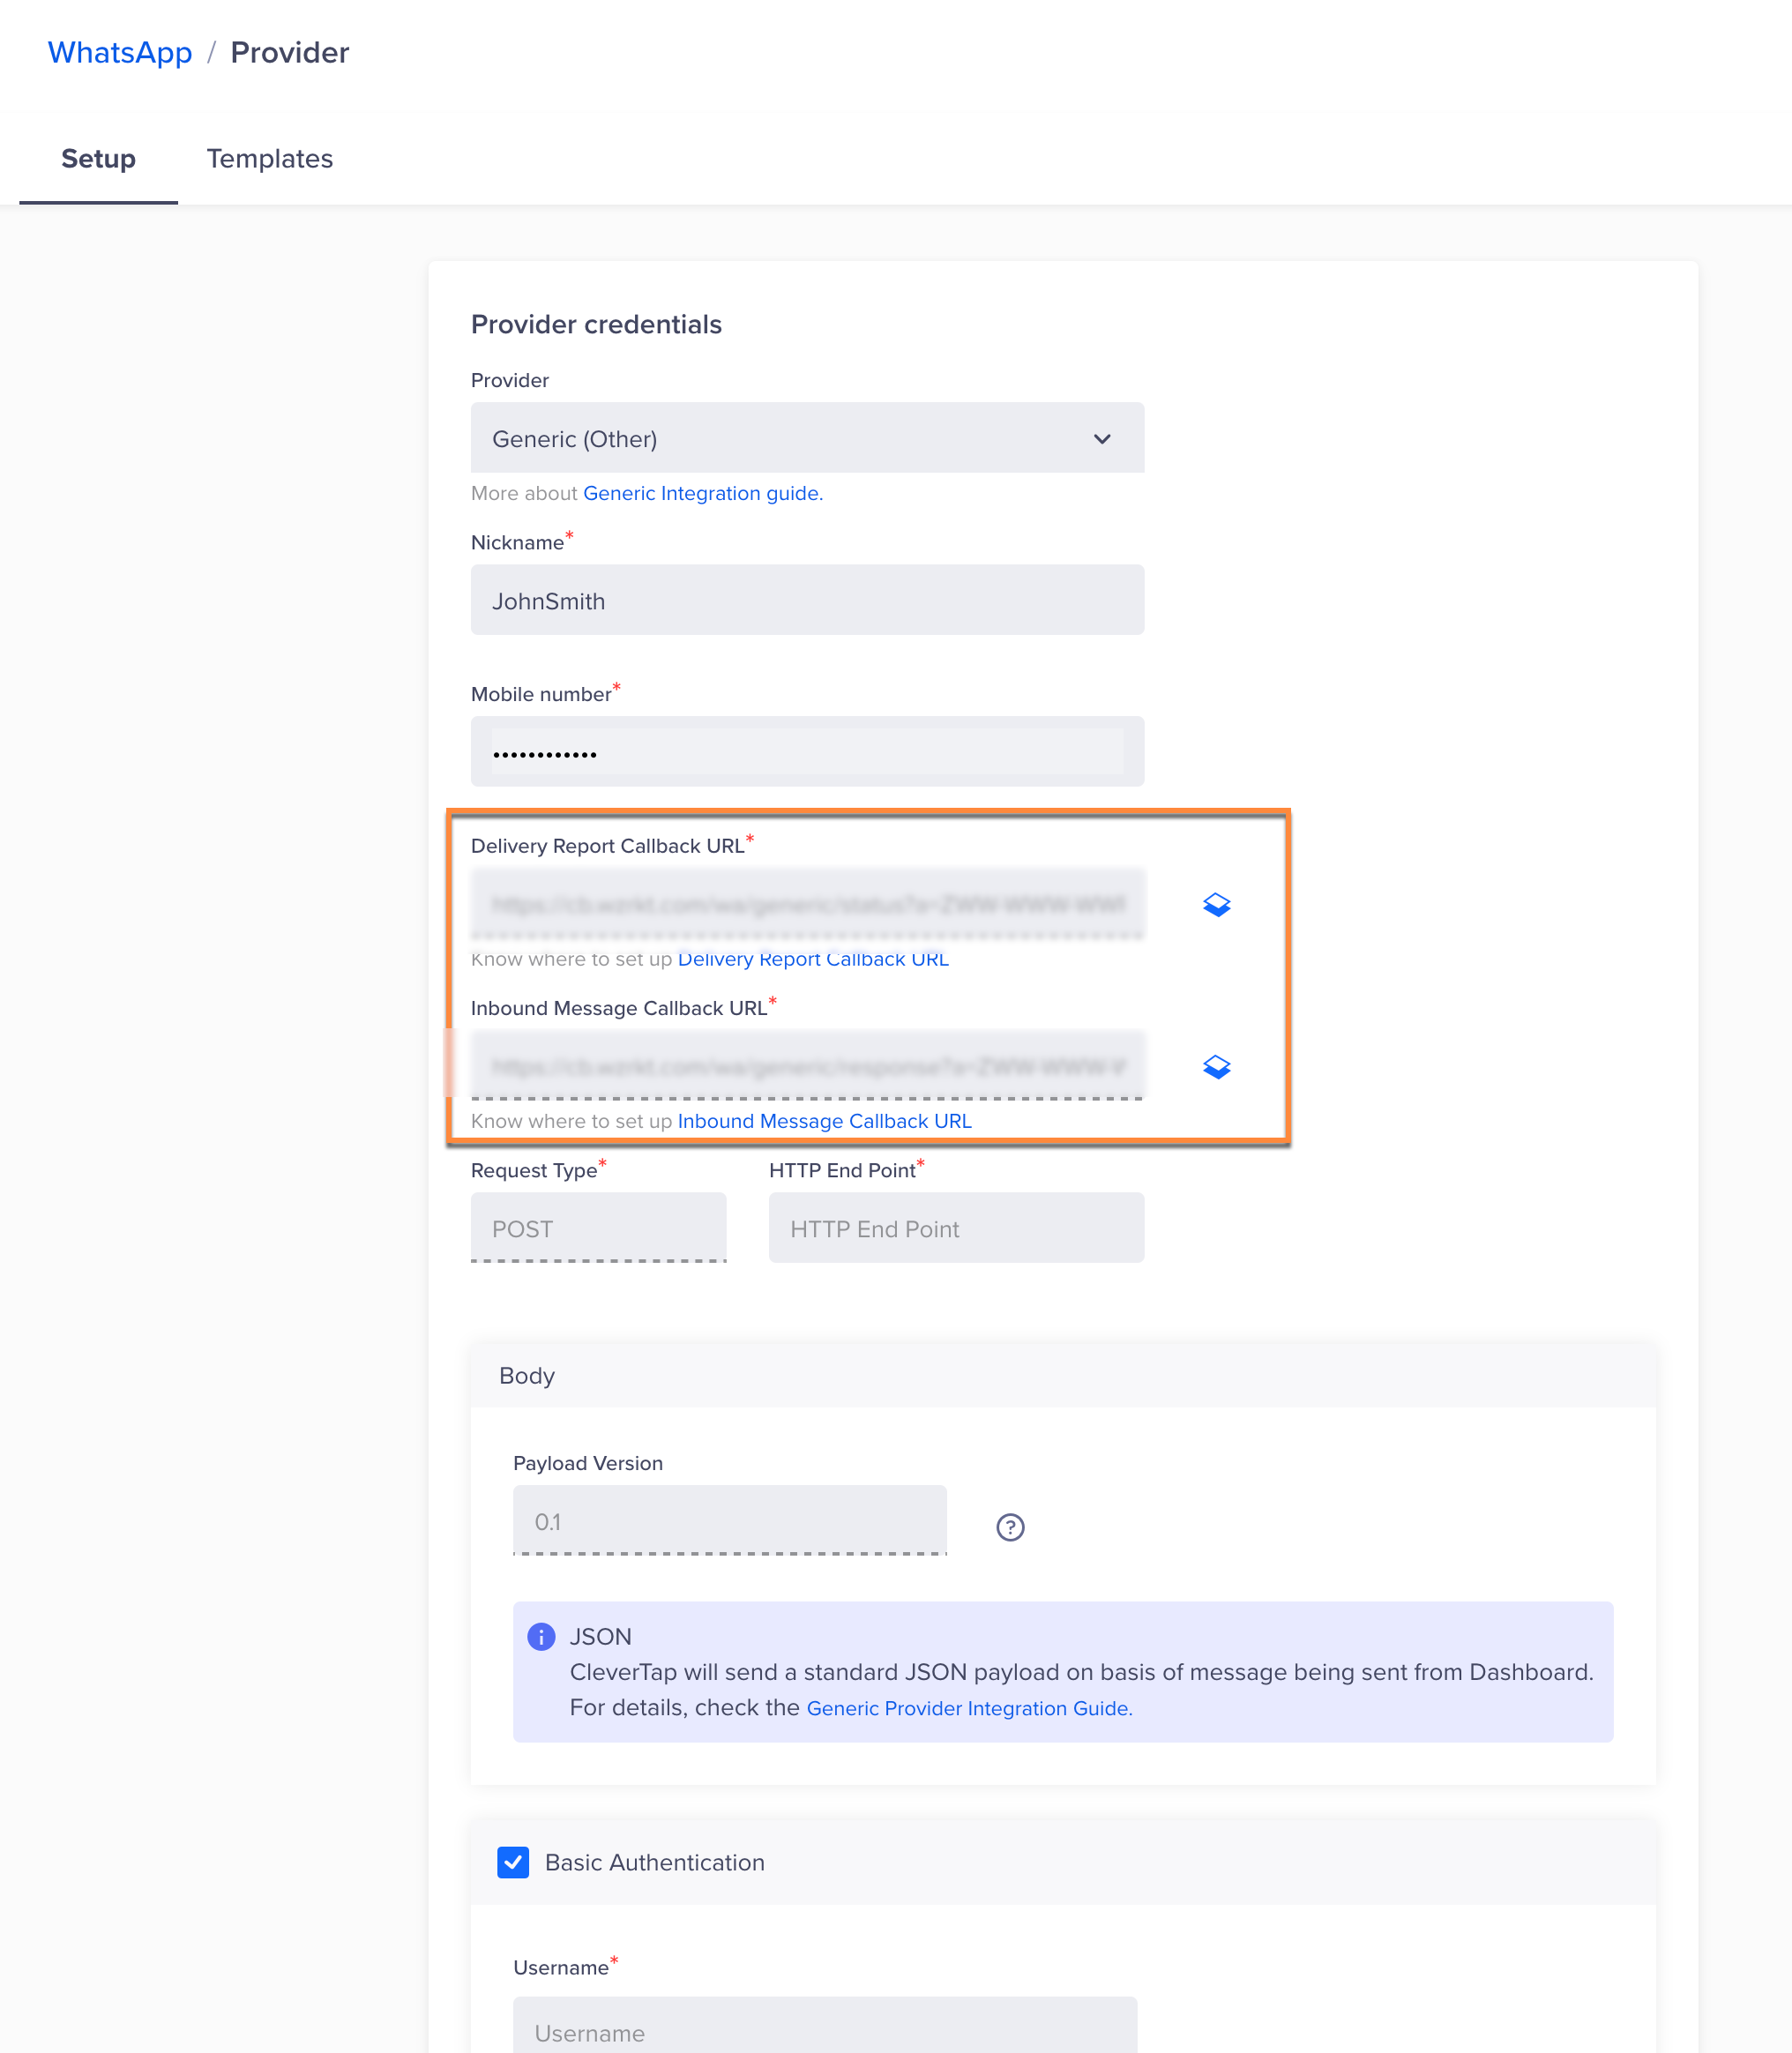
You can find the Callback URLs on the CleverTap dashboard under the Provider Setup page. Naviagte to Settings > Channels > WhatsApp > WhatsApp Connect >Infobip.
To set up the CleverTap callbacks, share the following with your Infobip account manager:
- Delivery Report Callback URL
- Inbound Message Callback URL
- The WhatsApp phone number that will be used in CleverTap
Callback URLs
Find or Create Templates
You can find or create WhatsApp templates from the Infobip dashboard. To do so:
- Navigate to Channels and Numbers from the left menu as shown below:

Set up WhatsApp on Infobip
-
Select WhatsApp and click the Senders tab.
-
From the Action menu, click View Templates.

View WhatsApp Templates
- From the list of templates, search for your template. Expand the template that you want to save in the CleverTap Dashboard.

Expand a WhatsApp Template
- Export and save the template on your machine.

Export WhatsApp Template
Exporting a TemplateThe Infobip dashboard does not display all the details for the selected template. We recommend exporting the template and keeping the details handy. You can copy and paste the values from the exported template to the CleverTap dashboard to ensure you are not missing any field. For more information, refer to Adding a WhatsApp Template in CleverTap.
Add Message Template
Naming WhatsApp TemplatesTemplate names and language variants must be unique for each provider configuration. This means that you can use the same template name once for each provider configuration.
For example, if you have multiple provider configurations, such as Phone_1, phone_2, you can use the same template name once within Phone_1 and Phone_2.
To create WhatsApp campaigns, you must have pre-approved WhatsApp message templates saved in the CleverTap dashboard. To add the message templates:
- Navigate to Settings > Channels > WhatsApp > WhatsApp Connect >Provider Nickname from the CleverTap dashboard.
- Select the Templates option, and click +Template.

Add Pre-Approved Message Template
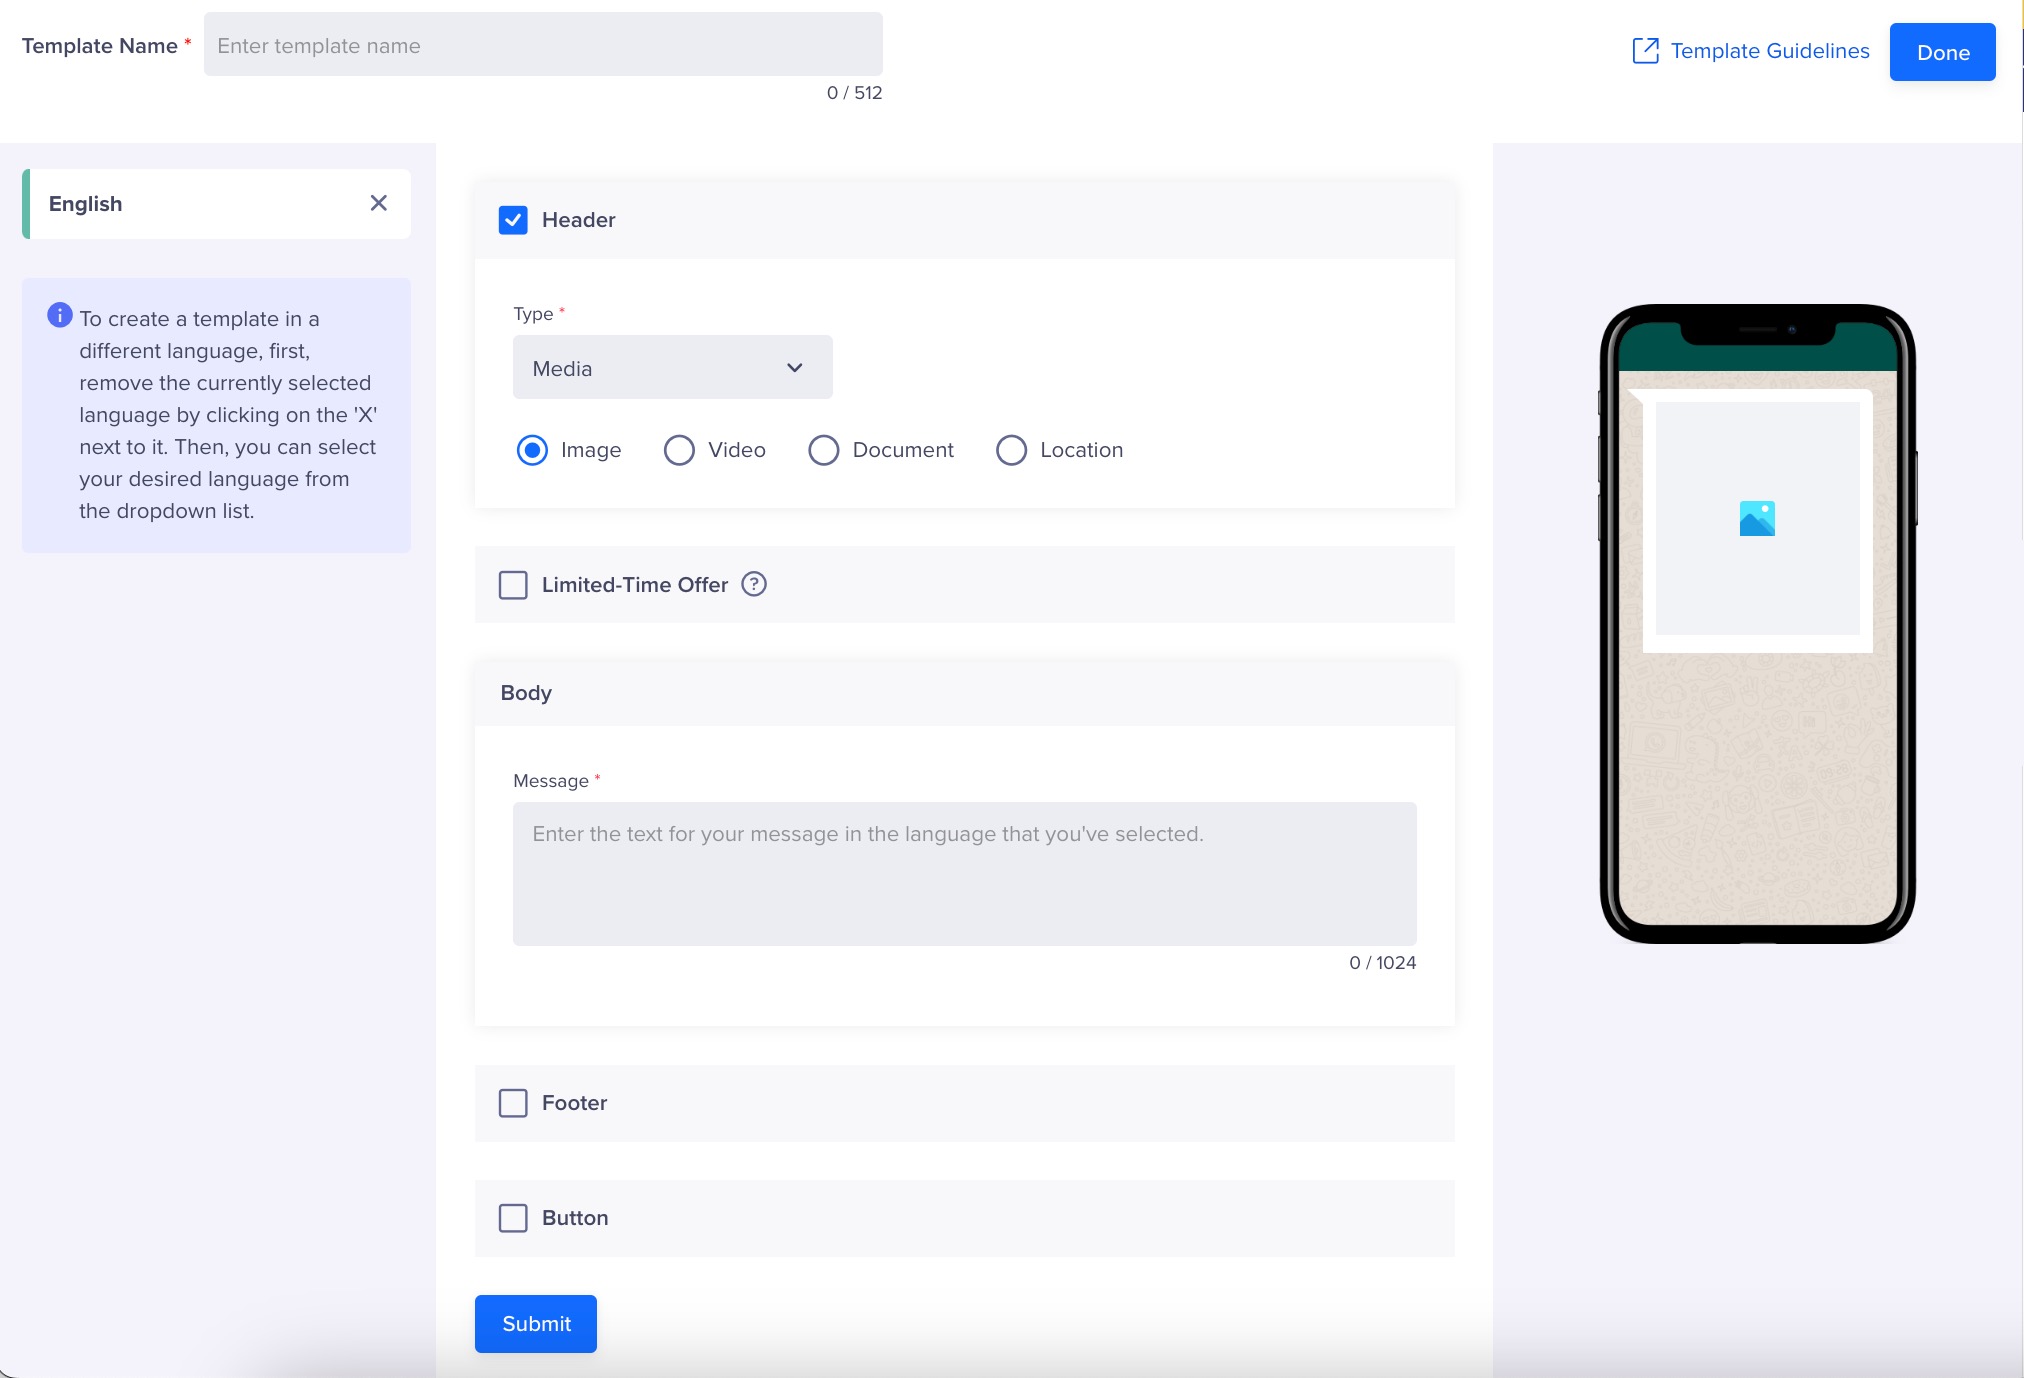
- Enter the template name in the Namespace field.
- Choose the type of template header (Text or Media). For Media headers, you can use Image, Video, Document, and Location.
- You can choose to use the Limited Time Offer template for your message. For more information, refer to Limited Time Offer Template.
- Enter the message content.
- Select Footer to add a footer text and a button (Quick Reply or a Call To Action).
- Select the Language in which you want to display the message.
Define Template Content
- Click Save Template.
Test a Message Template
You can send a test message using the saved templates from the CleverTap dashboard as follows:
- Right-click the ellipsis below the template.
- Click Send Test.
- Select the test profiles or manually enter the mobile number to whom you want to send the test message and click Send Test.

Test WhatsApp Message
The success or failure response is displayed on the dashboard. If the message is not delivered, you can copy the response payload and share it with the Infobip team to debug the issue, as shown in the following figure:

Successful Delivery Response
Create Campaign
To create a WhatsApp campaign using Infobip as the provider, refer to Create a WhatsApp Campaign for detailed instructions.
Creating a Journey
To create a WhatsApp journey using Infobip as the provider, refer to Create a WhatsApp Journey for detailed instructions.