OpenWeather
Contextual Location Partner
Overview
OpenWeather provides fast and elegant access to weather forecasts, nowcasts, and historical data globally. This enables businesses to integrate with CleverTap for targeted campaigns. CleverTap and OpenWeather integration allows you to fetch the user's location and weather updates in real time and send personalized campaigns to your users. For instance, retail companies can send localized notifications recommending weather-appropriate products such as umbrellas during rainy seasons. This document is a comprehensive guide for integrating OpenWeather with CleverTap.
Prerequisites
You must have the following for this integration:
- An OpenWeather account
- API key for OpenWeather. To get the API, contact your OpenWeather account manager.
- A CleverTap account
NoteEnsure that you are tracking user coordinates (latitude and longitude) as user attributes on CleverTap.
Integrate CleverTap with OpenWeather
This process involves the following three major steps:
Get API Key from OpenWeather
You need to generate an API key from the OpenWeather dashboard to integrate with CleverTap:
- Log in to your OpenWeather dashboard.
- Select My API Keys from the dropdown list from your account. You can also select the API keys tab directly.
- Enter your API key name under the Create Key field and click Generate. OpenWeather also creates a default API key when you log in to the dashboard for the first time.
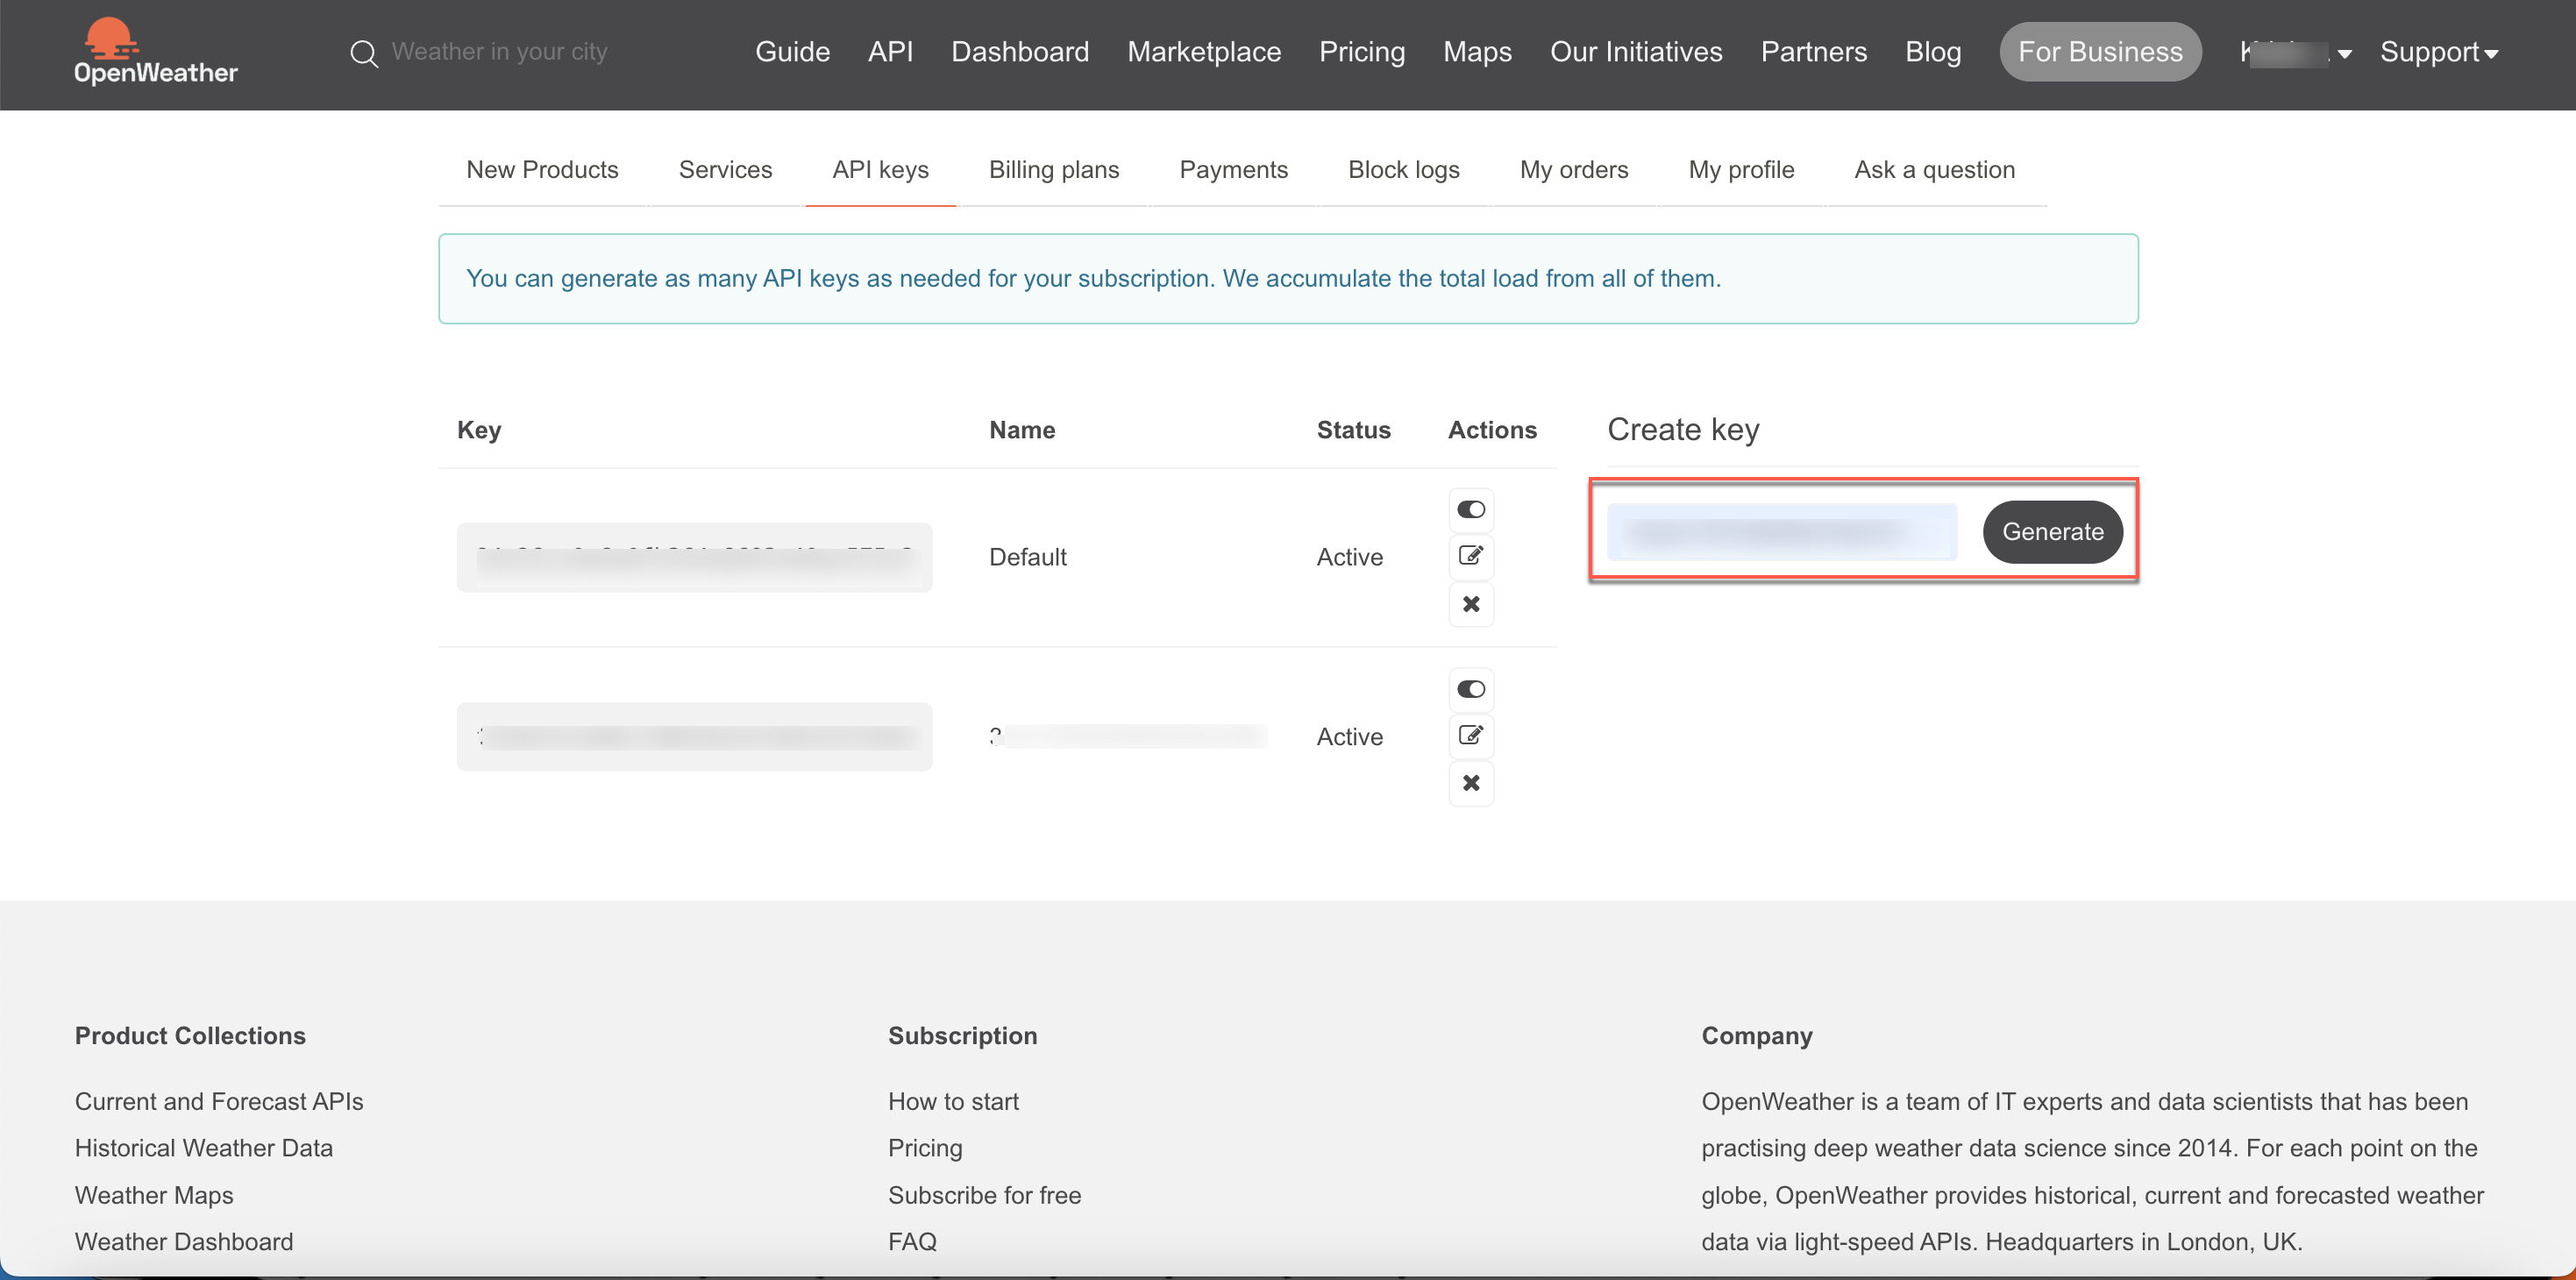
Generate OpenWeather API Key
Set Up CleverTap Dashboard
To set up CleverTap dashboard:
- Go to Settings > Setup > Linked Content and click + Linked Content.
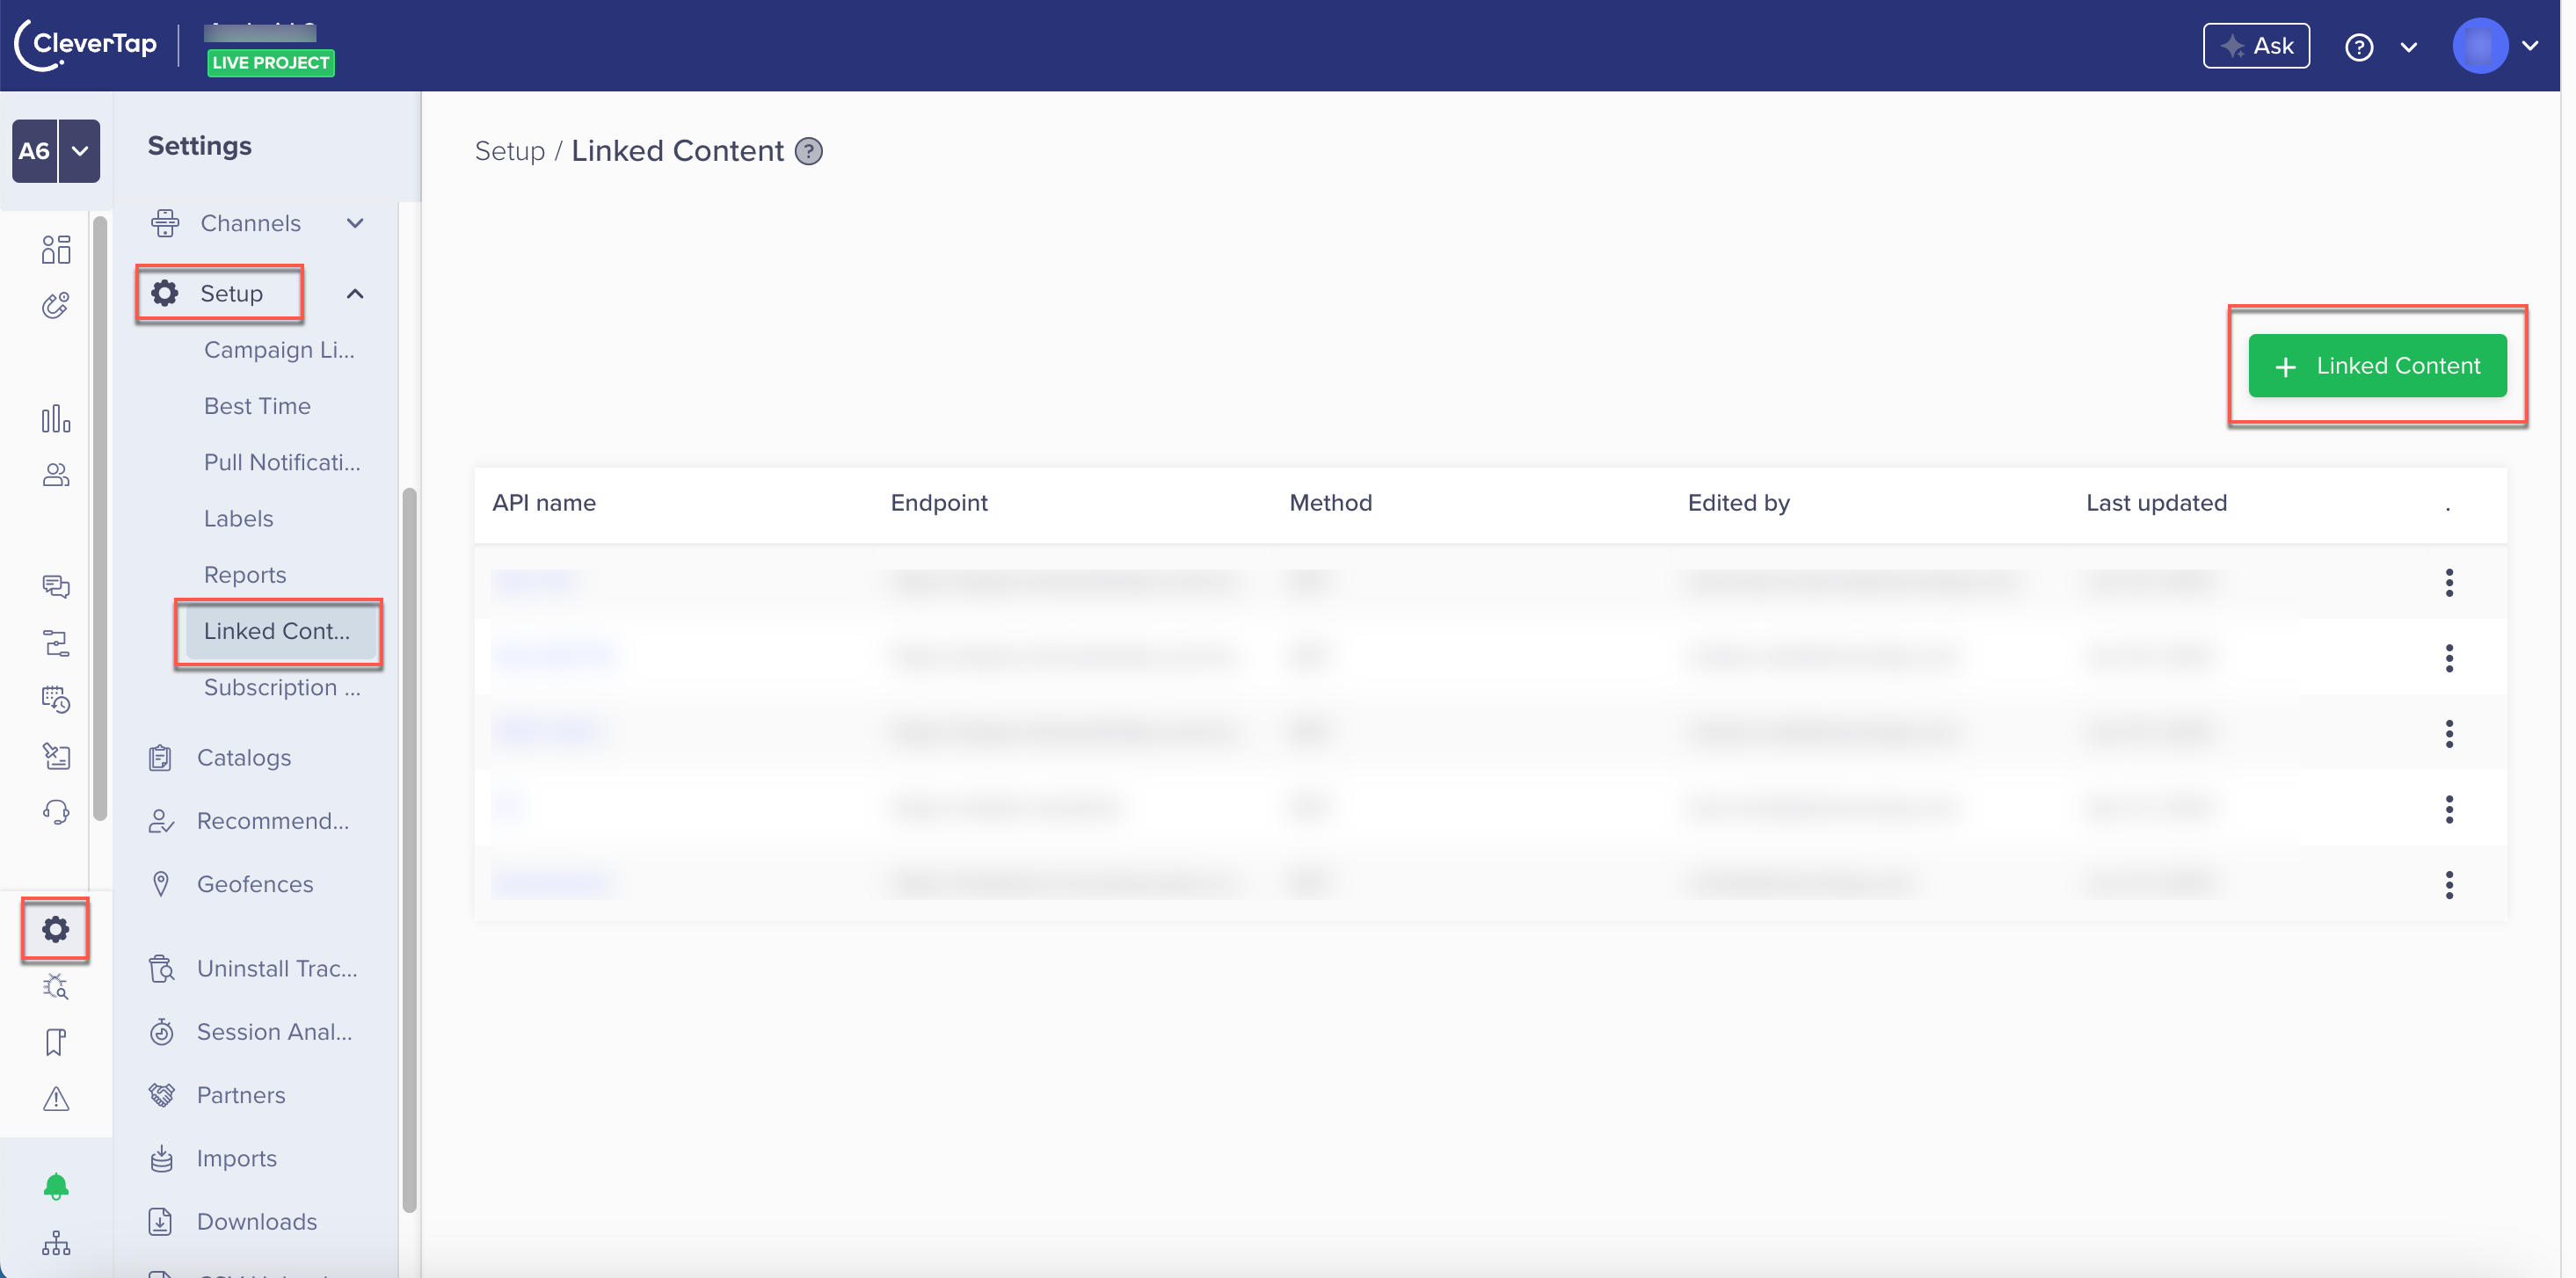
Set Up Linked Content
- Enter the following details:
| Parameters | Description |
|---|---|
| API Name | Enter the name to uniquely identify your API. |
| Endpoint URL | Select GET from the dropdown list and use the Open Weather API endpoint URL that most suits your purpose. For our use case, we want to fetch current weather data for the user's location. Enter the following endpoint URL: https://api.openweathermap.org/data/2.5/weather?lat={{latitude}}&lon={{longitude}}&appid=f2b6d7ac90dcc08639e4118621673bdb&exclude={{part}} For more information about OpenWeather's available APIs, refer to Weather API.
|
| Parameters | Declare the parameters to replace them with the personalized value while running the campaigns/journey. For our use case, we are declaring the following parameters: |
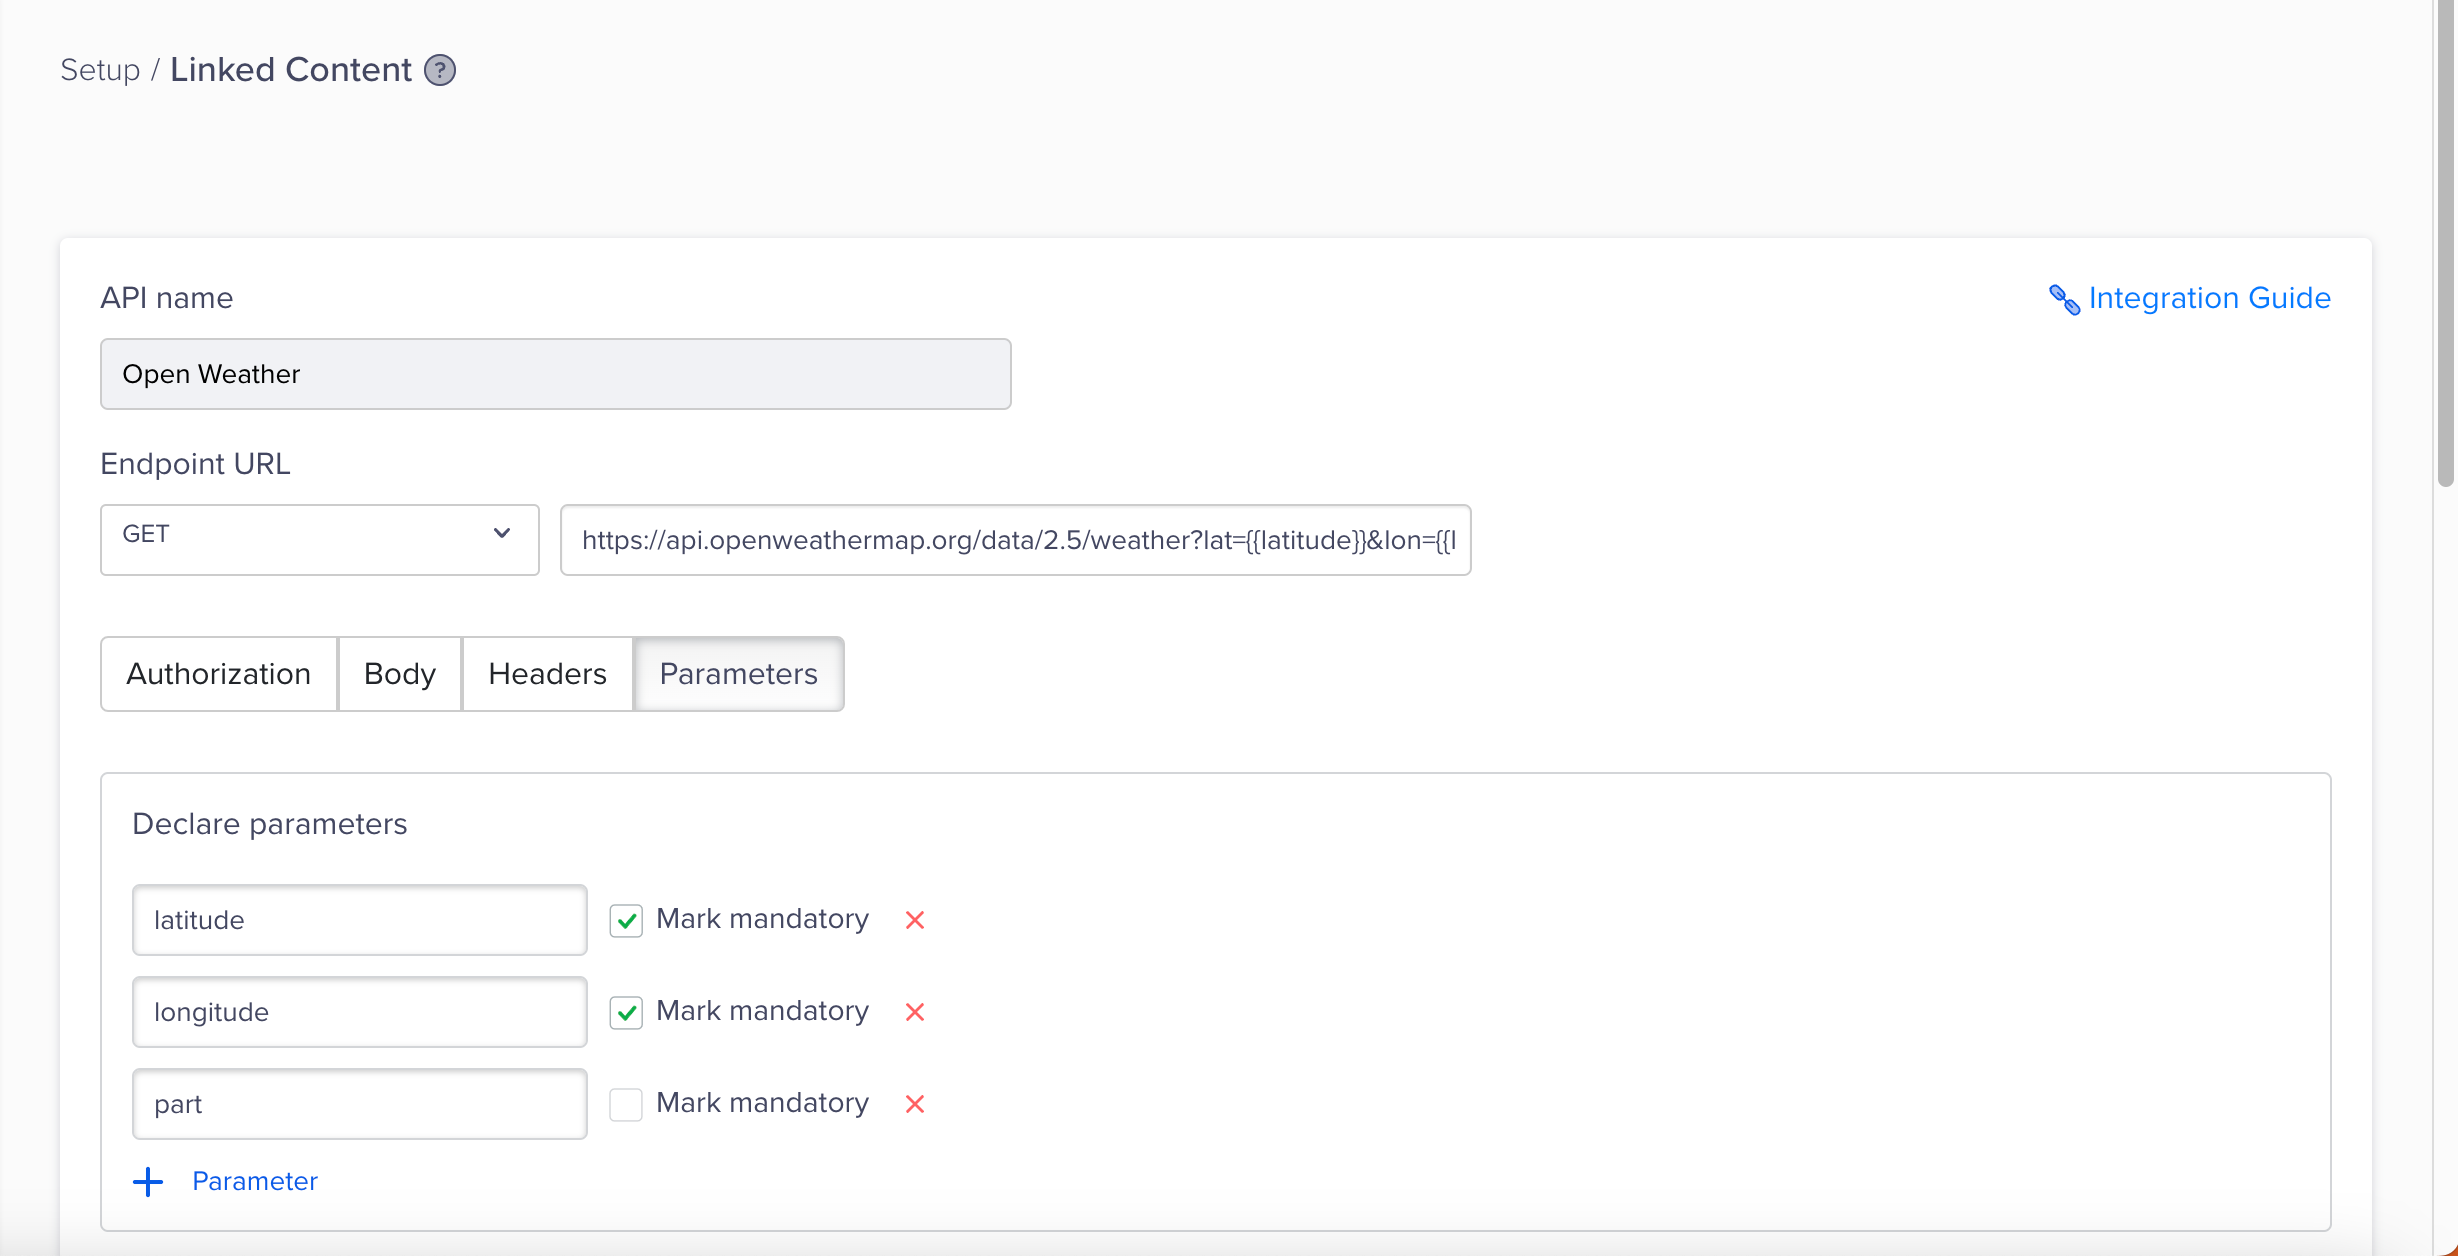
Set Up Linked Content
- (Optional) Click Test Linked Content to ensure that the Linked Content is set up correctly.
- Fill in the required mapping according to your requirements, or click Auto-fill Objects with Responses. Once you do this, click Test & Save changes to proceed with the campaign creation.
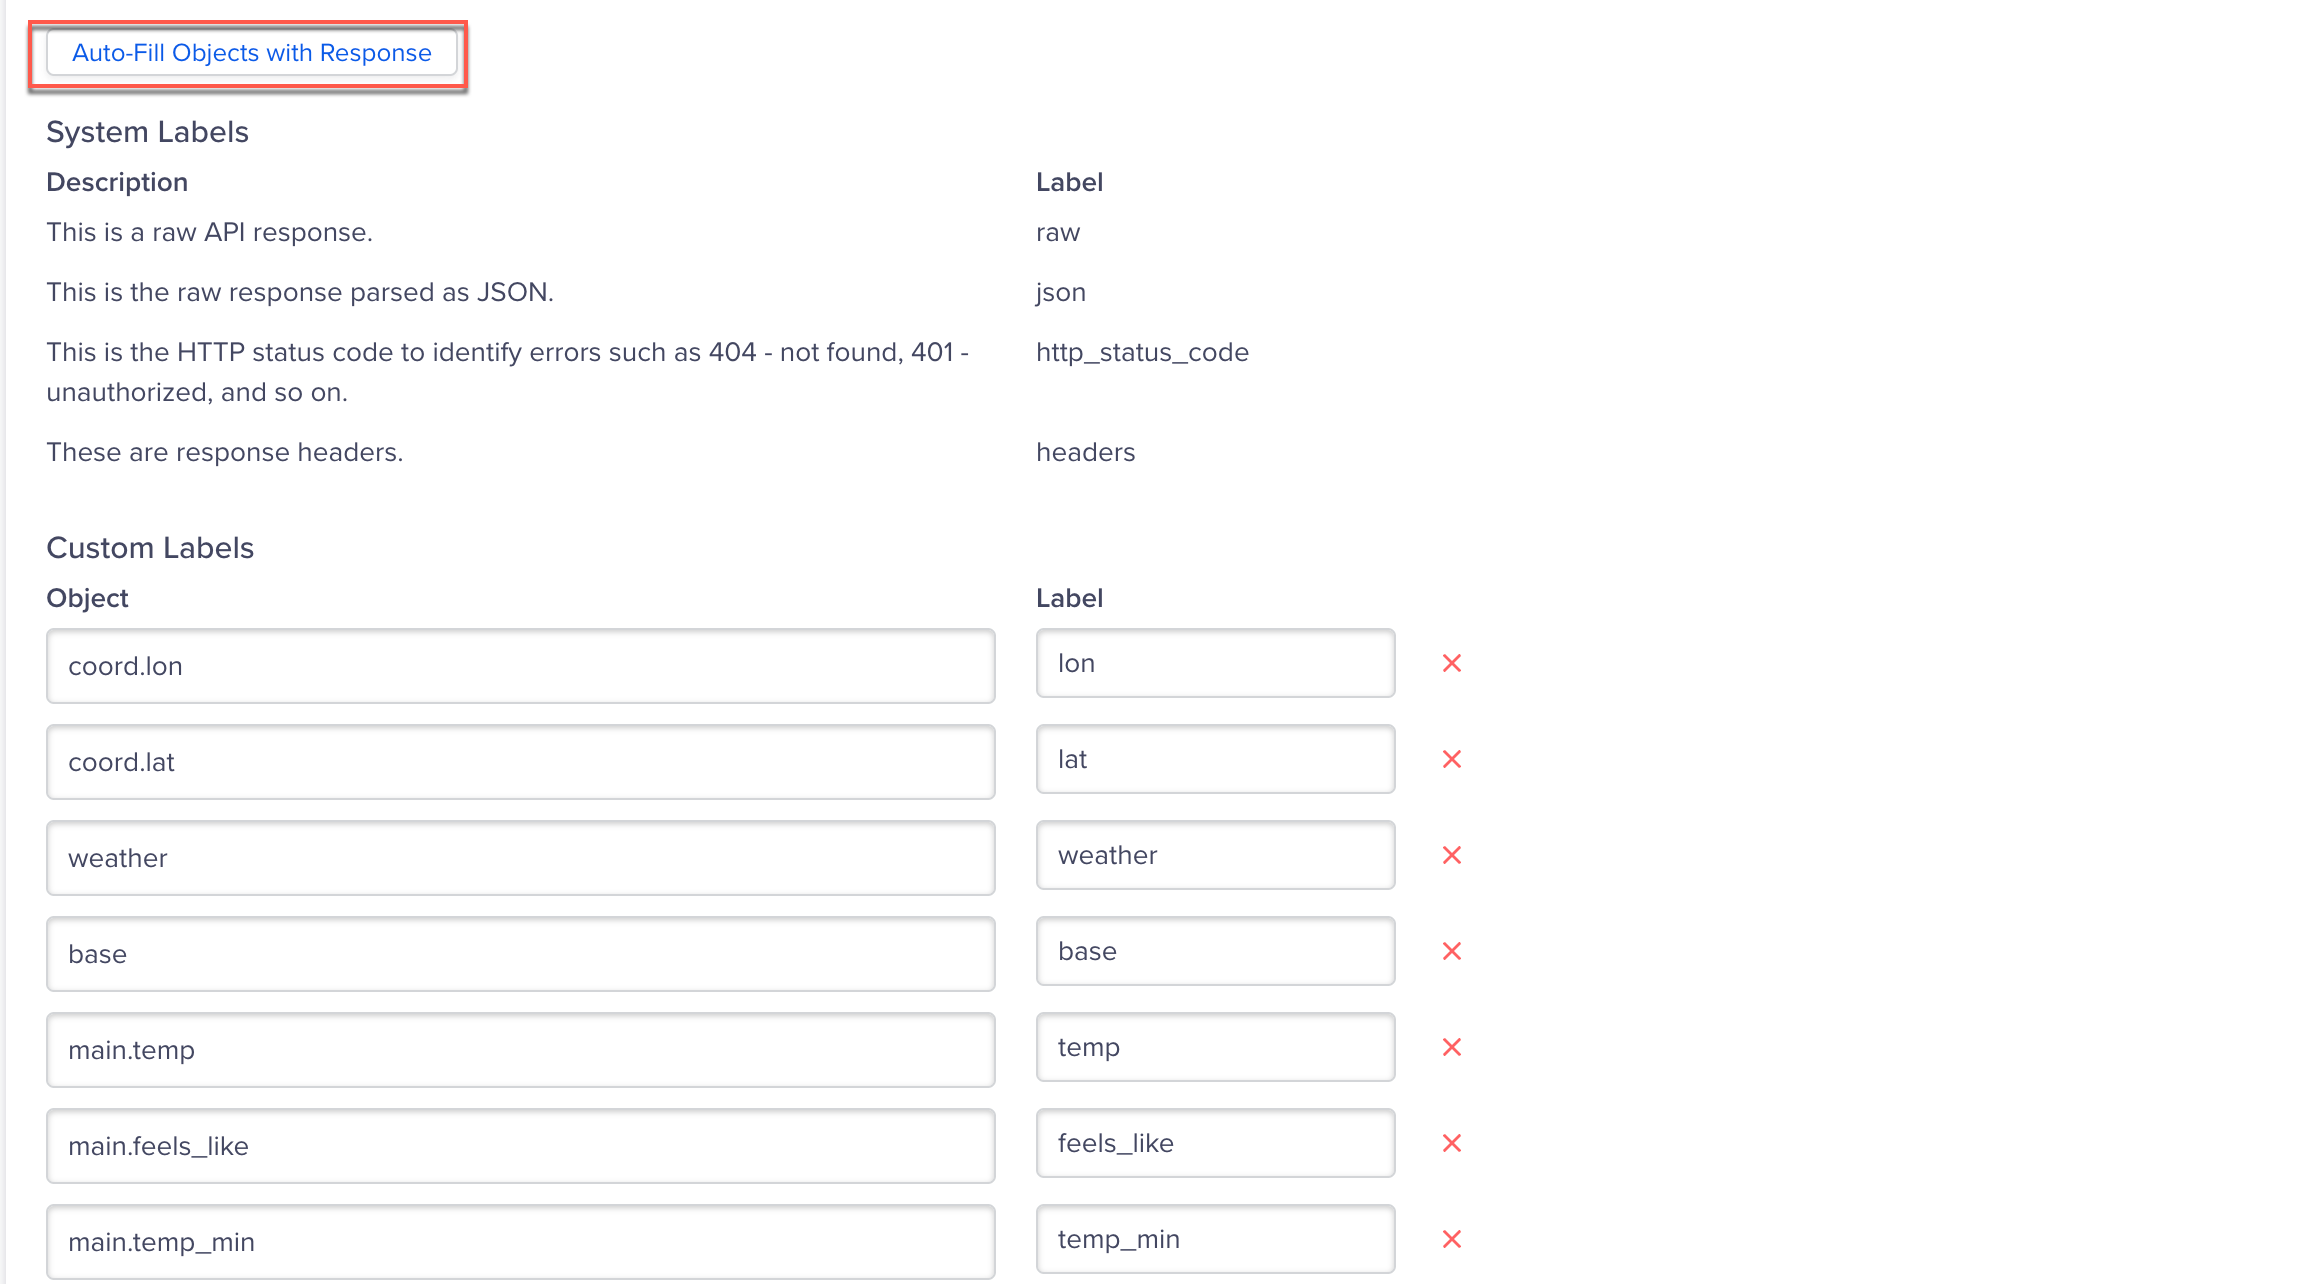
Auto-Fill Objects with Response
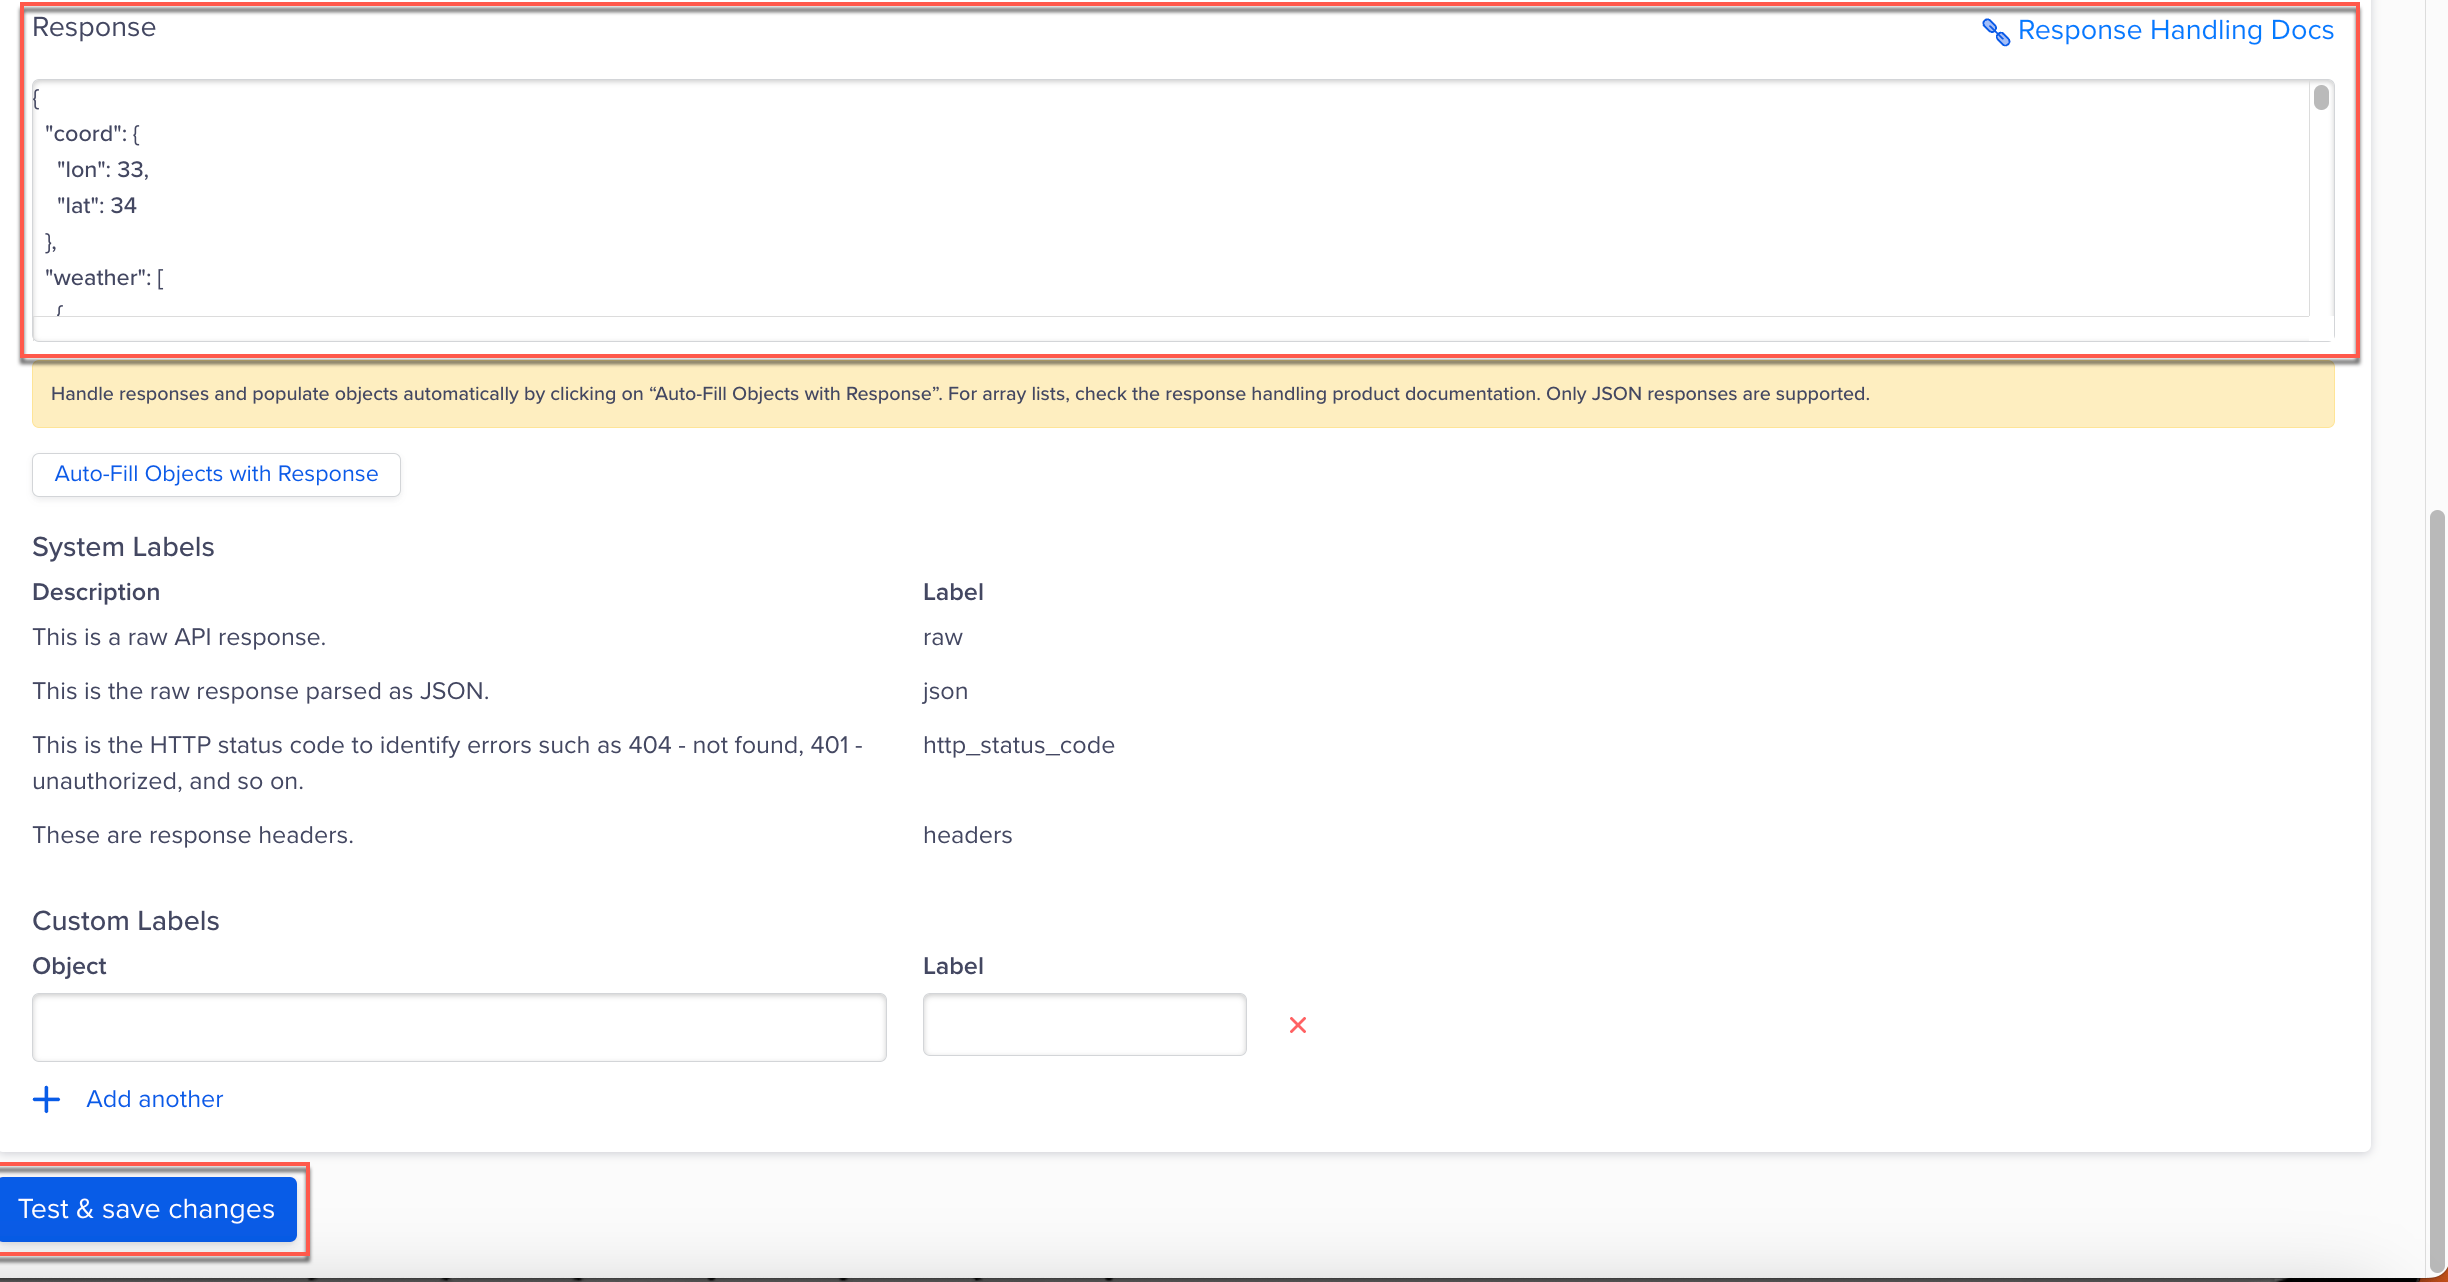
Test & Save Changes
Here is an example of the response:
{
  "coord": {
    "lon": -94.04,
    "lat": 33.33
  },
  "weather": [
    {
      "id": 803,
      "main": "Clouds",
      "description": "broken clouds",
      "icon": "04d"
    }
  ],
  "base": "stations",
  "main": {
    "temp": 305.36,
    "feels_like": 311.36,
    "temp_min": 303.15,
    "temp_max": 305.36,
    "pressure": 1014,
    "humidity": 62,
    "sea_level": 1014,
    "grnd_level": 1003
  },
  "visibility": 10000,
  "wind": {
    "speed": 1.54,
    "deg": 340
  },
  "clouds": {
    "all": 75
  },
  "dt": 1720188172,
  "sys": {
    "type": 1,
    "id": 6094,
    "country": "US",
    "sunrise": 1720177934,
    "sunset": 1720229345
  },
  "timezone": -18000,
  "id": 4736096,
  "name": "Texarkana",
  "cod": 200
}
Create a Campaign on CleverTap
Once you set up the Linked Content on CleverTap, you can now run personalized campaigns from the CleverTap dashboard. OpenWeather will be available in Push, SMS, Email, WhatsApp, Web Push, and Webhook campaigns. In our case, the retail company wants to send a personalized email campaign recommending weather-appropriate products such as umbrellas during rainy seasons and so on. To do so:
- Go to Campaigns and click + Campaigns.
- Select Emails from the list of messaging channels.
- Click Go To Editor from the What section and select Email with Rich Media template to create an email campaign.
- Click the
 icon and select the Linked Content tab.
 - Slect the API you configured while setting up the Linked Content on the CleverTap dashboard.
- Map the API Parameters to attributes in the users' profile and click Apply.
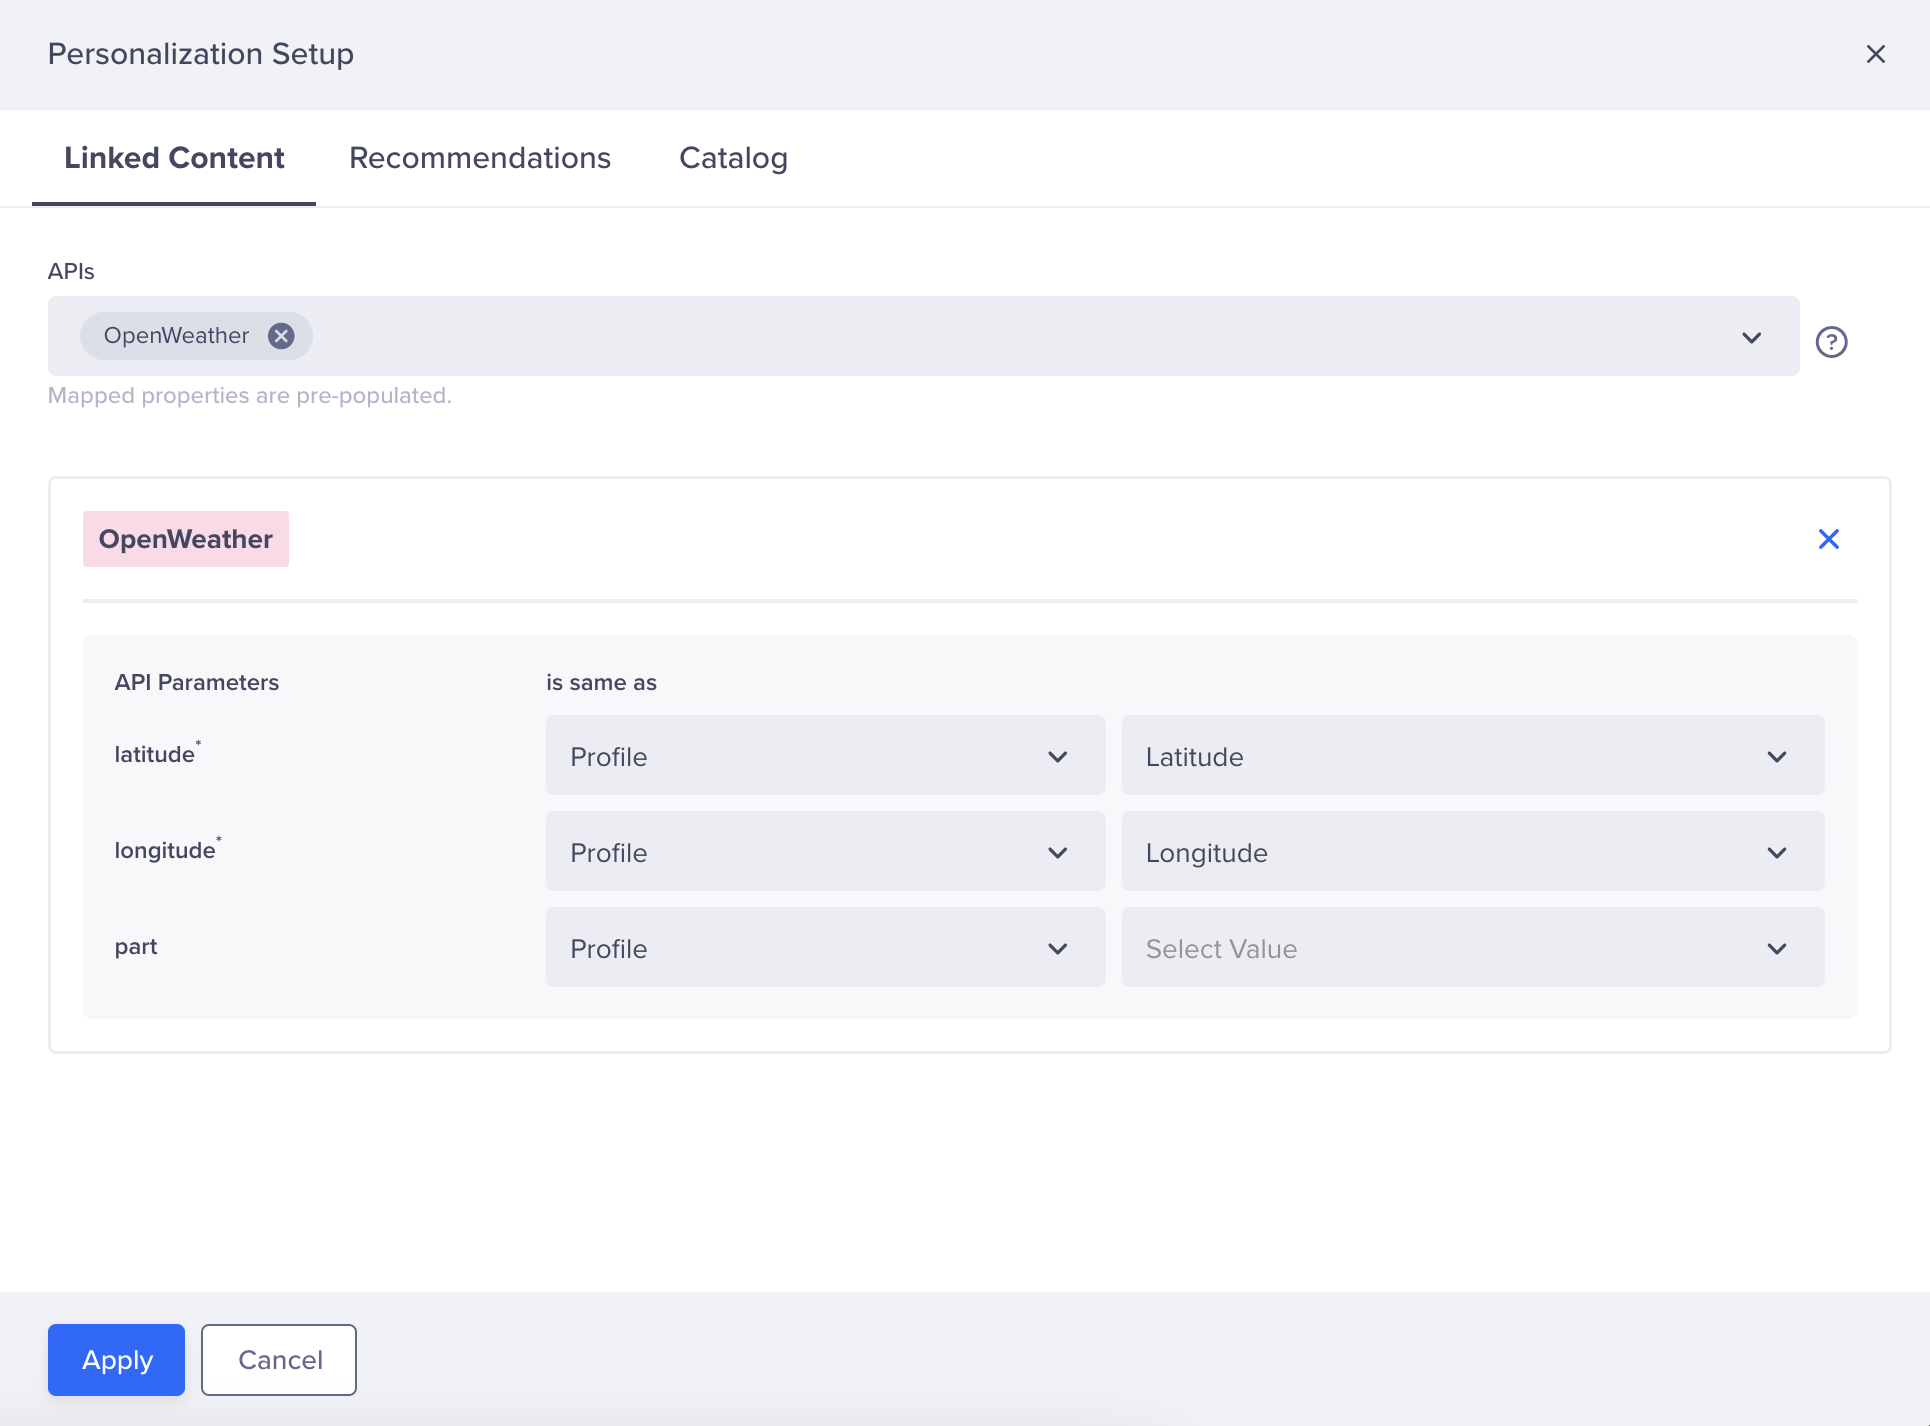
Personalization Set up
- Create the campaign message using the Linked Content as shown in the following image:
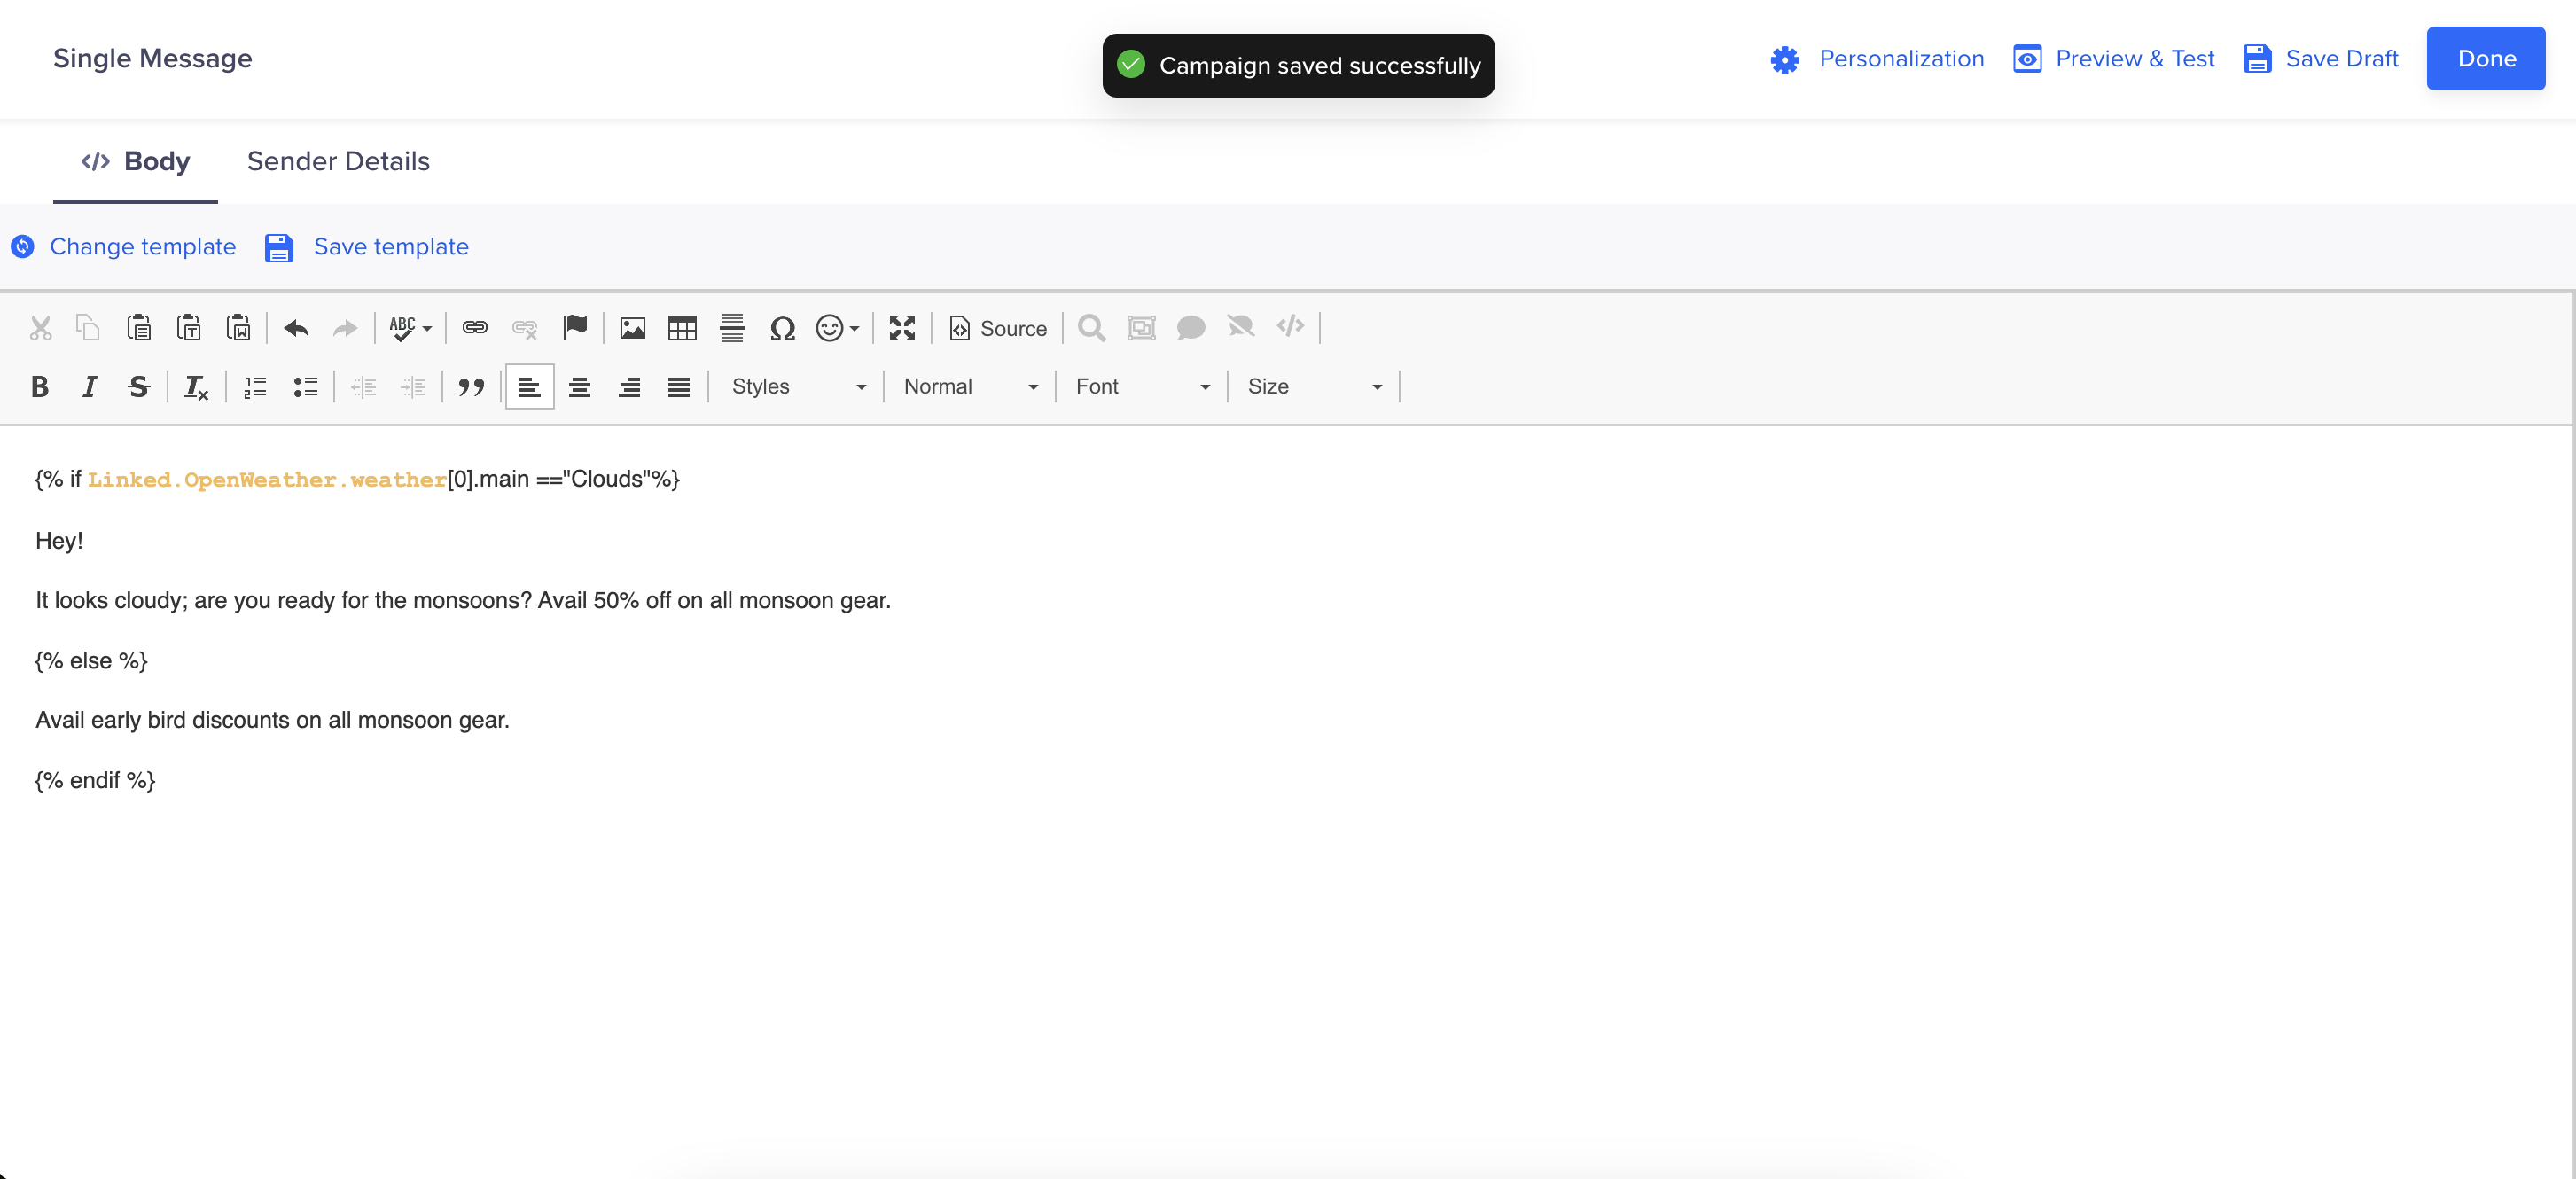
Create a Personalized Email Campaign Using Linked Content
{% if Linked.OpenWeather-Demo.weather[0].main == "Clouds"%}
  Hey! it looks cloudy, are you ready for the monsoons? Avail 50% off on all monsoon gear.
{% else %}
   Avail early bird discounts on all monsoon gear.
{% endif %}- Define all the campaign sections and click Publish. You can also send a test campaign before publishing it to a broader audience.
Updated 8 months ago