Create TikTok Remarketing Campaign
Learn how to set up the TikTok Remarketing campaign for TikTok
Create a TikTok Remarketing Campaign
Follow these steps to create a new remarketing campaign on TikTok:
- From the dashboard, navigate to Campaigns.
- Click + Campaign button.
- From the Messaging Channels list, select TikTok.
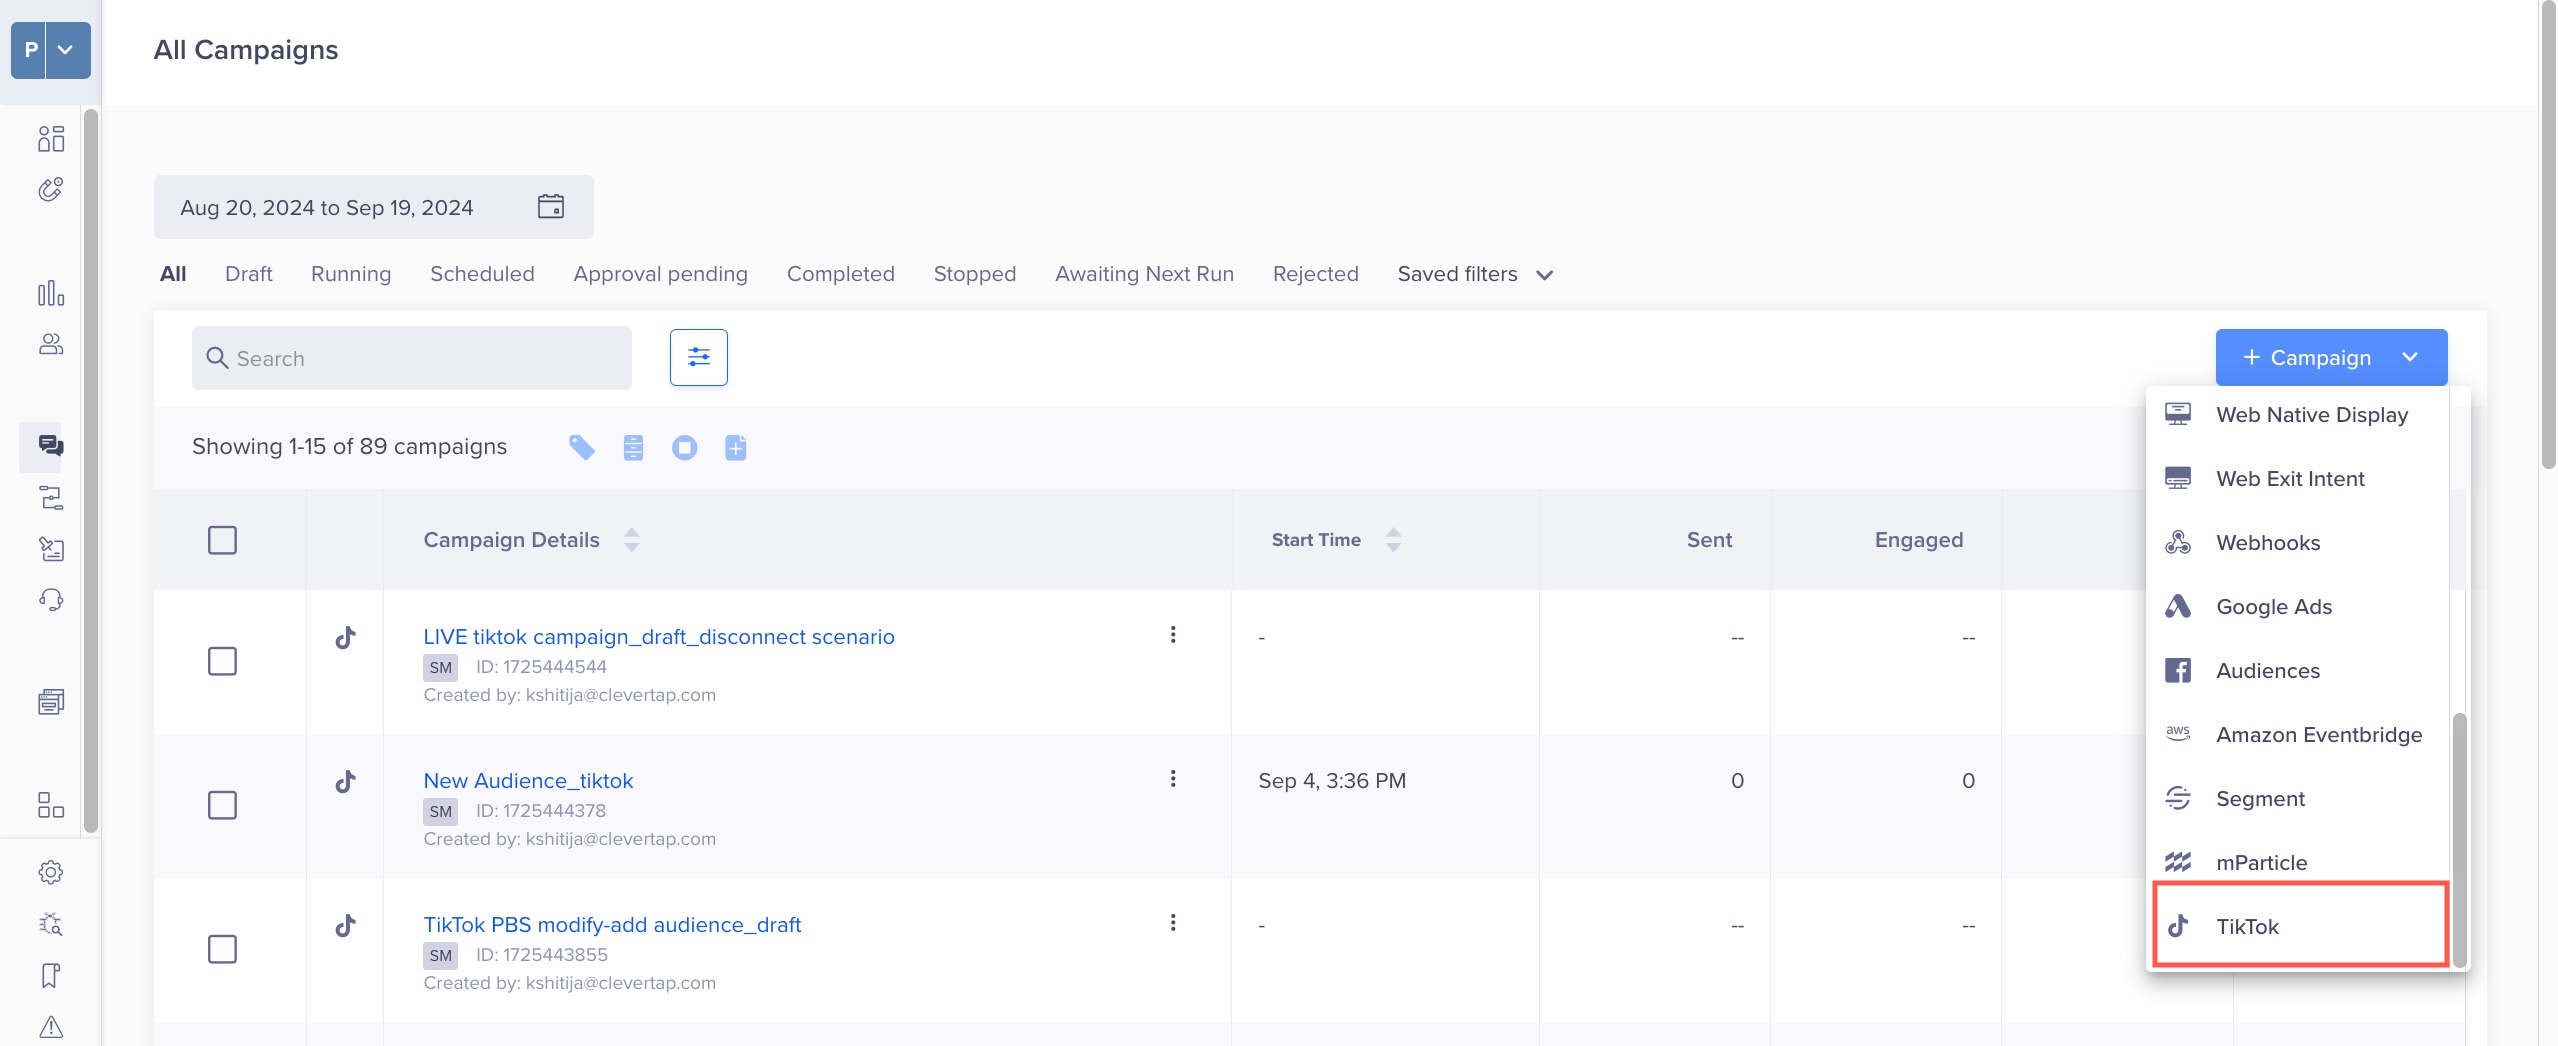
TikTok Create Campaign
The campaign page displays.
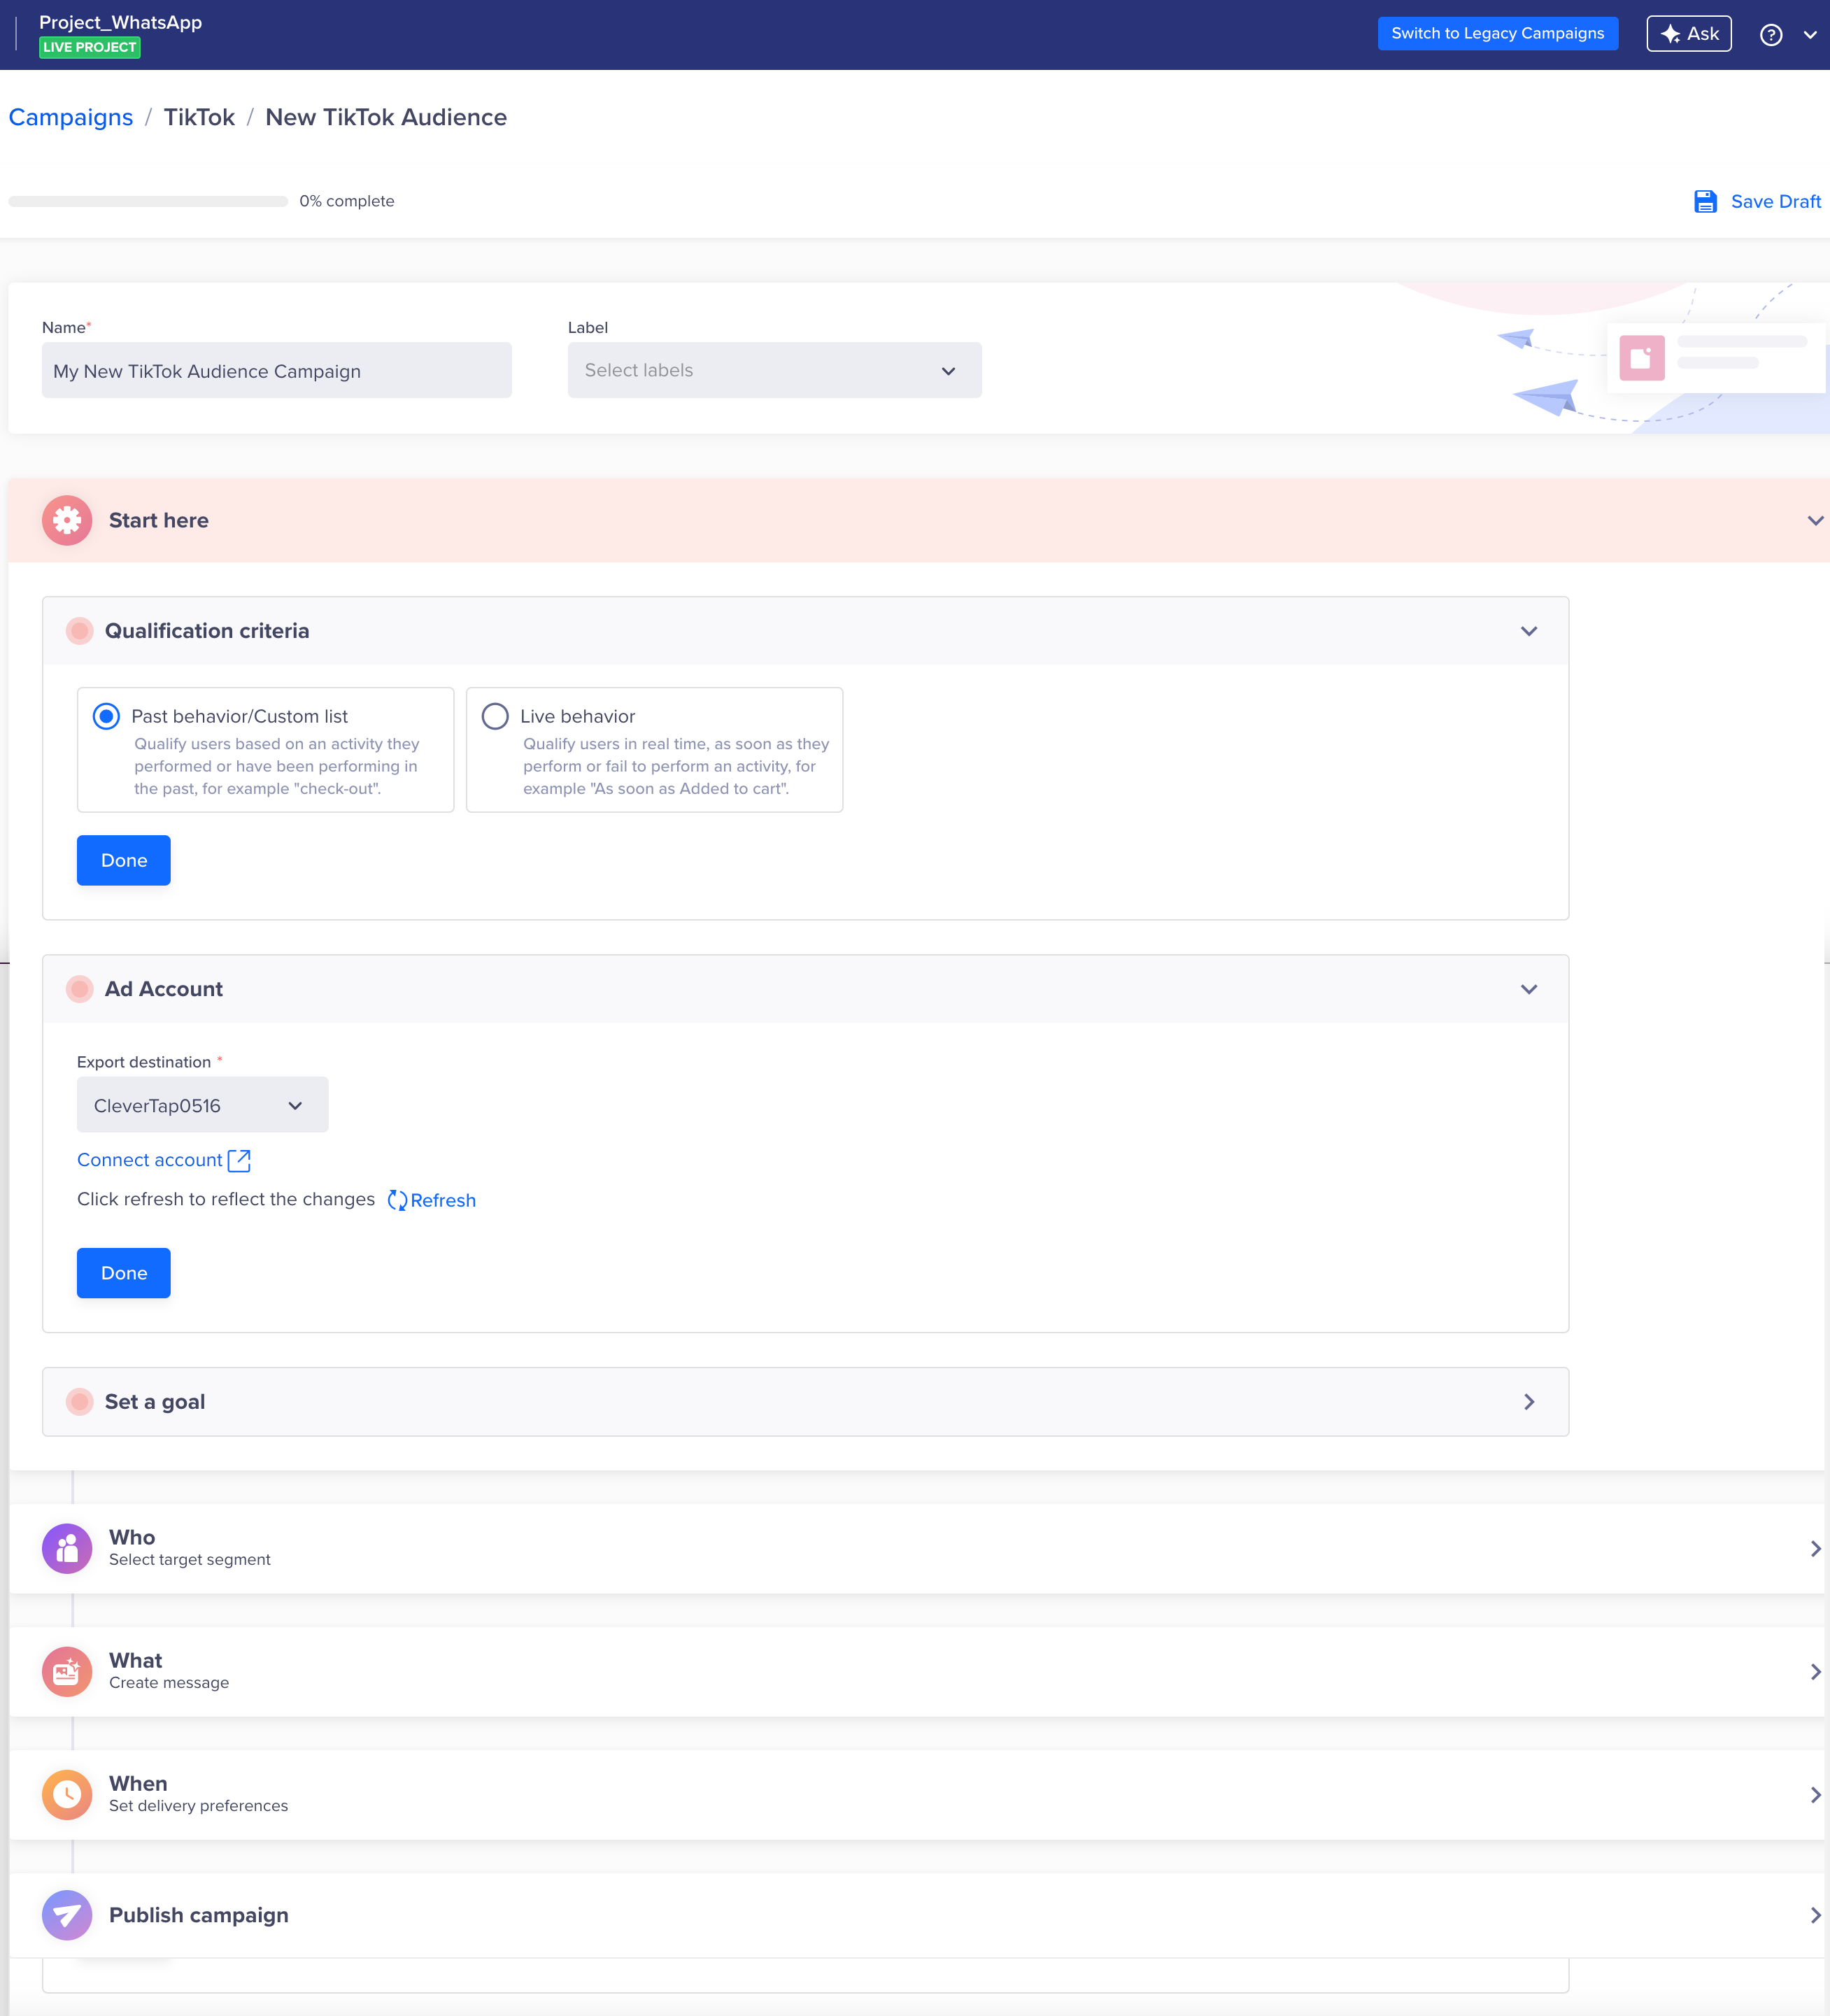
TikTok Campaign
Start Campaign Setup
The Start here section displays the setup information.
Qualification criteria: Here, you must define the criteria for your target audience. You can deliver the TikTok ad based on the user's past or live behavior.
Ad Account: From the Ad Account drop-down, select the linked TikTok account to which you want to export the audience.
Set a Goal: You can track your campaign conversion by setting a specific conversion goal. Setting a goal allows you to measure your campaign effectively against what you want to achieve in the campaign. This selection is optional. For example, you can set a conversion goal to analyze the users who purchased within 5 days of publishing the campaign.
Define the Target Audience
Under the Who section, you must define the target audience for your campaign. You can create a new segment or use a previously saved user segment from the segment list. Define the audience according to your use case. A sample use case is Re-targeting users who have viewed a particular product but have not purchased it in the last 30 days.
Filter by User Properties
Using the With user properties filter in the Who section, you can segment your campaign only to reach users who meet specific criteria.
For example, you can display TikTok Ads to users who live in the United States and are over twenty years old. The following image represents a sample target segment filtered using additional user properties, such as location and age, to reach the required audience.
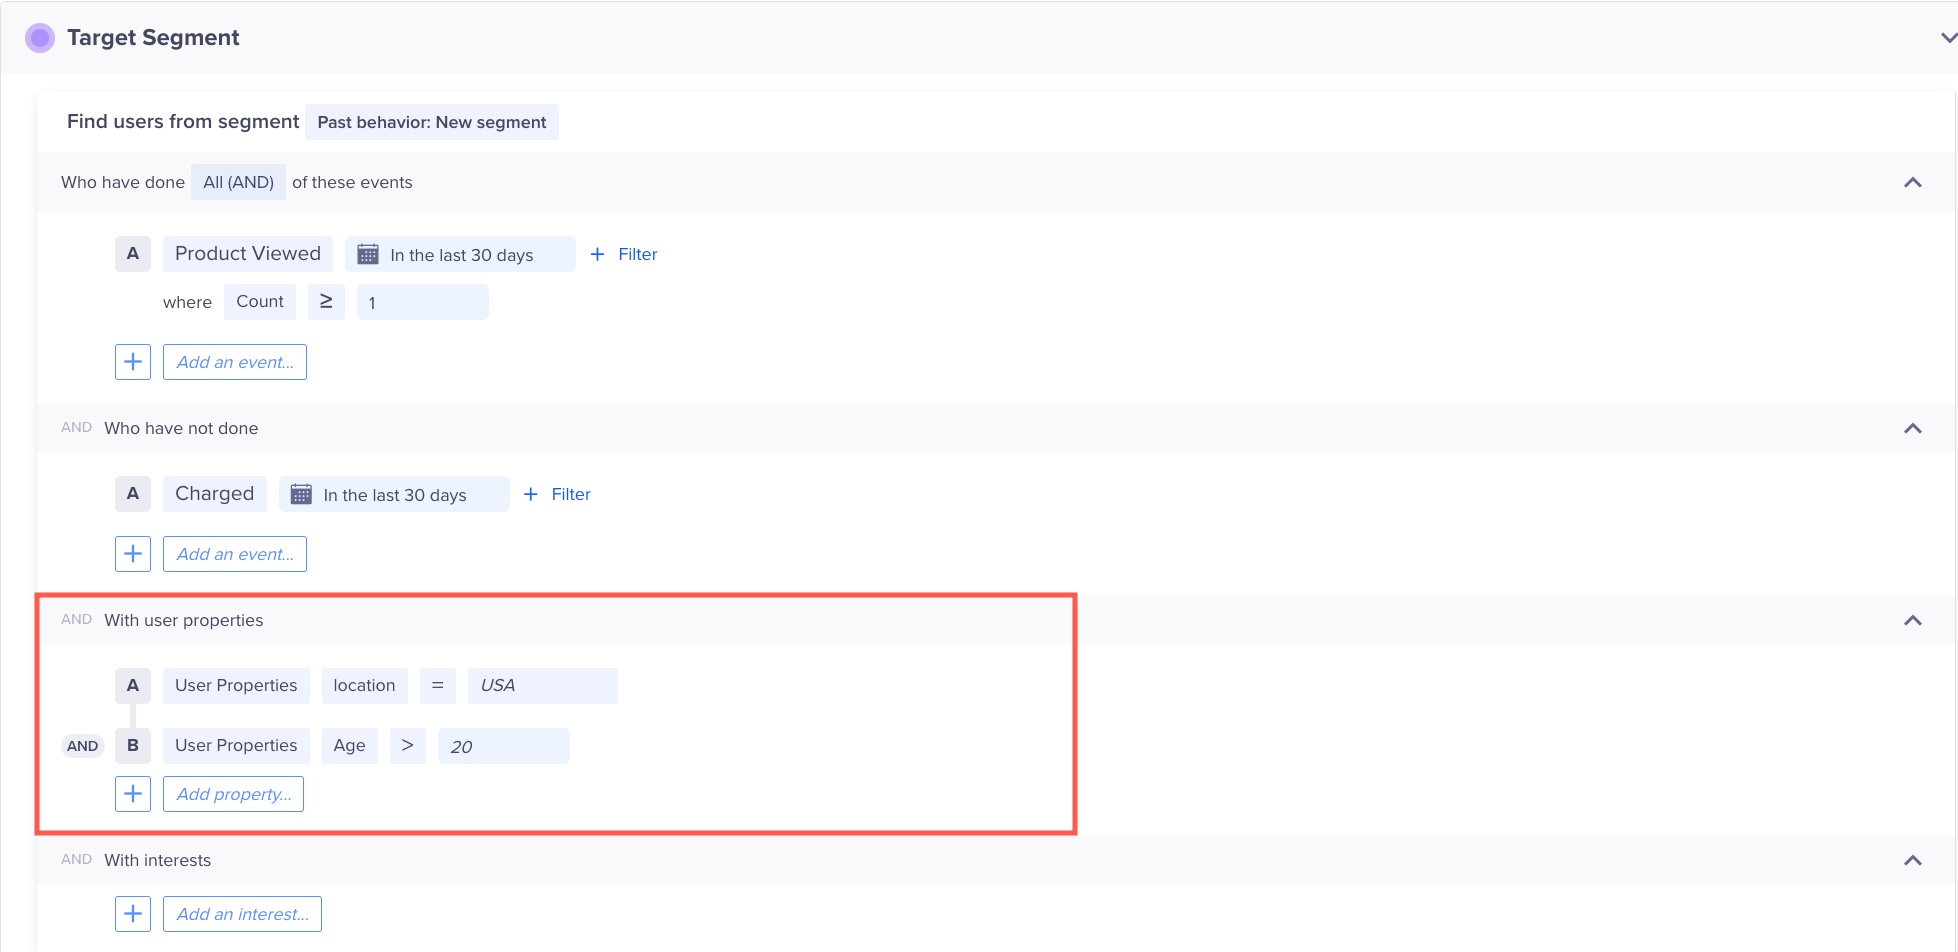
Filter by User Properties
The following table provides a description for the various property types:
Property Type | Description | Example |
|---|---|---|
User Properties | Custom user profile properties that you define and send to CleverTap. | Customer Type = Platinum |
Demographics | Demographics filters include Age and Gender. | Age = 25 to 40 years |
Geography | User's coarse location. Filters include Country, Region, and City. CleverTap's SDK can automatically detect this from the user's IP address. | Country = United States |
Reachability | Reachability filters include Has email address, Has phone number, Unsubscribed email, and Unsubscribed SMS. | Unsubscribed email = No |
App Fields | App field filters include App Version, Device Make, Device Model, OS Version, and CleverTap SDK Version. CleverTap's SDK sends this information for each device that has your app, which means a single user can have multiple devices associated with their user profile. | OS Version = 10 |
Control Group and Target Cap
You can define the control group to compare and measure the results of your campaign. For more information on control groups, see Control Groups
You can limit the number of users receiving the Ad.
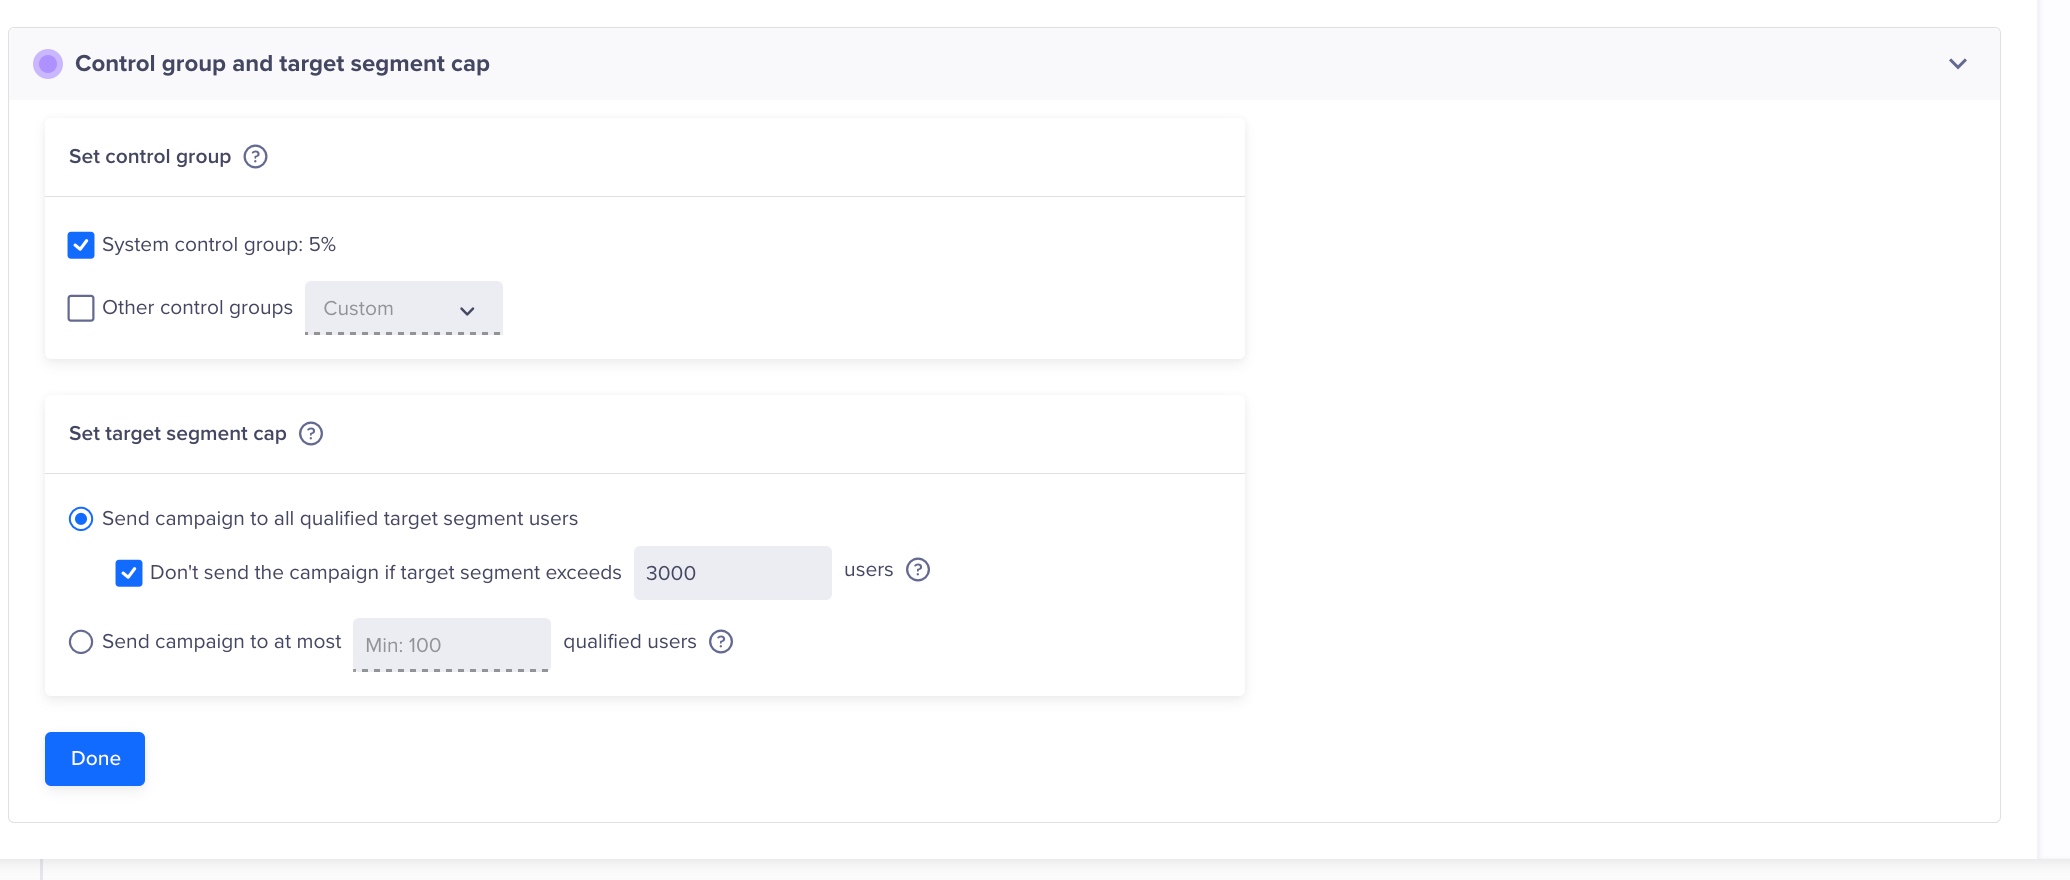
Control Group and Target Cap.
A relevant use case is distributing a limited-time offer to specific users. If your campaign's total reach exceeds the number of available coupon codes, you can limit the number of users who will receive the message.
What Section
The What section allows you to export an audience based on criteria defined in the Who section.
Export Audience
The What section enables you to export the audience based on the criteria you define for your target audience in the Who section.
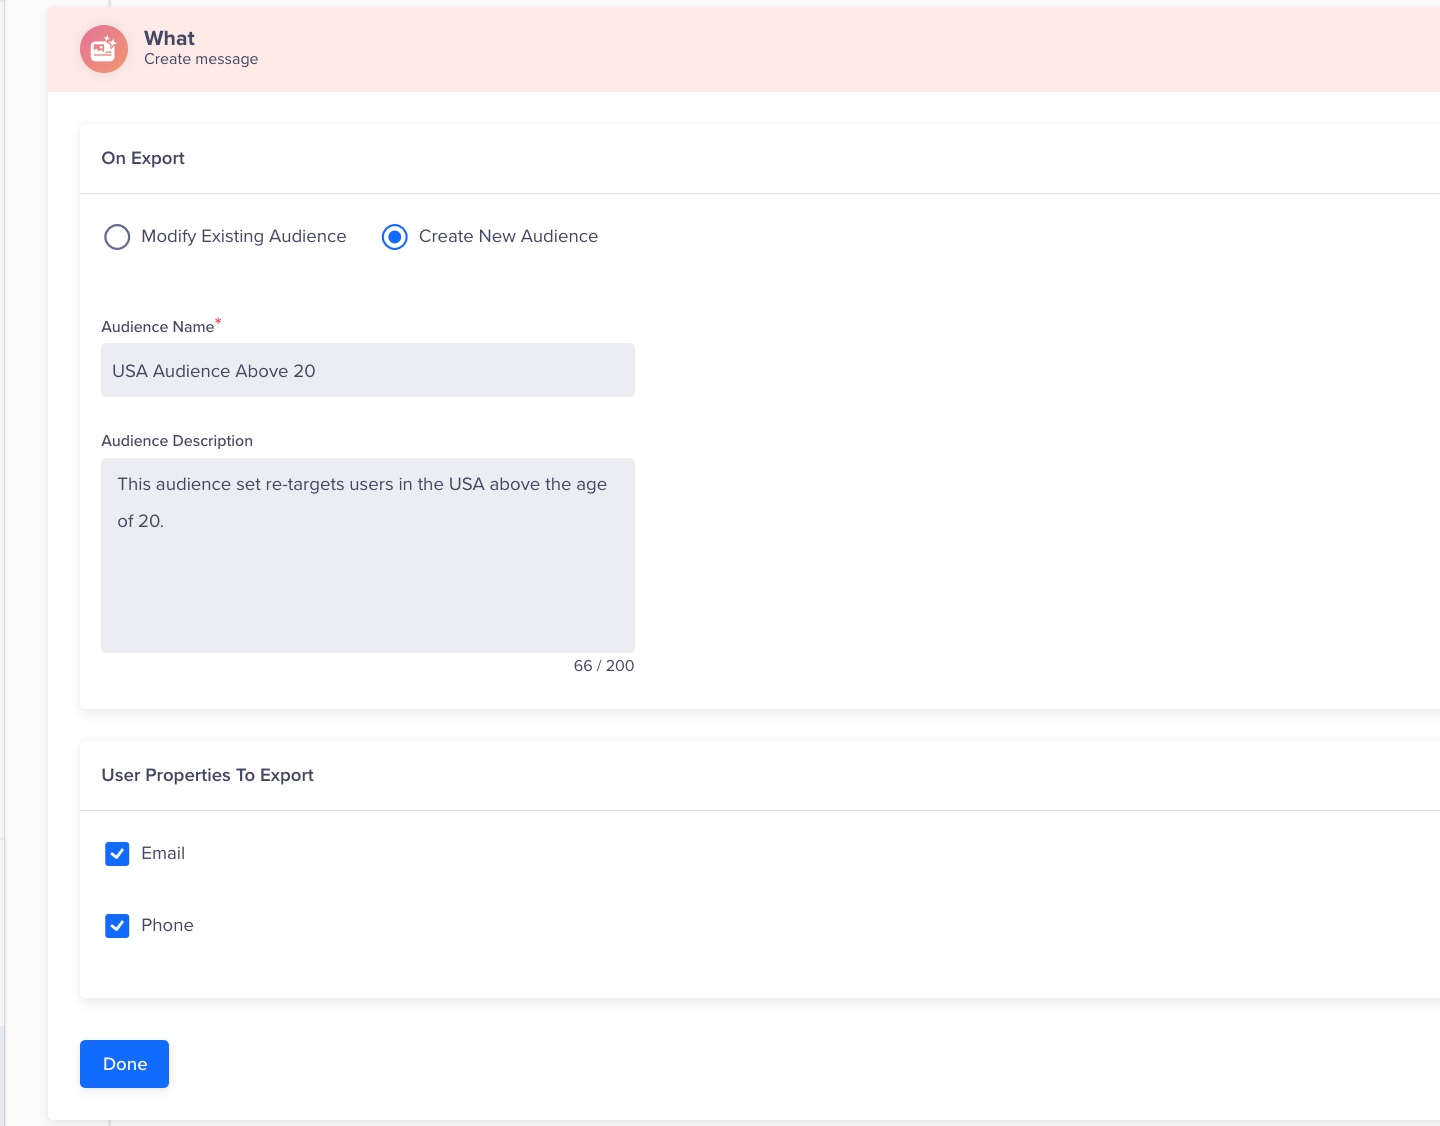
Here are two ways to define the export behavior:
- Modify Existing Audience - If an existing audience qualifies the criteria, select this option to add qualified users to that audience.
- Create New Audience - Choose this option to target a new audience based on the selected qualification criteria. If you are creating a new audience, define the following:
- Audience Name:
Enter a unique name for the audience you’re creating or updating. This name must be specific enough to quickly identify the audience later. - Audience Description:
Provide a brief description (up to 200 characters) of the audience, explaining the common characteristics or behaviors that define this group. This description helps maintain clarity when managing multiple audiences.
- Audience Name:
You can also select the user properties that you want to export for the target segment, such as (you can pick either one or both):
- Email: Target users based on their registered email addresses.
- Phone: Use phone numbers for targeting.
Define the Remarketing Campaign Schedule
Under the When section, you must define the timeframe for your campaign to start and end.
Past behavior campaigns can be scheduled to run:
- On a specific date and time.
- On multiple specified dates and times.
- Recurring at a periodicity you set.
Live campaigns can be set up on a specific event:
- In response to a user event.
- User event/inaction combination (for example, abandoned cart scenario).
You can set specific dates and times to control when your ads will be live. Depending on the campaign's goals, you can also set recurring schedules or specific time windows when the ads will be shown.
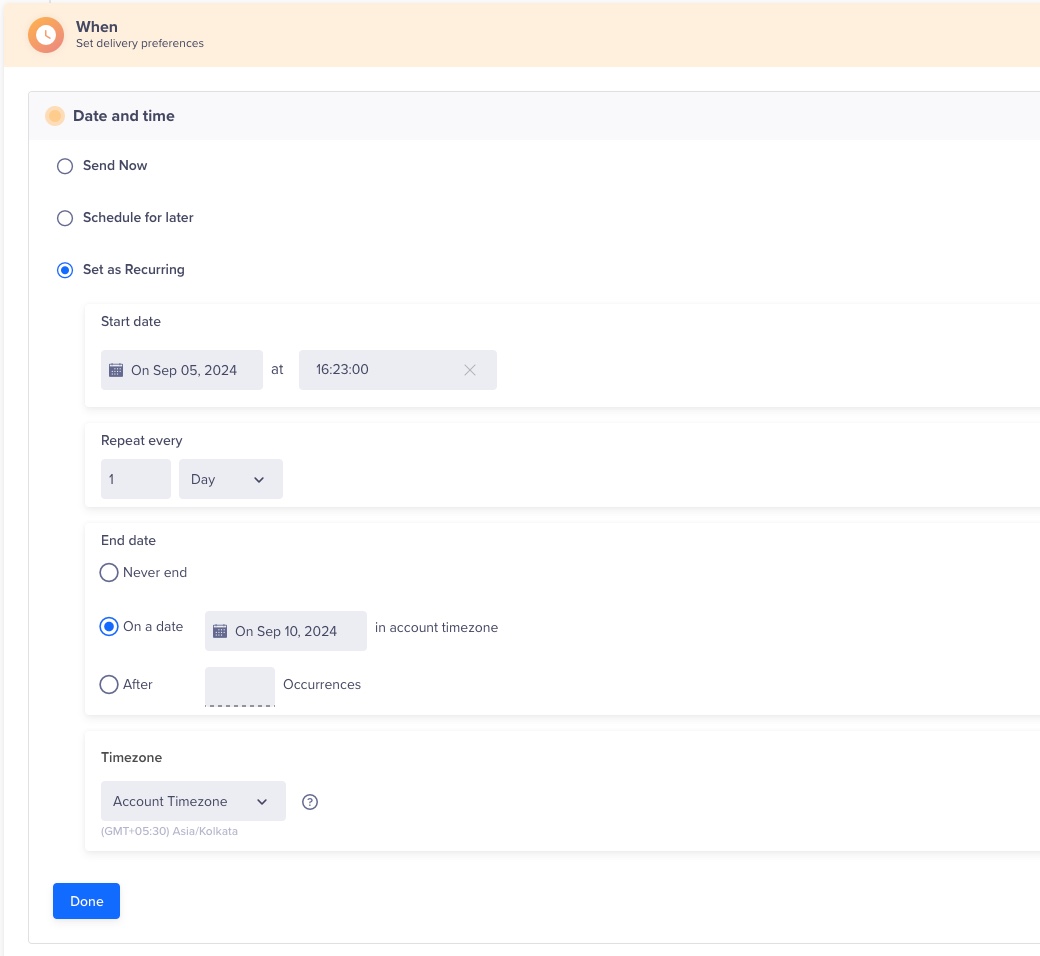
Define the Remarketing Schedule
Publish Campaign
After previewing the overall configuration of your remarketing campaign, finalize your campaign by clicking Publish Campaign.

Publish Campaign
Updated about 1 month ago
