Outgrow
Overview
Outgrow is an interactive content platform designed to create surveys, quizzes, calculators, and forms that drive engagement and generate qualified leads. With its no-code builder and customizable templates, Outgrow enables marketers to capture user data seamlessly across engagement channels.
Integrating Outgrow with CleverTap via Zapier allows you to:
- Automatically sync user responses from Outgrow into CleverTap.
- Create or update user profiles based on Outgrow submissions.
- Trigger CleverTap journeys, such as follow-up or thank-you campaigns, based on user actions.
- Enrich profiles by adding response attributes to CleverTap profiles for improved segmentation and personalization.
Prerequisites for Integration
The following are the prerequisites for this integration:
- Access to your Outgrow account
- Access to an active Zapier account
- A CleverTap account with a valid Account ID and Passcode
Integrate Outgrow with CleverTap Using Zapier
This integration connects Outgrow, Zapier, and CleverTap, ensuring that every user submission is automatically sent to CleverTap as profile updates or events. This enables real-time segmentation, automated campaigns, and personalized user engagement.
For example, you want to capture user details such as Name, Email, and Feedback through an Outgrow survey. The responses are then automatically sent to CleverTap via Zapier, enabling them to be used instantly for segmentation or campaign triggering.
The integration consists of the following four key steps:
- Create Passcode on CleverTap Dashboard
- Create Interactive Content in Outgrow
- Configure CleverTap Campaign
- Connect Outgrow and CleverTap via Zapier
Create Passcode on CleverTap Dashboard
CleverTap uses a header-based authentication model to authenticate API requests. Every CleverTap API call must include Account ID and Passcode as request headers. To create a passcode, refer to Create Account Passcode.
Create Interactive Content in Outgrow
You can capture user details such as Name, Email, and Feedback through an Outgrow survey embedded in a CleverTap campaign. To do so, perform the following steps:
- Log in to your Outgrow dashboard and create the content type you want (such as a survey, quiz, or poll). For more information on creating interactive content in Outgrow, refer to Introduction to The Outgrow Builder.
- Once the content is ready, select the CONFIGURE tab.
- Select Launch in an Email and click Copy to copy the HTML Snippet**.
Copy HTML Snippet
The snippet can be used to embed your Outgrow content in a CleverTap campaign.
Configure CleverTap Campaign
Configure a CleverTap campaign to display your survey form inside the CleverTap campaign so users can respond directly without leaving the app or email. To do so, perform the following steps:
- In the CleverTap dashboard, create a new Email or In-App Message campaign that supports HTML.
- In the What section, select Email with rich media template and click Source.
Custom HTML Template in CleverTap
-
Replace the existing code with the HTML snippet copied from Step 3 of Create Interactive Content in Outgrow.
-
Add dynamic personalization using Liquid tags to insert CleverTap profile attributes such as name and email.
The following example shows how to populate query parameters using Liquid tags for CleverTap profile attributes:
<iframe width="100%" height="900px" src="<outgrow_link>?name={{ Profile.name | default: \"User\" }}&email={{ Profile.Email | default: \"[email protected]\" }}"></iframe>- Click Preview and Test to verify that the content renders correctly.
- After verifying, publish the campaign only after configuring the Zap as Create/Update User Profiles or Upload Event.
Connect Outgrow and CleverTap via Zapier
Zapier acts as a bridge between Outgrow and CleverTap. When a user submits a response, Zapier captures it and sends the data to CleverTap in real time. You can either update user profiles or log submissions as events.
The integration supports the following two use cases:
Create/Update User Profiles
Use this option to update user profiles in CleverTap with Outgrow responses for personalization and segmentation. To do so, perform the following steps:
- Log in to the Zapier dashboard and click + Create Zap. Zapier can connect various applications, including Outgrow.
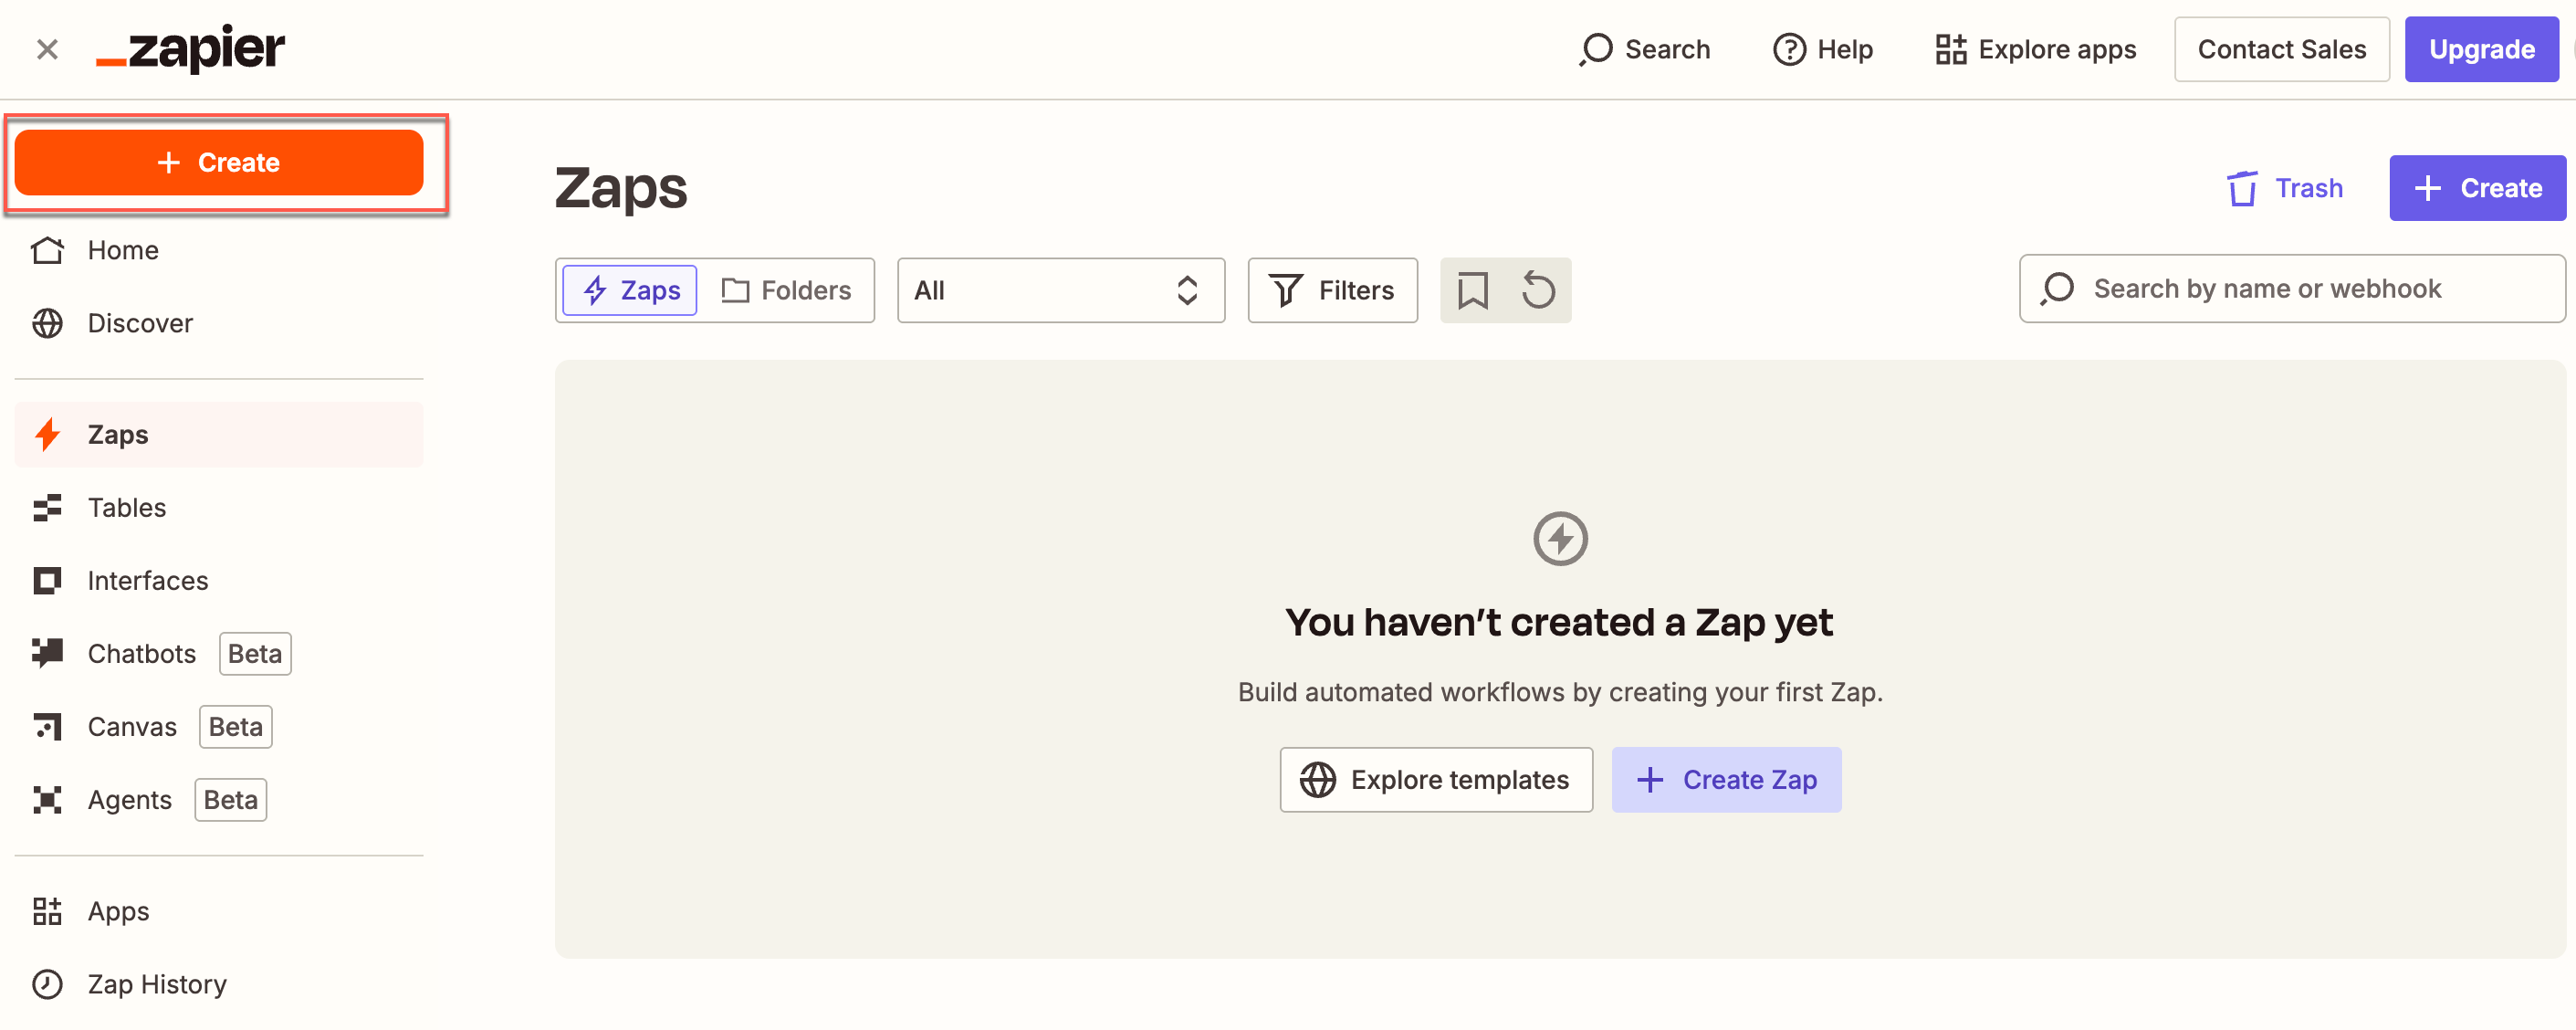
Create a Zap on Zapier Dashboard
- Set up a Trigger in Zapier to start the workflow when a user submits a response in Outgrow. To do so, perform the following steps:
- Select Outgrow from the App section. This starts the Zap when a trigger event occurs on Outgrow.
- Select Trigger Event from the dropdown list, then select the appropriate event for this use case. (@amrita: the example is inconsistent)
- Select Account and sign in using your Outgrow account credentials.
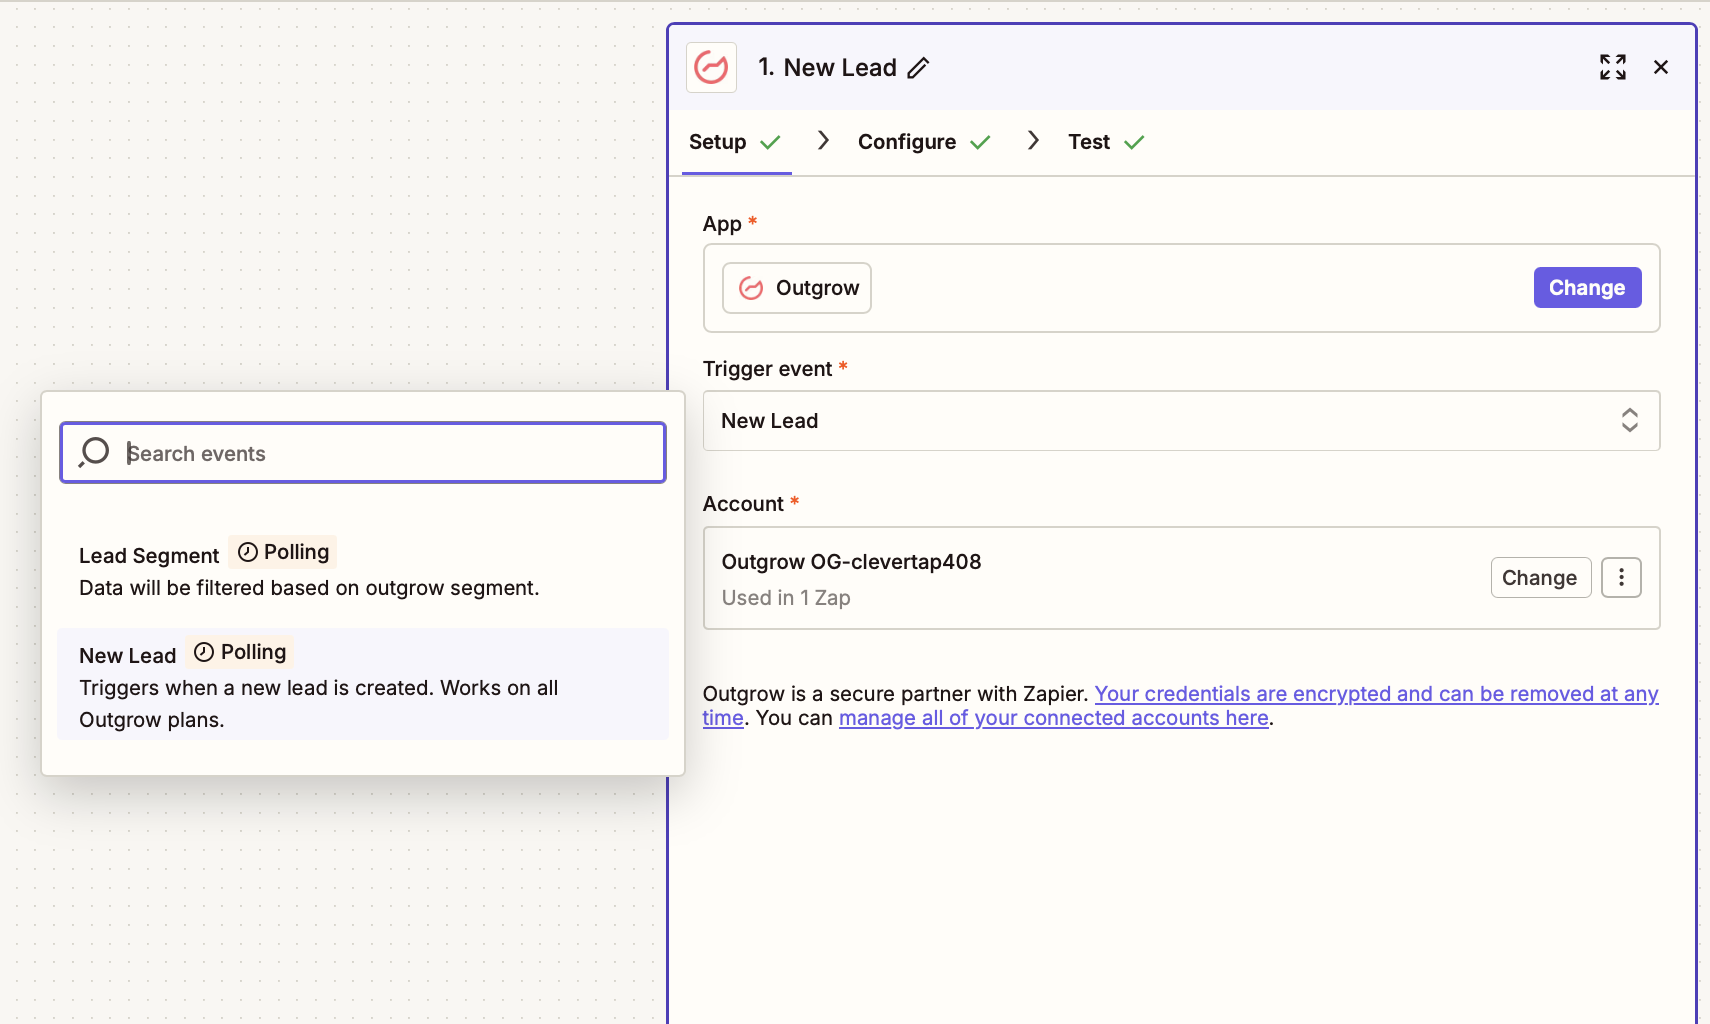
Set Up Trigger Event
- Click Test Trigger. This ensures that the correct account is connected and the trigger is set up correctly.
After testing the trigger, you will see a sample of the most recent responses to the form.

Details of Pulled Records
- Click Continue with selected record.
- Select the Action that the zap must perform after the trigger event occurs. To do so, perform the following steps:
- Select CleverTap from the App dropdown.
- Select Create/Update User Profile from the Action event dropdown. This implies that whenever a new response is generated, a new user profile is created, or an existing user profile is updated with the new information.
- Select Account to connect the CleverTap account. The Zapier window opens. Enter all the required details to connect to the CleverTap account. Enter the same passcode you obtained during the Create a Passcode on CleverTap Dashboard step.
- Click Continue after successfully connecting your account.
Select the Action for Zap
- Configure the Action. Map Outgrow data fields to CleverTap fields as follows:
| CleverTap Field | Outgrow Field |
|---|---|
| Identity | Outgrow user ID field, the email ID, or any Unique identity field corresponding to the user. |
| Object ID | Unique identifier for the user. |
| Creation Date | Date of the user’s creation in Outgrow. |
| Profile Properties | Responses in JSON format (for example: {"name": "Alex", "email": "[email protected]", "interests": "Webinars"}) |
Mapping Identity and Object IDYou can keep the Identity field blank if you provide an Object ID, and vice versa.
- Click Continue, and click Test Step to test the Zap after mapping the fields.
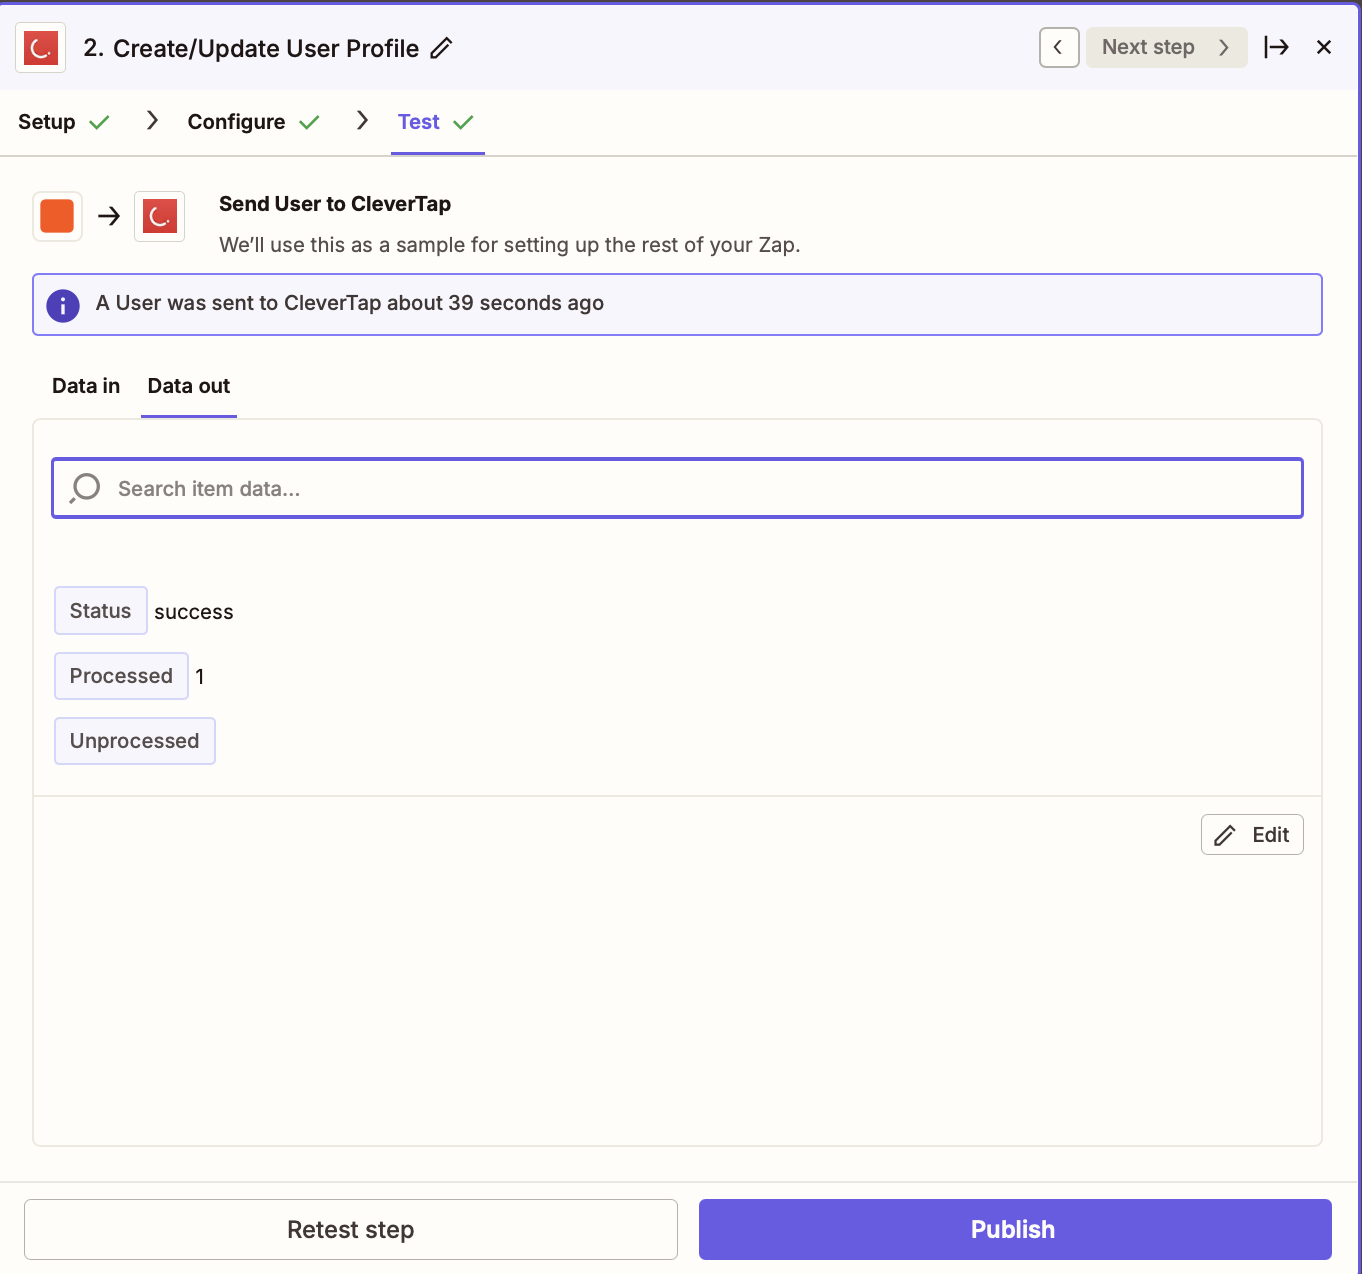
Test Zap
- Click Publish. Also, publish the campaign you have created in Configure CleverTap Campaign. After this, users will receive the survey you have created, and the responses will be reflected in your CleverTap dashboard. If the user doesn’t exist, a new user will be created.

Verify on the CleverTap dashboard
Upload Event
Consider an example where you want to track form submissions as events in CleverTap instead of updating user profiles. This automation ensures that every submission is logged for analytics and segmentation.
-
Follow Step 1 to Step 4 from Create/Update User Profiles to configure Outgrow as the trigger.
-
Select the Action that the zap must perform after the trigger event occurs. To do so, perform the following steps:
- Select CleverTap from the App dropdown.
- Select Upload Event from the Action event dropdown.
- Select Account to connect the CleverTap account. The Zapier window opens. Enter all the required details to connect to the CleverTap account. Enter the same passcode you obtained during the Create a Passcode on CleverTap Dashboard step.
- Click Continue after successfully connecting your account.
Select the Action for Zap
- Configure the Action. Map Outgrow data fields to CleverTap fields as follows:
| CleverTap Field | Outgrow Field |
|---|---|
| User ID | Outgrow user ID field or email |
| Object ID | Unique identifier for the user. |
| Creation Date | Date of the user’s creation in Outgrow. |
| Event Name | Select a descriptive event name (for example: "Form Submitted" or "Webinar Registered") |
| Event Properties | Responses in JSON format (for example: {"name": "Alex", "email": "[email protected]", "topic": "AI Trends 2025"}) |
Mapping Identity and Object IDYou can keep the Identity field blank if you provide an Object ID, and vice versa.
- Click Continue and click Test Step to test the Zap after mapping the fields.
- Click Publish. Also, publish the campaign you have created in Configure CleverTap Campaign. Each submission will now be logged as an event in CleverTap.
FAQs
Can I use both profile updates and events together?
Yes. You can set up multiple Zaps: one to update user profiles and another to upload events. This way, you can both enrich CleverTap profiles with attributes and log submissions for analytics and campaign triggers.