Create Import
Learn how to import data from Data warehouses into CleverTap to enable personalized targeting and optimized campaigns.
Overview
Once your CleverTap data warehouse integration is in place, you can seamlessly import data from the data warehouses into CleverTap. To get started, set up your import by specifying your data source and query type, then validate your setup.
This document guides you through setting up a new import, including creating queries and validating data, to ensure smooth, accurate data ingestion.
Create Import
To begin importing to CleverTap, perform the following steps:
- Go to Settings > Partners > Import center and click Create Import.
- Select a data warehouse from the Create Import popup.
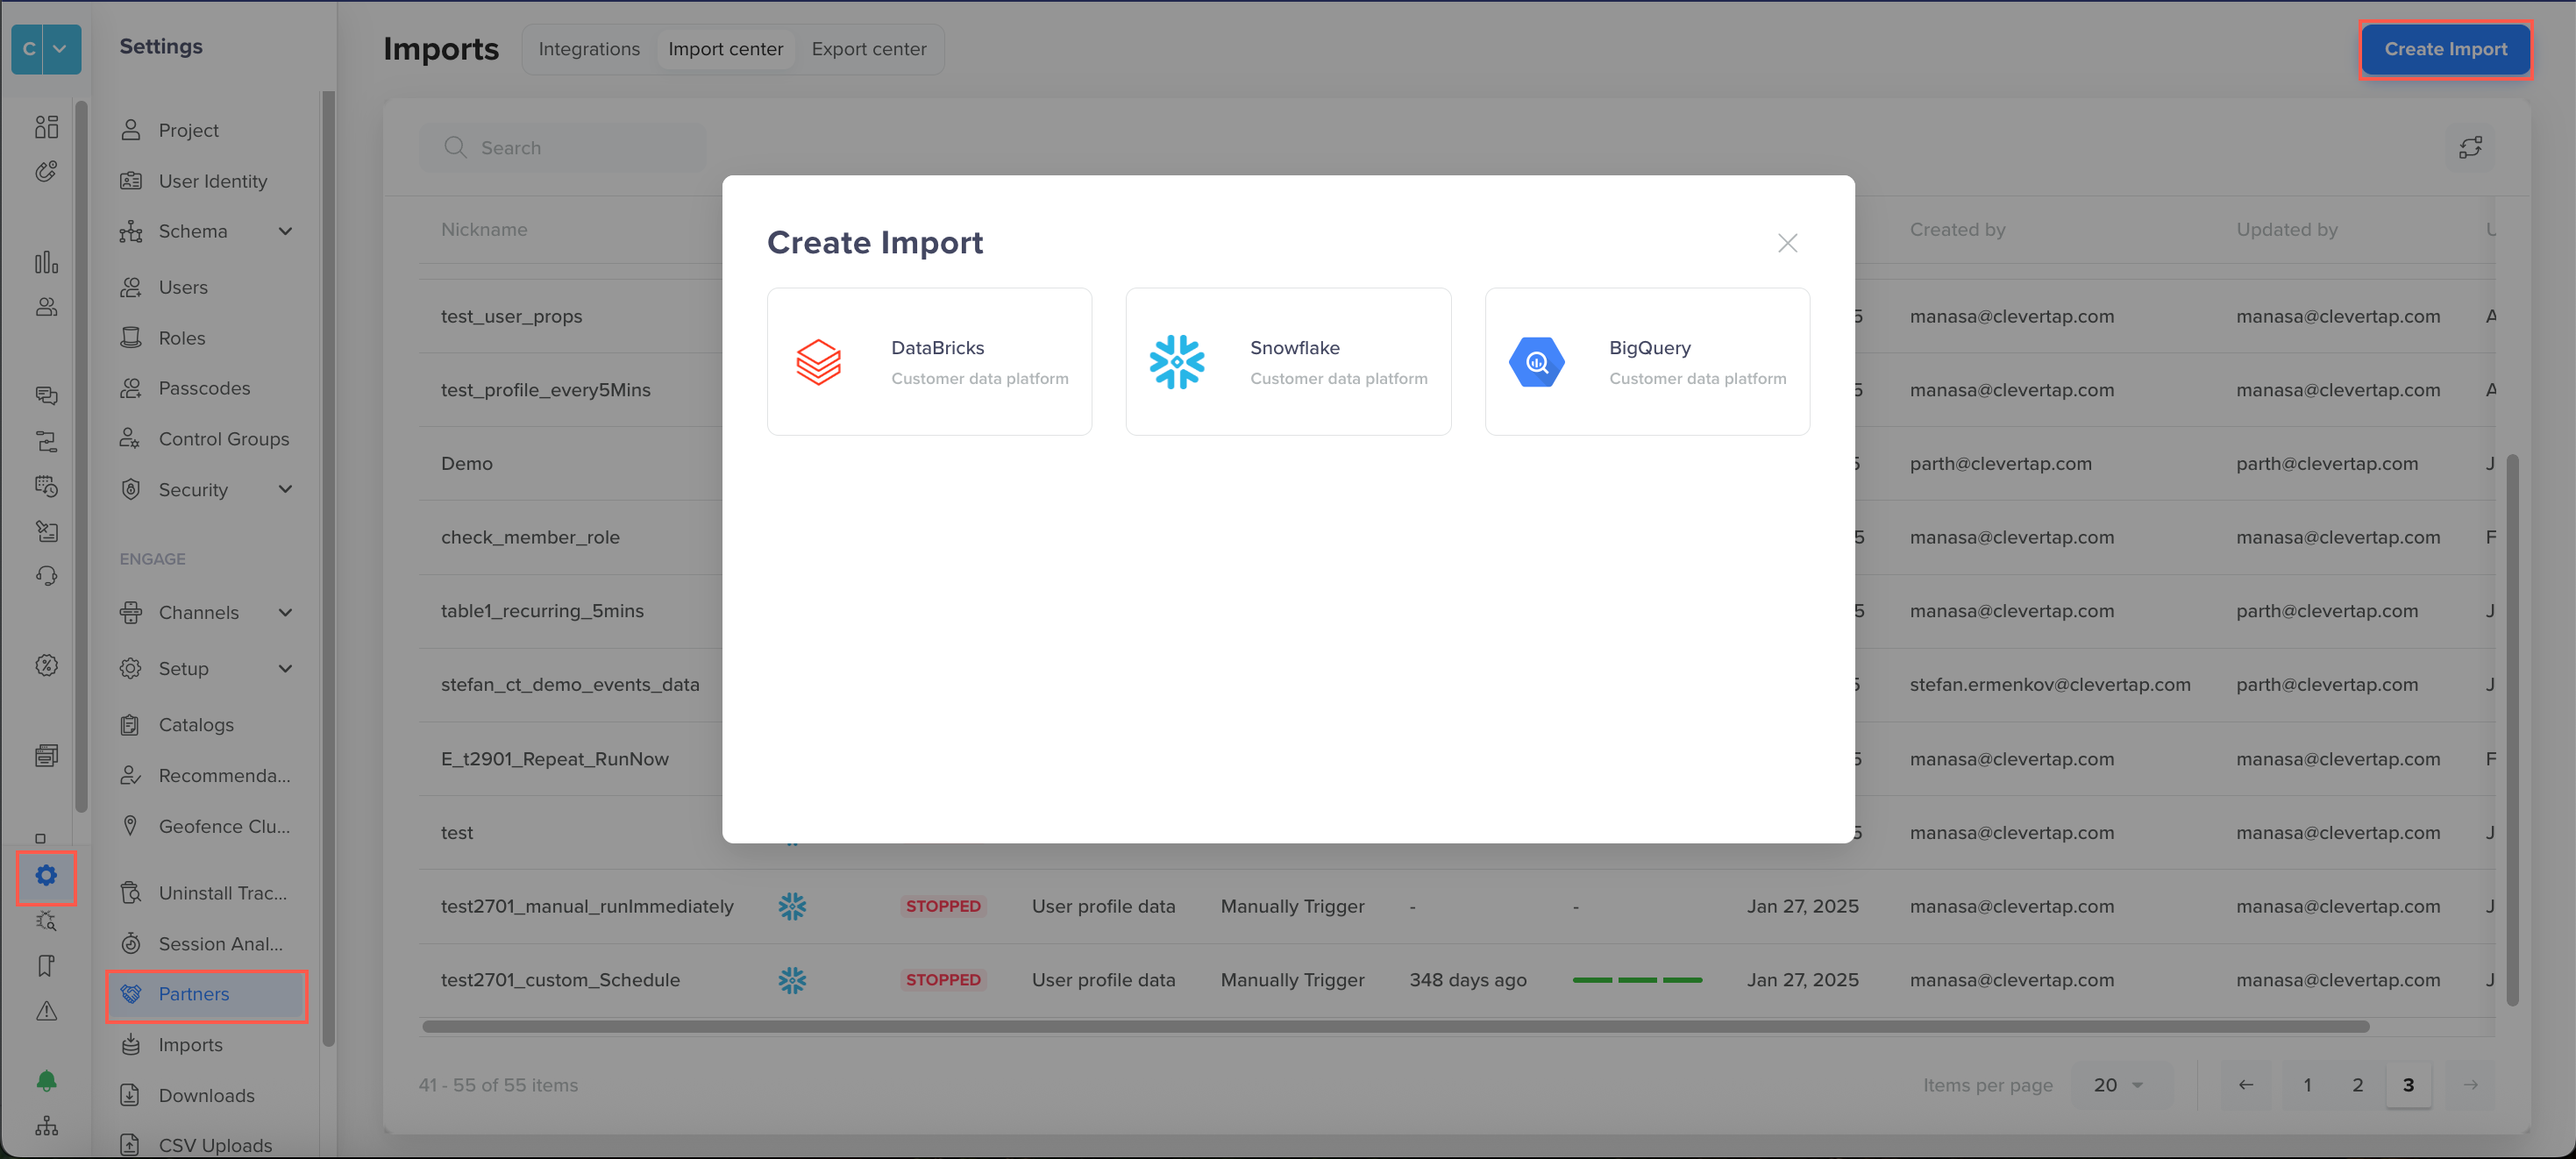
Create Import
- Under Configure Import, add the following details:
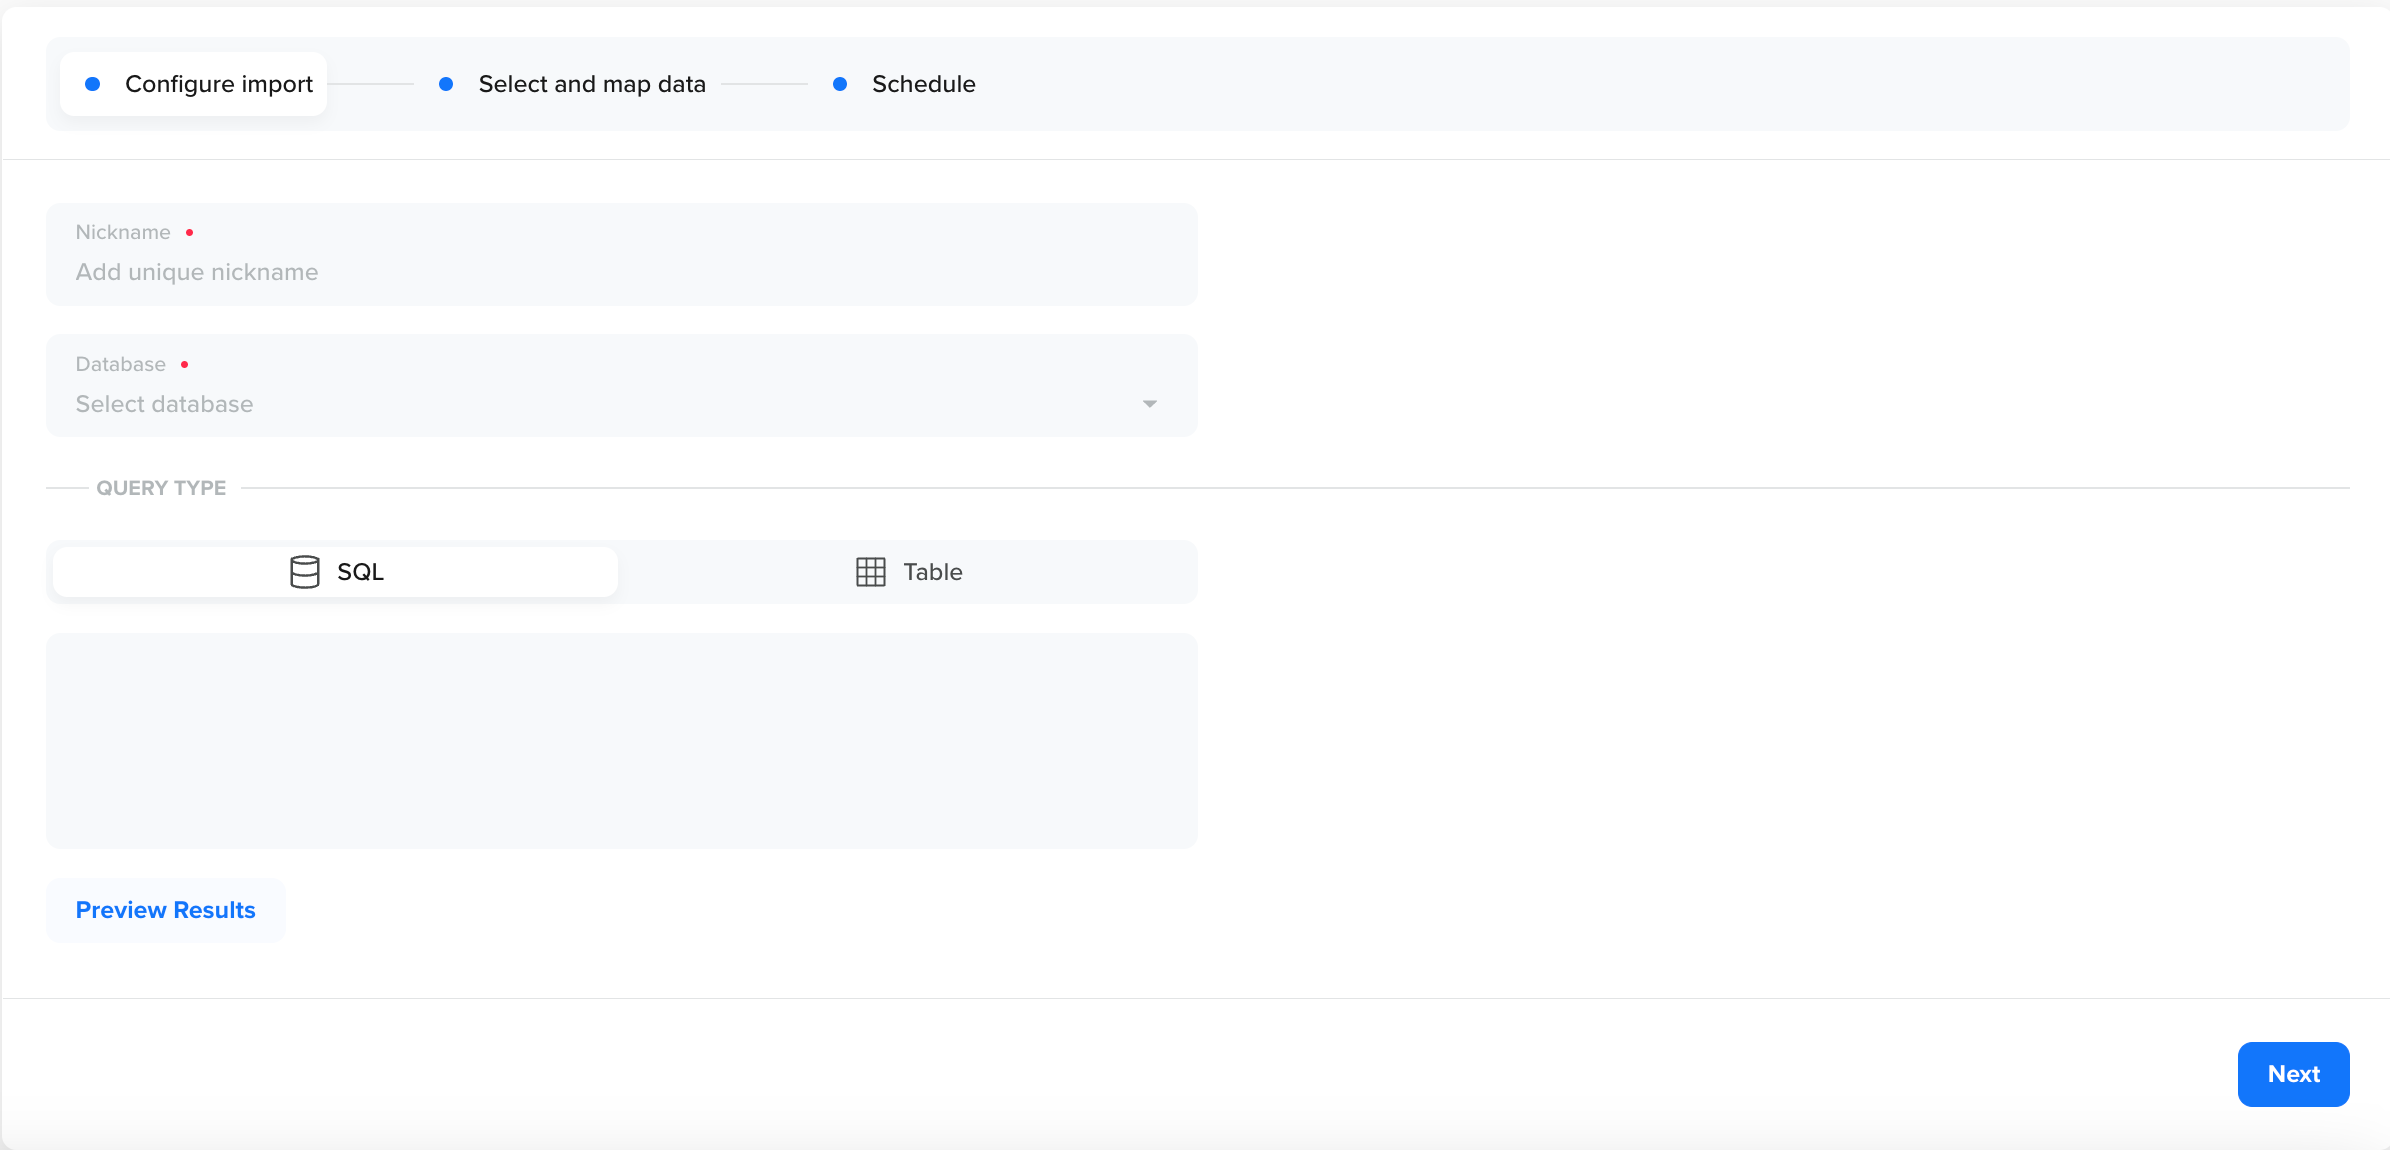
Configure Import
| Field | Description |
|---|---|
| Nickname | A unique name to identify the import configuration in CleverTap. Choose a name that reflects the purpose of the import (for example, "User Data Import"). |
| Database | Select a database from the dropdown. Ensure the database has been integrated with CleverTap. For more information, refer to Database Details. |
| Query Type | Specifies how data is selected from the data warehouses for import into CleverTap. Available options are as follows: |
| Preview Results | Fetches a preview of query results to validate data accuracy before saving the configuration. When you select Preview Results, the provided SQL query or table selection is executed on the database of the selected data warehouse, and a limited number of rows are fetched to minimize processing time. The retrieved data is displayed, allowing you to validate the query or table selection. If there are any issues, such as syntax errors or access problems, they are highlighted to help with troubleshooting. |
Preview ResultsPreviewing results is solely for validation purposes and does not import any data into CleverTap.
Once you validate your data using Preview Results, click Next to proceed to the mapping step. In this step, map event data or user profile data from your database to ensure accurate data, and transform the data type before pushing it to CleverTap. For detailed instructions, refer to Map Data and Identity.
Updated 3 months ago