Create Predictions
Overview
This document provides a comprehensive guide to creating predictions within CleverTap. By following these instructions, users can set up predictions tailored to their business needs and enhance engagement strategies through data-driven insights.
Start a System Prediction
Starting a system prediction in CleverTap is a quick and straightforward process. Follow the steps below to activate a prediction within a minute:
- Navigate to Predictions from the CleverTap dashboard. The Predictions page opens.
- From the list of available system predictions, hover over the prediction you want to start.
- Click the
 icon displayed against the prediction name and click Start.
 - Click Next > Next > Setup to start the prediction.
The following example shows how to start the Conversions system prediction:
Activating the Uninstalls System Prediction
Once started, the system begins processing user data to generate prediction results. This may take some time, and the prediction activates once processing is complete.
Create a Custom Prediction
The following are the key steps for creating any prediction:
- Go to the Predictions section from the CleverTap dashboard.
- Click Create Prediction. The Create Custom Prediction pop-up opens.
- Add Basic Details and click Next.
- Set a Goal and click Next.
- Click Add Rule to define the target audience.
- Click Create.
Add Basic Details
The first step in creating a prediction is to provide key identifying information that will help you organize and manage your predictions efficiently. This information includes:
- Prediction Name: The name you assign to your prediction. Choose a clear, descriptive name for your prediction that allows you and your team to easily understand its purpose. This name is going to appear as a custom User Property to indicate each user's Prediction Likelihood.
- Description: A brief summary of the prediction's purpose and goals. The description offers additional context, outlining the prediction's objectives and highlighting any specific details that differentiate it from others. This is particularly useful when you have multiple predictions with similar goals but slight variations in filters or criteria.
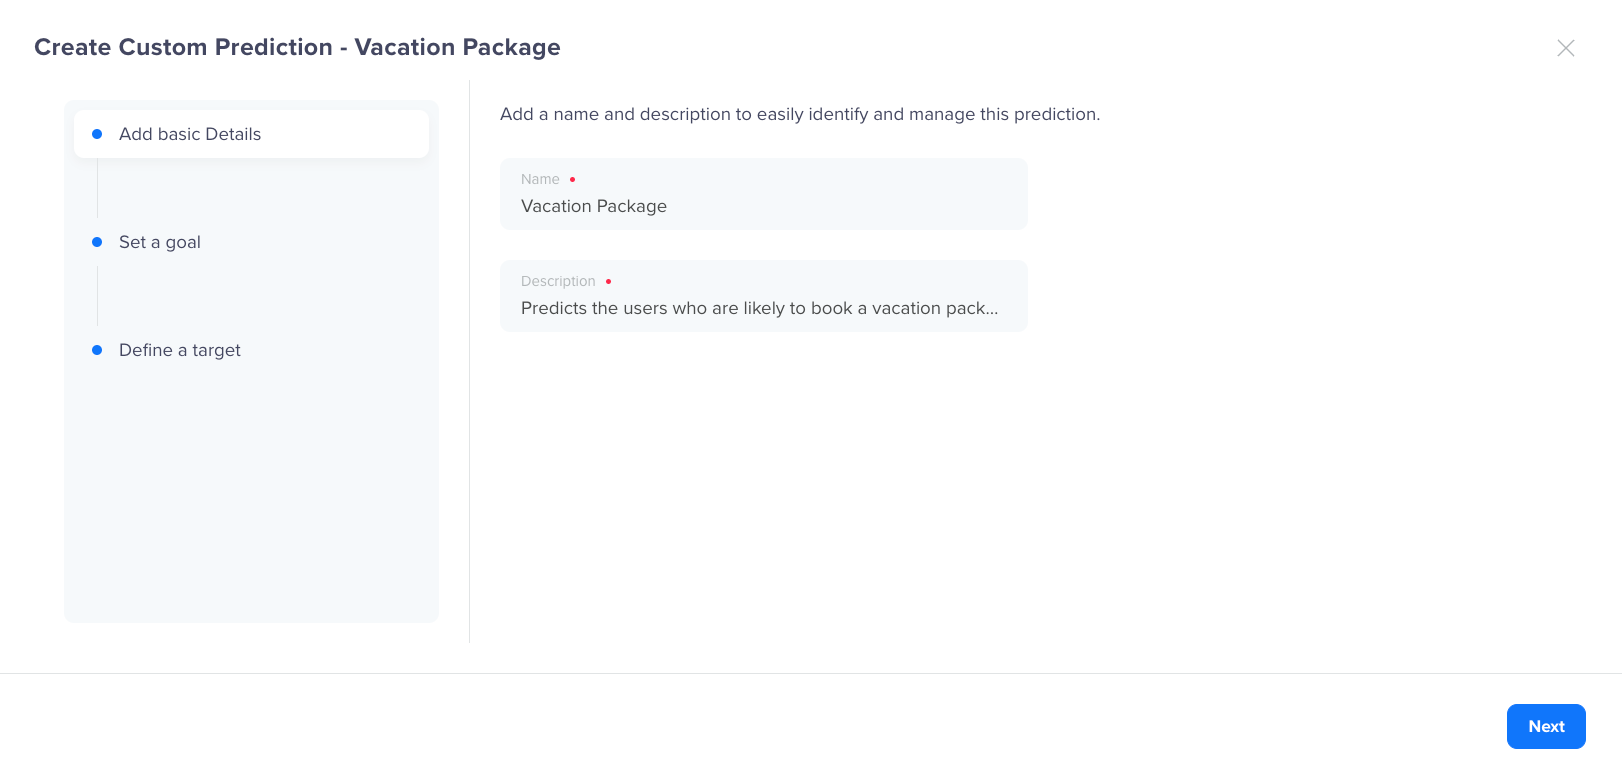
Add Basic Details
Set a Goal
Setting up a goal is a crucial step in the prediction process as it defines the specific outcome you want to anticipate. This involves the following two key components:
- Select Goal Event: The goal event is the specific user action that your prediction aims to anticipate. This action might include completing a purchase, signing up for a service, or reaching a milestone. By defining the goal event, you direct the prediction model to estimate the likelihood of users performing this action within the set timeframe. For example, in a travel booking app, a goal event might be Booked a Vacation Package, which tracks users who finalize their purchase of a vacation package. You can add up to three goal events for a Prediction.
- Enter Prediction Period: The prediction period specifies the time frame during which you expect the goal event to occur. This period provides context for your prediction, enabling you to plan and implement timely strategies. For instance, if the prediction period is set to 30 days, the model will project which users are likely to book a vacation package within the next 30 days. This helps you tailor your marketing efforts, such as offering targeted promotions or sending reminders, to drive user engagement during this period.
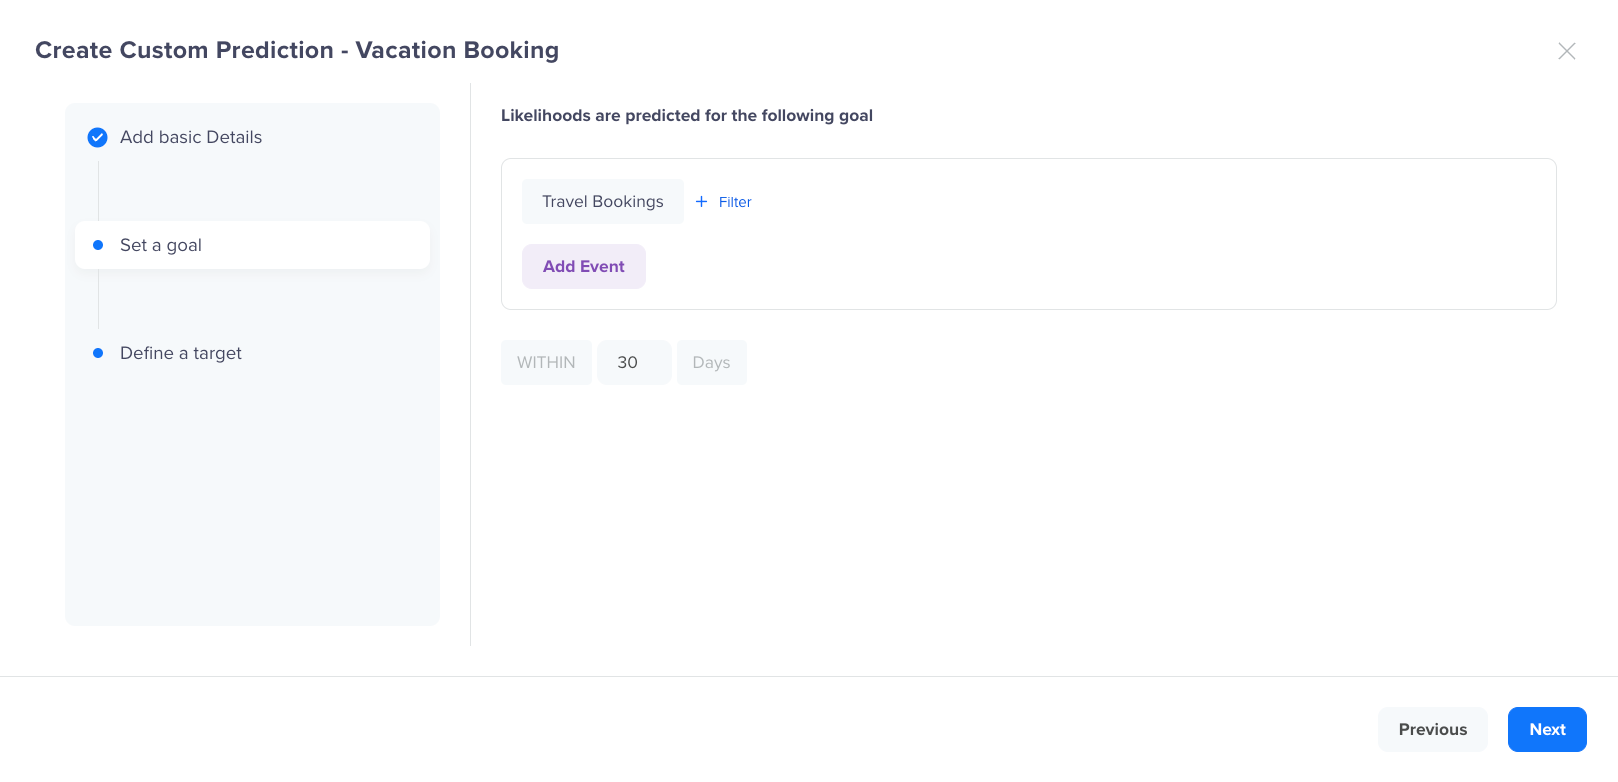
Set a Goal
Define a Target
The target segment determines which users the prediction model should analyze and for whom you want to set the Likelihood. This segment can be based on User Property, Behavior, or Interest. You can further define the target segment using filters such as their activity or purchase history to narrow down the audience. For example, you can target a segment of users who have viewed products but have not made a purchase in the last 30 days.

Define a Target
By selecting this target group, you ensure the prediction focuses on users who have shown interest but have not completed a purchase, predicting their likelihood of buying soon.
After creating a prediction, you will find it on the Predictions page. The system may take up to 24 hours to process user data and deliver actionable insights.
Active Prediction LimitYou can have a maximum of five active predictions at a time, including both System and Custom Predictions.
Operations
You can perform a range of actions for your predictions directly from the Predictions page. Each of them is explained as follows:
Search Prediction
You can search predictions by their Name from the Predictions page.

Search Predictions
Filter Predictions
You can filter out predictions based on the following fields by clicking Filters from the extreme right corner:
- Prediction Type: Indicates the type of prediction i.e. System or Custom.
- Created By: Indicates the name of the user who created the prediction.
- Prediction Status: Indicates the status of the predictions i.e. Available, Processing, Active, Stopped.
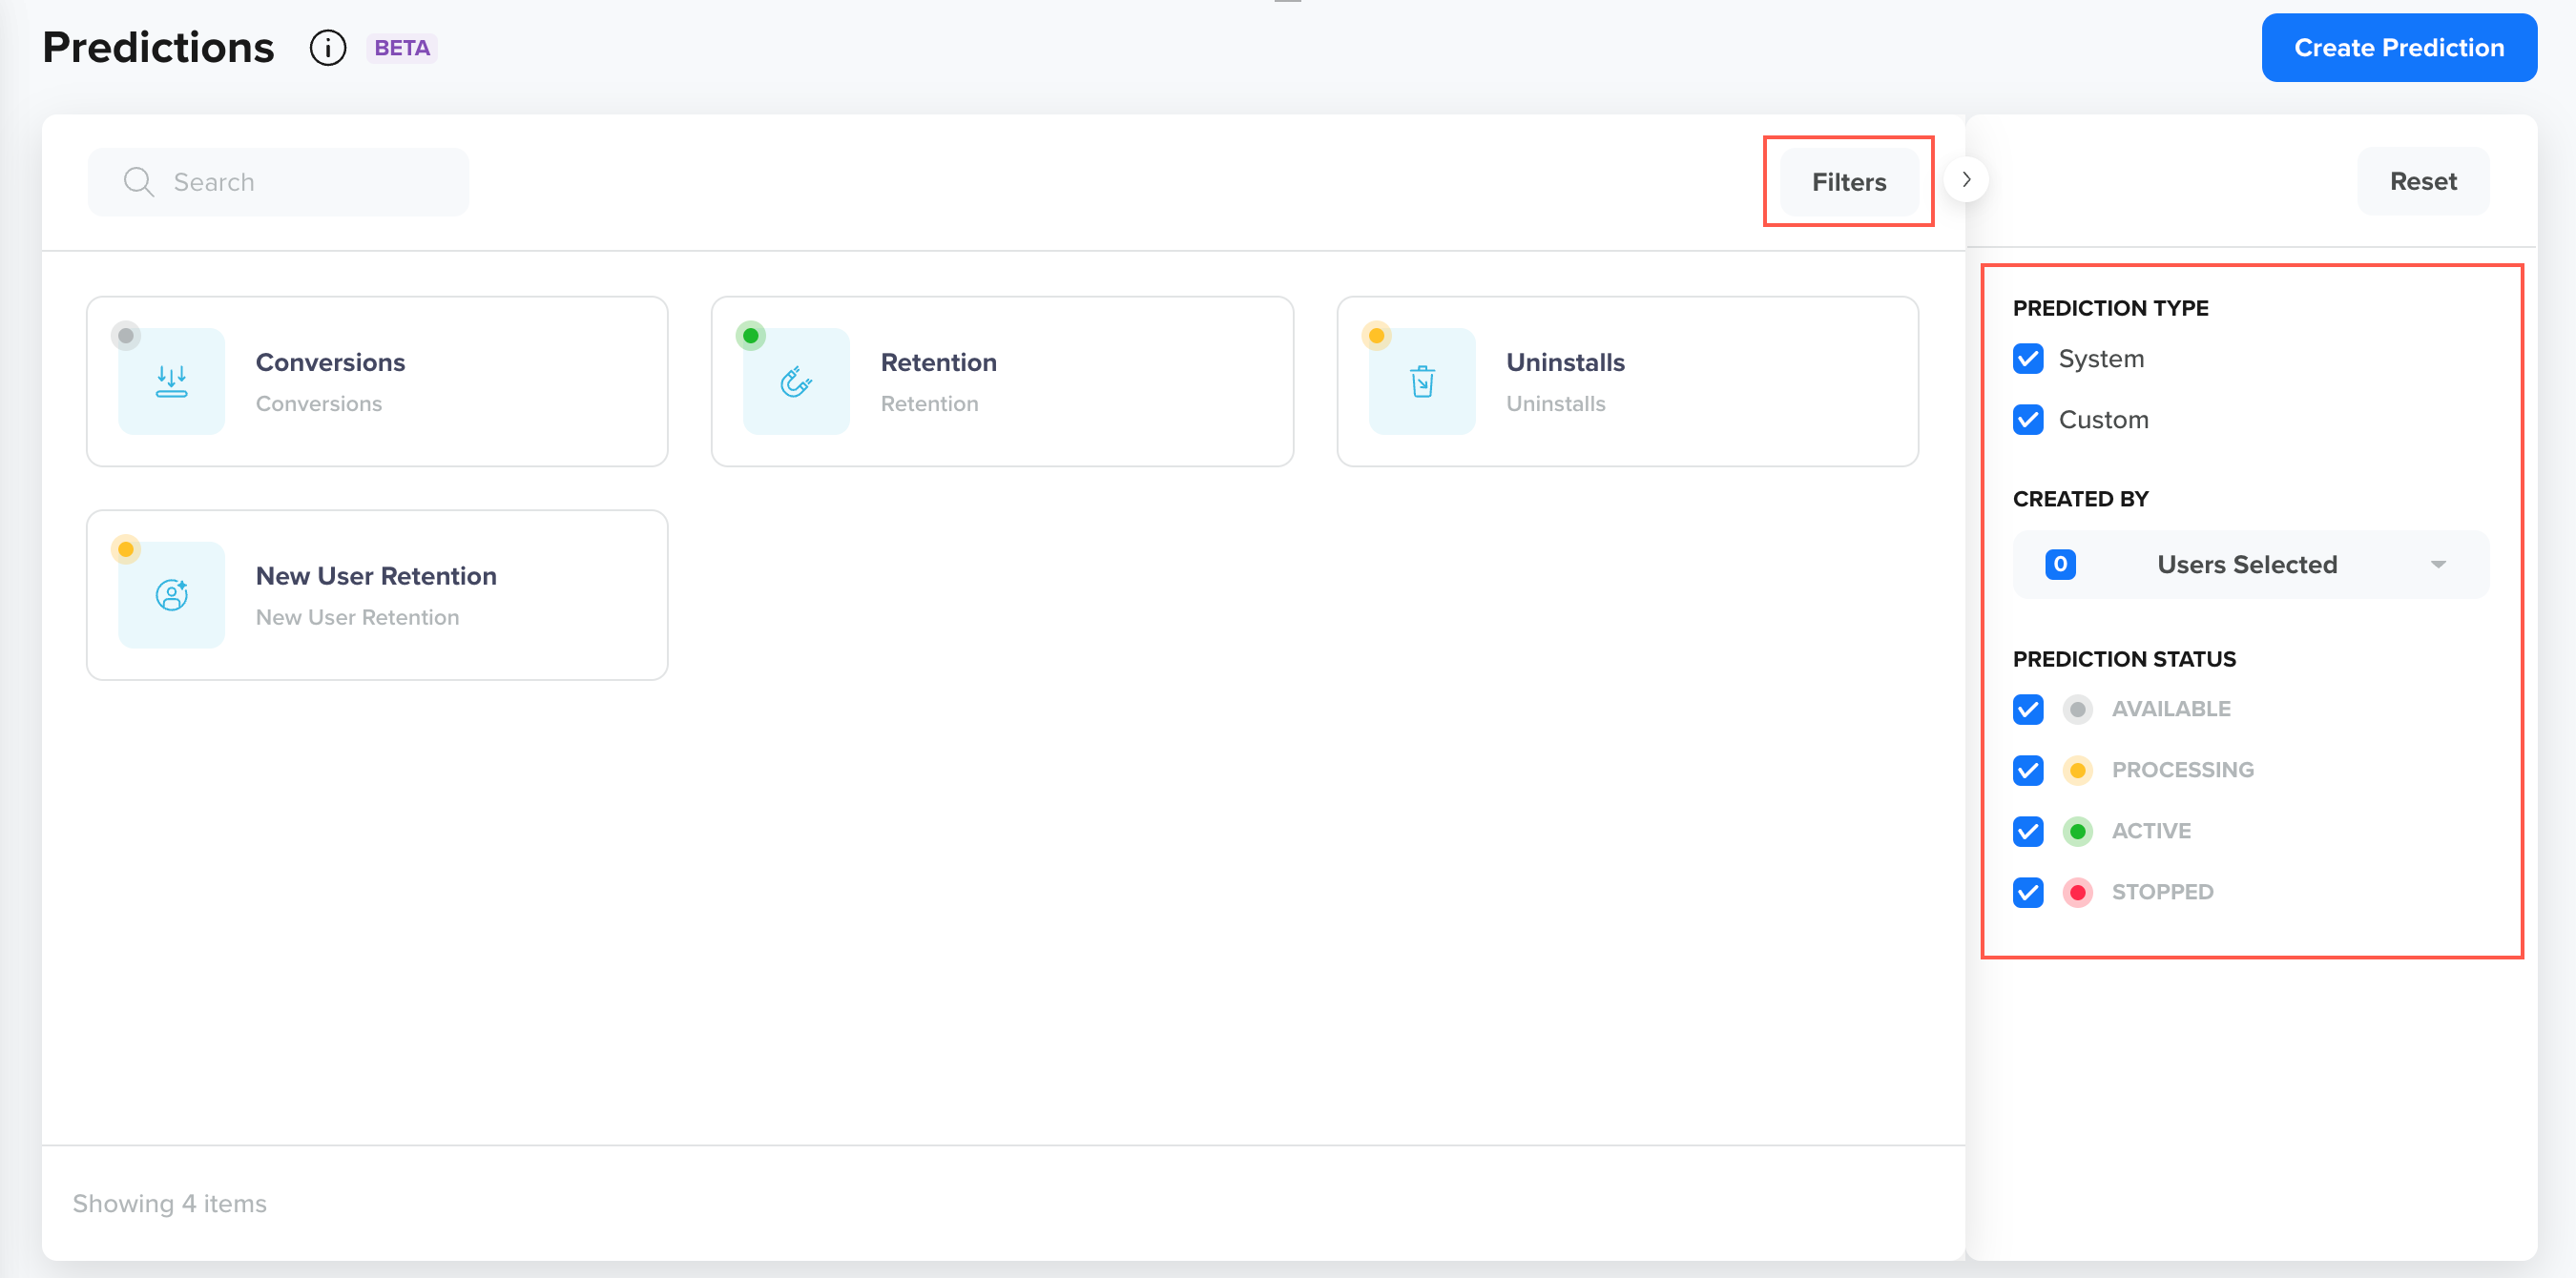
Filter Predictions
Edit or Clone Prediction
This operation helps to edit or clone an already existing prediction. To edit or clone a prediction directly from the Predictions page:
- Click the icon displayed against the prediction name and click Edit or Clone. The Edit or Clone Custom Prediction popup opens.
- Make the necessary edits and click Edit or Clone.
Edit/Clone Custom Predictions
Editing System PredictionsCleverTap has specific limitations when editing System Predictions. You can not modify certain key details such as the Target Segment, Name, or Description for most system predictions. However, other options may vary by prediction type. Below are the editable and fixed fields for each system prediction:
- Conversion: You can modify the Goal and Prediction Period.
- Retention: Only the Target Segment can be edited.
- Uninstalls: Only the Target Segment can be edited.
- New User Retention: No fields can be edited for this prediction.