Amazon EventBridge
Overview
CleverTap now enables you to send events to the Amazon EventBridge ecosystem. Events can flow from CleverTap via Amazon EventBridge to various other services such as AWS Lambda, Amazon SNS, Amazon SQS, Redshift, Firehose and Amazon Kinesis streams.
Once integrated with Amazon EventBridge, you can send the CleverTap events into any service in your AWS account.
Pre-requisites
- On AWS
- AWS account ID
- AWS region to be associated to
- On CleverTap
- AWS Account credentials
- Data stream setup
Integrate EventBridge with CleverTap
This process involves the following three steps:
- Find Amazon EventBridge Event Source Details.
- Configure CleverTap Event Source.
- Associate Event Source with Designated Event Bus in AWS Console.
Find Amazon EventBridge Event Source Details
To find the event source details:
- Navigate to Amazon EventBridge Partners from the Amazon EventBridge dashboard.
- Click Set up under the CleverTap partner listing. The Set up event source page opens.
- Click Copy to copy your AWS account number to your clipboard and save it. You will require these details for configuring the CleverTap dashboard.
Configure CleverTap Event Source
To configure CleverTap Event Source:
- Log in to your CleverTap account and navigate to the Settings > Partners page. Select Amazon Eventbridge from the list.
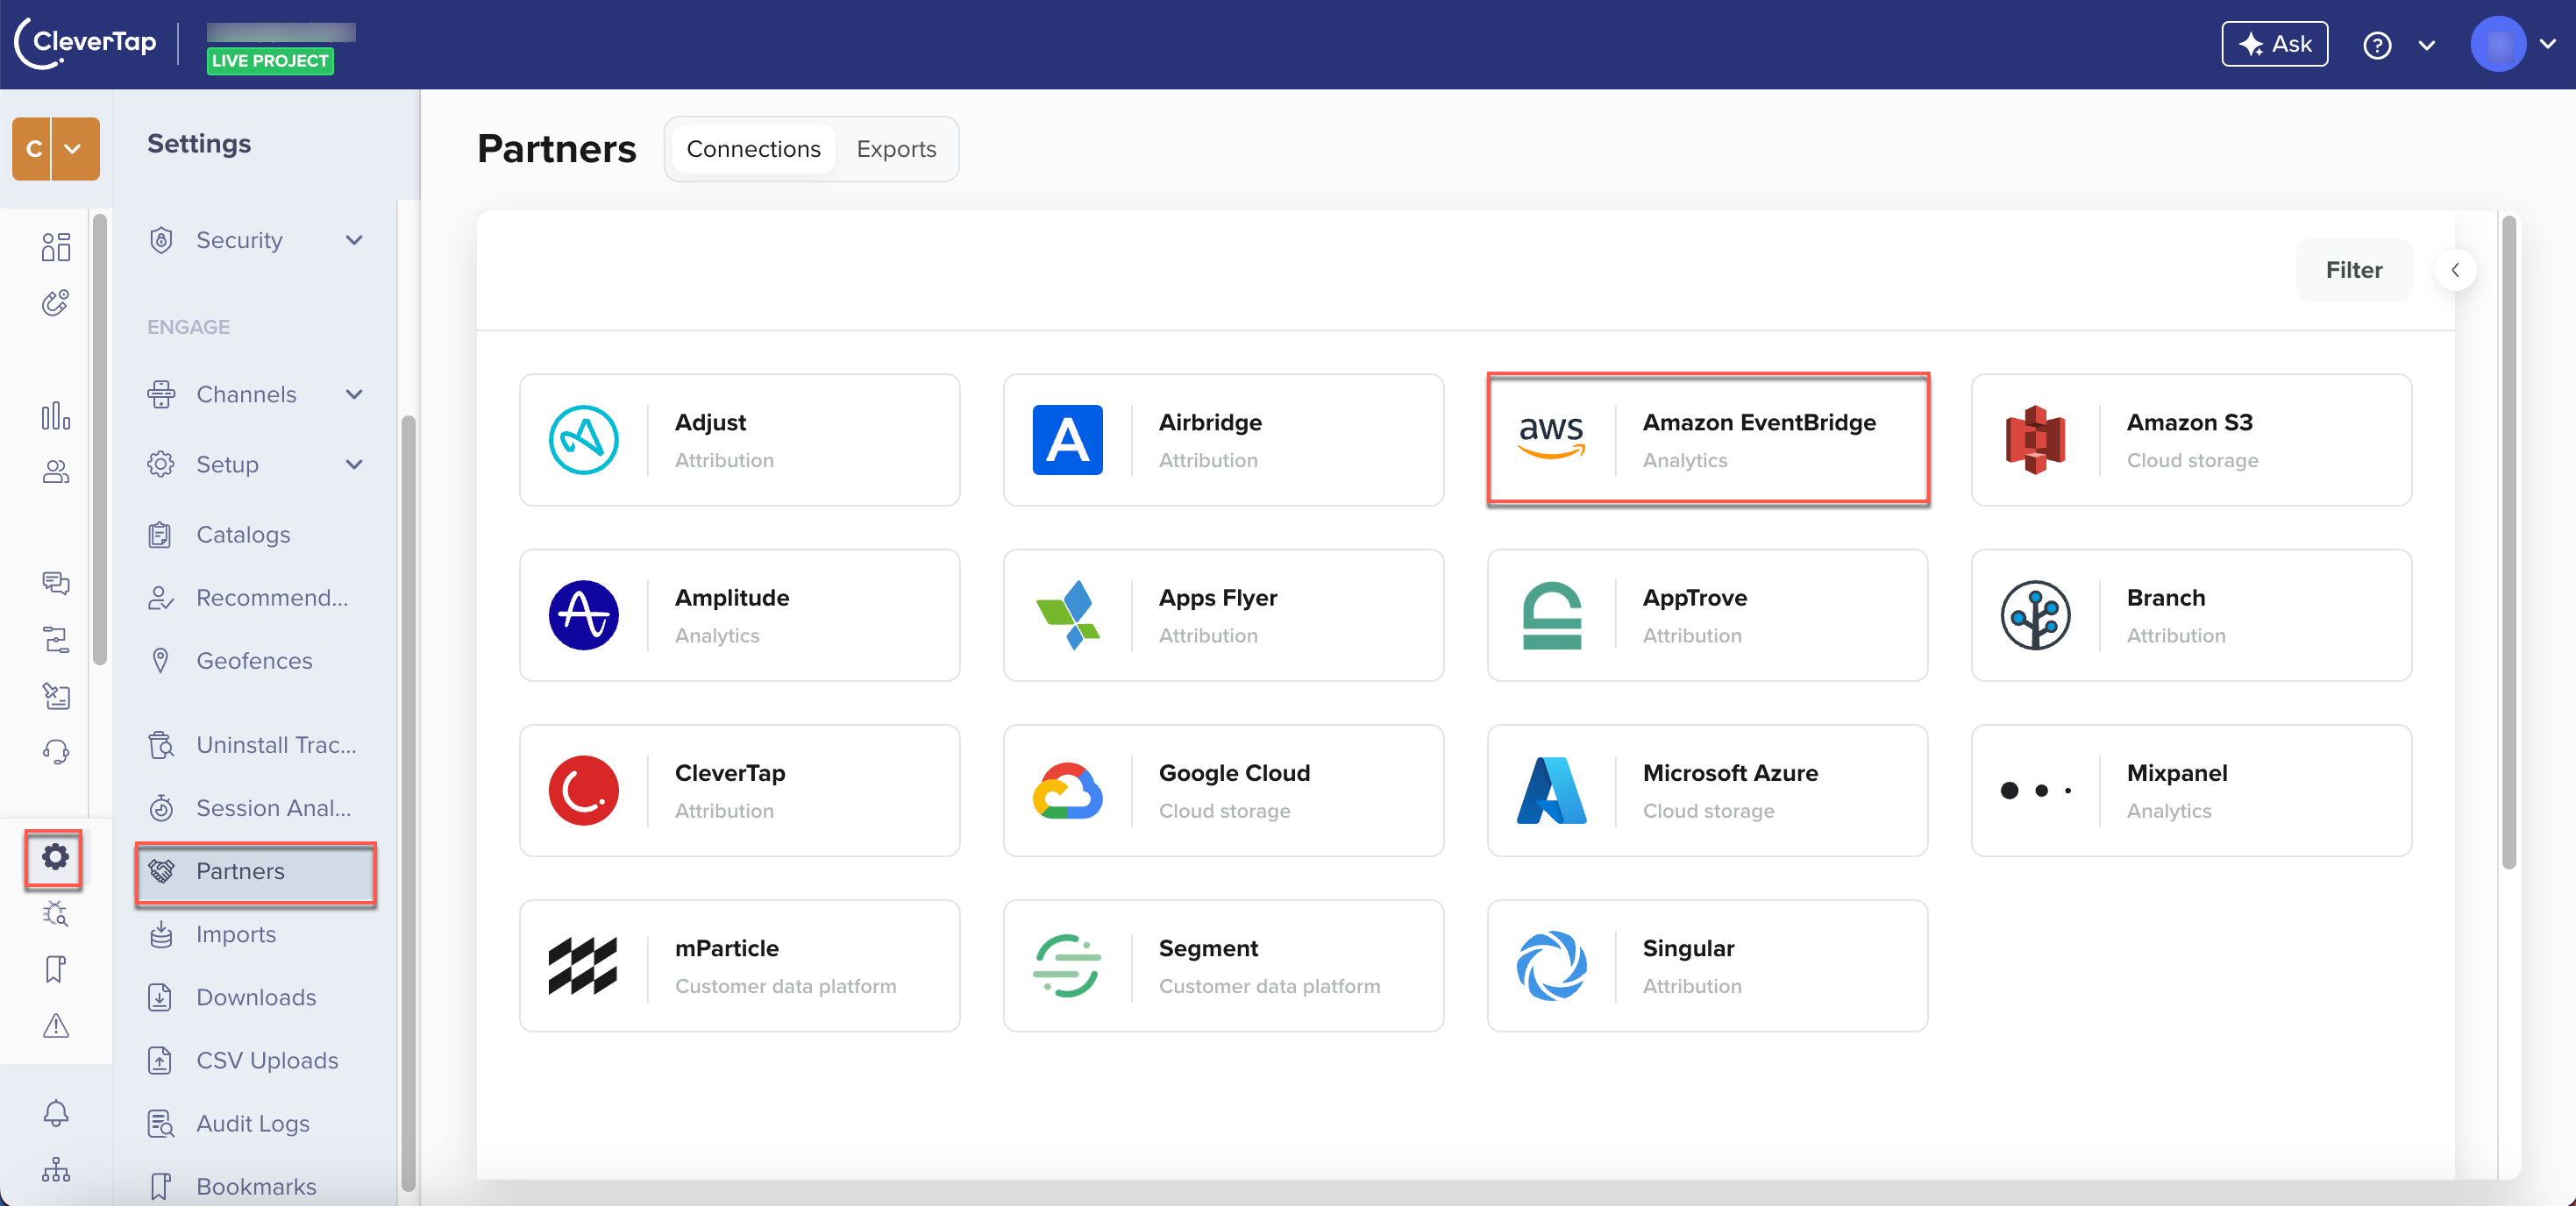
Partners Page
- A popup opens on the right side of the screen. Enter the following details and click Integrate.
Field | Description |
|---|---|
Partner Nickname | Enter the Nickname for your integration. |
AWS Account ID |
|
| Region | The AWS account region. The events are sent to the selected region. |
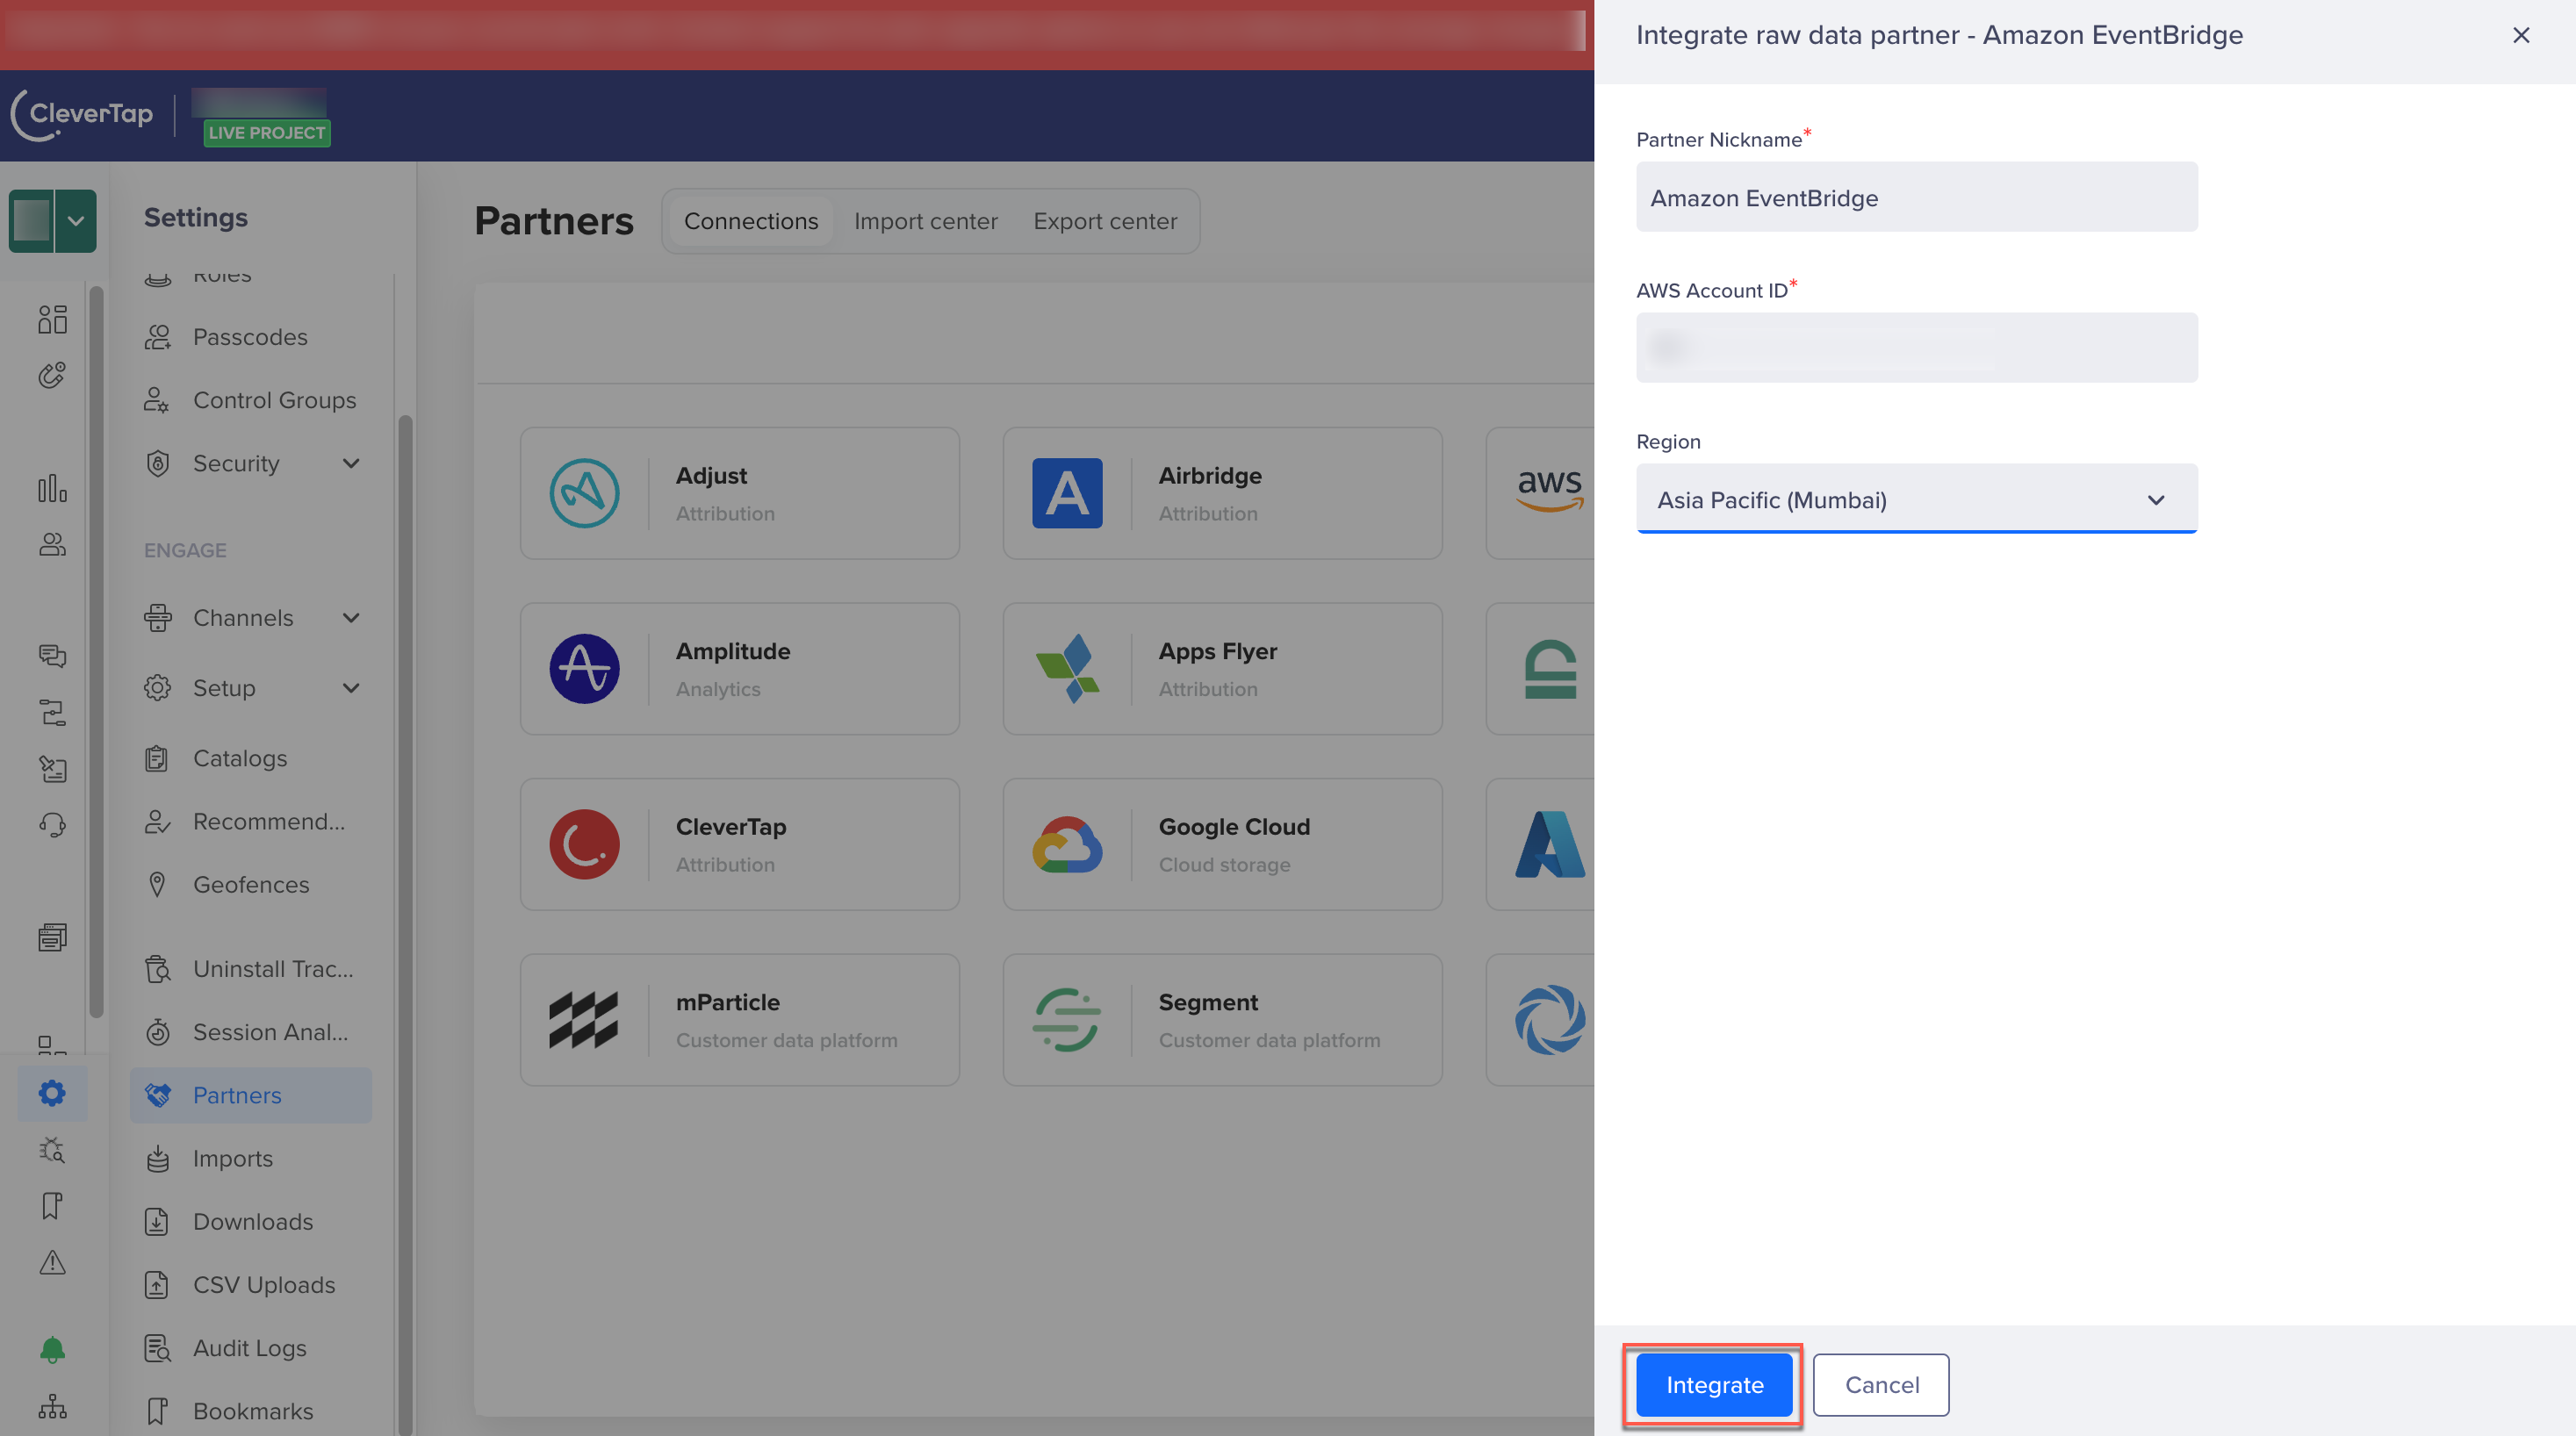
Enter Amazon EventBridge Project Details to Integrate
Associate Event Source with Designated Event Bus in AWS Console
To establish an event connection to Amazon EventBridge, your CleverTap event source must be associated with the event bus in Amazon EventBridge. You can now see the CleverTap event source, created in Step 3 of Configure CleverTap Event Source, under the Partner events sources on the Amazon EventBridge dashboard. To associate the event source with the designated event bus in the AWS console:
- Select the event source name and associate it with an event bus.
- After establishing the connection, set your rules and targets for Amazon EventBridge to redirect events to an AWS service. For more information, refer to the Amazon EventBridge documentation.
Send Events to EventBridge
There are two ways events can be sent from CleverTap to EventBridge.
- Via campaigns
- Via Journeys
Sending via Campaigns
- Navigate to Campaigns from the CleverTap dashboard and click on ‘+ Campaign’.
- Select Amazon EventBridge from the channels list.

Select Amazon EventBridge from the Channels List
- Select the appropriate option on 'Type', 'When' pages
- Select the events to be sent to Amazon EventBridge on the 'Who' page.
- Once you reach the 'What' page, you will be able to choose what to send to Amazon EventBridge

Define Amazon EventBridge Message Content
- If the EventBridge connection is not set up, you will not be able to proceed. The ‘Modify settings’ link will navigate you to the configuration section for Amazon EventBridge.
- You can also choose the details to send in the payload - Email, Identity & CleverTap ID, User profile attributes, GCM / APNS tokens
- Click ‘Continue’ to proceed to the 'Setup' page, and then to the 'Overview'page and then schedule the campaign
Sending via Journeys
- When you are creating a journey, you can drag a ‘Partner’ node from engage node section

Drag and Drop Amazon EventBridge Engagement Node
- On the 'Channel Type' page, click on ‘Amazon EventBridge’ to proceed.

Define Amazon EventBridge Message Content
- Once you reach the 'What' page, you will be able to choose what to send to Amazon EventBridge

Click Save and Close after Defining the Message Content
- If the EventBridge connection is not set up, you will not be able to proceed. The ‘Modify settings’ link will navigate you to the configuration section for Amazon EventBridge.
- You can also choose the details to send in the payload - Email, Identity & CleverTap ID, User profile attributes, GCM / APNS tokens
- Click ‘Save and close’ to save the node
Updated 6 months ago