Content Manager Files
Learn how to organize, store, and manage files in CleverTap Content Manager.
Overview
Marketing collaterals extensively use various files to add imagery and communicate brand voice. The Files section provides a centralized way of storing, uploading, deleting, and organizing files. You can save and reuse these assets in the Files section.
Custom RolesAll users with custom roles have read access to Files by default. However, the administrator must grant write access for any File operations. For more information, refer to Define Access for Custom Roles.
To manage files, navigate to Content > Content Manager > Files. The Files window displays.
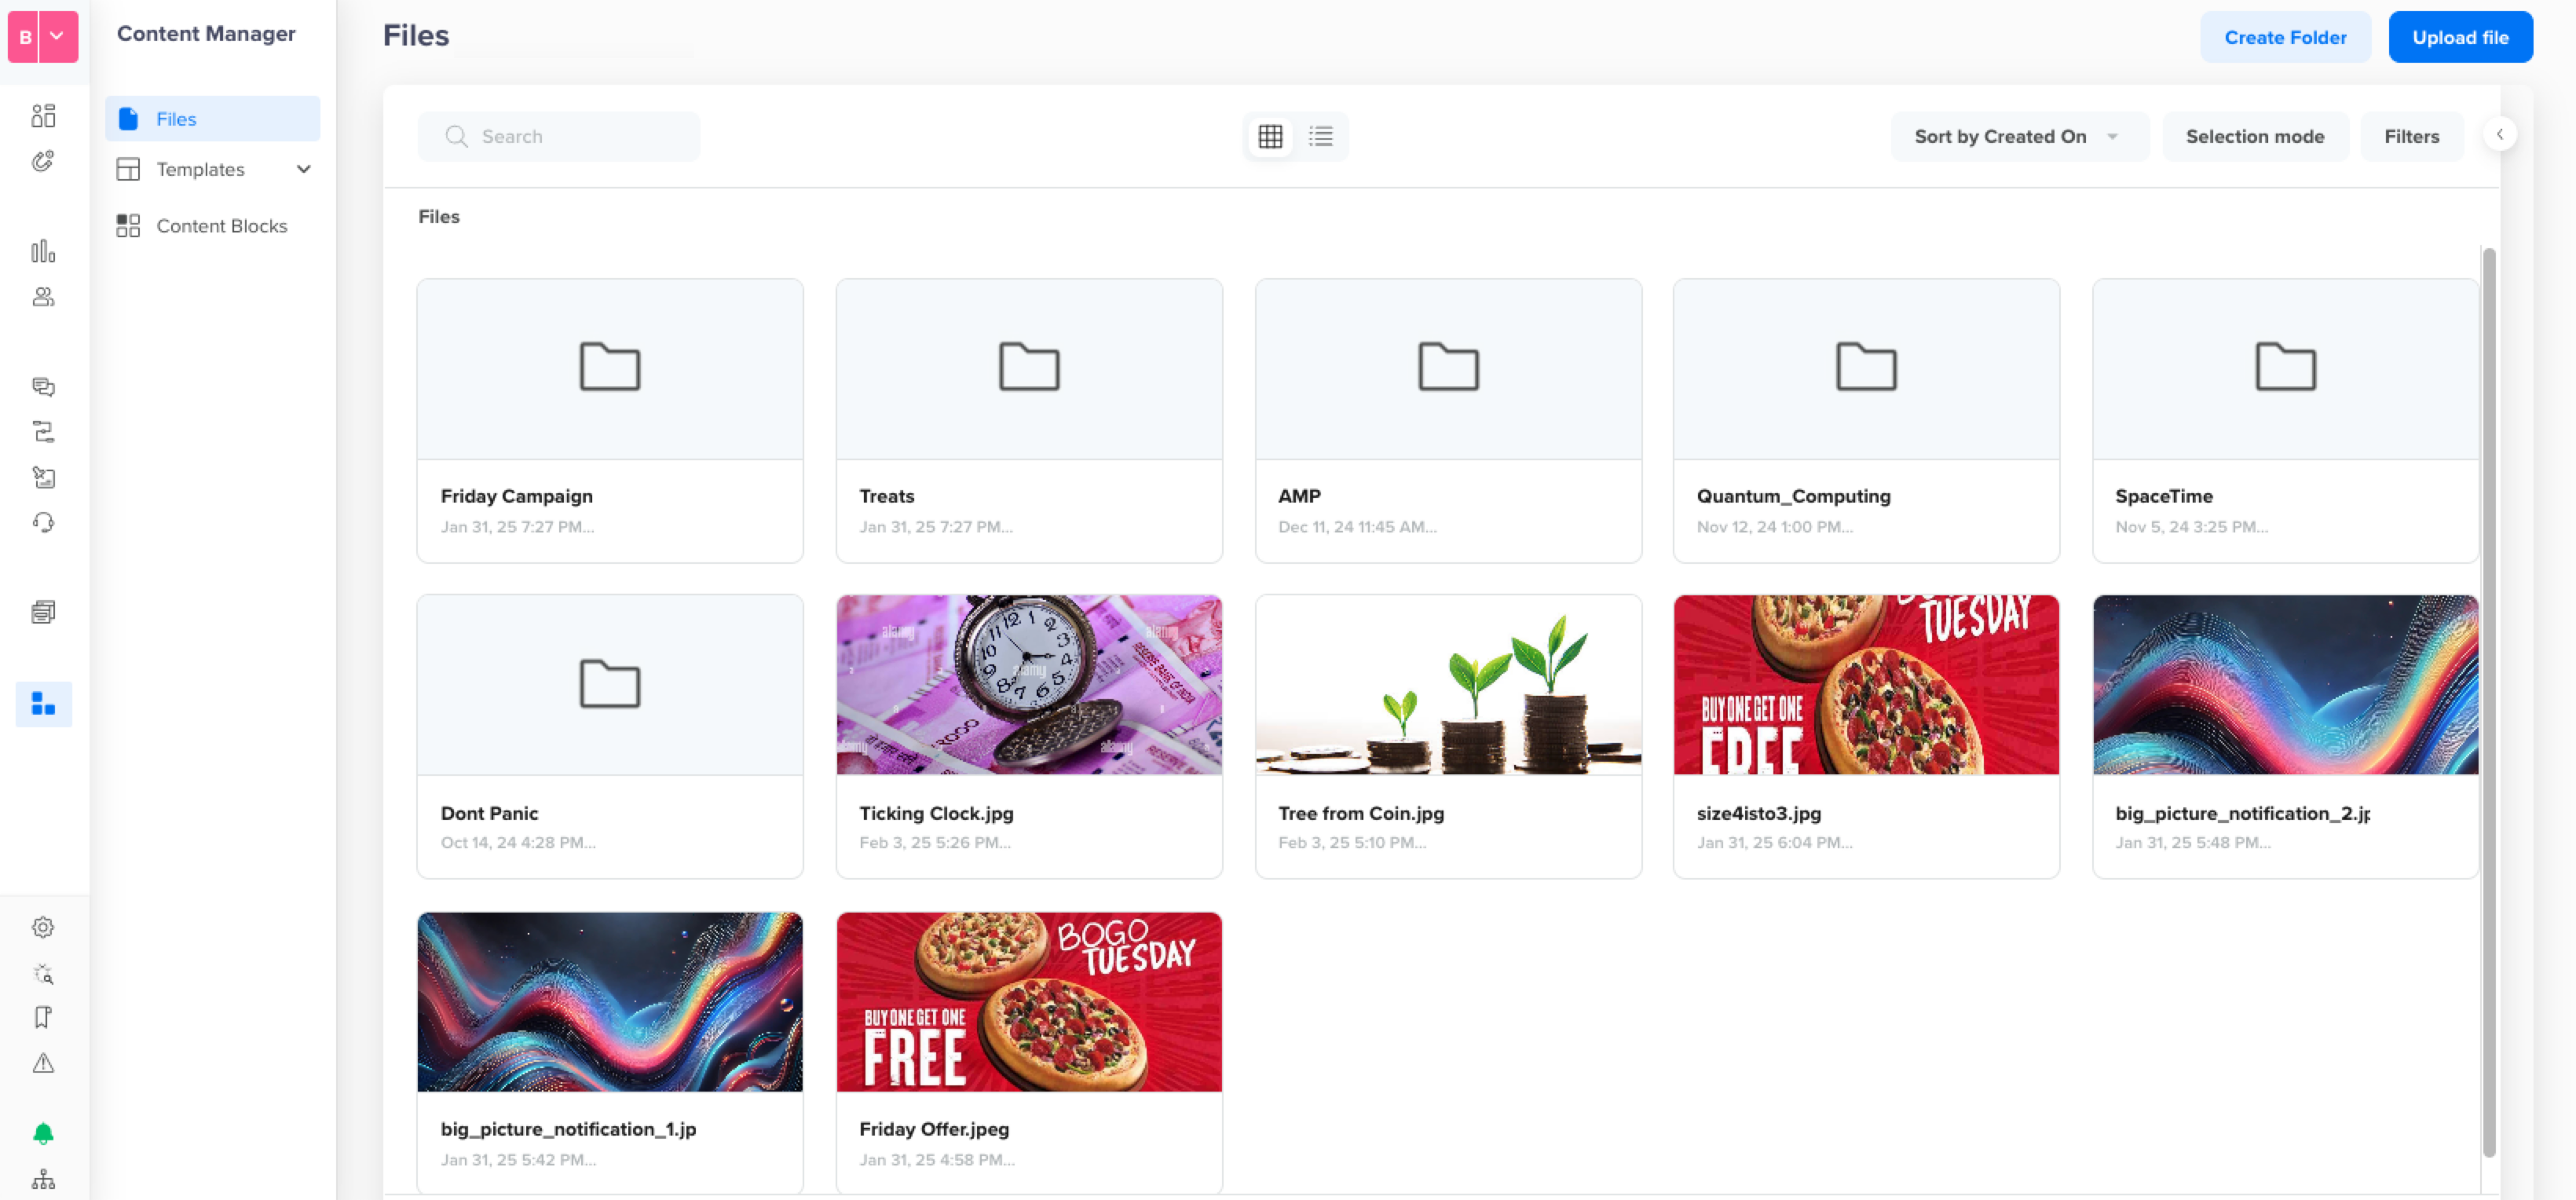
Files Editor
You can select the card view or the list view. The Files editor offers multiple options, such as:
- Select Views: Switch between list (
 ) and card (
  ) view for the image files.
 - Search Files: Search an image by its name.
- Sort: Sort by file name, created date, and last modified date.
- Multi-Select: Select multiple files by clicking the Selection mode button.
- Bulk Delete: Select multiple files and click the
 icon.
icon.
Image DeletionAn image deleted from the image gallery does not affect the images in a running campaign.
File Specifications
Refer to the following file specifications before uploading the files:
| File Type | File Format Supported | Maximum Size |
|---|---|---|
| Image | .png, .jpeg, .jpg, .webp, .gif | 1 MB |
| Video | .mp4 | 50 MB |
| Document | .pdf,.doc,.docx, .txt, .json, .ics | 2 MB |
| Audio | .mp3 | 4 MB |
File namesFile names can include letters, numbers (0-9), underscores (_), periods (.), hyphens (-), parenethesis(), and spaces. The name must begin with a letter. Additionally, the file name must be unique.
Upload Files
Upload files to use later in your messaging.
- Navigate to Content > Content Manager > Files.
- You can drag and drop the files in the editor or click Upload Files and select them to upload.
File Operations
Click the ![]() icon from the content card for additional actions to manage files.
icon from the content card for additional actions to manage files.
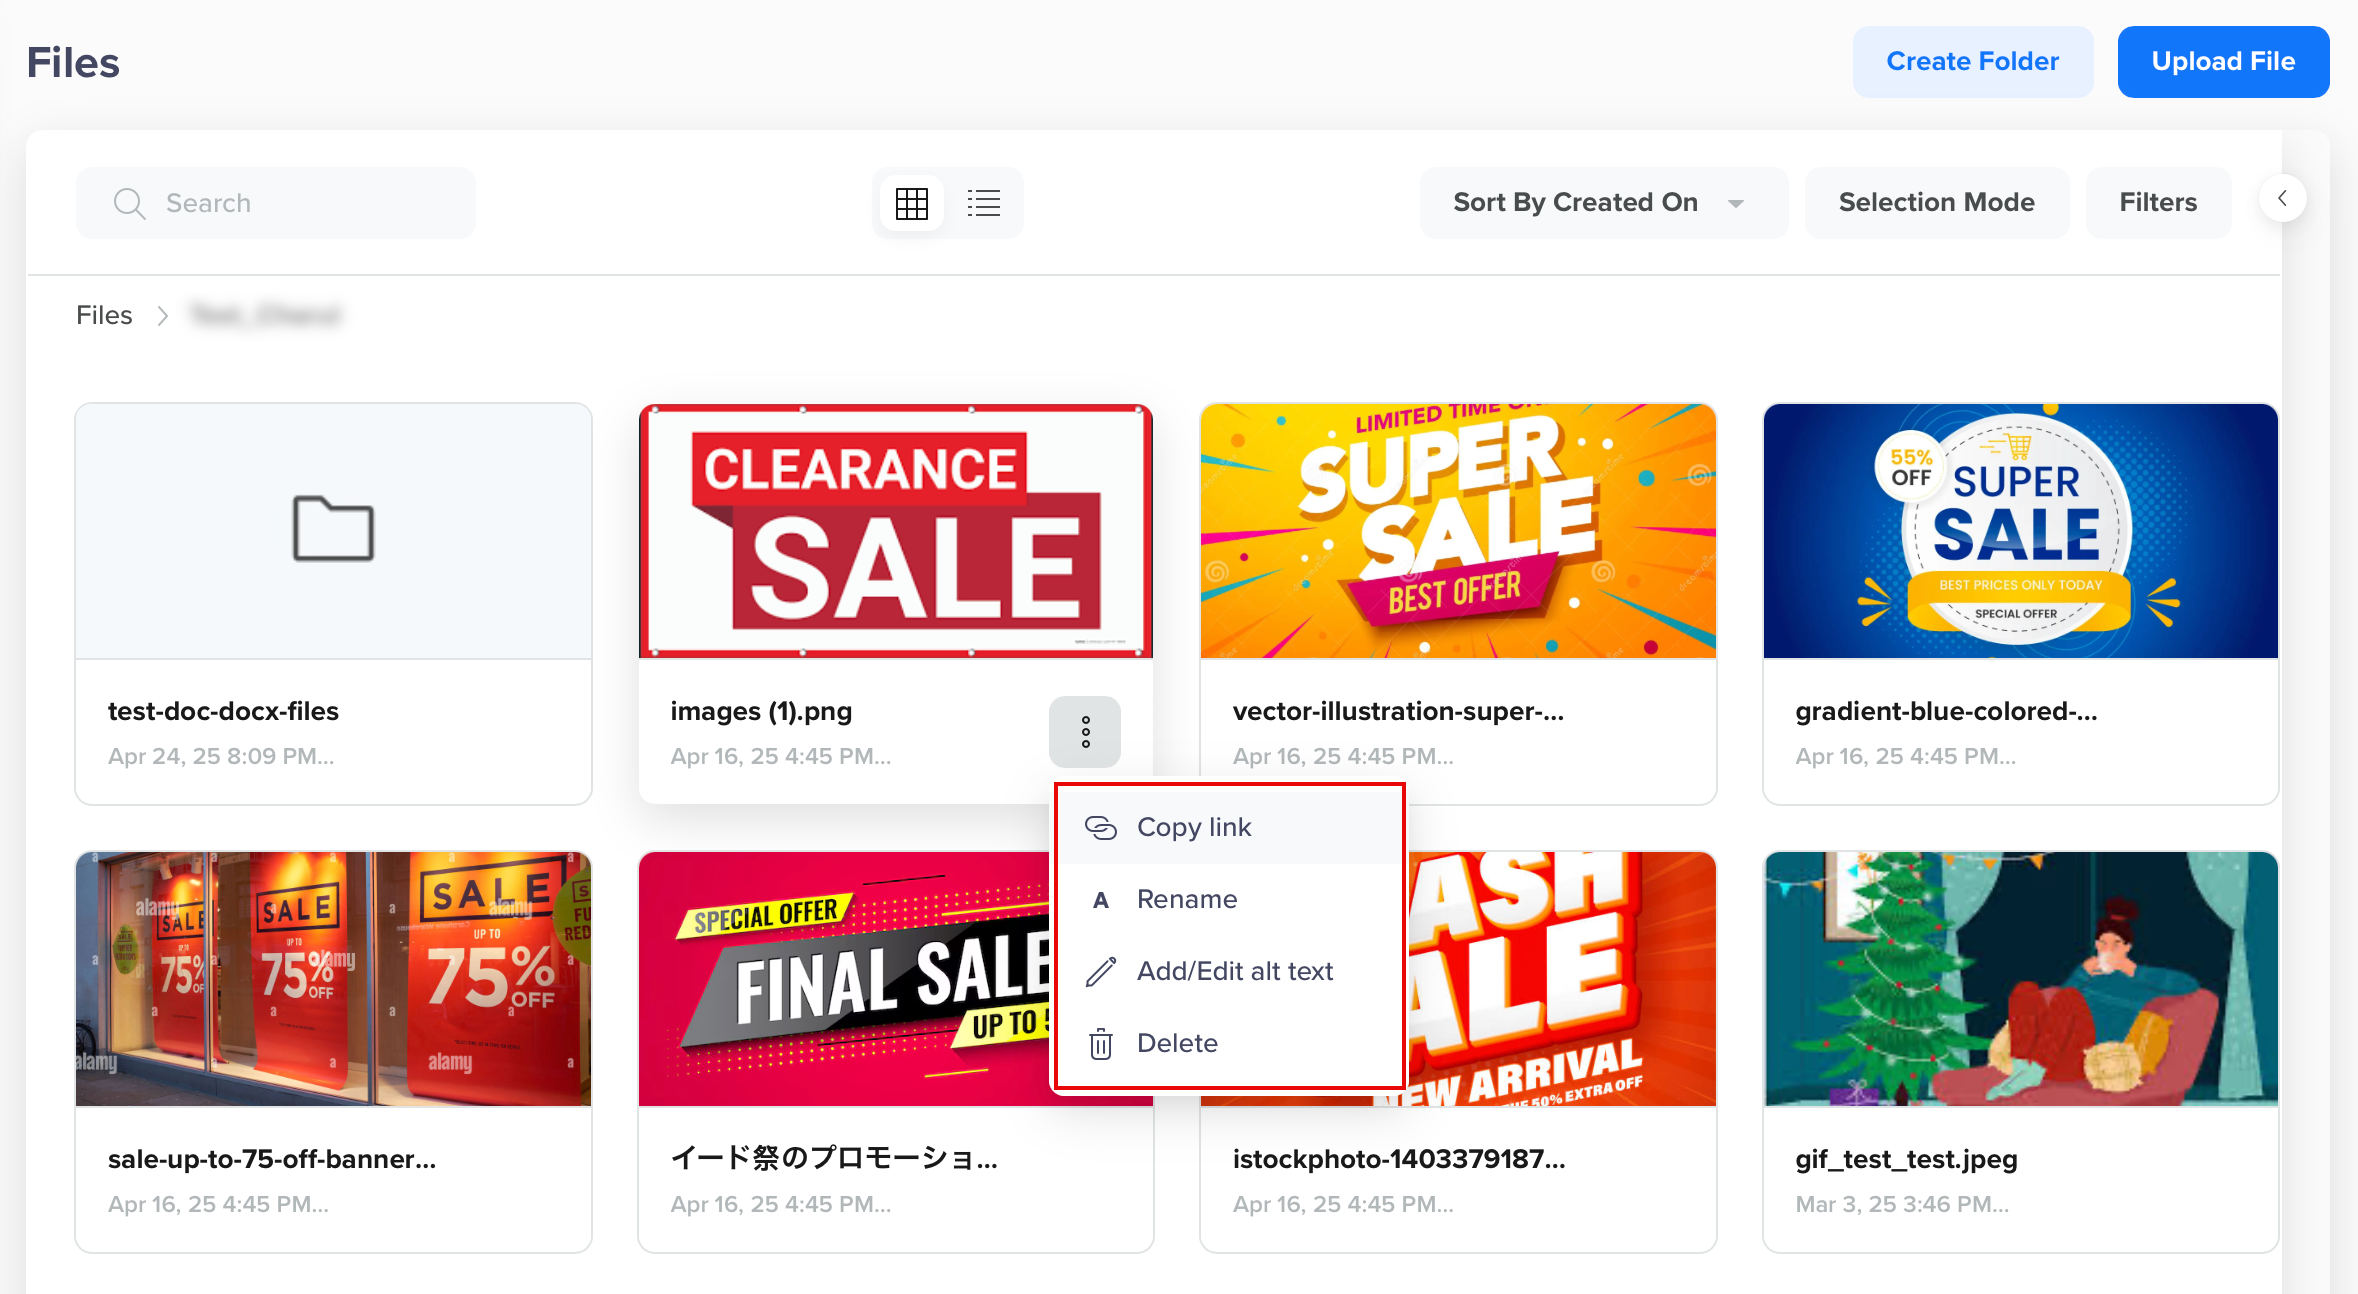
Additional Files Actions
Select from any of the following options:
- Copy link: Click to copy the file link.
- Rename: Click to change the name of the file.
- Add/Edit alt text: Click to add or edit descriptive alt text for the file.
Alt Text
- The maximum alt text length is 150 characters.
- This text helps screen readers interpret the file content for users with visual impairments. For more information, refer to Accessibility in CleverTap Messaging.
- Delete: Click to delete the file. A file deleted from the File section does not affect the files in a running campaign.
Filter Files
Filter from the saved files to find the required file quickly. To filter the files:
- Navigate to Content > Content Manager > Files.
- Click Filters and apply the required criteria.
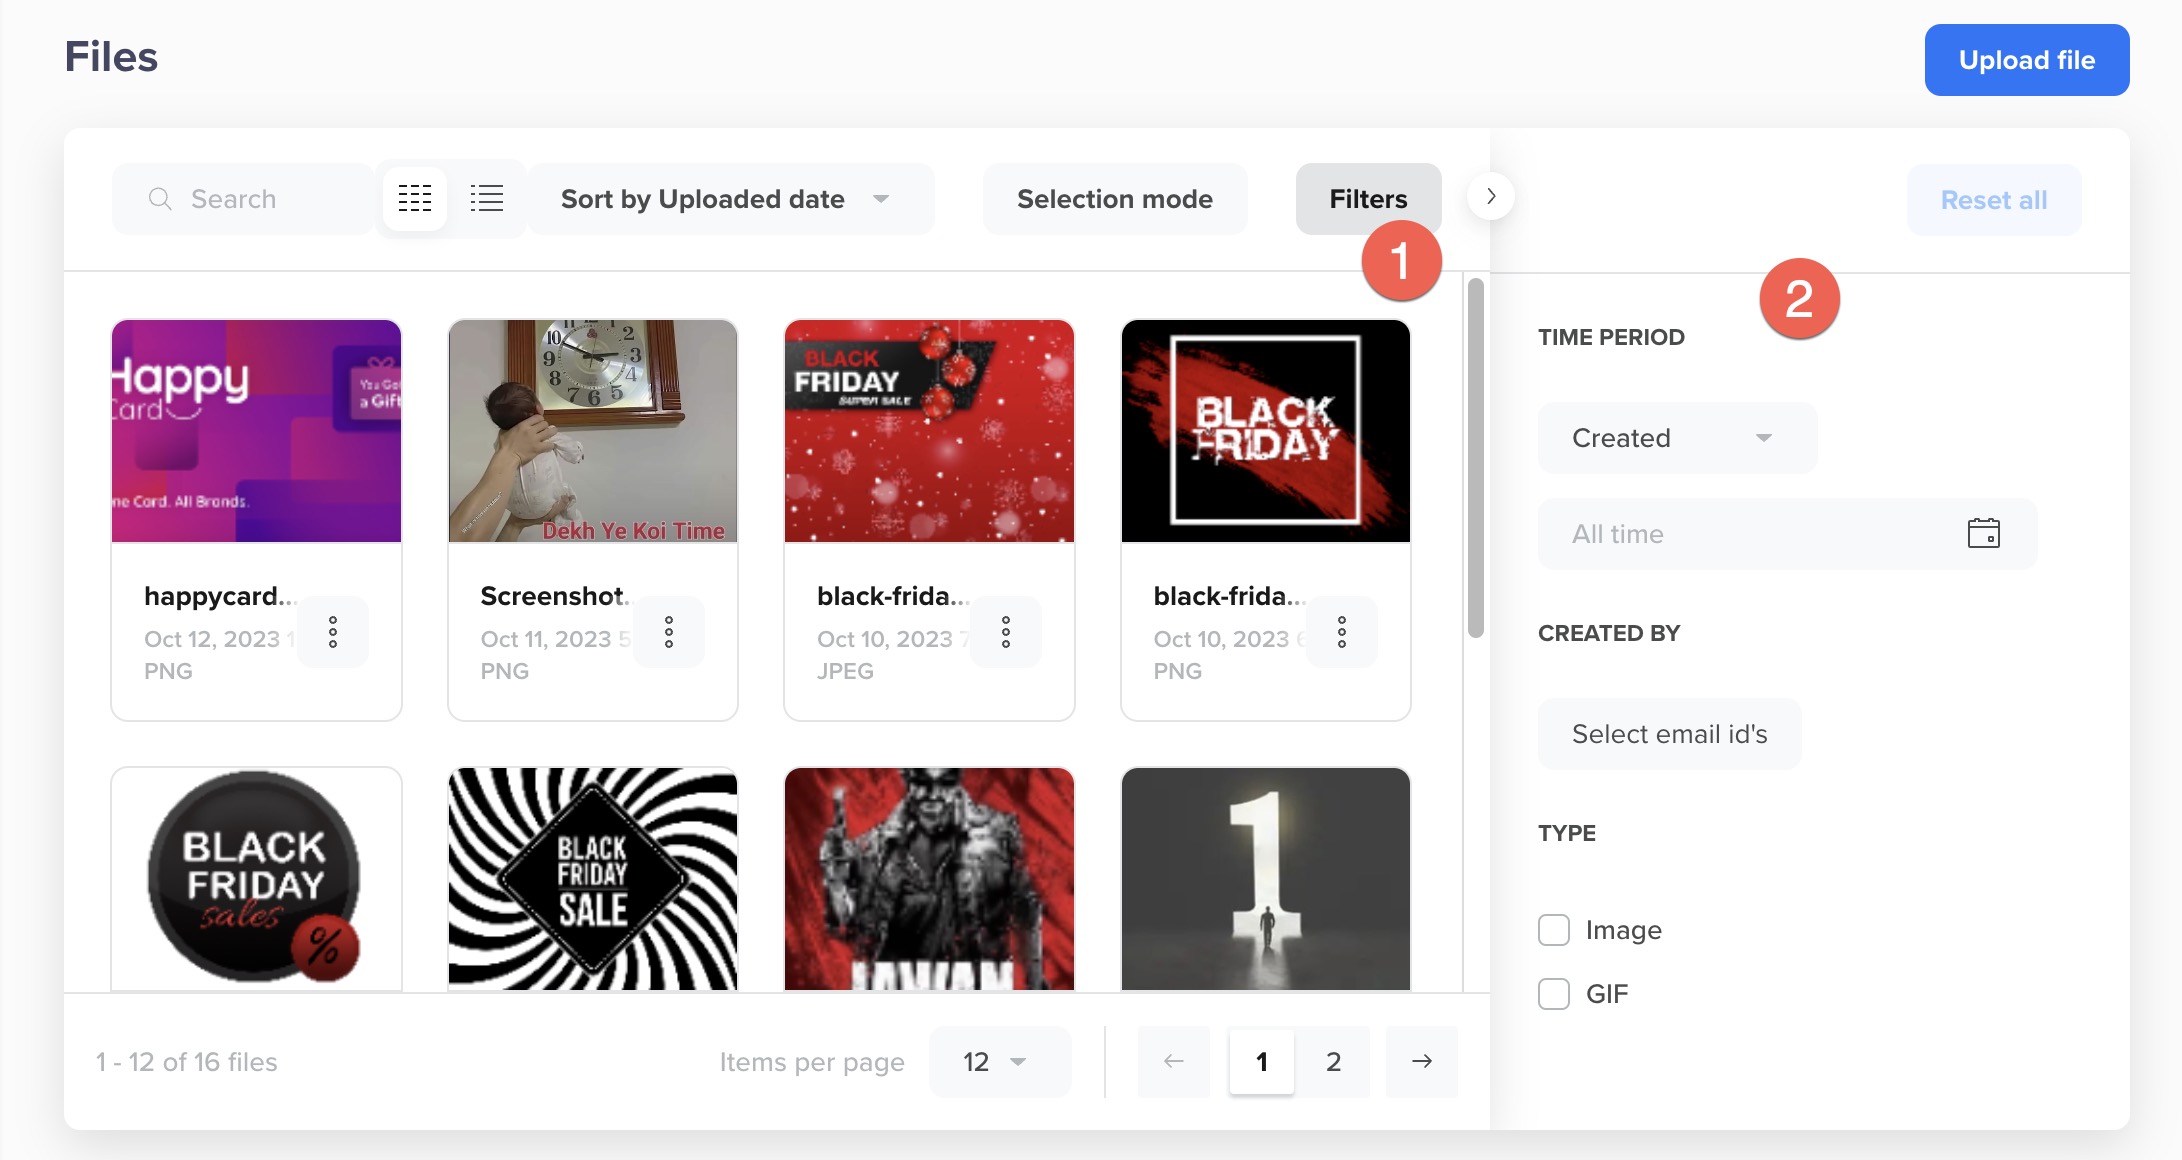
You can filter files with the following:
- Time Period: Search by the time period when the file was created.
- Type: Search by the file type.
- Labels: Search the file by the assigned label.
- Created by: Search by the person who created the file.
Organize Files using Folders
Organizing files using folders helps maintain a structured system, making locating and managing content easy. By grouping related files into designated folders, you improve accessibility and ensure efficient file management. You can organize files in a folder or using nested folders. You can also move or copy files to the required folder.
Create File Folders
To create new File folders, follow these steps:
- Navigate to Content Manager > Files and click Create Folder.
- Enter a name for your folder and click Create.
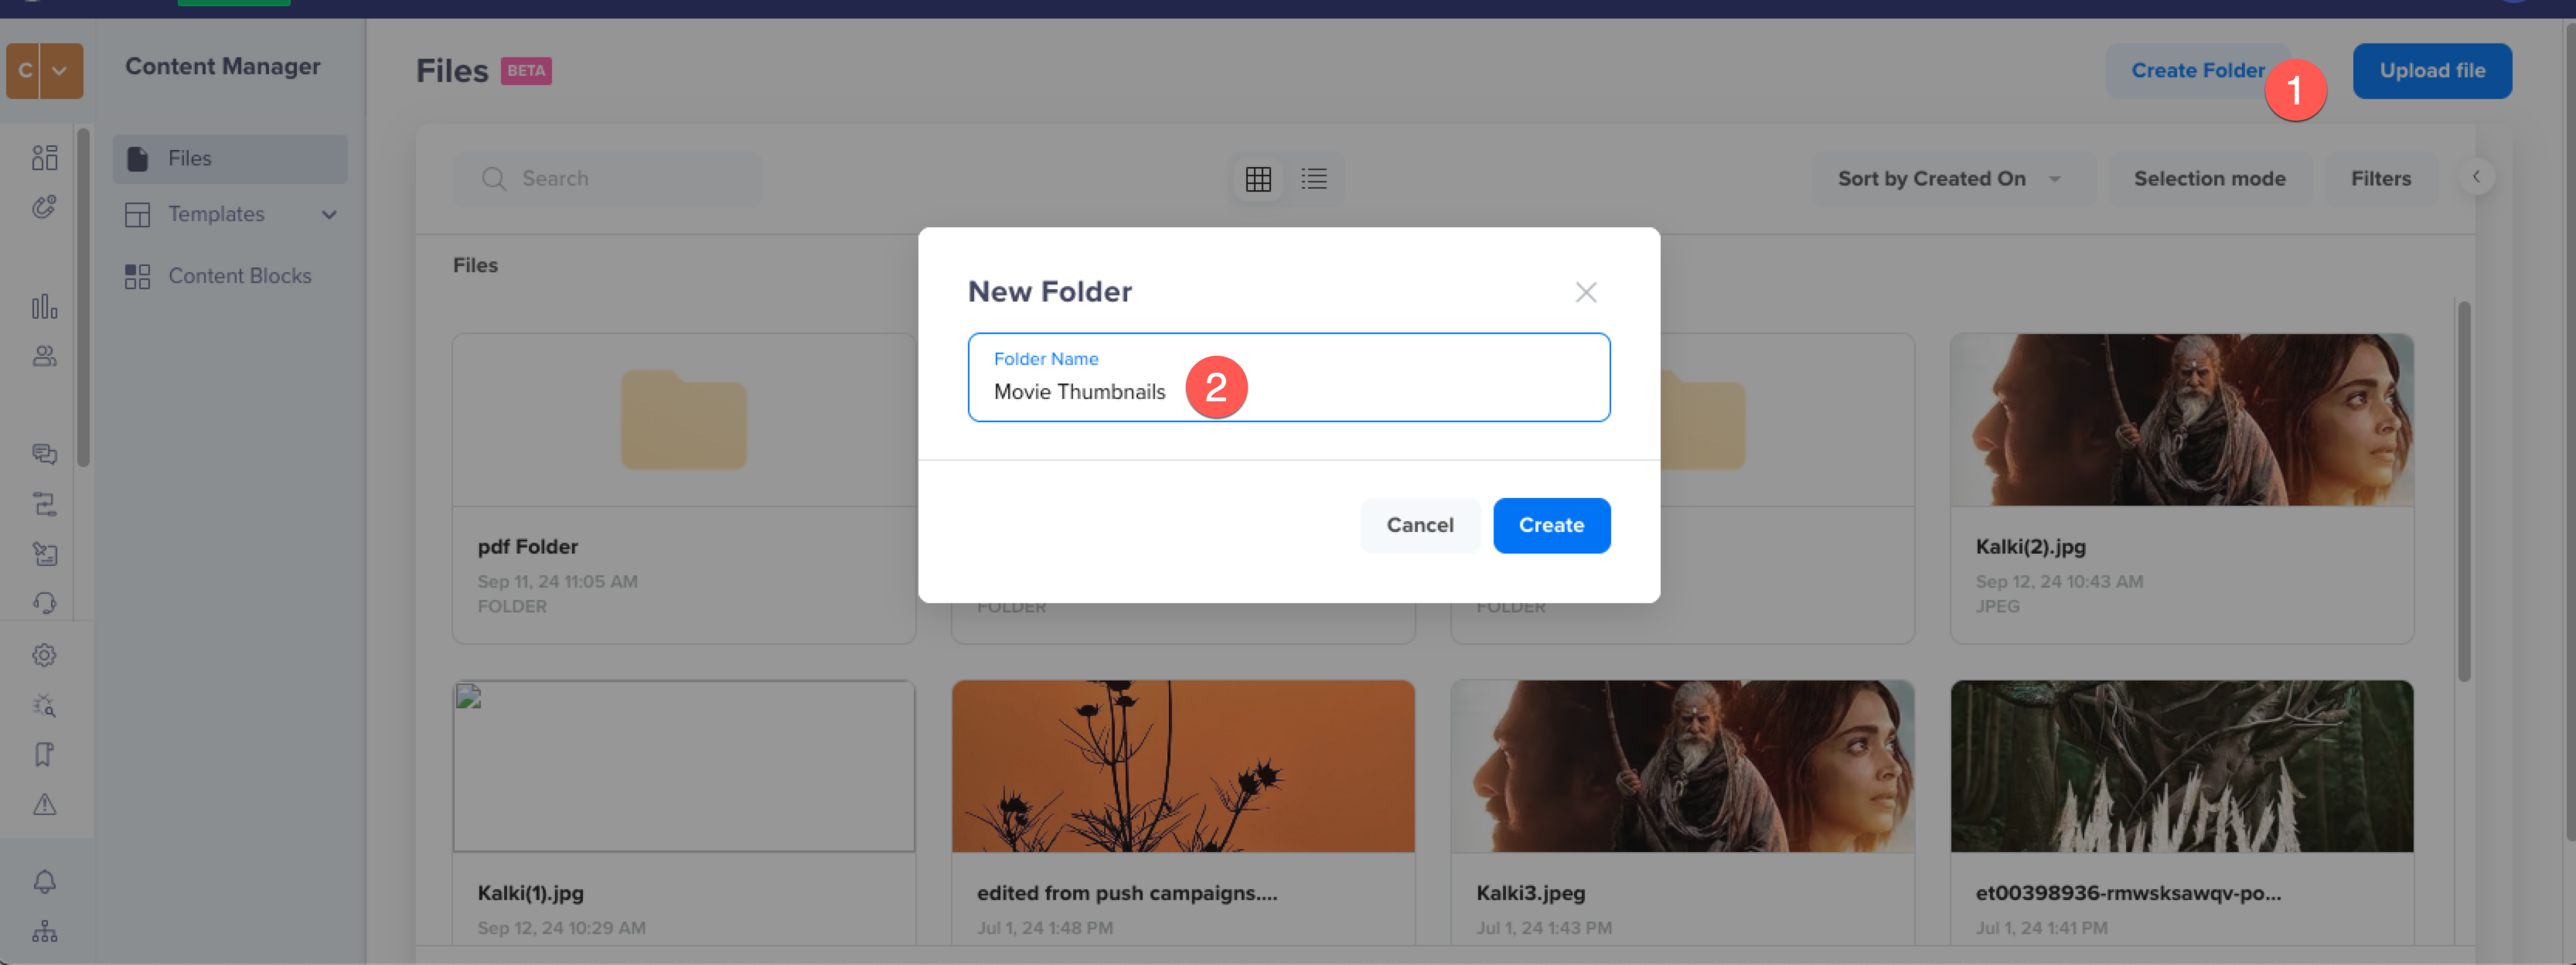
Create and name a Folder
You can also create a nested folder (a folder within a folder) using the same steps. Up to ten levels of nested folders are supported, giving you the flexibility to create deep folder structures for comprehensive file organization.
Folder namesFolder names can include letters, numbers (0-9), underscores (_), periods (.), hyphens (-), parenethesis(), and spaces. The name must begin with a letter. Additionally, the folder name must be unique.
Move or Copy Files to Folders
To move or copy files to your folders:
- Navigate to Content Manager > Files. The folders are displayed.
- Double-click to open a folder. The files are displayed.
- Click Selection mode to select multiple files.
- Select the required files and click Organize.
- Click Copy or Move icon. The list of destination folders is displayed.
- Select the required folder and click the Copy or Move Here button at the bottom of the window.
The files are copied or moved to the destination folders.
Navigate and Search Files in Folders
Your files are saved in the respective folders. To search them in folders:
- Go to Content Manager > Files. The folders are displayed with the path.
- Double-click to open a folder and view the files. You can go back and forth by clicking the folder name in the breadcrumb path.
- Use the search box to find a specific file or expand the pane to filter with specific criteria.
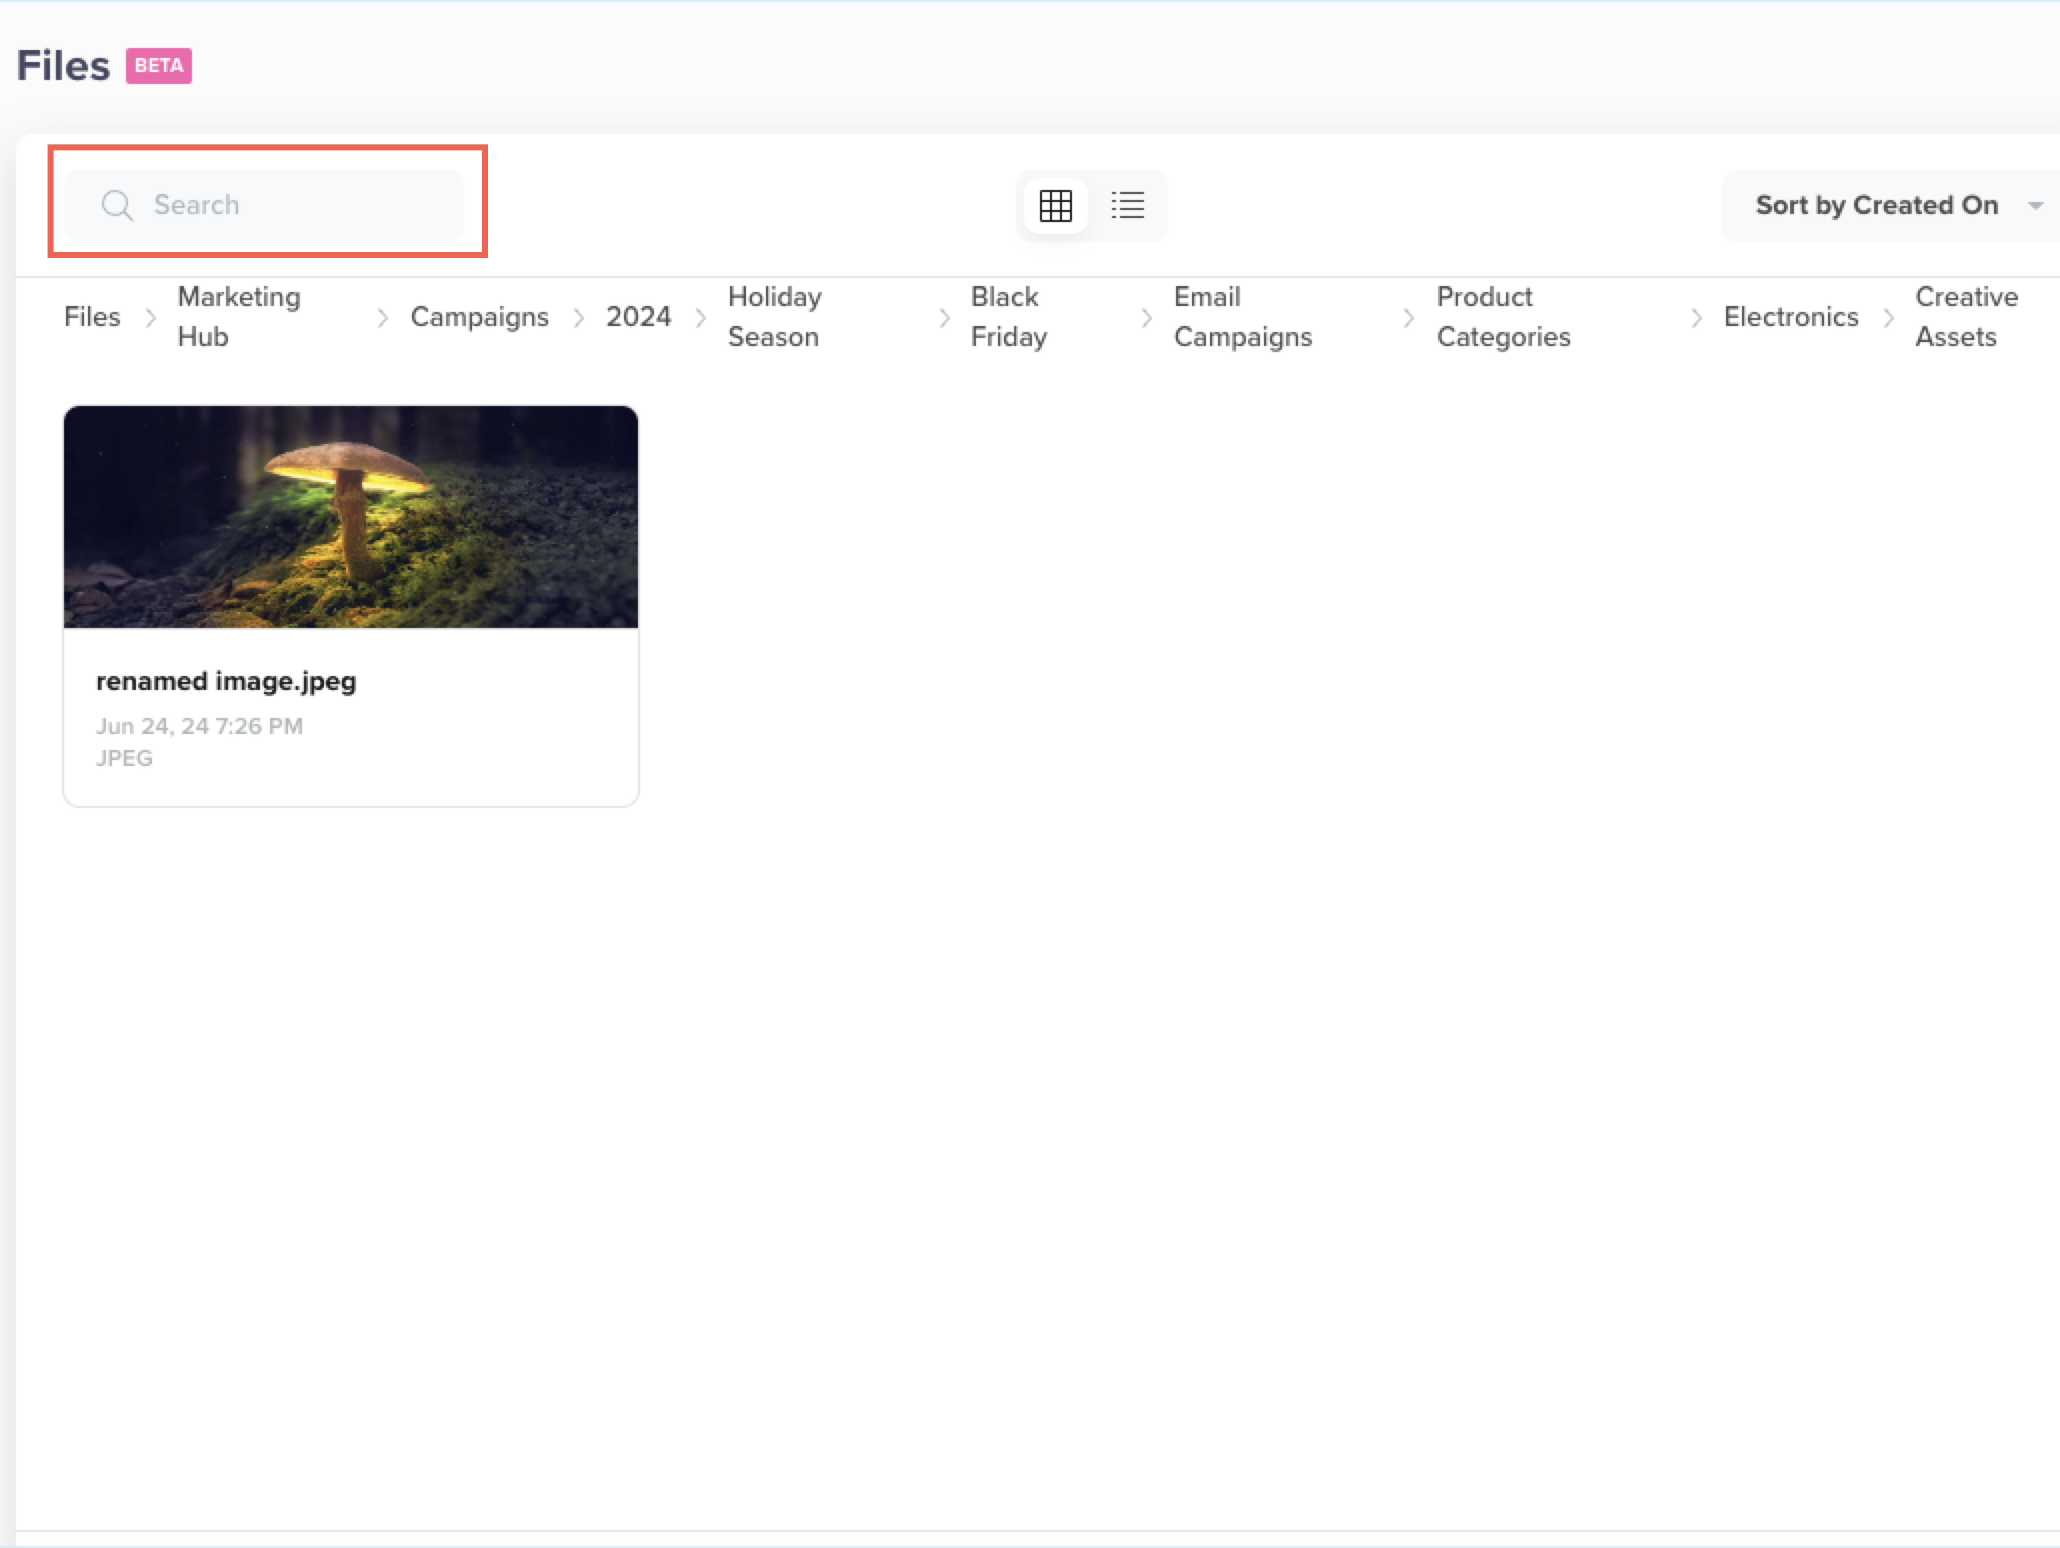
Search for Files or Folders
Folder Operations
You can perform various operations on your folder from the Files Window.
- Go to Content Manager > Files.
- Click the Folder card to perform various folder operations.
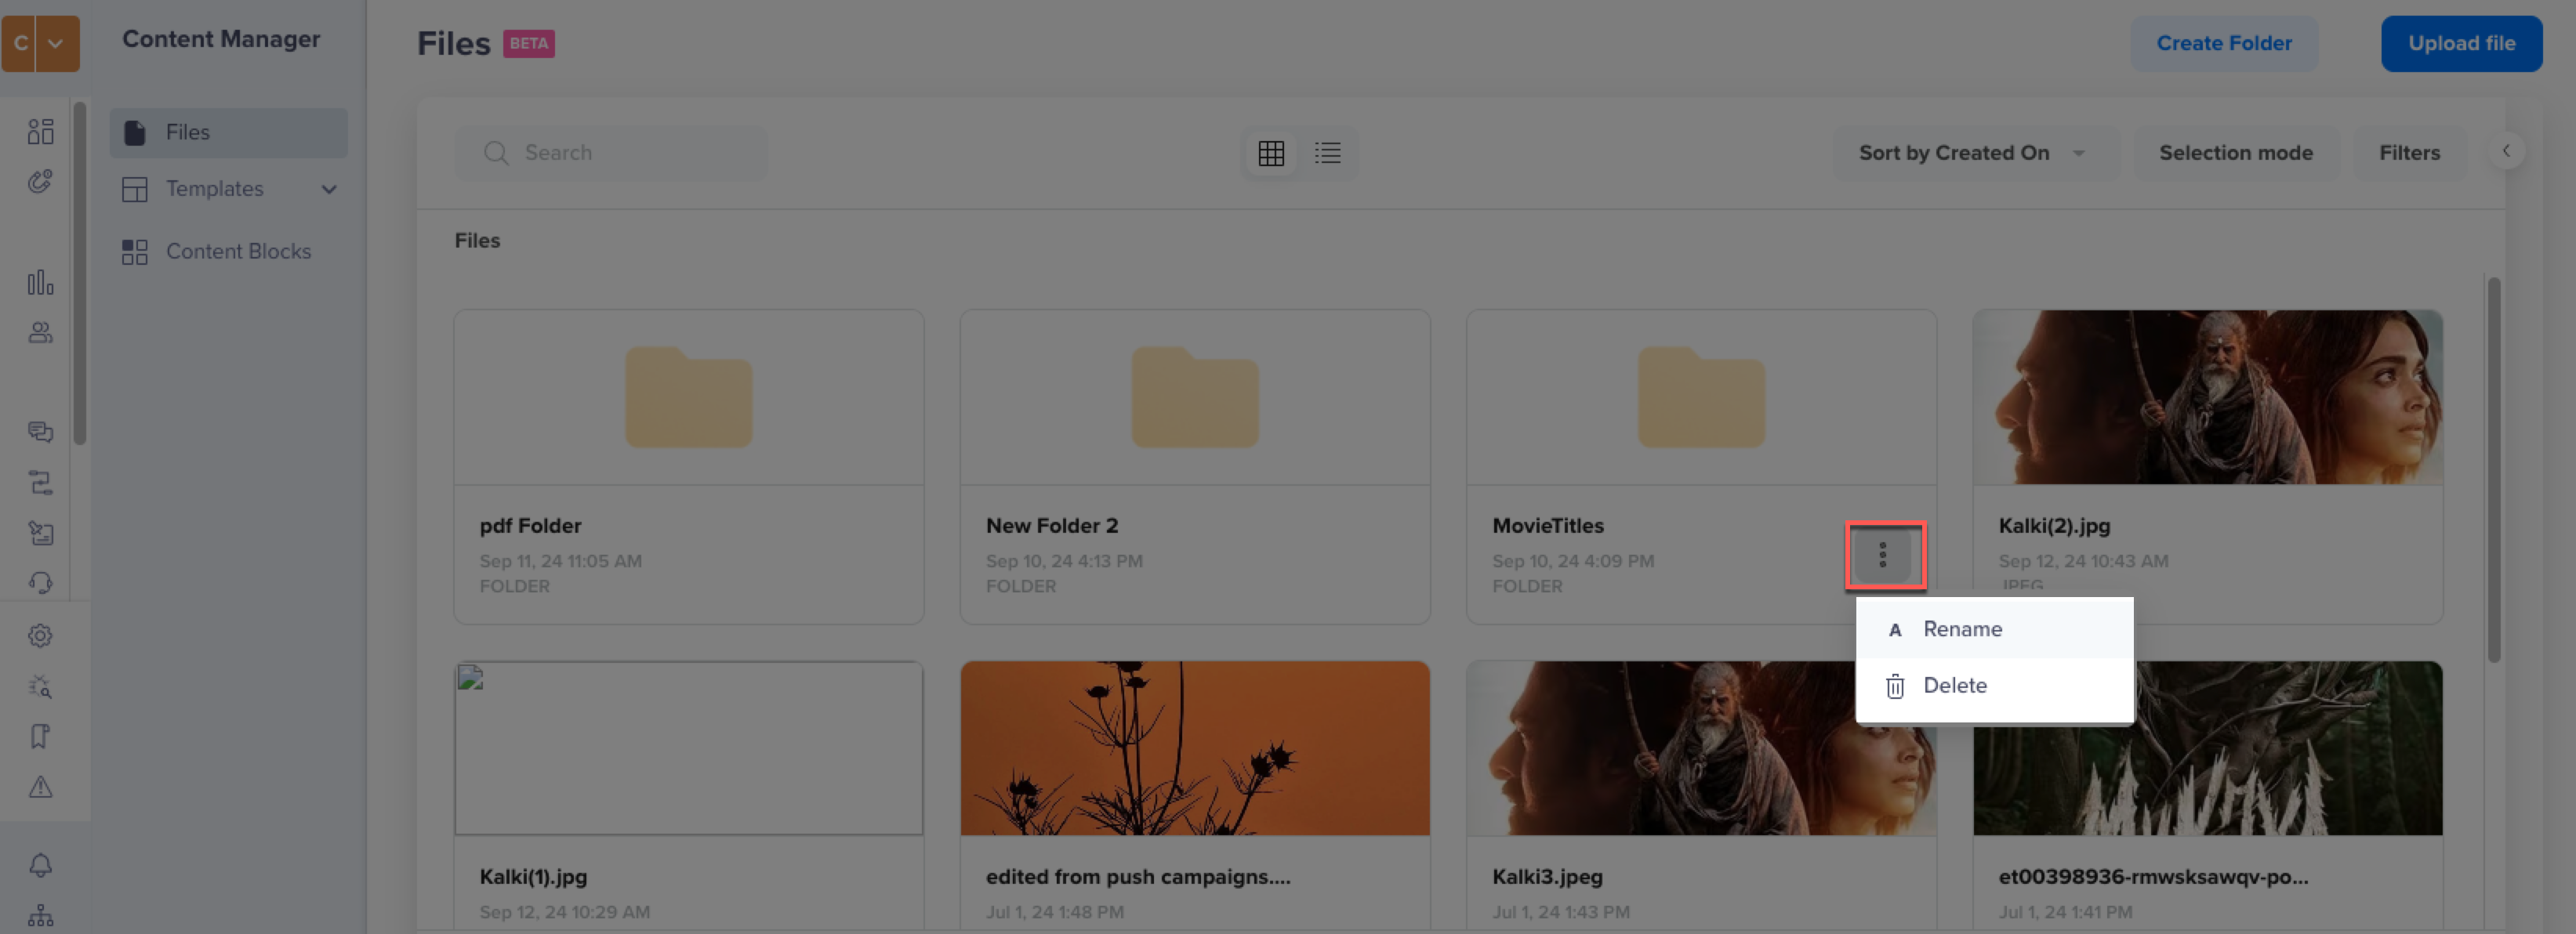
Folder Operations
- Select from the following options:
- Rename: Select to rename the folder.
- Delete: Select to delete the folder. All files and folders stored within this folder will be deleted.
Move/Copy FoldersYou can click the Selection Mode button to move or copy multiple folders simultaneously.
FAQs
What is the maximum upload limit for files per account in CleverTap?
The maximum upload limit for files is based on your subscription plan. You can check the upload limit for your CleverTap account from Organization > Billing > My plan > Content Manager Usage.
Updated about 2 months ago
