Notification Delivery Options
Understand how to choose from various delivery preferences.
Overview
CleverTap provides the capability of delivering notifications in the user’s timezone while creating scheduled campaigns or journeys. This is a relevant feature for businesses having international users and who want to send time-sensitive notifications to their users. If you select this option, CleverTap staggers the delivery of notifications and qualifies users according to their time zone.
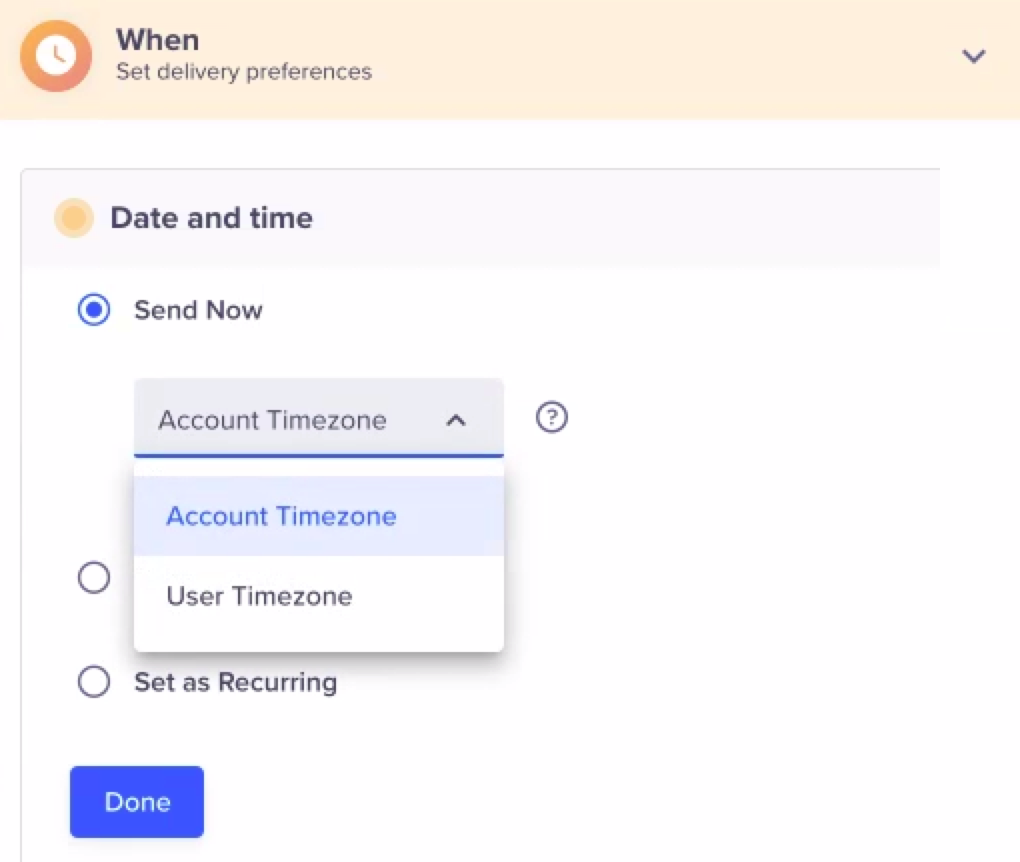
Select Timezone
Use Case
A marketer in San Francisco (Pacific Time) creates a campaign at 4:14 PM in their CleverTap dashboard. The campaign is scheduled to deliver messages to users at 8:00 PM in their local timezone.
At 5:00 PM Pacific Time (account’s timezone), the first set of messages will deliver to users on the East Coast (8:00 PM in the Eastern timezone). One hour later (6:00 PM Pacific or 8:00 PM Central Time), the second set gets delivered to anyone qualifying in this timezone. Two hours after that (8:00 PM Pacific), the next set is delivered to users on the West Coast, and so forth. A campaign executes for timezones around the globe delivering messages to users qualifying for each timezone.
After the marketer finishes creating the campaign, it moves into a scheduled state. Once the campaign starts executing, it moves into a running state where you can see that the campaign is scheduled to deliver in the user's timezone on the overview page.
User Timezone for Campaigns
Set the users' timezone via the Tz key in the profile update push.
To set up a campaign for message delivery in the user’s timezone:
- From the dashboard, navigate to Campaigns.
- Click + Campaign.
- Select a messaging channel.
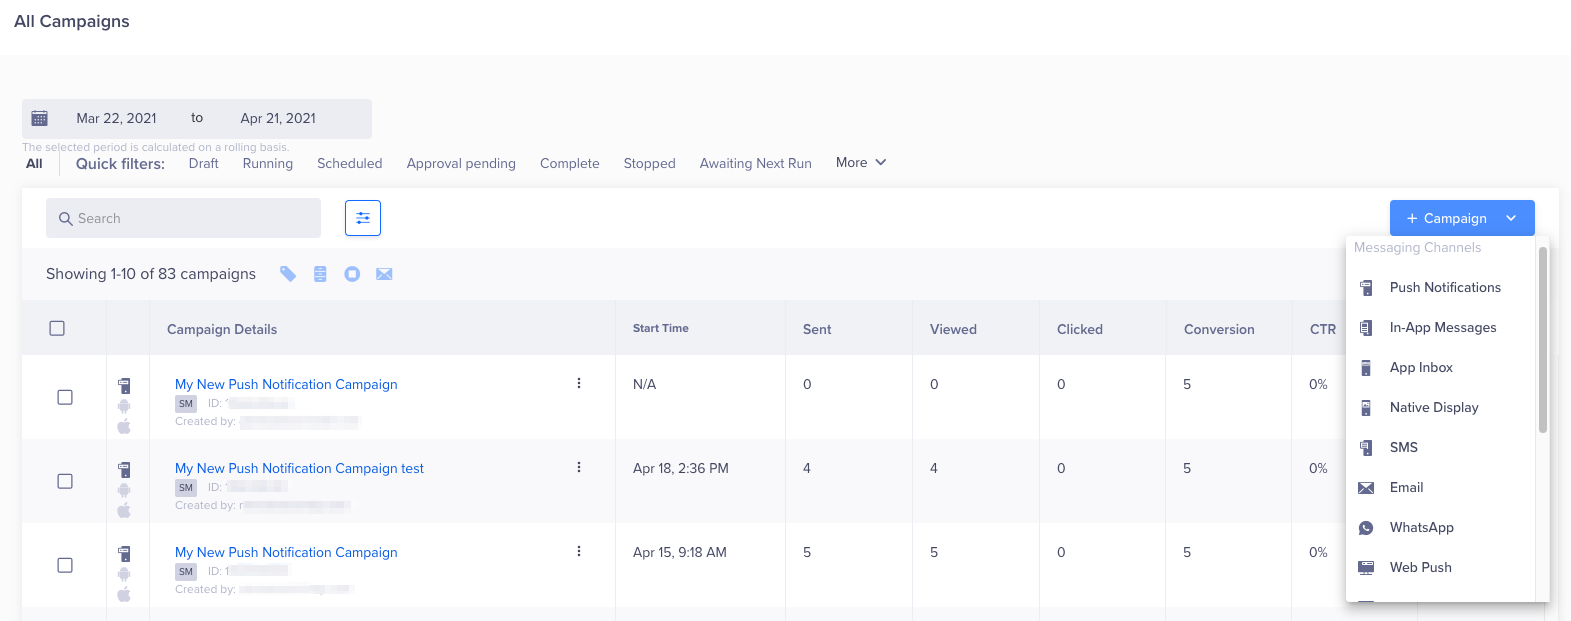
Create a Campaign
- Navigate to When > Delivery preferences.
- Select Timezone.
- Select a delivery option: Drop the campaign or Deliver the campaign the next day.
- Click Done.
How the Delivery Options Work
The following example involves a marketer located in the Midwest (Central Time). At 11:30 AM, a lunchtime campaign has been scheduled to be delivered in each user’s local time. The campaign start time is set to 12:00 PM and the first set of messages will go out at noon Central Time. Two hours later, West Coast users receive the campaign.
Since this campaign was initiated at 11:30 AM Central, it was already 12:30 PM Eastern Time which is after the specified delivery time for the East Coast users.
The campaign continues to deliver messages each timezone moving from East to West until it reaches the first timezone.
If you select Drop the campaign, any user whose timezone has already passed when the campaign kicked off will not receive this campaign.
If you selected Deliver the campaign the next day, then the campaign runs for timezones around the globe and eventually delivers the campaign to the East Coast users at noon (Eastern Time) the next day.
Critical Delivery DatesIf it is critical for a campaign to be delivered on a certain calendar day (e.g., an Easter campaign) and the message has to arrive on Easter Sunday or not at all, choose the Drop the campaign option.
Do Not Disturb Hours
CleverTap provides the option for setting the Do Not Disturb hours for notification delivery while creating a campaign. You can set this to ensure that the users who get qualified for the campaign are not disturbed during the specified DND hours.
If a user qualifies for a notification in DND hours, you can decide to completely discard the notification or specify to deliver the notification to the user after the end of DND hours.
DND TimezoneDND is set based on the respective timezone of every user by default. If the time zone is not available for any user, DND will be applied as per the account time zone.
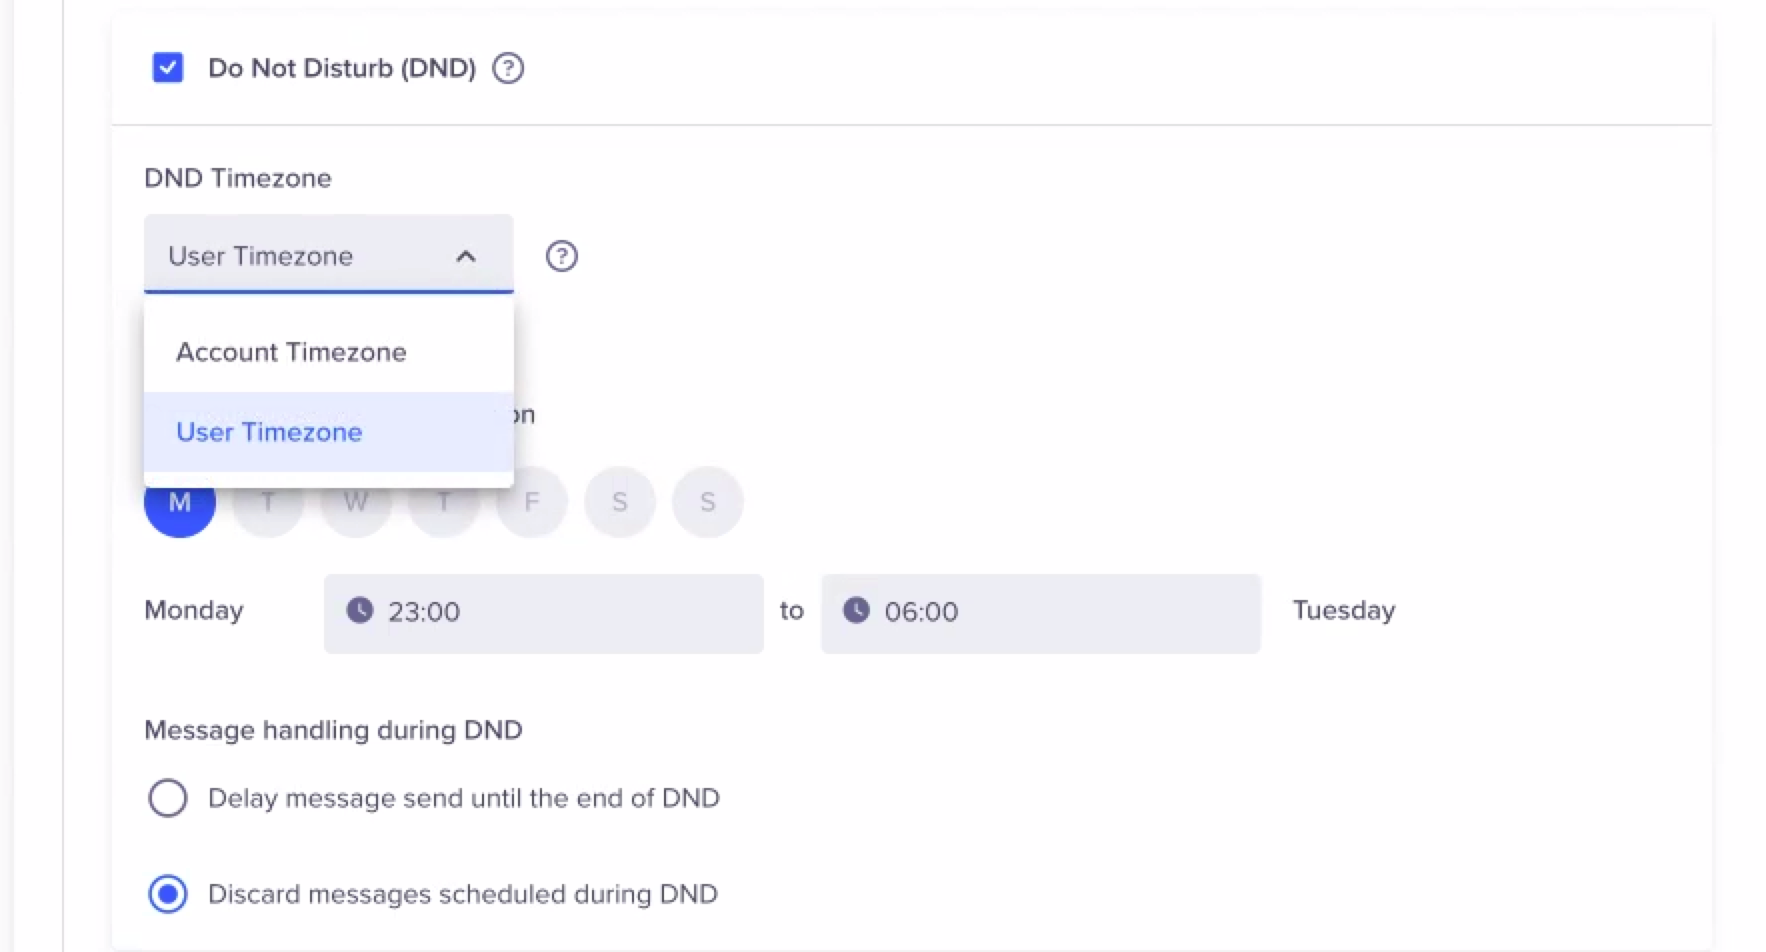
Select the DND Timezone
Set DND for Mobile Push, SMS, Email, Web Push, or WhatsApp
To set DND for mobile push, SMS, email, web push, or WhatsApp campaigns, perform the following steps:
- From the new campaign page, navigate to When > Delivery preferences.
- Select the Do Not Disturb (DND) checkbox to display the DND options.
- Select the days and input the times you do not want to send campaign notifications. If you want to use the same time inactive period for each day, click the Copy Time To All link.
- Select a message handling type.
- Click Done.
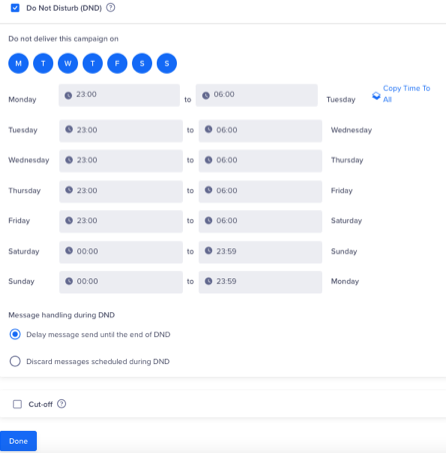
Select DND Preferences
Campaign Frequency for Mobile In-App, Web Pop-up, and Web Inbox
Campaign frequency provides the ability to define when the user qualifies for a message. If a user qualifies outside this window, the message is discarded.
To set campaign frequency for mobile In-App or web popup campaigns, perform the following steps:
-
Under When select the Set frequency checkbox.
-
Select the days and input the times you do not want to send campaign notifications. If you want to use the same time inactive period for each day, click Apply to all.
-
Select Deliver how often from the available options.
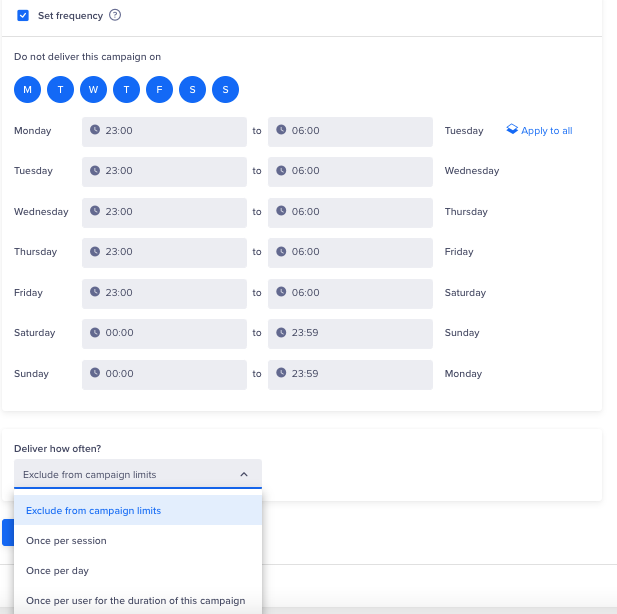
Set Frequency to Qualify Users
- Click Done**.
Campaign Cut-off
The campaign cut-off time ensures no notifications are sent after the specified time. This is useful if the campaign is time-sensitive and a later time makes the notification irrelevant.
Select the Cut-off checkbox and specify the time to stop sending the notification when the number of target users is large, causing a significant delay in processing the user queue. This ensures that after the set time, there's no notification sent.

Campaign Cut-Off Time
TTL - Push Notification Delivery
Time to Live is the notification's persistence sent to an end user. It regulates the time that the system monitors user device status to deliver a push notification. Whenever the user is online during the set TTL period, the notification is delivered. Any user not coming online will not receive the push notification, and there are no notifications attempted after the TTL period is over.
More information is available here.
Message Frequency Caps
If you have multiple marketing campaigns running simultaneously for any one channel, the same user may qualify to receive a message from more than one campaign in a given day, week, or month. Frequency caps provide you the capability to limit the number of notifications a user will receive from all the campaigns running for that channel.
Frequency is channel-specific. Frequency caps let you limit the total notifications received in a given timeframe for one delivery channel and not across all the channels as a whole.
To set frequency caps, navigate to Settings > Engage > Setup > Campaign Limits:
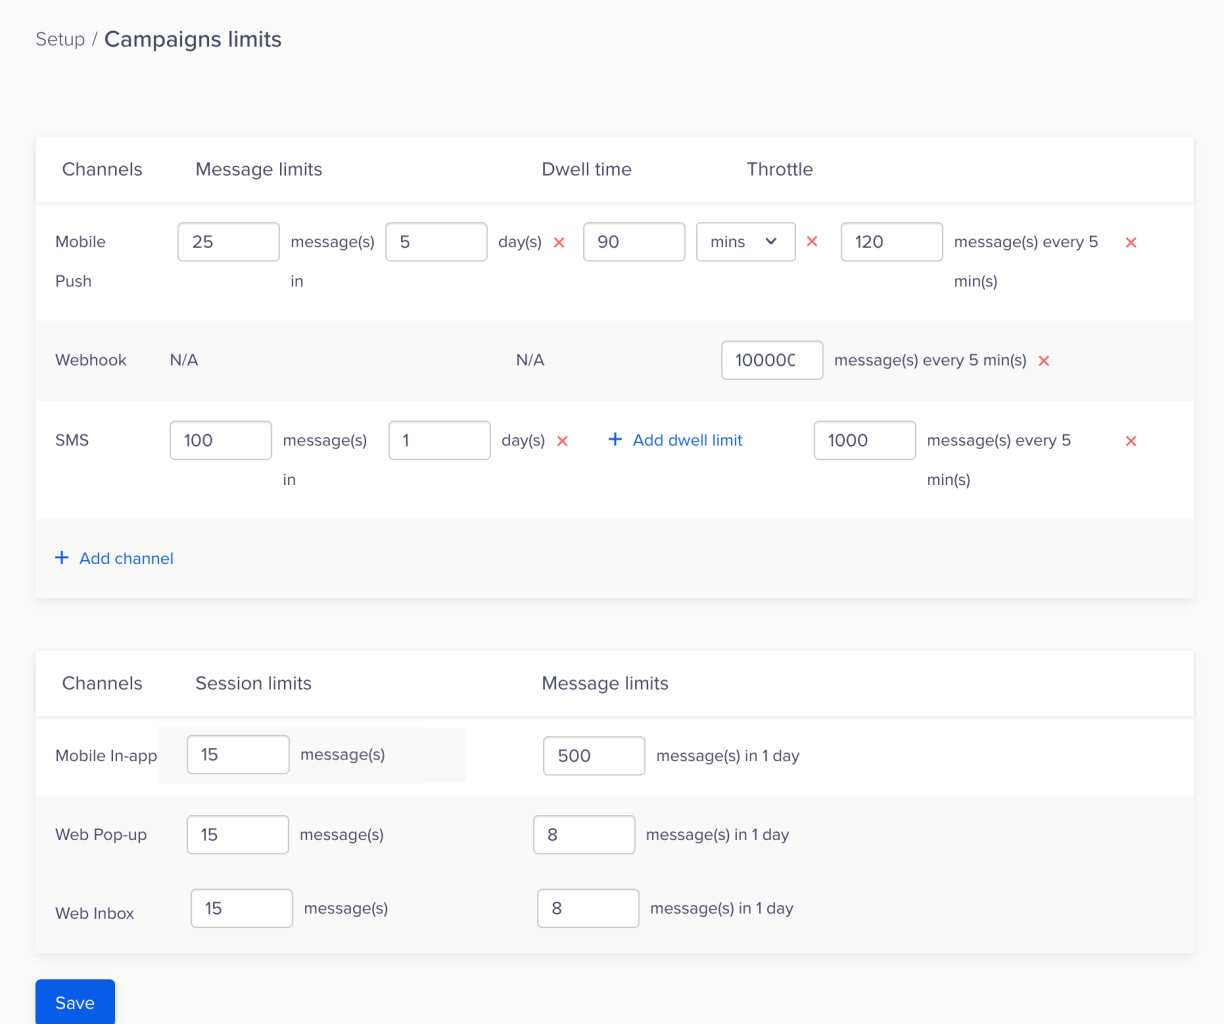
Set Campaign Limits
Error Reporting with Frequency Caps
In the error reporting section of the campaign report, you can find the number of users who did not receive the campaign because of this frequency cap setting.
| Non-technical Errors | Android | iOS |
|---|---|---|
| Frequency Caps Exceeded | 1158 | 73 |
| Profile not reachable | 237 | 0 |
| Undelivered Due to App Uninstall | 351 | 120 |
| Count | 1746 | 193 |
Updated about 1 month ago
