Catalogs
Learn how to use Catalogs in CleverTap.
Overview
With rapidly changing customer preferences in real-time, recommendation engines become very crucial for growth marketers to deliver the most relevant recommendations or suggestions to their customers. You can achieve this with the help of CleverTap's Catalogs feature.
Catalog provides the ability to send personalized recommendations using catalogs from the CleverTap dashboard. It includes details, such as product names, descriptions, prices, images, and other relevant attributes. Using catalogs, you can send campaigns with dynamic information in messages from product prices to inventory levels. You can upload a catalog directly to the CleverTap dashboard via a CSV file that is generated by your inventory management system on your servers.
The following are two types of catalogs you can upload:
- Product Catalog
- Product Location Catalog
Real-Time Inventory UpdatesIf your inventory or stock is highly dynamic, updating more than once a day, you must use the Linked Content feature to fetch the data in real time.
Download a Sample Catalog
Before you upload your catalog to the CleverTap dashboard, it is good practice to download a sample catalog. This helps ensure that your data aligns with the platform's requirements, avoids common mistakes, and optimizes the effectiveness of your marketing efforts. To download a sample catalog:
- Navigate to Settings > Catalogs.
- Click Sample Product csv or Sample Product Location csv links depending on your requirement.
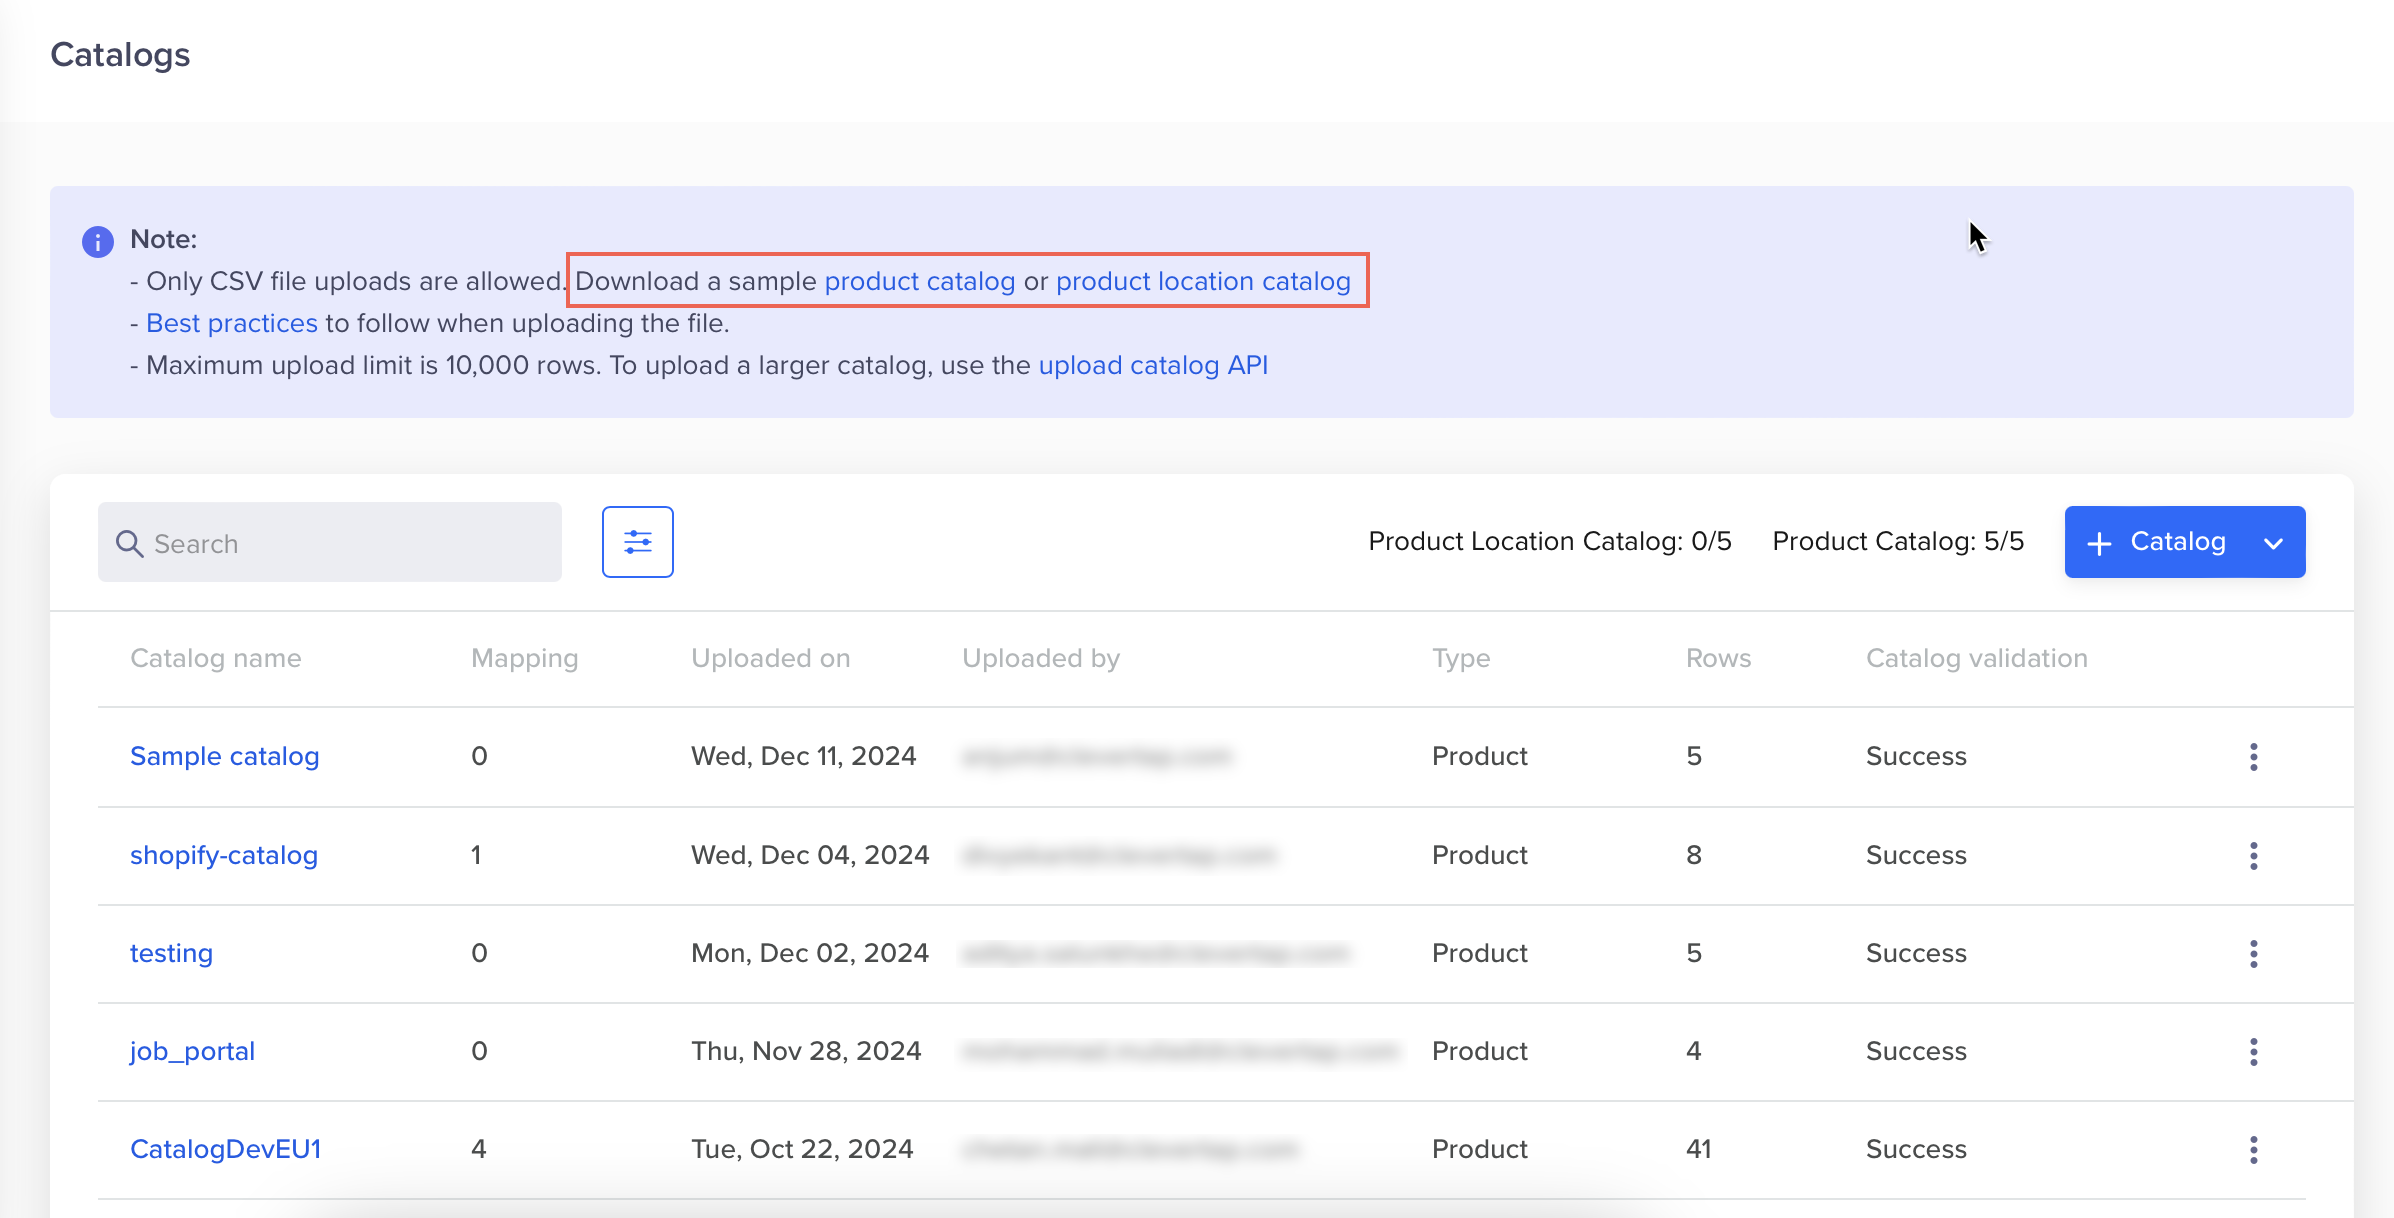
Download Sample CSVs
The sample files help you get started with creating your catalog.
- Product Location Catalog: In this type of catalog, the identity represents the location ID. The following is the sample product location catalog:

Sample Product Location Catalog
- Product Catalog:
The following are the mandatory fields for the product catalog: Identity, Name, and ImageURL.The following is the sample product catalog:

Sample Product Catalog
Create a New Catalog
After you have the catalog ready, you can upload it to the dashboard. To do so:
- Navigate to Settings > Catalogs and click + Catalog.
- Select Product or Product Location.
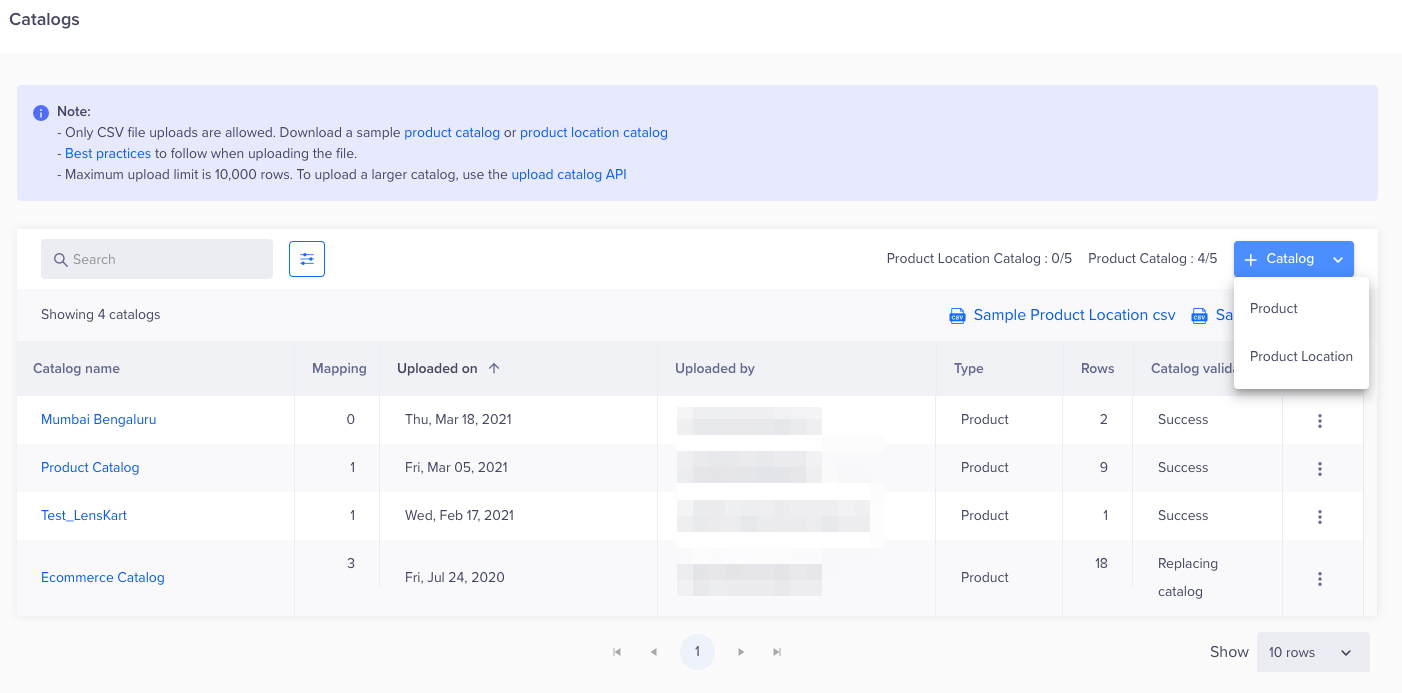
Create a New Catalog
- Click Browse to search and upload a new catalog. The catalog file must be in a CSV format.
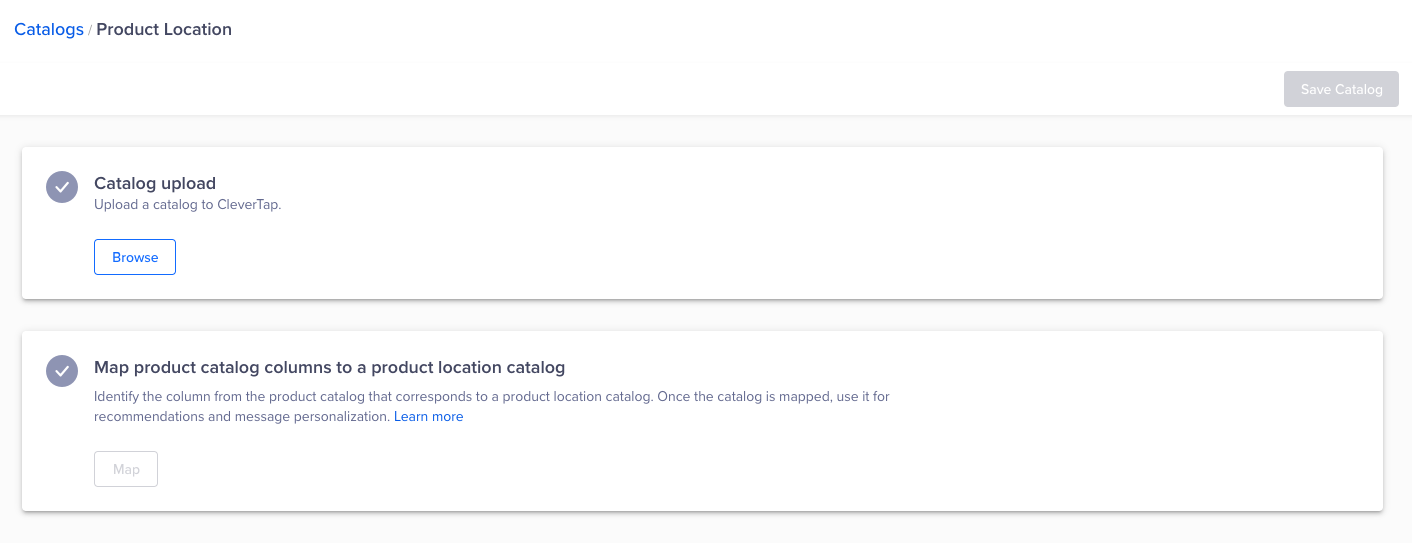
Browse to the catalog CSV file location from your system
Upload Limit
- Insert up to 10,000 rows from the dashboard or up to 5 million rows using the Catalog API.
- Upload up to five Product Catalogs, each with a maximum of five million rows.
- Upload up to five Product Location Catalogs, each with a maximum of one million rows.
- Enter the Catalog name after the Catalog preview popup opens.
- Click Upload.
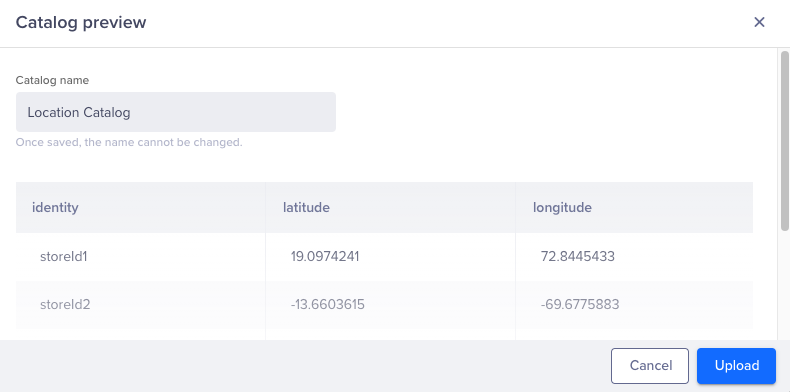
Upload Catalog
Uploading a catalog may take some time. Once the file is uploaded, the status is updated next to the file name.
Handling Duplicate Identity RowsIf your catalog file contains multiple rows with the same
identity, CleverTap retains only the most recently updated row. Ensure that your catalog has the latest data for each identity to avoid inconsistencies in campaign personalization.
- Click Map to map catalog columns to the associated property on the CleverTap dashboard.
- Click Save Catalog.
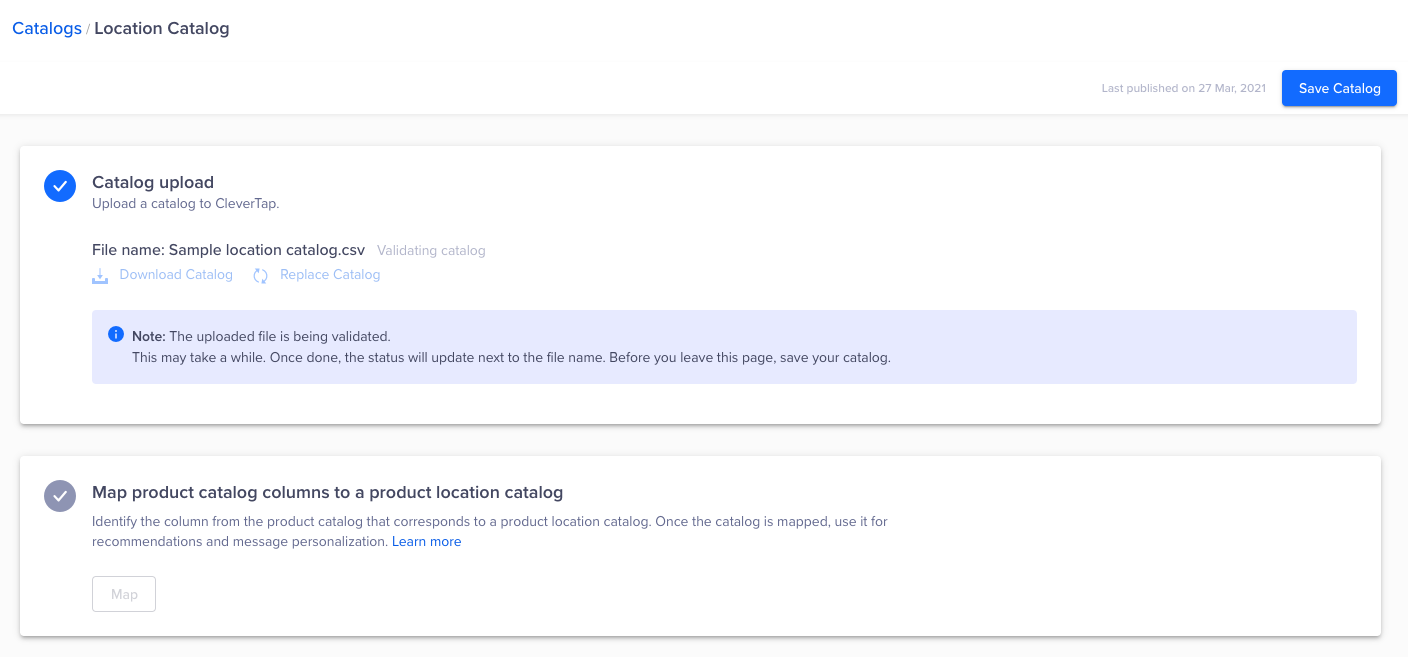
Click Save Catalog to save the catalog
The new catalog is now displayed on the Catalogs page.
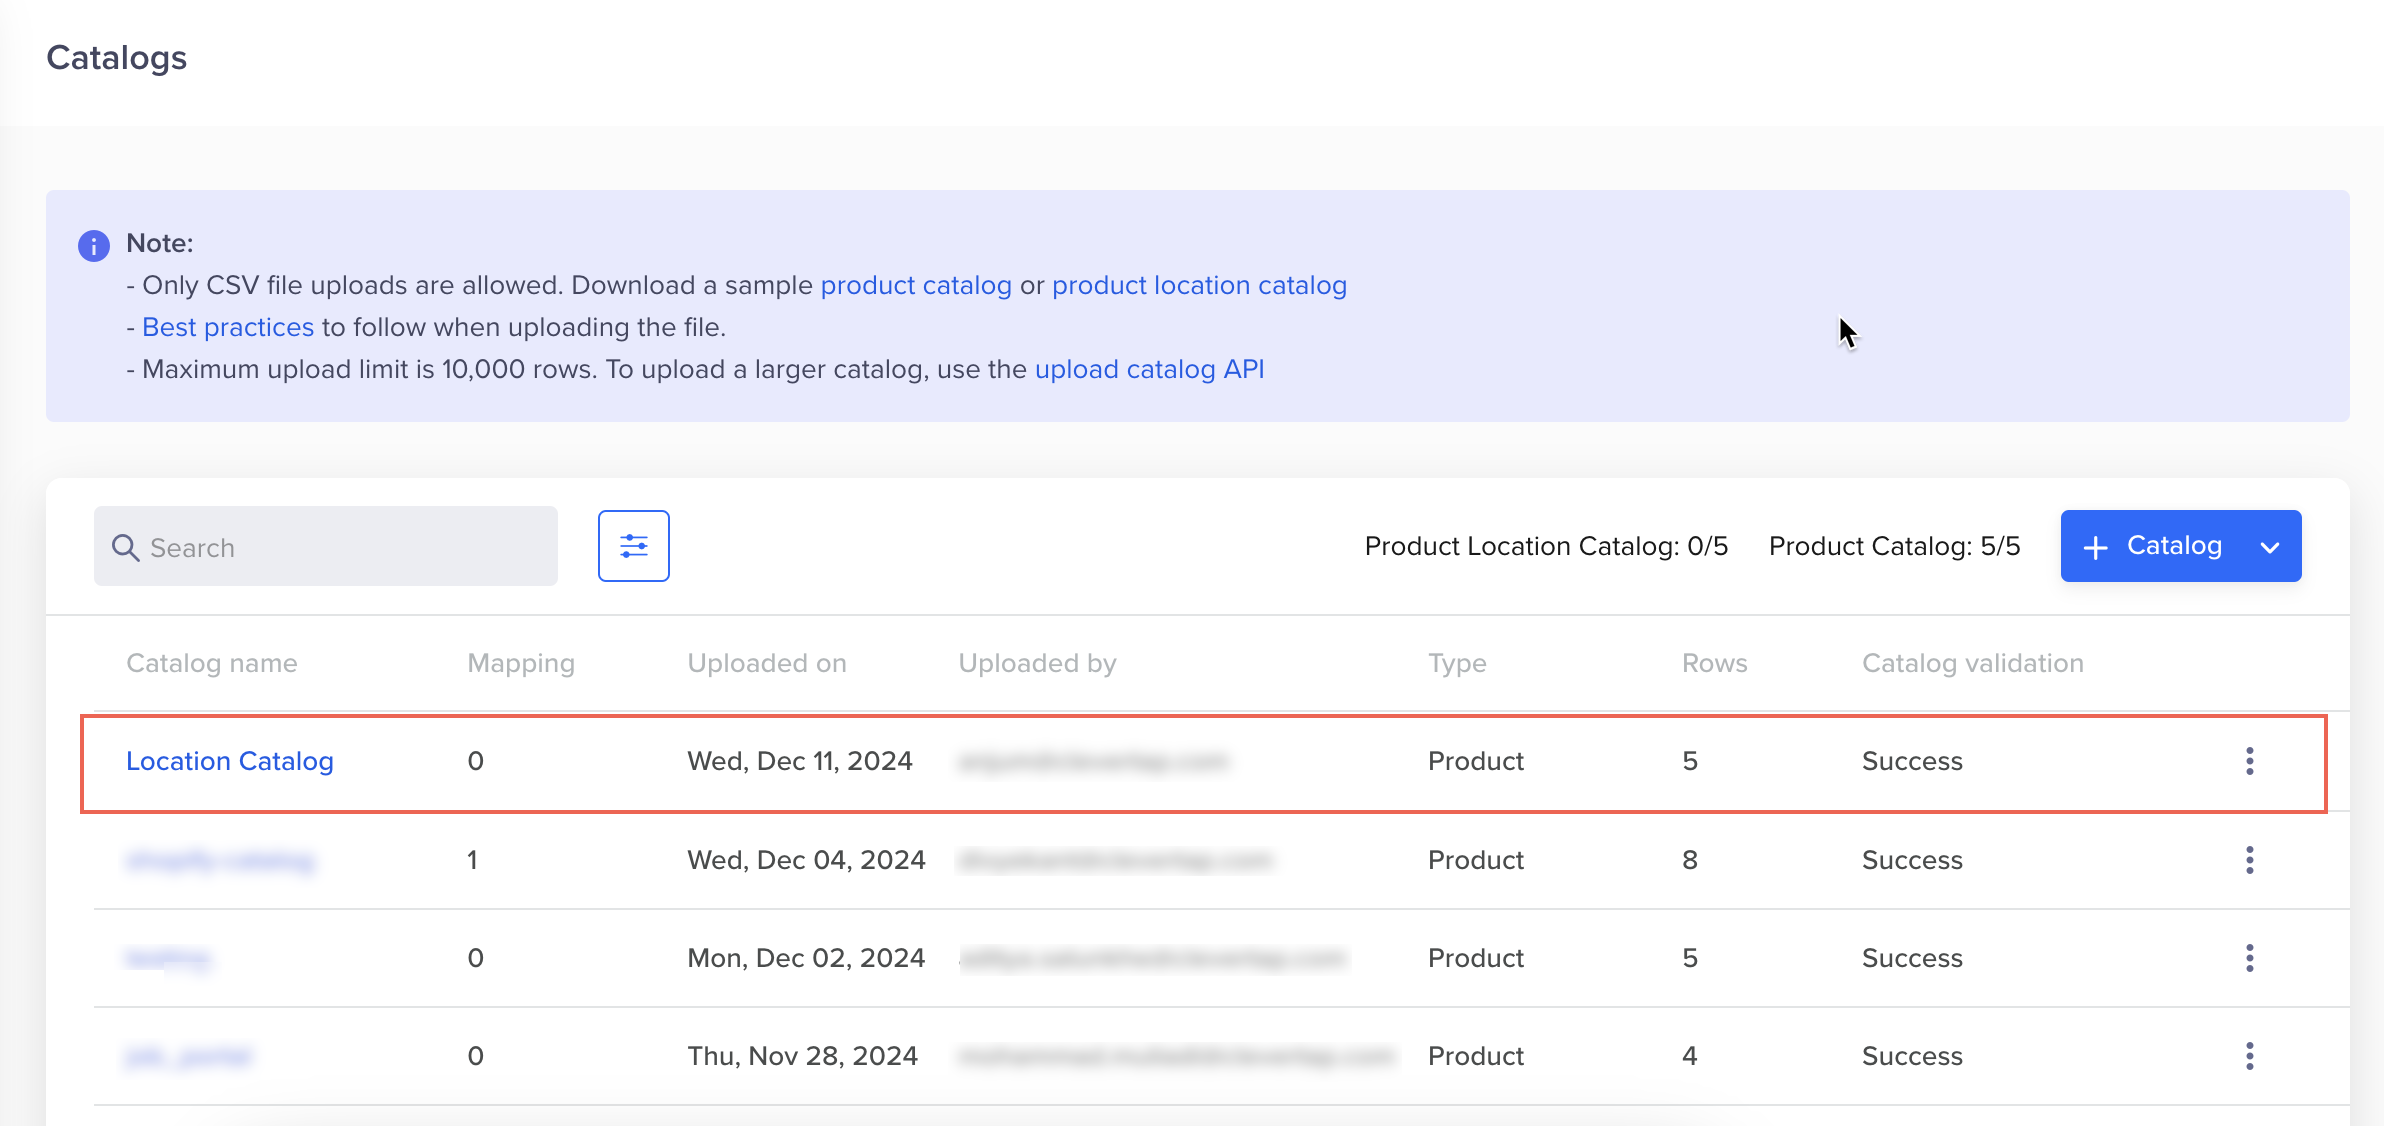
New catalog displays on the Catalogs page
Key Points to Consider
You can add a maximum of 20 columns in a catalog.
You can upload the catalog with columns having accent marks and emojis, but you cannot view these characters at the time of catalog send-time personalization or downloading the catalog.
Map Catalog Columns
After uploading the catalog, you must map the catalog column with the associated event and property on CleverTap (for example, map the Name field of the catalog to the event property Product Name of the event Product Viewed).
- Navigate to Settings > Catalogs and select the uploaded catalog.
- From the map catalog section, select the catalog columns to map.
NoteCatalog mapping is not supported for array type items in Charged events.
The following is the sample mapping of the Product Location Catalog where the identity column from the catalog must be mapped to any other column in any product catalog:
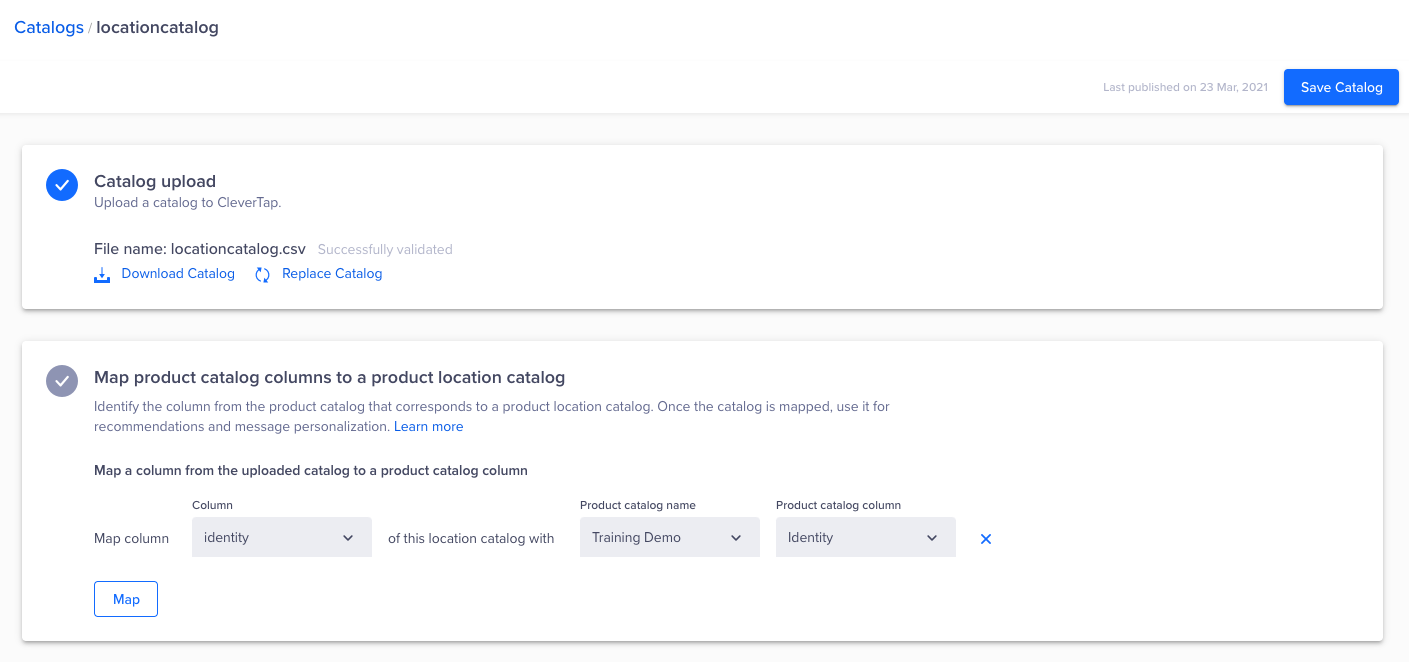
Select Product Location Catalog columns to map
The following is the sample mapping for the Product Catalog:
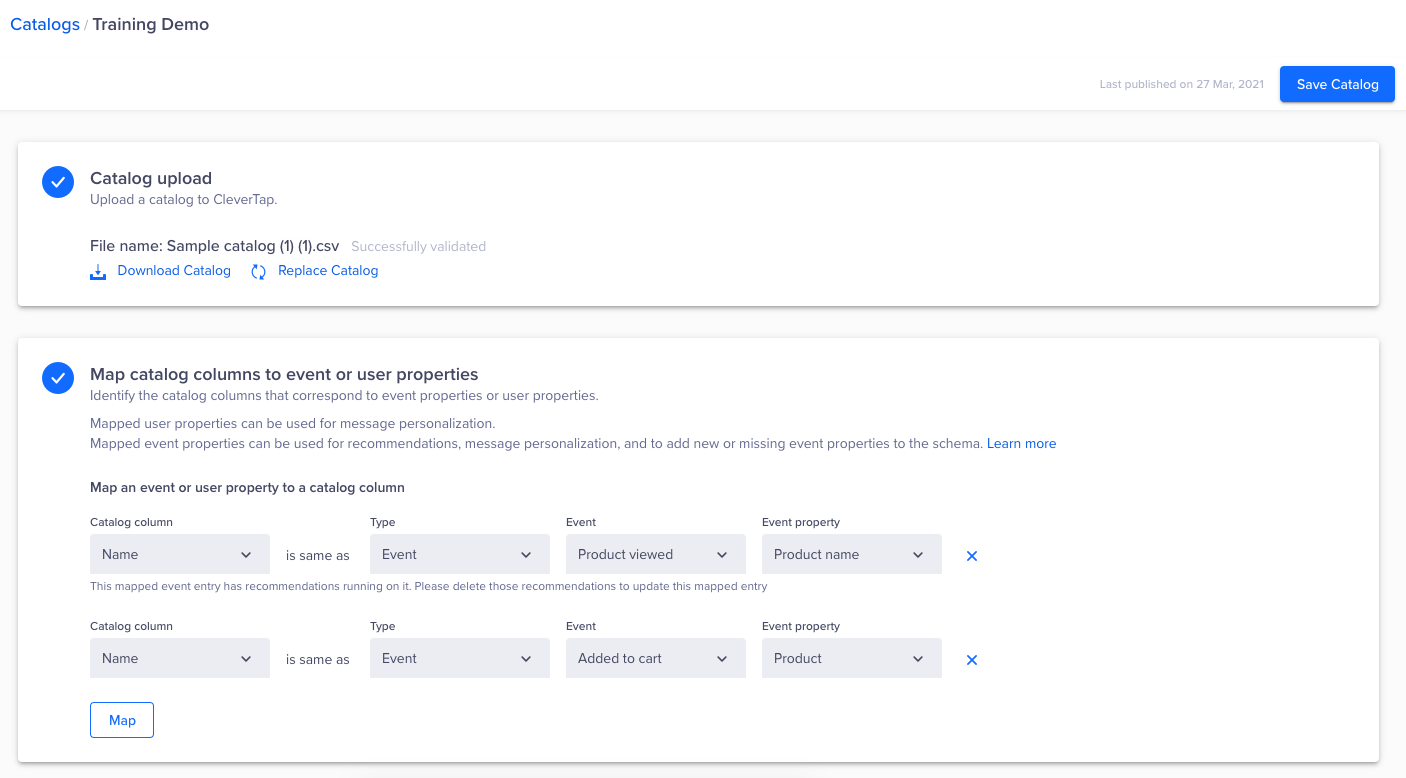
Select Product Catalog columns to map
- Click Save Catalog after the mapping is complete.
Catalog Mapping Guidelines
- A product catalog must include a field that can be mapped to the identity column in a product location catalog.
- You can create multiple mappings with the same product location catalog.
- You can map multiple catalog columns to a CleverTap event property, but each mapped property must belong to the same event.
- When mapping catalog columns, both user and event properties are always interpreted as String values, regardless of the provided data type.
Supported Channels
This section provides information about the messaging channels that support Catalog Send-Time Personalization:
- Push Notification
- SMS
- Web Inbox
- Web Push
- Webhooks
Catalog Best Practices
When uploading a catalog, consider the following best practices: some items are mandatory, and others are recommendations.
Mandatory Practices
The following are some of the mandatory practices when working with Catalogs on the CleverTap dashboard:
-
The first row in the file must contain the header fields separated by commas. The subsequent rows are fields with your individual catalog items in them, also separated by commas. Each row identifies one item in your catalog.
-
Ensure that each
identityin your catalog is unique. If duplicates exist, only the latest entry is retained. -
There can be a total of 20 columns in your catalog. The following are some tangible benefits of adding a large number of custom fields when uploading your record:
- Every field in the catalog can be used for sending personalized messages to your users.
- Also, every field could be used to create recommendations for a filtered set of items in your catalog. For example, you could have a field that identifies the things that are the flavor of the season.
- You could create a recommendation to serve only the flavor of the season from the catalog. You could also exclude items that are not best suited to be recommended to a wider audience (for example, rated content).
-
The images added within the ImageURL field must meet the following requirements to render correctly:
- Use HTTPS links only.
- For In-App Campaigns, follow the Aspect Ratio guidelines.
- For other channels, use an aspect ratio of 16:9 or 1:1, depending on your campaign requirement.
Recommended Practices
The following are recommended practices:
- You can add custom fields in addition to the mandatory fields.
- It is highly recommended that you keep your catalog updated to ensure that:
- The recommendations are accurate and useful to users. Also, it is important to avoid showing recommendations for items that have expired or are currently out of stock.
- The Catalog Data Ingestion is accurate.
Updated about 2 months ago
