Catalog Send-Time Personalization
Overview
Catalog send-time personalization allows messages to be personalized with external data pulled from an uploaded catalog when a campaign is sent. Automatically include dynamic information available in the catalog directly in a message, such as product price, product category, available inventory levels, and more.
E-commerce App ExampleA user adds a laptop to the cart, then exits. By providing additional details in the engagement message such as the image, size, latest price, and specifications of the laptop, the user can be nudged to purchase the item. Using catalog send-time personalization helps keep users engaged in a meaningful way.
After you have uploaded the catalog, you can start using it in a campaign. For more information, refer to Catalog.
Event Property
Follow the steps below to personalize a catalog by event property:
-
Create a campaign.
-
Click the Personalization link to select a catalog. Once the personalization setup window displays, you can map the required catalog columns to event properties and user properties.
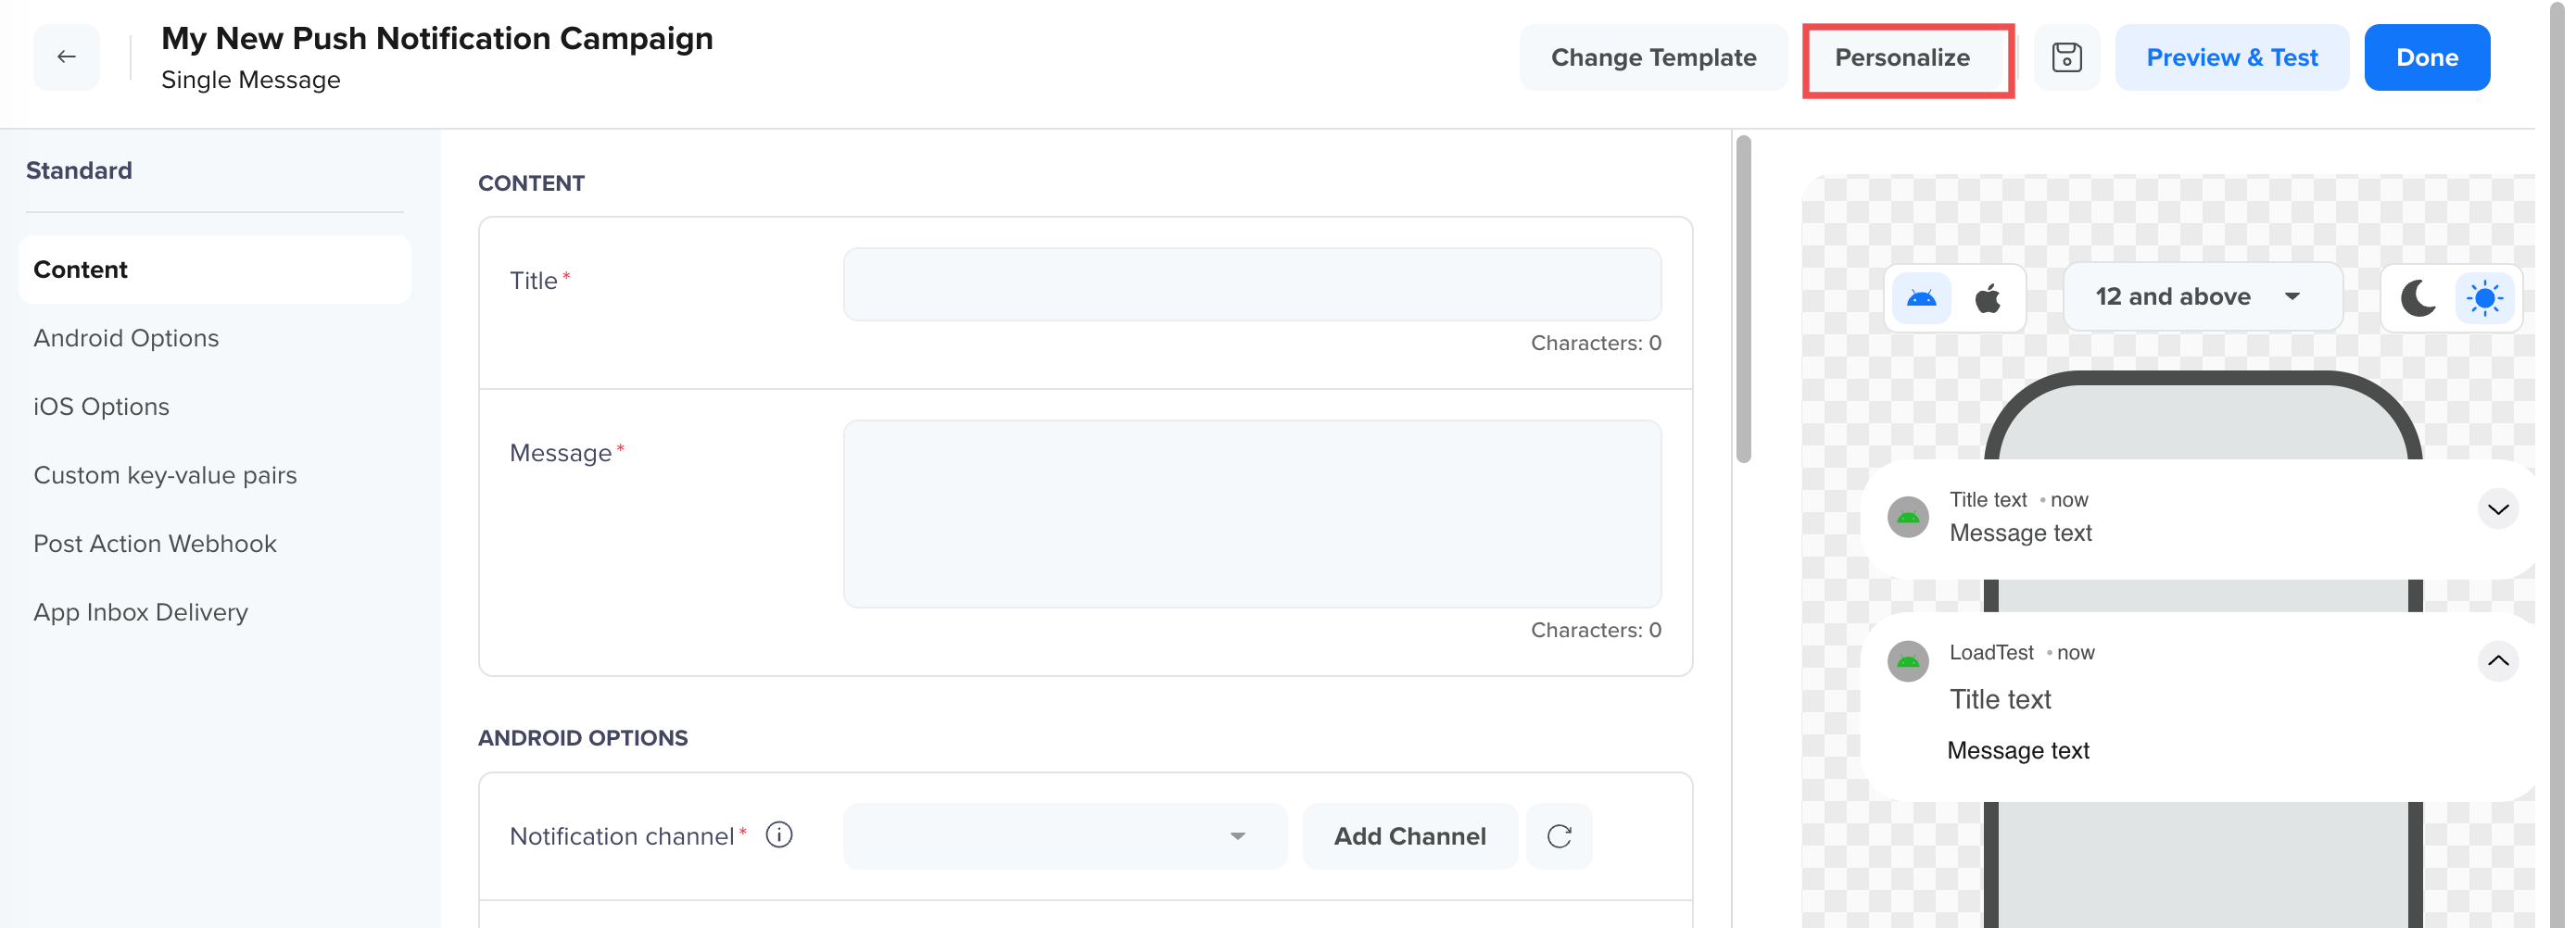
Personalize Setup
- Click the Catalog tab and select the required catalog from the list.
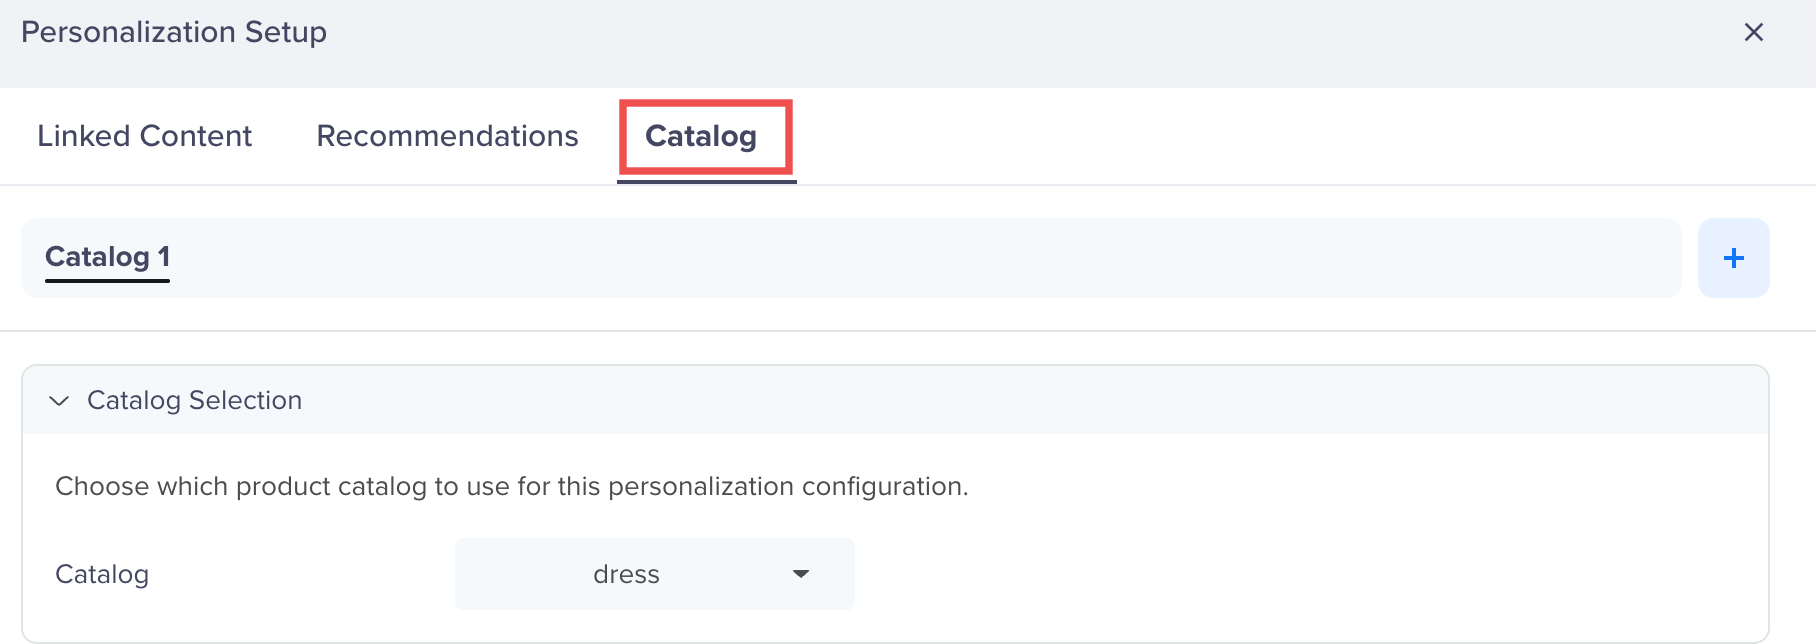
Select Catalog
- Select the event. You can personalize your message based on the event's property values.
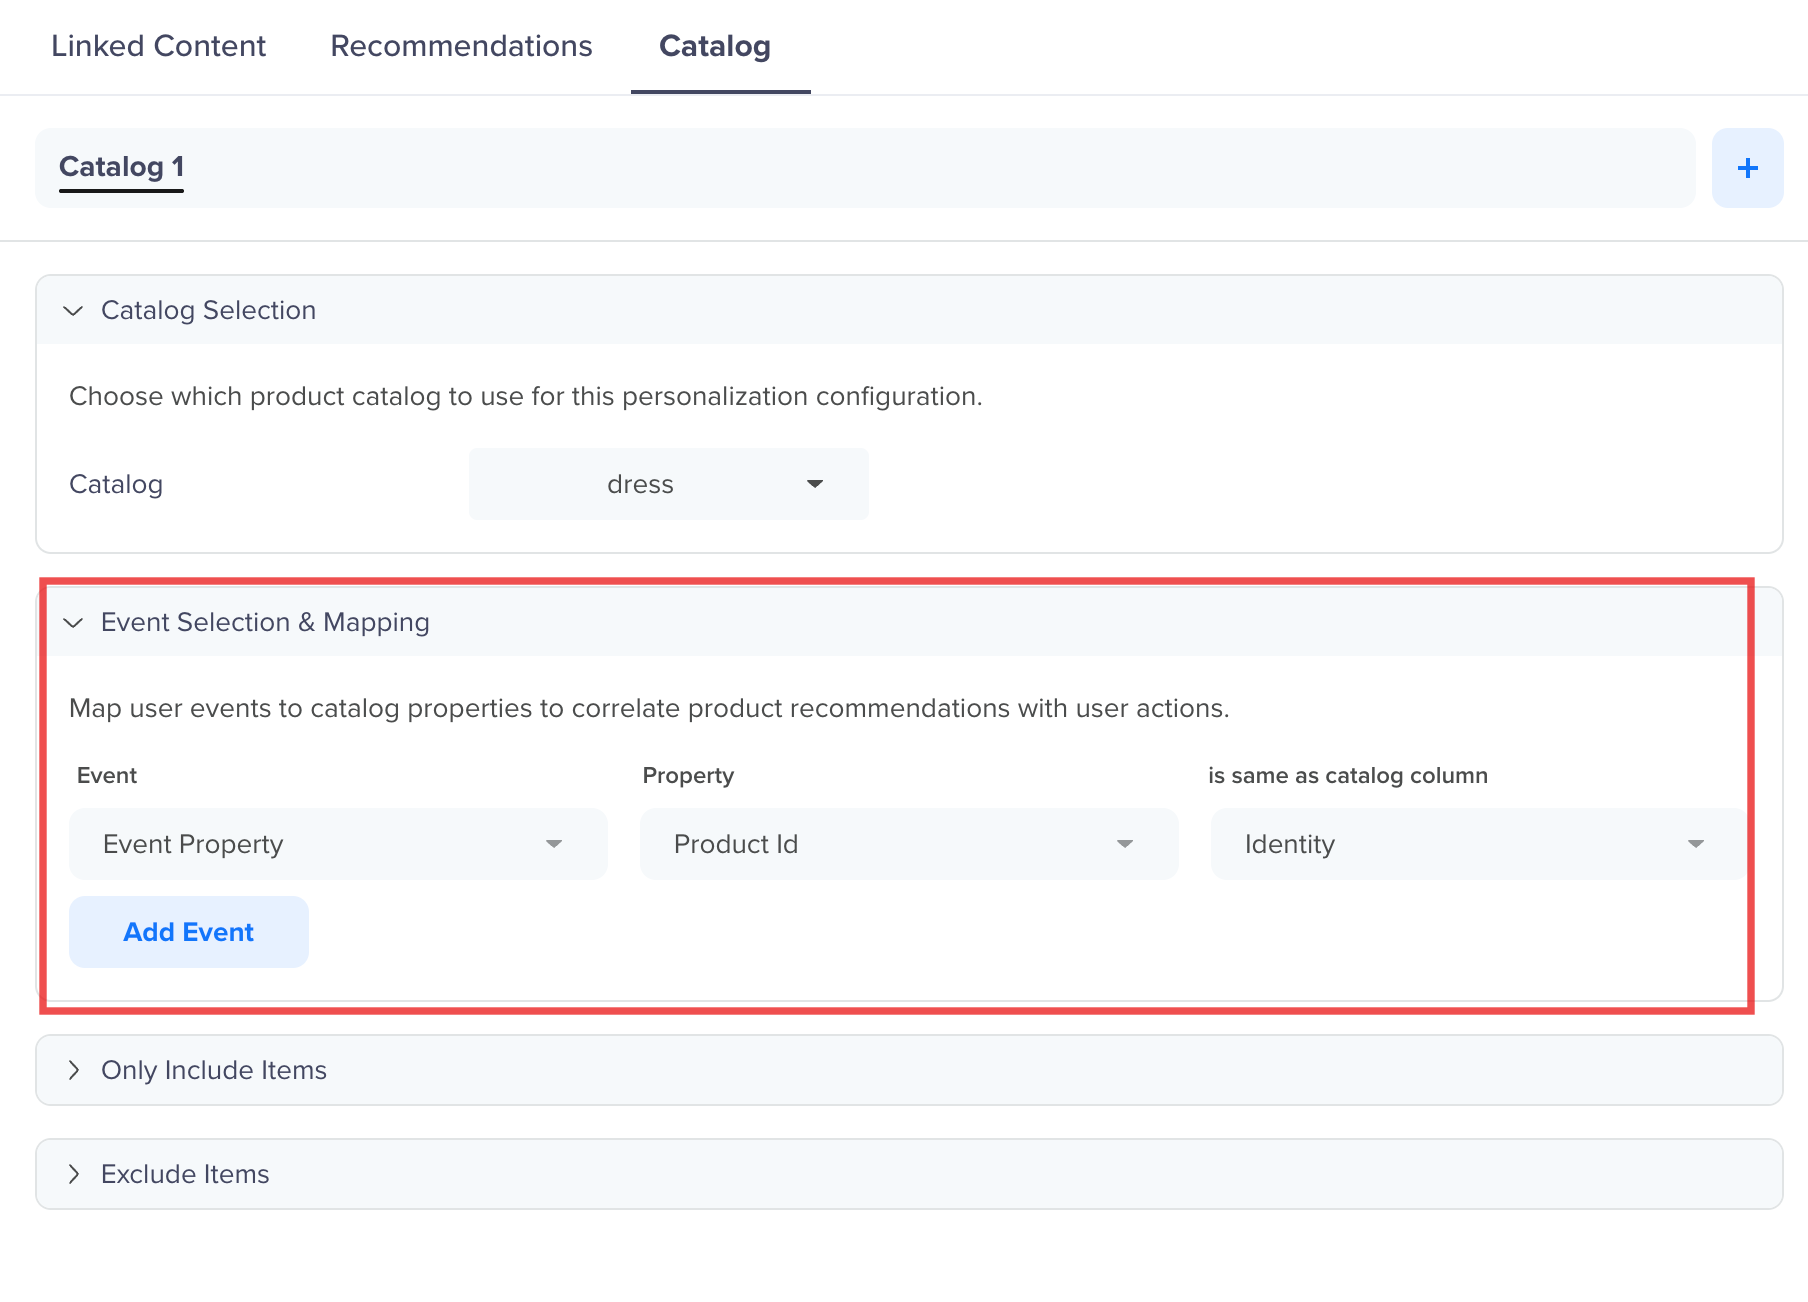
Map Event to the Catalog Columns
Recent OccurrenceThe most recent occurrence of the event is used to select the relevant item from the catalog. If the campaign is a triggered campaign, then the event that triggered the campaign is considered.
- Select the event property to map to the catalog column. This mapping is important to identify the catalog column that matches the event property. For example, we map Product Name, such as a laptop (from the Viewed event), to the Name column in the catalog.
Repeat this step to map more properties.
Note
- If required, map multiple properties. Every addition to the mapping is treated as an and condition. For example, map the name, the color, and the brand to personalize the message for the user.
- Catalog mapping is not supported for array-type items in Charged events.
-
Click Save to set up the personalization.
-
Use liquid tags to create a personalized message for your target audience.
In this example, the syntax for using different catalog columns is shown below:
{{ Catalog.["Sample Catalog"].Name | default: "Laptop" }}
{{ Catalog.["Sample Catalog"].Amount | default: "0" }}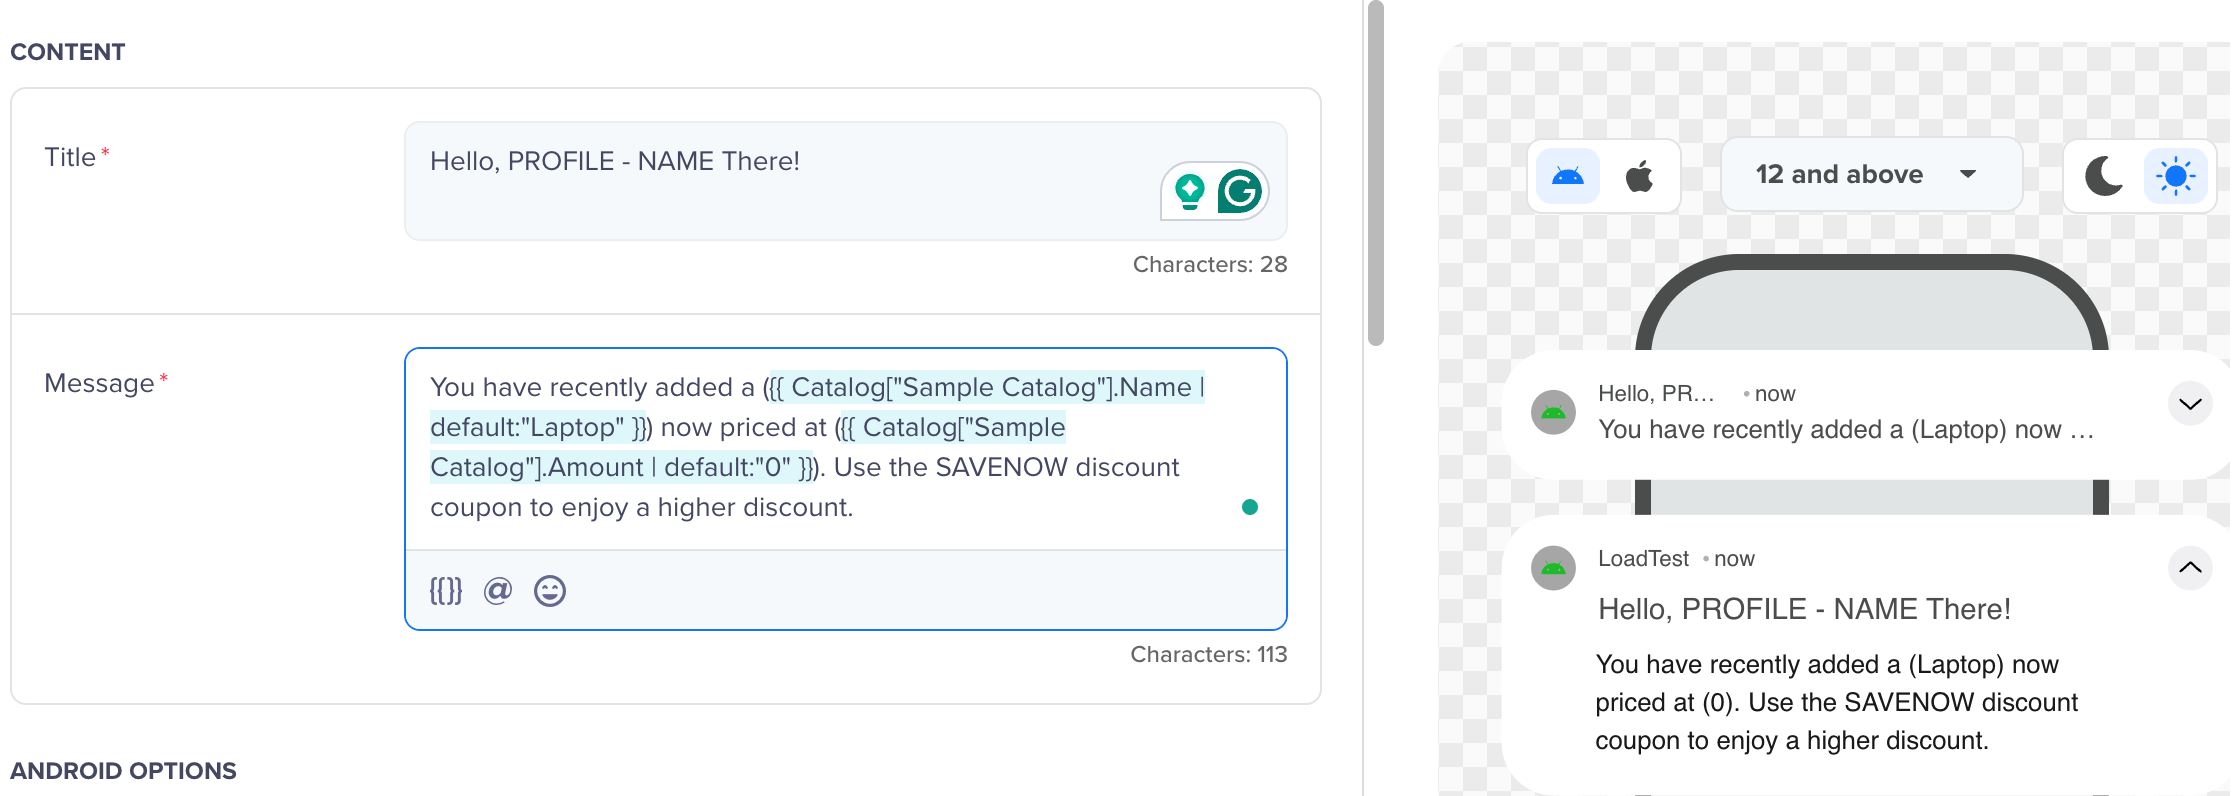
Create Message using Liquid Tags
You can now use the latest amount for the last item added to the cart, such as the laptop.
User Property
Follow the steps below to personalize a catalog by user property:
- Create a campaign.
- Click the Personalization link to select a catalog. After the personalization setup window displays, you can map the required catalog columns to event properties and user properties.
Personalize Setup
- Click the Catalog tab and select the required catalog from the list.

Select Catalog
- Select the user property to map to the catalog column. For example, you can recommend the top restaurant in New York with rich details about the restaurant from the catalog to a user with the user property City set as New York.
NoteIf required, map multiple properties. Every addition to the mapping is treated as an and condition. For example, map the city, the top-rated restaurants, and the Chinese restaurants to personalize the message for the user.
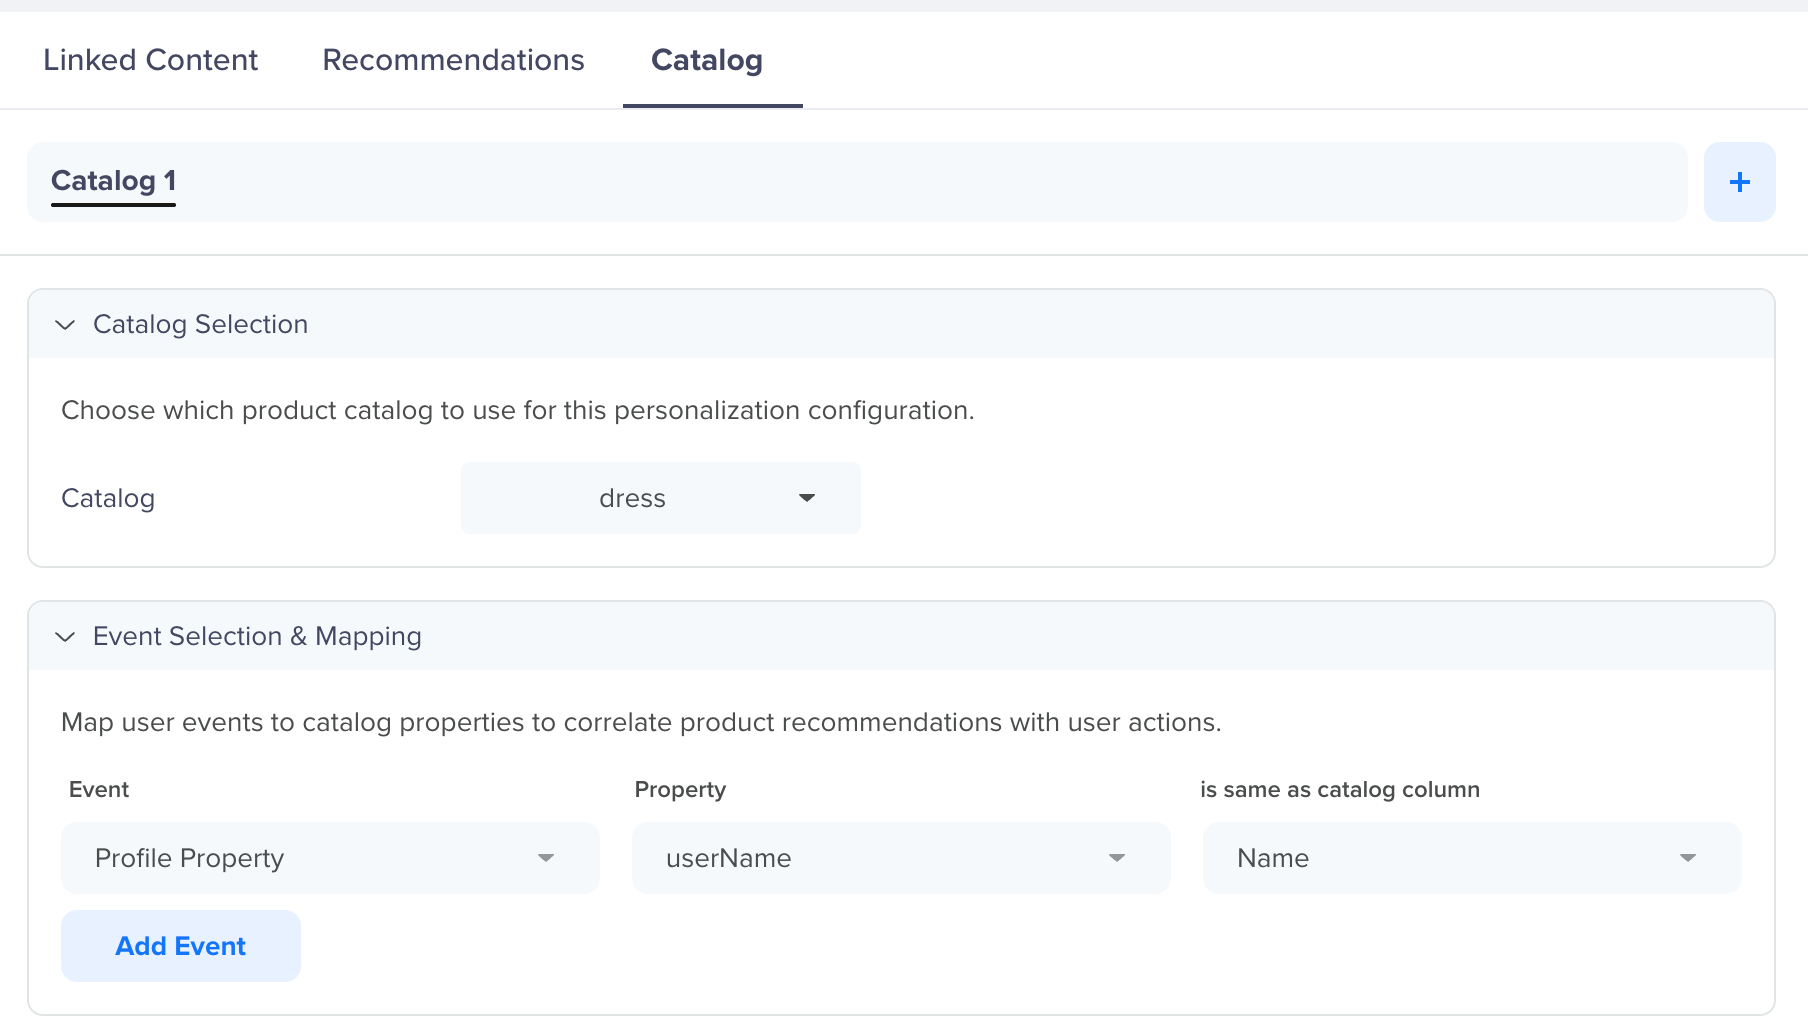
Map Catalog Column to Profile Property
- Click Apply to set up the personalization.
- Use liquid tags to create a personalized message for your target audience.
In this example, the syntax for using a catalog column is shown below:
{{ Catalog.Sample_Catalog.["City Restaurants"] | default:"New York Top Restaurant" }}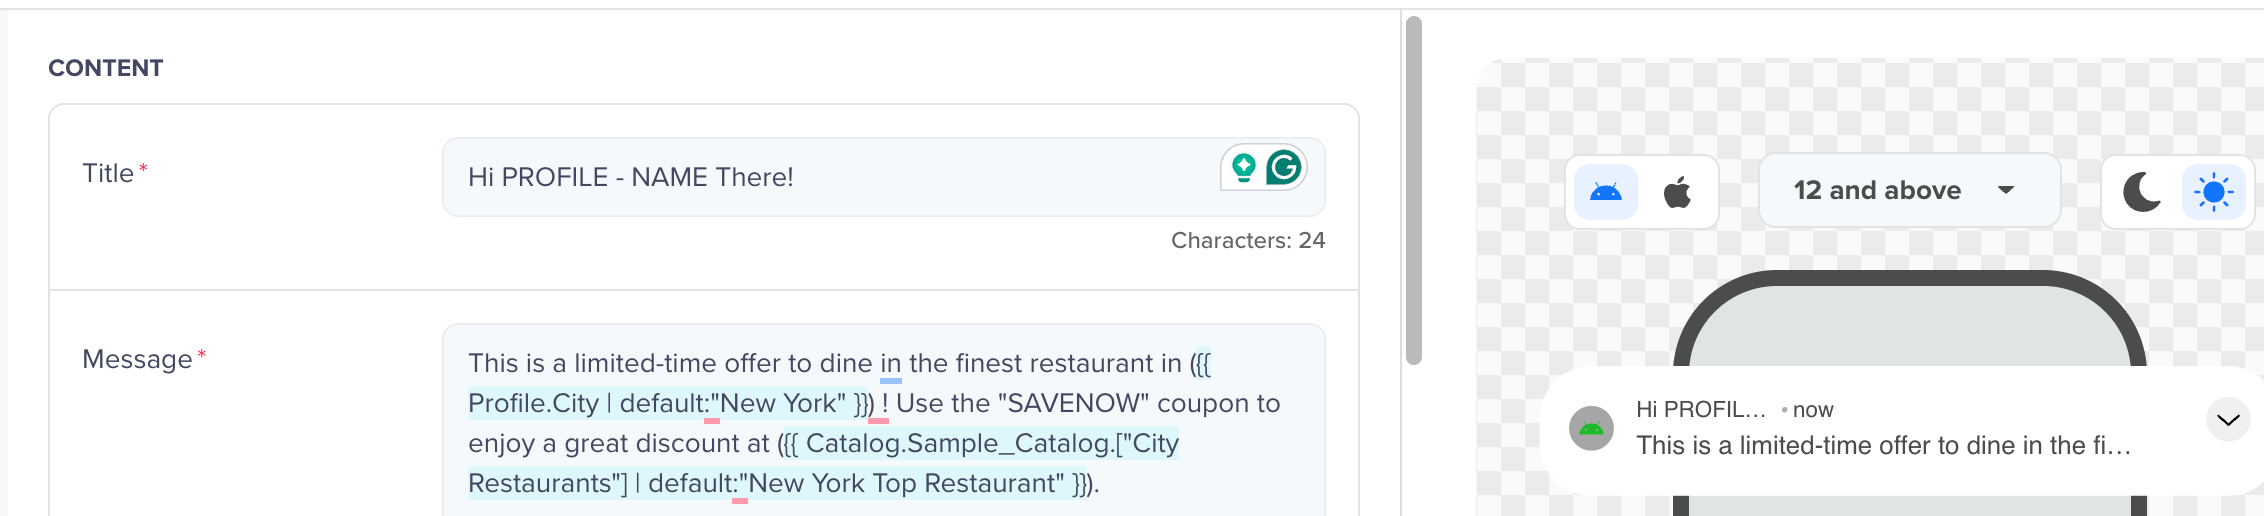
Create Message using Liquid Tags
Map Multiple PropertiesCreate personalization by combining catalog send-time personalization with constant event property.