NiftyImages
Dynamic Content
Overview
NiftyImages allows marketers to create personalized and dynamic images for Email and In-App messaging campaigns. By integrating NiftyImages with CleverTap, you can enhance your campaigns with real-time customized visuals, such as personalized images, countdown timers, and dynamic charts, creating a more engaging experience for your audience. With this integration, you can:
- Personalize Emails with Dynamic Images: Embed dynamic images tailored to individual users.
- Drive Urgency with Real-Time Countdown Timers: Add real-time countdown timers to create urgency for promotions or events.
- Enhance In-App Messages with Personalized Visuals: Personalize In-App messages with user-specific images.
- Keep Visuals Fresh with Automated Image Updates: Ensure your Emails and In-App messages reflect the most up-to-date information without manual intervention.
Prerequisites for Integration
The following are the prerequisites for NiftyImages:
- Ensure you have access to your NiftyImages account.
- Ensure you have a CleverTap account with valid Account ID, Passcode, and Region.
Support for IntegrationThis integration is managed and continuously improved by NiftyImages. The CleverTap and NiftyImages integration has undergone stringent testing to ensure seamless functionality. For any questions or issues, contact NiftyImages for support and resolution.
Integrate CleverTap with NiftyImages
To set up the CleverTap integration with your NiftyImages account, perform the following steps:
- Create Personalized Image in NiftyImages.
- Configure Email Campaign in CleverTap.
OR
Configure In-App Campaign in CleverTap.
Create Personalized Image in NiftyImages
NiftyImages enables marketers to create dynamic and personalized visuals for campaigns, including countdown timers, personalized images, and data-driven charts. To do so, follow these steps:
- Log into your NiftyImages account.
- Select the type of image you want to create from the available options:
- Personalized Image (user-specific details)
- Countdown Timer (event-based urgency)
- Mobile Text (responsive visuals)
- Messaging Charts (real-time data-driven graphics)
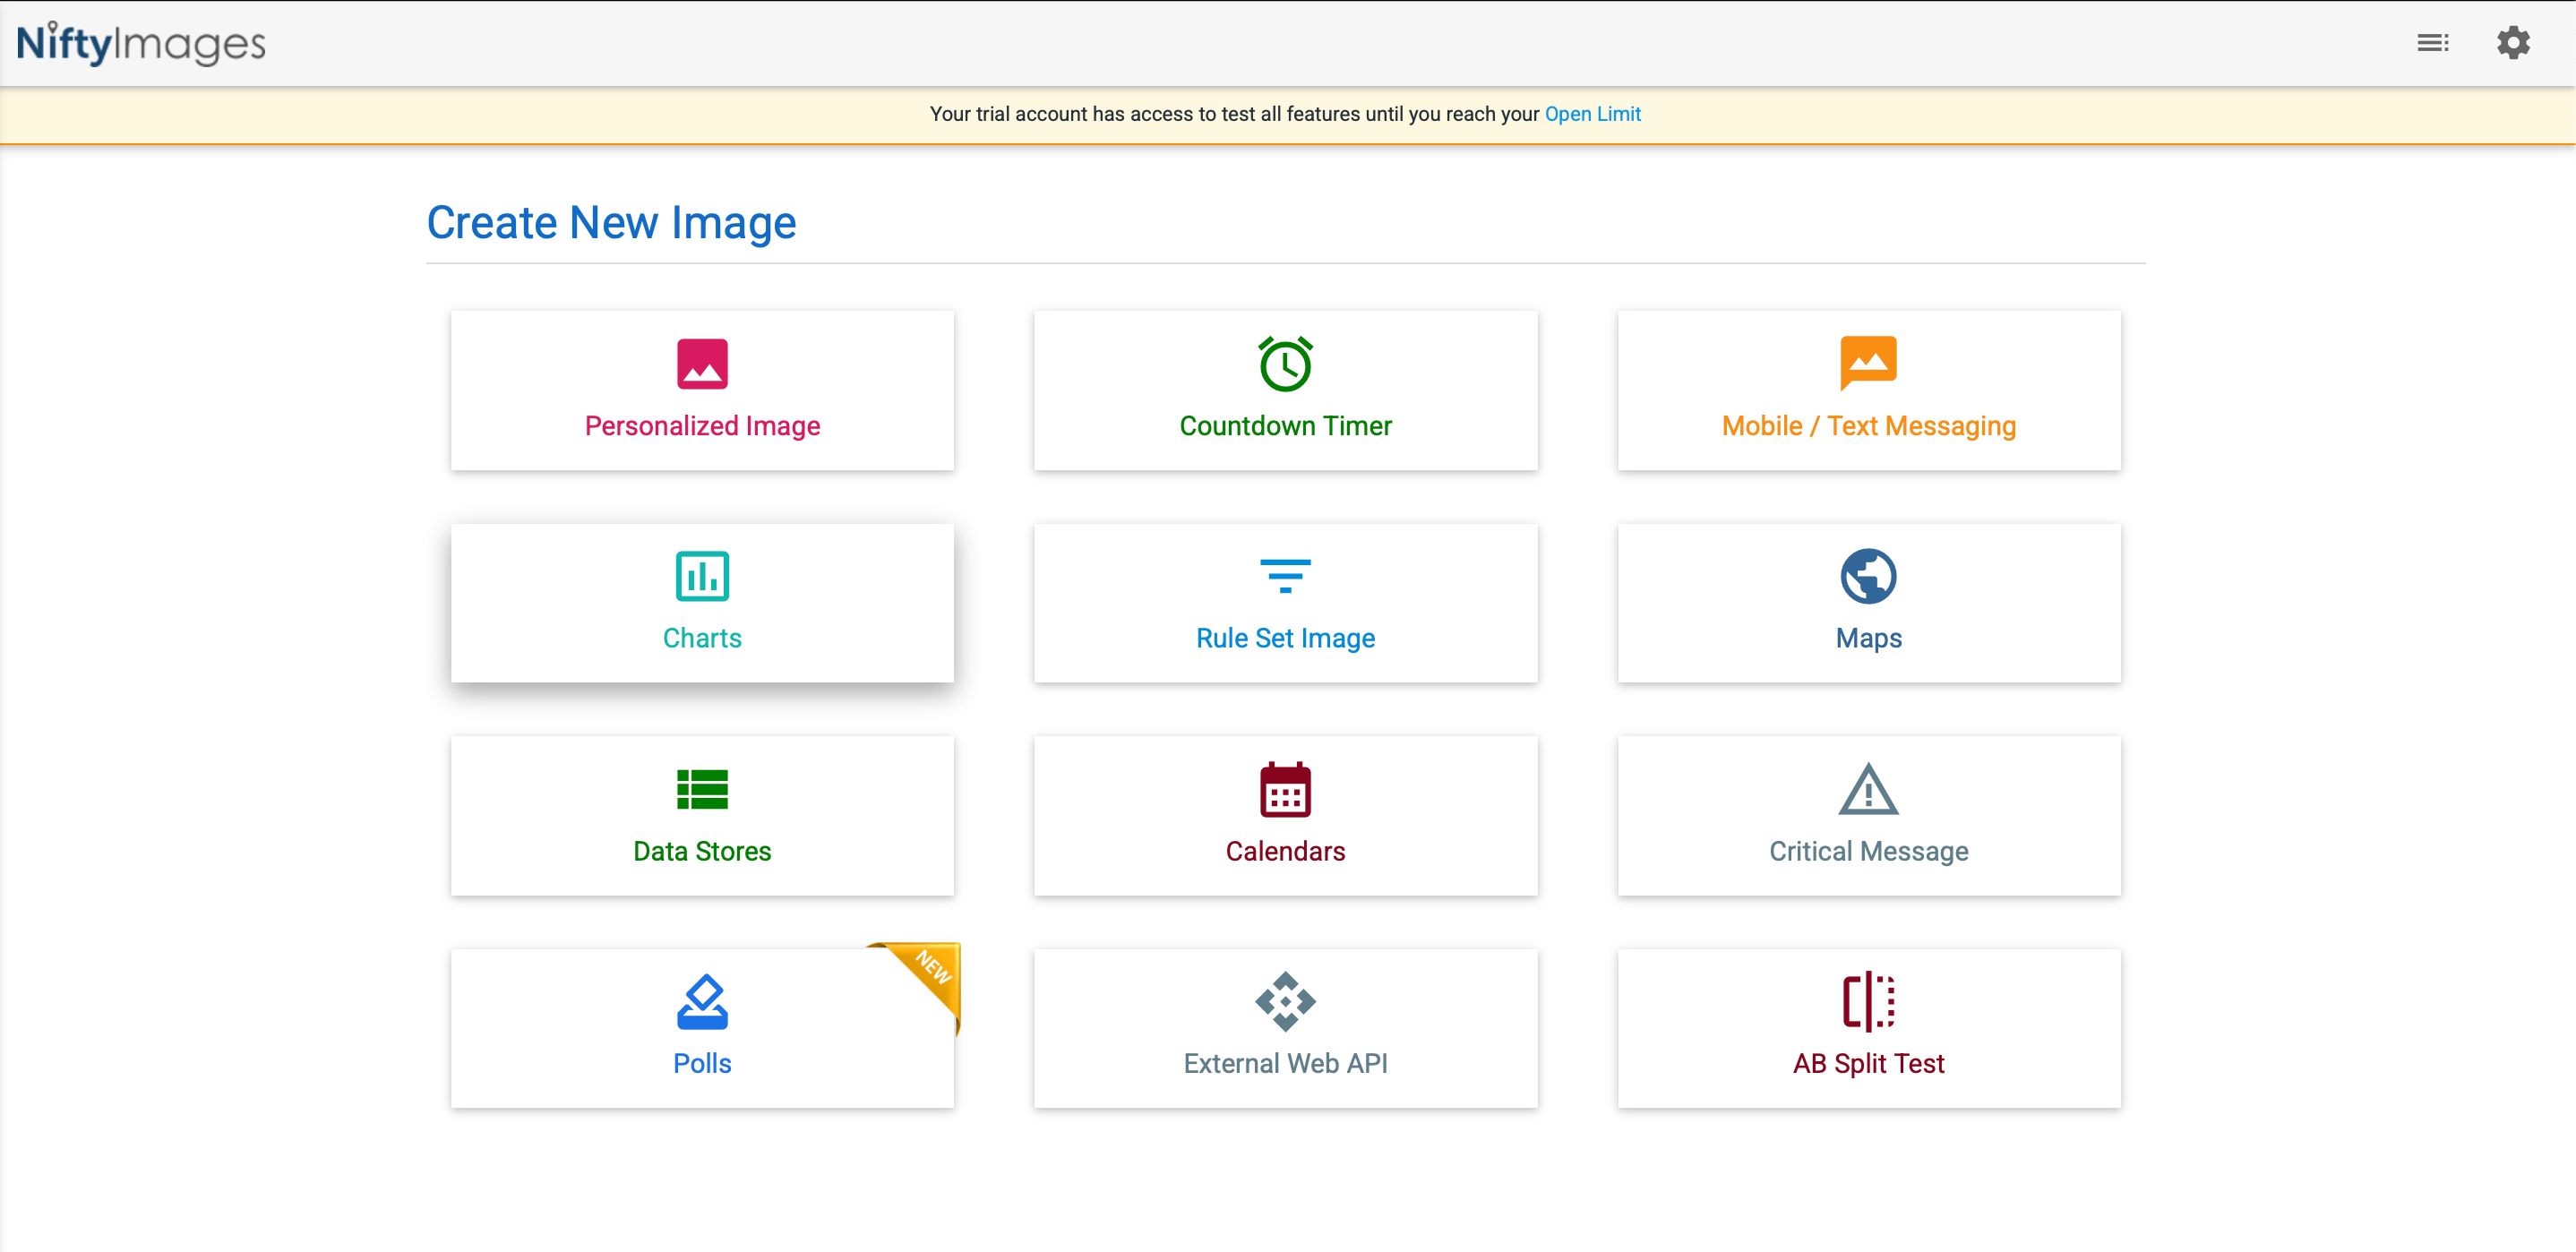
Create New Image
For this, we have selected a Personalized Image (upload your own image).

Personalized Image
Personalization Options:
- Use merge tags like
{{Profile.name}}to dynamically pull data and personalize elements (for example, inserting user names automatically). - Set default values to ensure a fallback is displayed when specific data isn’t available (for example,
{{Profile.name | default: "User"}}will display "User" if the name field is empty). - Configure customization based on the intended purpose (for example, using a countdown timer for a sale event or dynamic charts for personalized insights).
- Customize fonts, colors, and layouts to enhance personalization.
NoteMerge tags in NiftyImages function the same way as Liquid tags used in CleverTap. They dynamically pull user-specific data to personalize content in Emails and In-App messages.
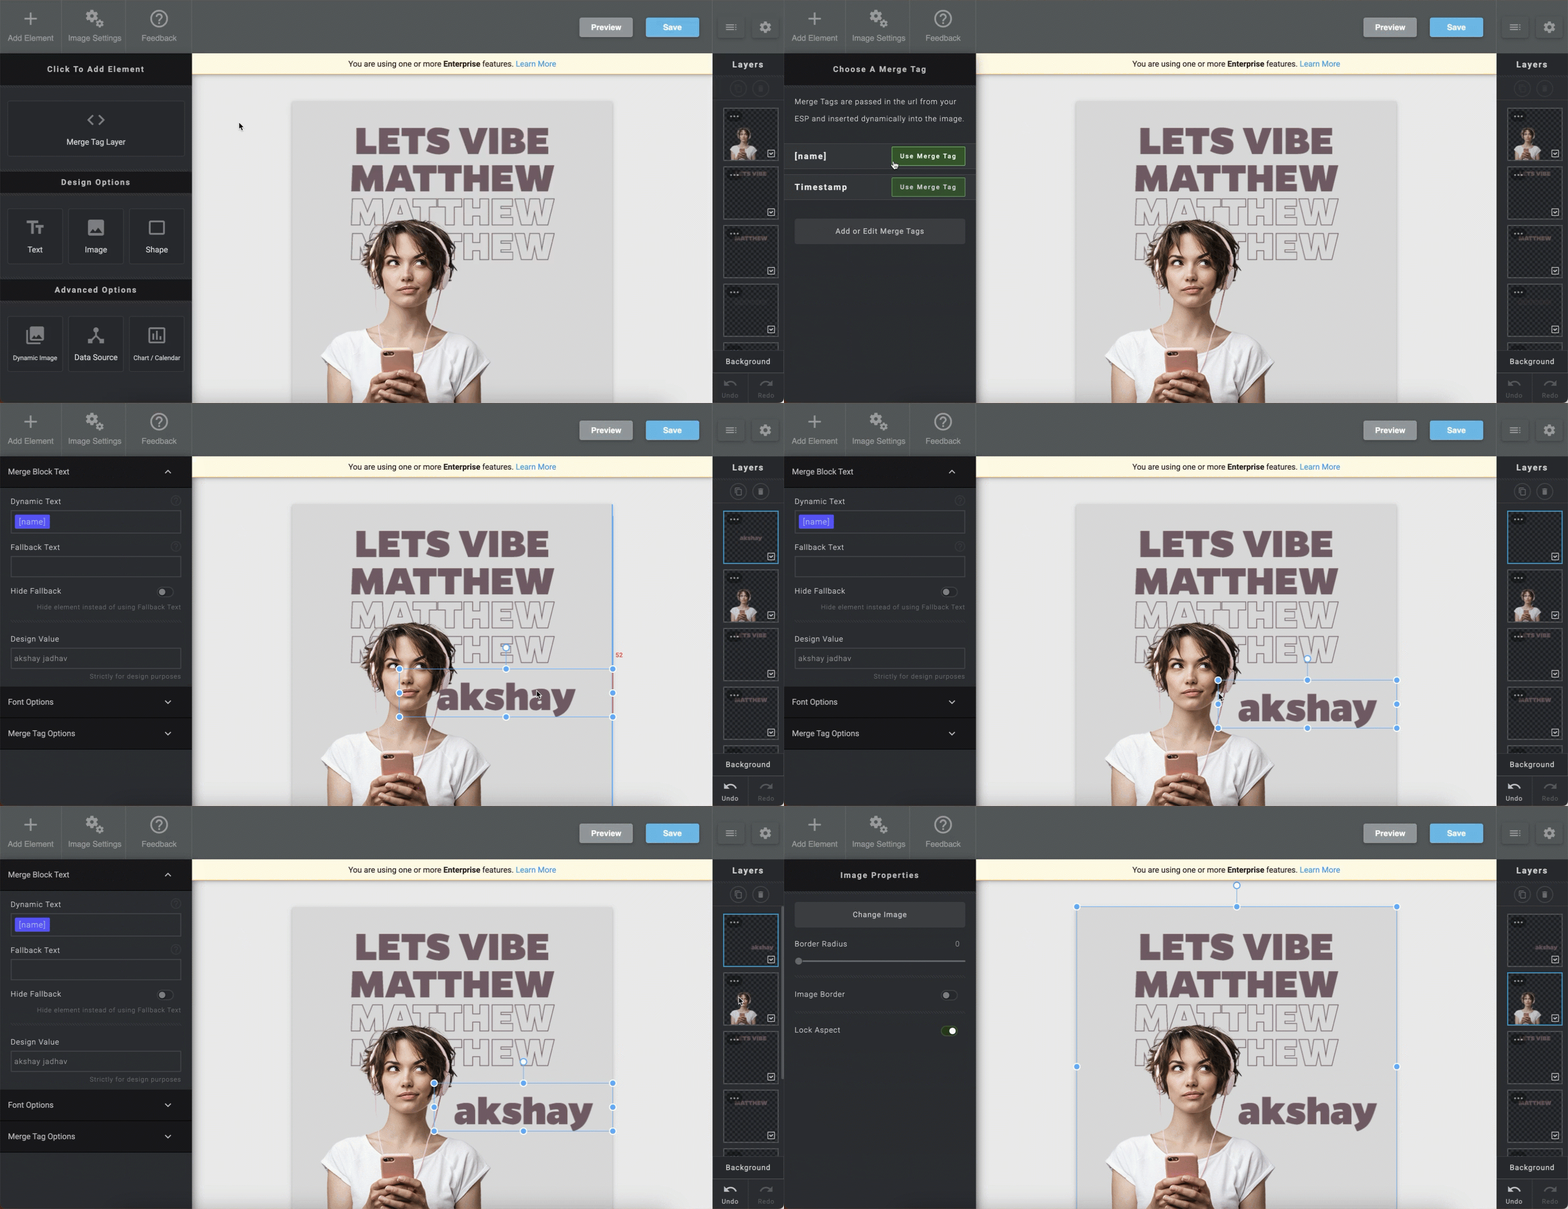
Personalization Options
- Add Design Options and Advanced Options to enhance the image by adding:
- Text – Insert user names or messages.
- Image – Upload custom visuals.
- Shapes – Highlight key areas.
- Dynamic Image – Change visuals based on real-time data.
- Data Source – Connect live data.
- Chart / Calendars – Display insights or events.
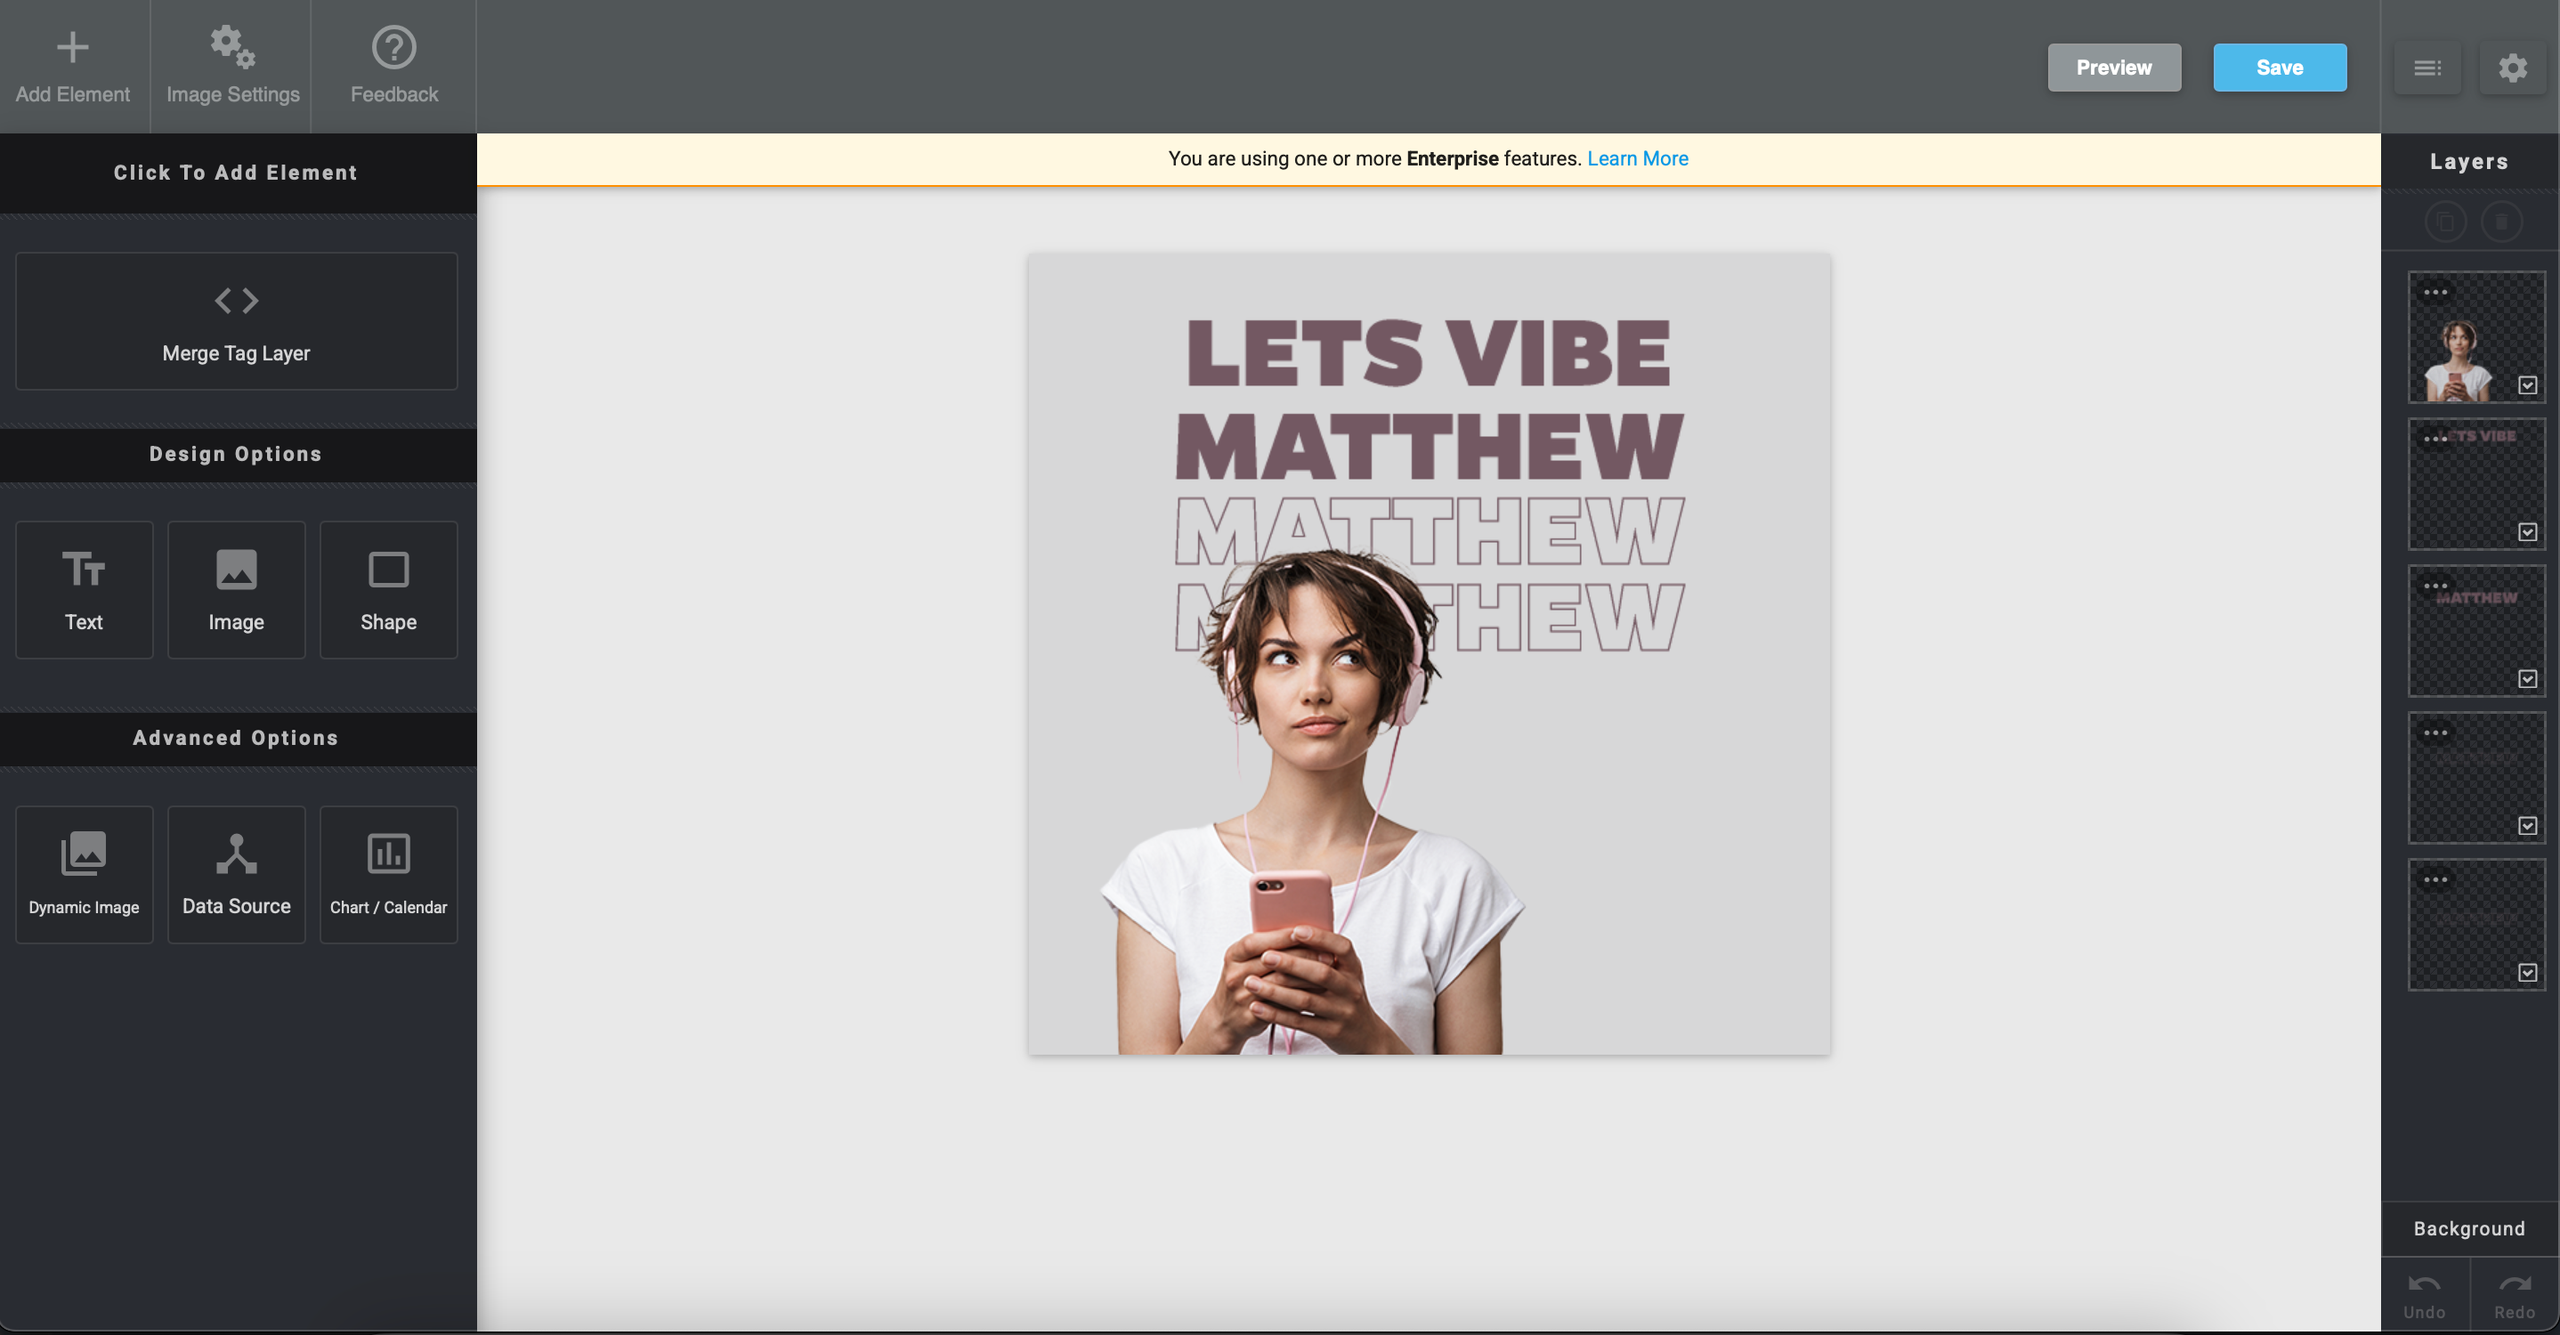
Add Elements
- Save and generate HTML code. To do so, perform the following steps:
- Click Save in the top-right corner.
- Provide a name for the file. NiftyImages generates an HTML code snippet.
- Preview the functionality by entering a sample name to see the dynamic image changes.
- Copy the generated HTML snippet.
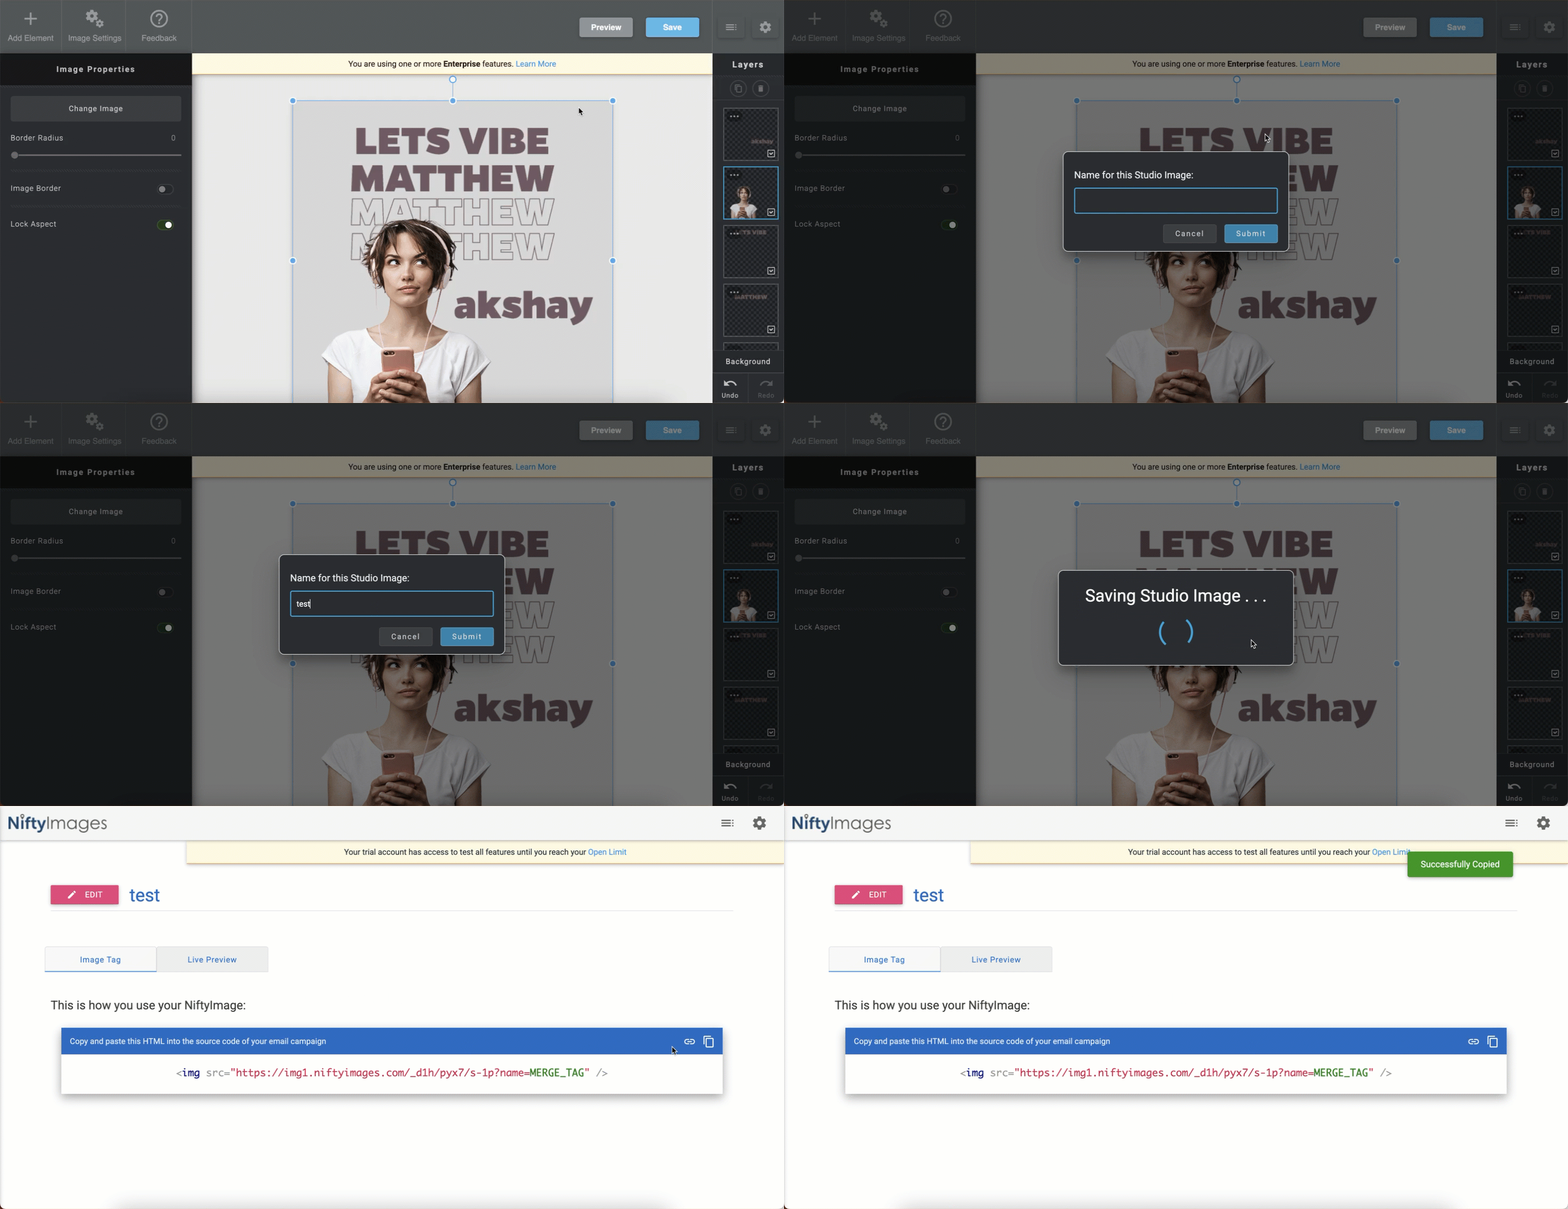
Generate HTML Code
Configure Email Campaign
Set up and personalize your email campaigns in CleverTap to engage users effectively. To do so, follow these steps:
- Go to the Campaigns page, click + Campaign, and select Email from the list of messaging channels.
- Click Go to Editor under the What section.
- Select a Basic Template, Pre-used Template, or a Saved Template.
- Switch to Source mode in the email editor to edit the HTML code of the email body.
- Paste the copied NiftyImages HTML snippet inside the
<body>section in CleverTap Email editor Source.
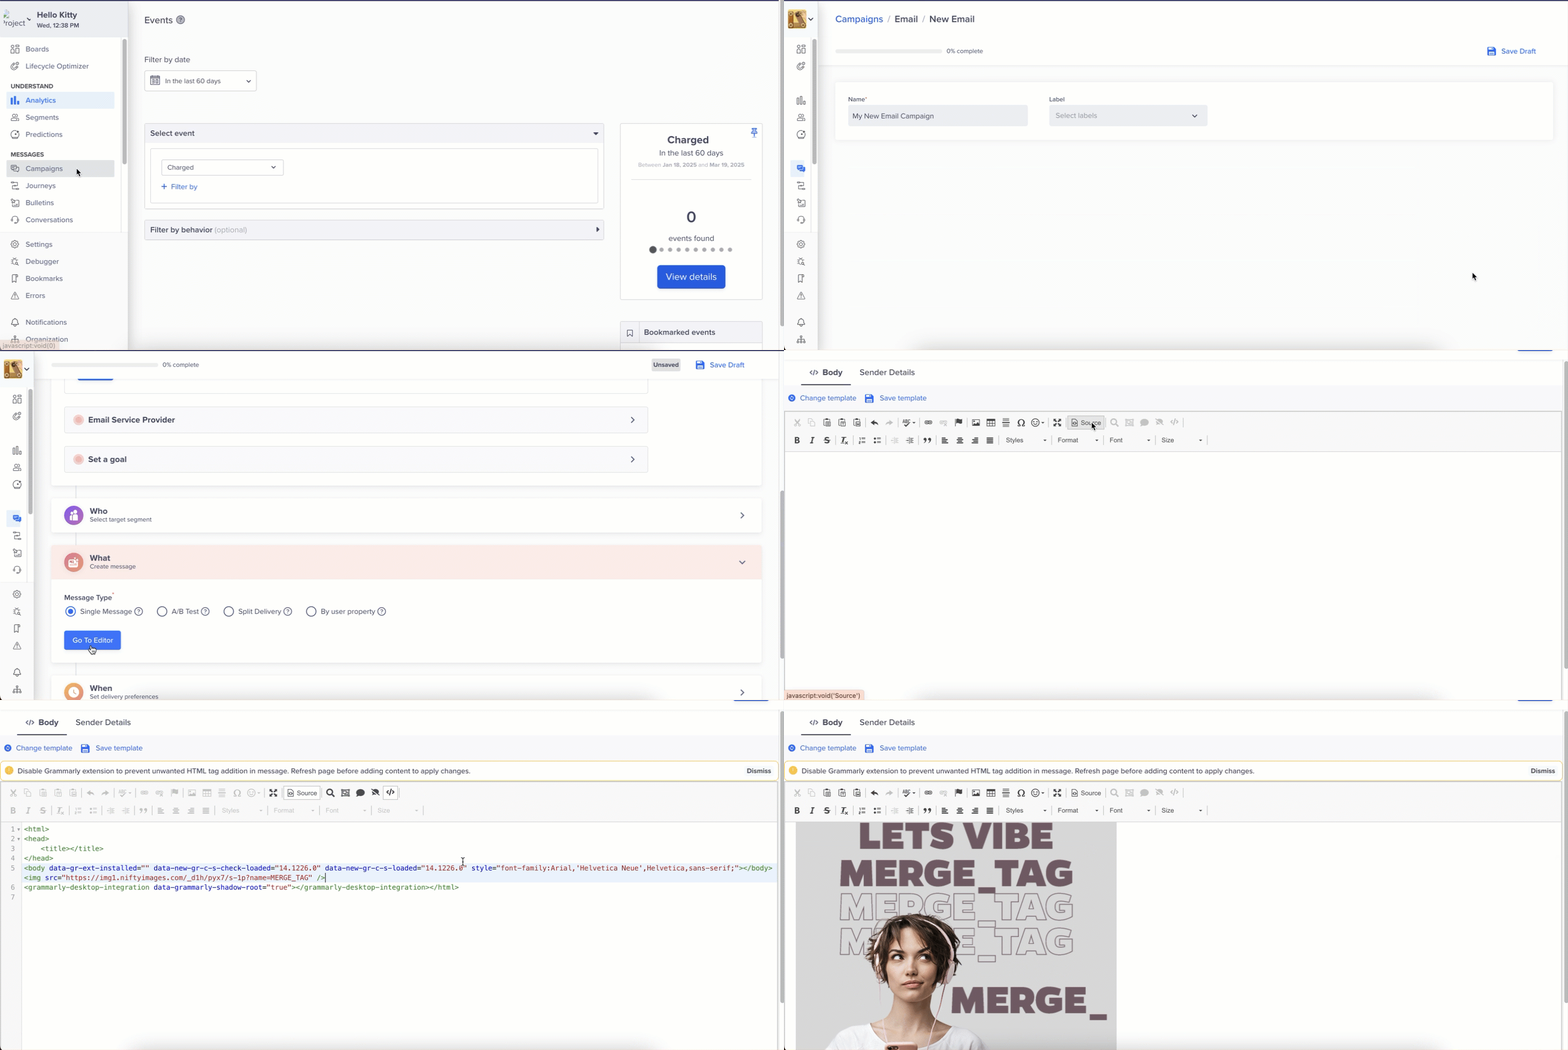
Insert the HTML Code Snippet
- Replace the MERGE_TAG with the appropriate CleverTap Liquid Tag for personalization, as shown in the following example:
<img src="https://img1.niftyimages.com/hqkh/ixv5/5qyp?name={{Profile.name}}" />You can also use the following code to dynamically personalize images for users while setting a default fallback value for the personalized image in NiftyImage itself.
<!DOCTYPE html>
<html>
<head>
	<title></title>
</head>
<body style="font-family:Arial,'Helvetica Neue',Helvetica,sans-serif;">
<p>Hello</p>
<p><img src="https://img1.niftyimages.com/hqkh/ixv5/5qyp?name={{Profile.name}}" /></p>
<p> </p>
</body>
</html>`- Send a test email to verify personalization and ensure the NiftyImages integration functions correctly.
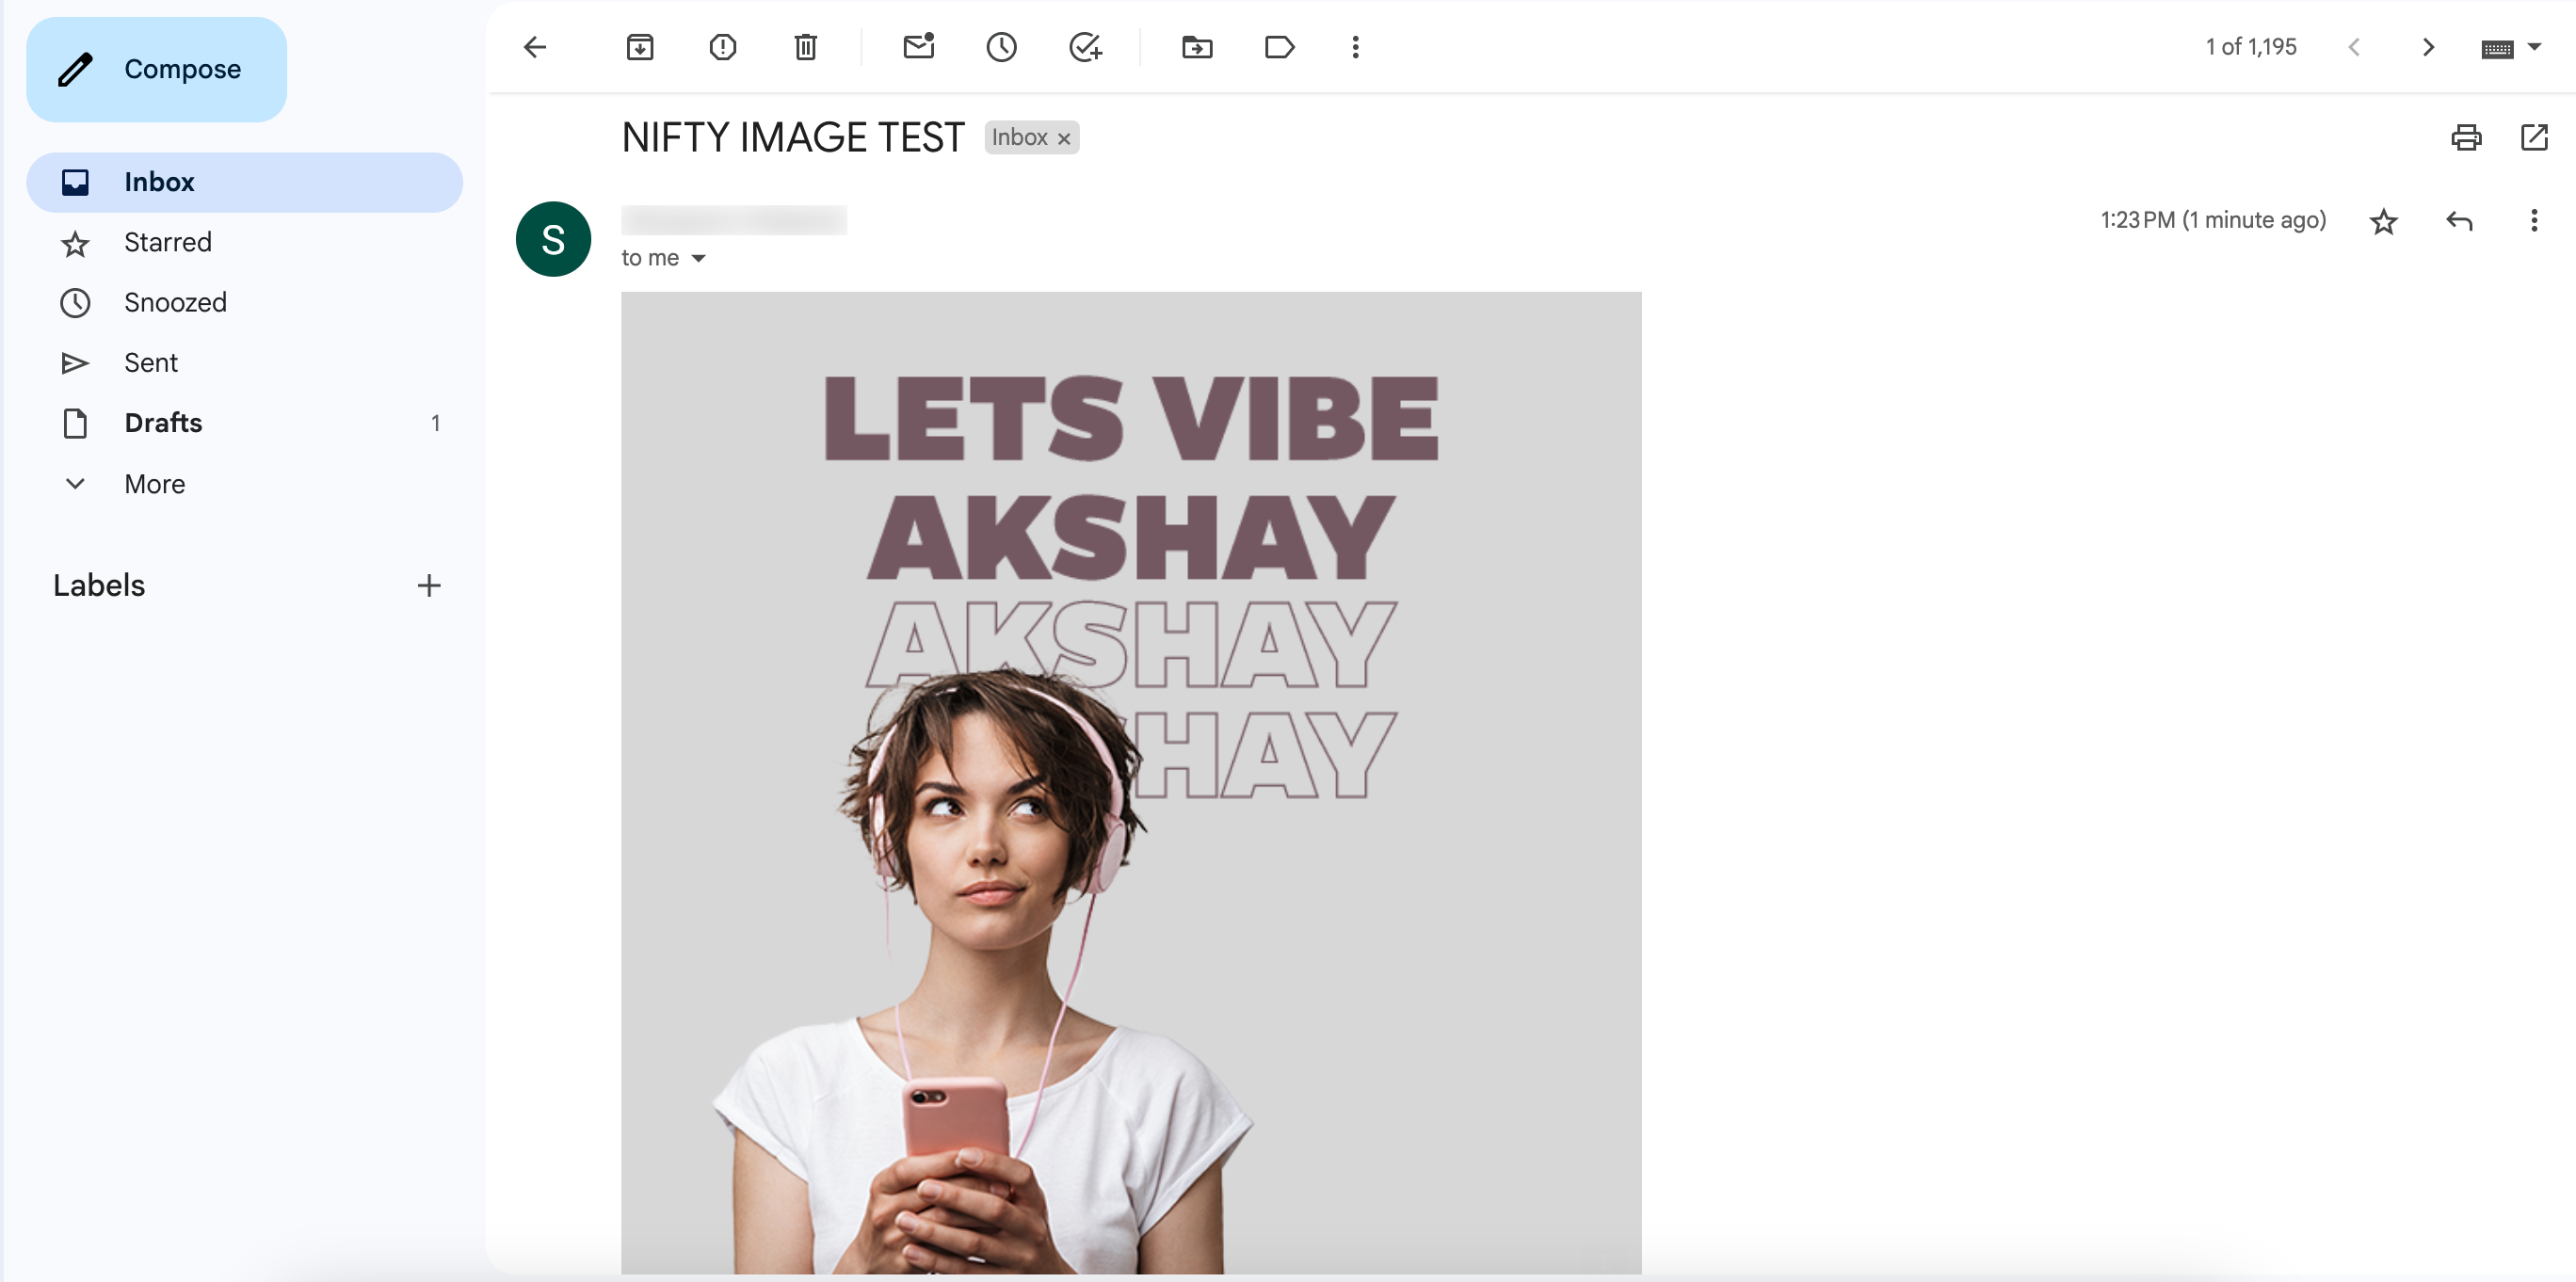
Test Email
- Publish the email campaign once verification is complete. Users will receive personalized emails based on the configured merge tags and settings.
Configure In-App Campaign
Before creating an In-App campaign, ensure your app is configured with the CleverTap SDK and has Push Notifications enabled. This ensures seamless delivery and functionality of In-App messages.
Set up and personalize your In-App campaigns in CleverTap to engage users effectively. To do so, follow these steps:
- Go to Campaigns in the CleverTap dashboard. Click on + Campaign and select In-App Messages from the dropdown menu.
- Click Go to Editor under the What section.
- Select any template from the available options. For this example, we will use Custom HTML Templates.

Custom HTML Templates
- Paste the NiftyImages HTML snippet inside the
<body>tag of the custom HTML.
Example HTML for an In-App Message:
<!DOCTYPE html>
<html>
<head>
<title> </title>
</head>
<body>
<img src="https://img1.niftyimages.com/hqkh/ixv5/5qyp?name= MERGE_TAG " width="300" height="300" />
</body>
</html>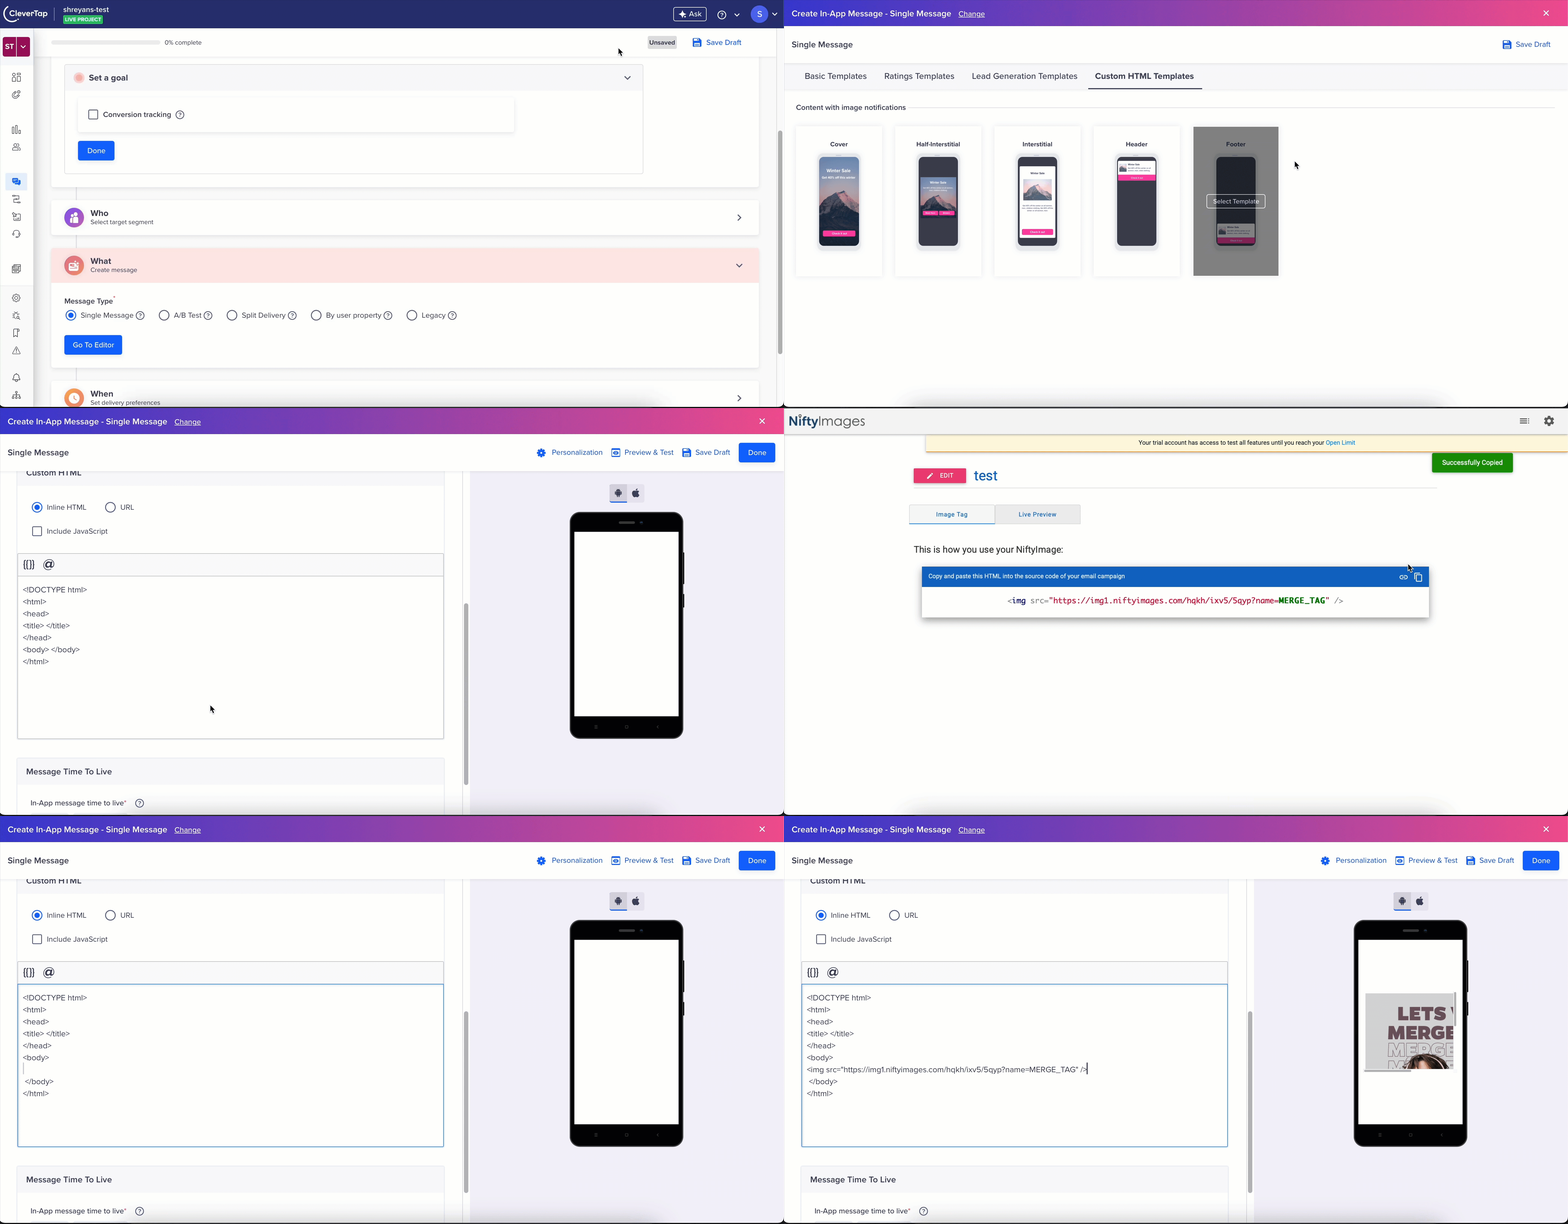
Custom HTML Templates
- Replace the MERGE_TAG with the appropriate CleverTap Liquid tag for personalization. For example:
- Use
@Profile - Name | default: "Parth"or{{Profile.name | default: "Parth"}}.
- Use
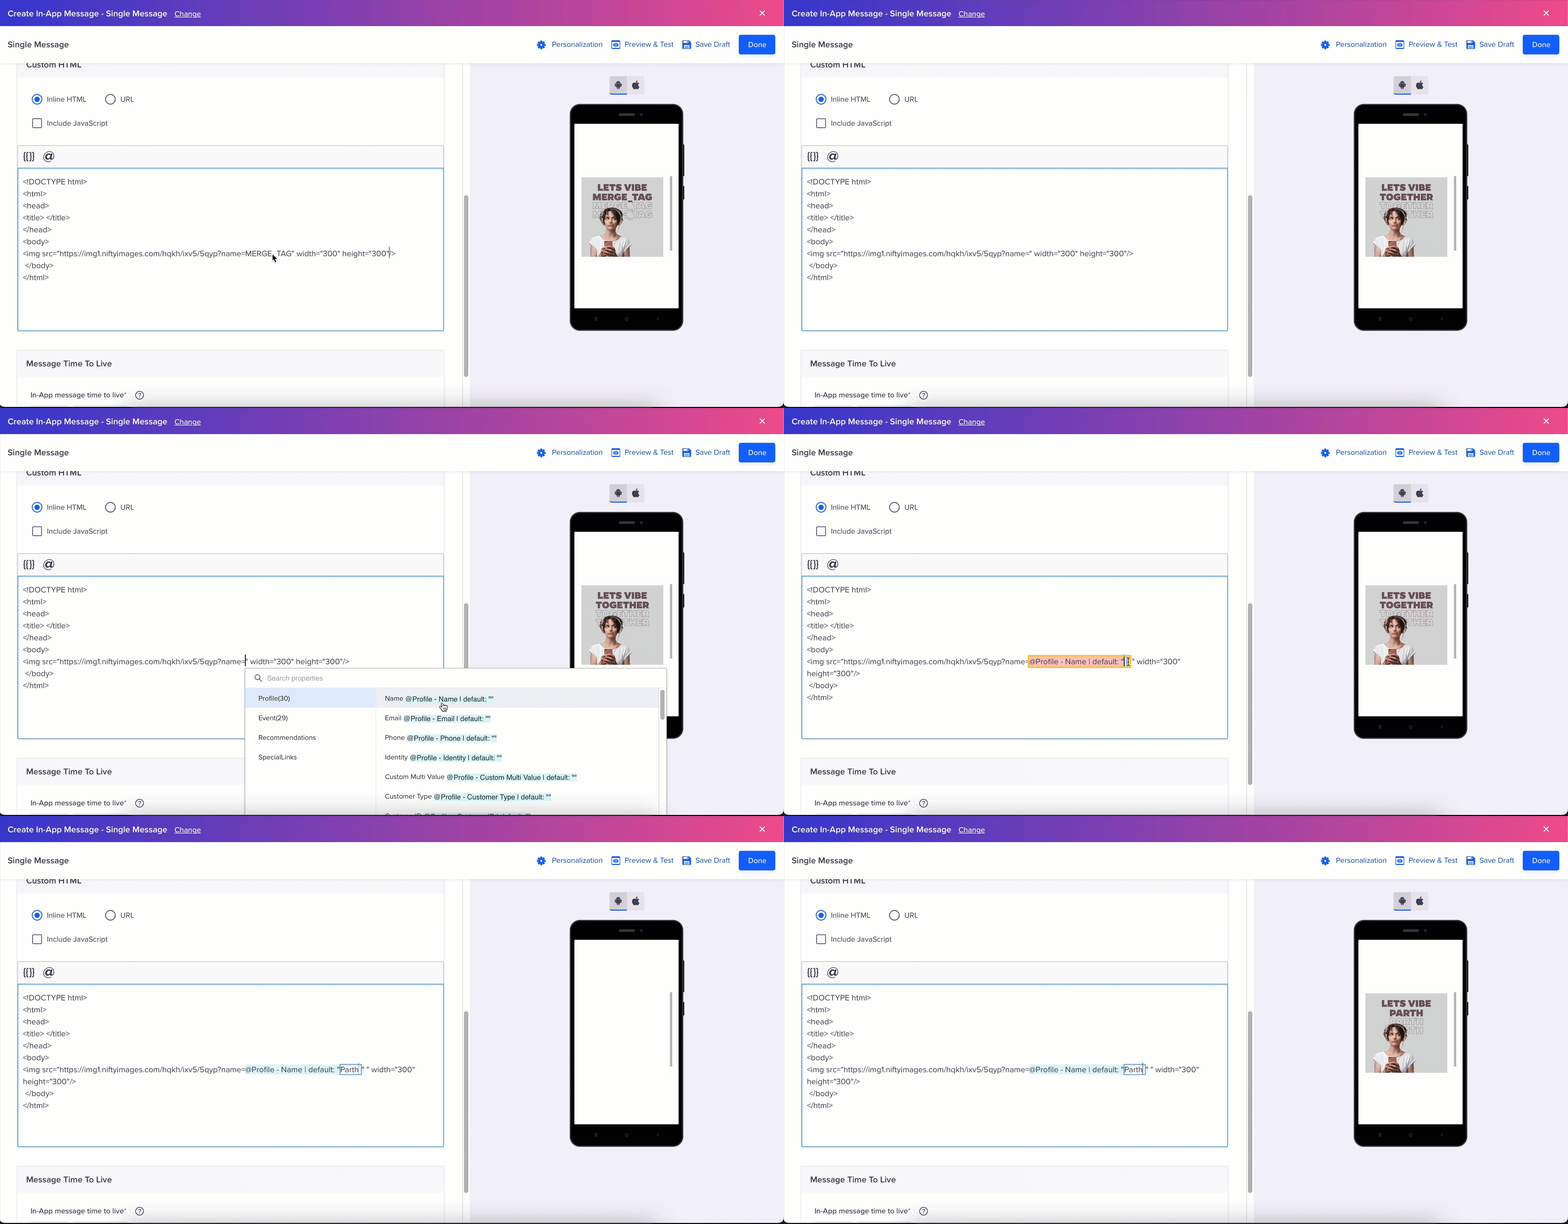
Replace the MERGE_TAG
If the user profile contains a name, it will display the user name. In this example, the default value Parth will be displayed if no name is available.
You can access liquid tags and dynamic placeholders by typing {, or by using the {{ or @ option.
- Click Send Test to preview and verify the In-App message.
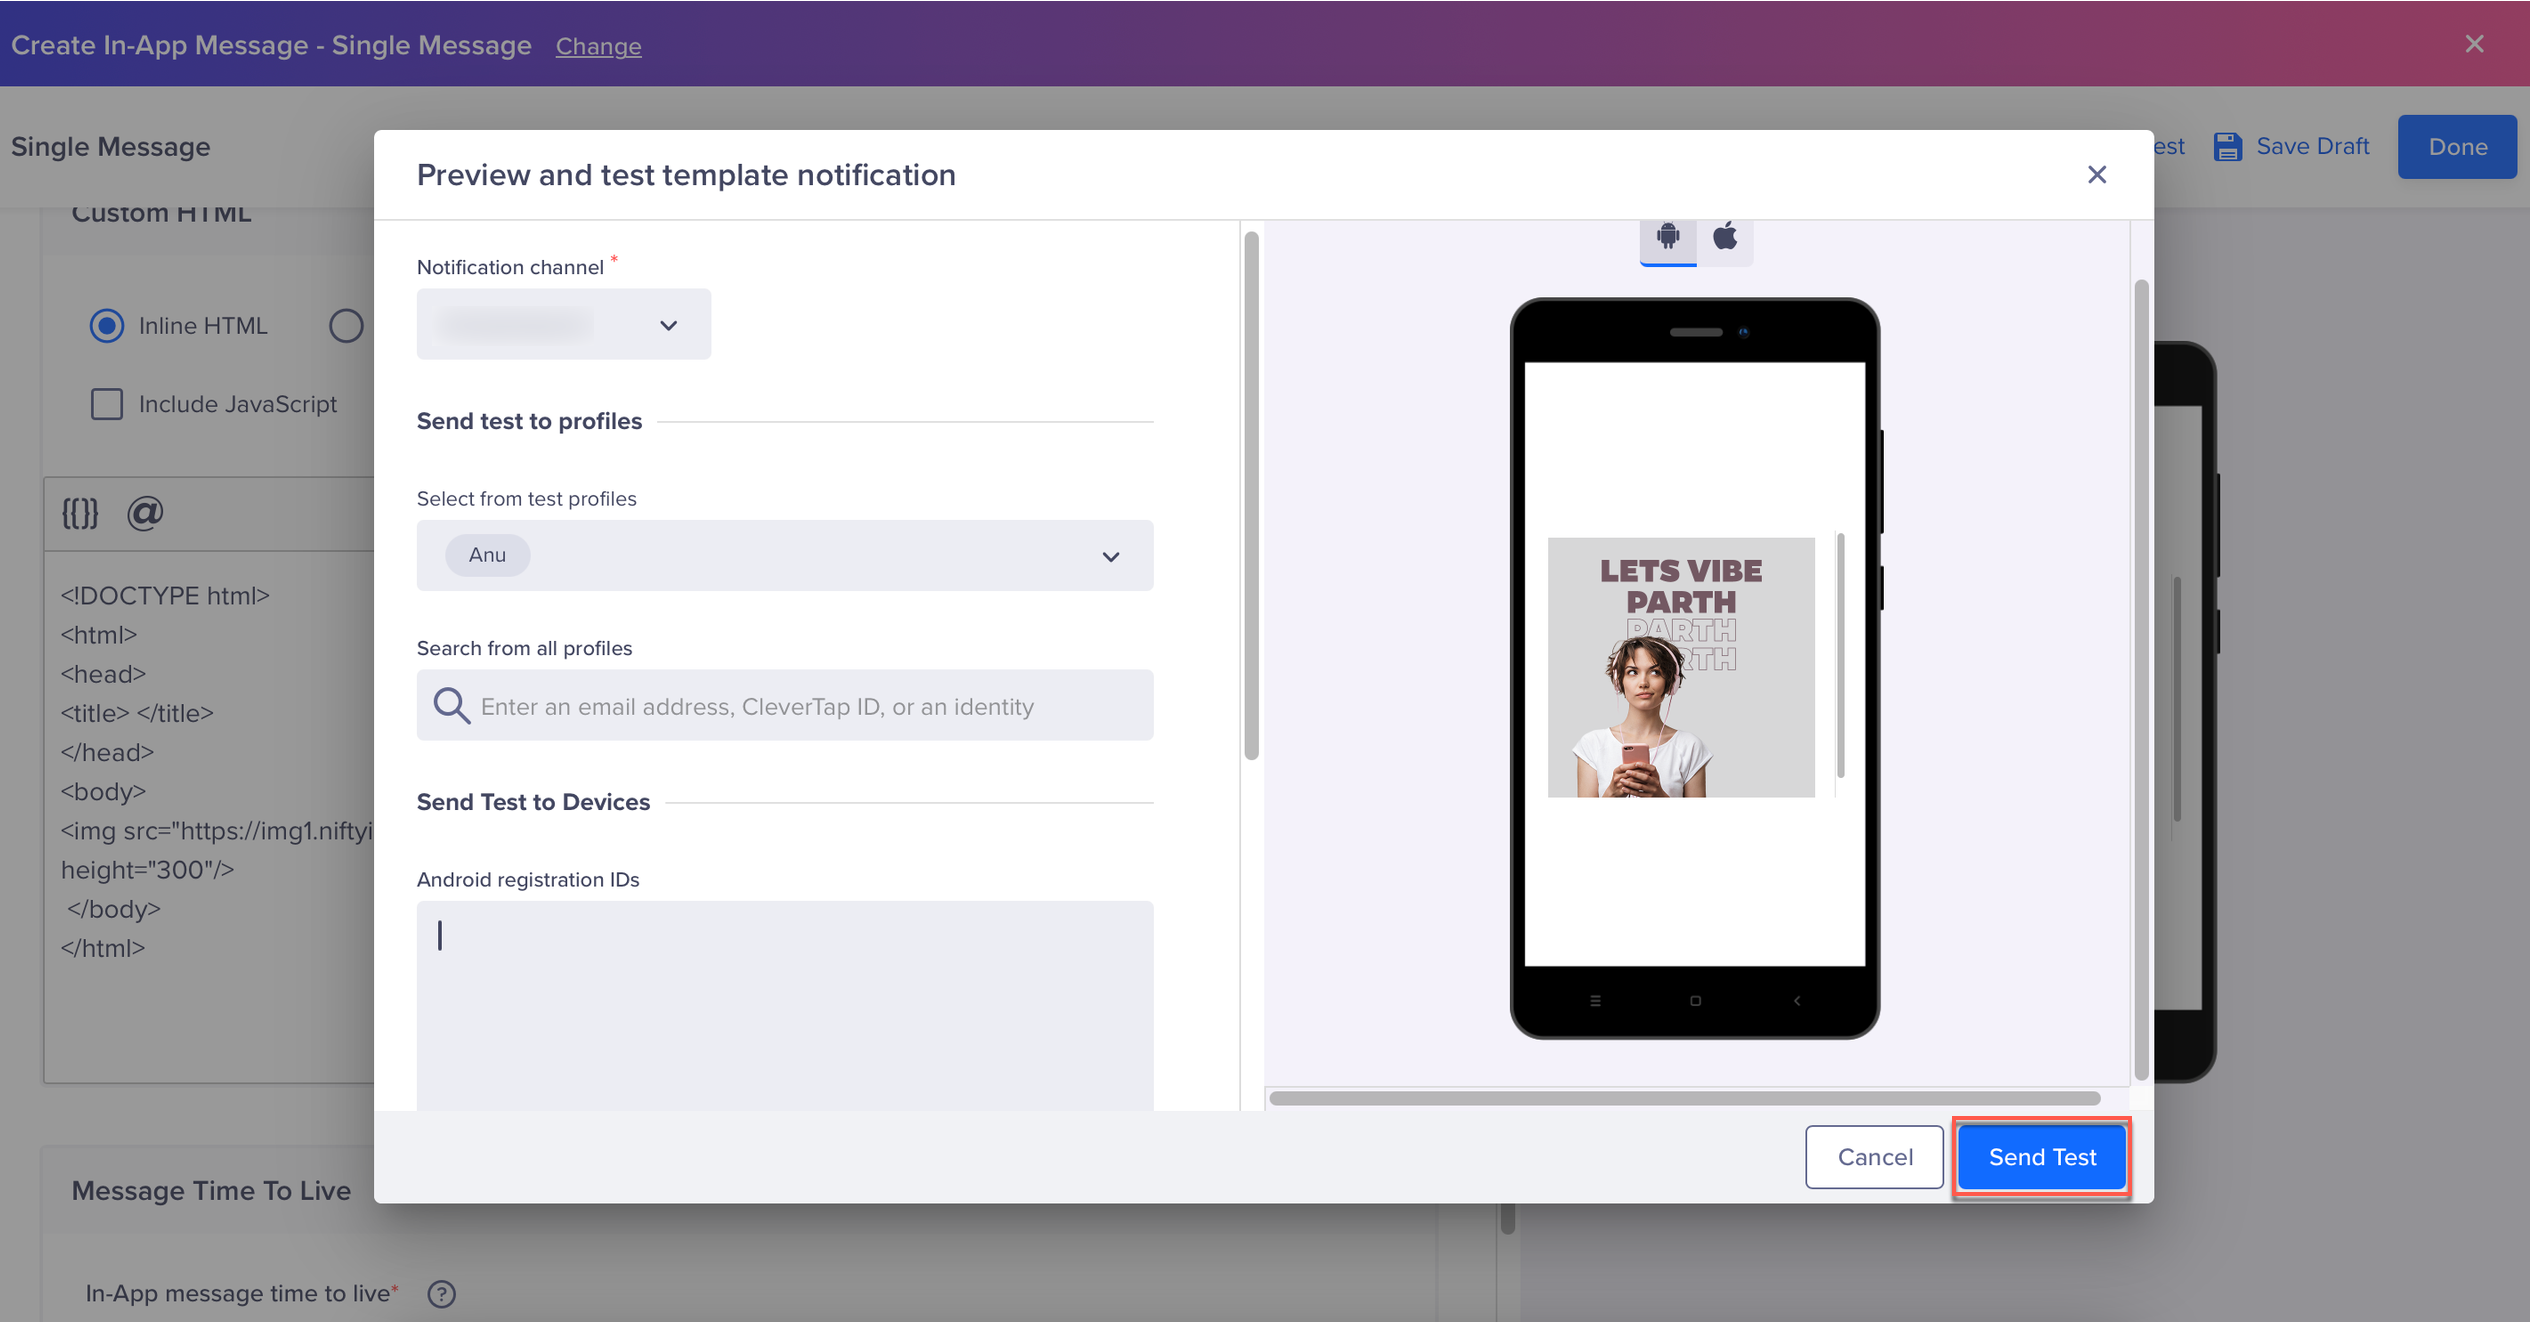
Send Test
- Click Save and Publish to launch your In-App campaign.
Once published, users will receive personalized In-App messages based on the configured liquid tags, ensuring a dynamic and engaging experience.
Updated about 1 month ago
