Product Experiences (Legacy) Setup
Learn how to setup Product Experiences (Legacy)
Create keys and segments for your app to enable product experiences.
Create Keys
These are the keys that you have defined in your app code. You can map these keys from the CleverTap dashboard and control the configuration of your app. Keys can be used for Product Config, Feature Flags, and A/B Tests.
To create keys:
- Navigate to Product Experiences > Setup > Keys
- Click +Key to create a new key.
NoteThe name of the key defined here must match the name of the key defined in the app. This name cannot be changed later. You can add up to 500 keys.
- Add the Key definition.
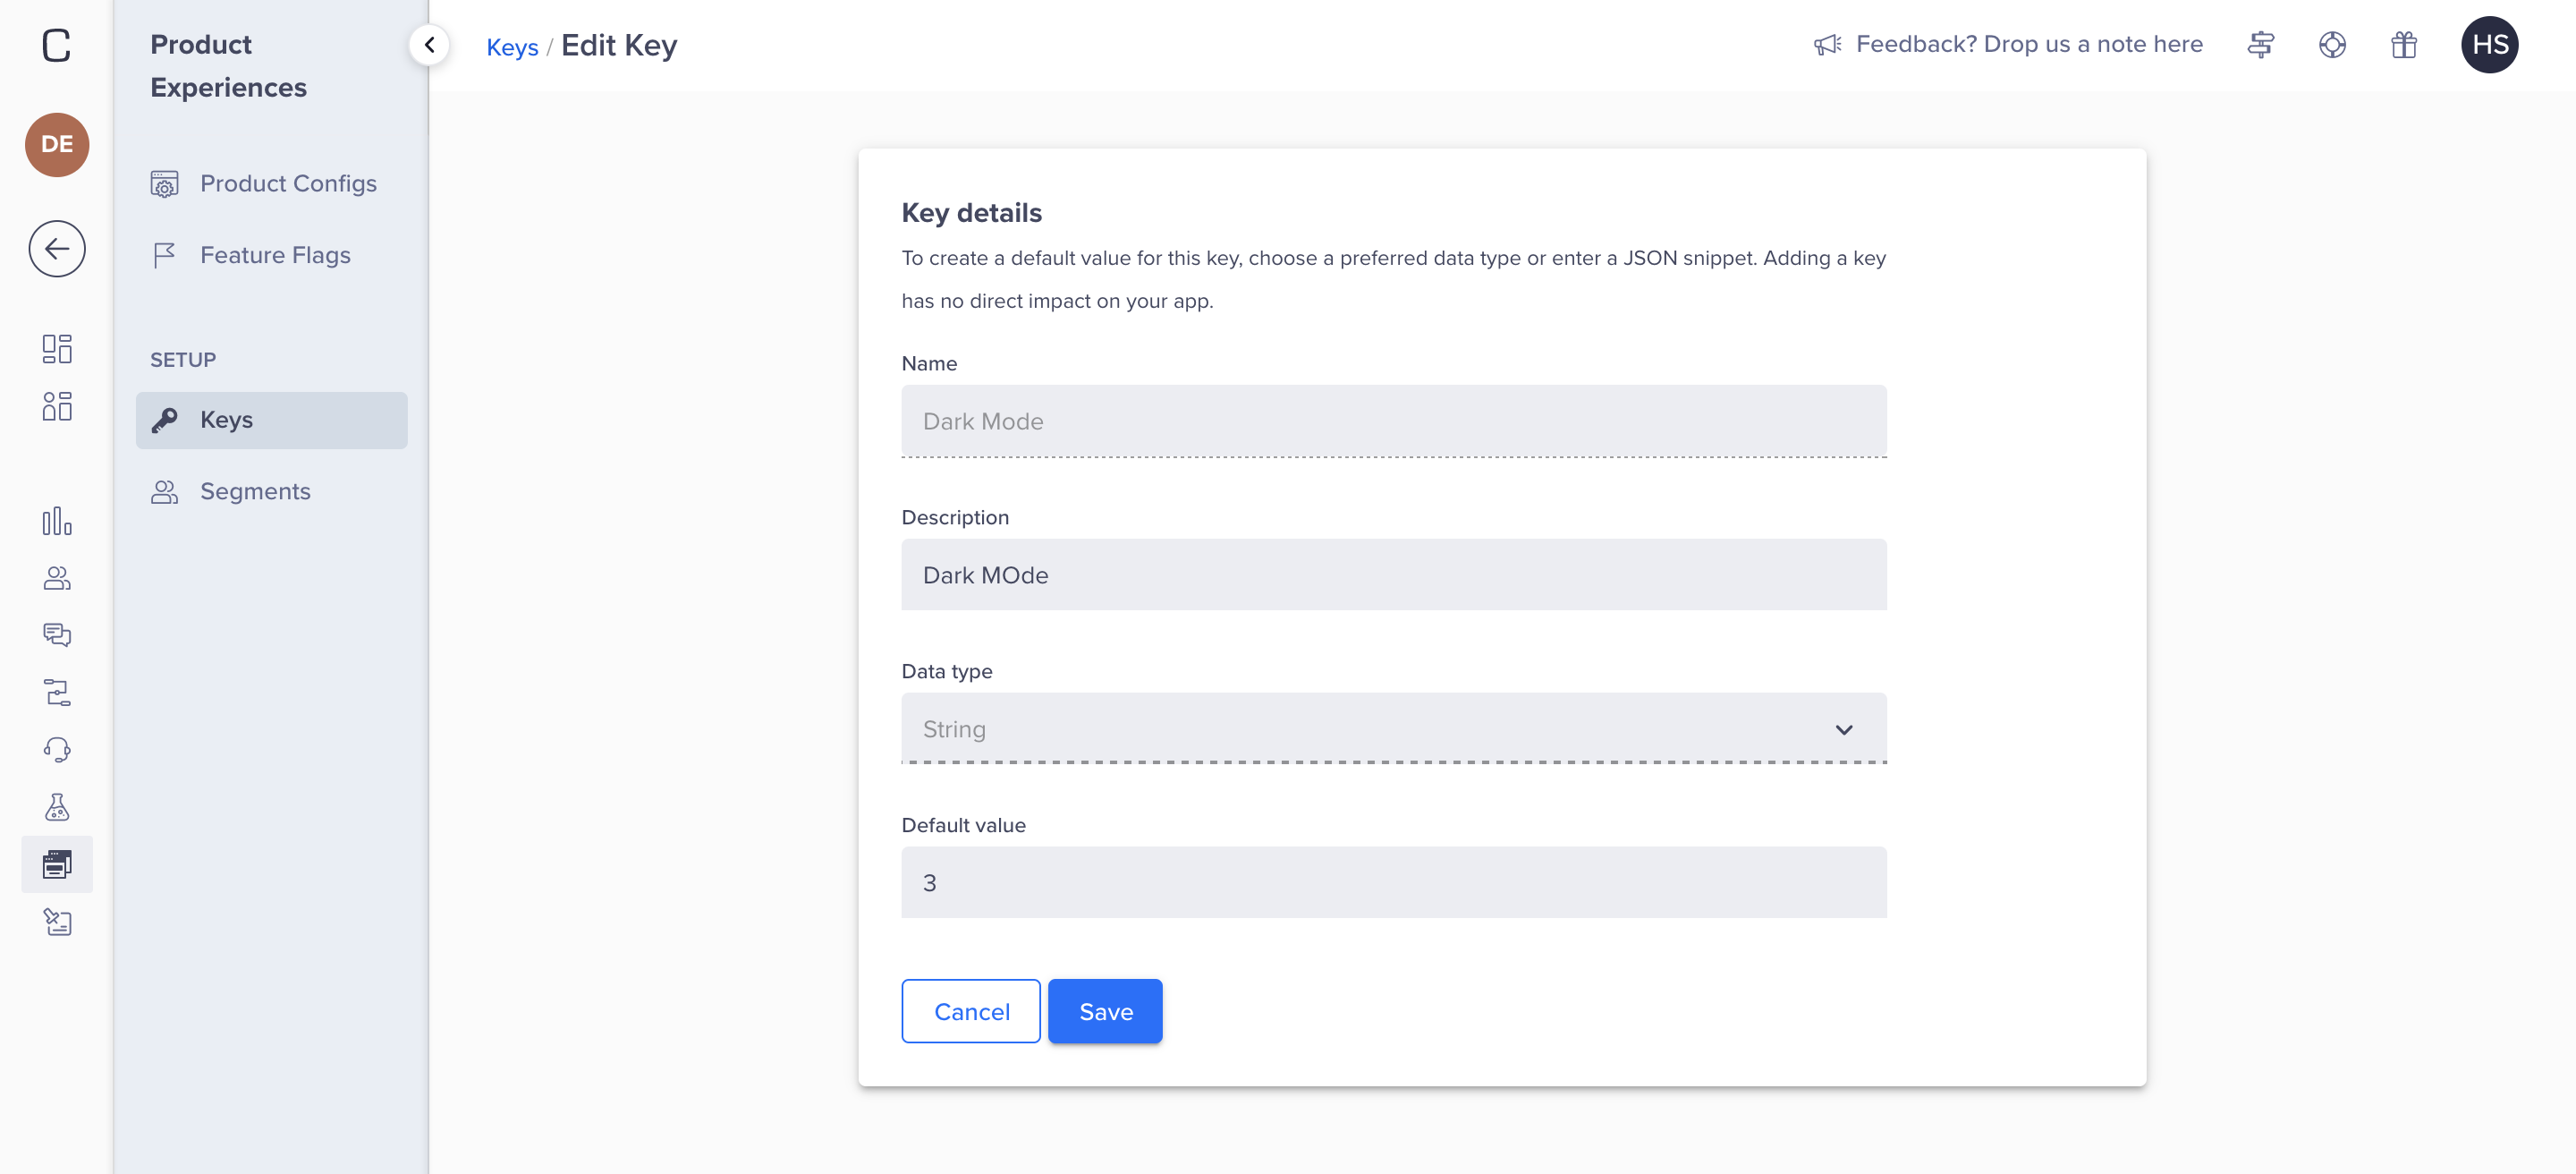
Let us add some sample values:
You can now activate or deactivate the dark mode based on the Keys. The default value that the app is expecting for this key is 3. These values are set in your app. Let us assume that the key value 3 means to activate the feature, and 4 means to deactivate the feature.

Add Key Details
- Click Save. The
dark_modekey is now listed on the Manage Keys page.
Edit/Archive Keys
- Navigate to Product Experiences > Setup > Keys. The Keys page appears.
- Click the ellipsis menu to edit or archive a key. Only the default value and description can be edited after saving a key.
You can view all the archived keys by selecting the Archived Keys box at the bottom of the key's list. If a key is used in a product config or feature flag then it cannot be archived.
Create Segments
The segments are the target users who will receive app changes. These segments can be used for Product Config, Feature Flags, and A/B Tests.
To define the segments:
- Navigate to Product Experiences > Setup > Segments
- Click +Segment to create a new segment.
- Name the segment.
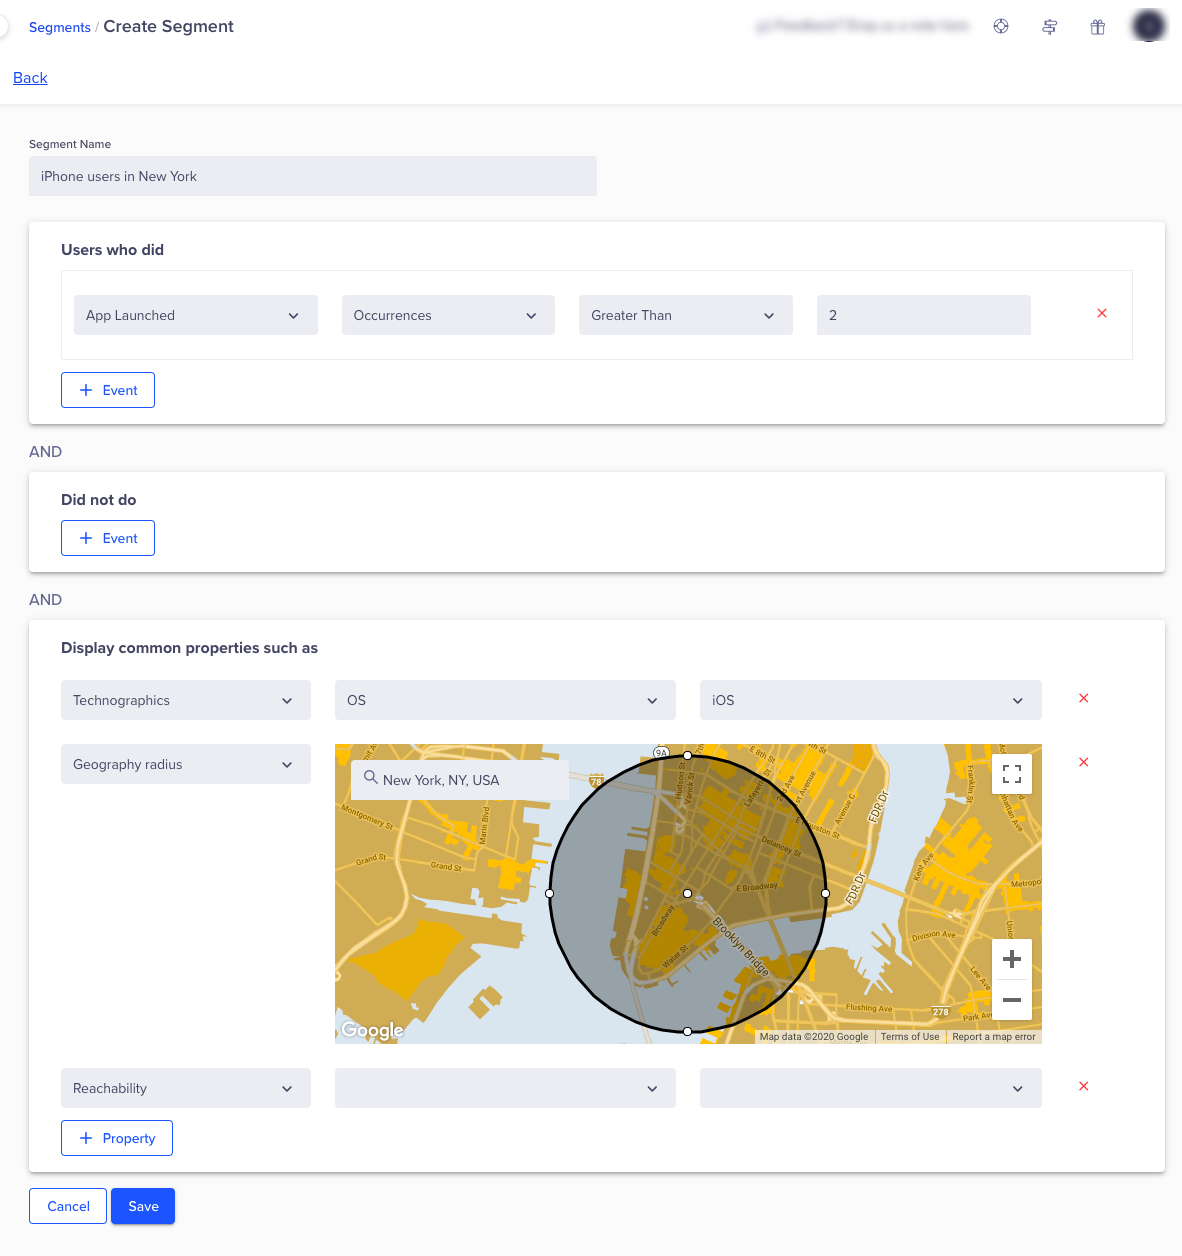
- Create a segment by users who performed and/or did not perform an event. You can also create segments for user properties such as demographics, geography, and so on. For our example, create a segment of iPhone users living in New York.
- Save the segment.

Create Segments Who will Receive App Changes
Edit/Clone a Segment
- Navigate to Product Experiences > Setup > Segments. The Segments page appears.
- Click the ellipsis menu to edit or clone a segment. For example, you may want to edit the city and create another user segment for Miami.
Create Goals
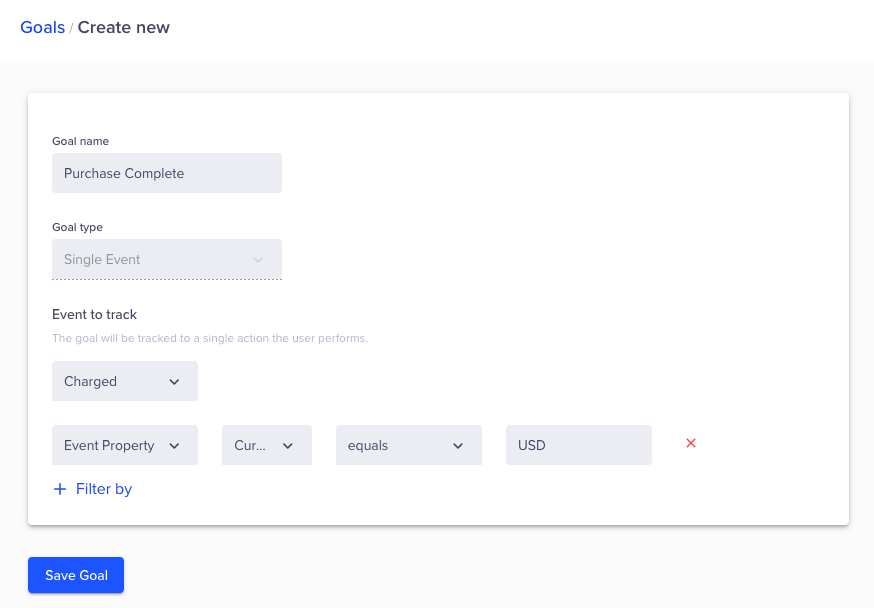
Goals are used to evaluate the performance of an A/B test. It is an event and when a user performs this event, it is considered a conversion.
Navigate to Product Experiences > Goals. Create a goal and save it. This goal is now available for selection in Product Experiences.

Create Goals for A/B Tests
Archive Goals
- Navigate to Product Experiences > Goals.
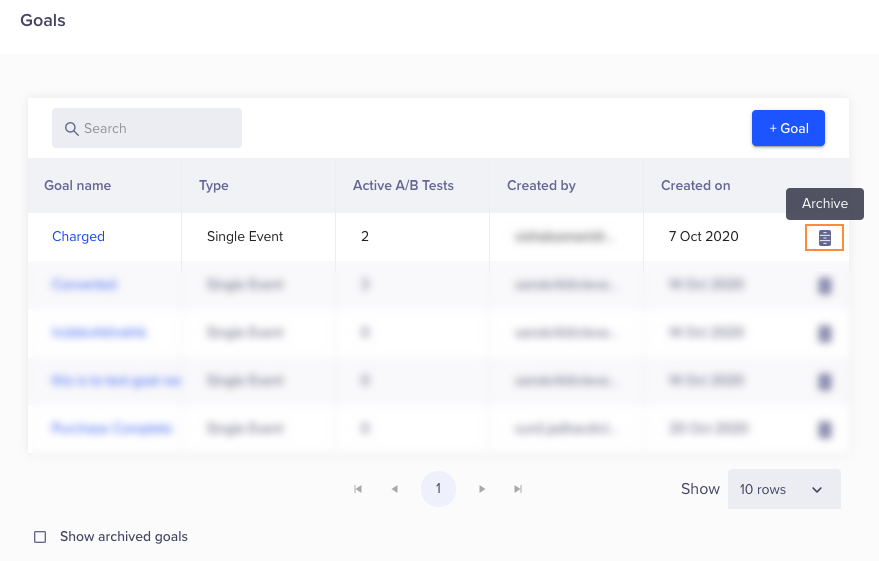
- Click the archive icon to archive a goal.

Archiving Goals for A/B Tests
You can view all the archived Goals by selecting the show archived goals box at the bottom of the goals list. If a goal is used in a product experience then it cannot be archived.
Mutually exclusive A/B tests
This is a global setting that is applicable only to A/B tests. You can choose to exclude your segment from all other experiments. It applies only to the new experiments that are created after this setting is enabled. For example, if it is set as disabled at a global level, you will have to enable it on each subsequent test. The users who qualify for this A/B test are unique and they are not shared across any other experiment.
- Navigate to Product Experiences > Settings > Mutually exclusive A/B tests.
- Turn on the toggle. These users will be included only in one A/B test at a time.

Enabling Mutually exclusive A/B tests
Video Tutorial
For further information, you can watch the following video on product configs and feature flags:
Updated about 2 months ago
