
Upload Product Catalog
Learn how to upload and manage catalogs and feeds in CleverTap to upload, sync, and structure product data for personalization, recommendations, and engagement.
Overview
Uploading a product catalog is the first step to bringing product or content data into CleverTap. A product catalog acts as a container for items that can later be used across personalization, recommendations, and engagement use cases.
Once uploaded, catalogs are populated and updated using one or more feeds. Each feed is processed independently, so updates from one feed apply only to the fields it manages and do not affect data from other feeds. For example, you might use one feed to upload an initial set of products and another feed to keep pricing or availability updated over time.
NoteEach feed replaces a product's attributes in full.
When a feed processes a product, it overwrites that product's entire attributes object with the values in the current feed. Any attribute you do not include in the feed is removed from the product, it is not preserved from an earlier feed.
This means you cannot split a catalog across feeds by field. A pricing only feed that omits color and size will strip color and size from every product it touches.
Always include every attribute you want to keep in each feed that touches a given product. For more information, refer to How Multiple Feeds Work.
Product catalogs store item-level details such as name, price, and category. Once a catalog is uploaded, its type cannot be changed.
Upload a Product Catalog
To upload a catalog, perform the following steps:
-
Go to Product Catalog and click Add Catalog.
-
Enter the required details.
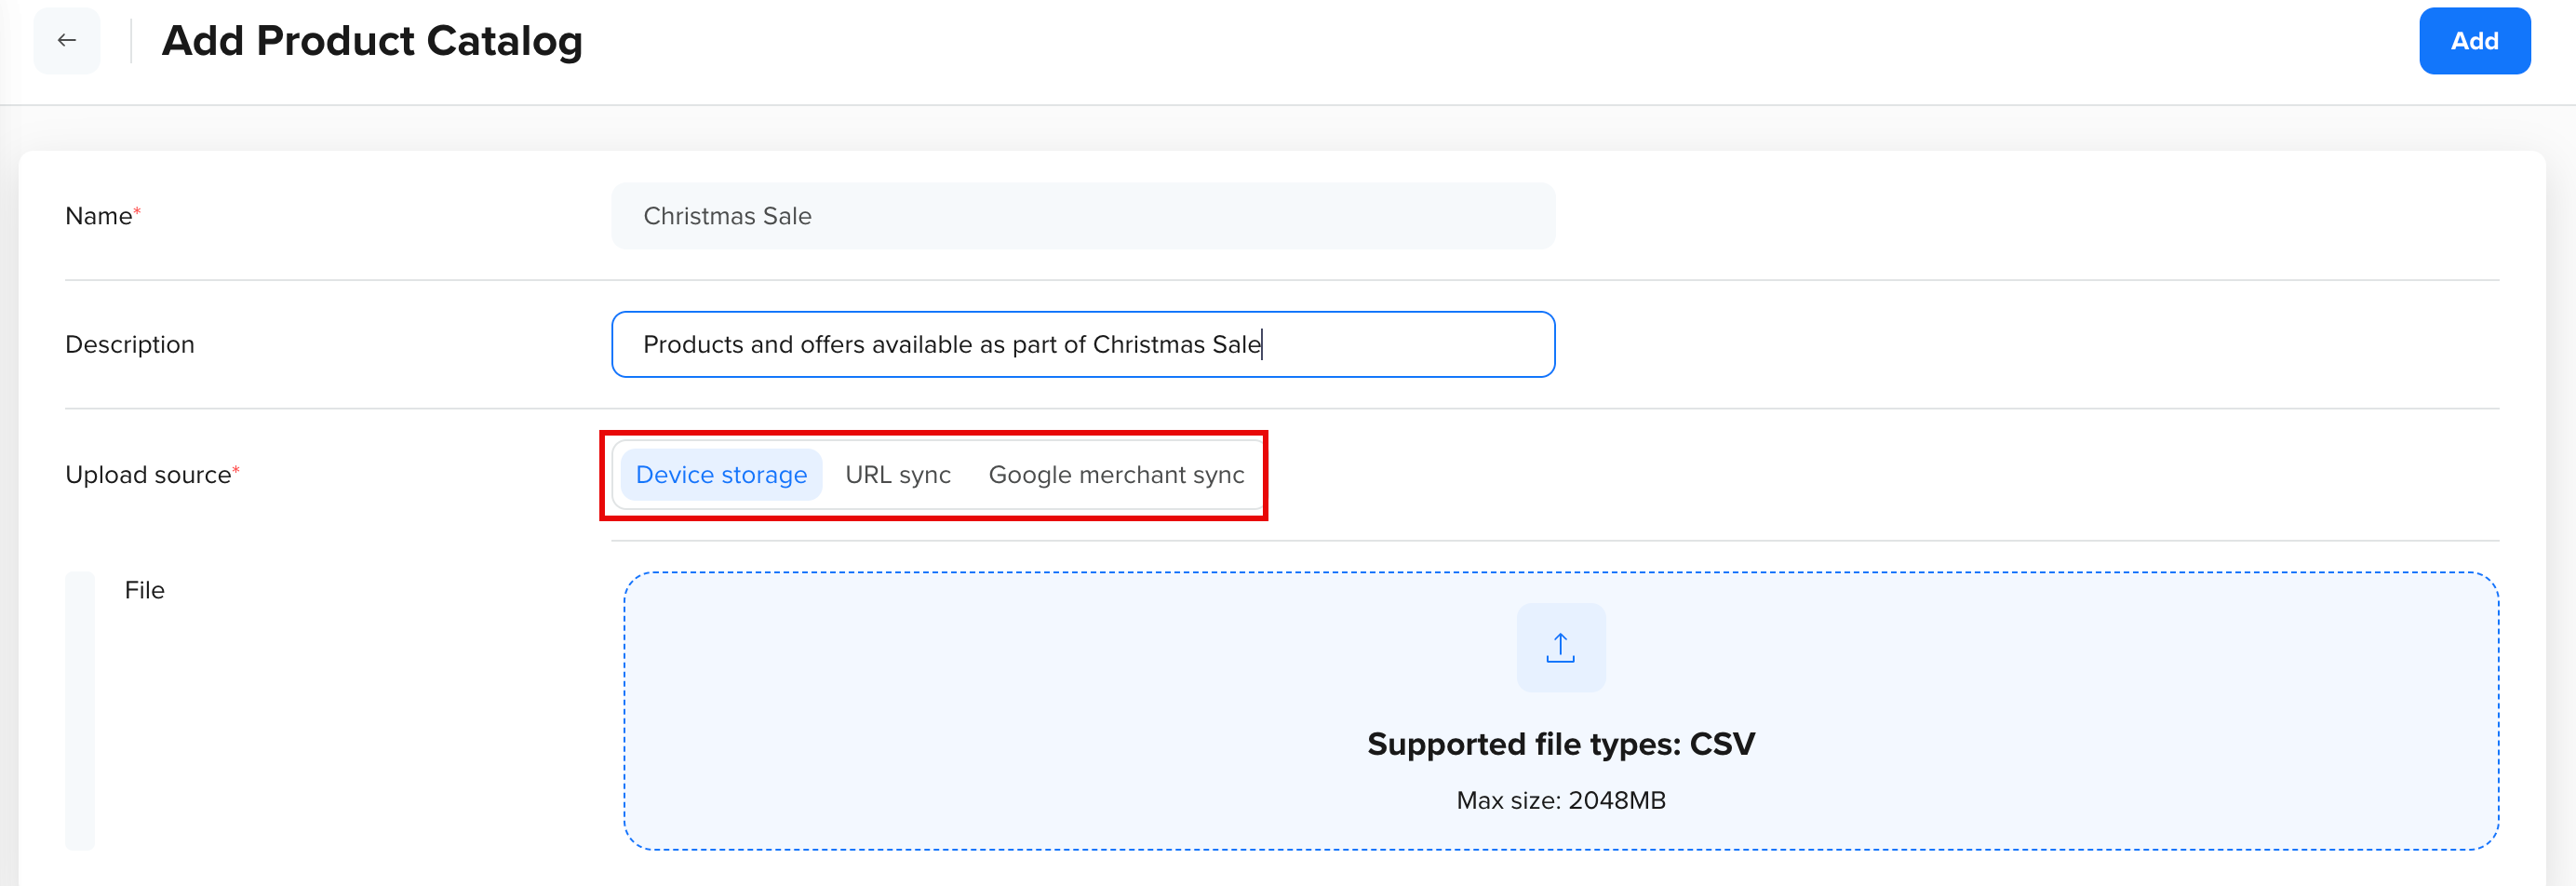
Upload Product Catalog
| Field | Description |
|---|---|
| Catalog Name | Enter a name to uniquely identify the catalog. |
| Description | Add context about the catalog. |
| Upload Type | Select how your catalog data is sourced. Choose Device storage, URL sync, or Google merchant sync. You can upload a CSV file, fetch data from a URL, or sync from an external source. For more information, refer to Upload Types. |
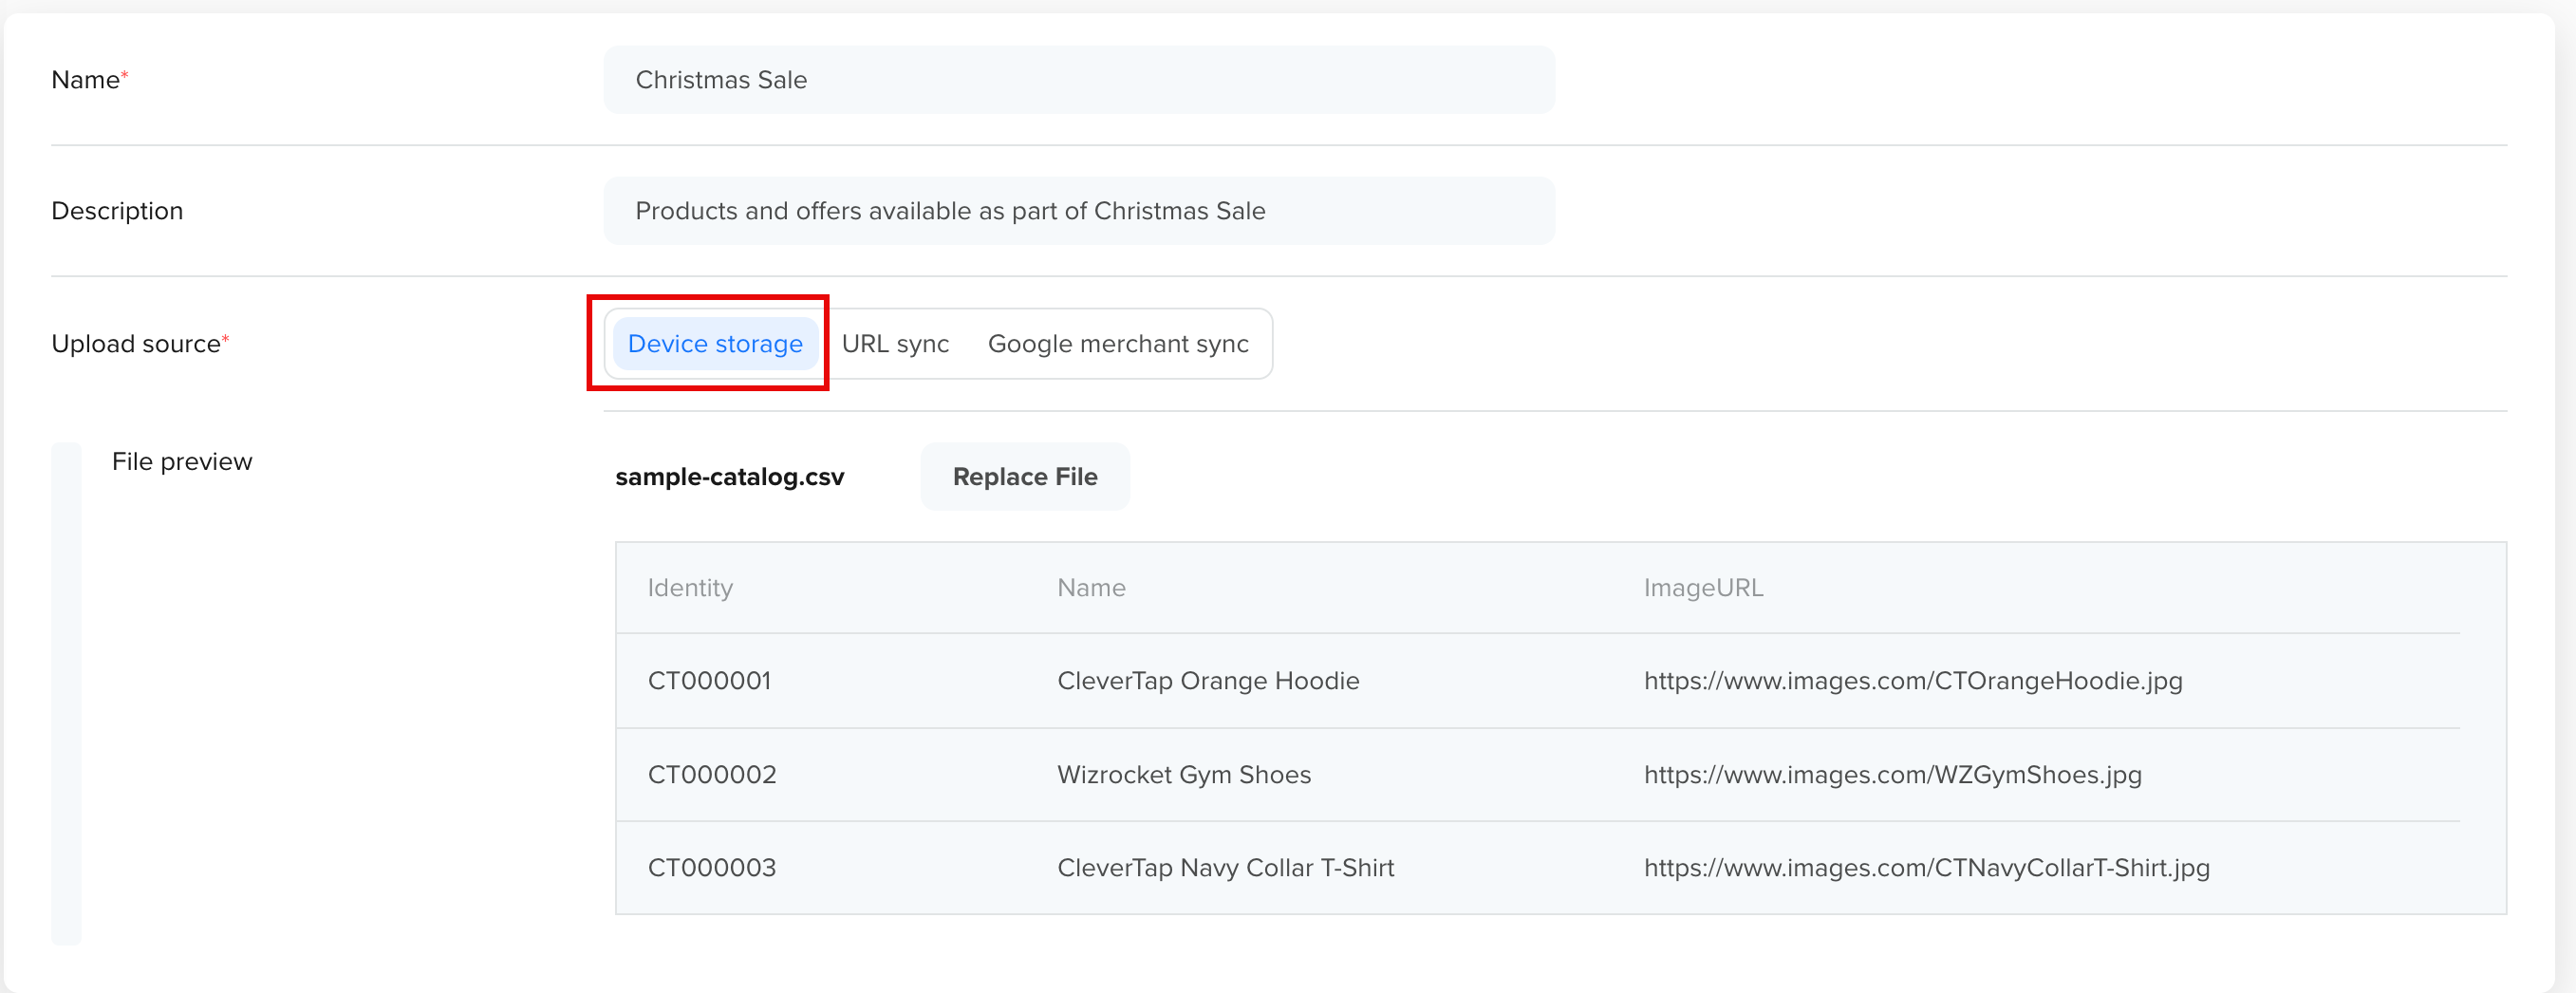
After a file is uploaded, the system validates the catalog. Once validation succeeds, the file preview section displays a few rows of catalog data, including column headers, so you can review the data before proceeding. This helps ensure the catalog content is correct before upload.
- Map data type with Catalog columns.
- Create a Feed to populate your catalog with data.
Click Upload to upload the catalog. Once the Catalog is uploaded, it becomes available immediately.
Catalog ConstraintsA catalog supports the following:
- A maximum of 100 columns in total
- 3 fixed columns: Identity, Name, and Image URL. Column headers are case-insensitive. You can use any of the following header casing in your CSV file: identity vs Identity vs IDENTITY, name vs Name, and imageurl vs ImageUrl vs Image_URL vs image_url
- Up to 97 custom attribute columns, defined during catalog creation. Columns cannot be added or removed after the catalog is saved.
Your account supports up to 5 catalogs and a combined total of 15M rows across all catalogs. Both limits apply: you cannot create a new catalog once you reach 5, and you cannot upload more rows to any catalog once your combined row count reaches 15M, whichever comes first.
Custom attribute names must be at most 50 characters, must start with a letter or underscore, and may contain only letters, numbers, underscores, dashes, spaces, and parentheses.
identity, name, image_url, and imageurl are reserved and cannot be reused as custom attribute names.
Attribute names must be unique within a catalog and case-insensitive.
Upload Types
Upload Type defines how catalog data is imported into CleverTap. You can upload a file, fetch data from a URL, or sync data from an external source.
Device Storage
Use this option to upload catalog data in bulk from a CSV file on your system. The uploaded file is displayed in a tabular preview, and you can replace it if required before proceeding. The maximum file size is 2048 MB.
This option is ideal for one-time or bulk uploads.
The following image shows the Device Storage tab:
Upload using Device Storage
URL Sync
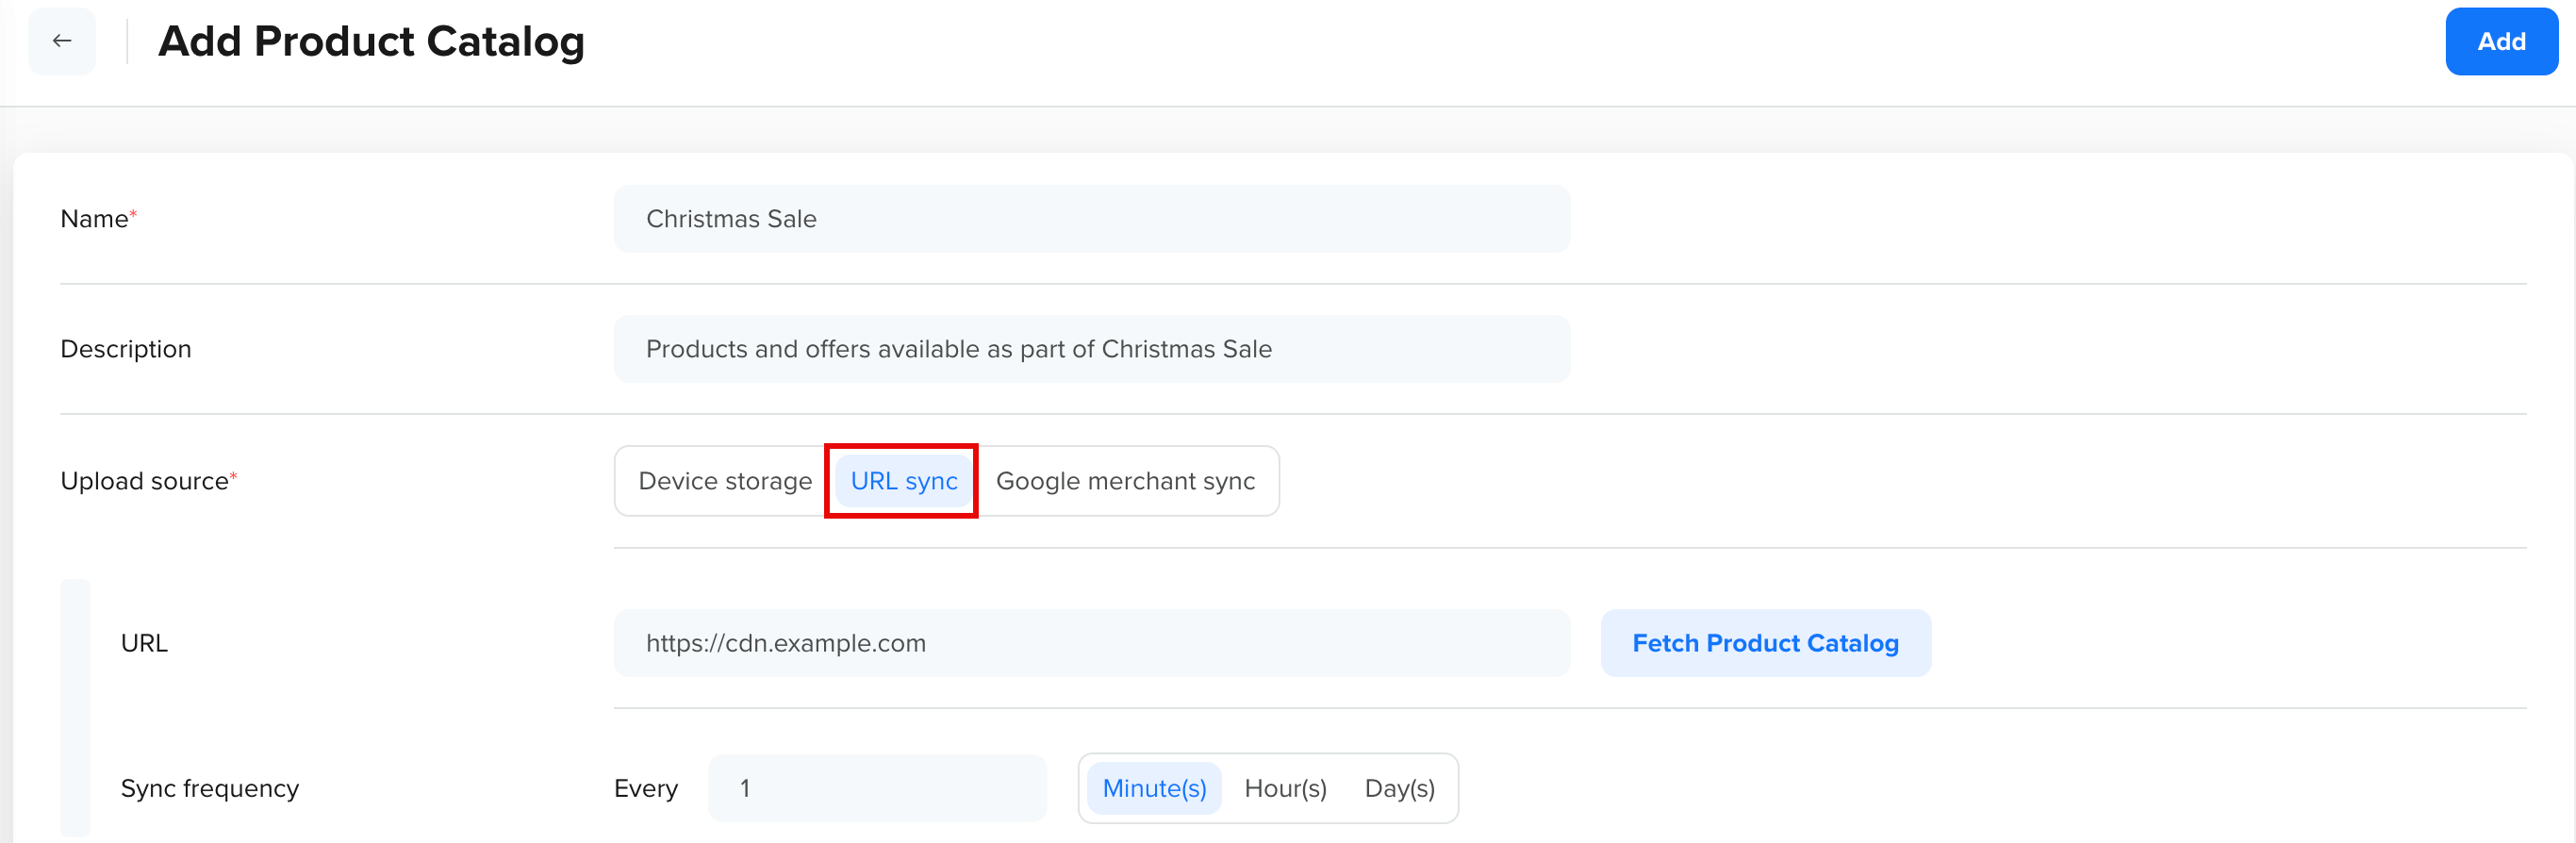
Select the URL sync tab to source catalog data from an external endpoint rather than uploading a file manually.
Enter a source URL to fetch catalog data, for example, to automatically pull product updates such as pricing and availability from your backend system at regular intervals.
NoteThe source URL must be publicly accessible. CleverTap fetches data directly from the URL without any authorization headers or credentials. Password-protected or authenticated URLs are not supported.
Click Fetch Catalogs to retrieve the data and display a preview of catalog rows and columns. Specify how often CleverTap must re-fetch data from the URL. Enter a Sync Frequency value and select the unit: Minute(s), Hour(s), or Day(s). For example, "Every 1 Hour(s)" pulls fresh catalog data once per hour.
The following image shows the URL sync tab:
Product Catalog Upload via URL sync
You can preview the first few rows of the data before validating the input.
Google Sync
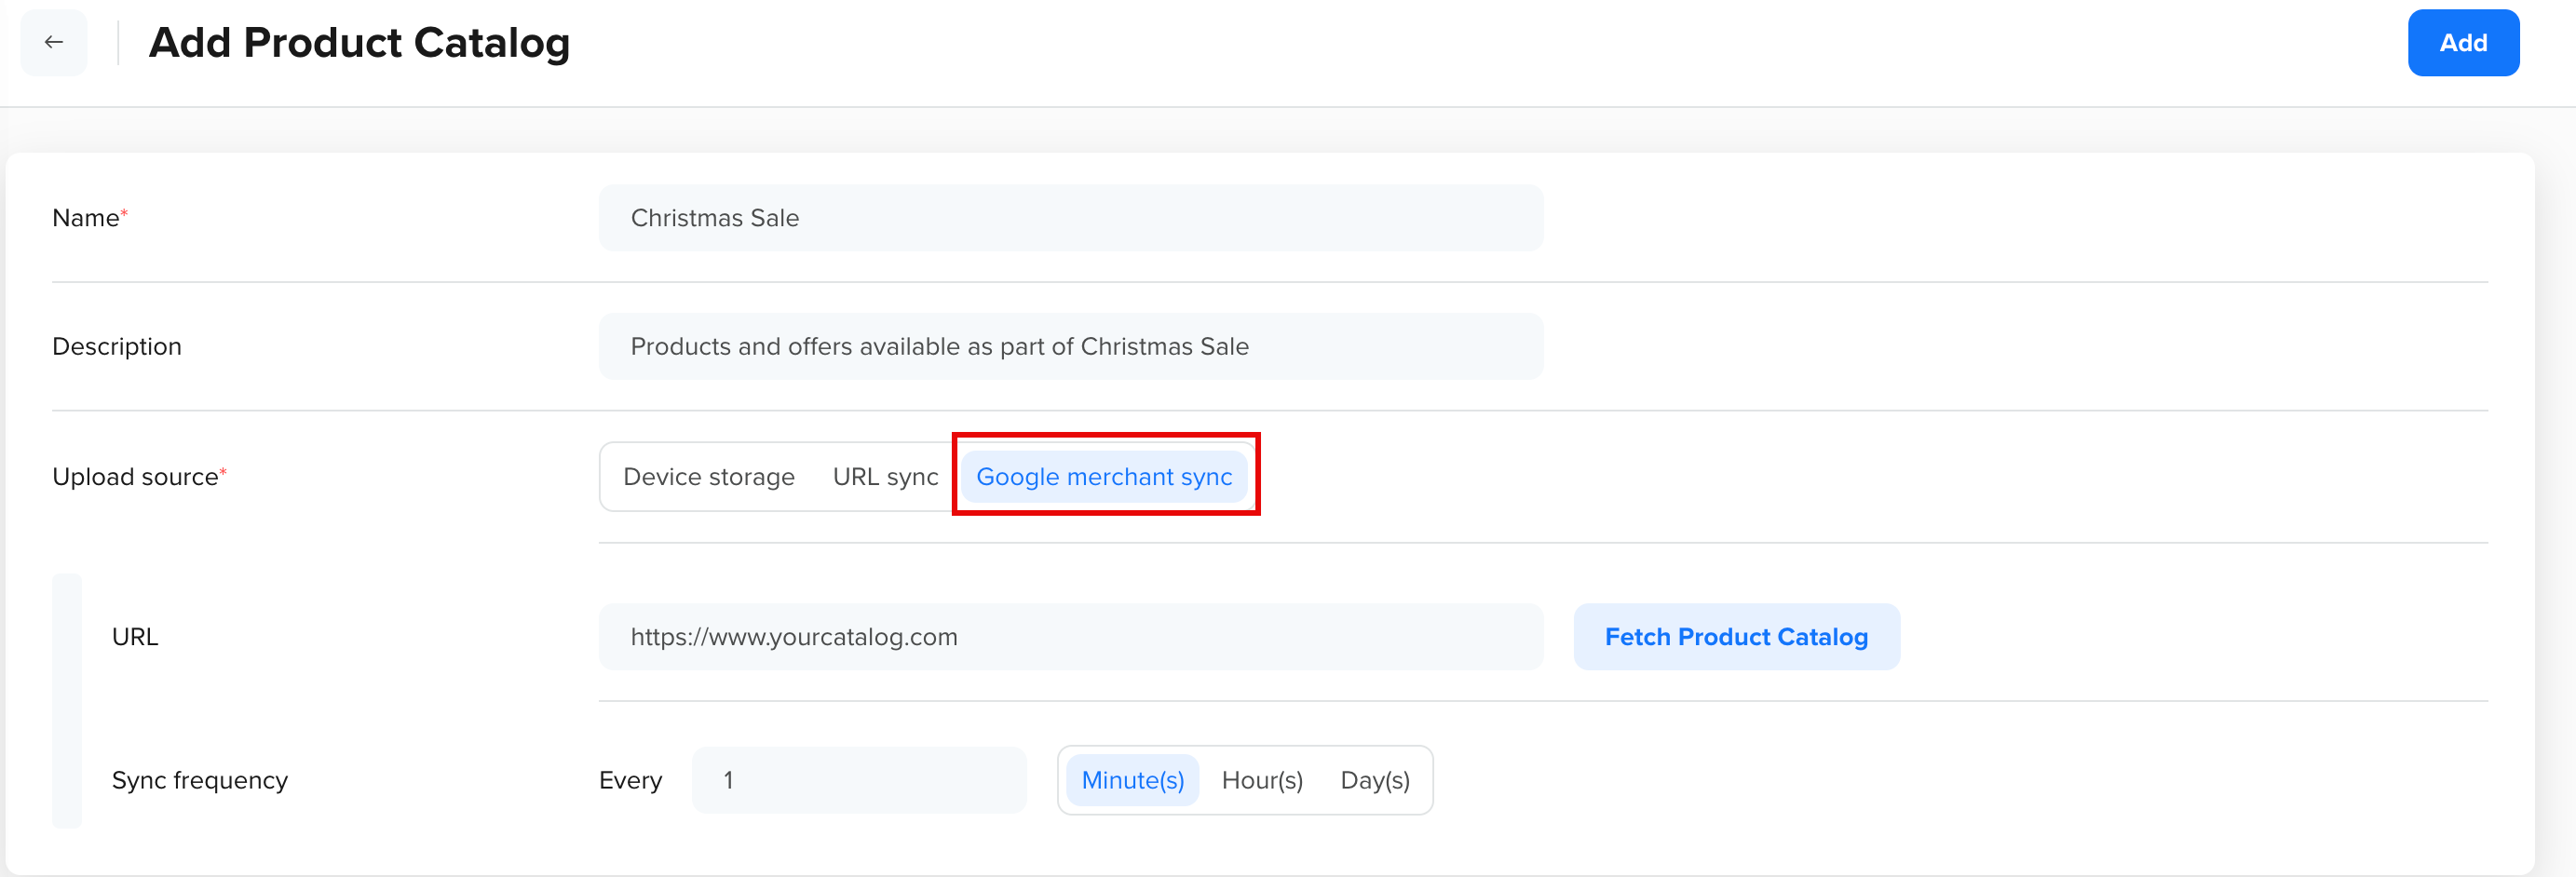
When Google Merchant Sync is selected, you can provide the Source URL, fetch the Catalog, and define a sync frequency in minutes, hours, or days.
Before fetching the catalog, configure the following fields in the table:
| Field | Description |
|---|---|
| Source Url | Enter the Google-hosted feed URL from which catalog data is fetched. |
| Sync Frequency | Define how often the catalog is refreshed. You can configure the interval in minutes, hours, or days. |
Click Fetch Catalog to retrieve catalog data from the configured source. This option supports ongoing synchronization of catalog data. Only links to XML files are allowed for Google Sync. For more information, refer to Google Merchant Center.
The following image shows the Catalog upload via Google sync:
Product Catalog Upload via Google Merchant Sync
Sync FrequencyCleverTap fetches your catalog from the source URL at the interval you set. It does not store a static copy, so the Sync Frequency you choose directly affects how current your catalog data is. Set a shorter interval, such as every hour, if your source updates frequently, for example during flash sales or when stock levels change in real time. Set a longer interval, such as once a day, if your catalog is relatively stable and only updated periodically. This also reduces unnecessary load on your data source.
Enter a value between 1–59 for minutes, 1–23 for hours, or any positive number for days. The minimum value is 30 minutes. There is currently no enforced maximum.As a best practice, match the sync frequency to how often your source data actually changes.
Map Data Type with Catalog Columns
After uploading and validating a catalog file, CleverTap automatically reads the data and provides a first-level mapping for each column. Mapping is available for all columns. Review the suggested mappings and update them if needed before saving, as mappings cannot be edited once saved. Correct mappings ensure the catalog data is structured correctly before proceeding.
The following table lists the data types and the usage examples:
| Data type | Use for |
|---|---|
| String | Text values such as names, categories, or SKUs. |
| Number | Whole numbers. |
| Float | Numbers with decimal values, such as prices or ratings. |
| Boolean | Values with exactly two states, such as true/false for stock availability. |
| Array | Lists of values, such as multiple tags or genres. |
Catalog Column LimitsA catalog supports a maximum of 100 columns in total:
- 3 fixed columns: Product ID, Name, and Image URL
- Up to 97 custom attribute columns,defined during catalog creation
Columns cannot be added or removed after the catalog is saved.
The following image shows the Mapping data type section:
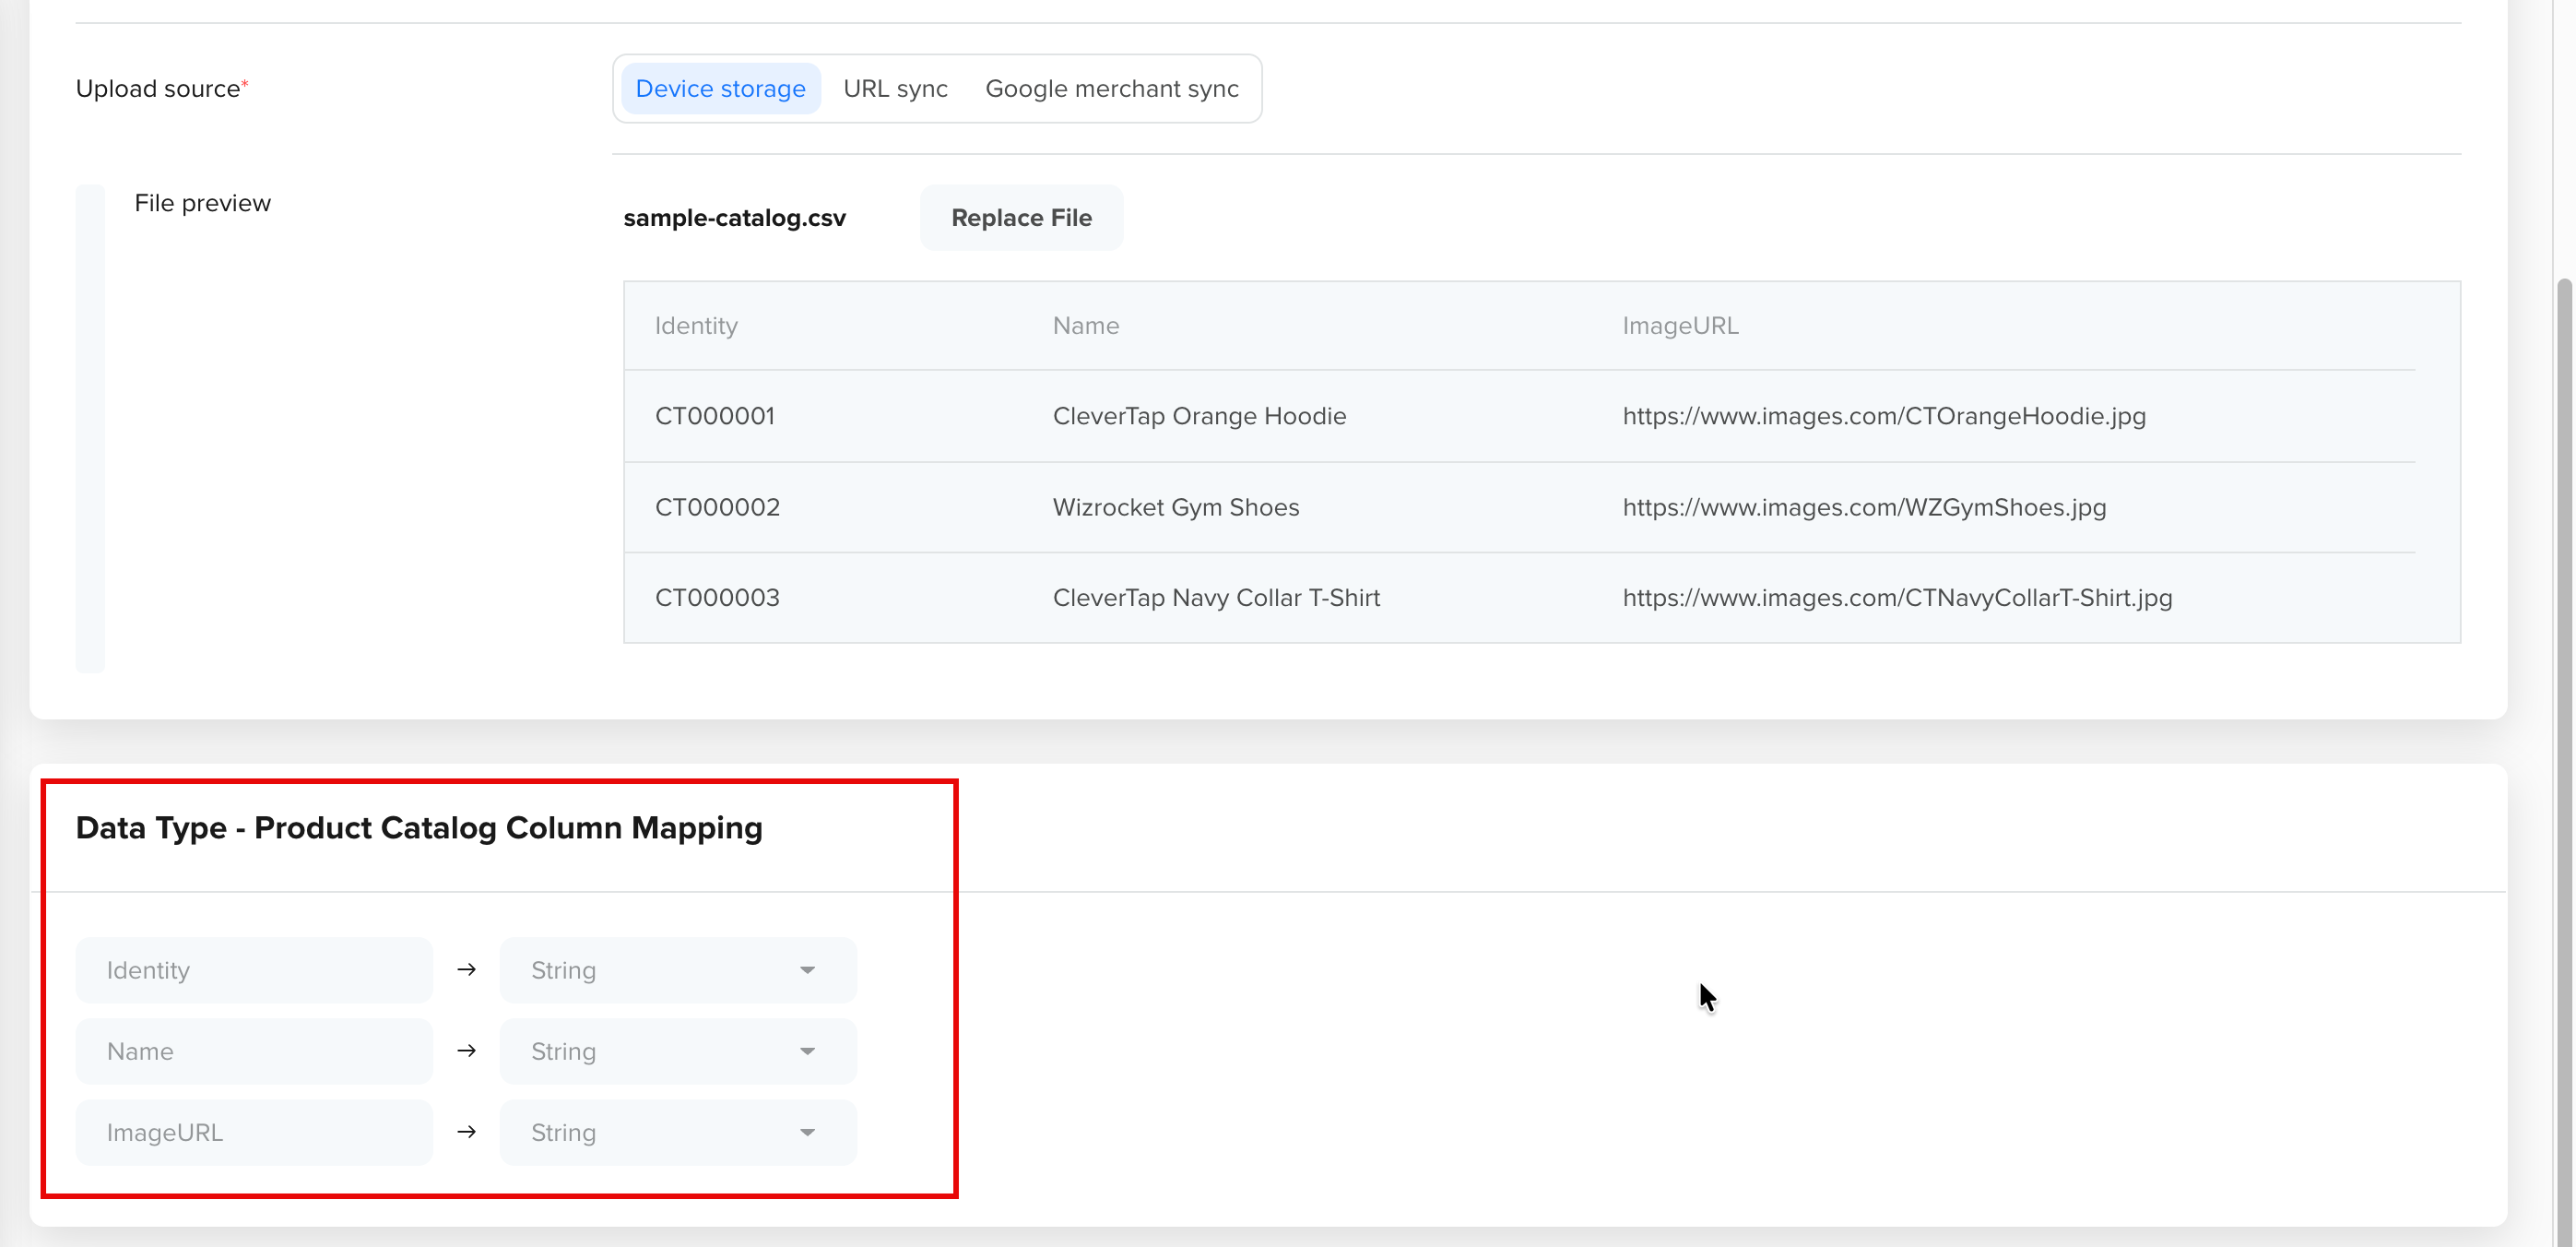
Map Data Type
Updated about 1 month ago