Use Case 2: Recover Abandoned Cart Using Journeys
Learn how to recover abandoned carts using CleverTap Journeys.
Scenario
A potential user visits an online shoe app and adds a pair of sneakers to the cart. However, the consumer leaves the app without completing the transaction.
Objective
Using CleverTap Journeys, send notifications to:
- Encourage consumers to complete the transaction by re-engaging with them.
- Recover potential lost revenue.
- Provide a seamless and personalized shopping experience to the consumer.
Create an Inaction Journey
Create an inaction journey that triggers when the user adds items to the cart but does not complete the purchase within two minutes. Using an inaction journey allows you to filter users for your Journey based on the actions they did not perform within a specified time. Use a combination of the user's preferred channels to send reminders at specific intervals. For example, Push, SMS, and Email messages. Customize these messages for a personalized touch. The goal is to encourage users to complete the transaction.
In this example, you create the following Journey flow:
Inaction Segment > Yes > Push Notification > 2 Hours Delay > SMS > 2 Hours Delay > Email
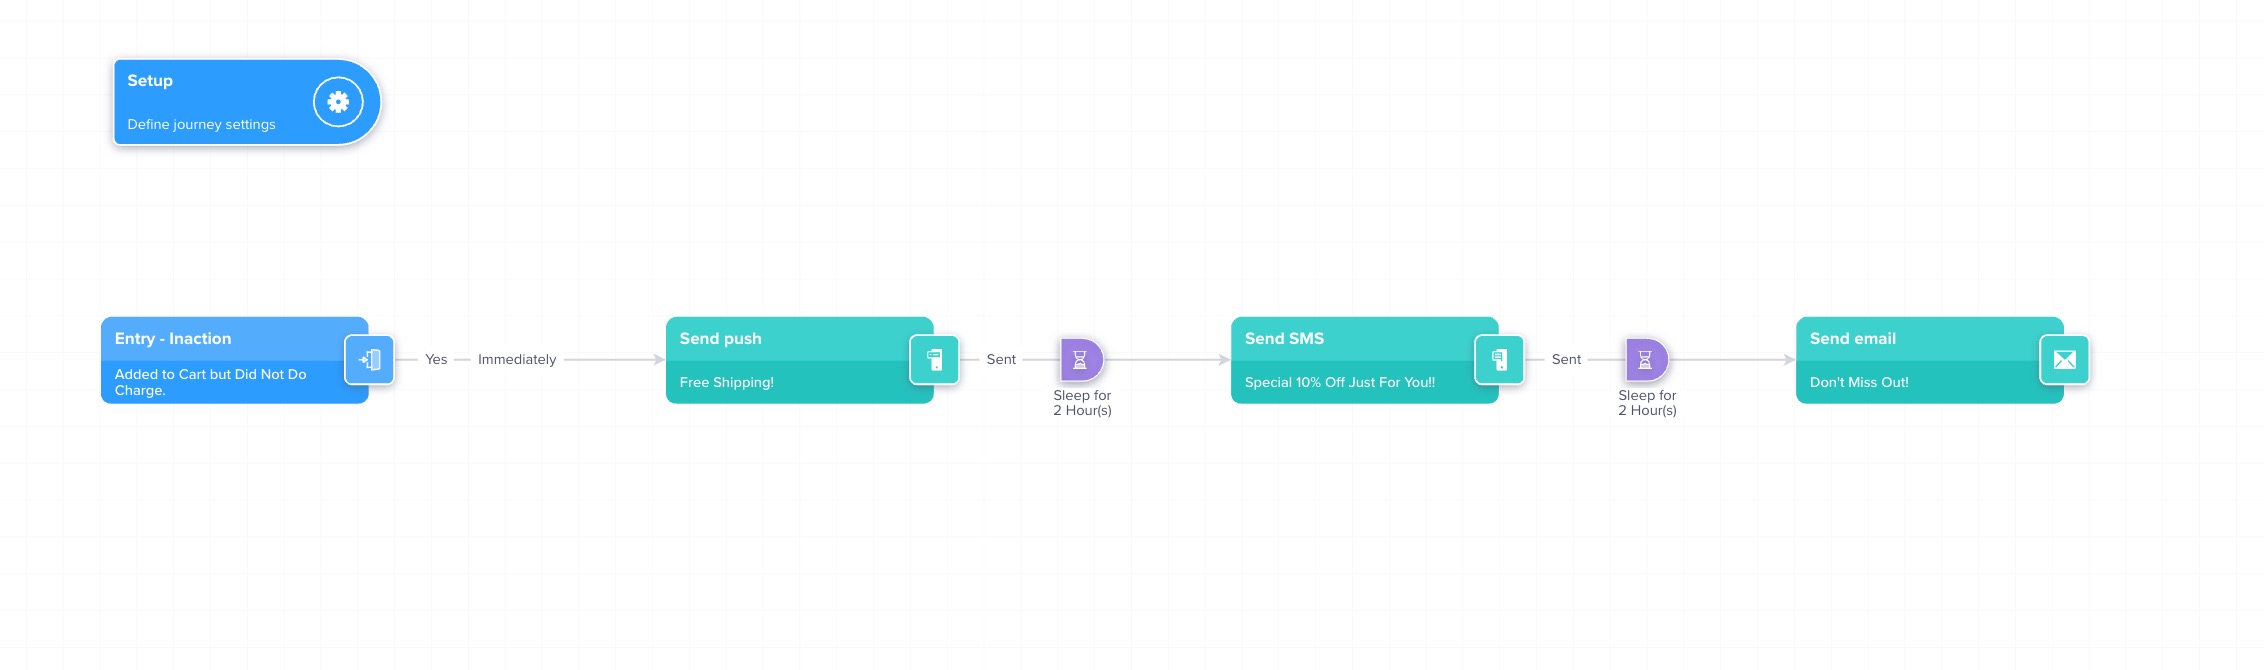
Let's understand how to create this sample Journey using the CleverTap dashboard.
On the CleverTap Dashboard, go to Journeys and click +Journey. On the canvas, perform the following steps:
- Set up the journey
- Define goals
- Define entry segment
- Define the journey path
- Personalize the journey
Once you complete all the steps, publish your journey.
Set Up the Journey
As this is an Inaction Journey, the user's entry into the journey is determined based on the event trigger.
-
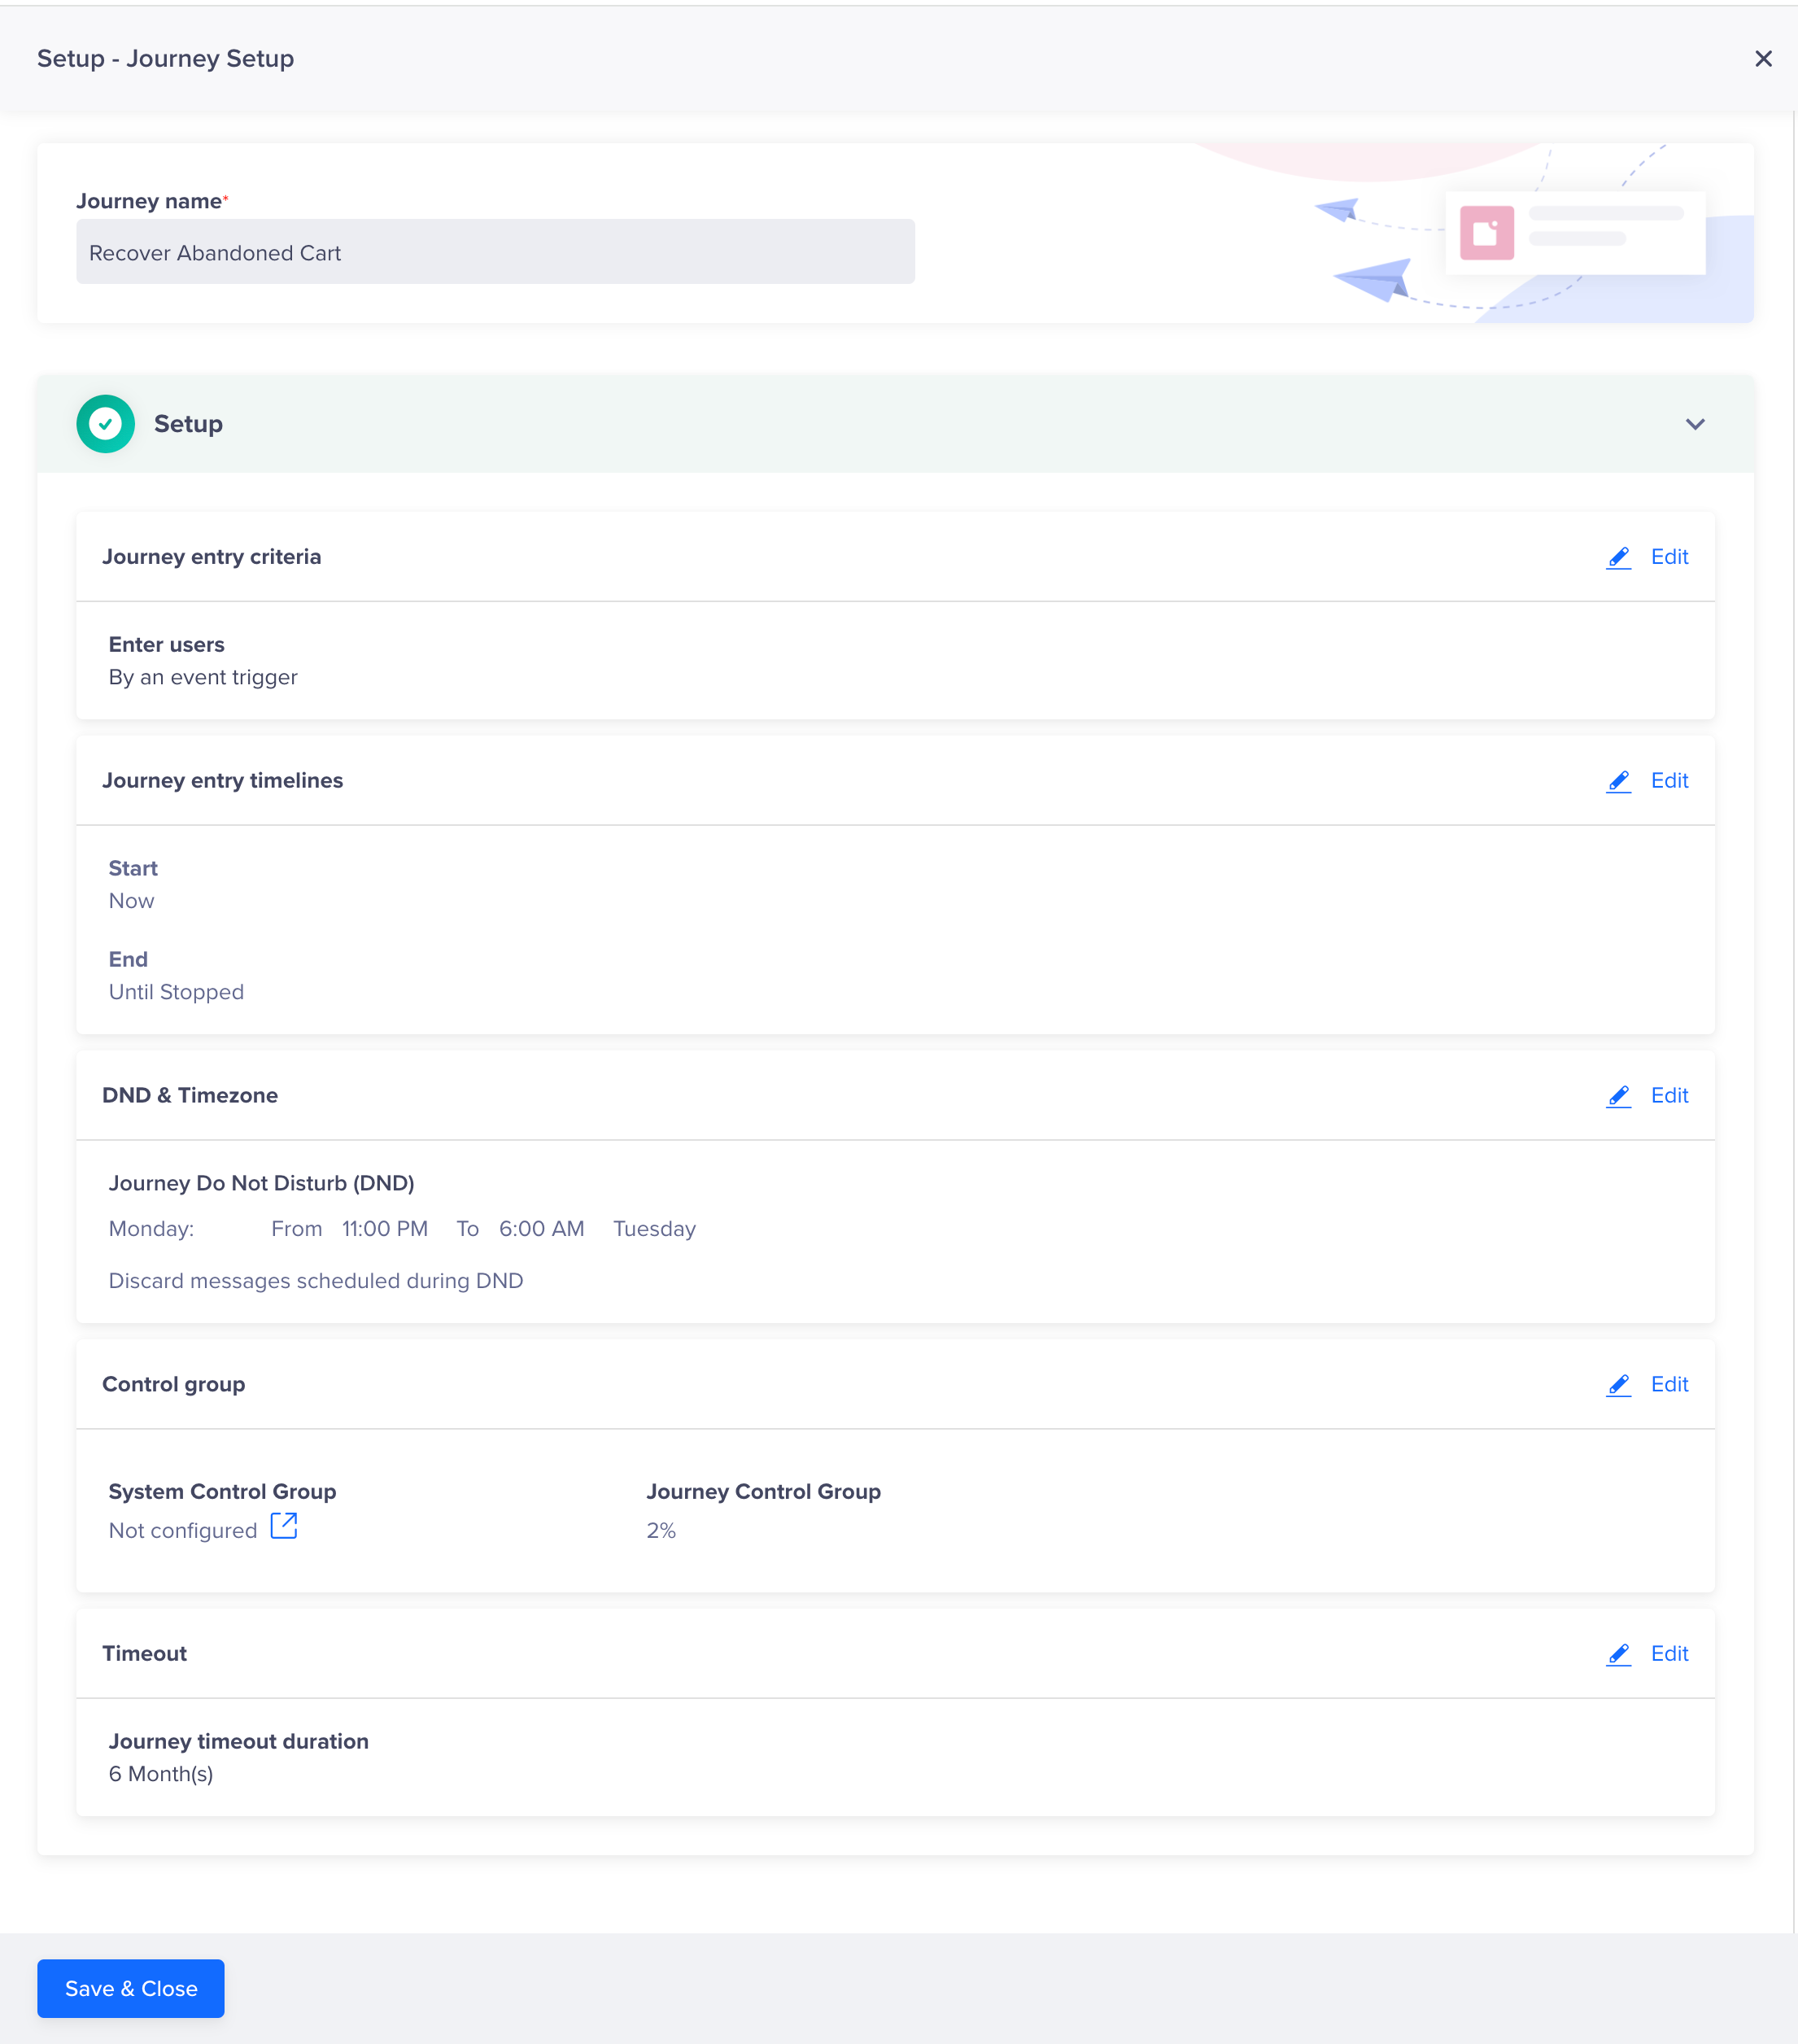
To set up your Journey, click the Setup widget and provide the following details as shown in the following image:
- Journey name
- Journey entry criteria
- Journey entry timelines
- DND & Timezone
- Journey control group
- Journey timeout duration
-
Click Save & Close.
For more information, refer to the Setting Up a Journey document.
Define Goals
To define goals for the Journey:
-
Expand GOALS, drag and drop the Action segment in the Goals widget.
-
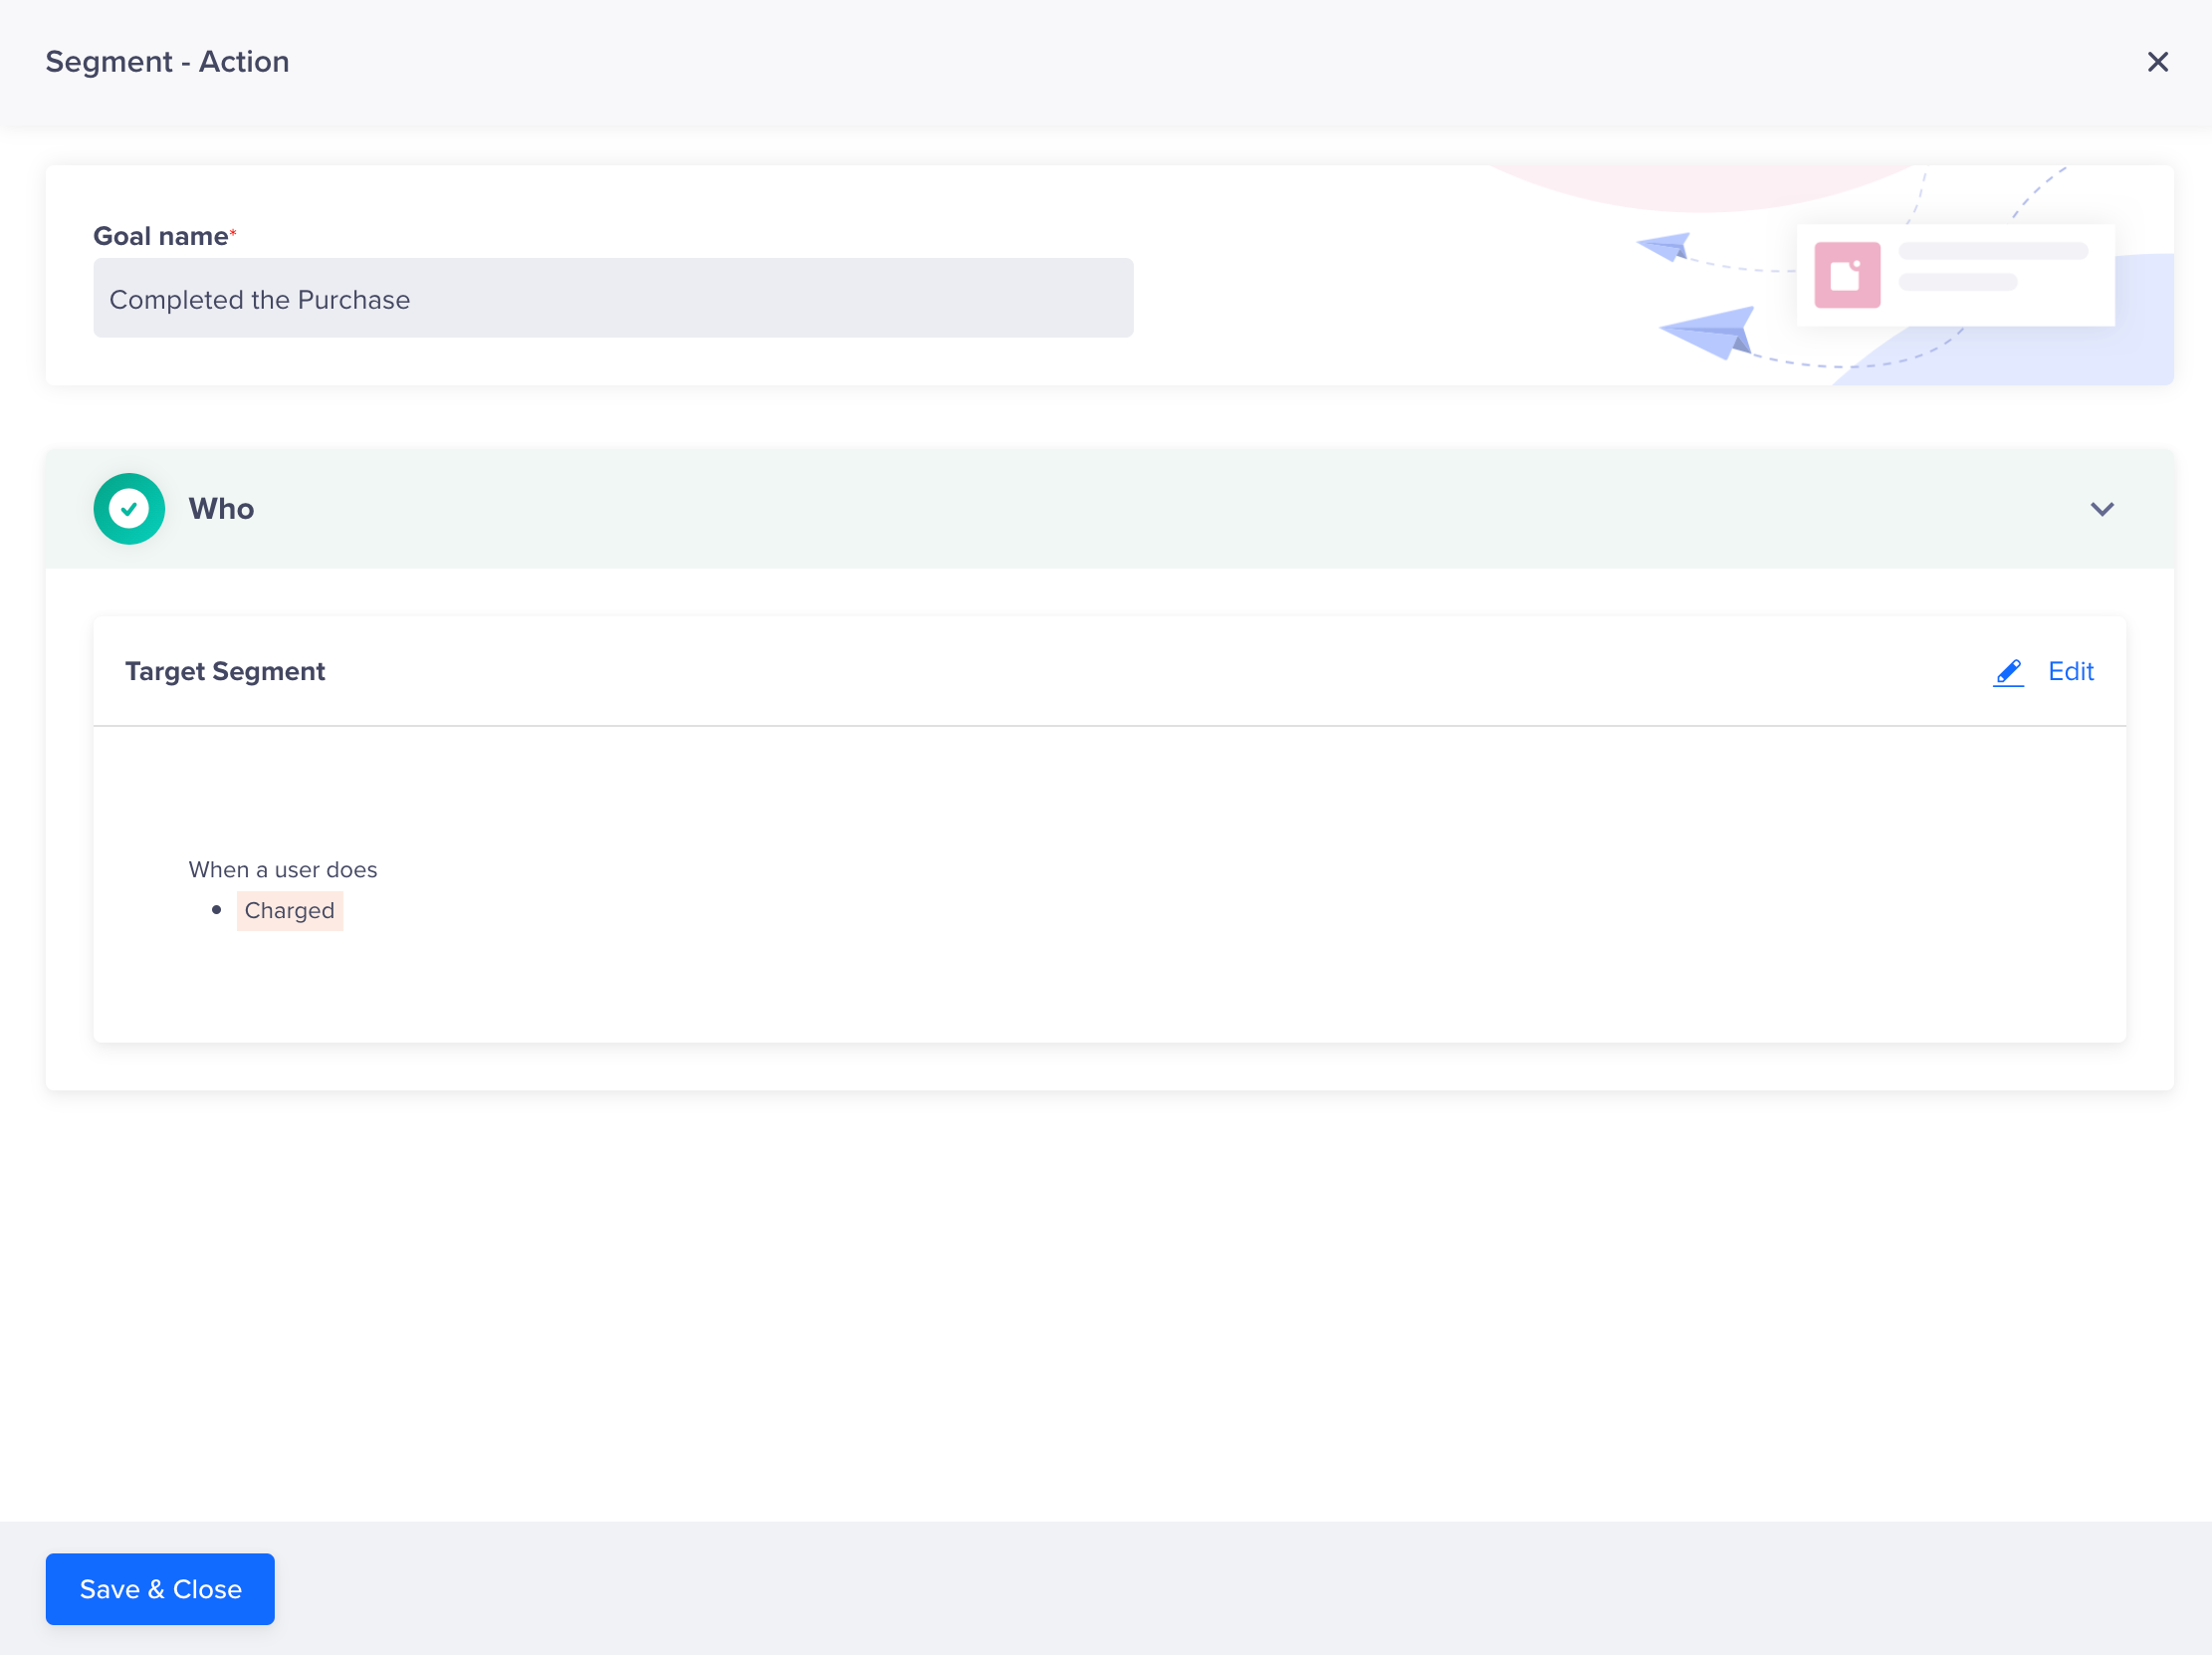
Click the Goals widget and set the following details:
-
Enter the name of the goal in the Goal name field. For example, Completed the Purchase.
-
Under Who > Target Segment, set the Charged event as the exit criteria. Click Continue.
-
-
Click Save & Close.
For more information, refer to the Define Goals document.
Define the Entry Segment
The Entry Segment identifies users who will qualify to enter the journey. For example, users who added items to the cart but didn't complete the transaction within 2 minutes qualify to enter the Journey.
-
Drag and drop the Inaction segment node to the Entry Segment block as the entry criteria.
-
Click the Action segment node and enter the following details:
-
Enter the name of the segment in the Segment name field. For example, Added to Cart but Did Not Do Charge.
-
Under Who > Target Segment, set the following events and click Continue:
-
As soon as user does = Added to Cart event
-
And does not do = Charged event within 2 minutes

-
-
-
Click Save & Close.
For more information, refer to the Define Entry Segment document.
Define the Journey Path
Drag and drop engagement nodes from the left pane, connect them using the journey links (e.g., Yes or Sent path), and set the delay hour using the Sleep Time icon. Create the journey path in the following sequence:

- Push Notification with Free Shipping:
- Sent immediately if the user qualifies for the journey through the inaction segment.
- Offers free shipping to the consumer.
- SMS with Discount:
- After 2 hours, if the user hasn't completed the purchase.
- Provides a limited-time offer of a 10% discount.
- Final Email Reminder:
- Another 2-hour wait.
- Sends a final reminder through email.
Personalize the Messages
Once you have outlined the journey path, compose the Push, SMS, and Email messages.
For more information about composing your message, refer to the Push, SMS, and Email documents.
In this example, let's understand how to personalize a Push message.
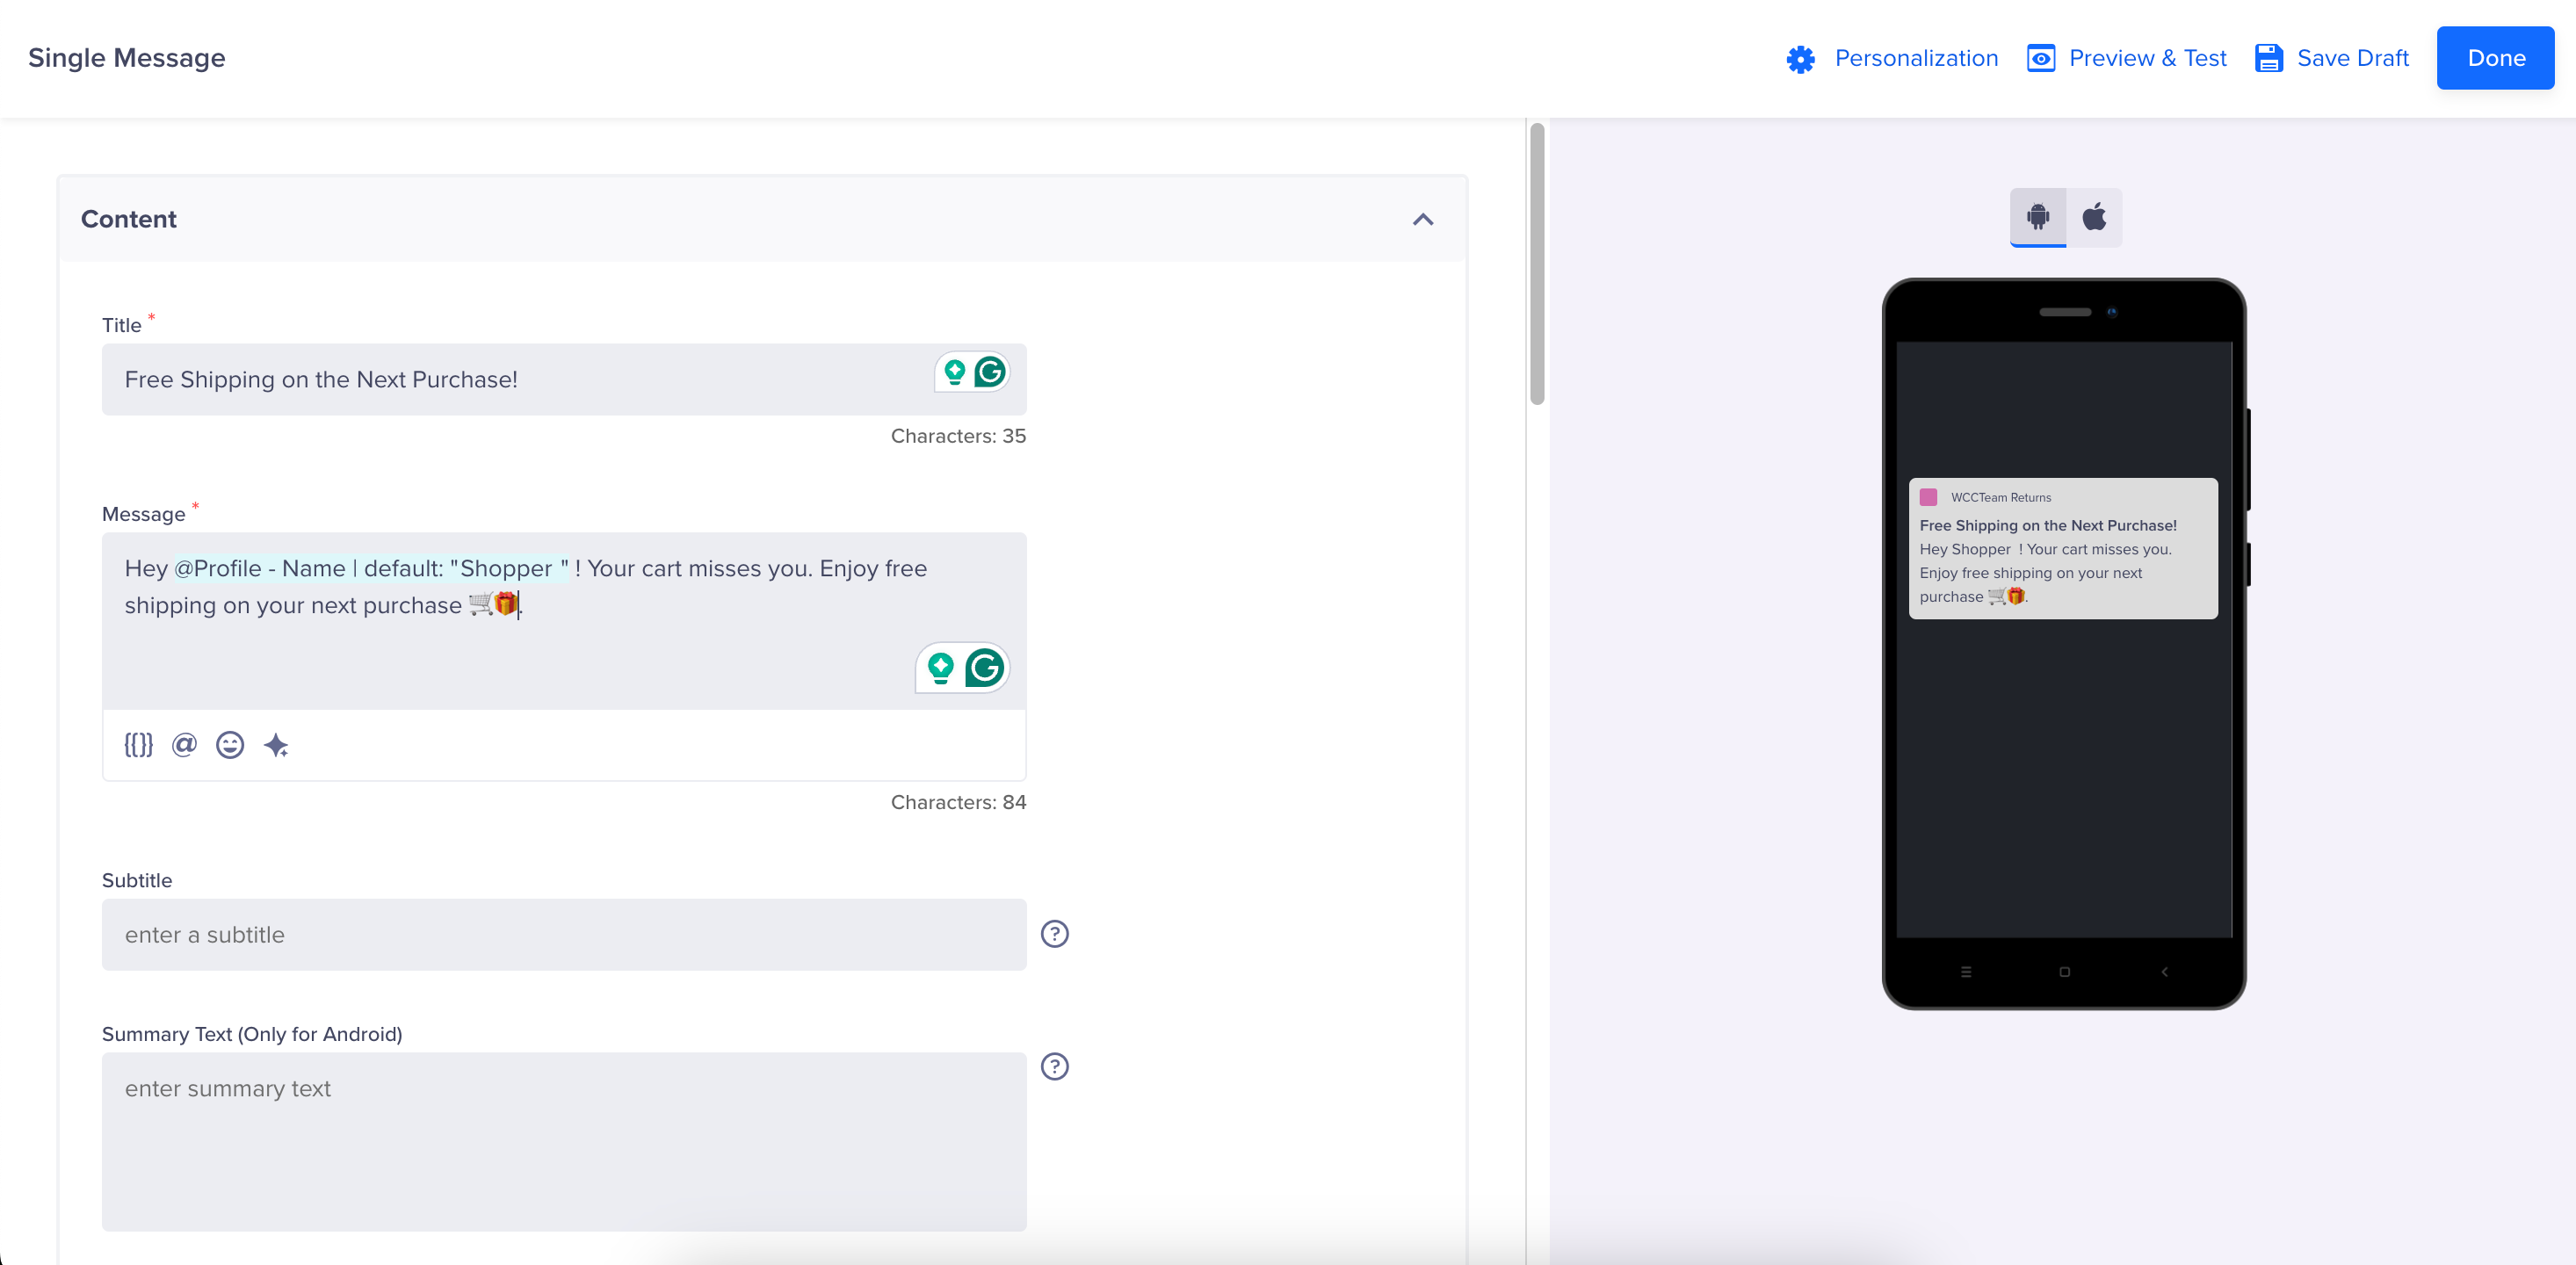
- Click the Push engagement node.
- Under What, select Message Type and open the editor.
- Enter the message in the Title and Message field. You can use the Scribe
 icon to generate personalized copies.
 - Further, you can use the inline @ personalization option or the more advanced options from the Personalization icon at the top of the page.
In the following graphic, use @Profile - Name to includes the customer's name in the message.
Personalize in Journeys
For more information on personalization, refer to the Personalization in Journeys document.
- Click Done. Similarly, you can compose SMS and Email messages.
- Click Publish to make the journey live.
Once you have published the Journey, you can monitor the Journey using Journey stats. For more information on Journey statistics, refer to the Journey Performance document.
Conclusion
Thus, CleverTap Journeys offers an effective solution for addressing cart abandonment. It allows you to re-engage users and guide them toward completing their purchases. As a result, it increases conversions and revenue generation.
Updated 8 months ago