Email Sunsetting
Learn about Email Sunsetting strategy, one of the email best practices, to encourage a more positive user experience and a healthier sender reputation.
Overview
Email sunsetting is a strategy to identify and discontinue sending emails to those contacts or subscribers who do not engage with particular email campaigns over a particular period of time. With this strategy, marketers can try to re-engage with such users to see if they would like to continue receiving such email campaigns in the future. You can do so by setting up a journey to periodically send email campaigns to understand if the users want to continue receiving the email campaigns or would prefer to unsubscribe.
Implement Email Sunsetting
When implementing sunsetting, we recommend you have the sunsetting email parameters ready. These parameters are the criteria used to determine the email addresses that should no longer receive emails from you. These parameters may vary depending on the nature of a business or its audience. Identifying the sunsetting email parameters aims to maintain a clean and up-to-date email database and improve engagement rates.
To implement the email sunsetting:
Identify Inactive Users
Inactive users are users that did not engage (viewed or clicked) with the email campaigns for a specified period. The exact criteria for determining inactive users can vary depending on your business and audience.
After determining the inactivity criteria, you can use it to create a segment and re-engagement journey for these users. This helps you keep your email list up-to-date and avoid sending emails to no longer active users, thereby improving email deliverability and engagement rates.
Create a Segment
After identifying the inactive user base, create a Past Behavior Segment of these users.
Create a Re-engagement Journey
After creating a segment of inactive users, you can identify the users who may no longer want to receive email campaigns by running a series of re-engagement email campaigns. This can be done by creating a journey that includes sending a series of email campaigns at specified intervals. If the users continue to not engage with these campaigns, you can set the MSG-email flag as false. This indicates that the users with MSG-email set as false will no longer receive any email campaigns.
Consider a scenario where the marketer wants to engage with users to whom the email campaigns were sent in the last seven months and did not view any campaign in the last five months. After identifying the user segment, the marketer can re-engage with such users and unsubscribe the users (who continue to show such behavior) from receiving the email campaigns. To do so:
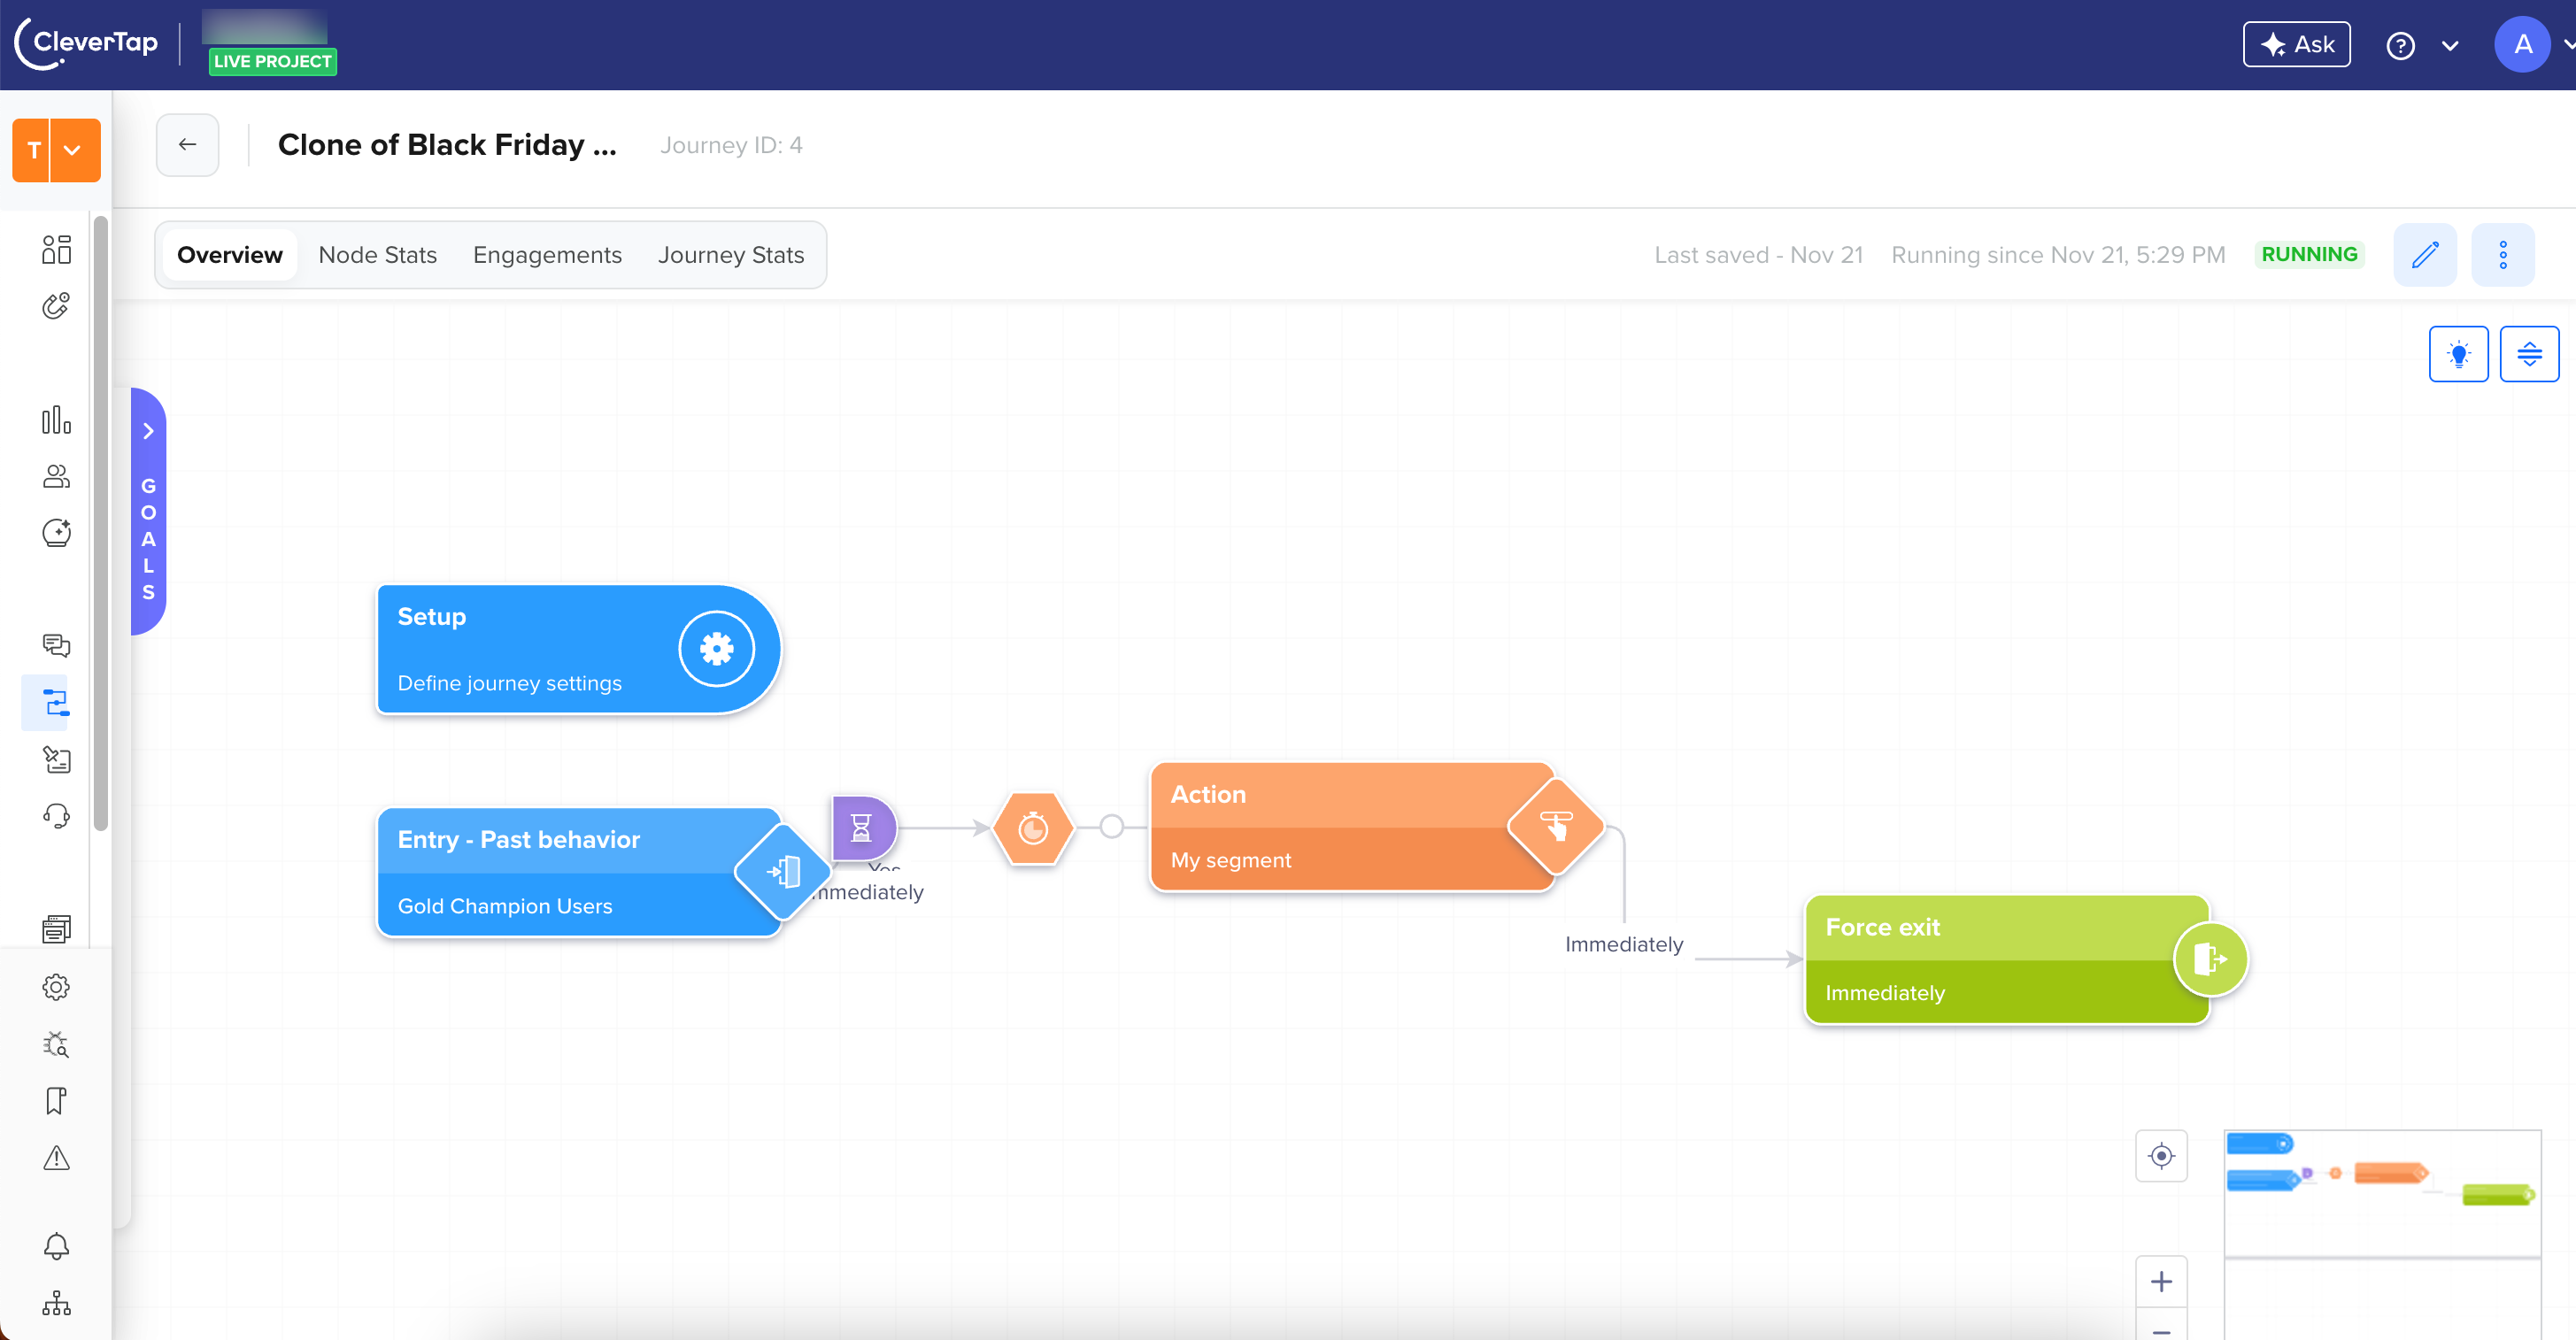
- Navigate to Journeys from the CleverTap dashboard and click +Journey.

Navigate to the All Journeys pages
- Set up the entry criteria for your journey as per the requirement.
- Define the Entry Segment. In this case, it would be a past behavior segment that will users who received the email campaigns in the last 7 months but did not view them in the last 5 months. In the following figure, Campaign type 2 refers to the Email campaign.
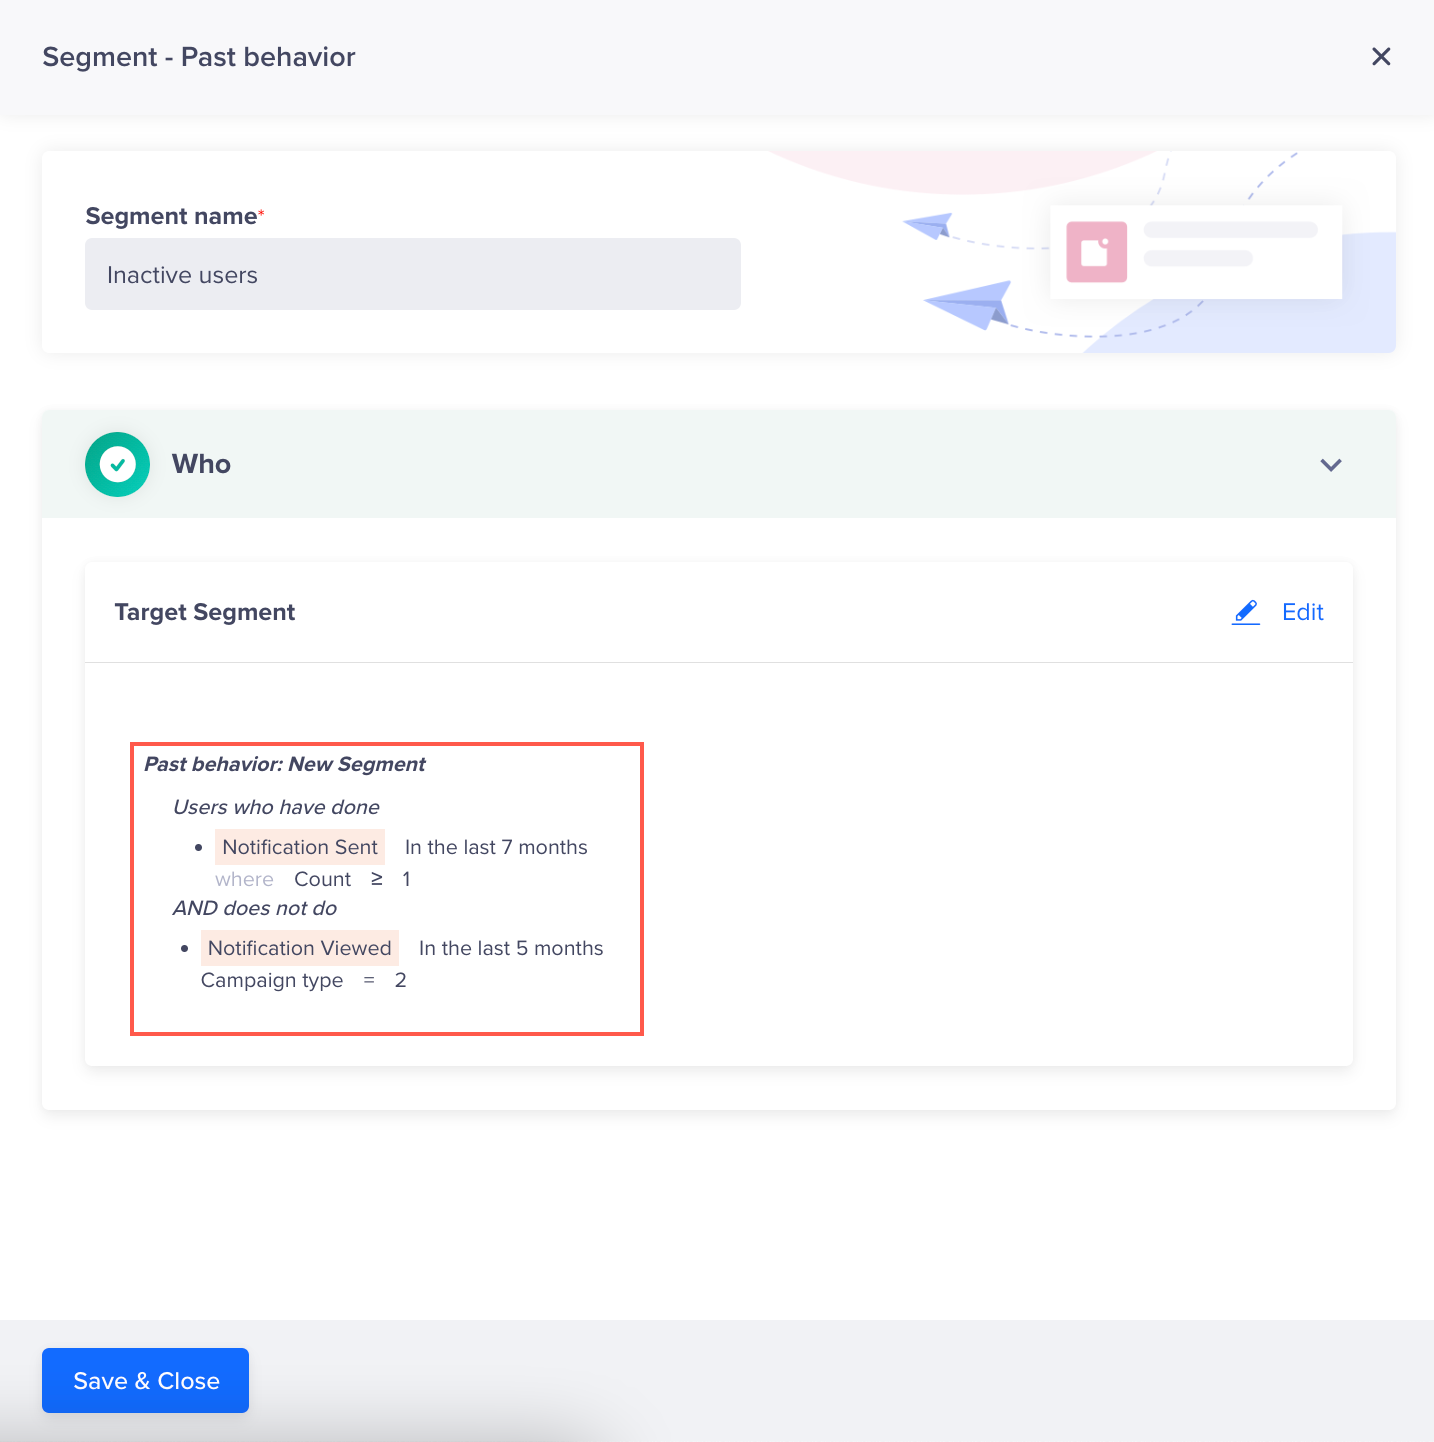
Define Entry Segment
- Create multiple email campaigns scheduled at specific intervals to re-engage with this segment of users. If the user views the campaign, they will be exited from the journey. But, if the user does not view the campaign within a particular period of time (termed as Qualifying Window), they will qualify for the next email campaign in the journey.
Multiple Email Campaigns Scheduled at Specific Intervals
- Drag and drop the Update user profile to update the following user profile properties for users who continue to not view the campaign till the end of the journey:
- MSG-email: Set this to false.
- Email Sunsetting flag (custom user property defined by the marketer/business before starting the email sunsetting process): Set this to true. When set to true, it indicates that the user has been through the Email Sunsetting journey completely and is a sunset user.

Update User Profile Property
At the end of this journey, for users who continue not to view all the periodic email campaigns set up as a part of this journey, the user property MSG-email is set to false. This indicates that the user must be unsubscribed from the email campaigns, and the Email Sunsetting flag must be set to true (in the above figure, prop1 is the Email Sunsetting flag).
Remove User from Email Sunsetting Segment
If the user engages with any email campaign(s) (post being marked as a sunset user) later, the MSG-email flag and the corresponding email sunsetting must be updated accordingly. To implement this, consider a scenario where the marketer wants to engage with users as soon as they view any email campaign after the above journey ends. In such cases, these users must be removed from the inactive segment identified and subscribed again to continue receiving the email campaigns. To do so:
- Navigate to Journeys from the CleverTap dashboard and click +Journey.
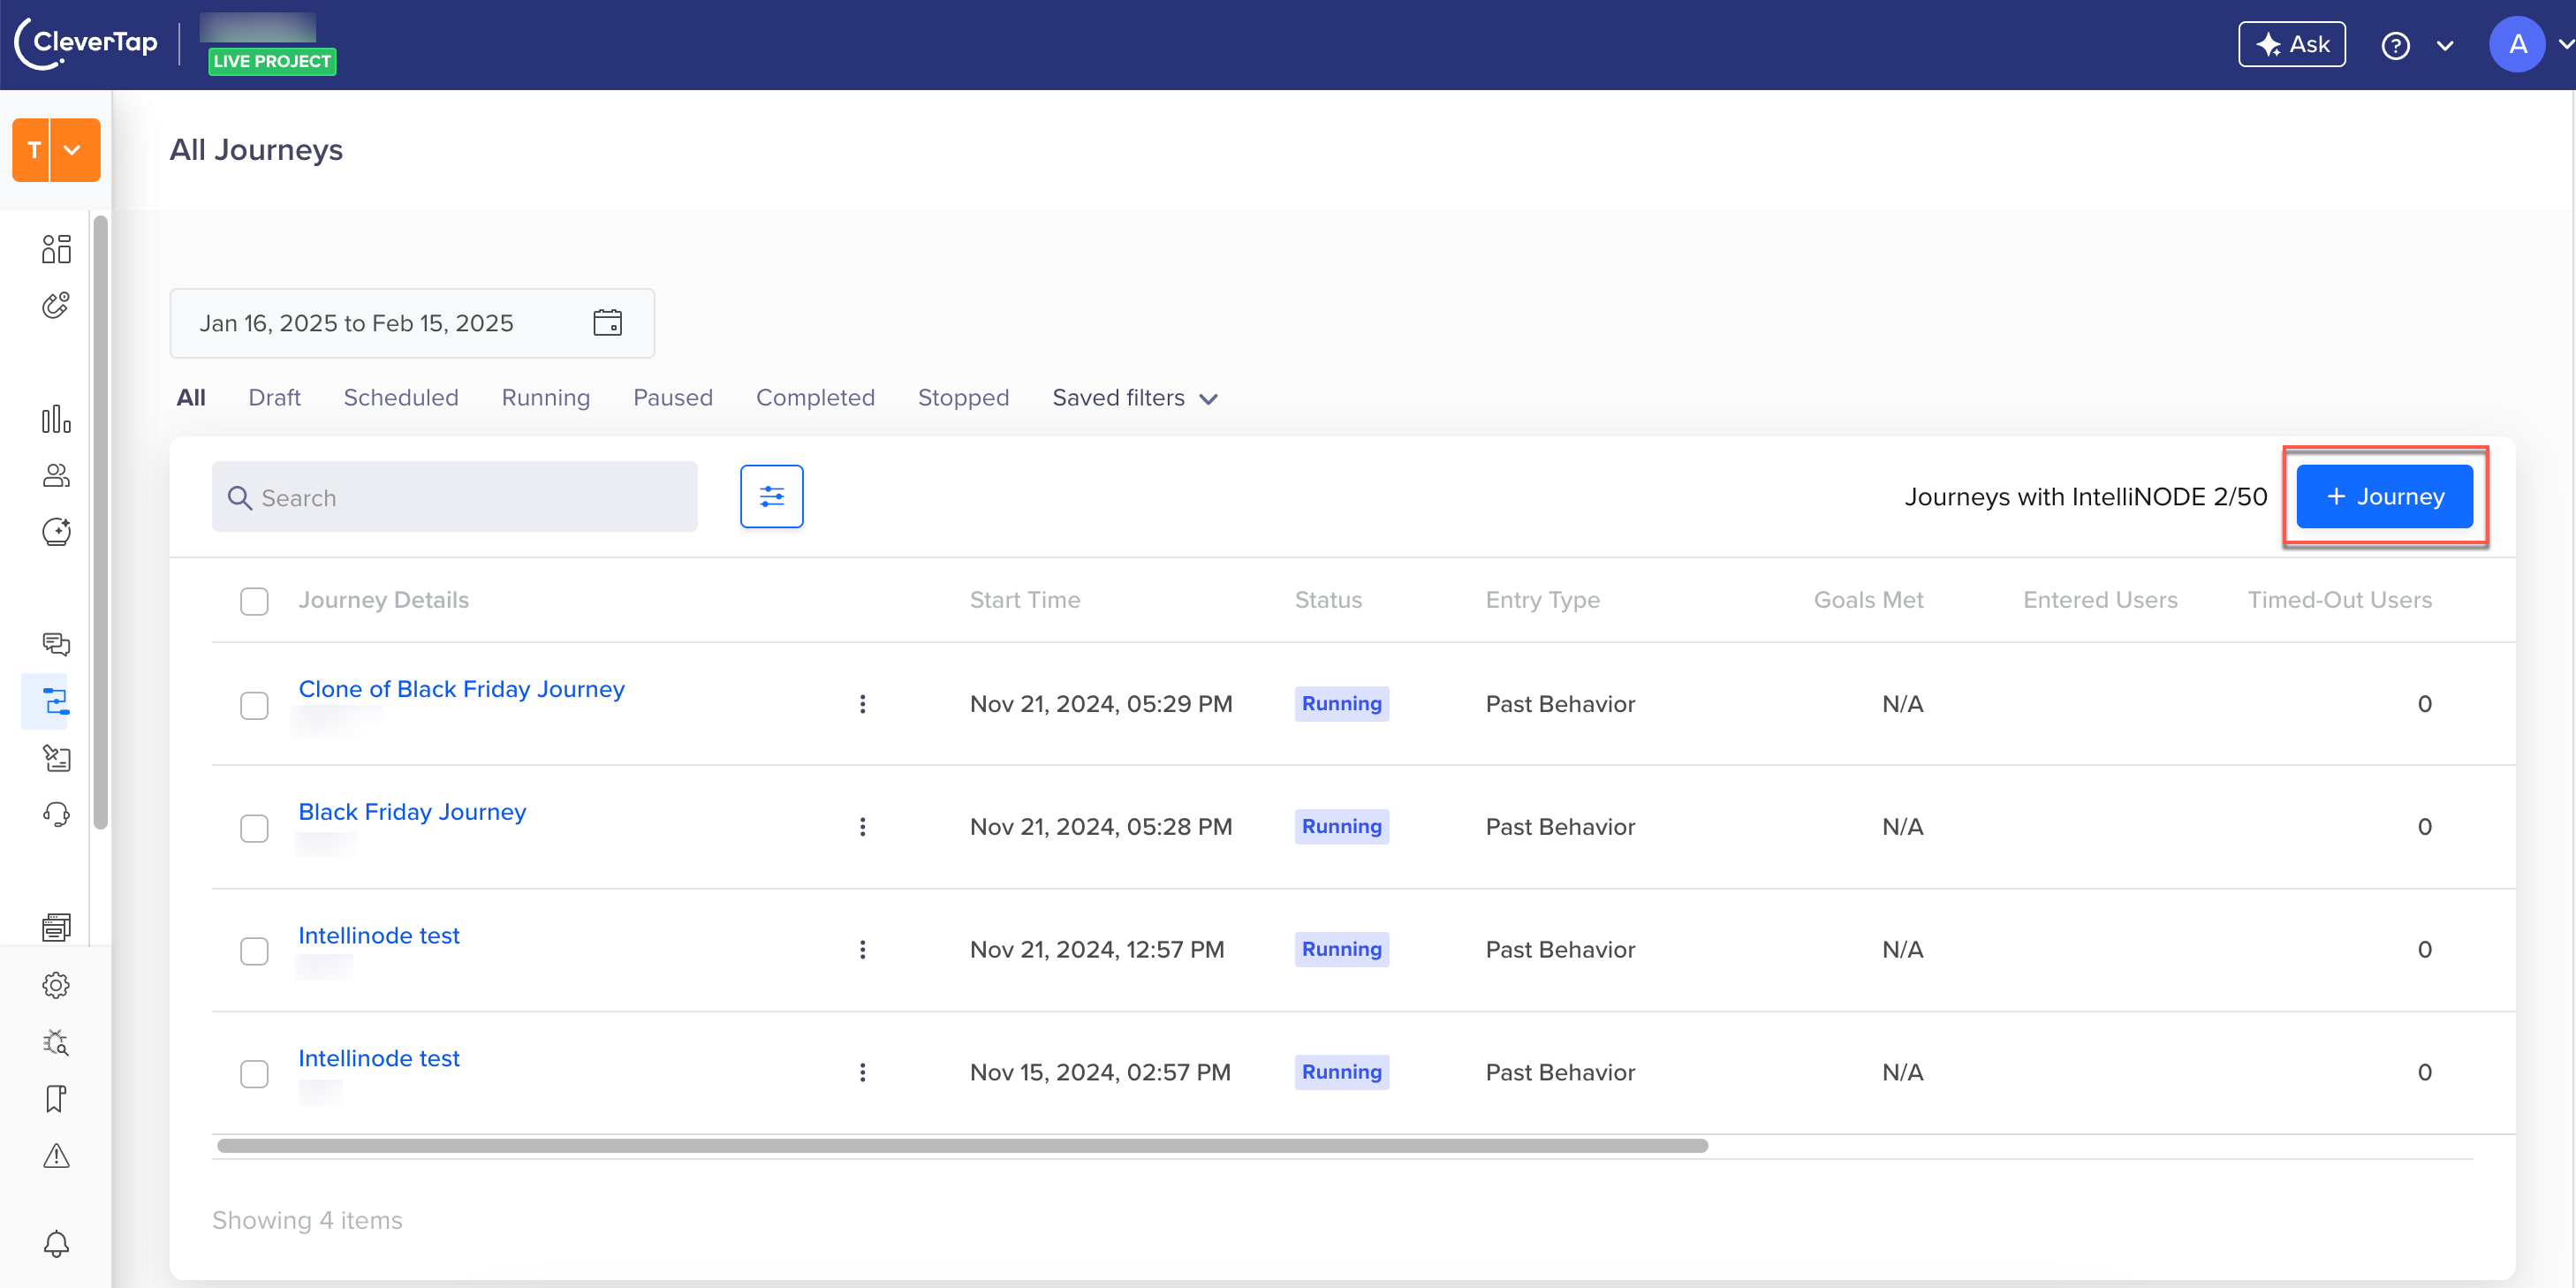
Navigate to the All Journeys page
- Define the setup for your journey as shown in the following figure:
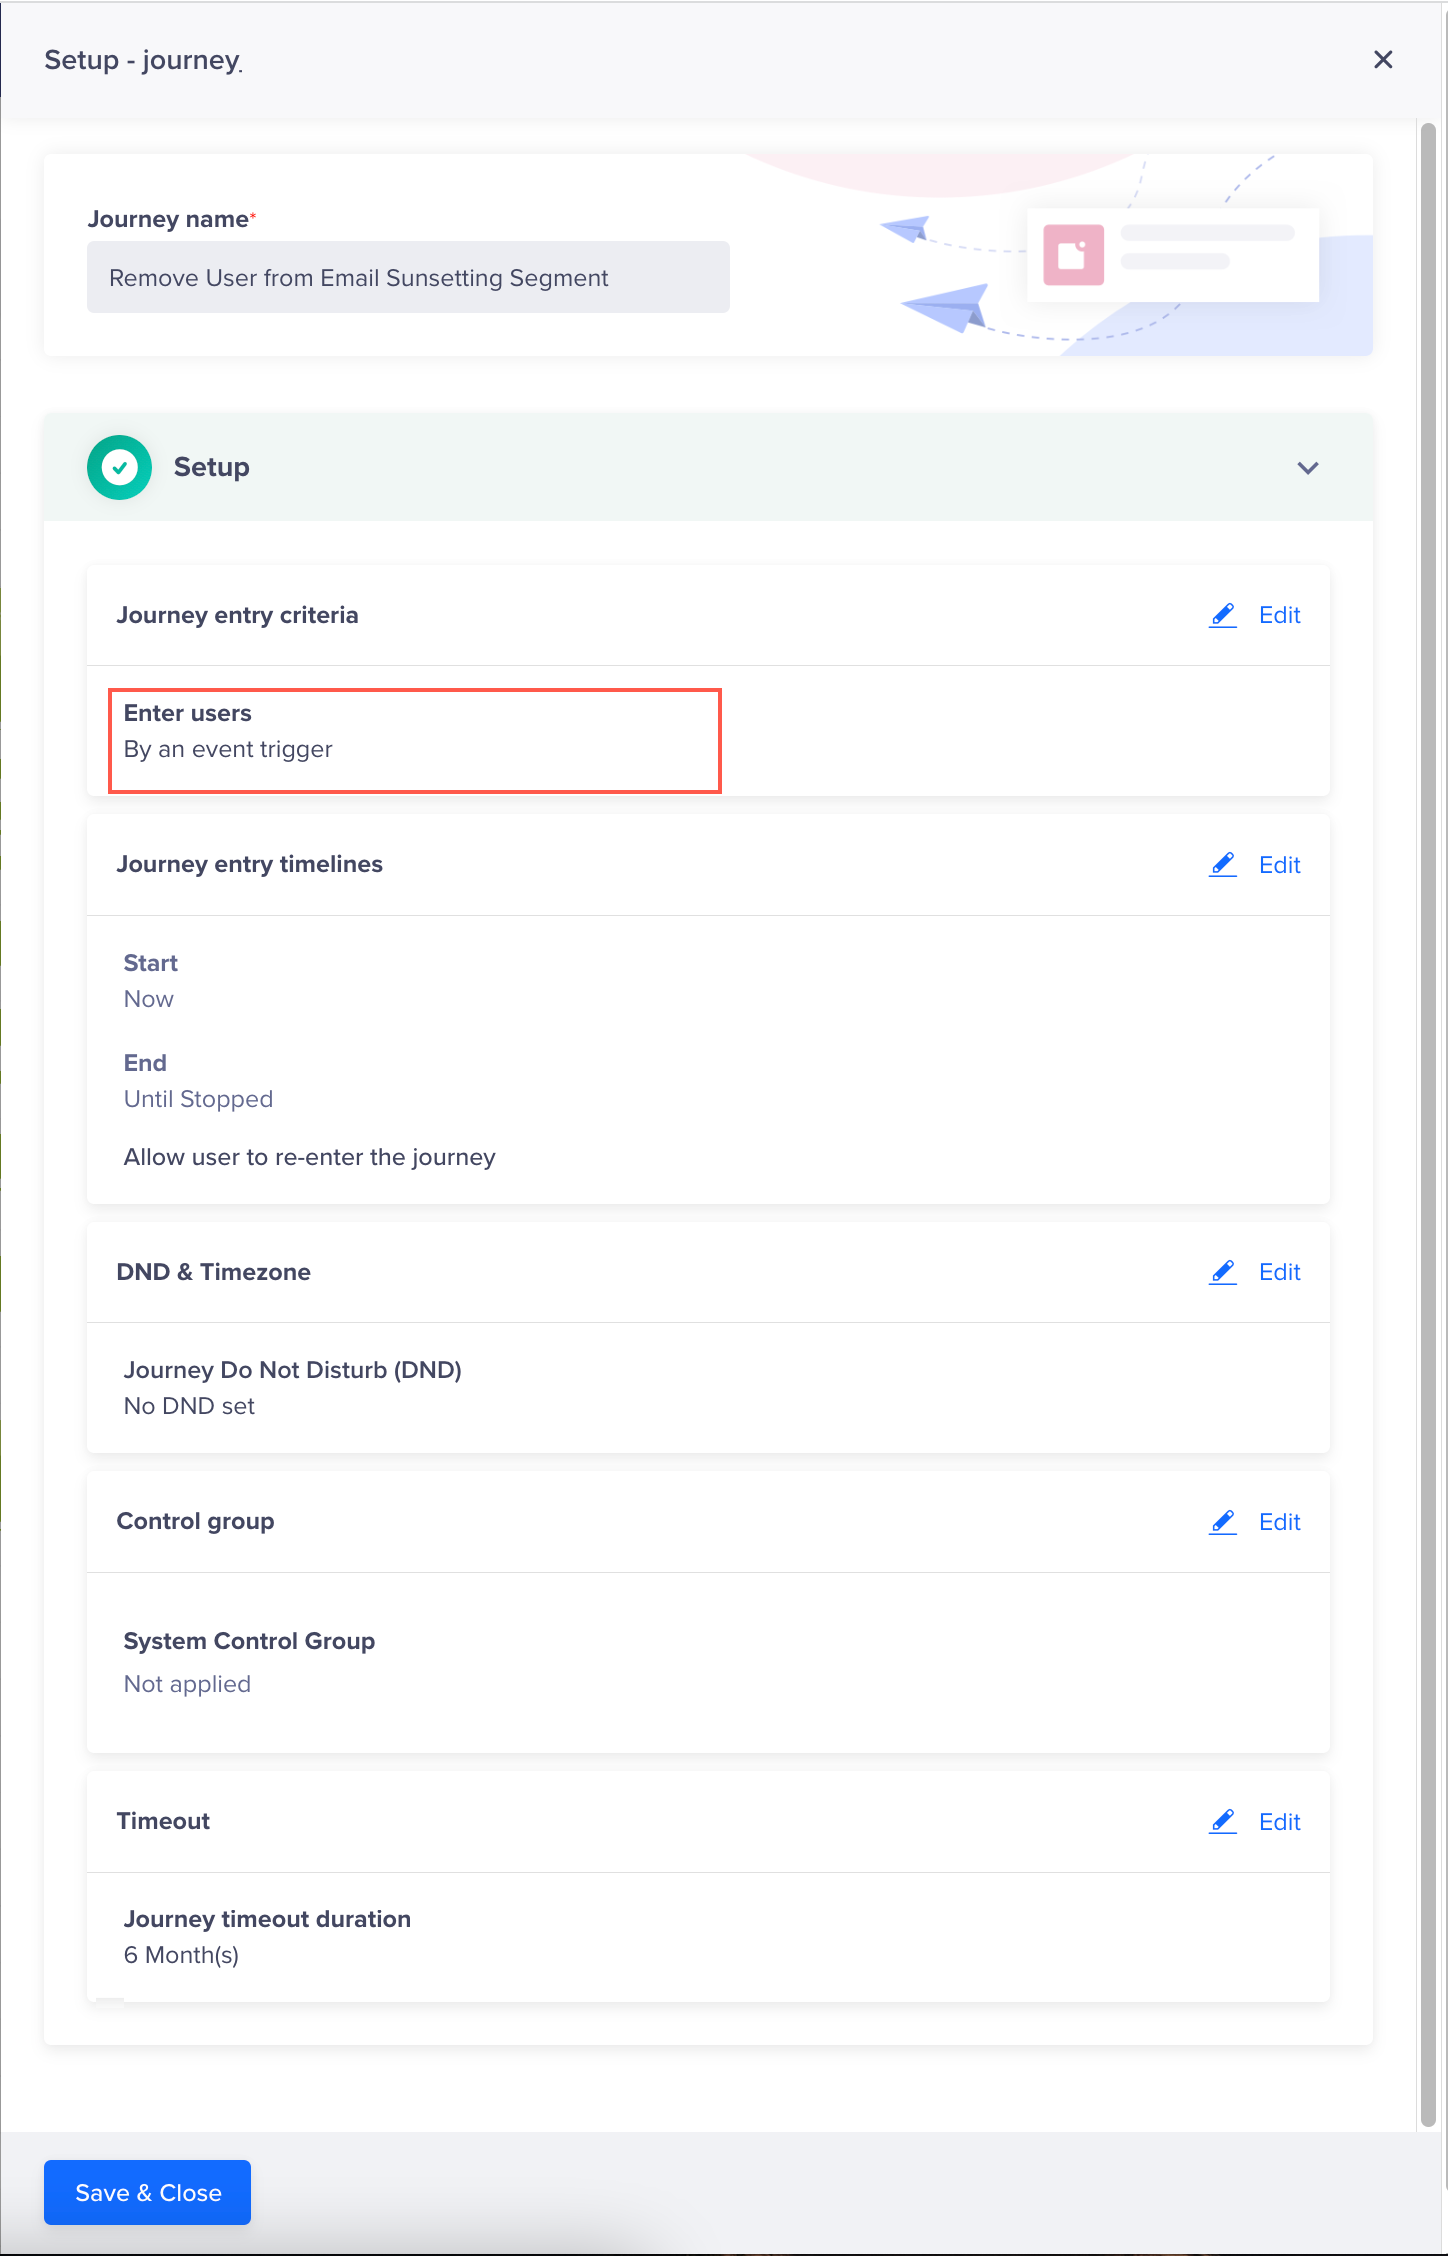
Define Journey Setup
- Define the Entry Segment. In this case, it would be a live user segment that will include sunset users who have viewed any of the email campaigns, and their email sunsetting parameter value is
true. In the following figure, Campaign type 2 refers to the Email campaign.
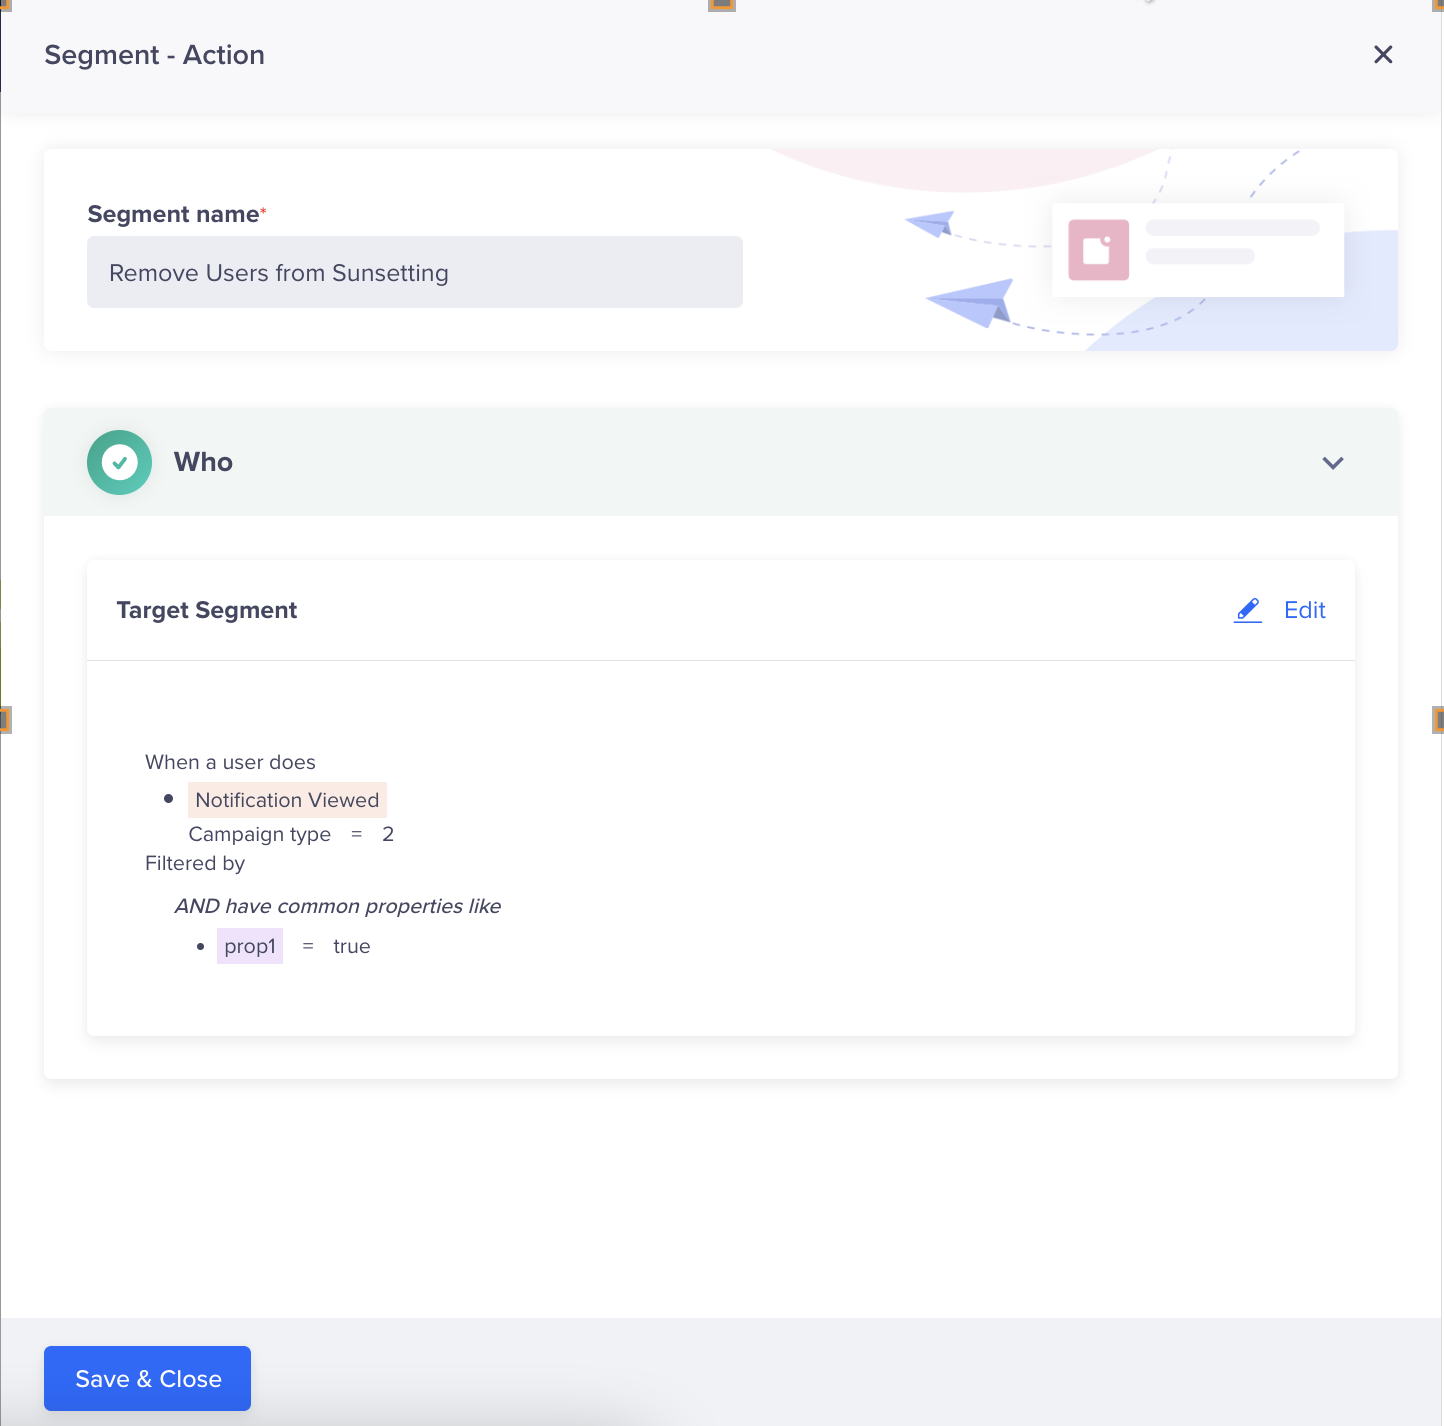
Define Entry Segment
So, as soon as the user views any email campaign and their email sunsetting parameter value ( for eg: prop 1 in the above screenshot ) is true, the following user profile properties must be updated as shown below;
- MSG-email: Set this to true.
- Email Sunsetting flag (custom user property defined by the marketer/business before starting the email sunsetting process): Set this to false. When set to false, it indicates that the user wants to continue receiving email campaigns from the business.
- Drag and drop the Update user profile to update the above user profile properties.
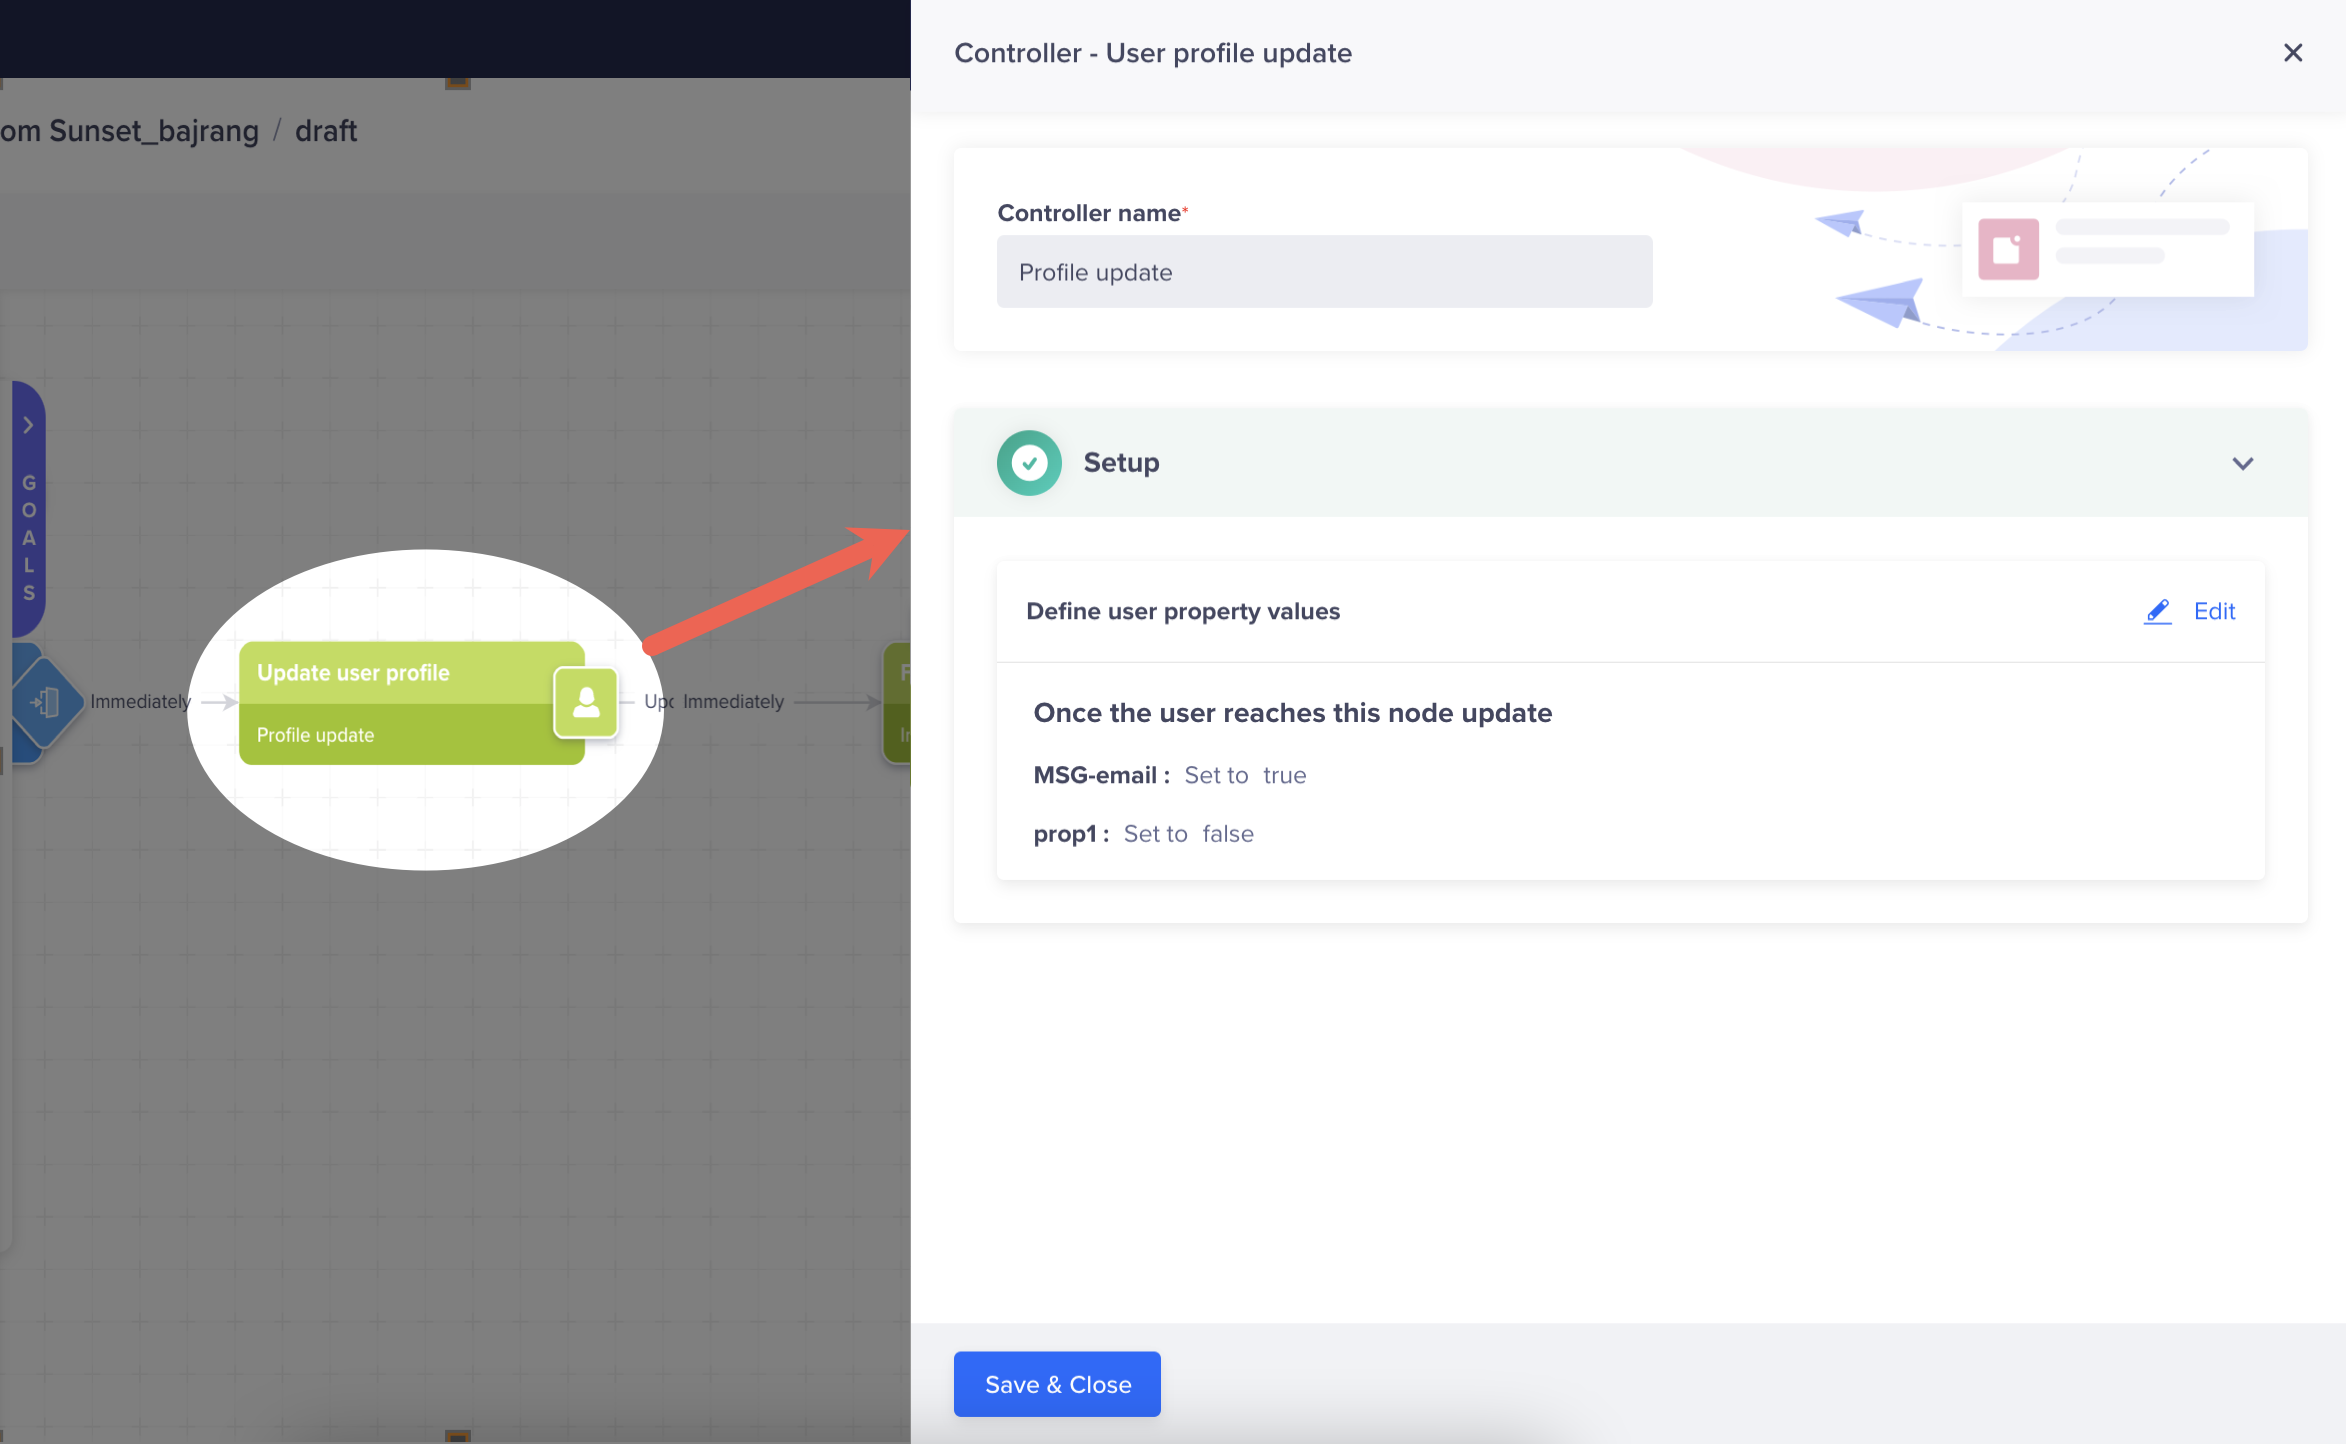
Update User Profile Properties
This indicates that the user must be subscribed again for the email campaigns.