Storyly
Understand how you can use CleverTap segments as an audience in Storyly
Overview
Storyly, an user engagement platform, enables brands to embed mobile-native stories in their mobile apps and websites through SDK integration. It creates an additional channel to deliver any marketing content in a full-screen and interactive format and communicate with users. This integrates helps with the following:
- Create Campaigns and Journeys to target the Past Behavior segments on CleverTap with stories or personalize their story experience
- Update your segment Storyly every time your Live Behavior segments on CleverTap are updated by their actions in your app.
For any issues regarding this integration, contact Storyly Support Team.
Prerequisites
The following are the prerequisites for this integration:
- Ensure that you complete the Amazon EventBridge setup.
- Ensure that you pass Custom Parameter to the Storyly SDK. Also, ensure that the identifier you pass here is the same as that used with CleverTap, as it is used to identify the user. For more information on this, refer to Passing Custom Parameter Recipe.
Connect CleverTap Audience with Storyly
This process involved the following two major steps:
Set Up Amazon EventBridge
To set up Amazon EventBridge:
- Log in to your CleverTap account and navigate to Settings > Partners page. Select Amazon EventBridge from the list.
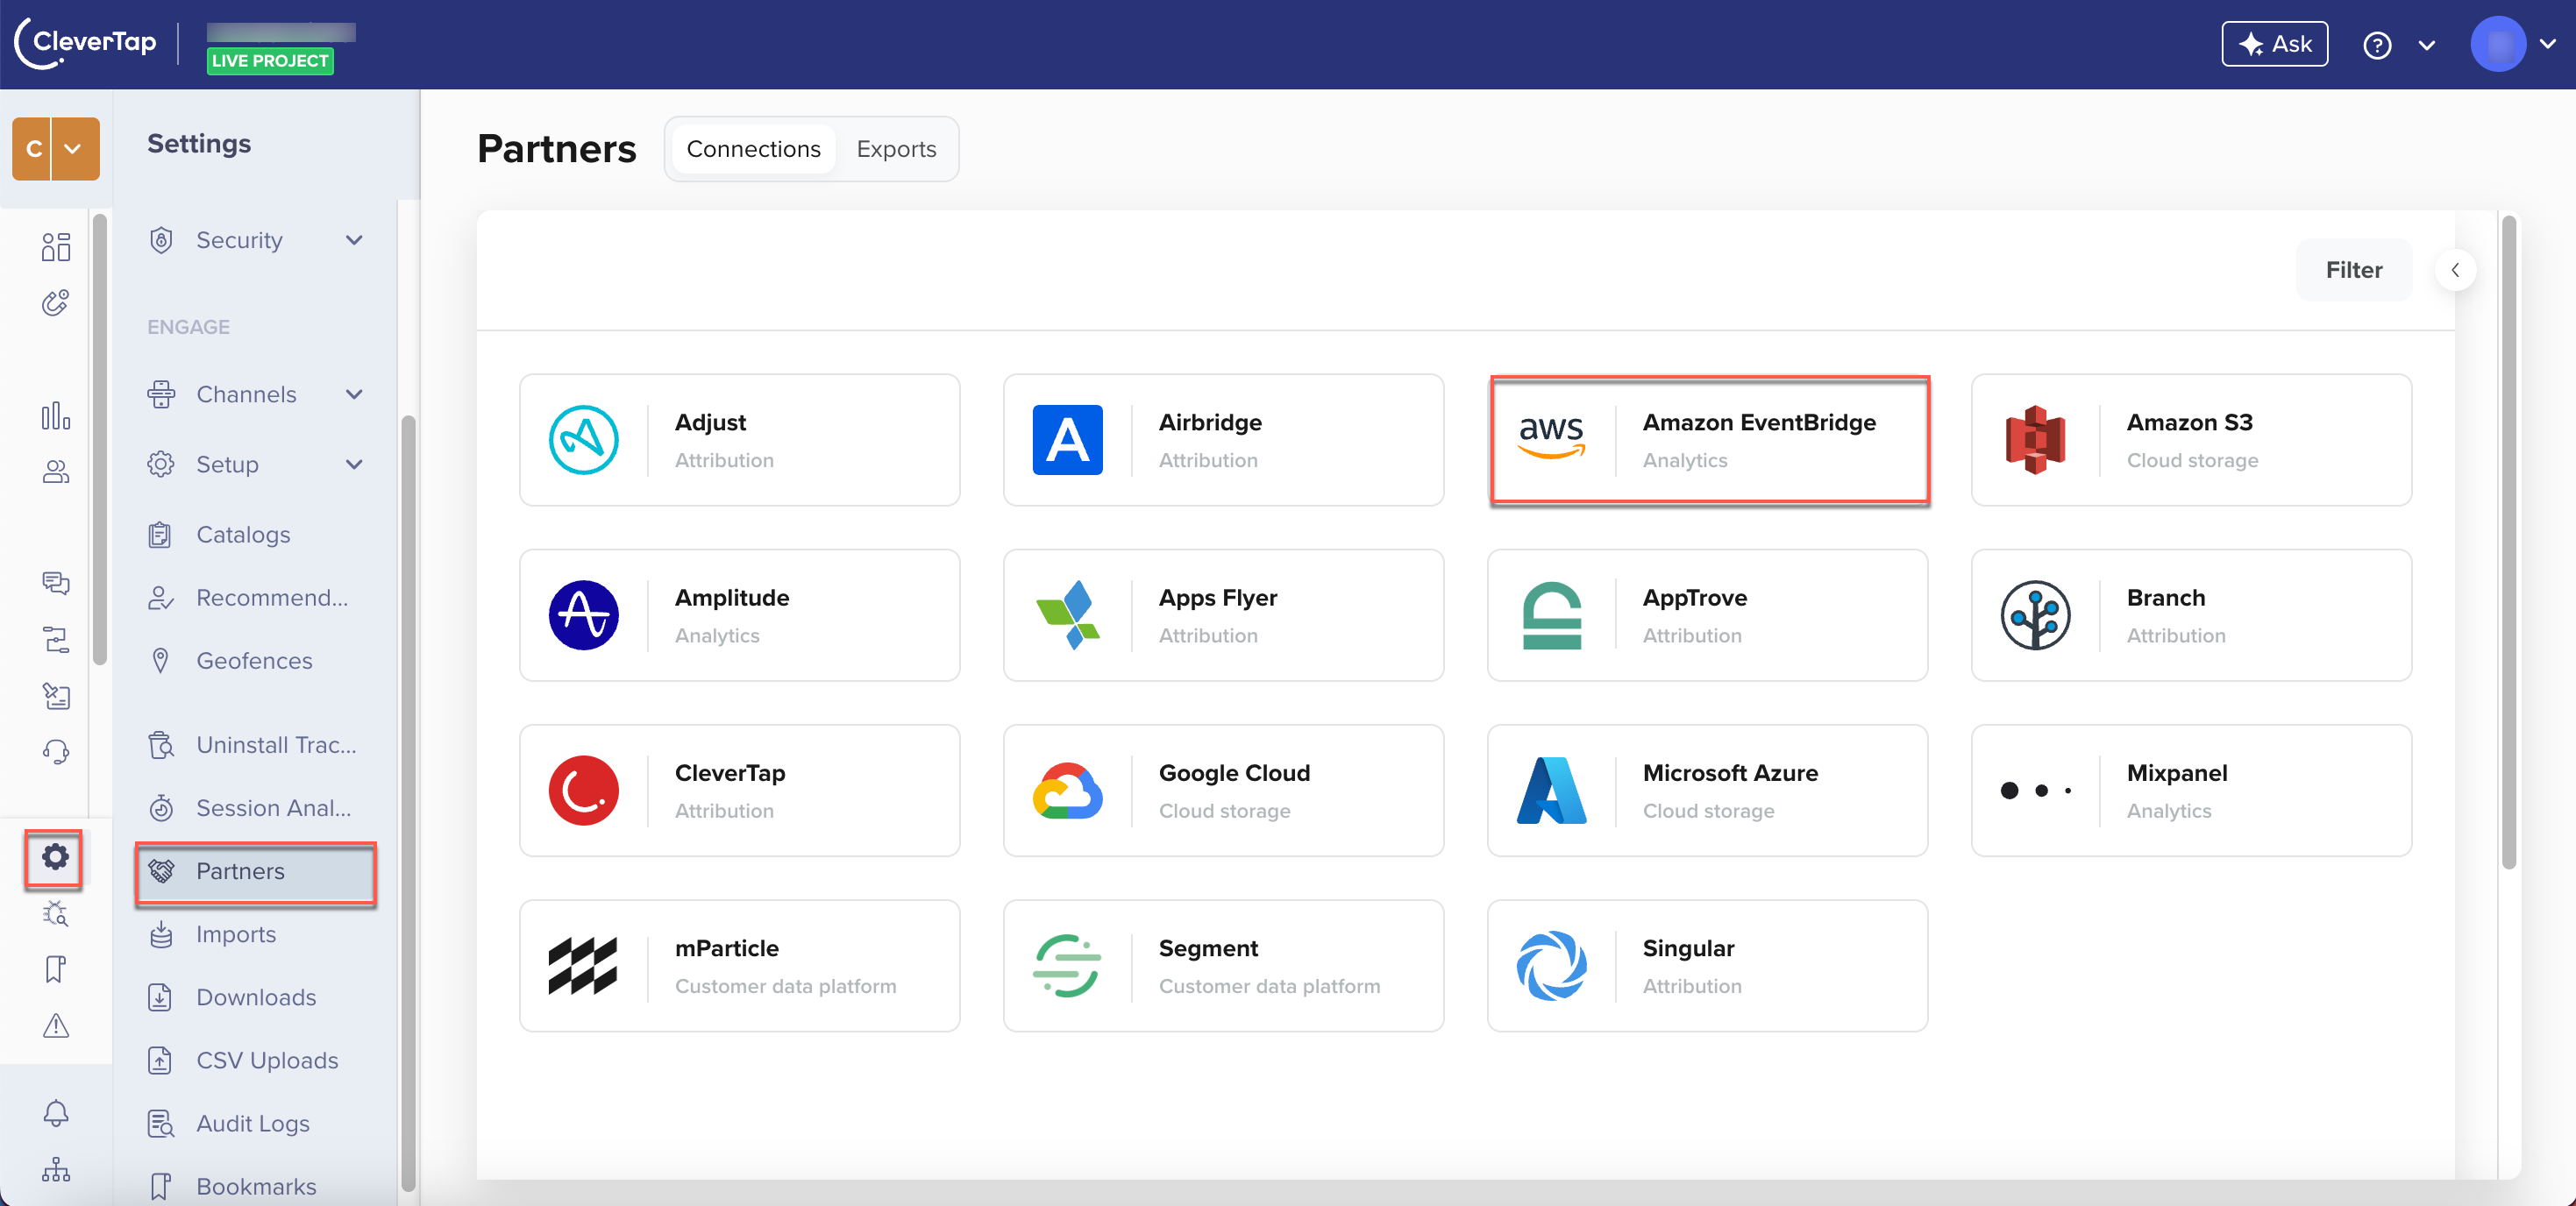
Navigating to Partners Page
- A popup opens on the right side of the screen. Enter the following details and click Integrate.
Field | Description |
|---|---|
Partner Nickname | Enter the Nickname for your integration. |
AWS Account ID |
|
Region |
|
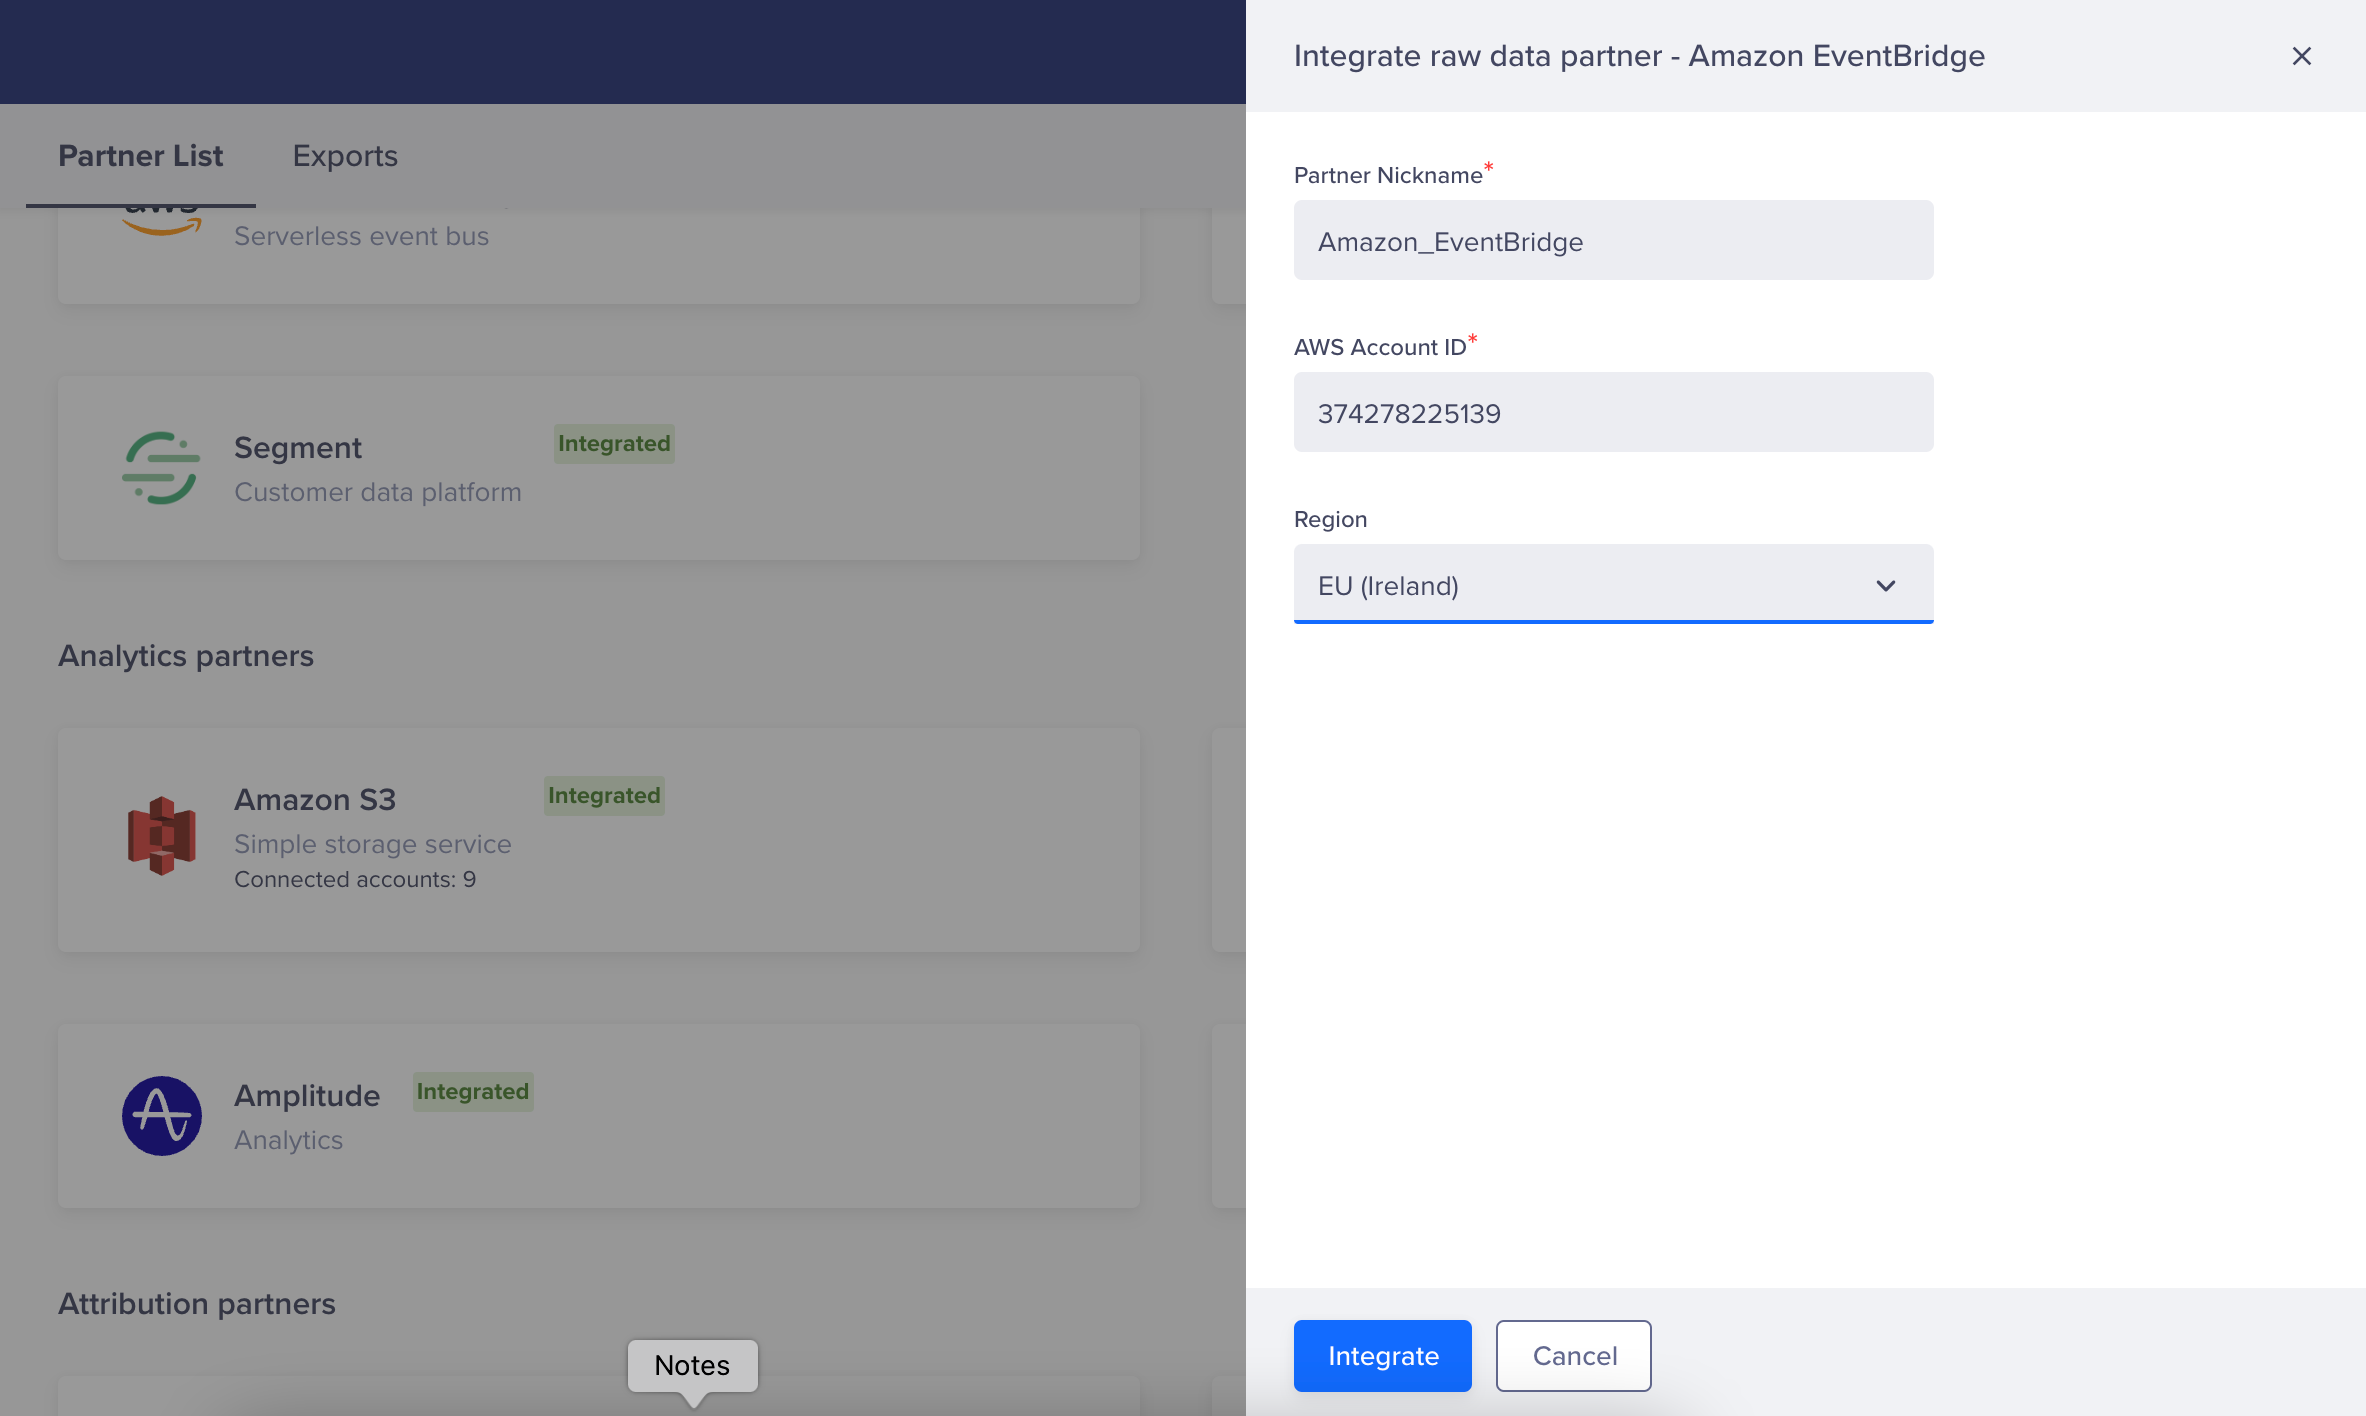
Enter Amazon EventBridge Project Details to Integrate
Create an Audience for CleverTap on Storyly Dashboard
After setting up the Amazon EventBridge on CleverTap, you need to create a unique token on the Storyly dashboard to complete the connection. To create a unique token on the Storyly dashboard:
- Navigate to Settings from the Storyly dashboard and find Audiences under Data Management tab.
- Click + New Audience on the top right side and select Create Audience for CleverTap.
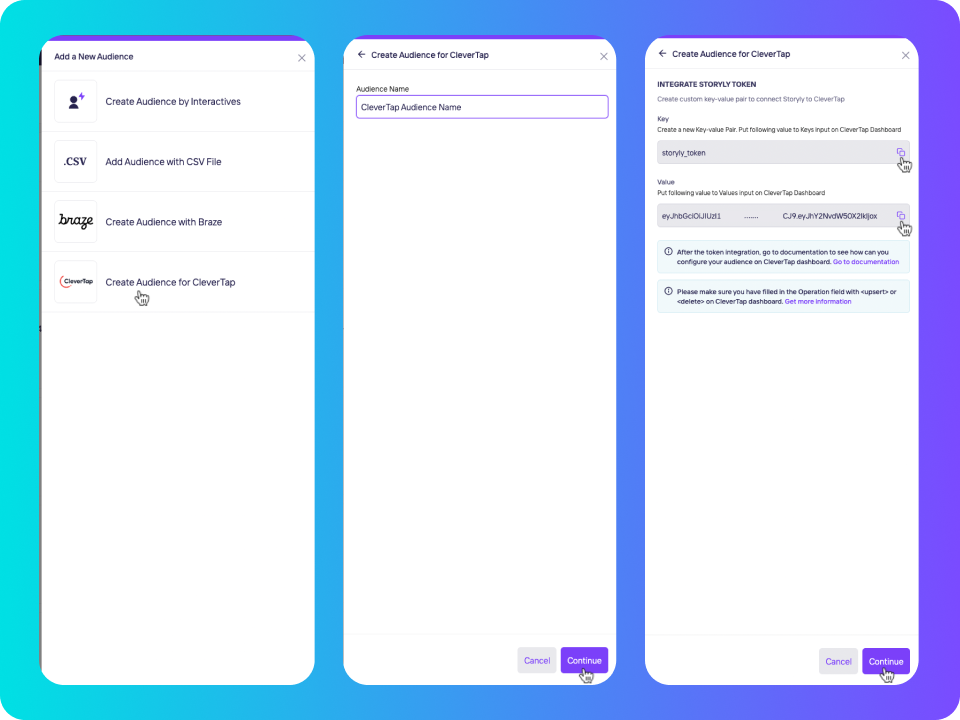
Create an Audience for CleverTap
- Enter the Audience Name to uniquely identify your audience and click Continue.
Storyly generates a Key and unique Token for your Audience. - Copy the Key and Token values, as you will need them when creating Campaigns and Journeys on the CleverTap Dashboard.
You can now start creating Campaigns and Journeys with Amazon EventBridge on the CleverTap dashboard.
Create Your First Campaign/Journey to Show Personalized Stories to Users
To create a campaign/journey:
- Select Amazon EventBridge as the Messaging Channel when creating a campaign/journey.
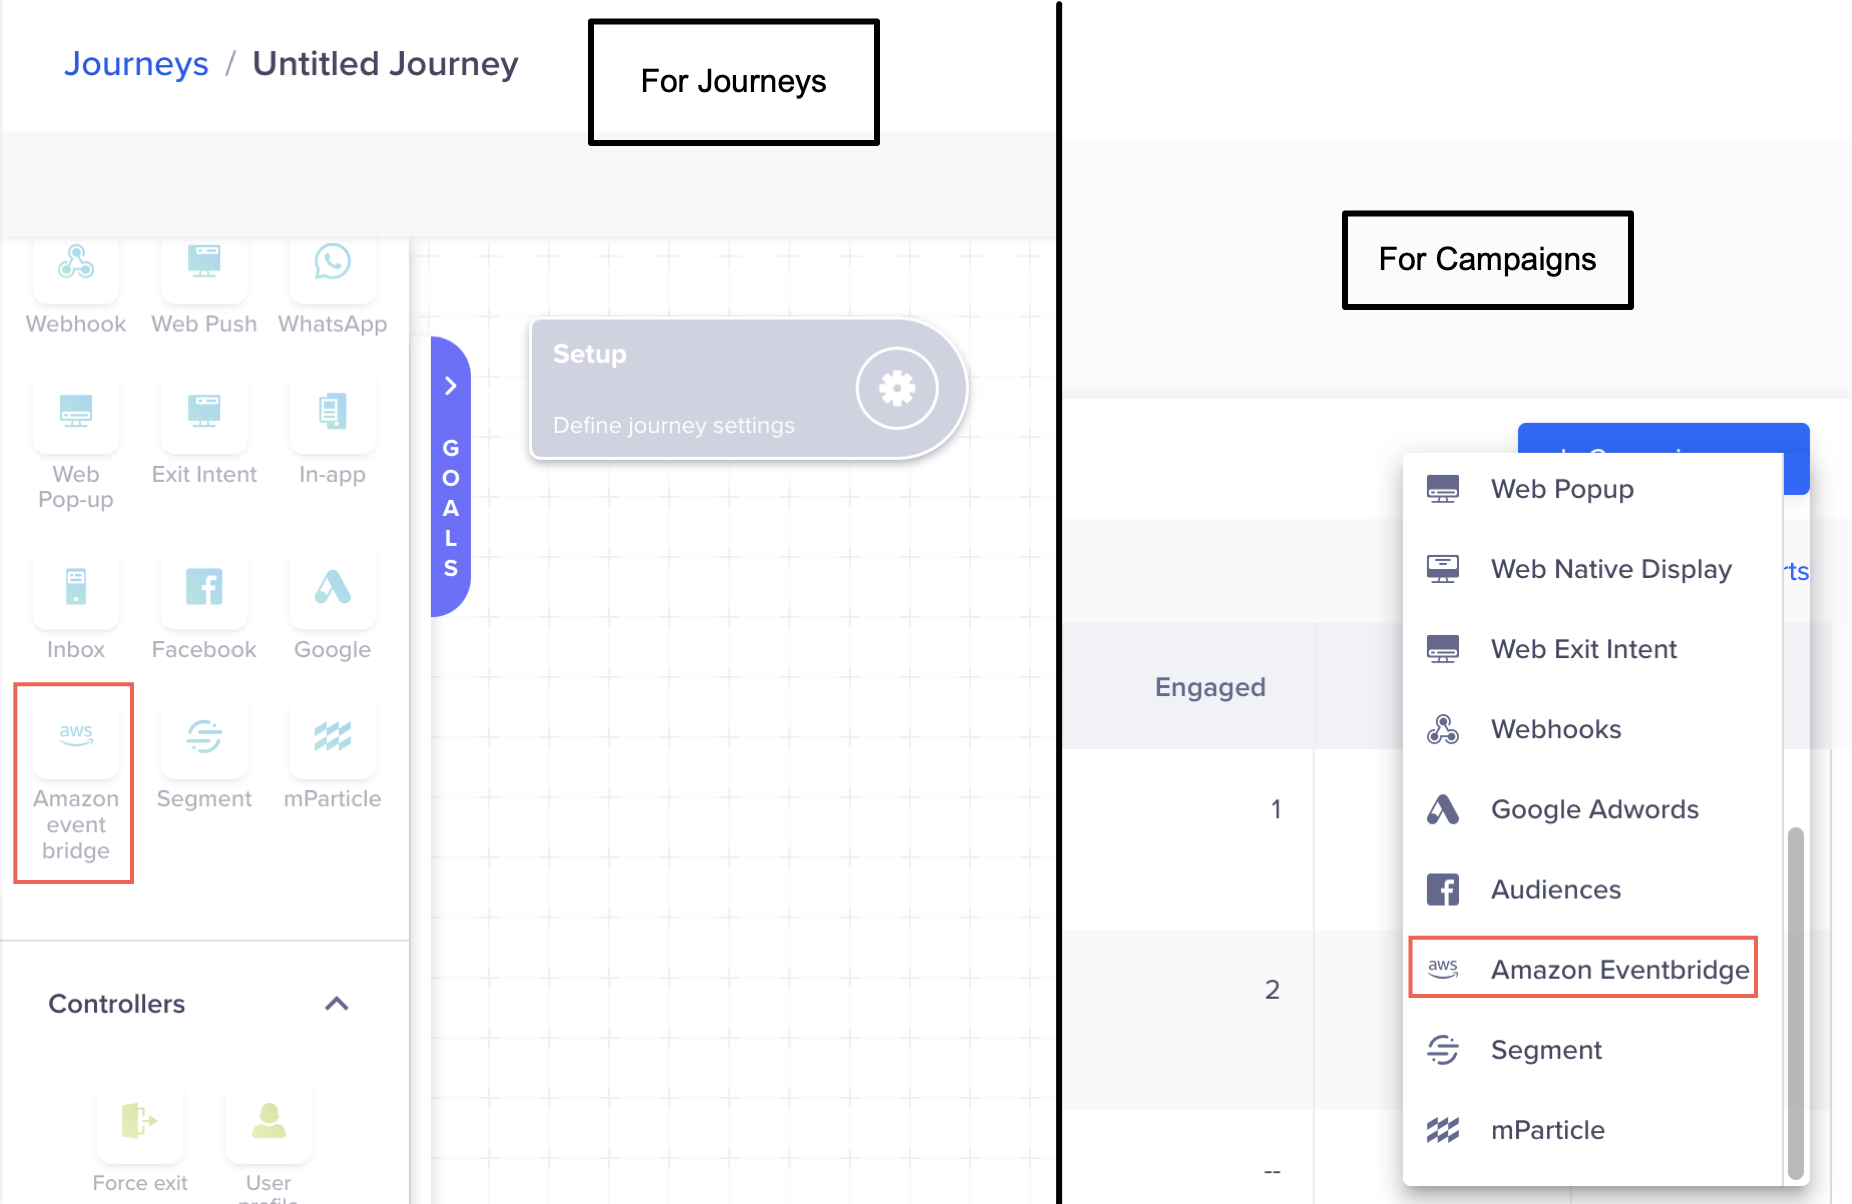
Create Amazon EventBridge Campaign or a Journey with Amazon EventBridge Engagement Channel
- Click Go To Editor under What section of campaign/journey.
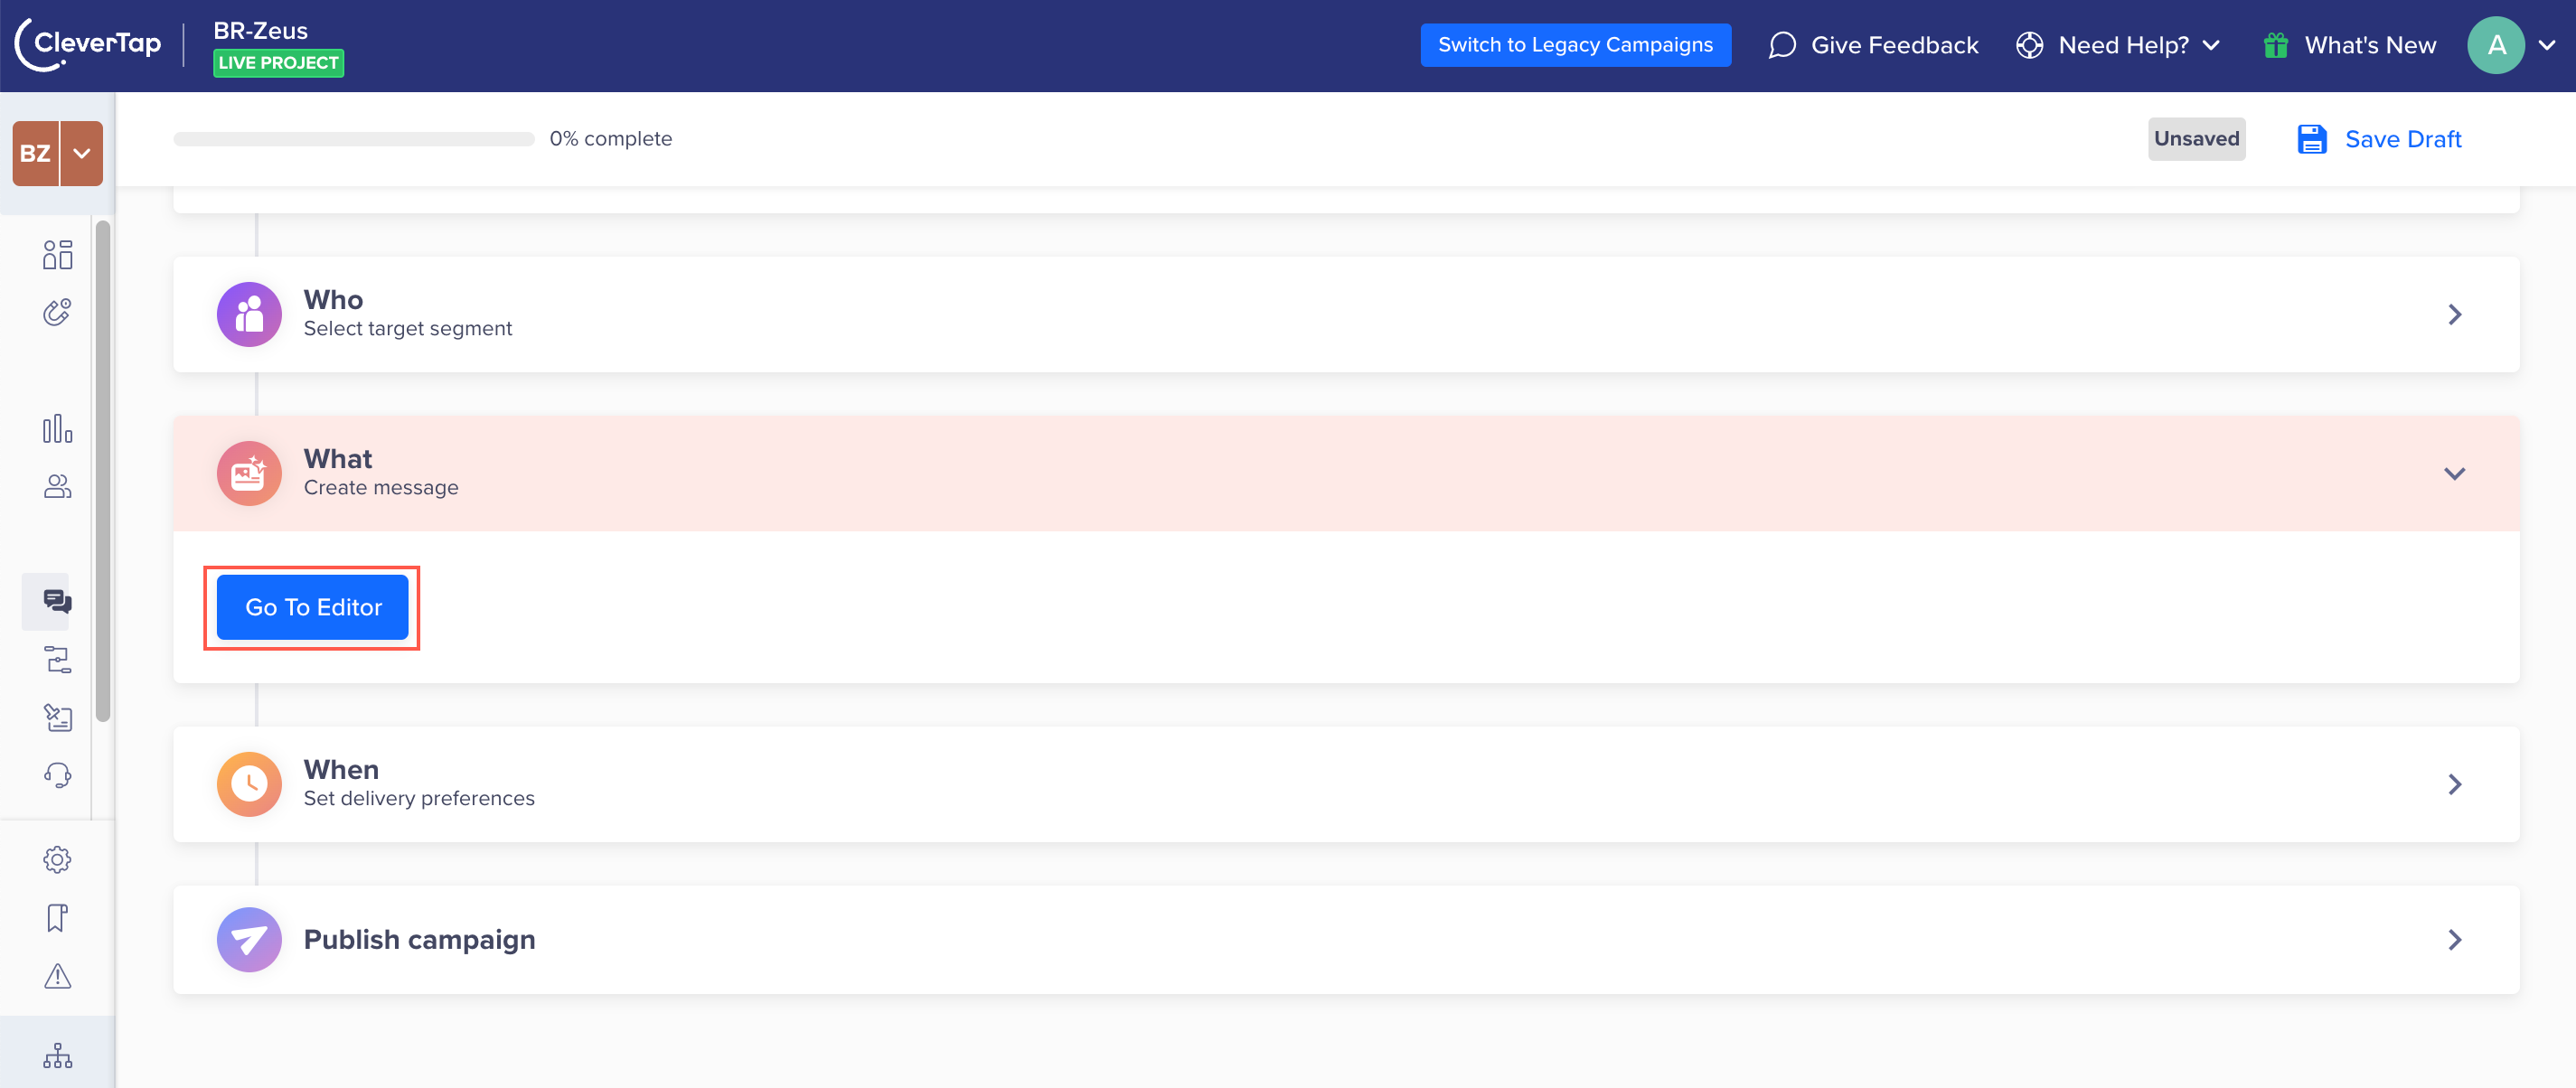
Create Amazon EventBridge Message - For Campaigns
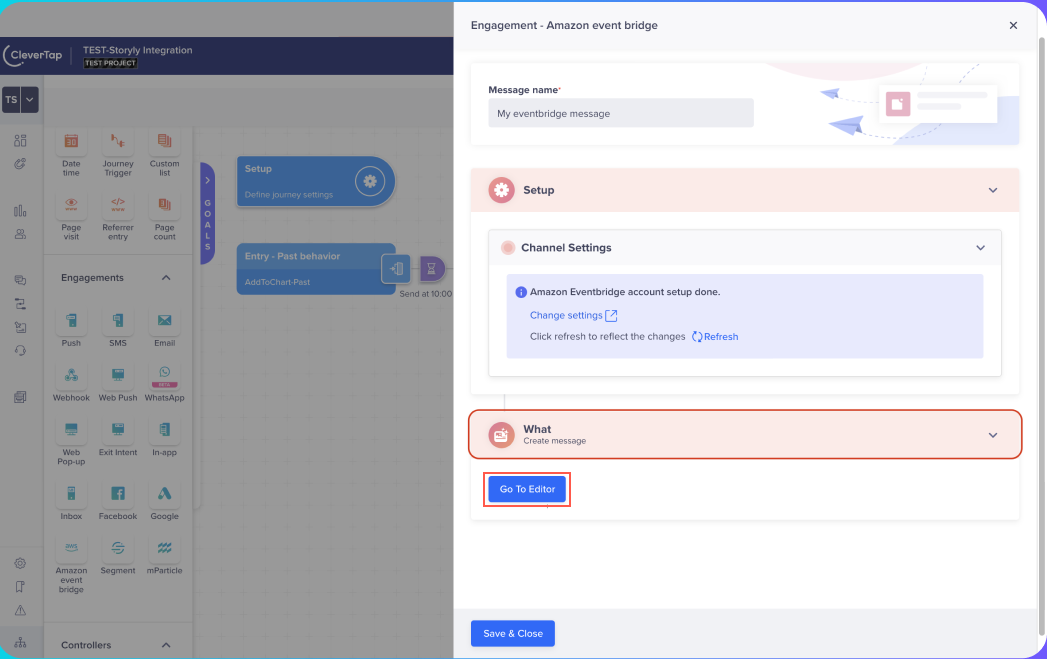
Create Amazon EventBridge Message - For Journeys
- Select Custom Profile Attributes and click + Key-Value Pair to add the following mandatory key-value pairs and other key-value pairs as per your requirement:
-
storyly_token
Enter the token you copied from the Storyly Dashboard in step 4 of Create an Audience for CleverTap on Storyly Dashboard section. -
operation- For insert & update operations: upsert
- To delete a user from the Audience: delete
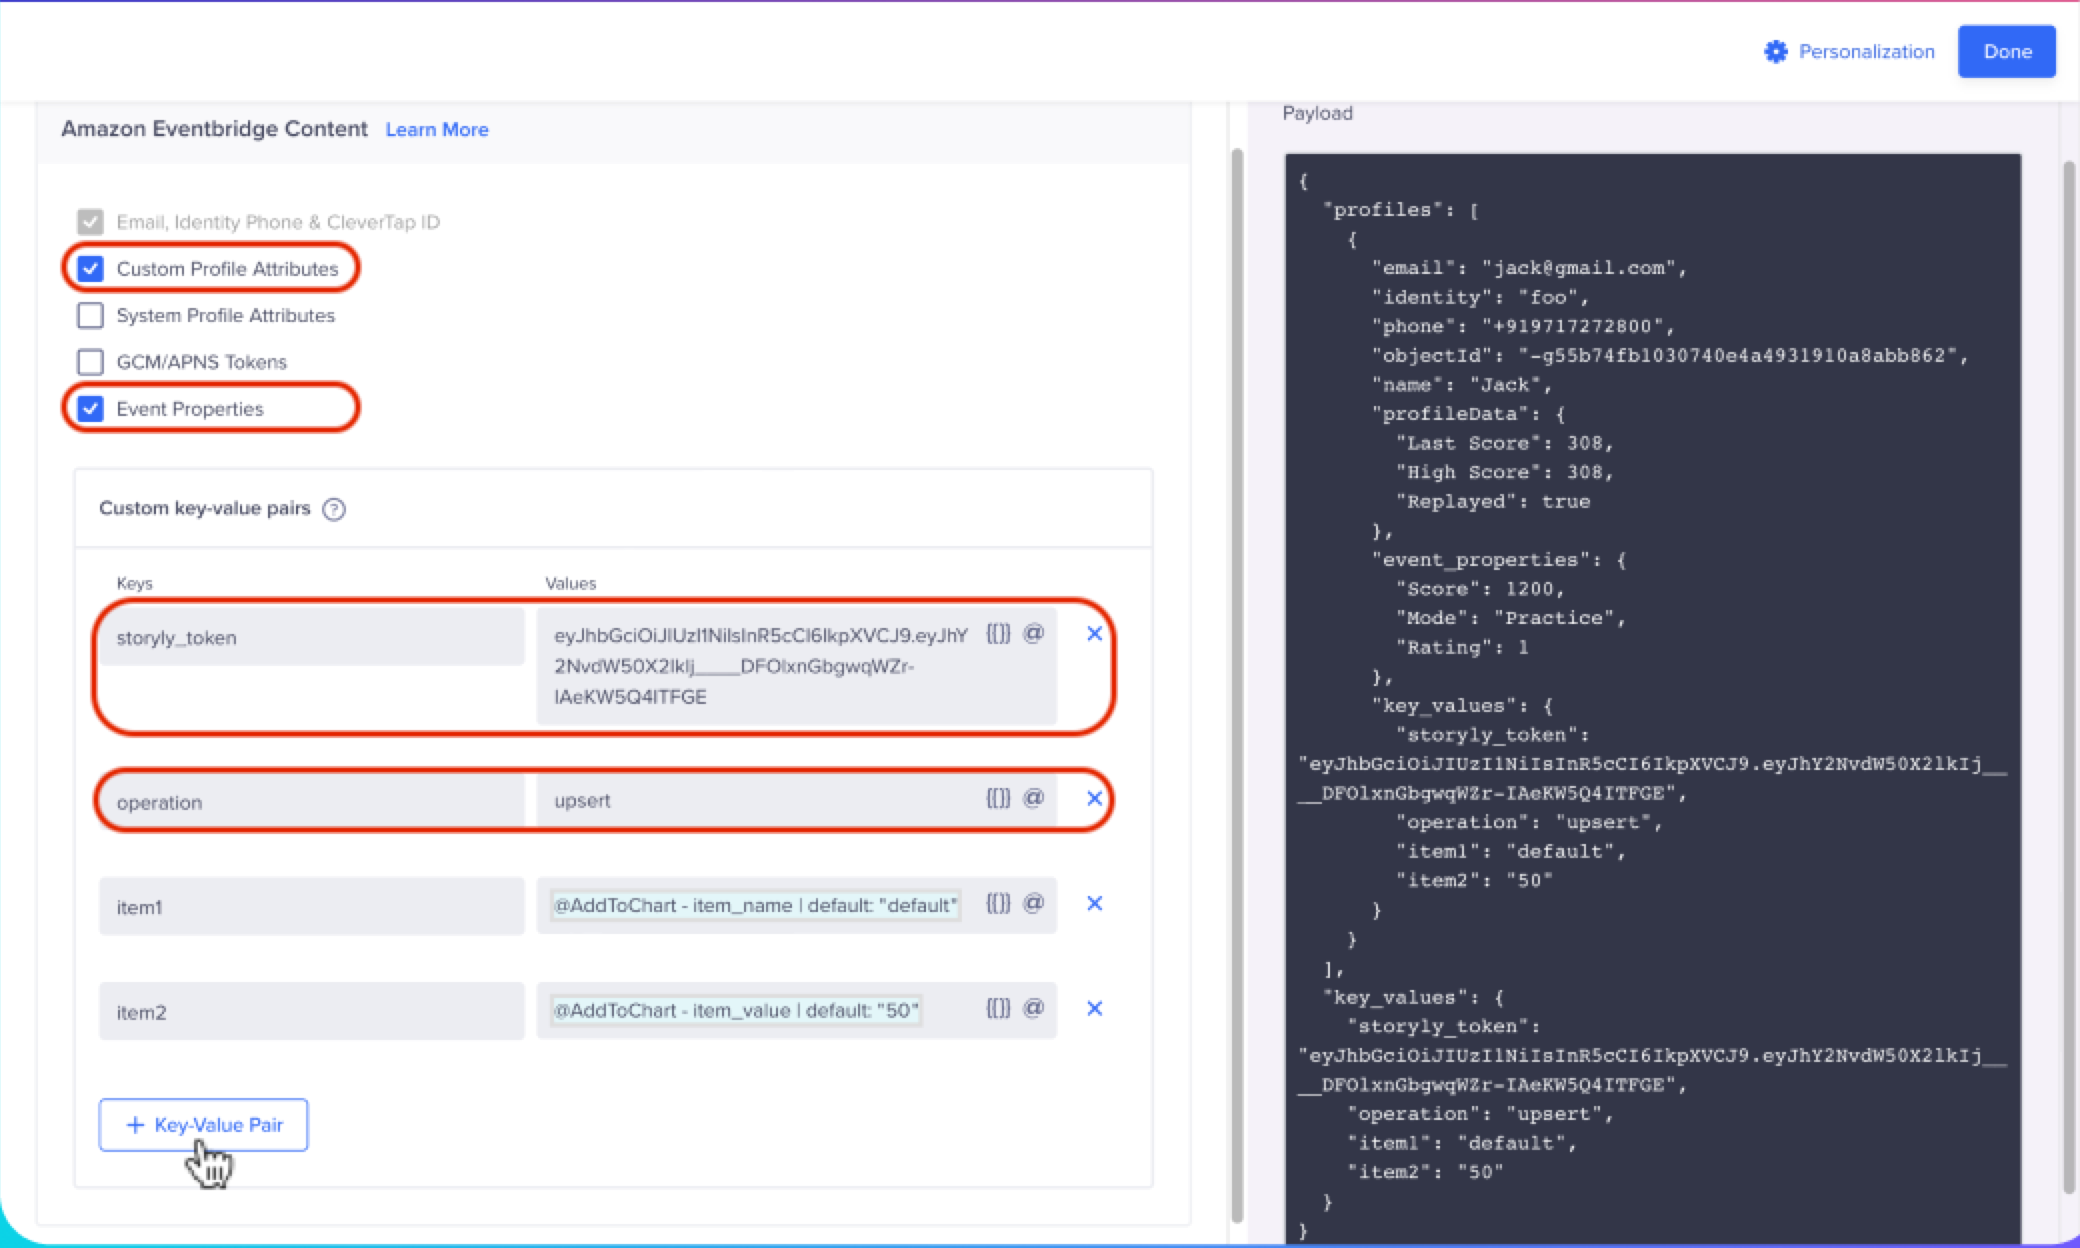
Adding Key-Value Pairs for Personalized Content
- (Optional) Add user properties in the payload by adding new key-value pairs to personalize your content.
- Click Done.
For a detailed example of sending personalized stories, refer to this example listed in the Storyly documentation.
Updated about 2 months ago
