Discord
Overview
Discord is a popular real-time communication platform used by tech communities, gaming groups, startups, and Web3 brands. It offers voice, video, and text-based interaction, and supports powerful customizations via bots and integrations.
With the CleverTap and Discord integration, you can automate syncing of events between Discord and CleverTap to:
- Onboard new community members with personalized journeys
- Trigger targeted CleverTap messages based on Discord activity
- Track engagement through reactions or mentions
- Segment users by roles, channel behavior, or message activity
To streamline community engagement, this integration captures Discord events, such as new users joining a server, and automatically pushes them to CleverTap as user profiles or events. You can also trigger outbound messages from CleverTap to Discord using webhooks.
Prerequisites for Integration
The following are the prerequisites for this integration:
- A verified Discord account with administrator access to the server
- An active Zapier account.
- A CleverTap account with a valid Account ID and Passcode.
Integrate Discord with CleverTap
The integration process involves the following four major steps:
- Create Passcode on CleverTap Dashboard
- Set up a Zap in Zapier
- Set Up a Webhook in CleverTap
- Create Webhook Campaign
Create Passcode on CleverTap Dashboard
CleverTap uses a header-based authentication model to authenticate requests to the API. Every CleverTap API call must include the Account ID and Passcode as the request headers. To create a passcode, refer to Create Account Passcode.
Set up a Zap in Zapier
Set up a Zap in Zapier to automatically push data from Discord into CleverTap. You will configure Discord as the trigger source and CleverTap as the destination. To do so, follow these steps:
- Go to your Zapier Dashboard and click + Create Zap.
- Set Discord as the trigger app.
- Select a trigger event. For this example, select New User Added.
- Authorize Zapier to access your Discord account.
- Select the server you want to connect to. Grant required permissions to Zapier.
Create Zap
- Click Test Trigger to fetch recent event data and confirm the connection. This step will display the most recent events, such as details of newly added users in your Discord server.
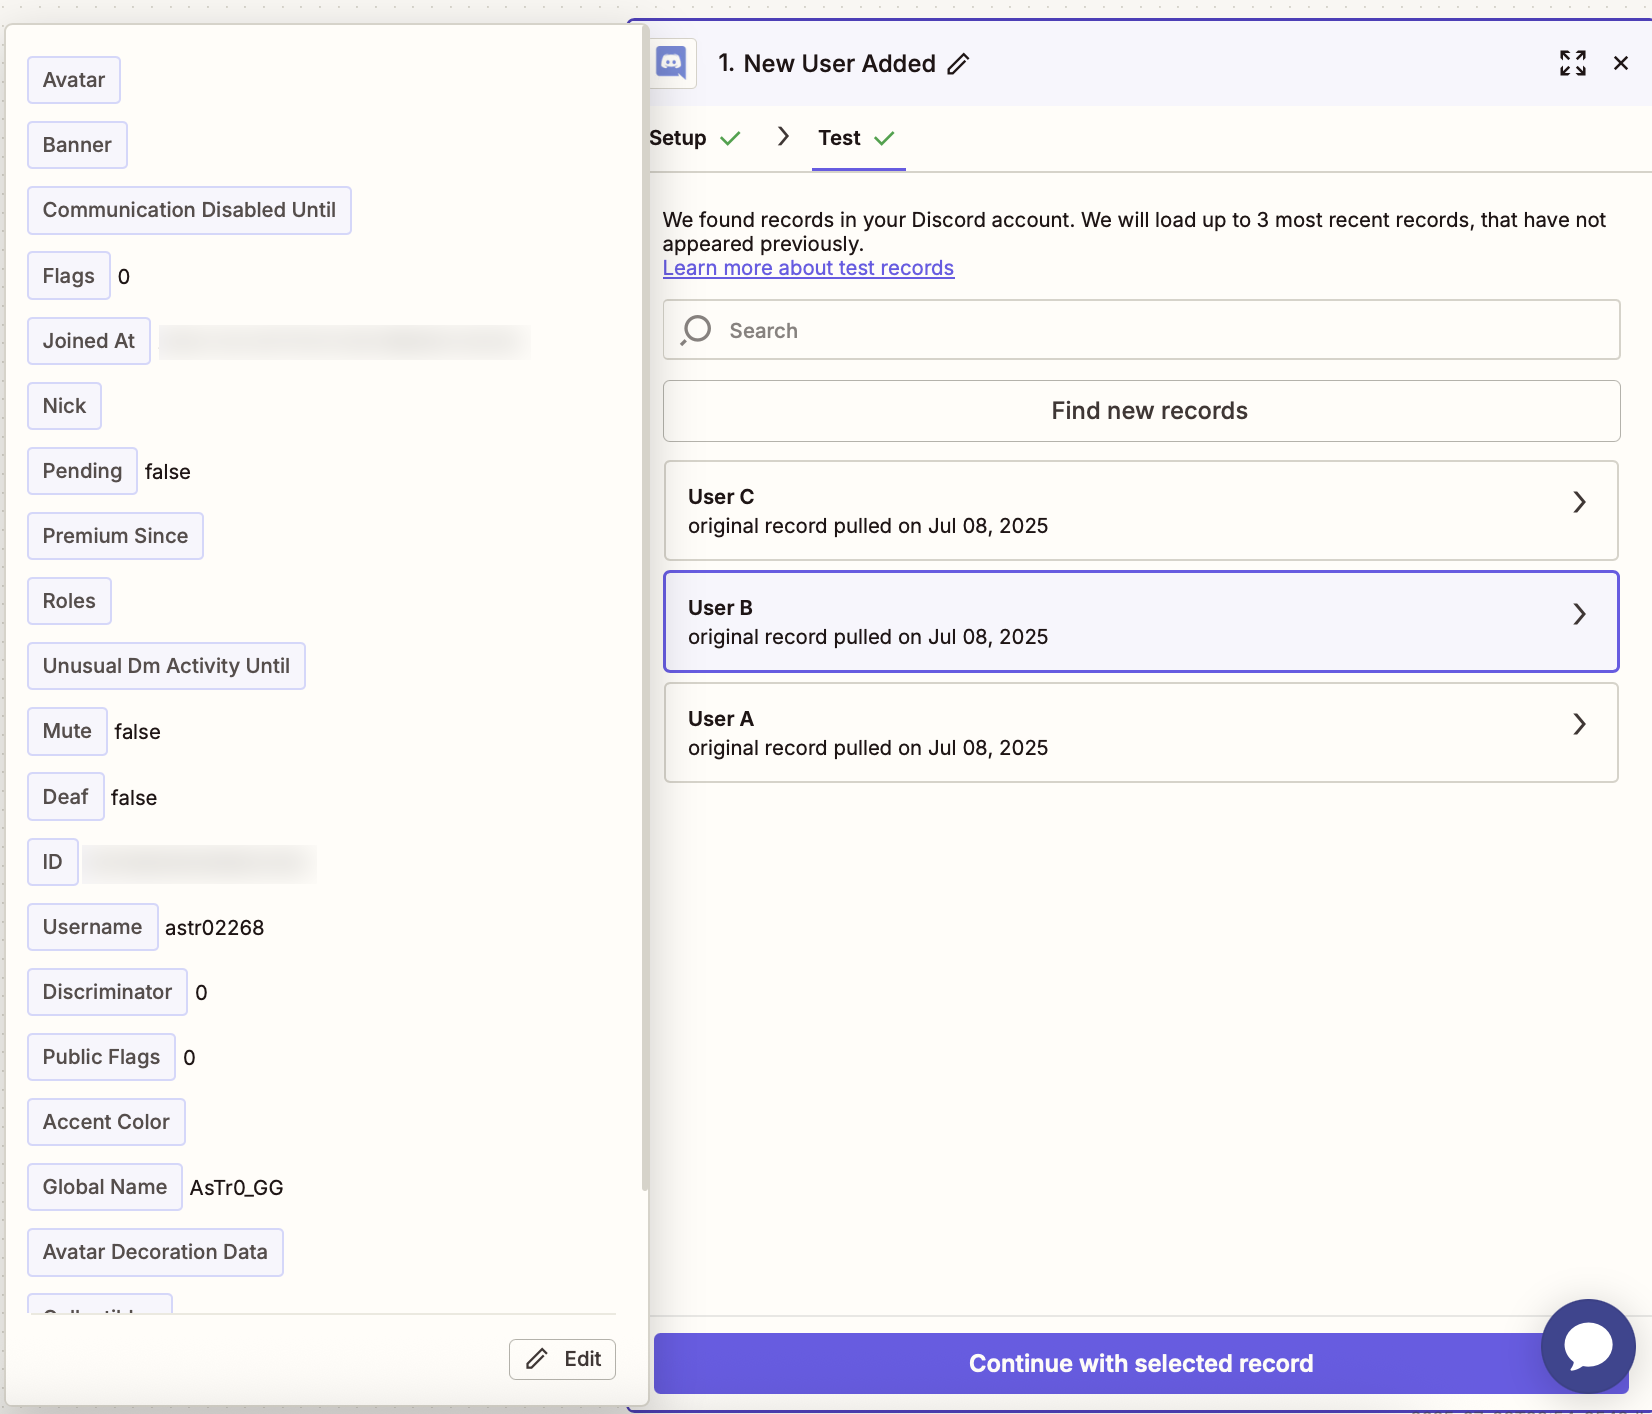
Configure Trigger
- Set CleverTap as the destination.
- For the Action App, select CleverTap.
- Select Create User Profile or Update User Profile as the action event.
- Enter your CleverTap Account ID, Passcode, and Region. For detailed steps, refer to Create a Passcode on CleverTap Dashboard.
- Configure the Action. Map Discord data fields to CleverTap fields as follows:
| CleverTap Field | Description |
|---|---|
| Identity | Discord user ID or email |
| Object ID | Unique identifier (optional) |
| Creation Date | Date the user joined the server |
| Profile Properties | Name, email, role, or other attributes in JSON format |
Map Identity and Object IDYou can keep the Identity field blank if you provide an Object ID, and vice versa.

Configure the Action
- Click Test & Review to confirm the setup.
- Check your CleverTap dashboard for the test event.
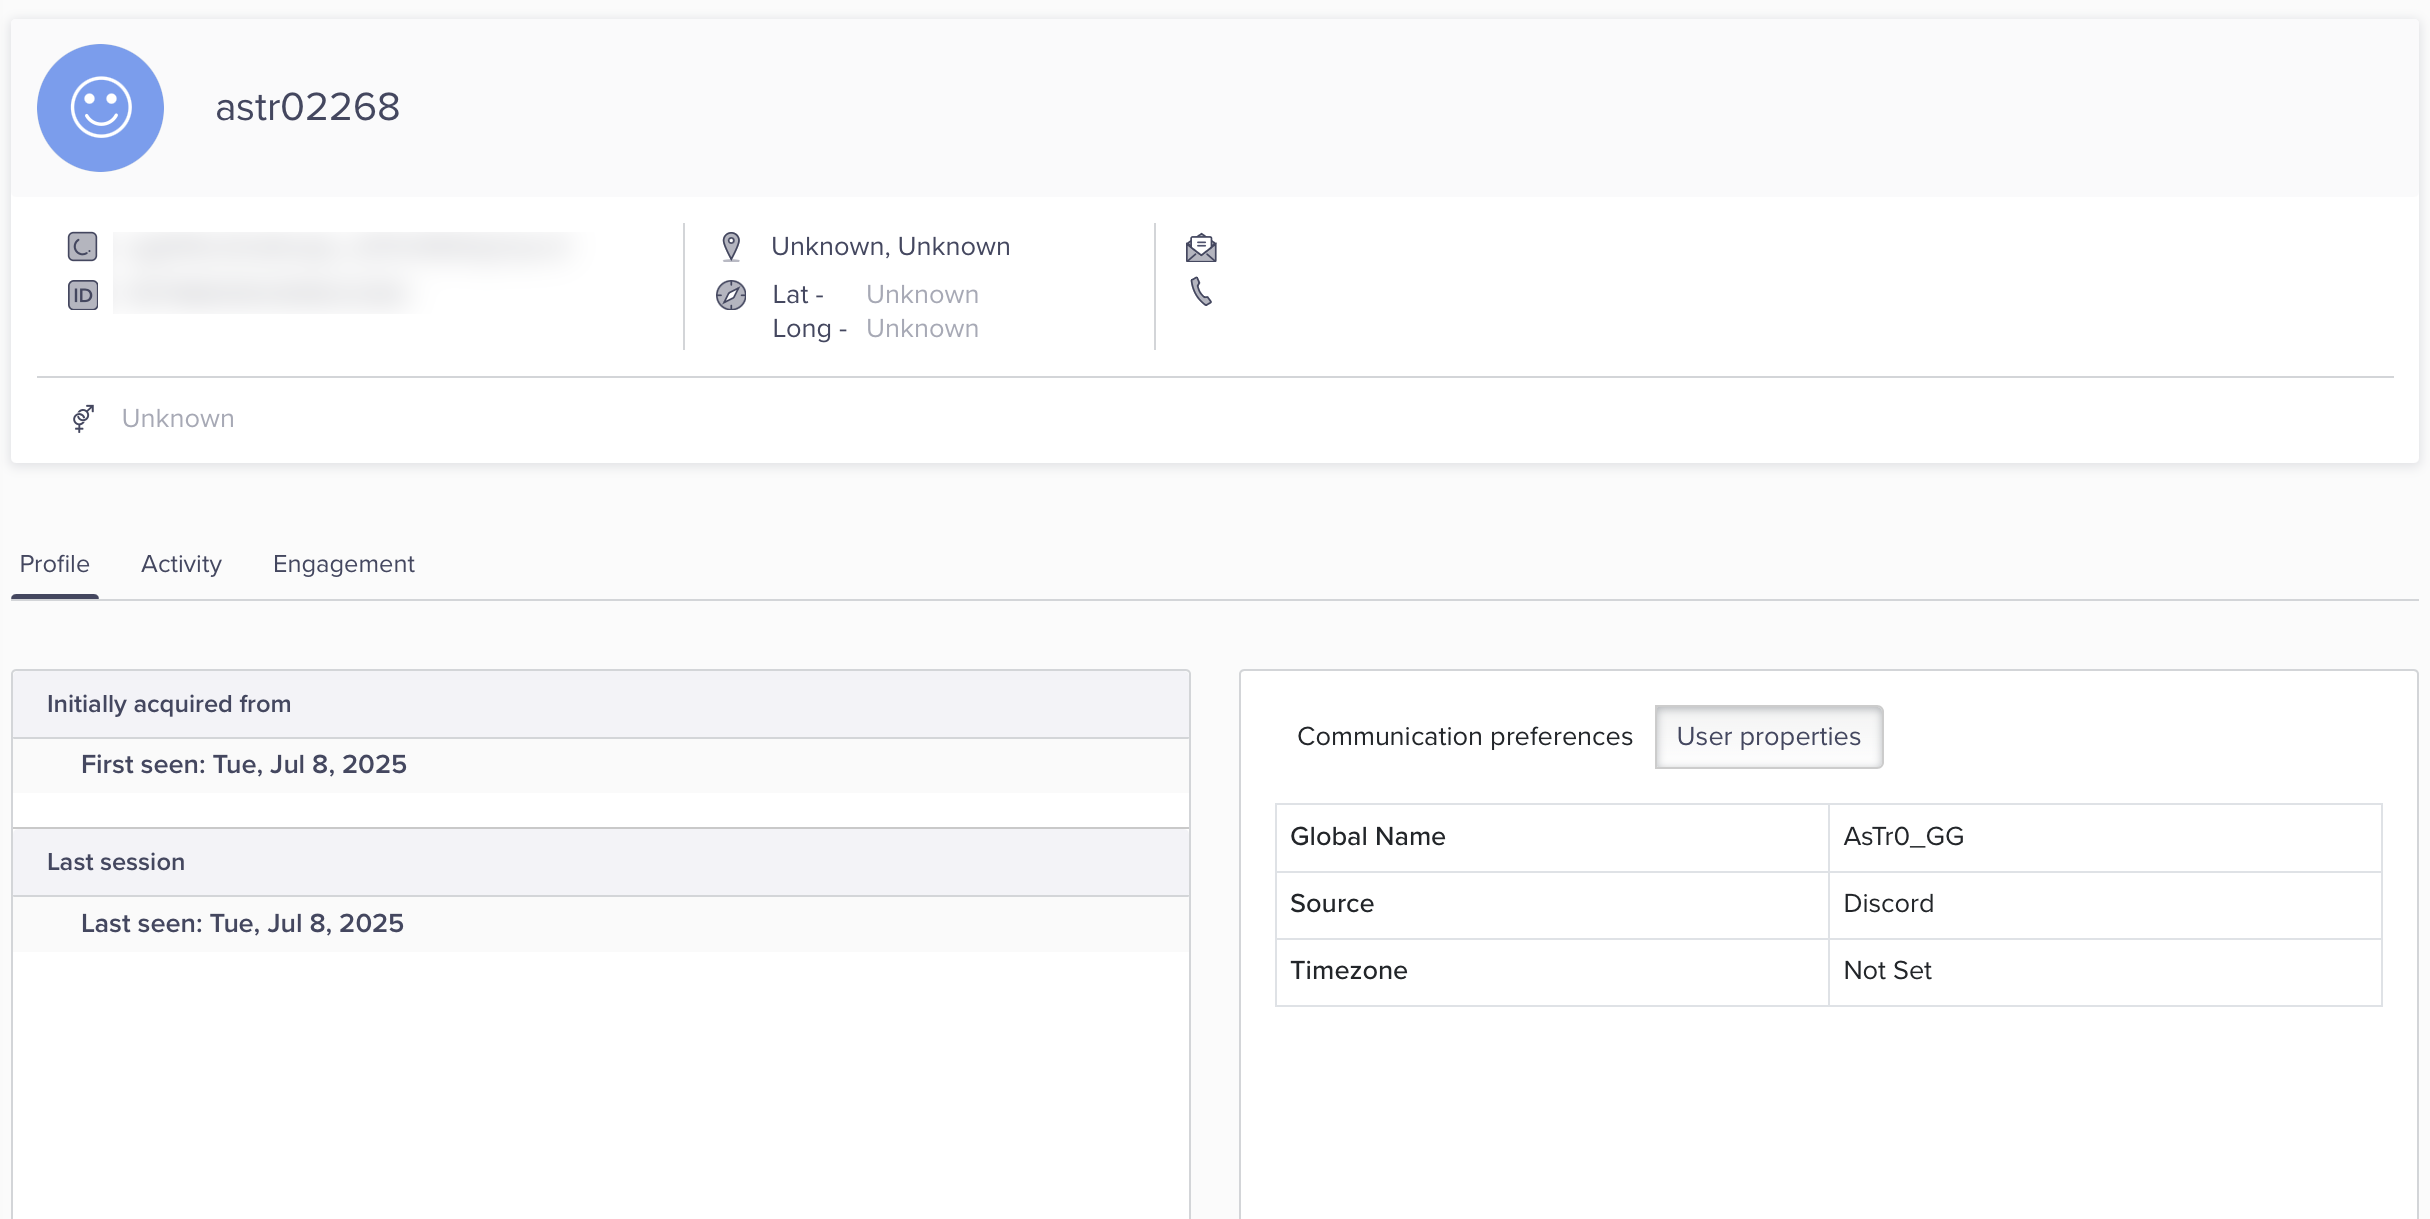
Verify user in CleverTap
Set Up Webhook in CleverTap to Send Messages to Discord
To send welcome messages to users who join your Discord server, you'll first need to generate a webhook URL in Discord and then configure CleverTap to use that webhook. This setup enables CleverTap to send outbound messages to your server based on predefined campaign logic.
Generate a Discord Webhook URL
Follow these steps to generate a Discord webhook URL:
- Go to your Discord server settings.
- Go to Integrations > Webhooks, click on New Webhook to generate a webhook URL.
- Copy the webhook URL.
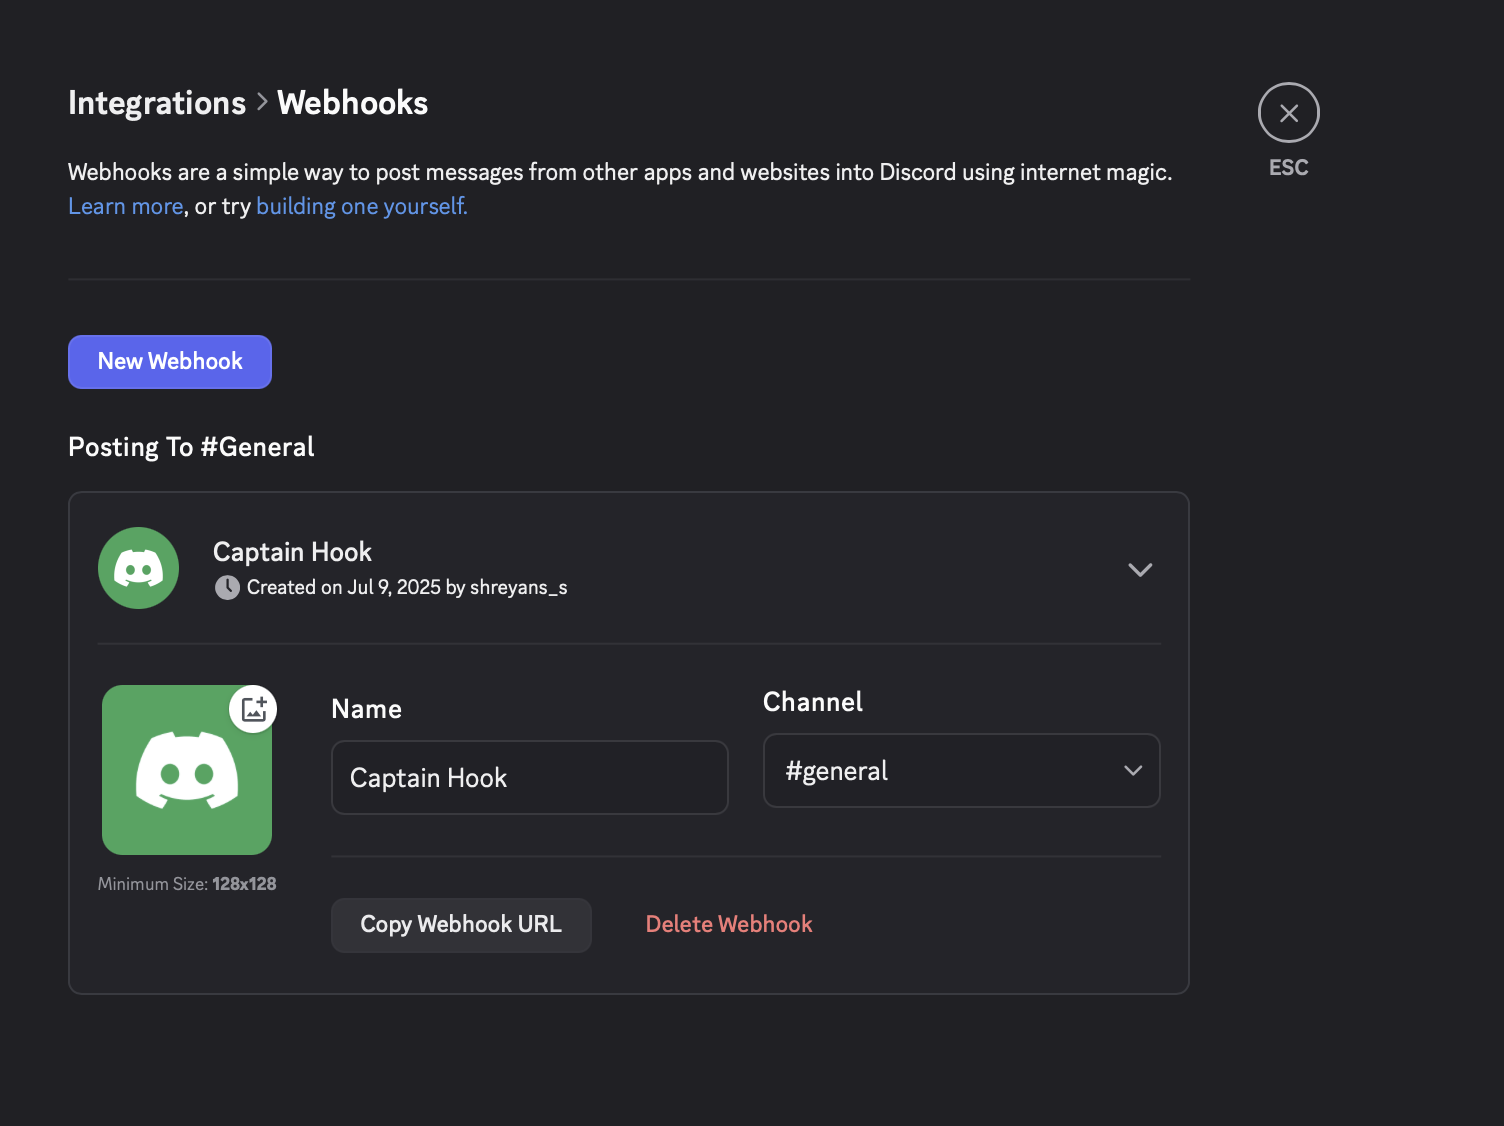
Generate a Discord Webhook URL
Configure Webhook in CleverTap
Set up the Discord webhook in CleverTap to send real-time messages to your server when a campaign is triggered. To do so, follow these steps:
- Go to Settings > Channels > Webhooks from the CleverTap dashboard.
- Click + Add Webhook and provide a meaningful name for the webhook.
- Set the HTTP Method to
POSTand paste the URL copied in Step 3 of Generate a Discord Webhook URL.
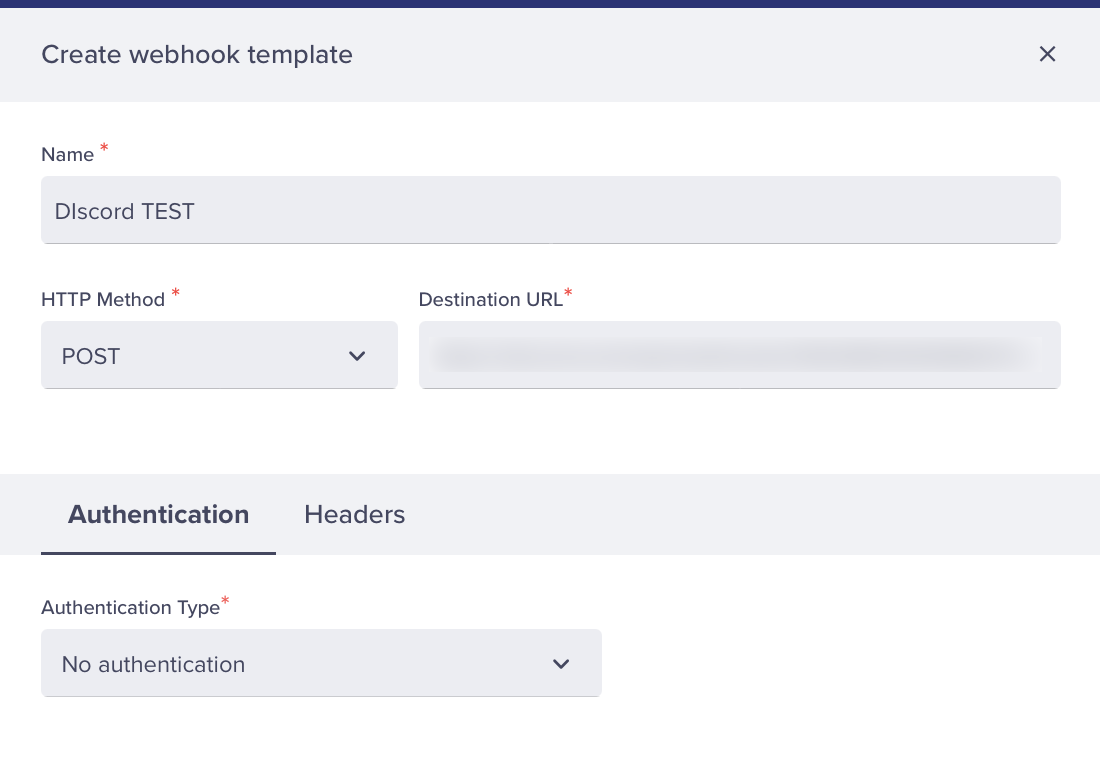
Create Webhook
- Click Save to create the webhook.
Once saved, your CleverTap account will be ready to trigger outbound messages to your Discord server via webhook campaigns.
Create Webhook Campaign in CleverTap
Set up a CleverTap campaign to automatically send welcome messages to Discord users when they join your server. Follow these steps:
-
Go to Campaigns on the CleverTap dashboard, click + Campaign and select Webhook from the list of messaging channels.
-
Configure the campaign settings, such as the target audience, schedule, and other basic preferences.
-
In the What section:
- Select the webhook you created in Set Up a Webhook in CleverTap.
- Set the content format to
JSON. - Select Custom Body and paste the following payload:
{
  "content": "Welcome to the server, <@{{ Profile.Identity | default: "null" }}>! :tada: Glad to have you here."
}
This message uses the
Identityfield (mapped earlier from Discord to CleverTap) to dynamically mention the user in Discord. To personalize your message further, use the{{button or type{to insert dynamic content. -
Click Preview and Test to push default values and validate the setup.
-
Once confirmed, click Publish. Users who join your Discord server will now receive a personalized welcome message, like the one shown below:

Example Welcome Message in Discord
Verify Integration Results
After publishing:
- If you selected Create or Update User Profile, CleverTap creates or updates a user profile using the mapped Discord data.
- If you configured a Webhook campaign, users will receive a personalized welcome message directly in Discord.
This integration enables real-time onboarding and contextual engagement within your Discord community without writing any code.