
Journey Operations
Understand how to perform various operations for your journey.
Manage Journeys
- Select Journeys. This takes you to the All Journeys page.
- Select a journey's checkbox to manage its functioning.
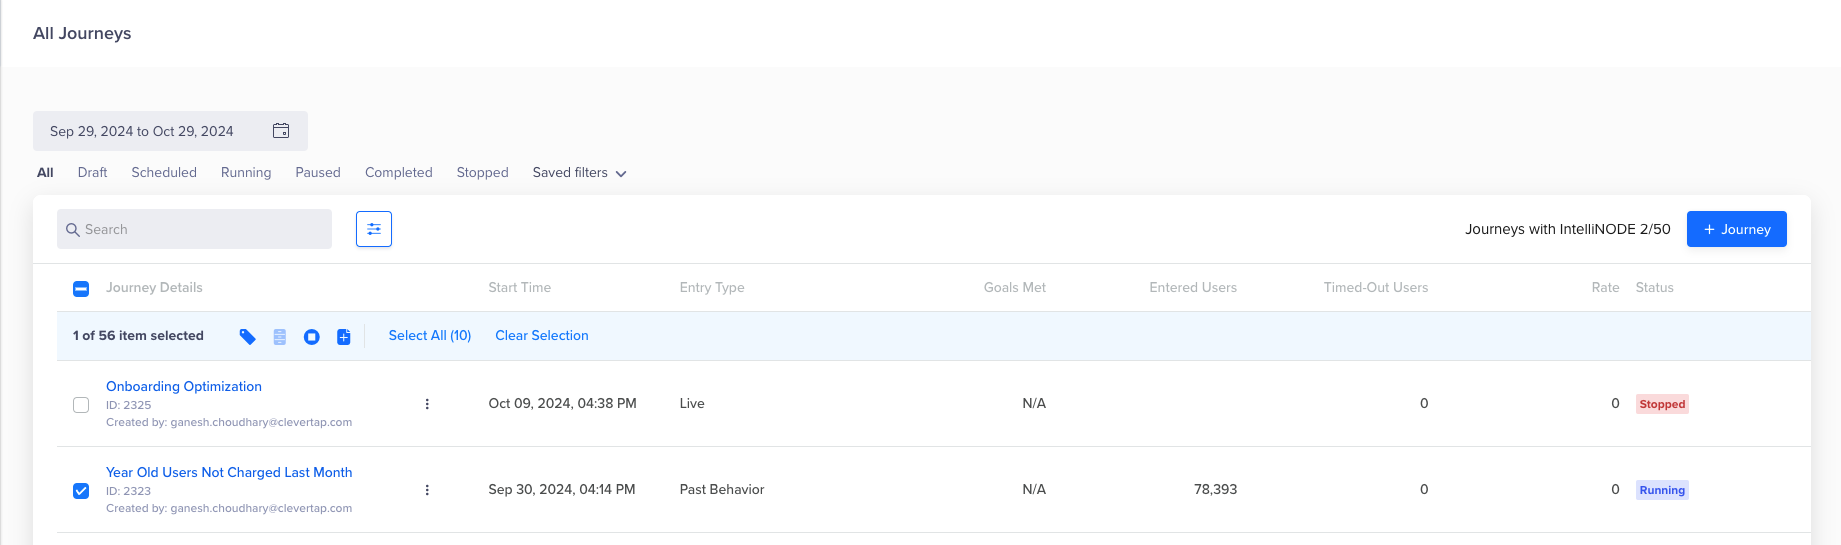
Manage Journeys
This activates the Action Buttons displayed on the top left. The buttons are:
| Action Buttons | Description |
|---|---|
Pause and Resume | Temporarily halts the qualification of new users in the Journey. Users already in the journey will continue traveling through it or continue receiving messages. You can select more than one Journey to pause or resume them altogether. |
| Completely halts the journey. It stops:
|
Ellipsis | More actions are available from the ellipsis icon:
|
| Operations using Keyboard Shortcuts | Using keyboard shortcuts, you can manage journeys. Click the  For example, press Shift and select the nodes you want to copy, and then press Option/Alt and drag the selected nodes to copy them, as shown in the following gif:  |


Summarize Journey
Journeys with many nodes, conditions, and paths can be hard to read at a glance. Journey Summarizer generates a short, plain-language summary of a journey so you can understand who qualifies, what the goal is, and how users move through the journey without opening every node.
Use it to:
- Get up to speed on a journey a teammate built.
- Explain a journey to a stakeholder without walking through the canvas.
- Confirm that a journey does what you intended before you share it.
- Get information on how a journey is set up. It doesn't show performance numbers. To see how a journey is performing, refer to the Journey Stats and Node Stats tabs.
View a Journey Summary
-
Select Journeys. This takes you to the All Journeys page.
-
Select the journey you want to summarize. The journey details page opens.
-
Click the Journey Summarizer icon.
A Summary pop-up opens.
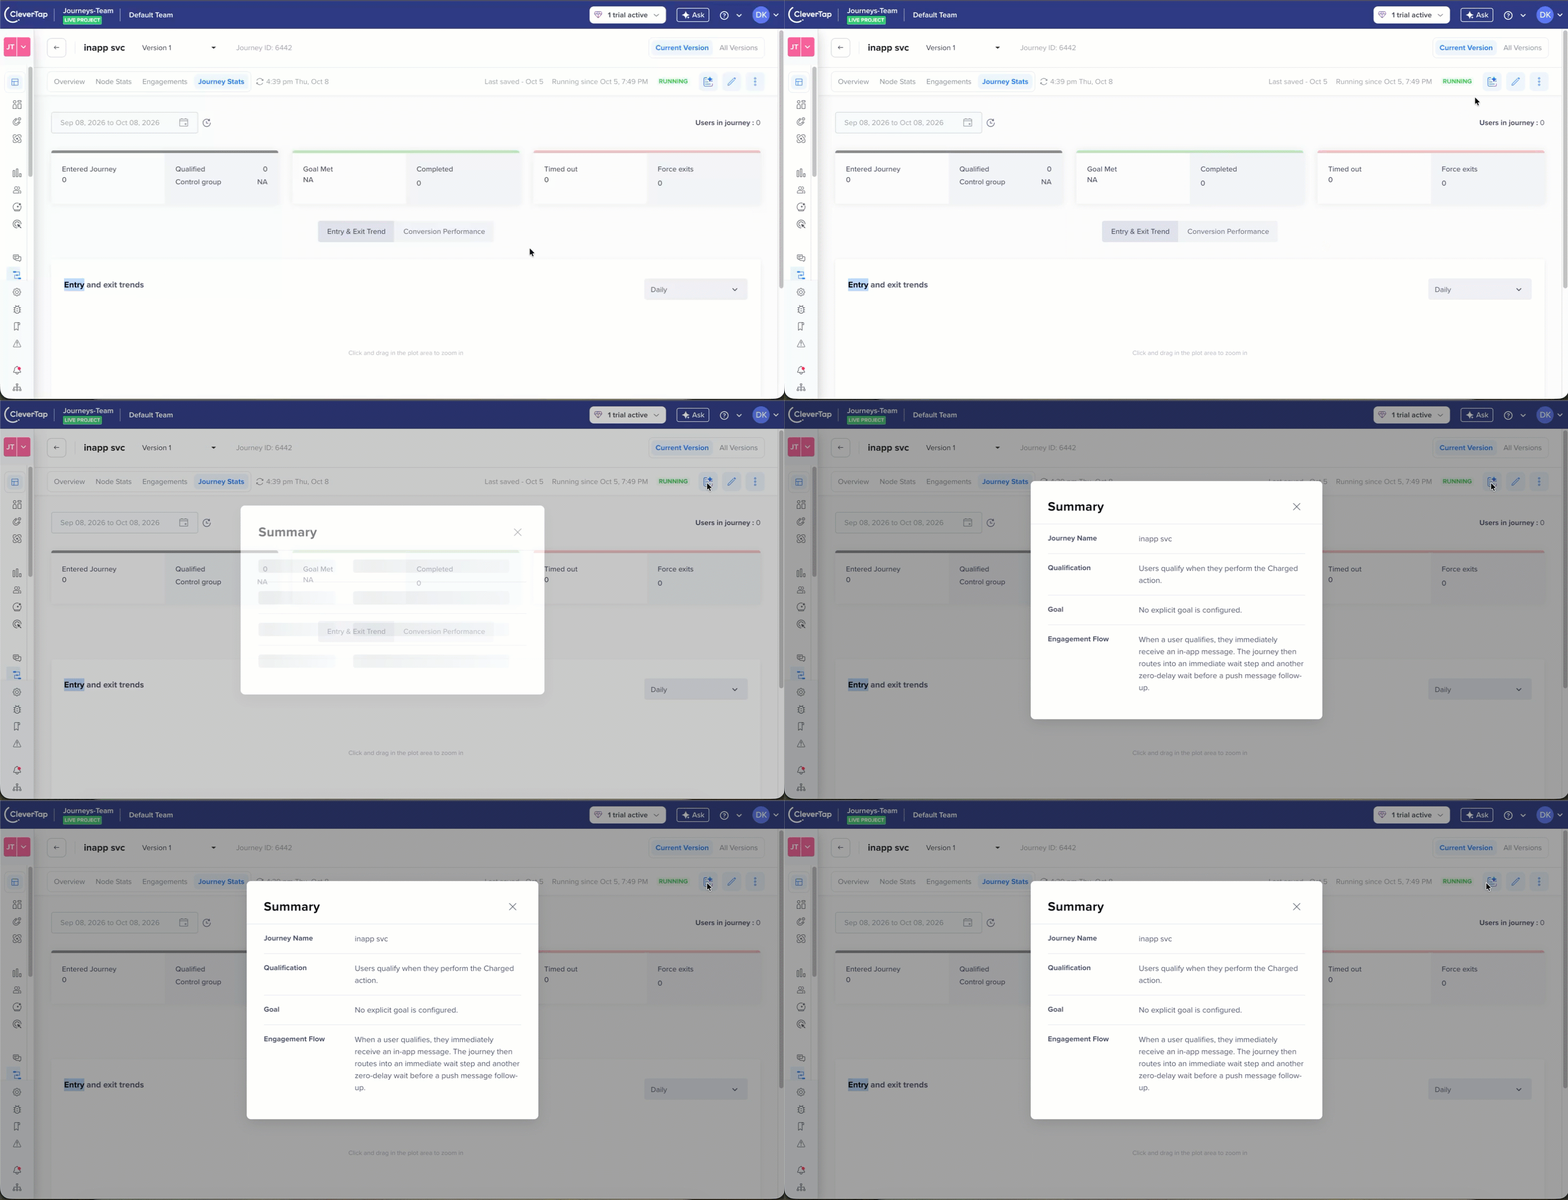
Journey Summarizer Workflow
Journey Summary Properties
| Field | Description |
|---|---|
| Journey Name | The name of the journey. |
| Qualification | The condition users must meet to enter the journey. For example, a summary might read: "Users qualify when they have done Charged Today at least once." |
| Goal | The goal is configured for the journey. If the journey has no goal, the summary says so. |
| Engagement Flow | The order in which users move through the journey and the messages they receive, if any. Some journeys do not send messages to users. They are used only to update user properties. For example, the Engagement Flow might read: "Qualified users enter the journey, receive one webhook immediately, then move to a second webhook after the first is sent." |
Journey Summarizer DistinctionThe summary is separate from journey comments. It does not replace the comments your team adds to a journey.
Best Practices
- Check the summary against what you intended. If the Qualification or Engagement Flow does not match your plan, review the journey before publishing it.
- Give your journeys clear names and descriptive node labels. The summary is built from your journey's setup, so clear naming makes it easier to read.
Updated 22 days ago