Create Segments
Learn how to create Segment in CleverTap.
Overview
Creating segments in CleverTap empowers you to target and engage specific groups of users precisely based on various criteria. This flexibility enables you to design segments based on past behavior and live user interaction with the app. The steps to create Segments vary based on the type of segment you want to create.
Create Past Behavior Segments
Consider the example of creating an action-based segment where users qualify if they purchased a particular product at least once in the past 30 days.
To create the above example segment, perform the following steps:
- Navigate to Segments > Segments from the dashboard.
- Click +Segment.
- Select the Past Behavior segment type.
- Click Add a rule group to start building your query.
- Select the Event (Did) rule from the User Behavior option.
- Select the Charged event where the count is one and then click Refresh Data.
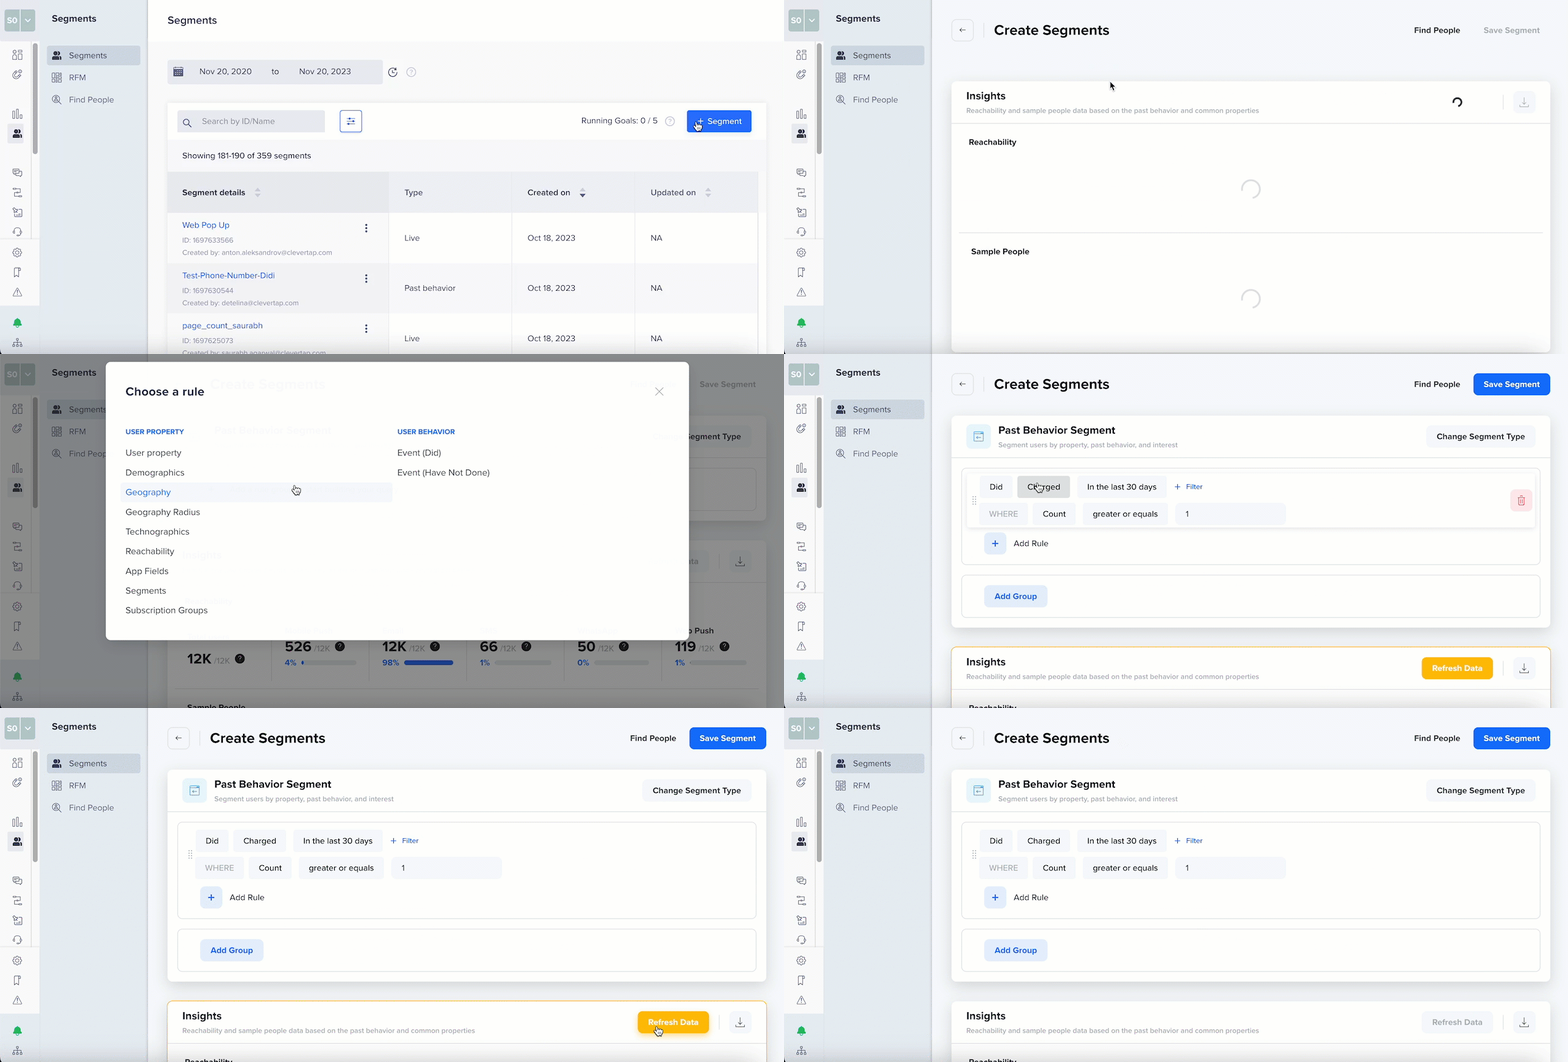
Create Past Behavior Segment
The qualified segment of users for the defined rule is calculated.

View Reachability of Qualified Users
- Click Save Segment.
- Enter the Segment name and click Save.
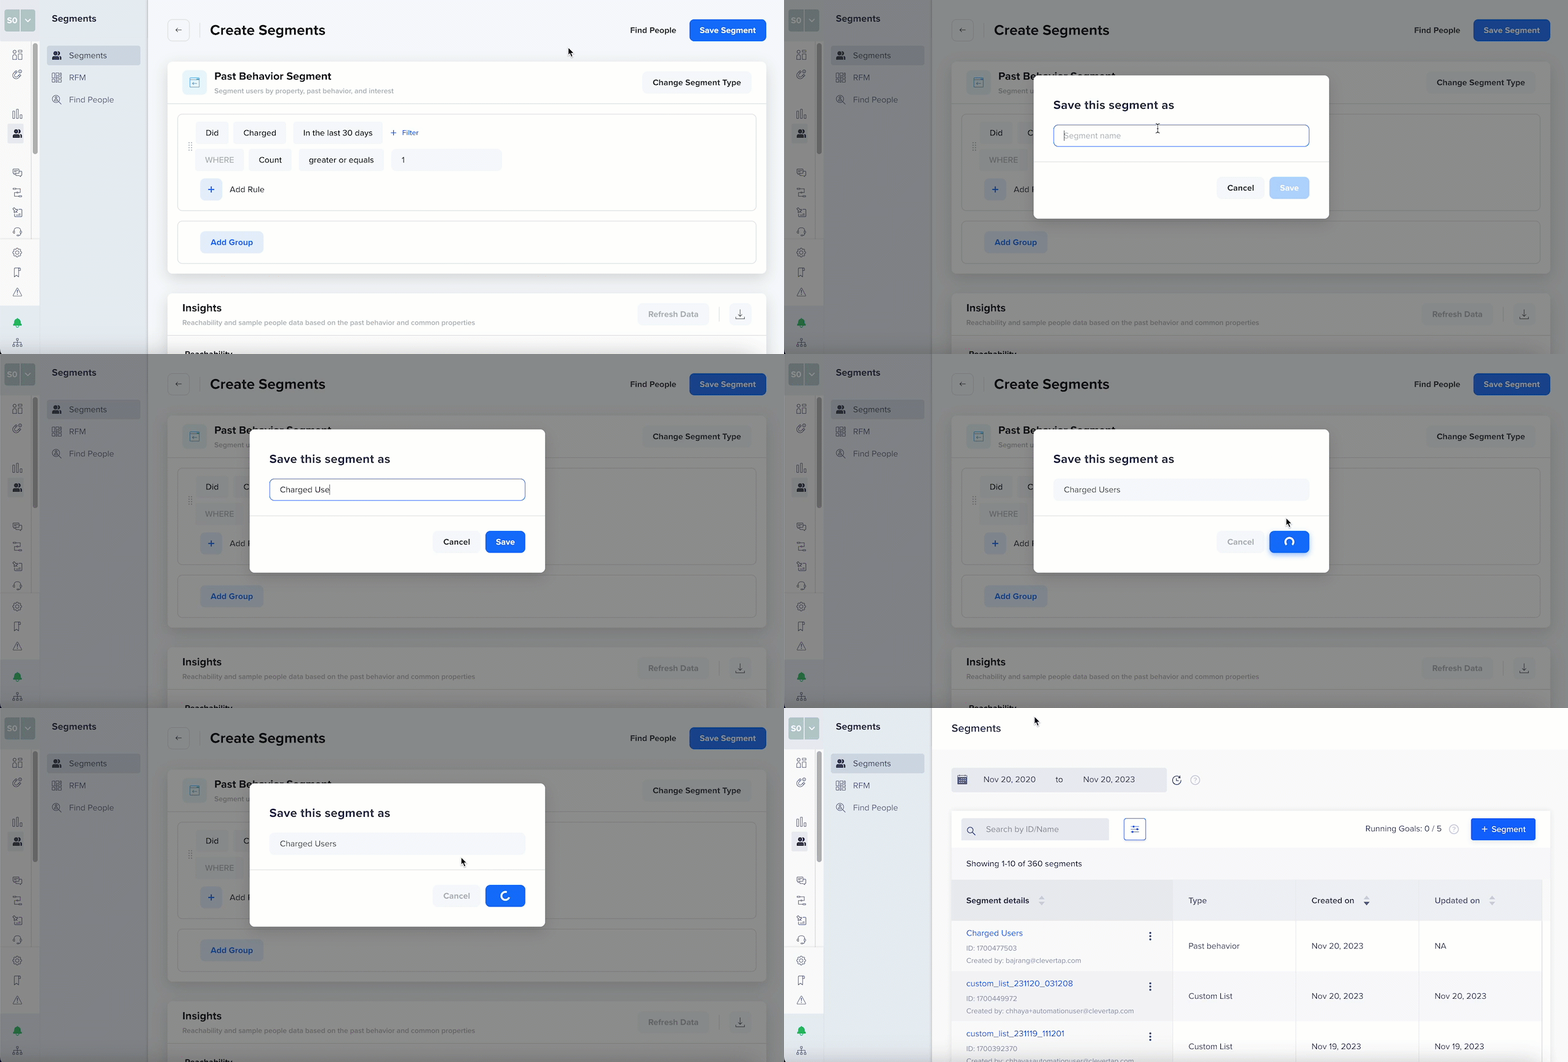
Save Segment
Your new segment, Charged Users , can now be seen in the main section on the Segments page.
To know more about creating more complex rules, refer to the Segmentation Rules.
Create Live User Segments
Consider the example of creating an Inaction in Time Frame segment for which users will qualify in real-time as soon as they add a product to the cart but do not purchase it within 10 minutes.
Golden Window for Mobile TransactionsThe golden window within which most users transact on our iOS and Android app platforms is within 10 minutes.
To create the above example segment, perform the following steps:
- Navigate to Segments > Segments from the dashboard.
- Click + Segment.
- Select the Live - Inaction in Time Frame segment type.
- Select the Added to Cart event and set the DOES NOT DO Charged within as 10 minutes.
- You may select the Filter on past behavior and common properties checkbox to apply filters to past actions, inactions, or common user property filters.
- Click Save segment.
- Enter the Segment name and click Save.
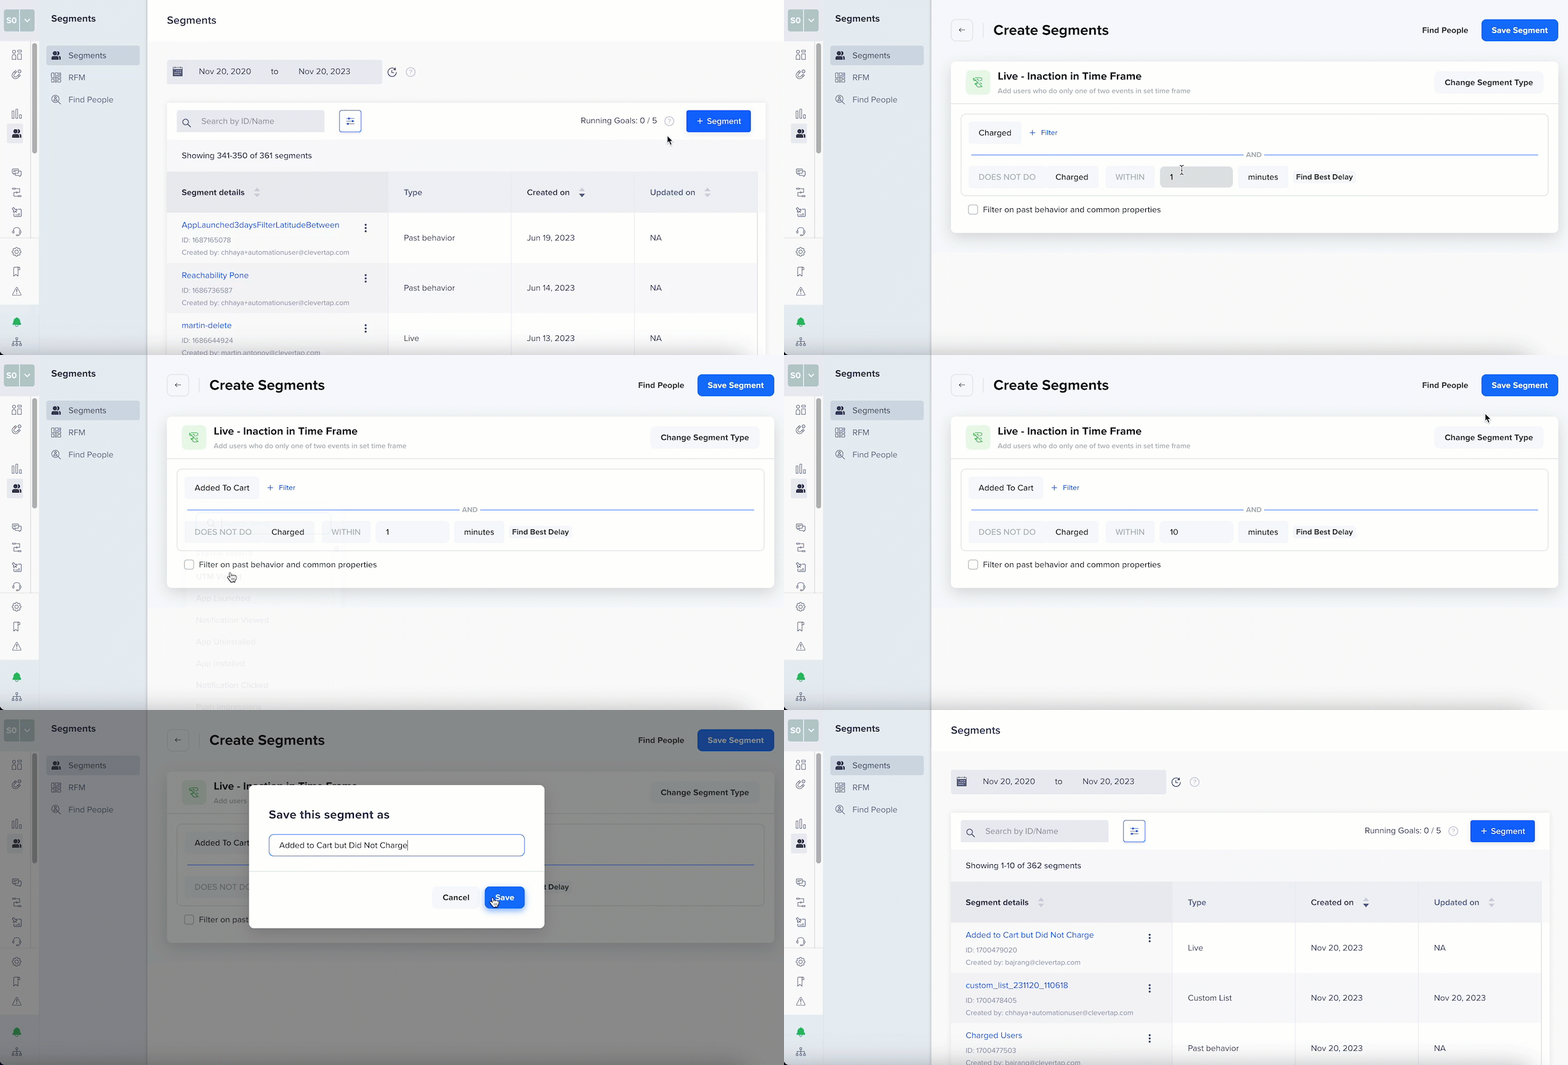
Create Live - Inaction in Time Frame Segment
Your new segment, Added to cart but no charge within 10 minutes, can now be seen in the main section on the Segments page.
Segment Naming Best PracticesConvey the core meaning of the segment while keeping the name brief.
Create Live Segments with Multiple Triggers
The Multi-Triggers feature lets you segment users based on one or more events. Consider an example of Live - User Actions segments where users qualify as soon as they perform any of the following events:
- App Launched
- UTM Visited
- Notification Clicked
To create a live user segment with multiple triggers:
- Navigate to Segments > Segments from the dashboard.
- Click + Segment and select the Live - User Actions segment type.
- Click Add Event and select the events from the list. In this example, select the App Launched, UTM Visited, and Notification Clicked events.
- Click Save segment.
- Enter the Segment name and click Save.
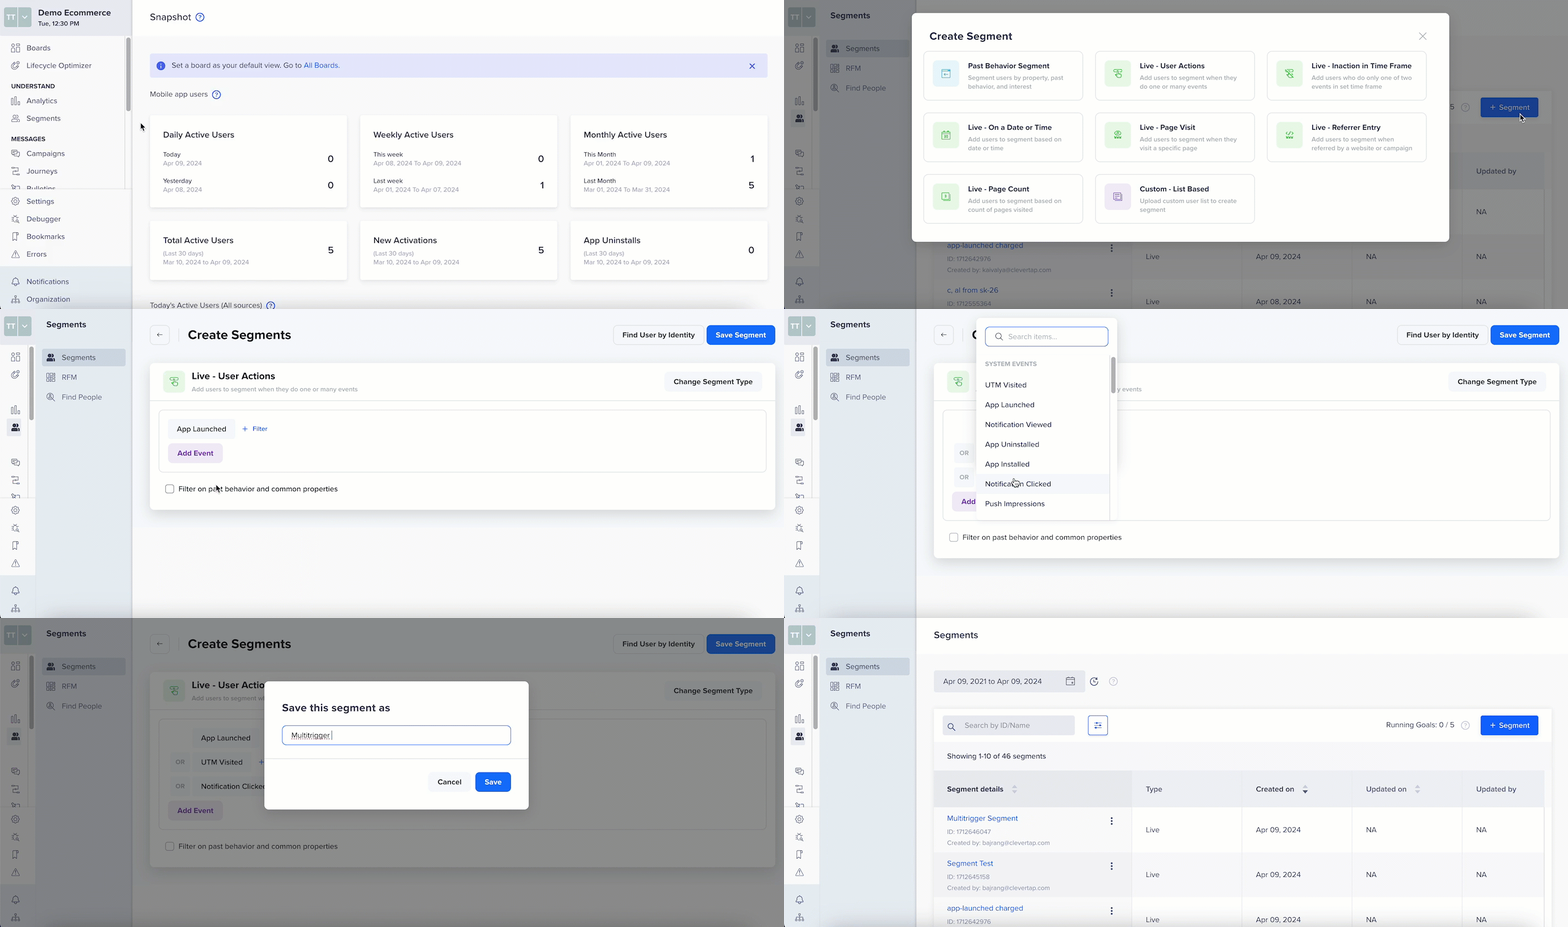
Create Live Segments with Multiple Triggers
Note
- You can add a maximum of 10 events for multi-trigger.
- Multi-Triggers are exclusive to the Live - User Actions segment.
Create Custom - List Based Segments
You can create a custom list segment by uploading user lists via the dashboard or API.
File SizeYou can upload a maximum file size of 50 MB from the dashboard. The maximum file size allowed from an API upload is 5GB.
File Format
Only CSV file format is supported for upload. Also, the list of users for your segment must follow a specific format. You can upload the profiles with identity type as CleverTap ID (g) or GUID and identity (i).
The format of the CSV file is as follows:
| Type | Identity |
|---|---|
| g | a1e2723cba7c4518bea8ef95b036ac83 |
| i | [email protected] |
The Type and Identity columns are mandatory for successfully uploading a custom list segment in the above format.
The Type field specifies the type of identity used for each segment user. This can be either g for CleverTap ID or GUID for a third-party identifier, and i for identity.
The Identity field contains the sample value of the identifier for each user, which can be a string or a number, depending on the identifier type. For example, if using the i type, the identity field might contain email addresses, phone numbers, or your custom identifier for each user.
User ProfilesA Custom - List Based segment can only contain user profiles that are on the CleverTap dashboard. It does not create any new profiles or update the attributes for the existing user profiles.
Create from Dashboard
- Navigate to Segments > Segments.
- Click + Segment.
- Click Custom - List Based.
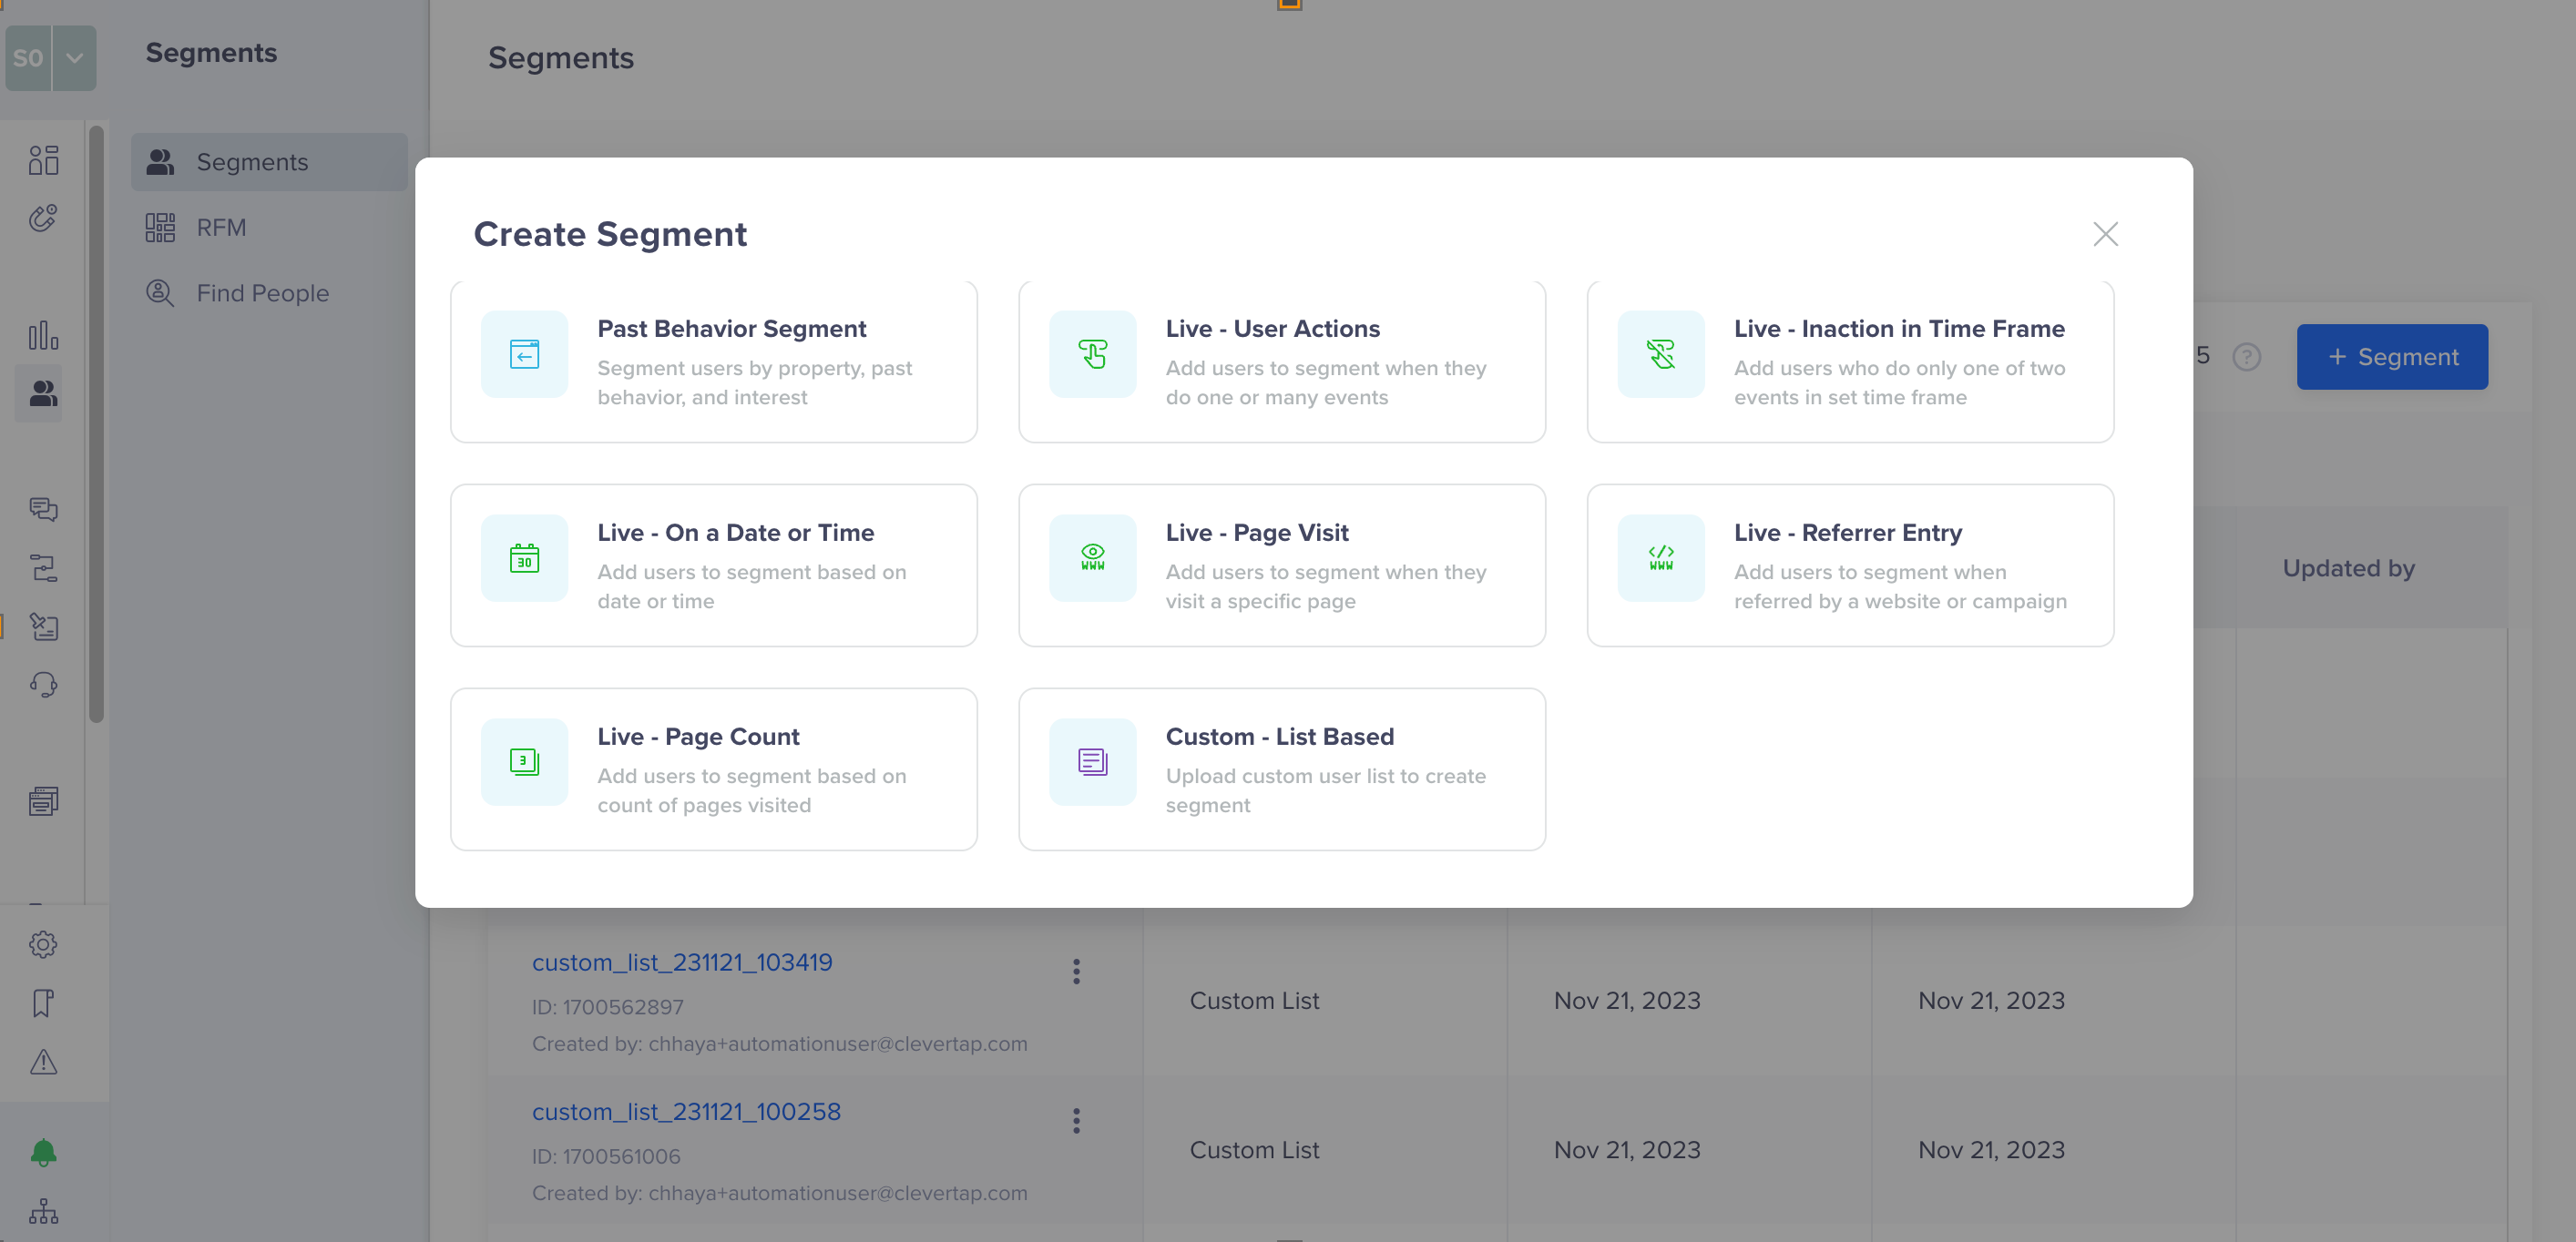
Custom - List Based Segments
The Create Segments page is displayed.
- Enter the Segment name.
- Click Browse and select the CSV file to be uploaded.
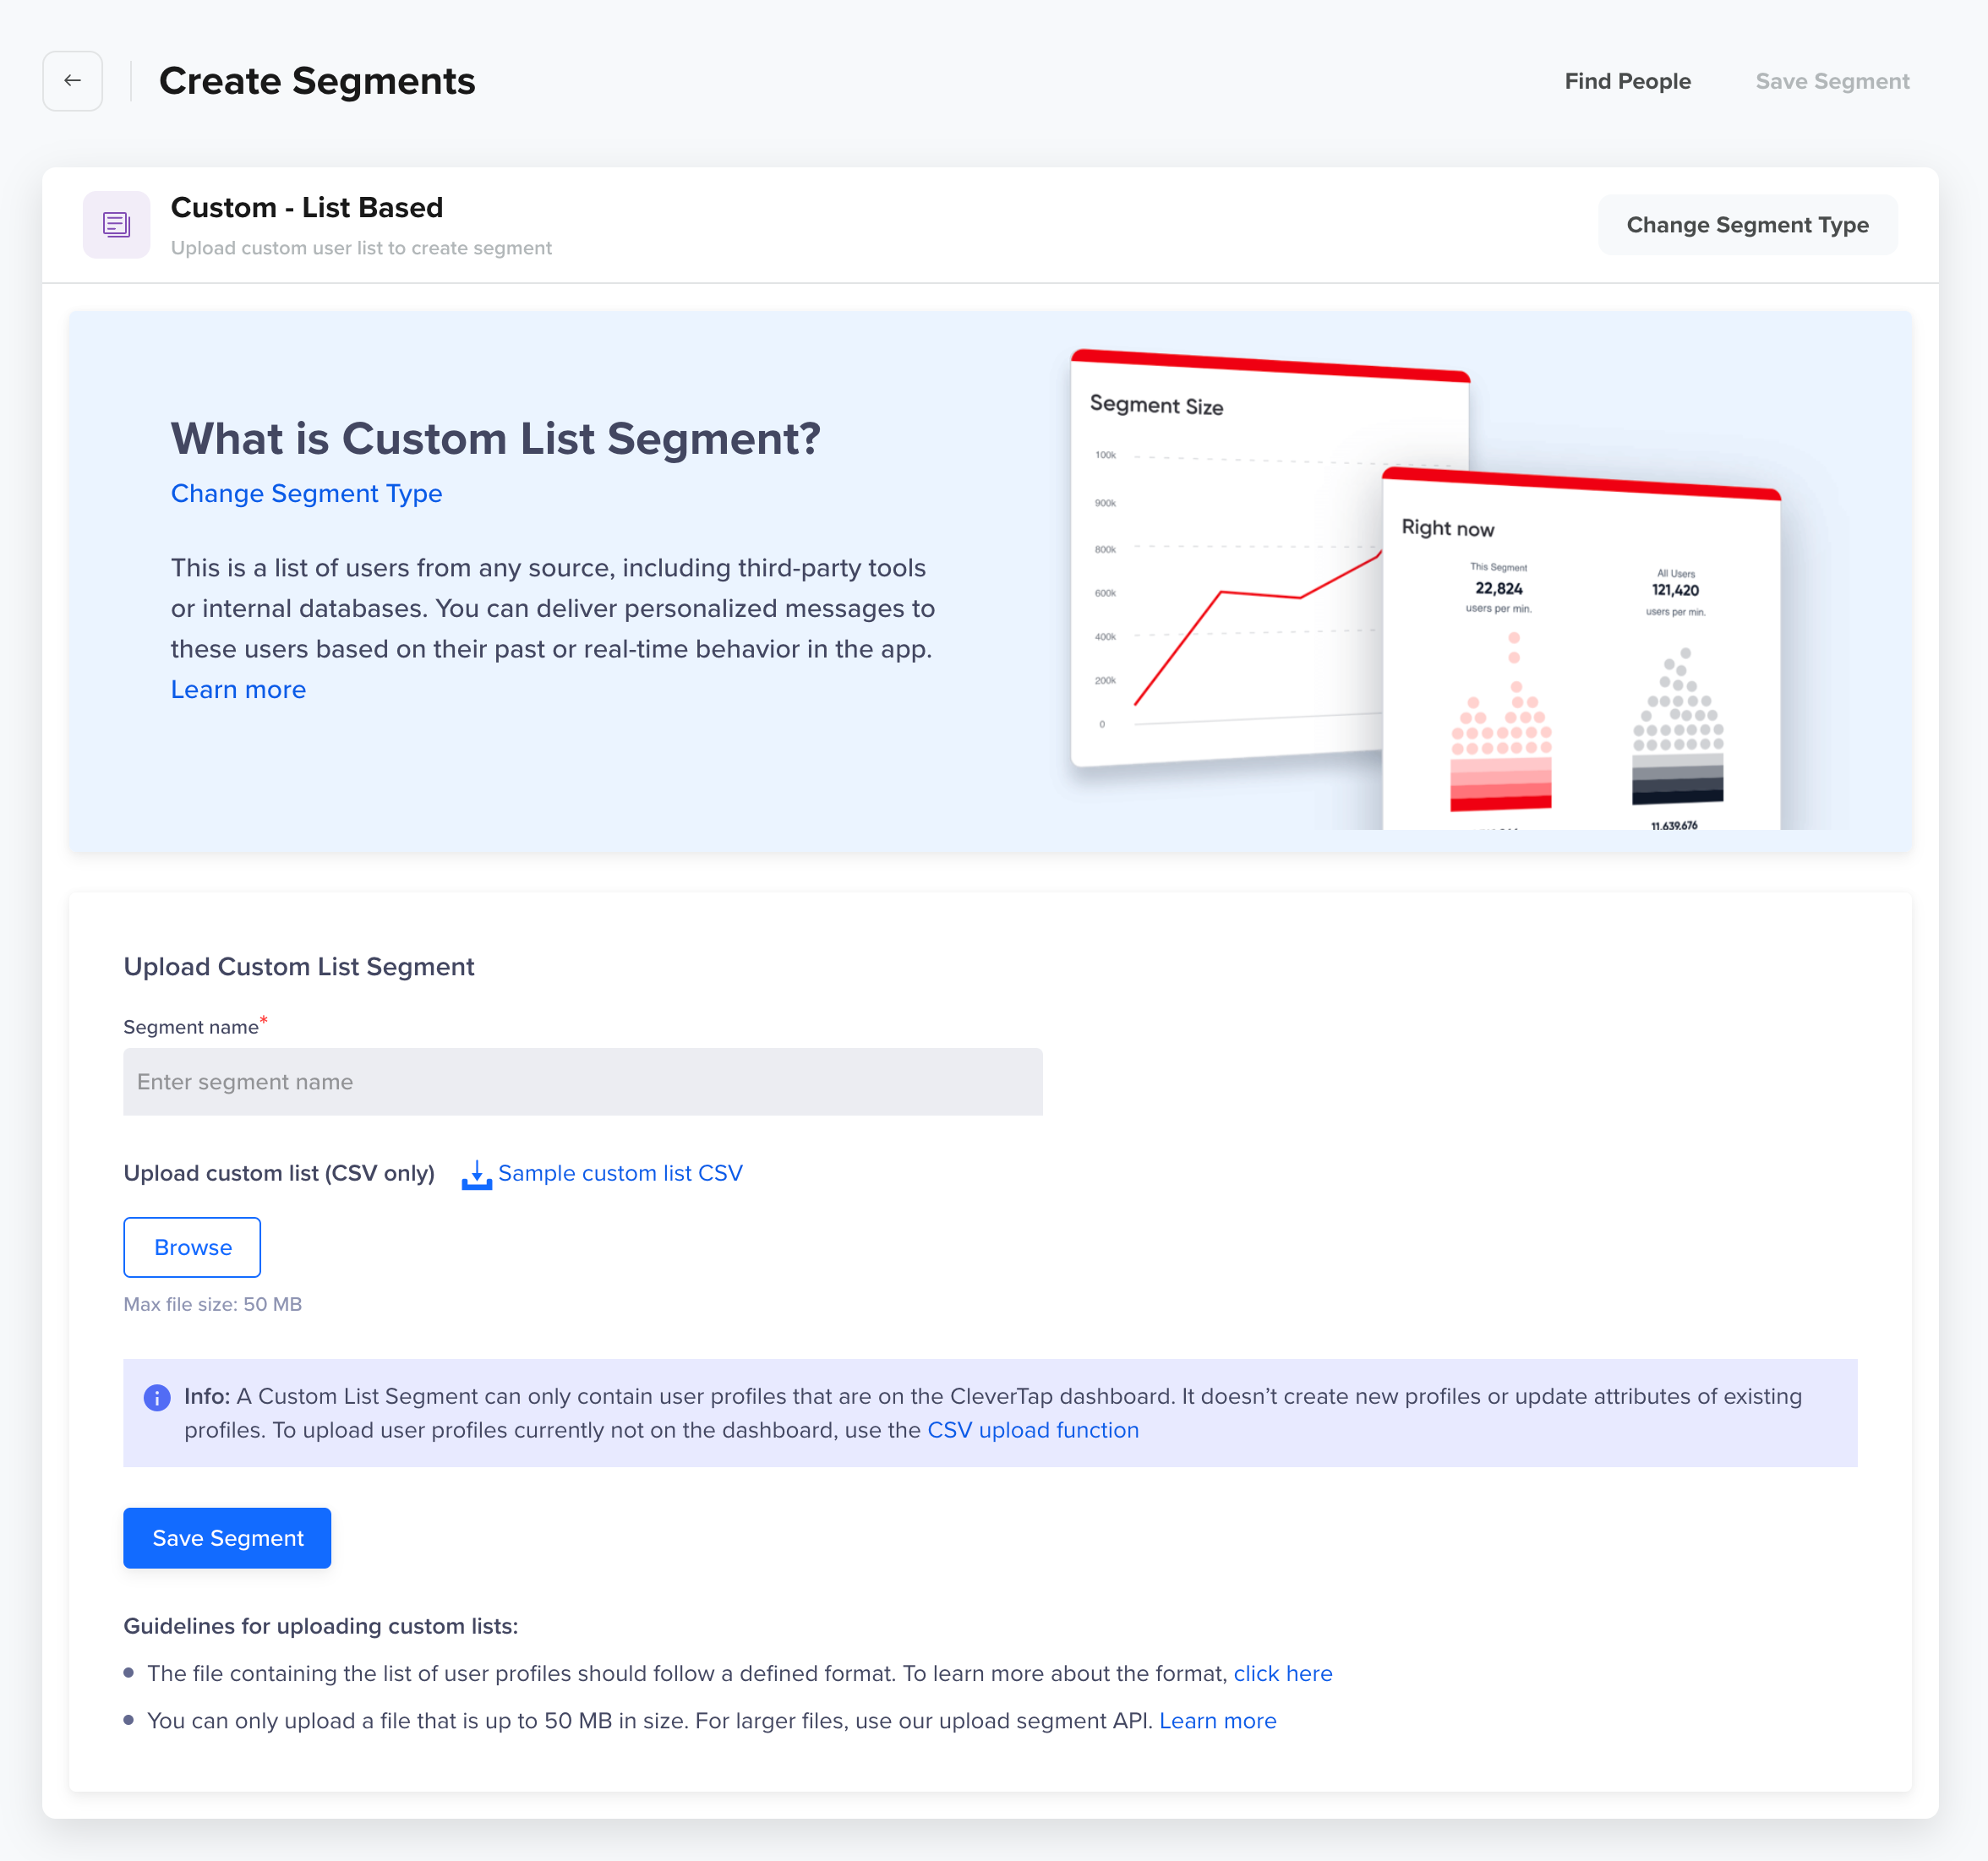
Upload CSV File
Sample custom list CSVIt is recommended to download the Sample custom list CSV file and format your custom list information as per the downloaded sample file.
- Click Save Segment.
You will receive an email with the details after the file is processed.
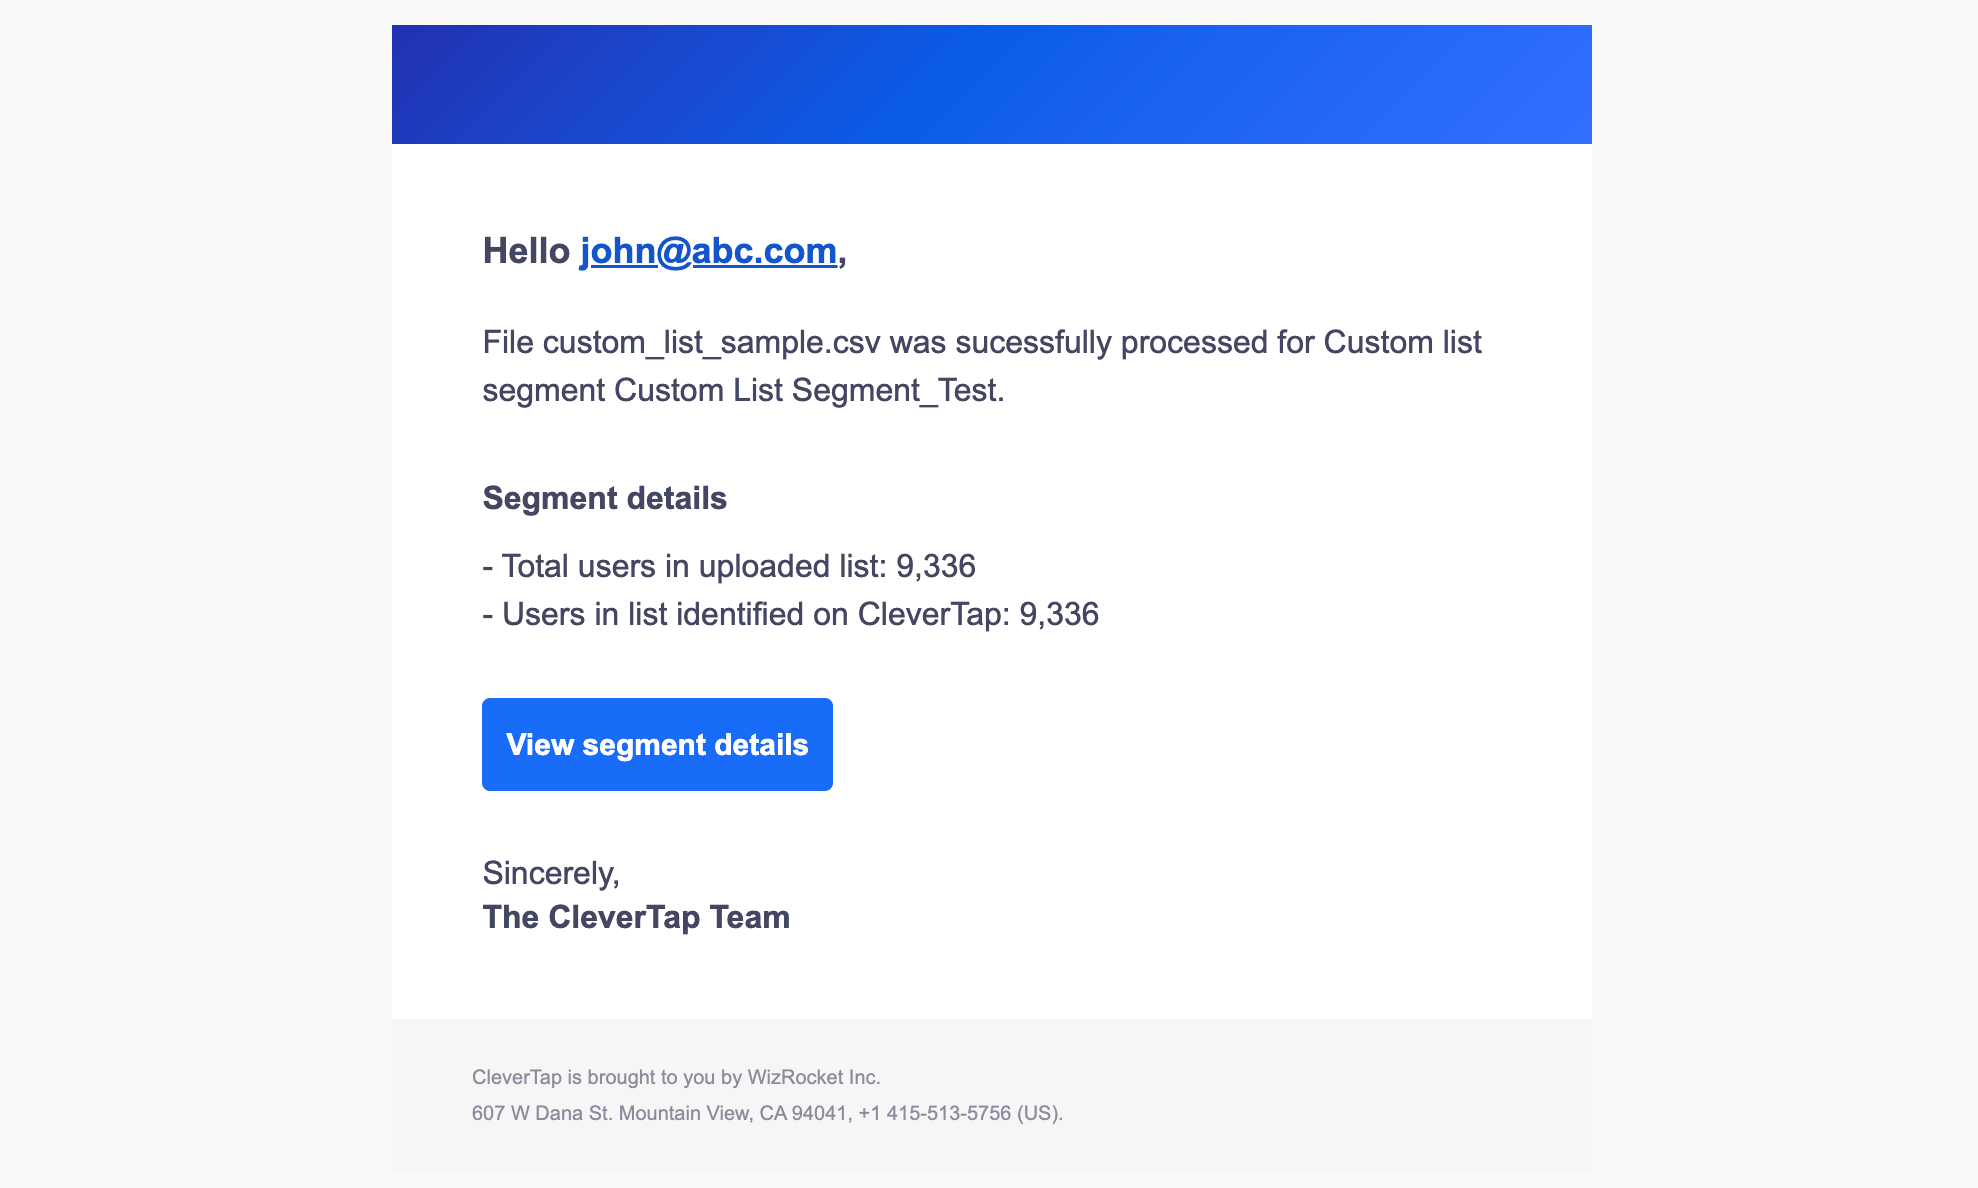
View Segment Details - Email
The uploaded segment is now available for use.
Create from API
You can create a custom list segment from API. For detailed steps, refer to Custom list API.
Replace via Dashboard
You can replace a custom list segment from the dashboard. However, if the segment is currently in use for engagement through a Campaign or Journey, then you must stop the Campaign or Journey before replacing the segment.
To replace a segment:
- Click the ellipsis
 icon from the segment you want to replace.
 - Click Replace.
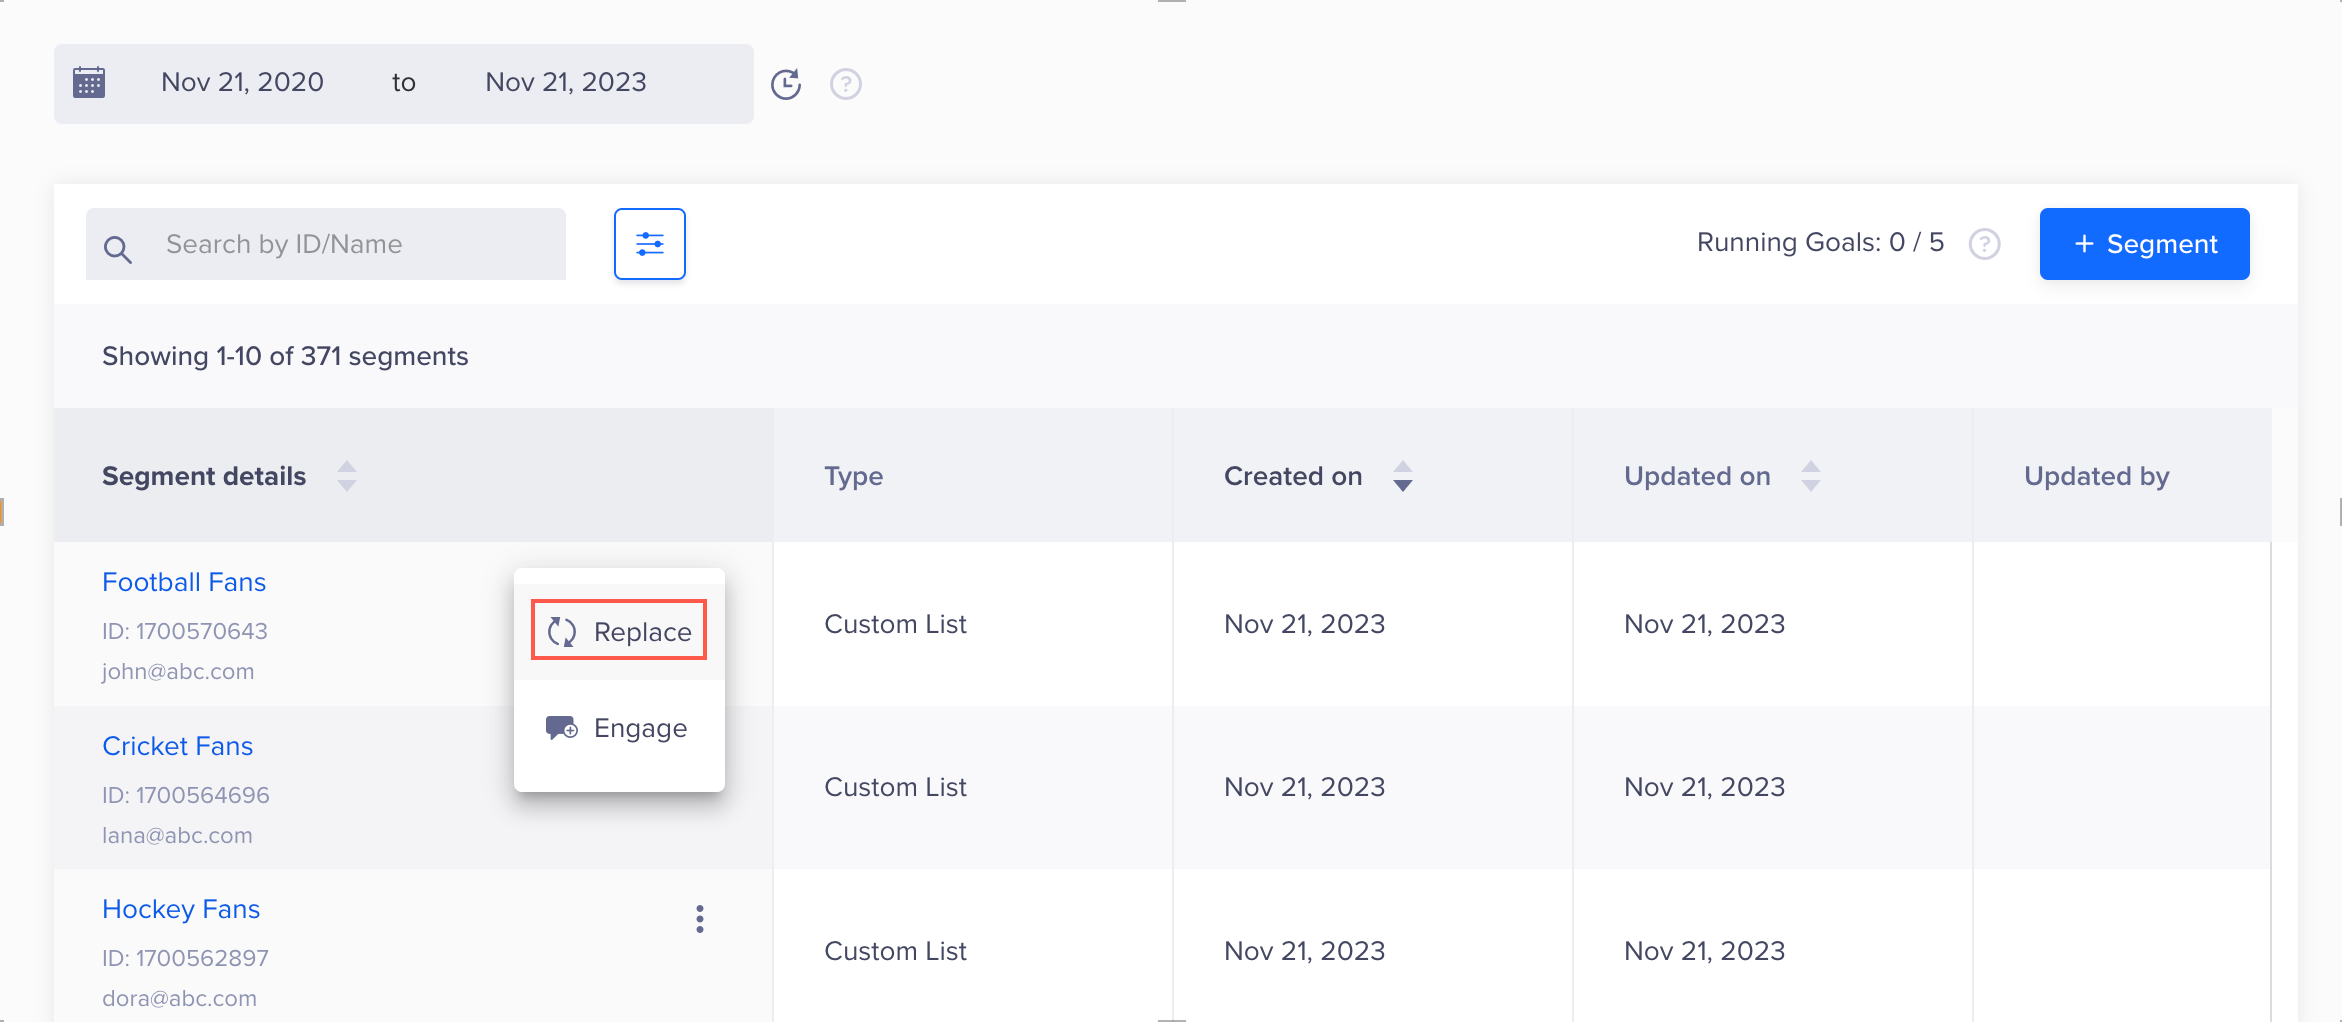
Replace a Segment
- Click the Re-upload user list and select the CSV file.
- Upload the CSV file.
- Name the file and save it. Wait for it to be processed.
- You will receive an email with the details after the file is processed.
The uploaded segment is now available for use.
Troubleshoot Upload
File size exceeds 50 MB
This error occurs when the file size exceeds 50 MB.
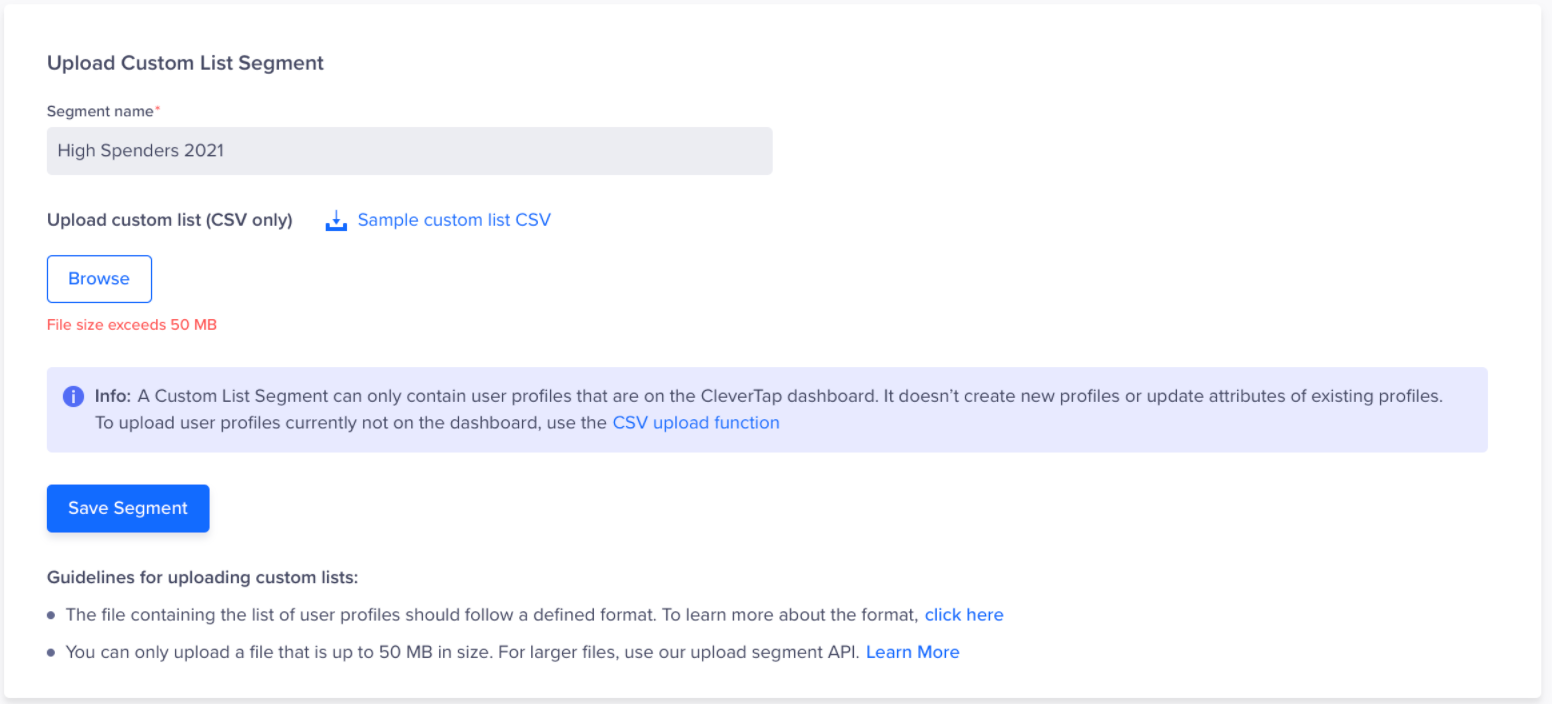
File Size Exeeds 50 MB - Error
NoteIf the file size is more than 50 MB, it can be uploaded via Custom list API.
Error uploading the file
You can see the following message when trying to upload the file.
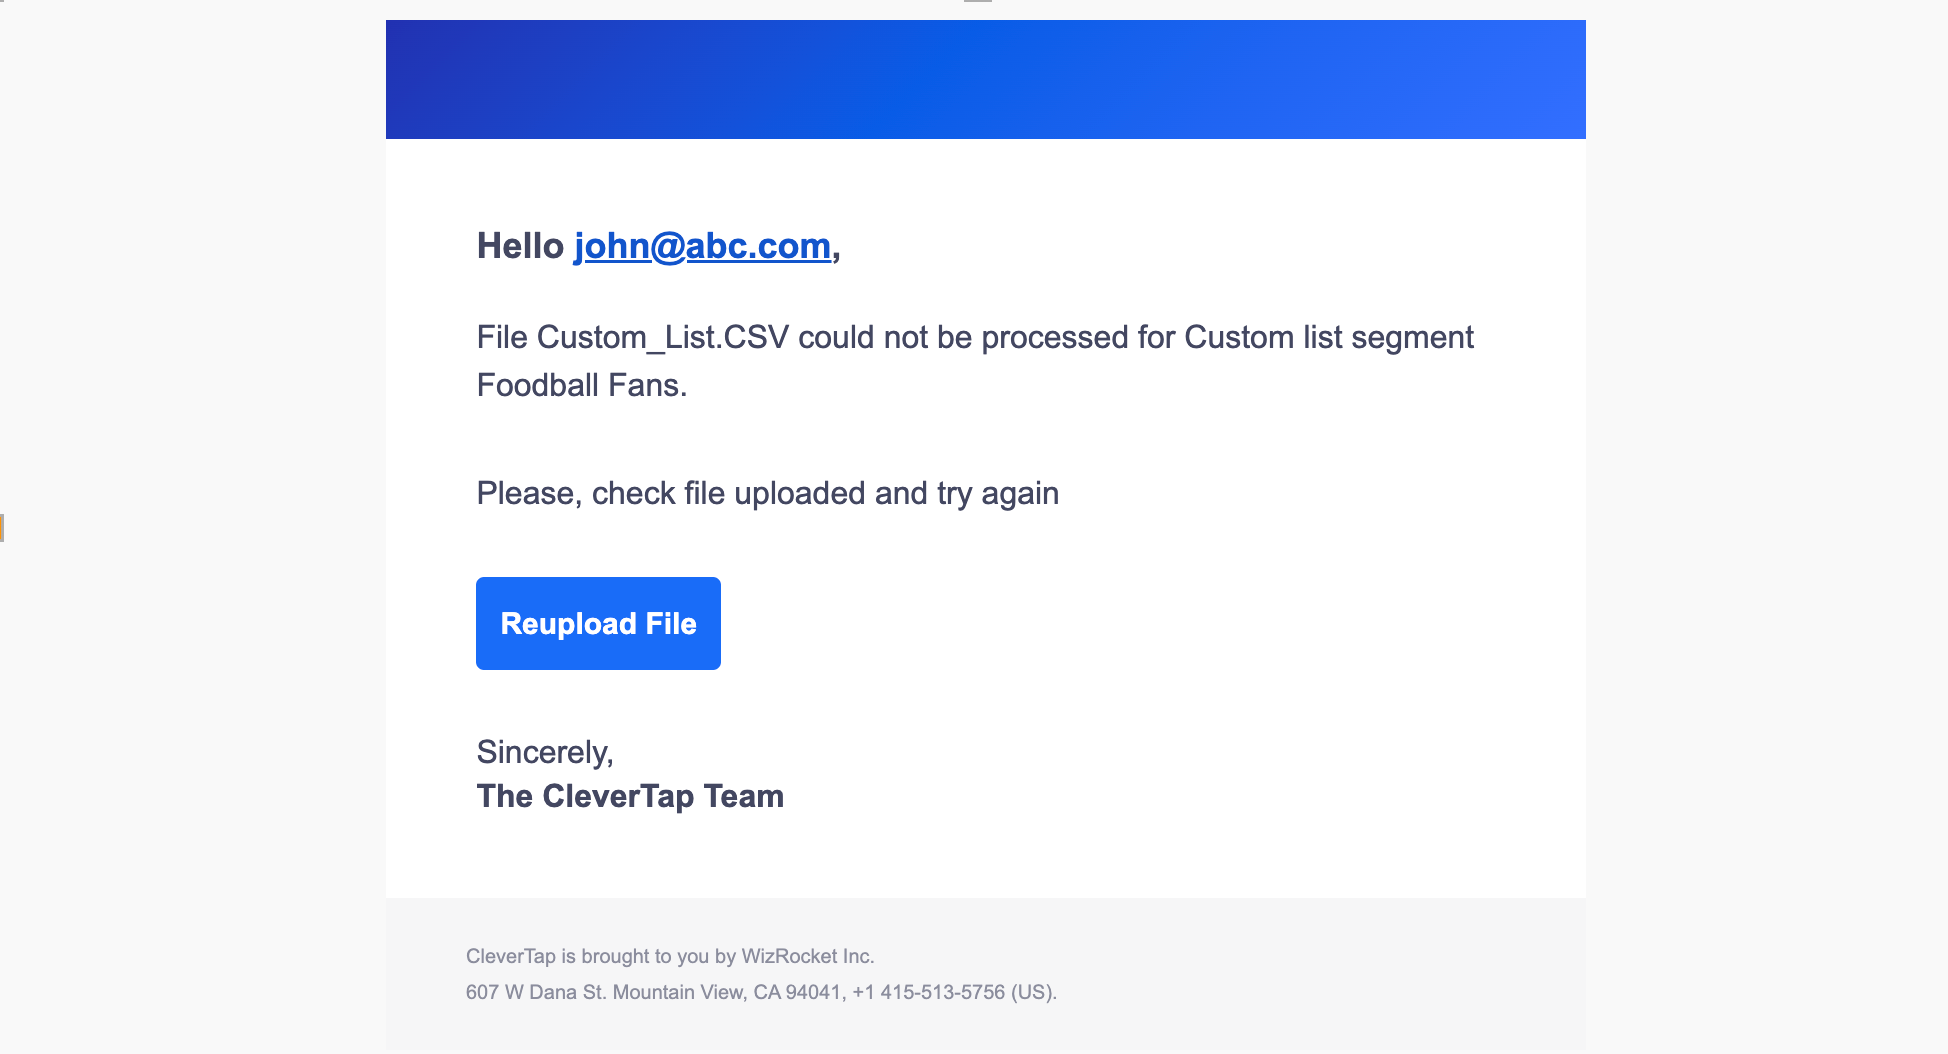
File Upload Error - Email
If the file is not uploaded correctly, you can upload it again.
| Segment issue | Resolution |
|---|---|
| File upload failed | The segment could not be created from the uploaded file. Fix the errors and re-upload the file. |
| File re-upload failed | The segment could not be refreshed with the latest file. The segment will be available with the last successful update. Refer to the View Segment Details page for the last updated file. |
Segment processingThe custom list segment is available for use only after the process of creating or updating is complete.
View Segment Details
The segment details can be viewed from the Segment dashboard. The segment details page shows all the available information for the segment, such as:
- Segment Trend: If the users have increased or decreased over time.
- Campaigns and Journeys: The number of campaigns and Journeys currently using the custom list segment.
- Segment size and reachability: The total number of users in the segment and their reachability across various engagement channels.
- Sample Users: These are samples from your list. You can open any of them to check their details.
TipClick the
download icon to download all the users in your segment.
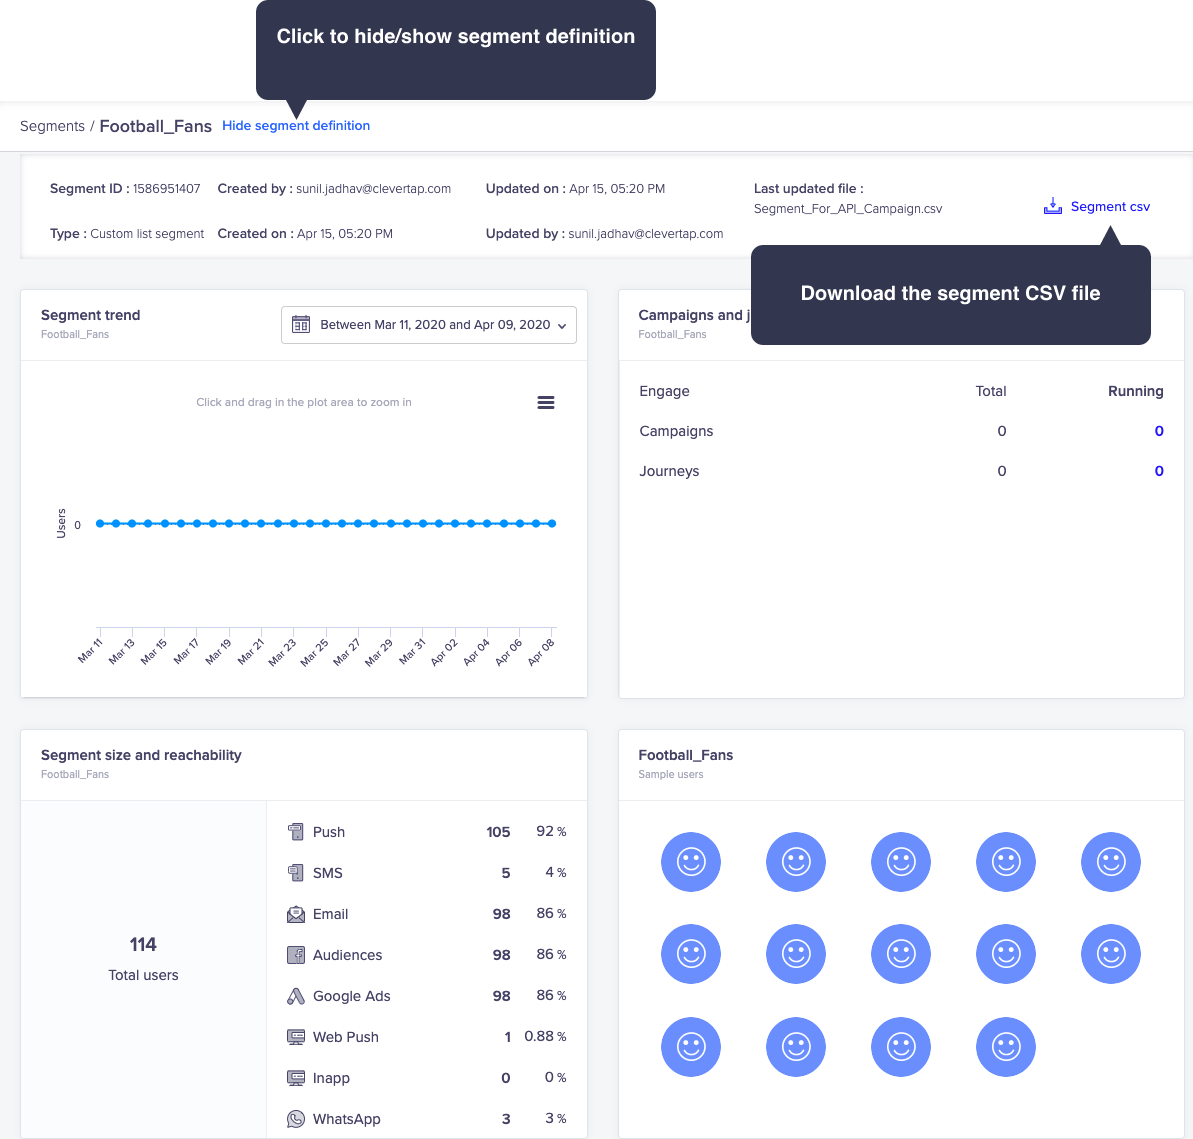
Hide/Show Segment or Download as CSV
Use Custom List Segment
When creating a campaign, you can use the custom list segment from the Who section. All the custom list segments are listed under the WHO section of the Campaigns page.
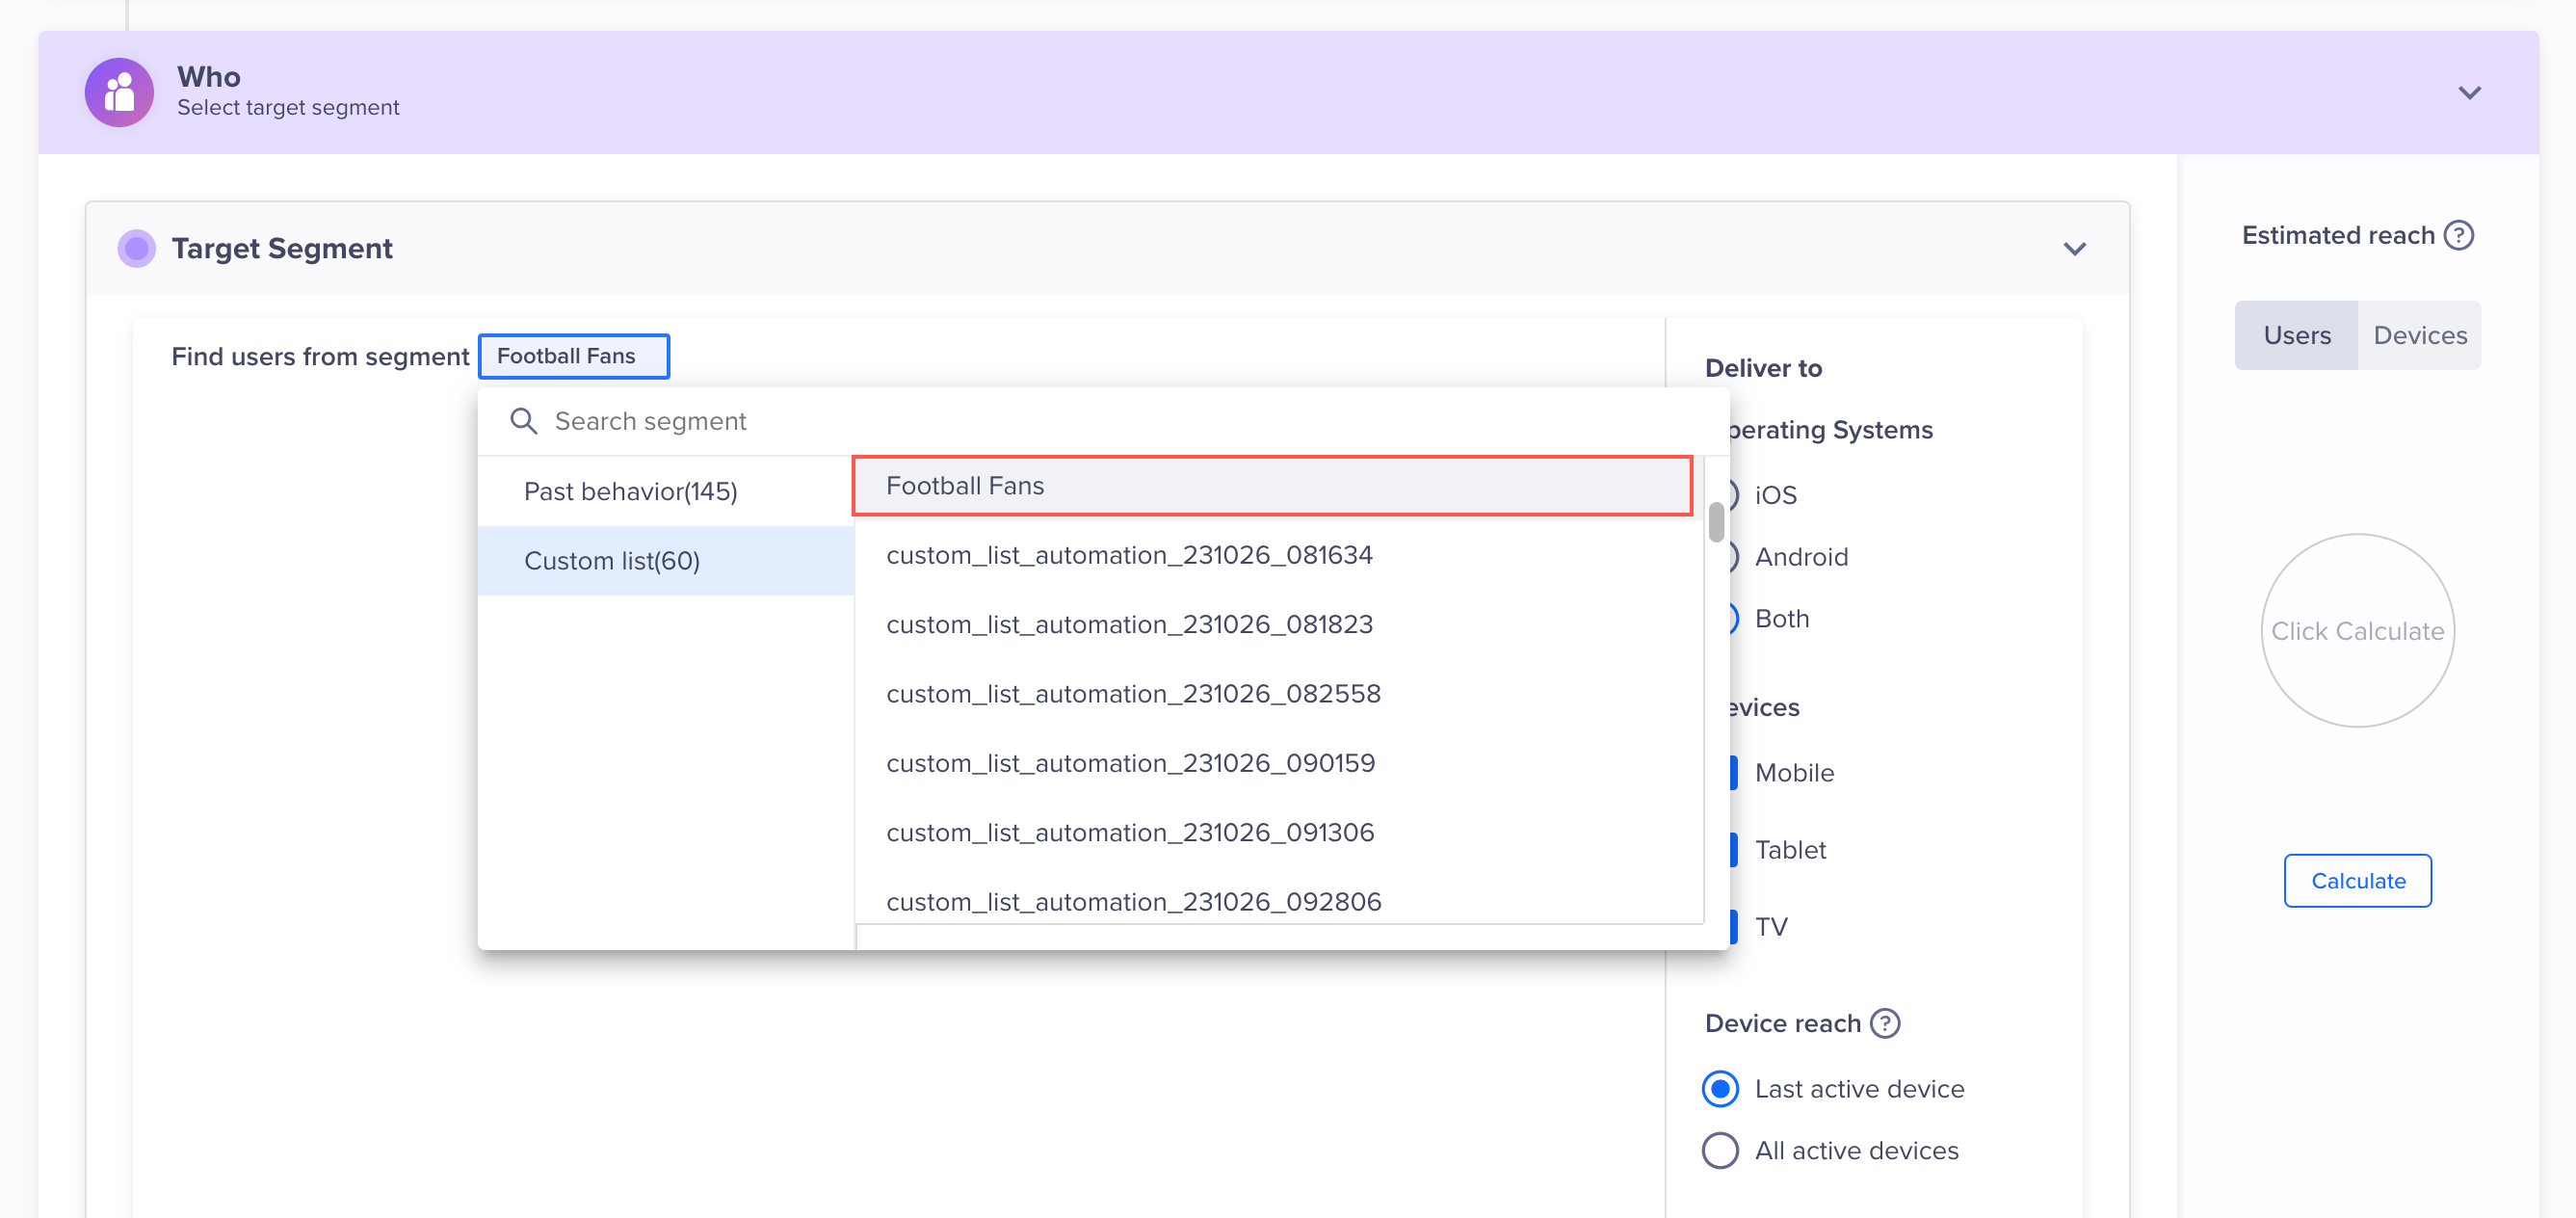
Use Custom List Segment in Campaign Creation
Updated about 1 month ago
