Geofencing Campaign
Send messages to your users based on their location.
Overview
A geofence is a virtual geographic area, represented as latitude and longitude pairs combined with a radius, forming a circle in a specific position on a map. CleverTap offers geofencing, a GPS location-based service. Customers can use this service to engage their audience by sending relevant messages to Android and iOS users. Geofences can vary in size, and a cluster can contain up to 100 geofences.
Customers can define geofences around the world from the CleverTap dashboard. Campaigns are delivered in real time to users as they exit or enter geofences or sent as follow-ups hours or days later. CleverTap's location analytics create user data as users enter or exit geofences. This data can be used for retargeting. Geofence-specific analytics can generate insight into activities or locations of interest.
Create Geofences
To create geofences, perform the following steps:
- From the CleverTap dashboard, navigate to Settings > Geofences.
- Click Add Cluster and select Create to create a new geofence cluster.

Geofence Cluster
- Select the preferred unit of measure for tracking the location of the geofence clusters. Select the distance in kilometers or miles and click Continue.

Set Up Geofence
- Click the Search for location window to select the area you want to display on the map or enter a location in the search bar. A setting pop-up window displays.
- Enter a Geofence name.
- Determine the radius that the geofence must cover.
- Click Save on the pop-up window.

Define Geofence Radius
- Click Continue.
- Enter a geofence cluster name.
- Select the start and end time of tracking the users. If you select Select date and time, day and time options display beneath the radio buttons where you can choose a future start and end date and time.
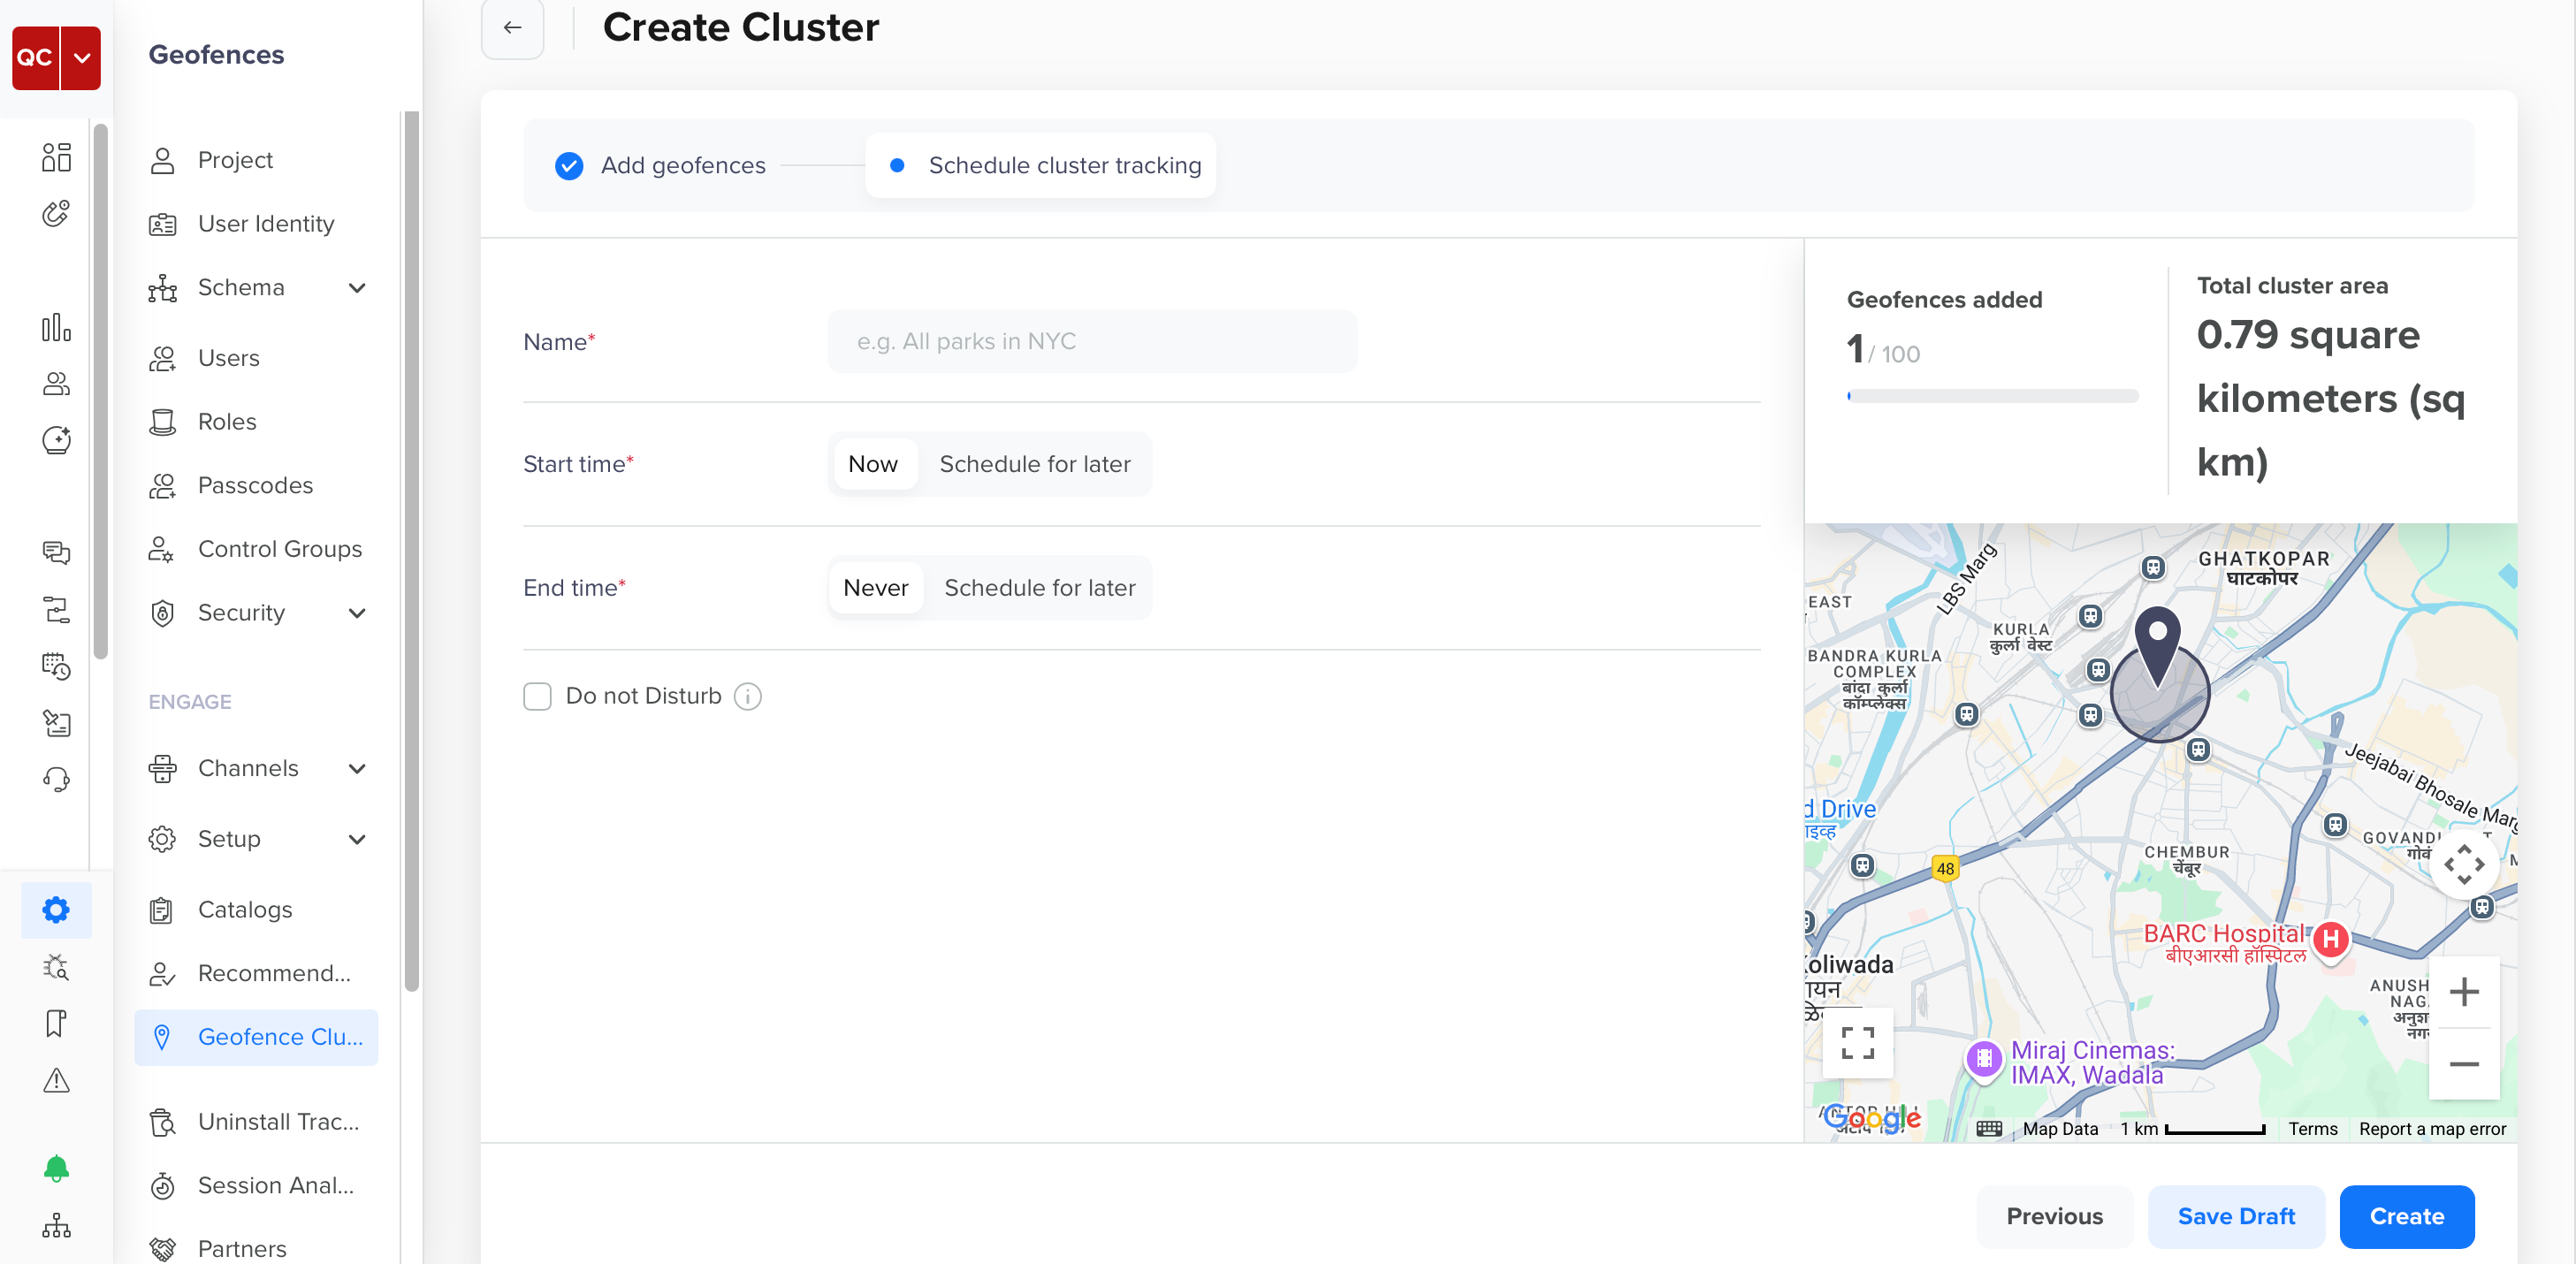
Schedule Cluster Tracking
- When entering the details for the geofence cluster, you can select Do Not Disturb (DND). The DND option prevents triggering an engagement for users who enter the geofence on specified days and times.

Set Up Do Not Disturb Details
- Click Create or Save Draft. You can also edit or delete a geofence by clicking the edit or delete icon.
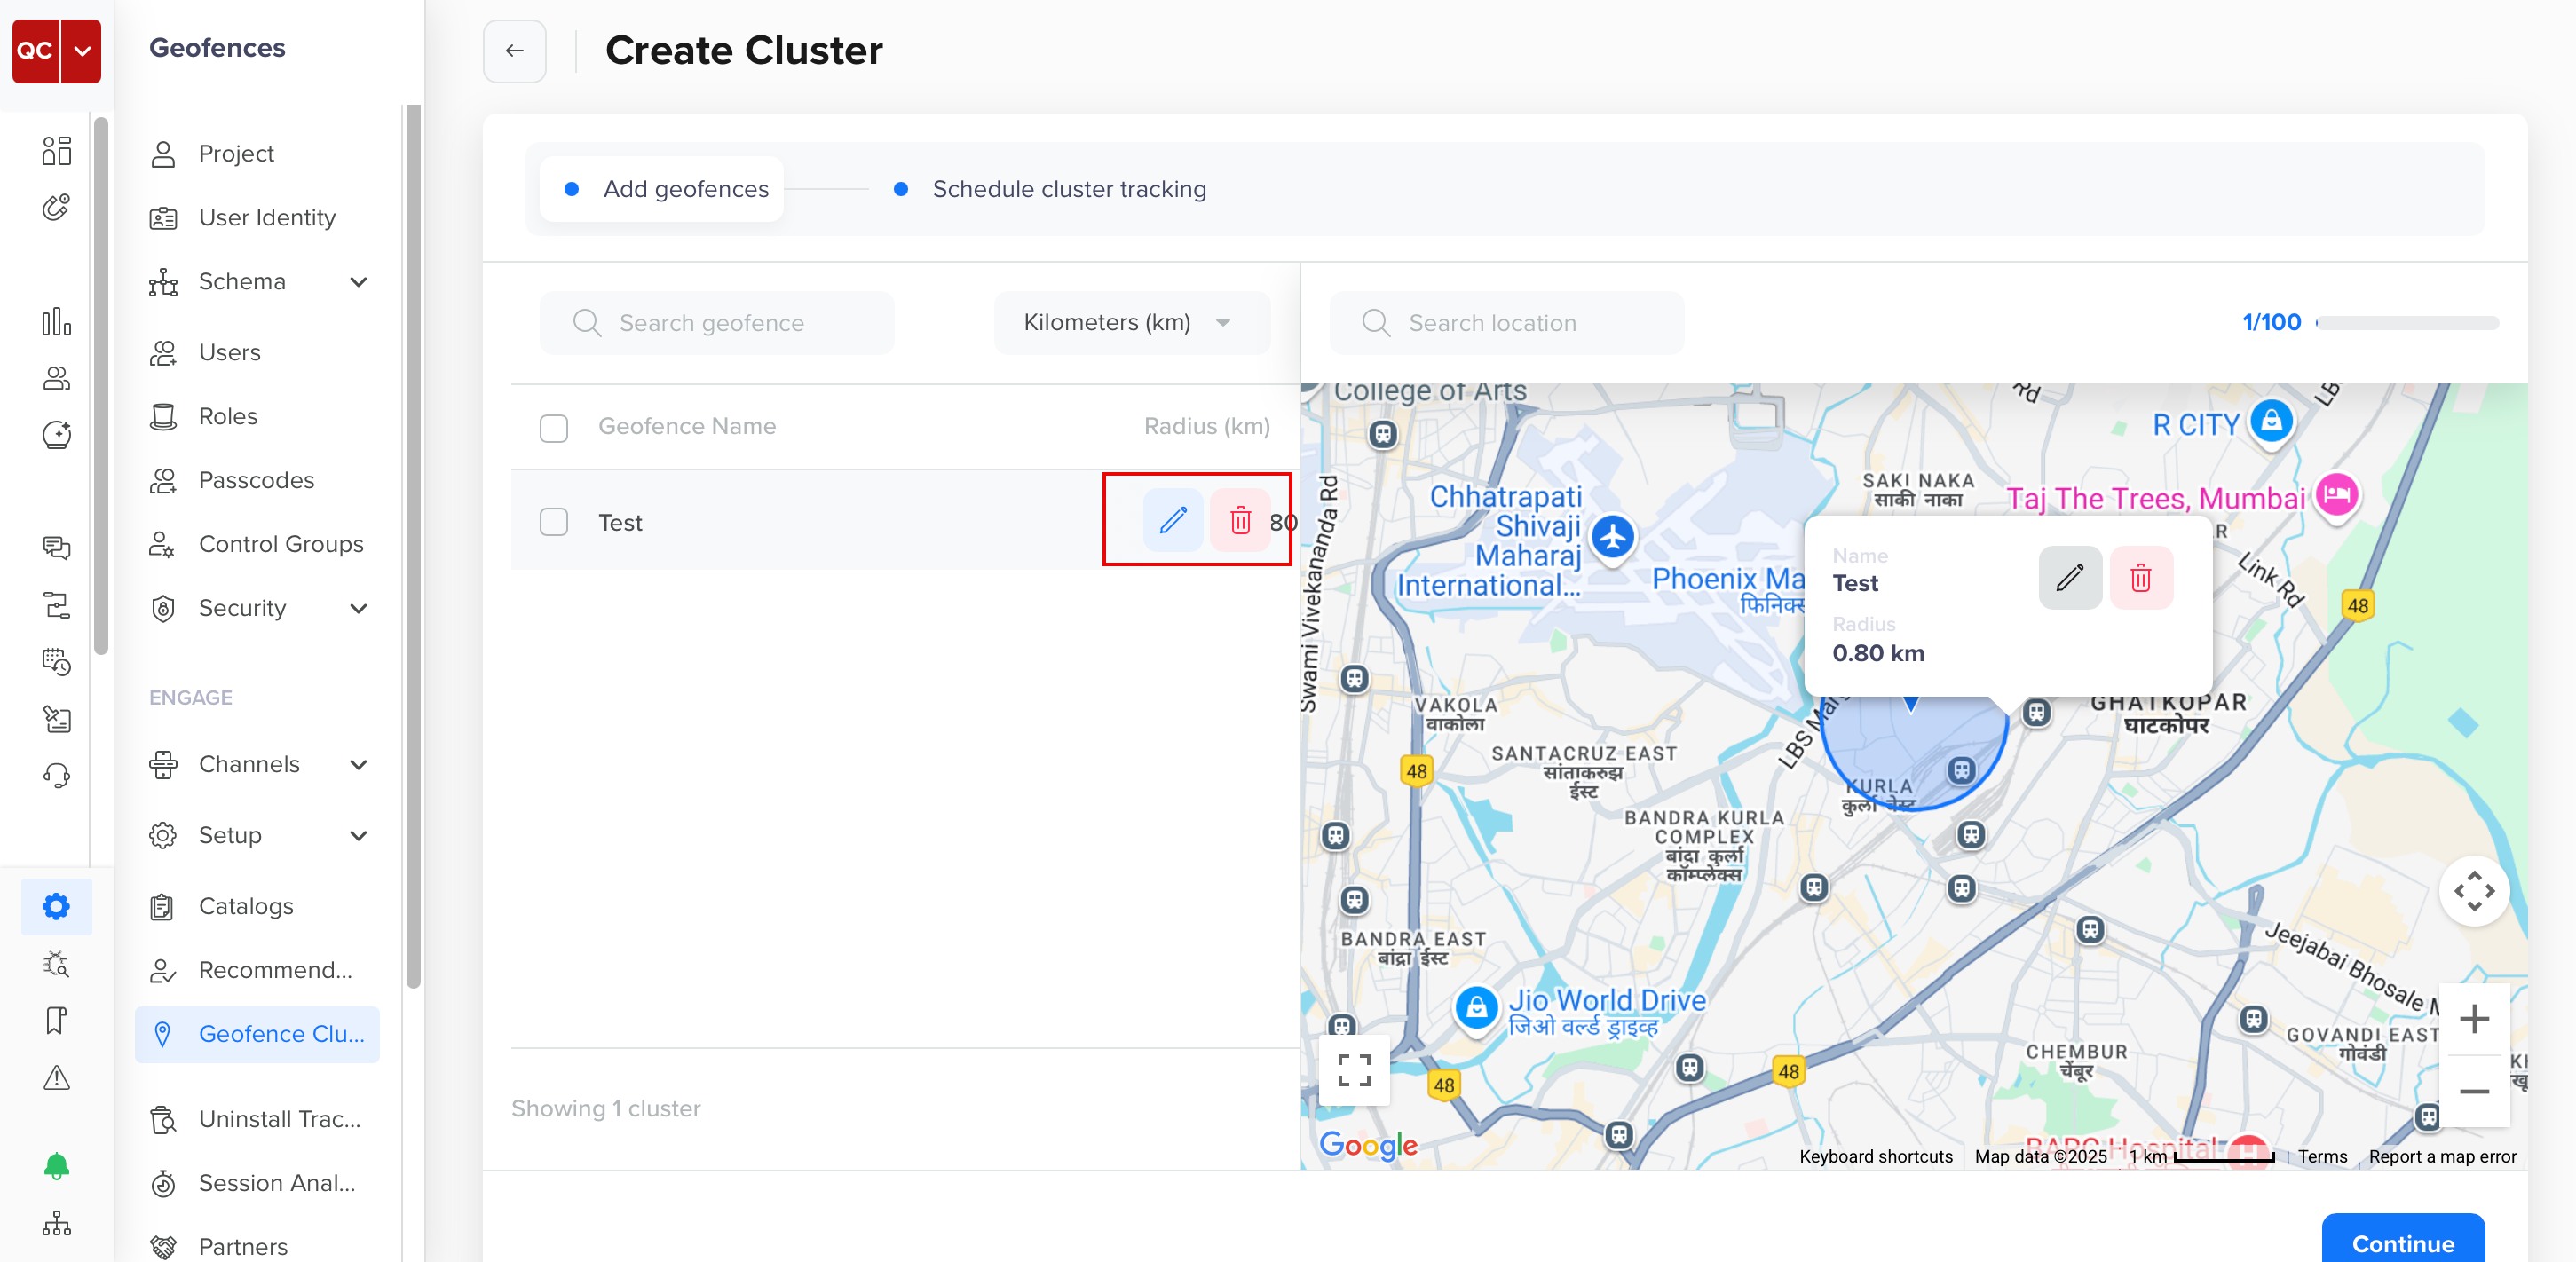
Edit or Delete Geofences in a Cluster
Geofence and Cluster LimitsYou can create up to 100 geofences in each cluster and up to 100 clusters for your app.
Geofence Operations
You can perform different actions on the geofence clusters from the All Geofences page. The following sections briefly discuss each operation.
Filter Geofence Clusters
You can quickly search your geofence clusters by applying the required filters. To do so, click Filters to filter the list of available geofence clusters based on their states, such as Draft, Scheduled, Active, Paused, and Archived.
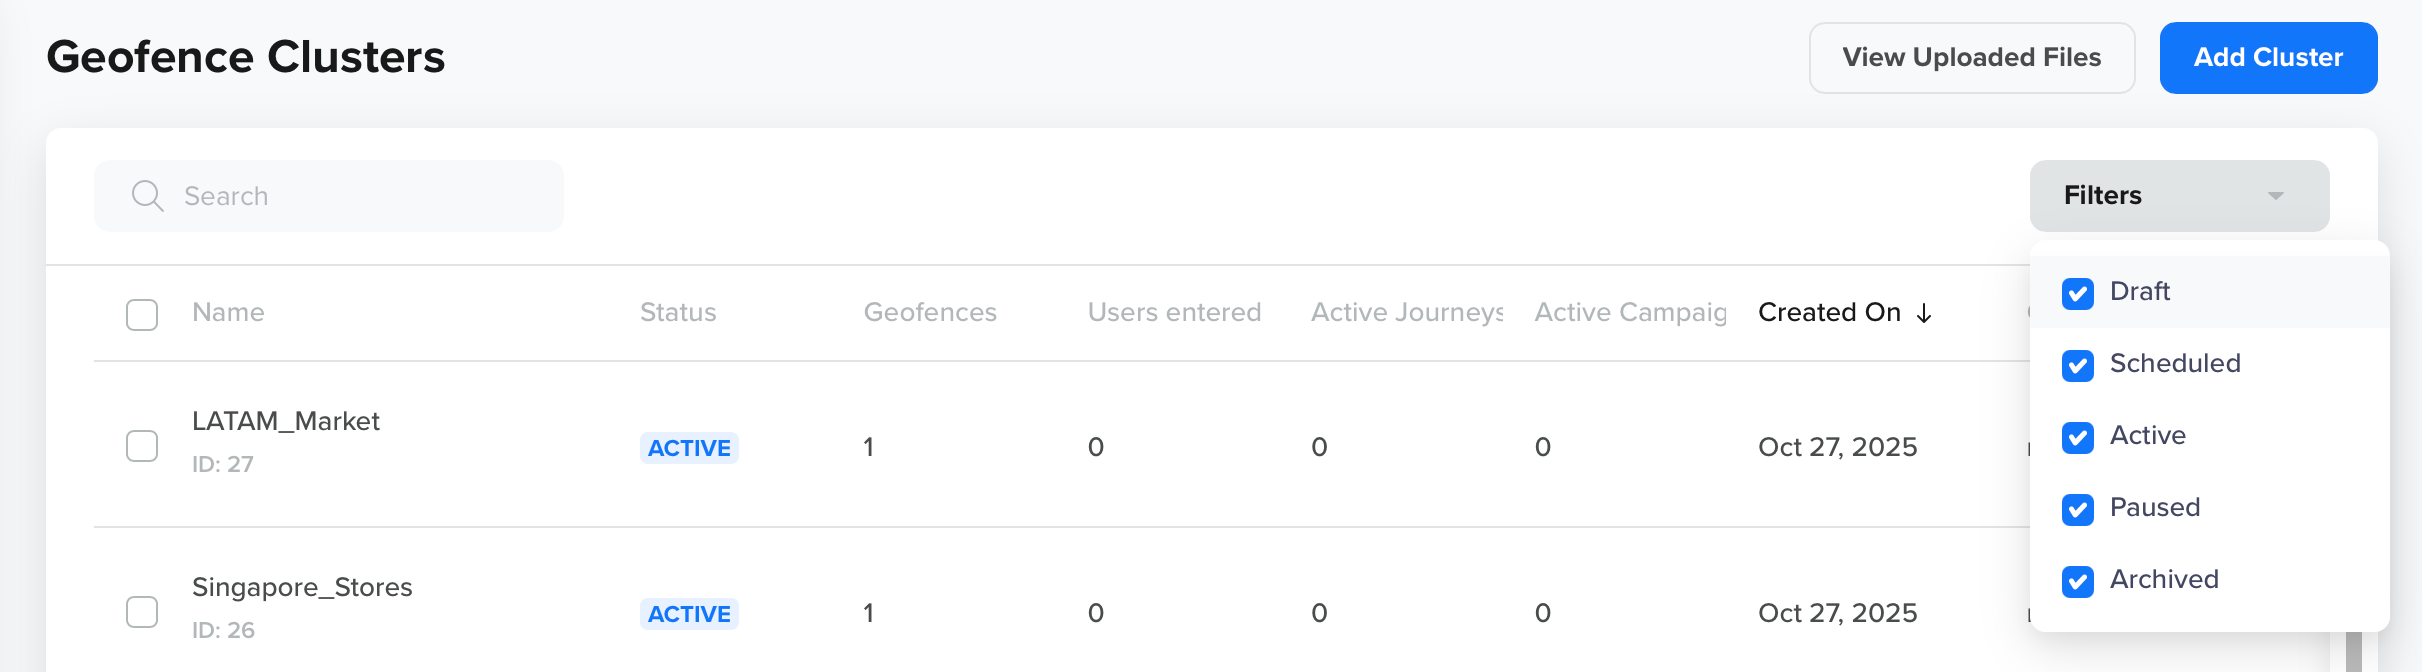
Filters
Manage Individual Geofence Clusters
You can perform the following actions on a geofence cluster:
- Edit: Modify the geofence cluster's name, location, or radius.
- Copy: Duplicate an existing cluster to quickly create a similar one.
- Pause: Temporarily deactivate the cluster without deleting it.
Manage Individual Geofences
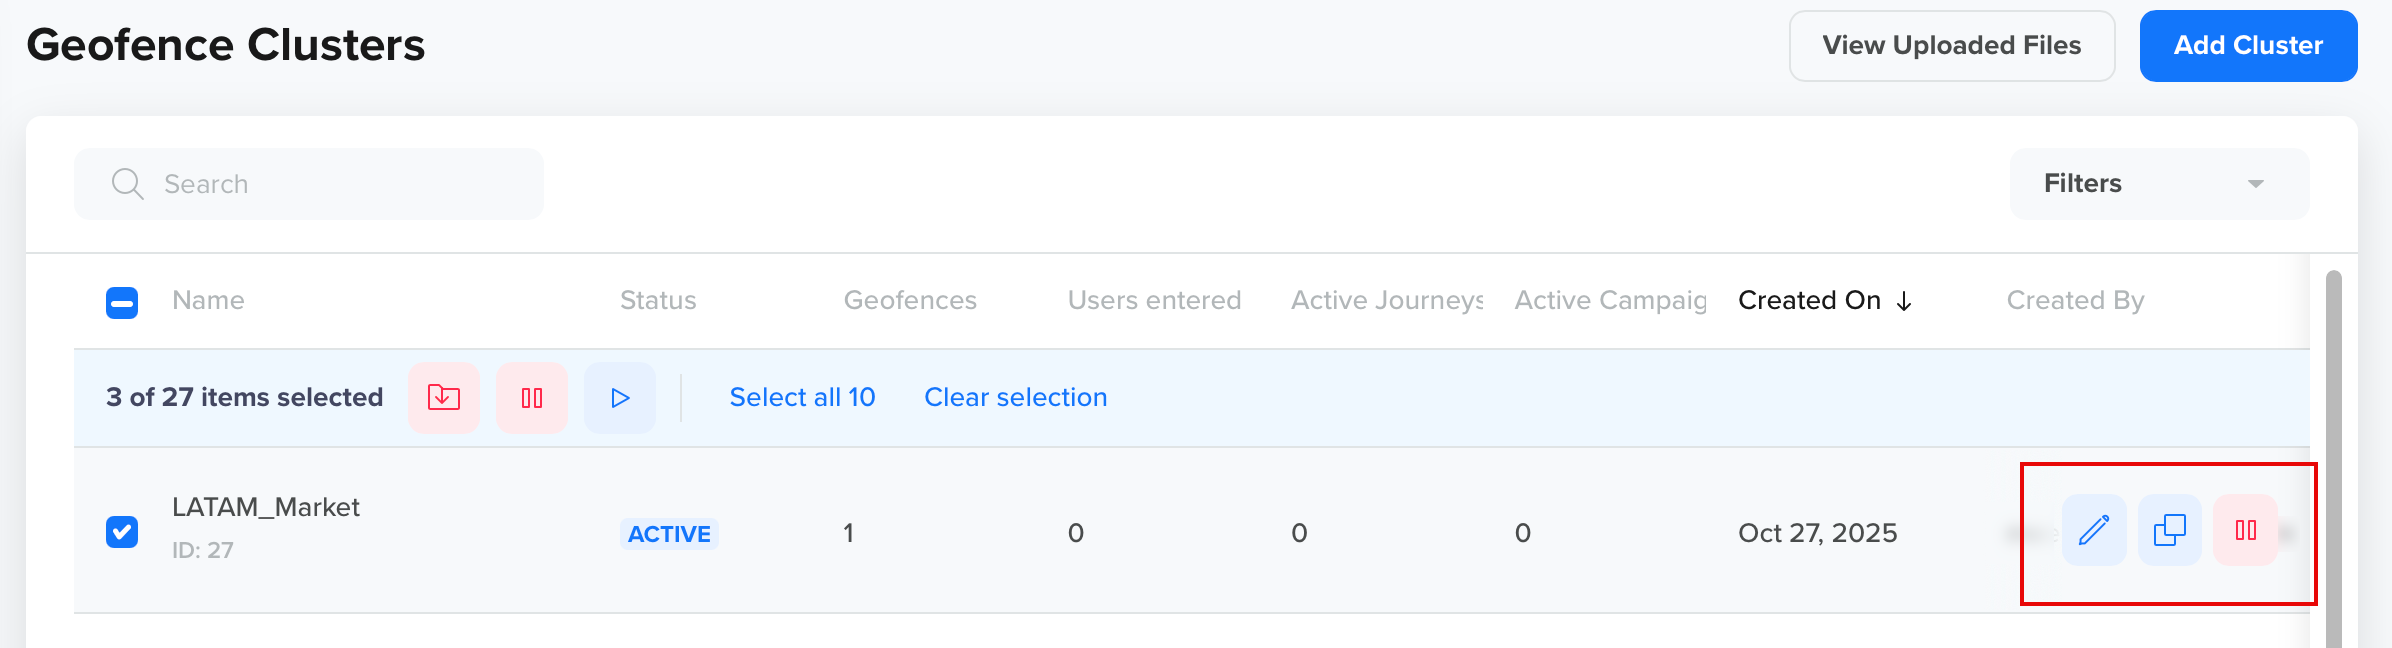
Bulk Actions
You can perform bulk actions on multiple geofence clusters at once using the toolbar at the top of the All Geofences page. The following bulk actions are available:
- Pause: Temporarily deactivate the selected clusters. They will stop tracking user activity until reactivated.
- Start: Activate selected clusters to begin location tracking.
- Archive: Archive clusters that are no longer needed. They can be reactivated if needed and event tracking will resume.
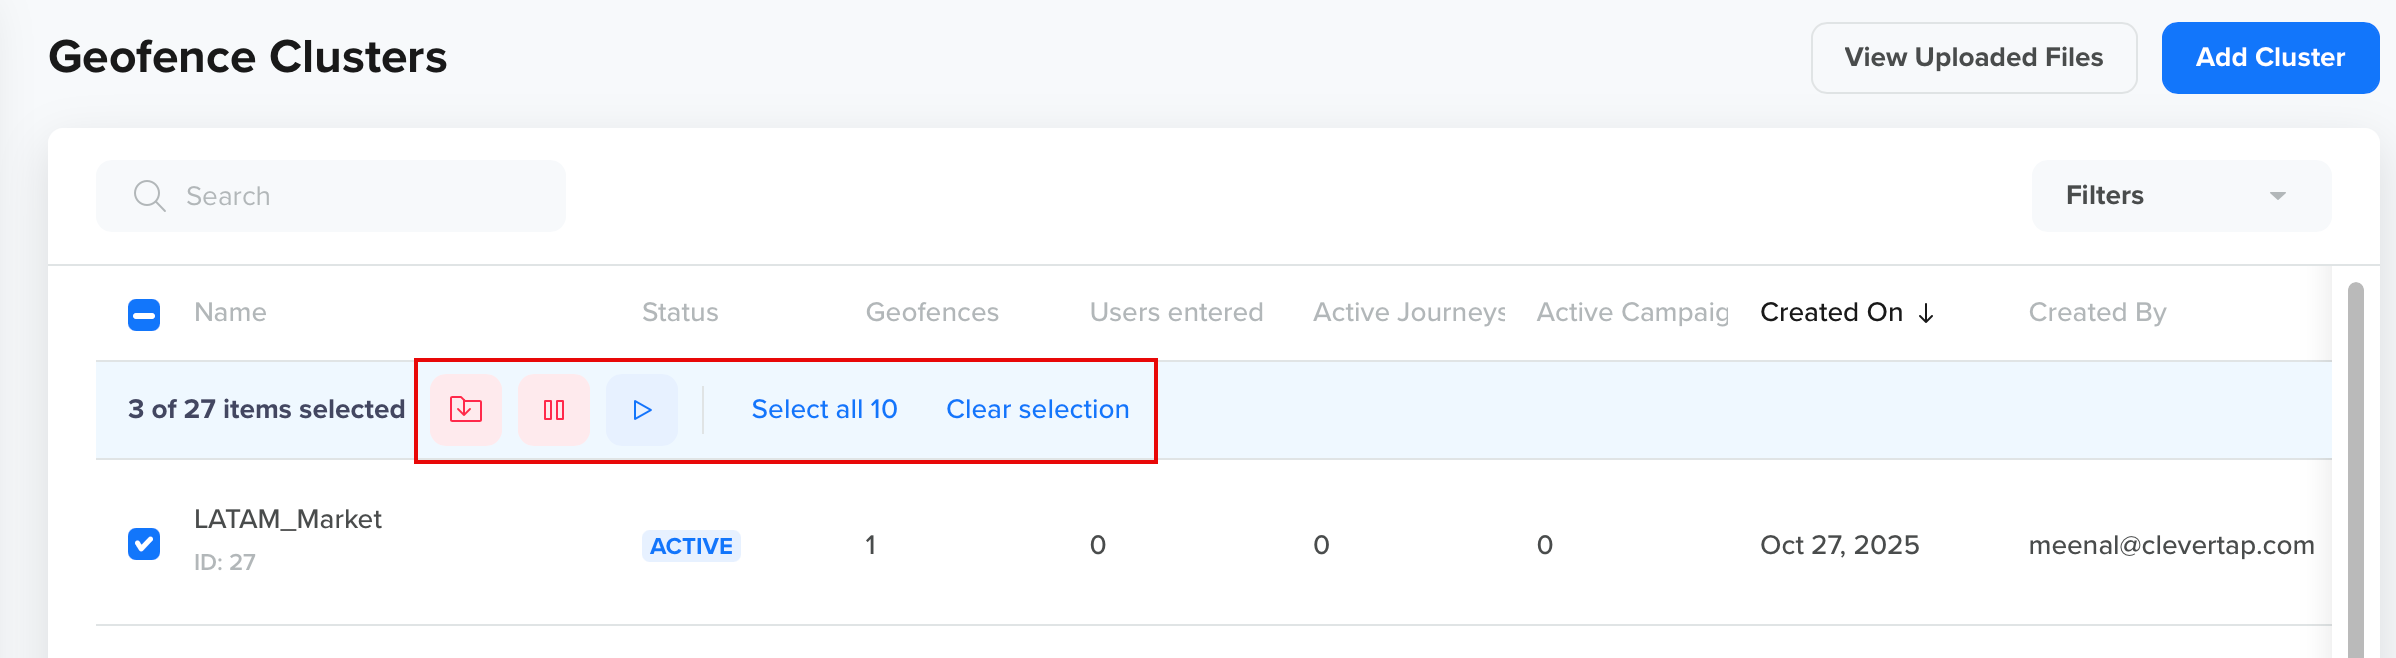
Bulk Actions
Bulk Upload
You can upload multiple geofences in bulk to new and existing clusters using a CSV or JSON file, instead of manually adding geofences. This feature is useful for scenarios involving a large number of geofences, such as, for franchises, stores, or branches.
Private BetaCurrently, this feature is released in Private Beta. If you want access to this feature, contact your Account Manager.
To bulk upload geofences, perform the following steps:
- From the CleverTap dashboard, navigate to Settings > Geofences.
- Click Add Cluster and select Upload to bulk upload geofences.
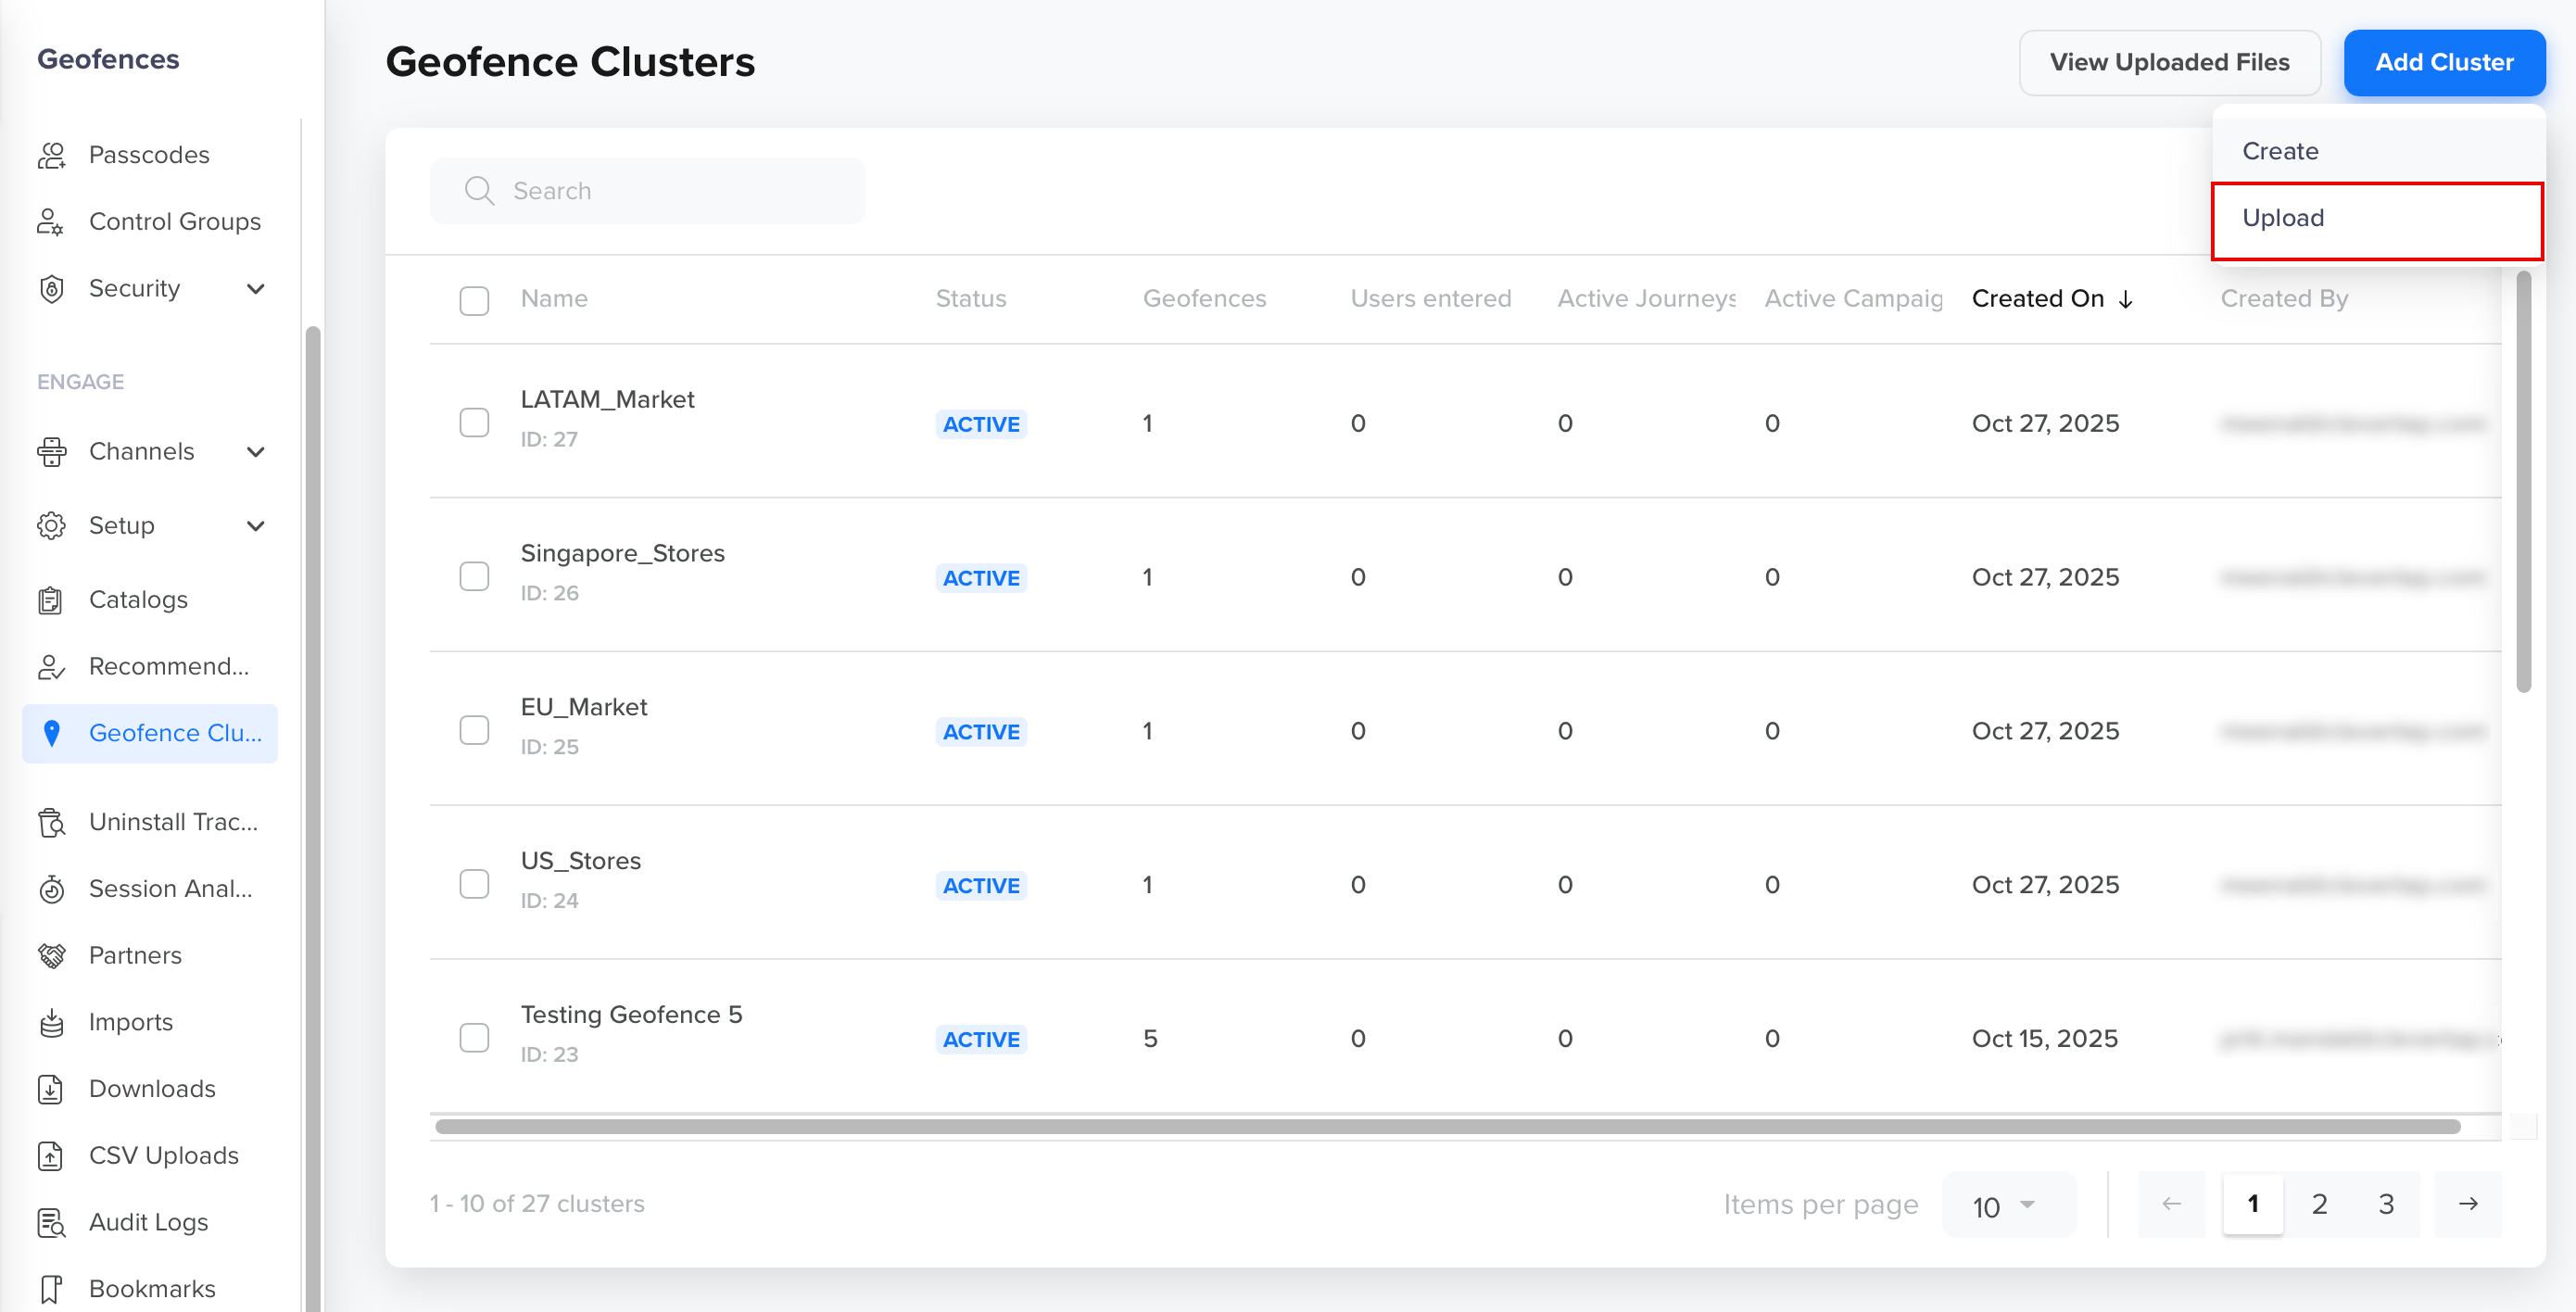
Upload Geofence Cluster
- Click Upload File or drag and drop the files to start the upload process.
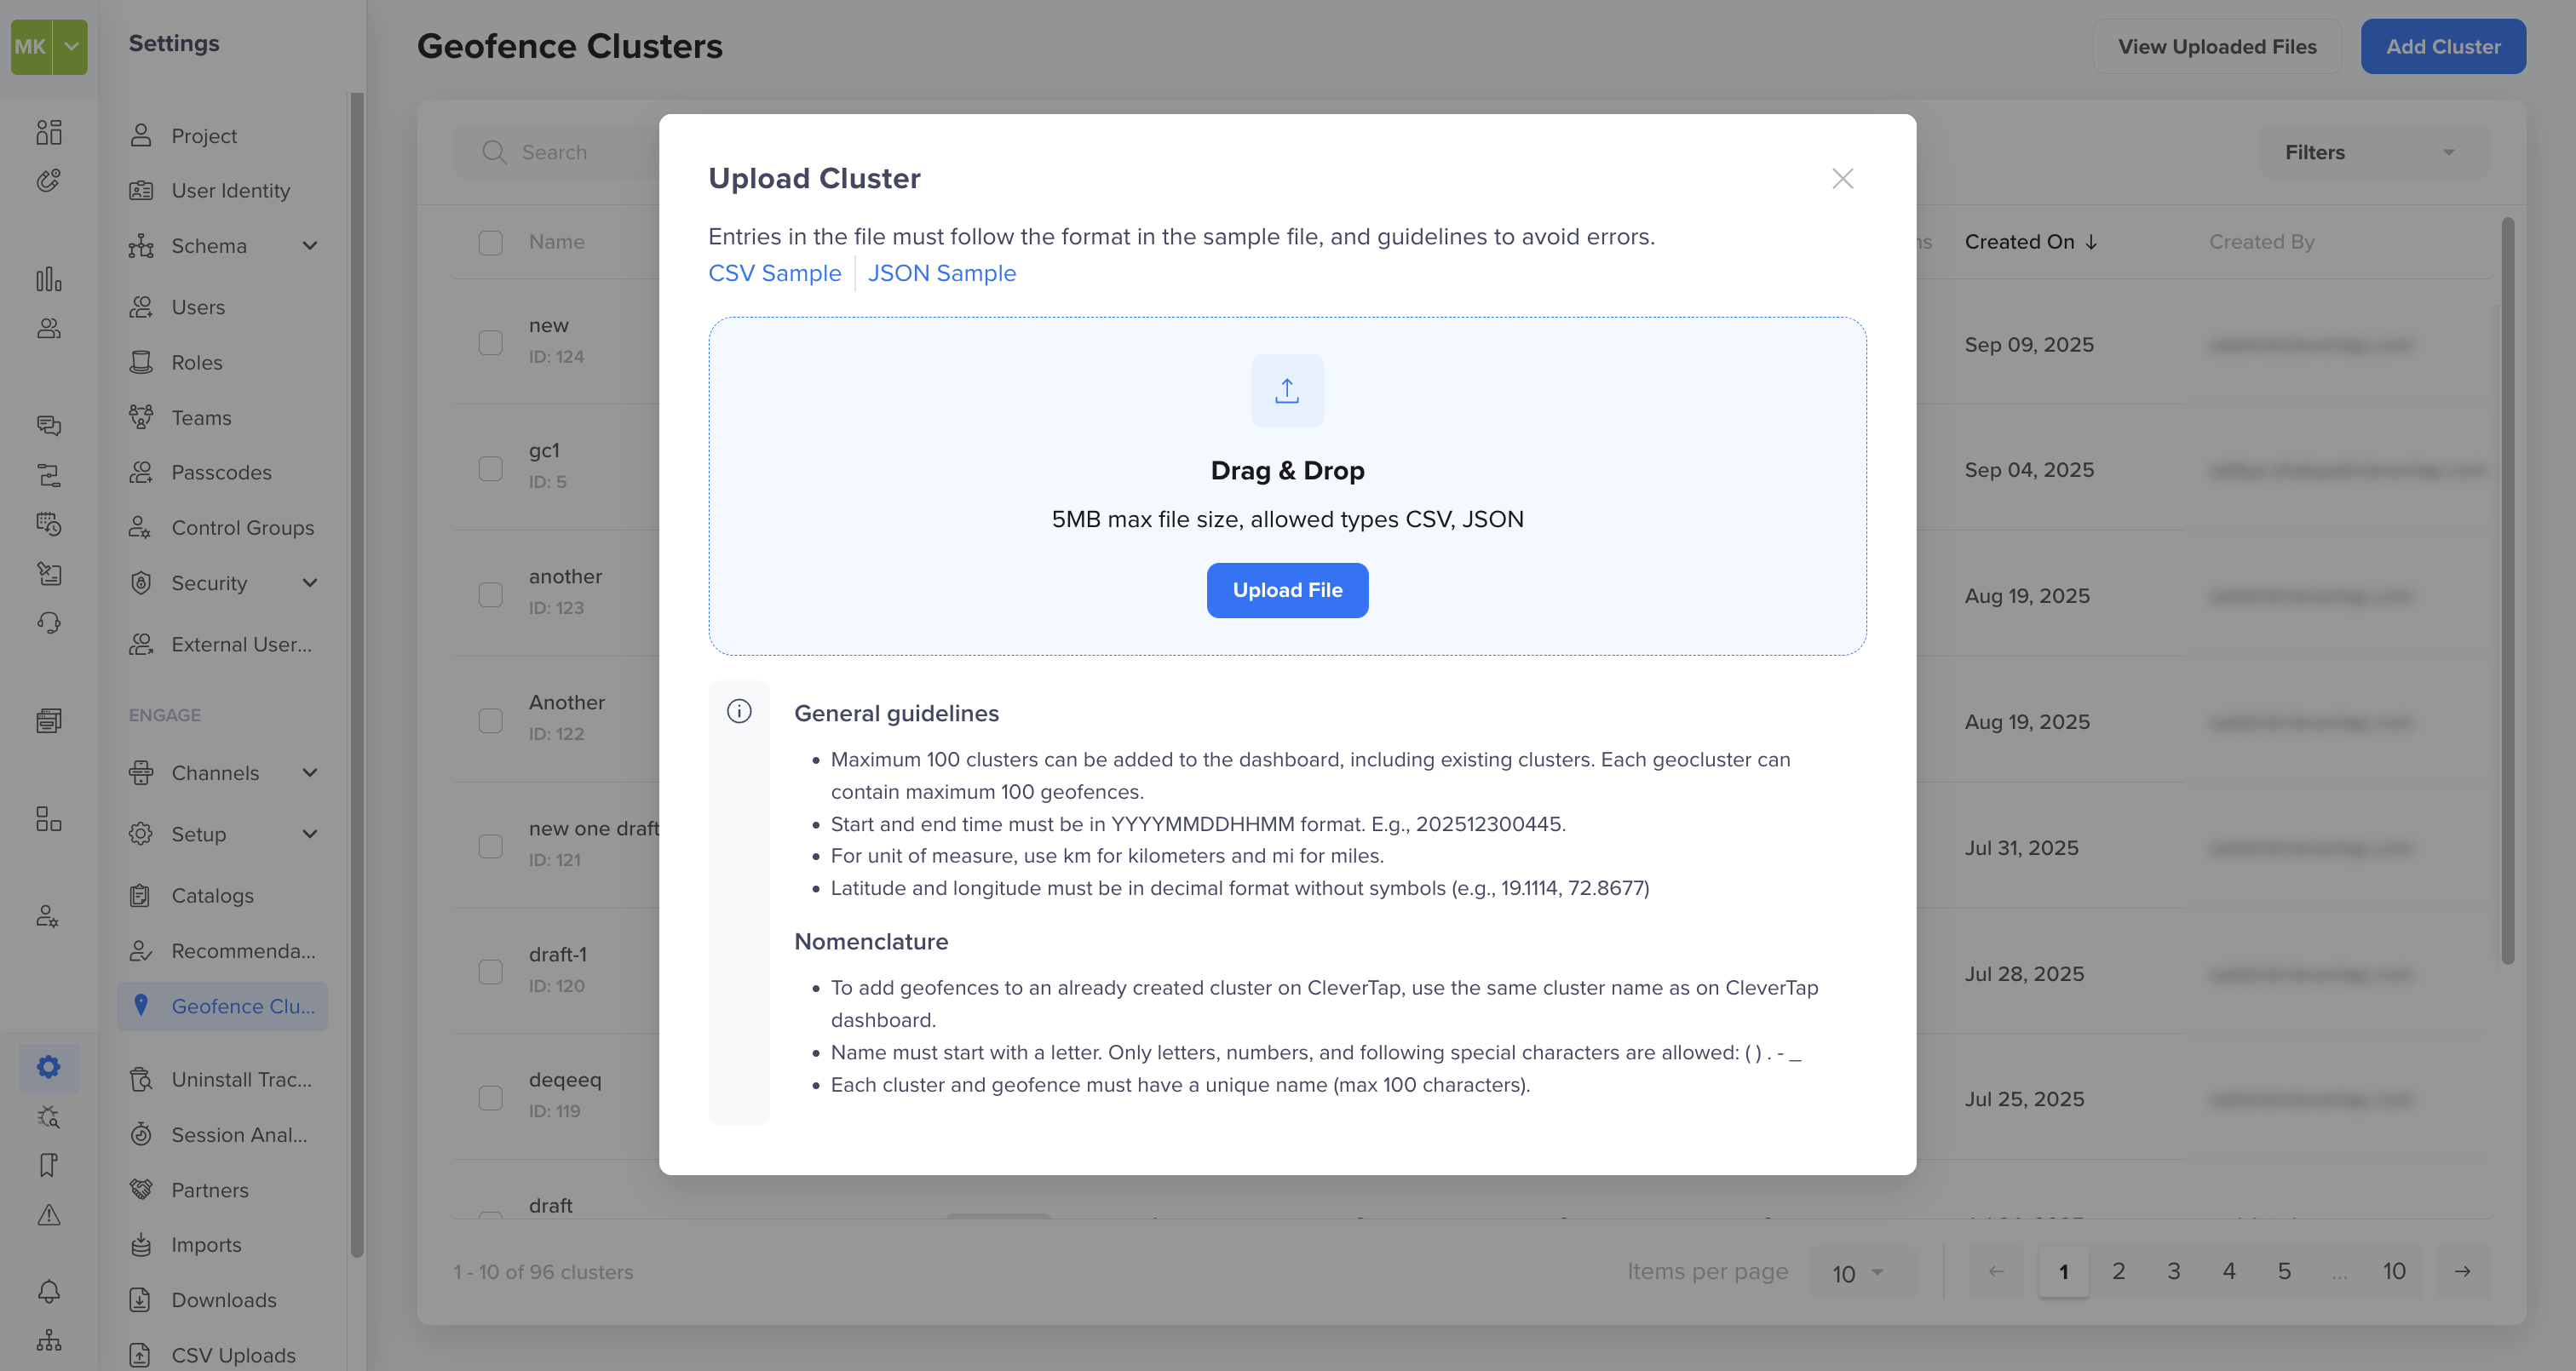
Upload Cluster
- To see previously uploaded files, click View Uploaded Files. Here you can filter by status: Processing, Imported, Partially Imported, and Failed. Once your upload is processed, you will receive an email confirmation.

View Uploaded Files
Note
- If a file includes mixed units for a new cluster, the first valid unit is used and others are adjusted accordingly. For existing clusters, their unit is retained.
- Follow the below general guidelines for bulk uploads:
- Maximum 100 clusters can be added to the dashboard, including existing clusters. Each geocluster can contain maximum 100 geofences.
- Maximum upload limit per file is 10,000 geofences.
- Start and end time must be in YYYYMMDDHHMM format. For example, 202512300445.
- For unit of measure, use
kmfor kilometers andmifor miles.- Latitude and longitude must be in decimal format without symbols (For example, 19.1114, 72.8677)
- The supported file formats are CSV and JSON.
- Maximum file size is 5 MB.
Error Scenarios & Messages
If the file fails validation, it will not be uploaded. You will receive detailed feedback by email, including an error report. Refer to the following table for common error scenarios:
| Scenario | Message |
|---|---|
| Invalid format | Invalid file format. Try again using a CSV or JSON file. |
| File too large | File size limit of 5MB exceeded. |
| Duplicate geofence/cluster name | Geofence with this name already exists. Try another name. |
| More than 100 geofences in a cluster | Limit of 100 geofences per cluster exceeded. |
| Archived cluster | Cannot import to archived cluster. |
| Invalid coordinates | Invalid coordinates. Check and rectify. |
| Invalid name characters | Name must start with a letter. Only letters, numbers, and special characters ( ) . - are allowed._ |
Geofence Cluster States
Geofence Clusters' states helps track progress and manage campaigns efficiently. Each state has distinct characteristics that determine what actions can be performed. The following table explains the campaign states.
| State | Description |
|---|---|
| Draft | The geofence is created but not yet live. |
| Scheduled | The geofence is set to go live at a future time. |
| Active | The geofence is currently live and tracking user activity. |
| Paused | The geofence is temporarily paused; can be resumed later. |
| Archived | The geofence is no longer in use. This will pause tracking and stop all engagements. |
Geofence EventsCleverTap raises three system events related to geofence interactions. The following events can be used to run campaigns, analytics, and segmentation:
- Cluster-level Events: These events fire when a user enters or exits a geocluster.
- Geocluster Entered
- Geocluster Exited
- Fence-level Events: These events fire when a user enters a geofence.
- Geofence Entered
Each event includes the following properties:
- Cluster ID
- Cluster Name
- Geofence ID
The geocluster name displays under event properties if the event has at least one occurrence.
For more information, refer to System Events.
Common Use Cases
Learn how to create personalized, location-triggered push campaigns using geofences.
Scenario
A retail company that sells apparel wants to increase traffic to its physical stores in Mumbai. They have multiple store locations and want to send personalized promotions to customers close to their stores. Using CleverTap's geofence campaign, the retail company can target users who enter the specified radius around their store locations with real-time and location-based messages.
Steps to Implement a Geofence Campaign
To solve the above business use case, create a push notification campaign adding the geofence cluster. The retail company can target users most likely to visit their physical stores and increase footfall. By using CleverTap's geofence campaign, they can send real-time, location-based messages that are personalized and relevant to the user.
The following are the steps to create a push notification campaign with a geofence cluster for users who enter the geofence:
1. Set Up a Geofence Cluster
Set up a geofence cluster around the store locations from the CleverTap dashboard. You can specify the radius and location coordinates of each store location. To set up a geofence cluster, refer to Create Geofences.
2. Create a Campaign
After you have set up the geofence cluster and created the segment, you can create a geofence campaign from the CleverTap dashboard. To do so, perform the following steps:
- From the dashboard, navigate to Campaigns.
- Click + Campaign.
- Select Push Notifications as a messaging channel.

Create Campaign
- Select the Live Behavior.
- Click Done.

Set Qualification Criteria
- Select Conversion Tracking under the Set a goal section.
- Select the conversion event, time, and revenue property.
- Click Done.

Set a Goal
- Select the Geofence Entered event with event property as Geofence ID from the Who section of campaign creation.

Define - Who
This ensures that the message is only sent to users close to the store locations.
- Set up the message content and design. For more information, refer to Define Message Content
3. Personalize the Message
You can also use CleverTap's personalization features to make the message more relevant to the user. For example, you can include the user's name or previous purchase history in the message. For more information, refer to Personalize Message.
4. Schedule the Campaign
Finally, schedule the campaign to be sent at a specific time or based on particular triggers. For example, send a campaign when the user enters the geofence for the first time.
Maximize your Location-Based Marketing with best practices and strategies to deliver targeted messages to users based on their physical location.
FAQs
Here are answers to common questions about using Geofences with Campaigns.
What happens when I unarchive a draft geofence?
When a draft geofence is unarchived, all clusters will go back to the draft state. Archived clusters can be seen using the Filters dropdown.
What happens if I pause a geofence and resume it later?
When you pause a geofence, it stops tracking user activity. You can resume event tracking for the geofence cluster anytime by clicking Resume tracking. You will also be able to create engagements for the cluster.
Can I edit a geofence while it's active?
Yes, you can edit the name, radius, or coordinates of a geofence. The changes apply immediately to live tracking and may affect ongoing campaigns. It is recommended to pause the geofence before making major edits to avoid inconsistent behavior.
Will users receive messages if they enter a geofence during the Do Not Disturb (DND) window?
No. If the user enters the geofence during an active DND window, no engagement is triggered even if the campaign is active.
Updated 6 months ago