Font Manager
Overview
This feature enables you to add and manage custom fonts and use them in your email campaigns. It simplifies font management across the Drag & Drop and Rich Media editors.
Feature AvailabilityThe feature is available to customers on the Advanced and Cutting Edge plans.
Add Custom Font
You can add custom fonts by navigating to Settings _>Channel > Email > Advanced Setup from the CleverTap dashboard. You can add up to 100 custom fonts.
The following are the steps to add a custom font:
- From the Advanced Setup page, click Font Manager.
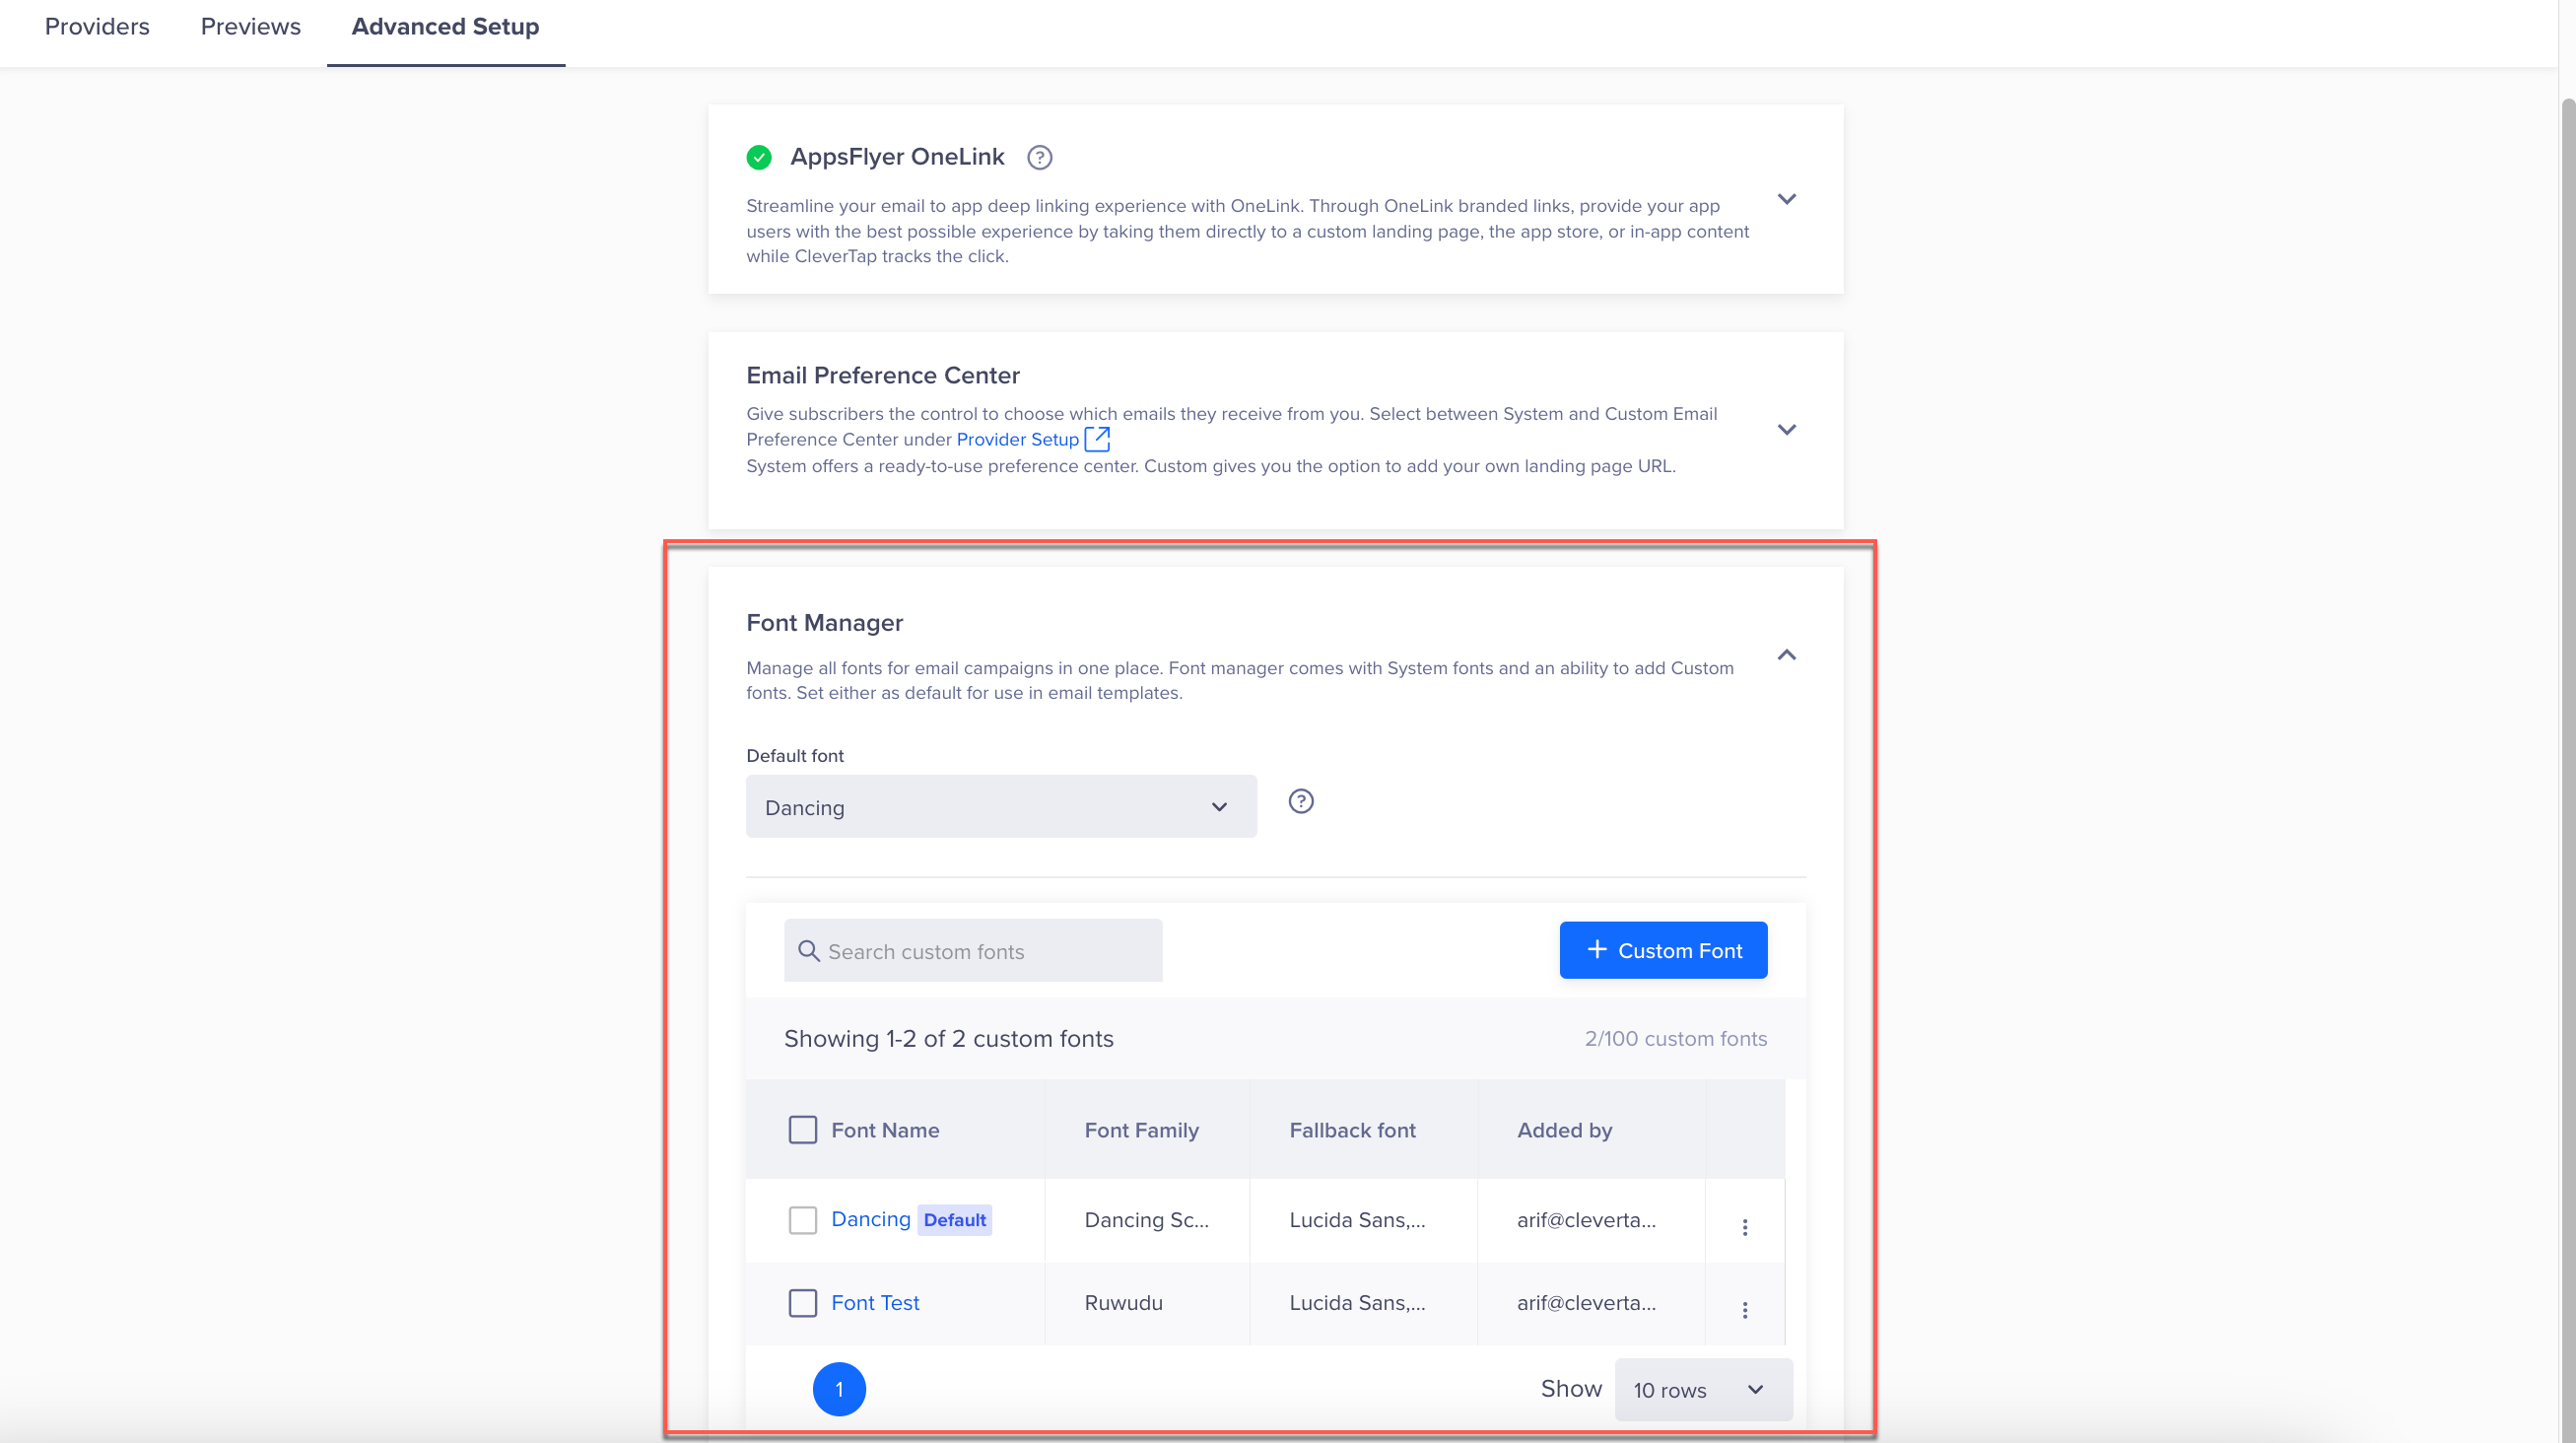
Font Manager
- Click + Custom Font. The Add Font popup opens.
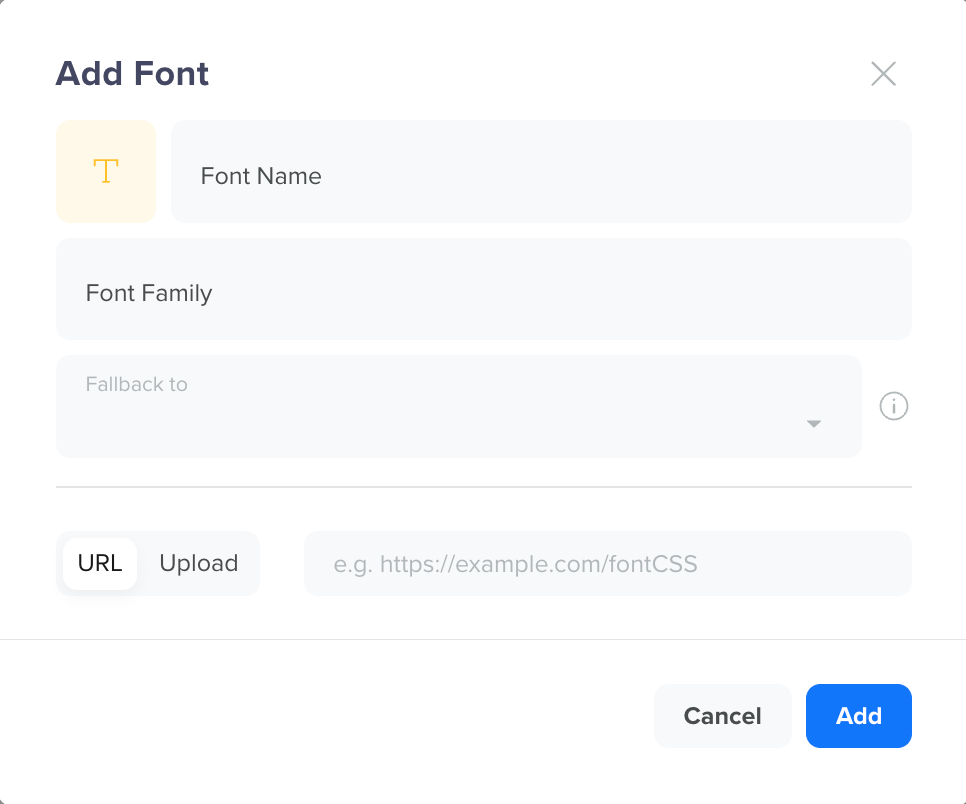
Add Custom Font
- Enter the following details:
Field Name | Description |
|---|---|
Font Name | Uniquely identifies the font. This field has a limit of up to 50 characters. |
Font Family | Defines the style applied to the font. This field has a limit of up to 50 characters. The custom font family must match the name of the font face in the CSS file. |
Font URL | If the font is not on your local system, you can select this option to add the URL for the font you want to add. The URL must point to a CSS file. The custom font file must have the following header: |
Upload Font | If you already have a font file available on your local system, choose Upload Font, and click Upload to upload the CSS file for your custom font. The file size should be a maximum of 1 MB. |
|
|
*The fields marked with asterisk sign are mandatory.
- Click Add to add the custom font.
Sample CSS code:
@font-face {
  font-family: 'Dancing Script';
  font-style: normal;
  font-weight: 400;
  font-display: swap;
  src: url(https://fonts.gstatic.com/s/dancingscript/v25/If2RXTr6YS-zF4S-kcSWSVi_szLgiuEHiC4W.woff2) format('woff2');
  unicode-range: U+0000-00FF, U+0131, U+0152-0153, U+02BB-02BC, U+02C6, U+02DA, U+02DC, U+0304, U+0308, U+0329, U+2000-206F, U+2074, U+20AC, U+2122, U+2191, U+2193, U+2212, U+2215, U+FEFF, U+FFFD;
}
Set Up Default Font
You can also set up the system and custom fonts as the default font for your email campaigns. Select the font from the Default font dropdown to set up the default font for your email campaigns.
The default font cannot be deleted. If you still want to delete it, change the default font and then delete the required font.
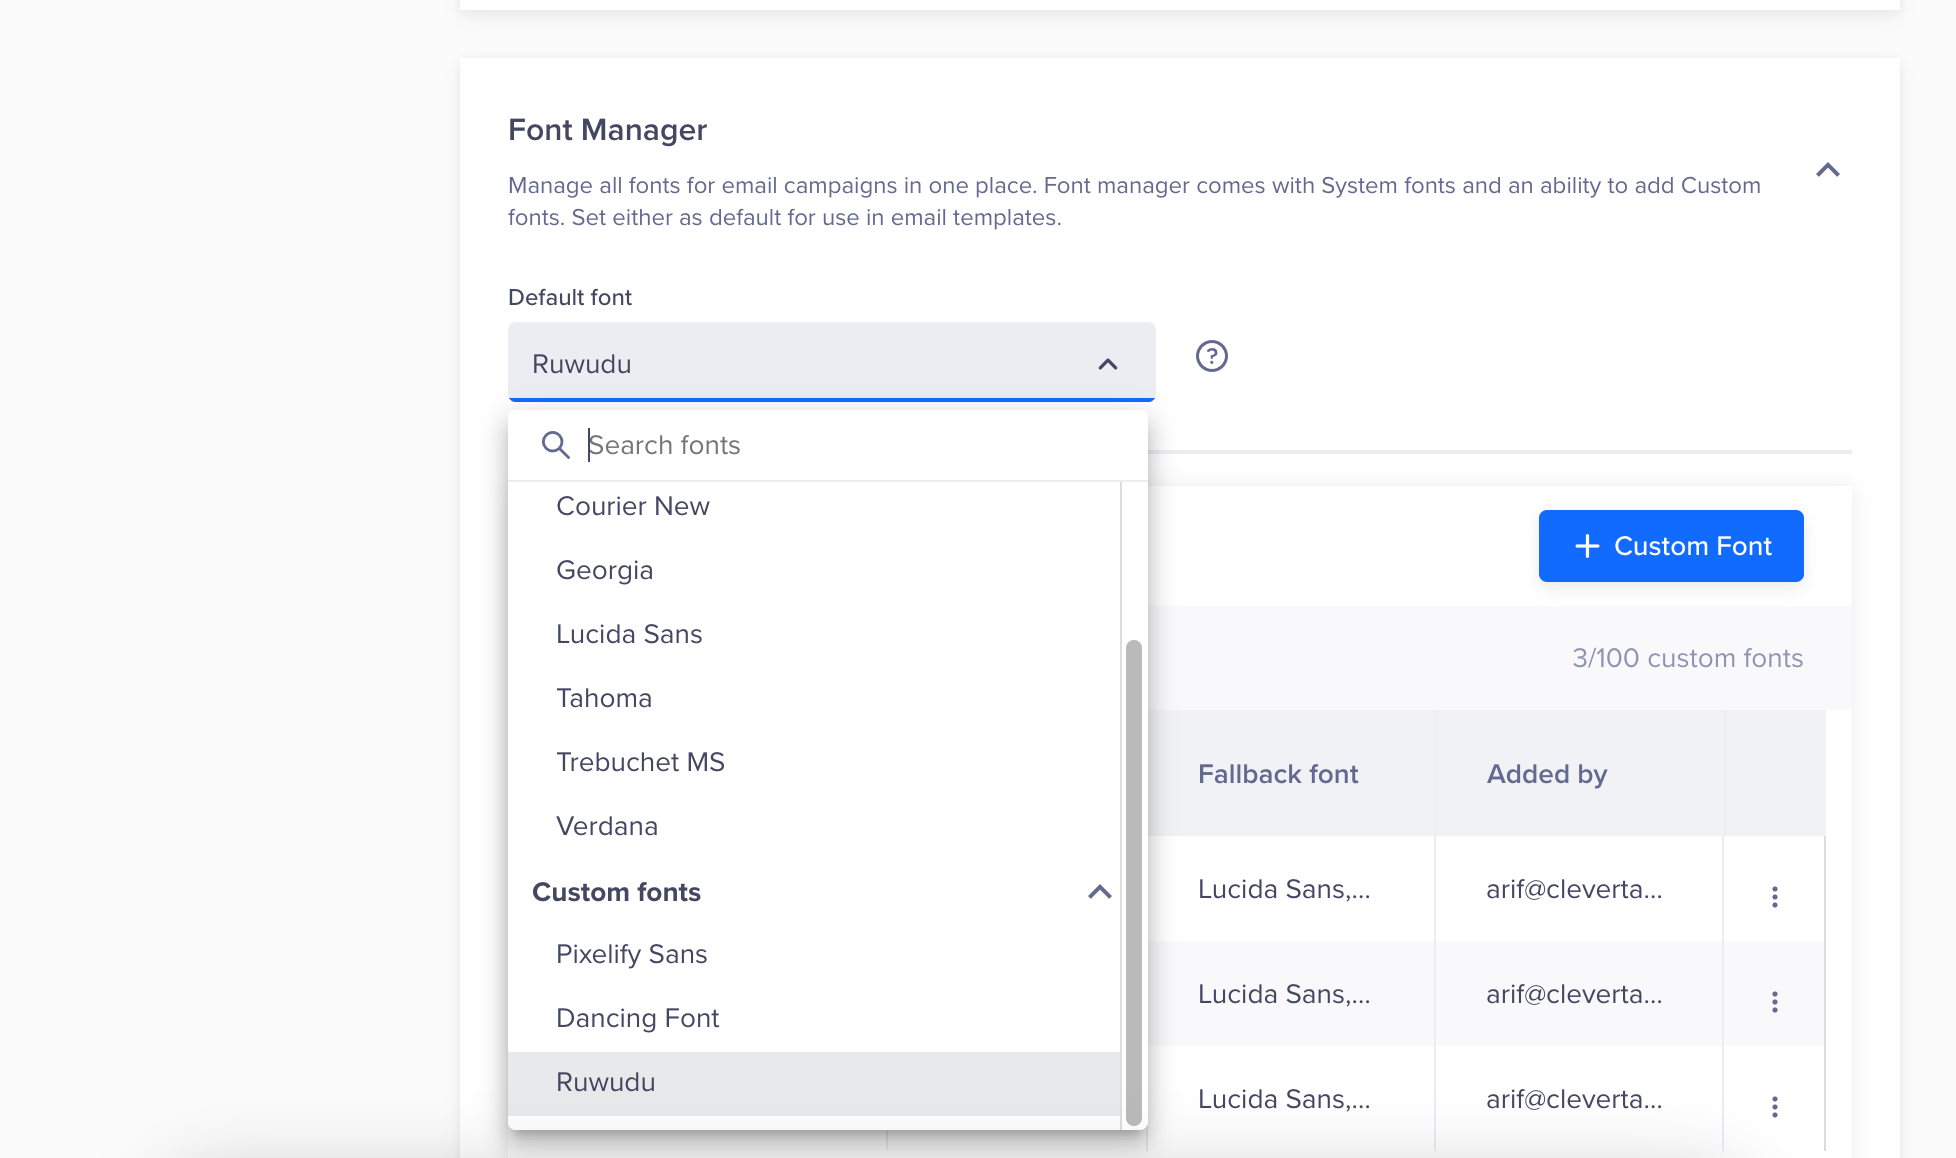
Set Up a Default Font
Delete Custom Font
You can delete one or multiple custom fonts to manage your custom font library. To delete a custom font
- Select one or multiple custom fonts you want to delete.
- Click the
 icon and select Delete. The Delete font? popup opens, highlighting potential impacts on drafts and saved templates and prompting you to confirm your action.
 - Select Delete to successfully delete the custom font(s). A confirmation message is displayed.
Upon deleting the custom font, it is unavailable for use in both the Drag & Drop and Rich Media_ editors.
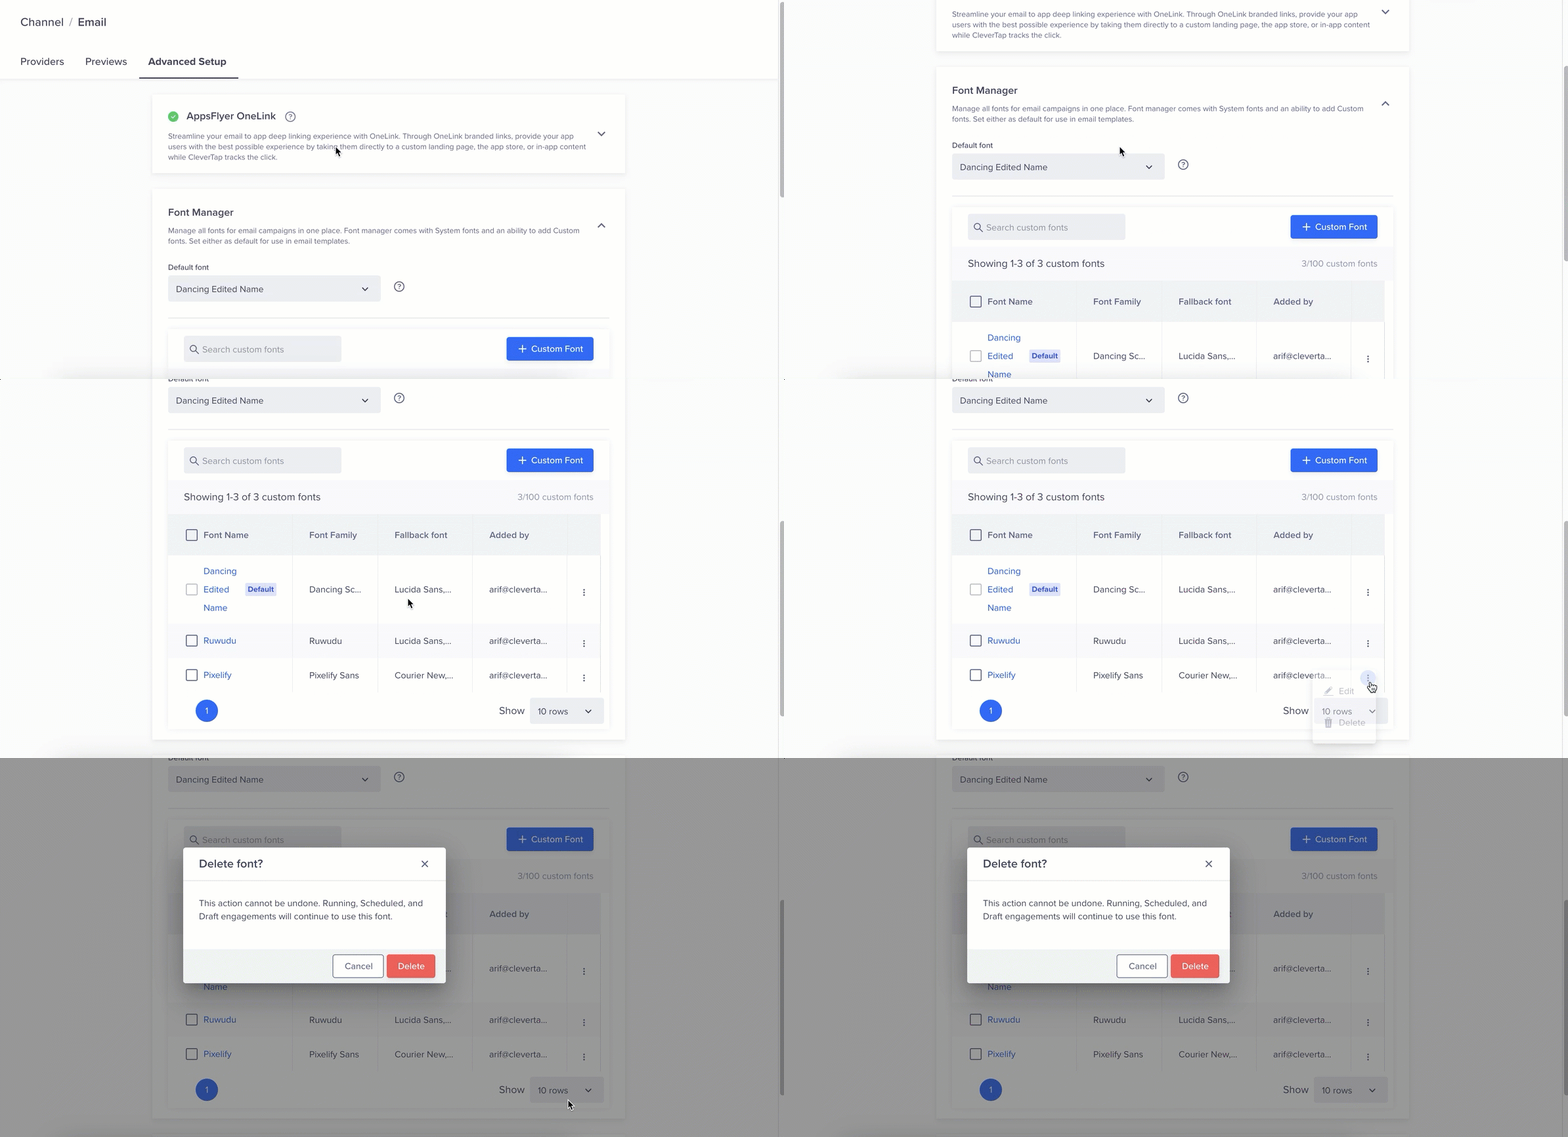
Delete Custom Font
Edit Custom Font
You can edit your custom font and update the font details.
- Select the custom fonts you want to edit.
- Click the
 icon and select Edit. The Edit Font popup opens.
 - You can update the required fields related to the custom font and click Save to save the changes.
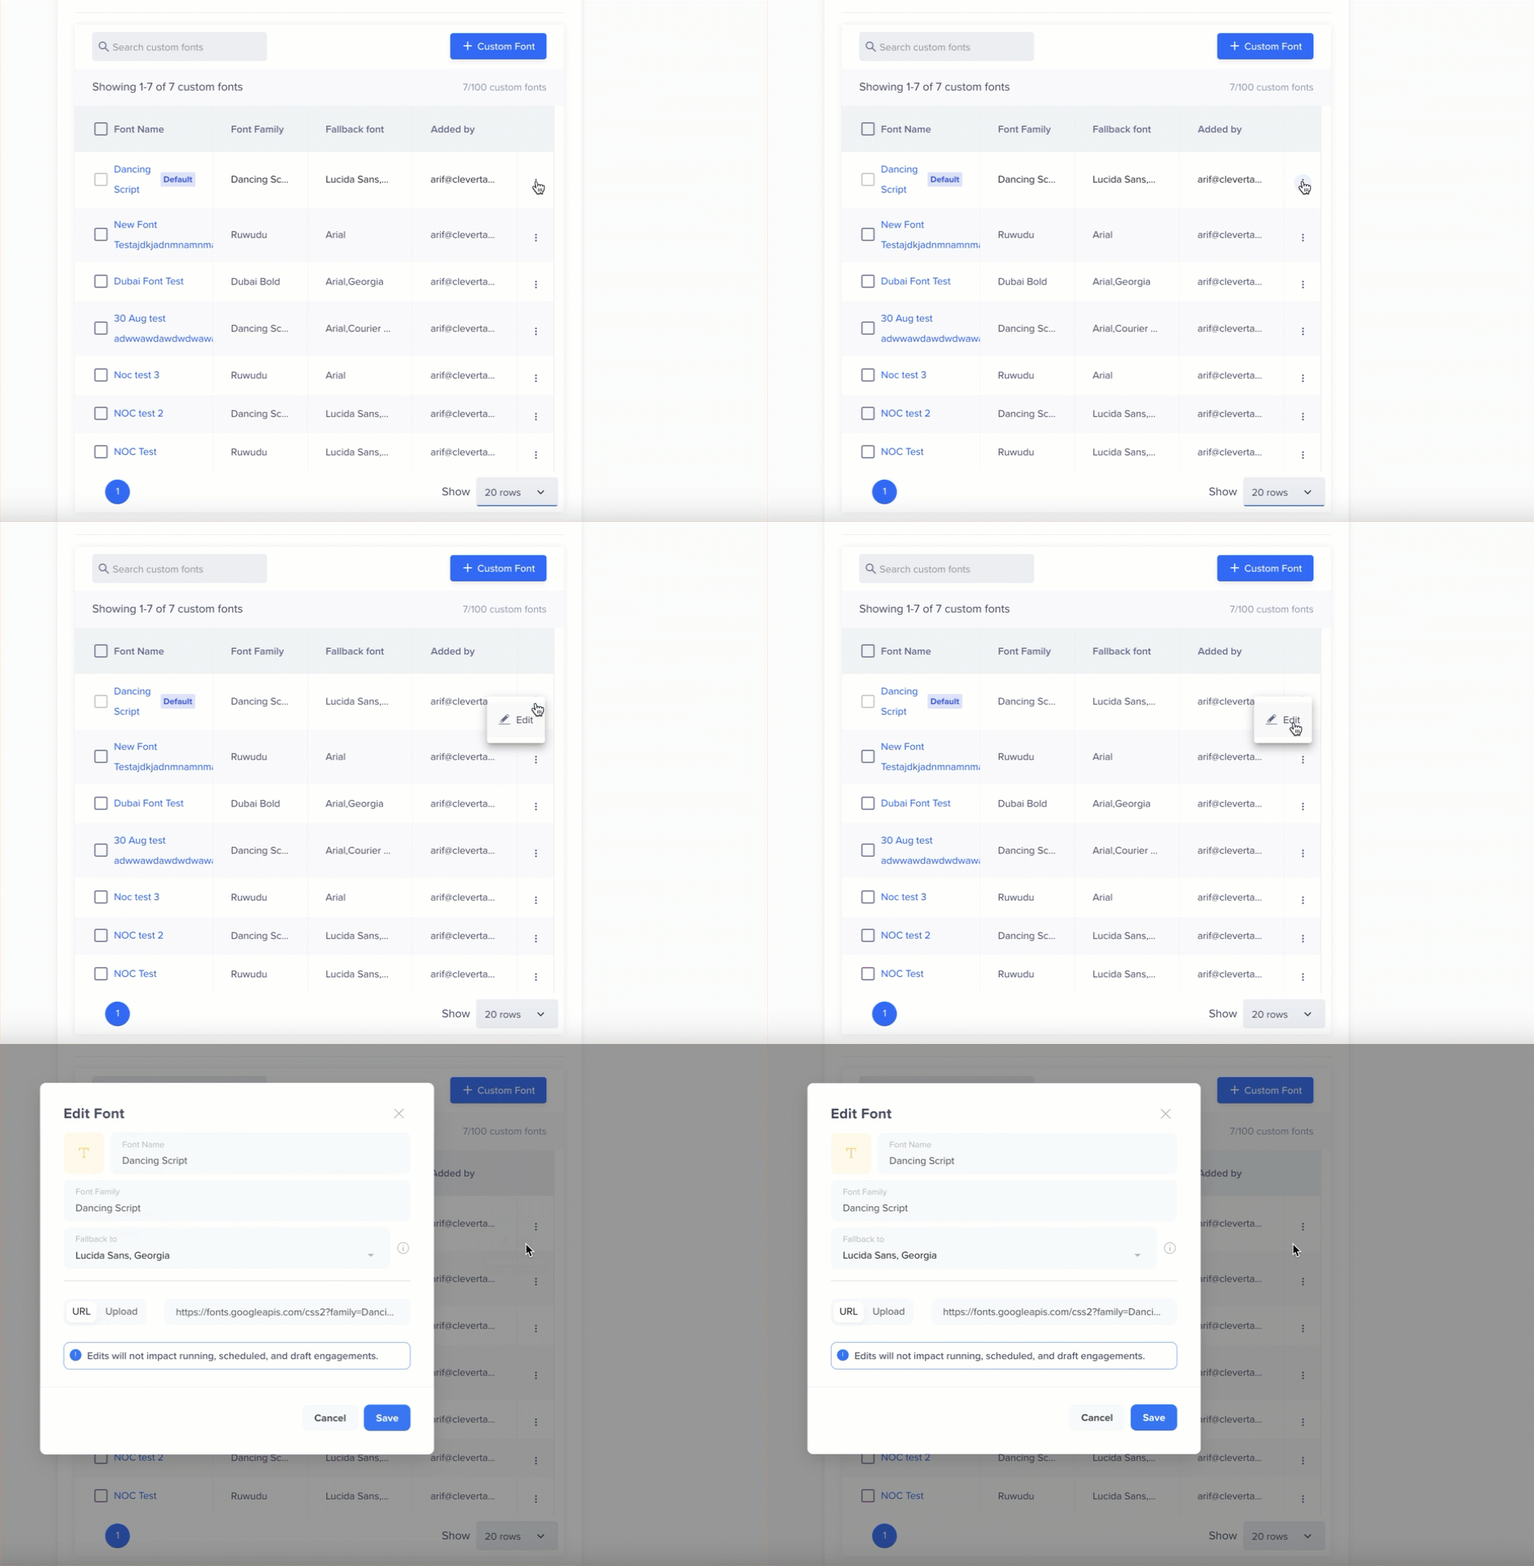
Edit Custom Fonts
The updated custom font is now available for both the Drag & Drop and Rich Media editors. When making changes to the custom font, an email alert is sent to the user updating the custom font and also to the account admin.
Delete or Edit Custom FontEditing or deleting custom fonts does not impact running, scheduled, and draft engagements. The modifications take effect for the campaigns created subsequent to your changes.
Updated about 1 month ago
