Email: Troubleshooting & FAQs
Refer to our frequently asked questions and troubleshoot any issues with your Email campaign.
This section provides FAQs, troubleshooting help for your email setup, tips to raise your reputation from poor to good, and IP and domain monitoring.
FAQs
Email Builder Functionality
Does linked content work in the email builder?
Yes. For more information, refer to Linked Content.
Does the recommendation feature work in the email builder?
Yes. For more information, refer to Email Recommendations.
What does the Do not stack on mobile devices mean?
Do not stack on mobile devices alerts you that it will disable the resizing and repositioning of the content per the device screen width.
With Stacking on Mobile
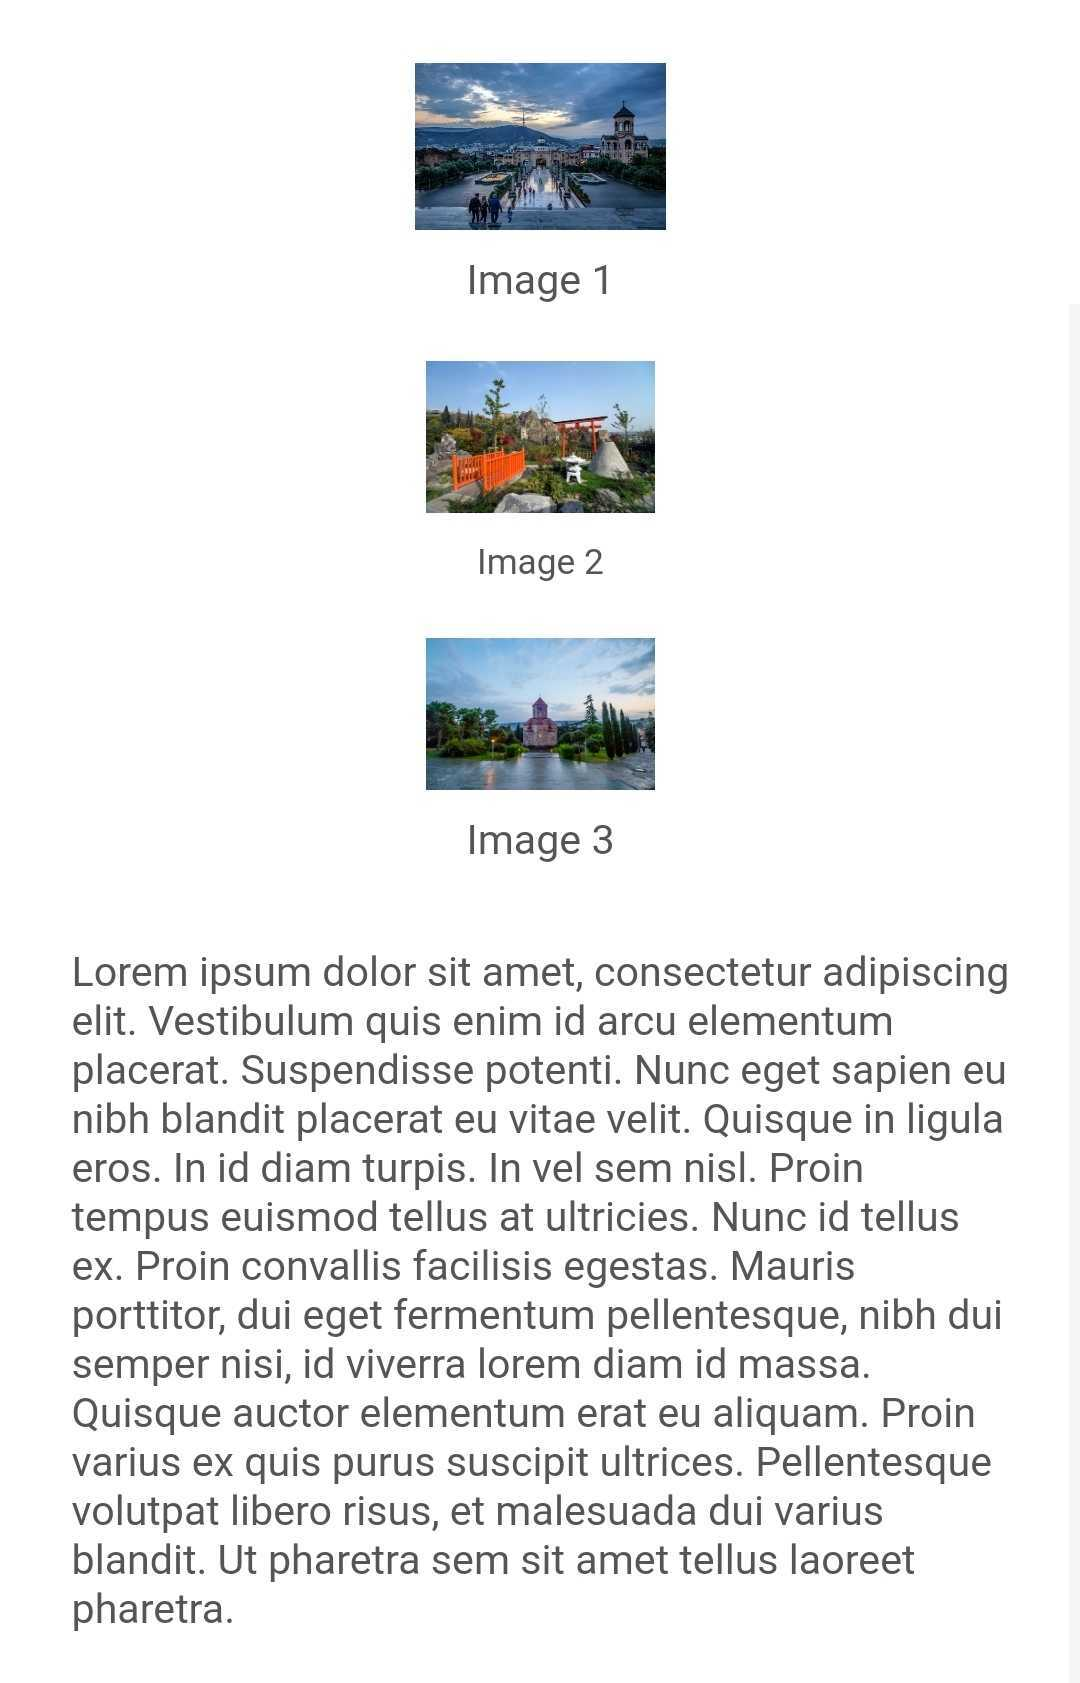
Email with Stacking on Mobile
Without Stacking on Mobile
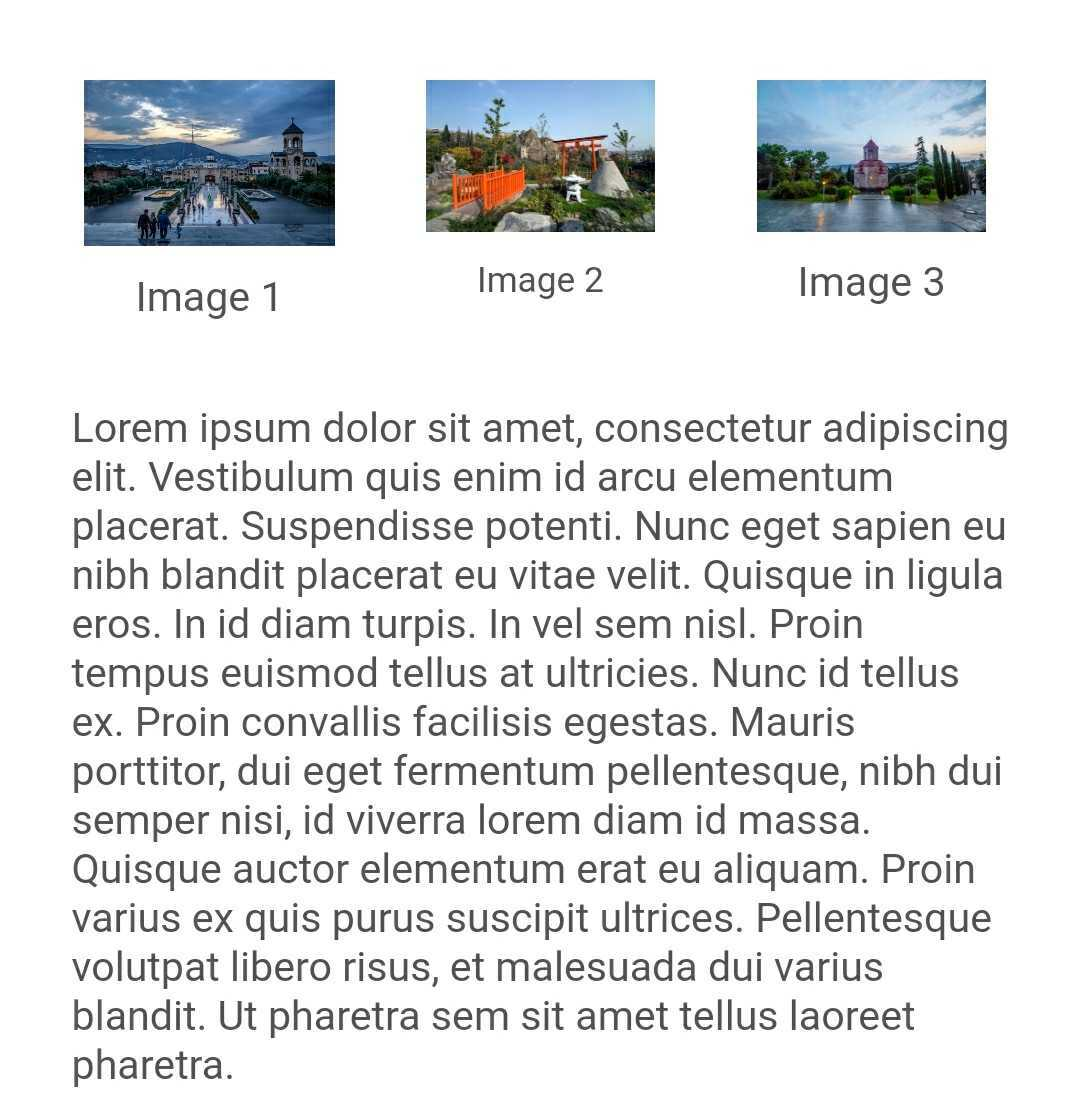
Email without Stacking on Mobile
How do you add a GIF file to an email?
You can add a GIF file using the content field image or custom HTML by following the steps below:
- Select the New Email with drag and drop template.
- From the Content tab, click Image.
- Drag and drop the image icon in the email body.
- Click Browse.
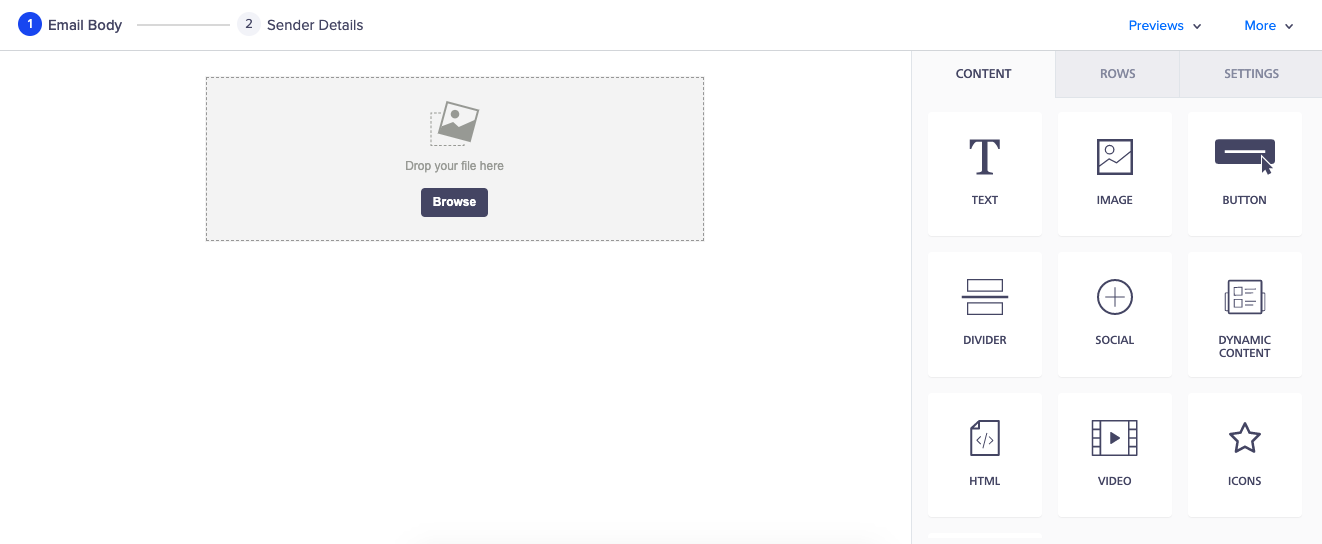
Add a GIF
- Click Upload and select your GIF file.
- In the File manager, find your GIF file and click Insert.
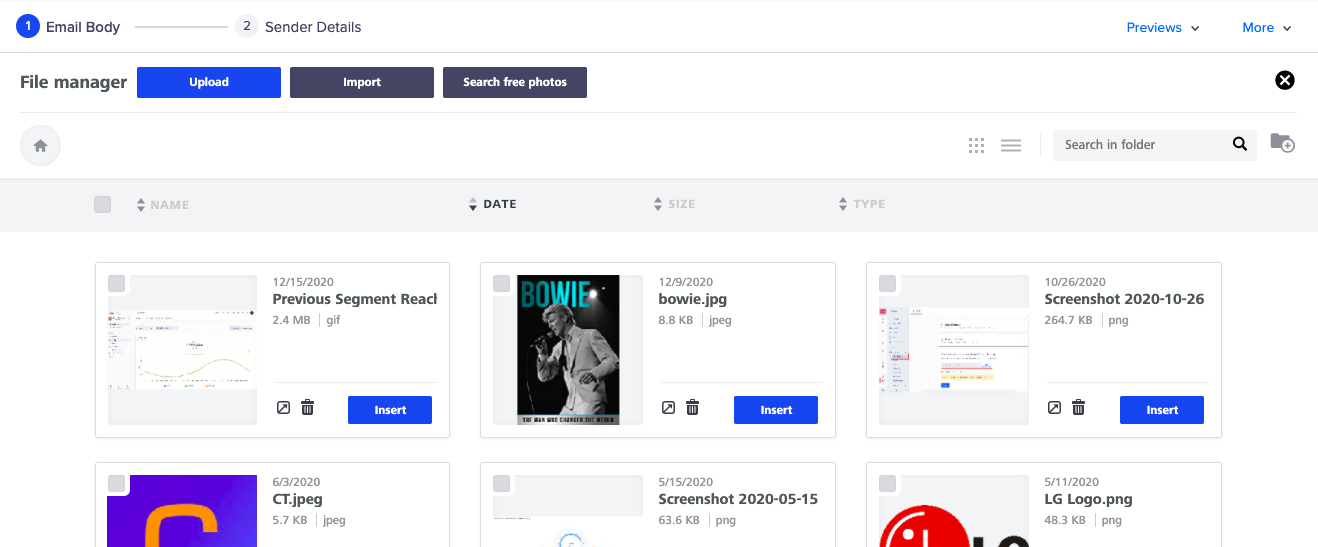
Insert a GIF
Note
- Images/GIFs must be less than 5 MB; however, we recommend the media must be less than 1 MB for optimal results. The media may not load in the user's inbox because all your users may not have a high-speed internet connection.
- The media formats supported are JPEG, GIF, and MP4.
Email Sending and Configuration
What IPs does CleverTap use to send out emails?
To view the IPs:
- Navigate to Settings > Channels > Email from the dashboard.
- In the Providers tab, refer to the Additional security note at the top highlighting the IPs.
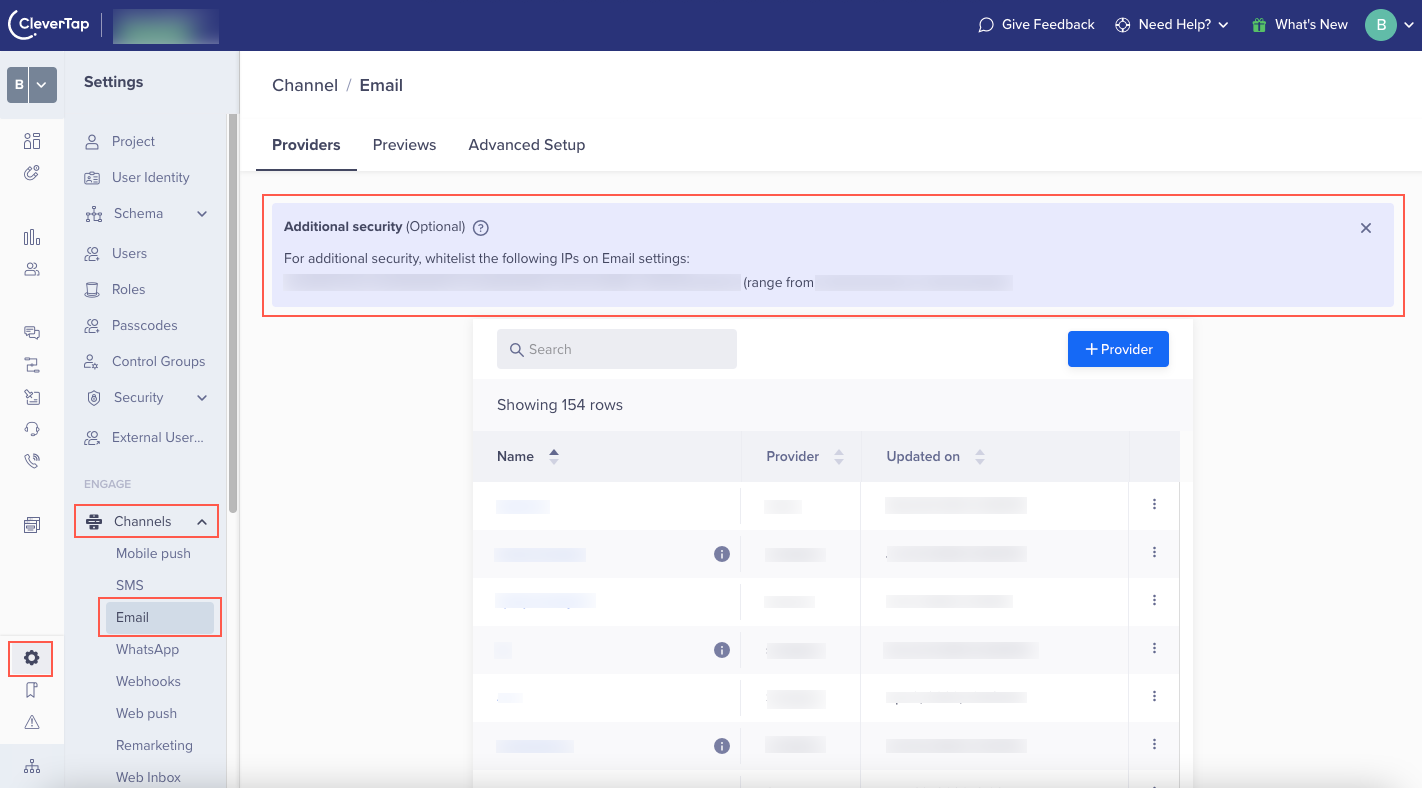
CleverTap IPs
Common IPsThese IPs are common for webhooks, SMS, and emails.
How do you handle unsubscribes and bounce for callbacks, such as Mandrill or SendGrid?
CleverTap must be notified for any email classified as bounced, rejected, spam, or unsubscriptions by the user so that we do not attempt any further deliveries to their mailboxes.
For more information, refer to SendGrid Bounces, Rejections, and Unsubscriptions and Mandrill Bounces, Rejections, and Unsubscriptions.
A service provider tracks any user unsubscribes using the unsubscription link in your email. The service provider then sends this information to CleverTap through the callback URL.
The communication preference for users is marked as false (MSG_Email=False).
Hard-bounced and unsubscribed users both fall under unsubscription. Follow the steps below to find the number of users who have unsubscribed via email:
- Navigate to Segments > Find People.
- From the Display common properties, select Reachability > Unsubscribed > Yes.
What are the timeouts and retry limits for Email?
The following are the timeout and retry limits for Email:
| Channel | Timeout (ConnectionRequest) | Retry Times |
|---|---|---|
| Kenscio | 5 Seconds | 0 |
| 15 Seconds | 2 | |
| Sendgrid | 10 Seconds | 0 |
| Mandrill | Not applicable | 0 |
| NetcoreCloud | Not applicable | 0 |
| PostMark | 10 Seconds | 0 |
| Not applicable | 5 | |
| Amazon EventBridge | Not applicable | 0 |
| mParticle | Not applicable | 0 |
| Segment | Not applicable | 0 |
For more information, refer to the Channel-Specific Timeouts and Retries.
Email Customization
How do you annotate an email?
Email annotations in the Promotions tab bring email messages to life with images, deals, expiration dates, and more. The email annotation can be performed in the drag-and-drop email editor and also in the custom HTML email editor.
Use the <meta> tag in the drag-and-drop editor to annotate an email. Following is the sample code that can be used in the HTML block of the drag-and-drop editor:
<p>
<div itemscope itemtype="http://schema.org/Organization">

<meta itemprop="logo" content="https://www.gstatic.com/images/branding/product/1x/googleg_48dp.png" />

</div>

<div itemscope itemtype="http://schema.org/DiscountOffer">

<meta itemprop="description" content="40% off" />

<meta itemprop="discountCode" content="DISCOUNTCODE" />

<meta itemprop="availabilityStarts" content="2020-03-20T08:00:00-07:00" />

<meta itemprop="availabilityEnds" content="2020-03-21T23:59:59-07:00" />

</div>

<div itemscope itemtype="http://schema.org/PromotionCard">

<meta itemprop="image" content="https://gmail-ads-markup-test.sandbox.google.com/sample.png" />

</div> This is metadata in HTML block of drag and drop editor</p>
For custom HTML implementation, refer to Get started: How to annotate your email in the Google documentation. The Promotions tab capability works in custom HTML with both inline microdata and the script tag.
When you test this feature, check the following:
- The target audience email addresses are not GSuite emails.
- The availability start date must be far apart from the end date. If the values of the start date and end date are closer to the current date, then the mail is most likely to appear in the Top Picks of the Promotions tab.
How do you add custom fonts in email?
You need the CleverTap custom HTML builder for your email campaigns.
You can add custom fonts to emails by adding a link tag to the header of your email HTML. It means the font must be hosted somewhere on the internet. Following is an example:
<html>
<head>
    <link href="https://fonts.googleapis.com/css?family=Roboto" rel="stylesheet" type="text/css" />
</head>
<body>
<h1 style="font-family:'Roboto'">Test text</h1>
</body>
</html>
Custom fonts may not be supported by all email clients. If you are adding a custom font to emails, you may also want to specify fallback fonts. This ensures the latter font is picked up if the first font is unavailable.
Following is an example:
<h1 style="font-family: Lato, 'Lucida Grande', Tahoma, Sans-Serif;">Welcome</h1>Email Unsubscribe and Metrics
Why is my unsubscribe count lower than expected?
This is because the unsubscribe count is updated when a user unsubscribes from email communications overall and not to only specific subscription group(s). You can check the dashboard for users unsubscribed from specific subscription groups by searching for them on the Find People page. Search for users by the Channel Unsubscribed event and filter by event property Group.
Email Provider Integration
Can I integrate an email provider that is not listed in documents?
Yes, you can use Generic SMTP to integrate any email provider of your choice. For more information, refer to Generic SMTP.
Troubleshooting
1. I received the error message: "Please set the email credentials." How do I fix it?
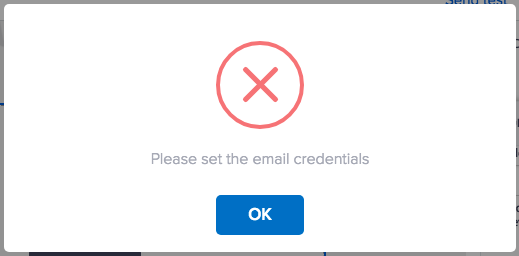 Error Message
This error message means you have not integrated your email provider with CleverTap. You can do this by following this guide.
2. Raise your reputation from poor to good
Monitoring your domain health is an ongoing process that requires consistent nurturing. Your sending reputation is a decisive factor when it comes to the delivery of your emails. By complying with permission policies and best practices and carefully monitoring your email list performance, you will be well-positioned to develop and maintain a robust sending reputation.
Take the steps below to improve your domain and IP reputation.
3. Prime your IP for success
The job of ISP filters is to defend against spam emails. How do you tell these filters that your IP is valid and trustworthy? Start any email campaign by sending small batches of emails. Send these messages to email addresses that you know are engaged. As these emails are received and opened by engaged users, your IP will build trust with the ISP. Slowly increase the number of emails until you scale to your peak volume.
4. Create a new subdomain
We do not recommend everyone to create a new subdomain, but you may wish to create one if possible. Over time, users will come to trust the subdomain, which is an added benefit. The purpose is that this subdomain will allow for domain-specific monitoring of your IP reputation and succeed against some domain-based certification filters.
To add a new subdomain in SendGrid, perform the following steps:
- Log in to your SendGrid account and navigate to the Settings section.
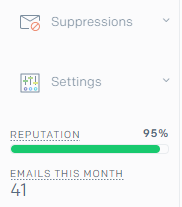 Settings
- Click Sender Authentication.
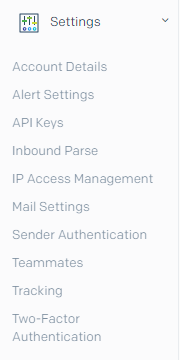 Sender Authentication
- Click Authenticate Your Domain under Domain Authentication.
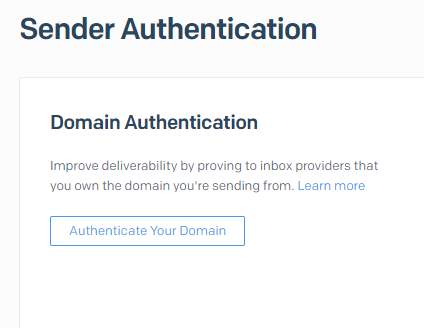 Domain Authentication
- Select the name of your DNS host provider.
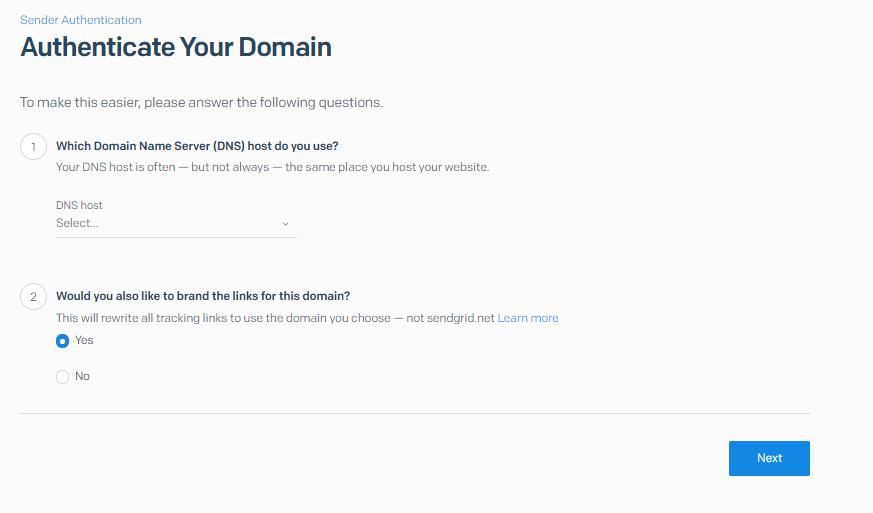 Select DNS Host Provider
- In the second option on the same page, choose if you want the link branding or not and click Next.
- Fill in the name of the domain/subdomain from which you wish to send your email campaigns.
- Select the Use automated security option in the Advanced Settings section and click Next.
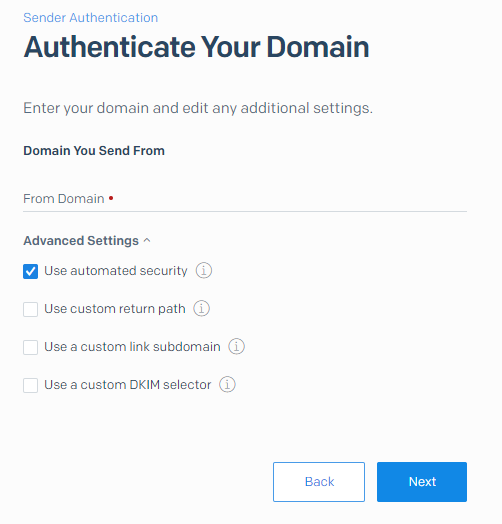 Advanced Settings
- The next screen will provide you the records which will be required to be updated on the DNS settings page of your domain host name provider.
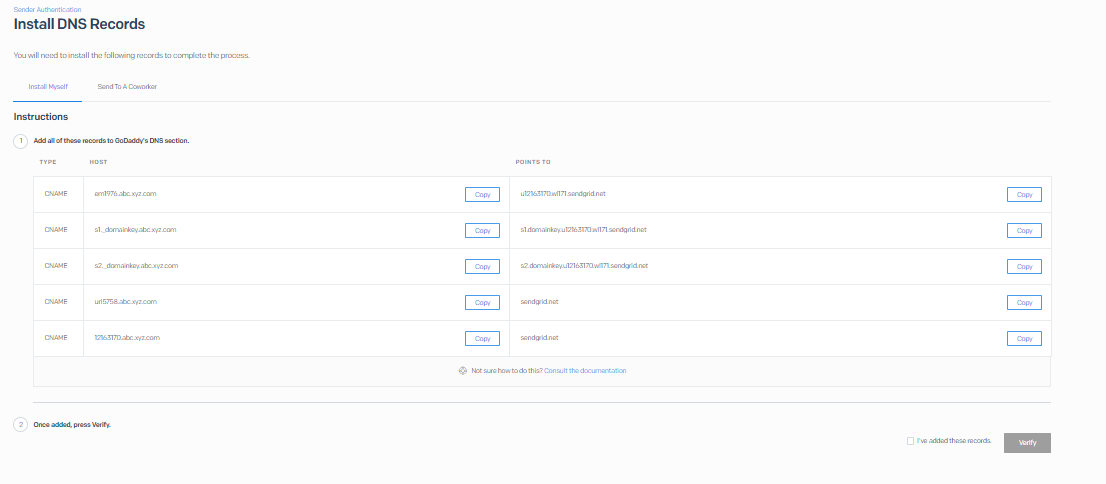 Install DNS Records
- Once the provided records have been updated on the DNS settings page, click on the checkbox in the bottom right corner along with the option I've added these records and click Verify. This step will verify that the correct records are added to the domain DNS. Once the verification is complete, the added domain is listed on the Sender Authentication page and is ready for use. If the verification fails, check if the records have been added to the DNS correctly and repeat the previous verification steps.
Updated about 1 month ago
