Amazon Redshift
Learn how configuring Amazon Redshift enables data sync for personalized engagement and growth.
Overview
Configuring Amazon Redshift with CleverTap enables seamless data import, ensuring synchronization and access to relevant information for analysis, personalized engagement, and data-driven growth.
Quick Start Guide for Existing Users
Expand for quick setup if you have previously configured an Amazon Redshift workspace and are familiar with the CleverTap dashboard. If you are setting up Amazon Redshift for the first time, skip to Prerequisites for Integration below.
Prerequisites
Before you begin, ensure you have the following details:
- Connection Nickname
- Host (Cluster Endpoint)
- Port (default:
5439) - Username
- Password
- Database
- Schema (optional): If not specified, the public schema is used by default.
Configure Redshift Credentials in CleverTap
To set up the Redshift credentials in CleverTap, perform the following steps:
- Go to CleverTap Dashboard > Settings > Partners > Amazon Redshift.
- Enter the following details: Connection Nickname, Host, Port, Username, Password, Database, and Schema.
- Click Test Connection and then Save.
After setting up the configuration, you can import data from Amazon Redshift into CleverTap.
Prerequisites for Integration
If you are setting up Amazon Redshift for the first time, ensure you have the following before proceeding with the CleverTap configuration:
- CleverTap Access to configure Amazon Redshift.
- Amazon Redshift Account Details:
- An active AWS account with access to the Amazon Redshift console.
- A provisioned Redshift cluster or Redshift Serverless workgroup.
- The cluster must be publicly accessible or have appropriate network configurations to allow connections from CleverTap.
- Redshift User Account Requirements:
- The user must have
INSERT/UPDATEpermissions for imports on the specified schema and tables. - Authentication Method: Username and Password.
- The user must have
IP WhitelistingEnsure CleverTap IP addresses are added to your Redshift cluster's security group inbound rules. To access the list of IPs to whitelist, refer to CleverTap IP Ranges for Import.
Set Up Amazon Redshift for Integration
You can set up Amazon Redshift using one of the following ways:
- For new users who need to provision Redshift resources from scratch: Create Database, Schema, and User.
- For users who already have configured resources in Redshift: Use Existing Redshift Credentials.
Create New Redshift Setup
If you do not already have a Database, Schema, and User configured in Redshift, you must create them before proceeding. These components are required to ensure CleverTap can securely access, store, and process your data.
To create each resource, perform the following steps:
Create Database
To store data for CleverTap integration, you first need to create a database. Follow these steps:
- Log in to the Amazon Redshift console and open the Query Editor v2.
- Connect to your cluster using admin credentials.
- Run the following SQL command to create a database:
-- Create a new database for CleverTap data storage
CREATE DATABASE clevertap_db;
NoteYou must disconnect from the current session and reconnect to the newly created database to create schemas and objects within it.
Create Schema
After creating the database, create a schema to organize CleverTap-related objects. To do so, perform the following steps:
- Connect to the
clevertap_dbdatabase using the Query Editor v2. - Run the following SQL command to create a schema:
-- Create a new schema for CleverTap data
CREATE SCHEMA clevertap_schema;

-- Verify schema creation
SELECT * FROM pg_catalog.pg_namespace WHERE nspname = 'clevertap_schema';
Create User
To manage access securely, create a dedicated user for the CleverTap configuration by executing the following SQL commands:
-- Create a dedicated user for CleverTap integration
CREATE USER clevertap_user PASSWORD 'YourStrongPassword123!';

-- Grant usage on the schema
GRANT USAGE ON SCHEMA clevertap_schema TO clevertap_user;

-- Grant SELECT on all existing tables in the schema
GRANT SELECT ON ALL TABLES IN SCHEMA clevertap_schema TO clevertap_user;

-- Grant SELECT on future tables created in the schema
ALTER DEFAULT PRIVILEGES IN SCHEMA clevertap_schema
GRANT SELECT ON TABLES TO clevertap_user;
Password RequirementsRedshift passwords must be 8–64 characters long and contain at least one uppercase letter, one lowercase letter, and one number.
Use Existing Redshift Credentials
If you already have Amazon Redshift set up, perform the following steps to find each detail on the AWS console.
- Obtain the Host (Cluster Endpoint)
- Find Existing Port
- Find Existing Database Name
- Find Existing Schema
- Verify the Username and Password
Obtain the Host (Cluster Endpoint)
The Host is the cluster endpoint URL that CleverTap uses to connect to your Redshift instance. You can find this endpoint in the AWS Management Console, and the value you need depends on whether you are using a Provisioned cluster or Redshift Serverless.
- Provisioned Clusters
- Redshift Serverless
Provisioned Clusters
A provisioned cluster is a dedicated Redshift cluster where you manage the infrastructure, including node type and count. The cluster endpoint is a stable DNS hostname assigned to your cluster and remains consistent as long as the cluster exists. To locate the endpoint, perform the following steps:
- Log in to the AWS Management Console and go to Amazon Redshift > Clusters.
- Select your cluster from the list.
- On the General information tab, locate the Endpoint field.
- Copy the endpoint value. The endpoint is displayed in the following format:
<cluster-name>.<unique-id>.<region>.redshift.amazonaws.com:<port>/<database>The Host is the hostname that appears before the colon and port number. For example:
my-cluster.abc123xyz.us-east-1.redshift.amazonaws.comRedshift Serverless
Redshift Serverless is a fully managed, auto-scaling option in which AWS automatically manages capacity through a workgroup. Like provisioned clusters, each workgroup exposes a stable endpoint hostname that you use to connect to it. To locate the endpoint, perform the following steps:
- Go to Amazon Redshift > Serverless dashboard and select your workgroup.
- On the General information tab, copy the Endpoint value.
- Identify the hostname from the endpoint, which follows a similar format.
ImportantAlways use the Redshift endpoint URL. Do not use the IP address of a cluster node or VPC endpoint, as these may change and can cause connection failures.
Find Existing Port
The Port is the Transmission Control Protocol (TCP) port number that your Redshift cluster listens on for incoming connections:
- Go to Amazon Redshift > Clusters and select your cluster.
- On the General information tab, the port is appended to the Endpoint field.
- Alternatively, navigate to the Properties tab and locate the port under Database configurations.
The default port for Amazon Redshift is 5439. If you did not modify the port during cluster creation, use 5439.
Find Existing Database Name
The database name identifies the specific database within your Redshift cluster:
- Navigate to Amazon Redshift > Clusters and select your cluster.
- On the Properties tab, scroll to Database configurations.
- The Database name field displays the name of the default database (commonly
dev).
Alternatively, connect to your cluster using the Query Editor v2 and run:
-- List all databases
SELECT datname FROM pg_database WHERE datistemplate = false;
Find Existing Schema
To find existing schemas in your Redshift database:
- Connect to the Redshift cluster using the Query Editor v2 or any SQL client.
- Run the following SQL command to list all user-created schemas:
SELECT nspname AS schema_name
FROM pg_catalog.pg_namespace
WHERE nspname NOT LIKE 'pg_%'
  AND nspname != 'information_schema'
ORDER BY schema_name;
Default SchemaBy default, every Redshift database includes a
publicschema. If you have not created a custom schema, you can usepublic.
Verify Username and Password
The username and password are the credentials used to authenticate with your Redshift cluster:
- If you have created a dedicated user for CleverTap (as described in Create a User), use those credentials.
- If you want to use an existing user, verify the username by running:
-- List all database users
SELECT usename FROM pg_user;- If you do not remember the password, you can reset it with:
ALTER USER <username> PASSWORD 'NewStrongPassword123!';Set Up CleverTap Dashboard for Integration
To connect Amazon Redshift with CleverTap, go to Settings > Partners > Amazon Redshift from the CleverTap dashboard, select Add Database, and configure the following fields.
Database Details
Enter the Database Details in the integration setup form. To create or retrieve details from your Amazon Redshift account, refer to Create New Redshift Setup or Use Existing Redshift Credentials.
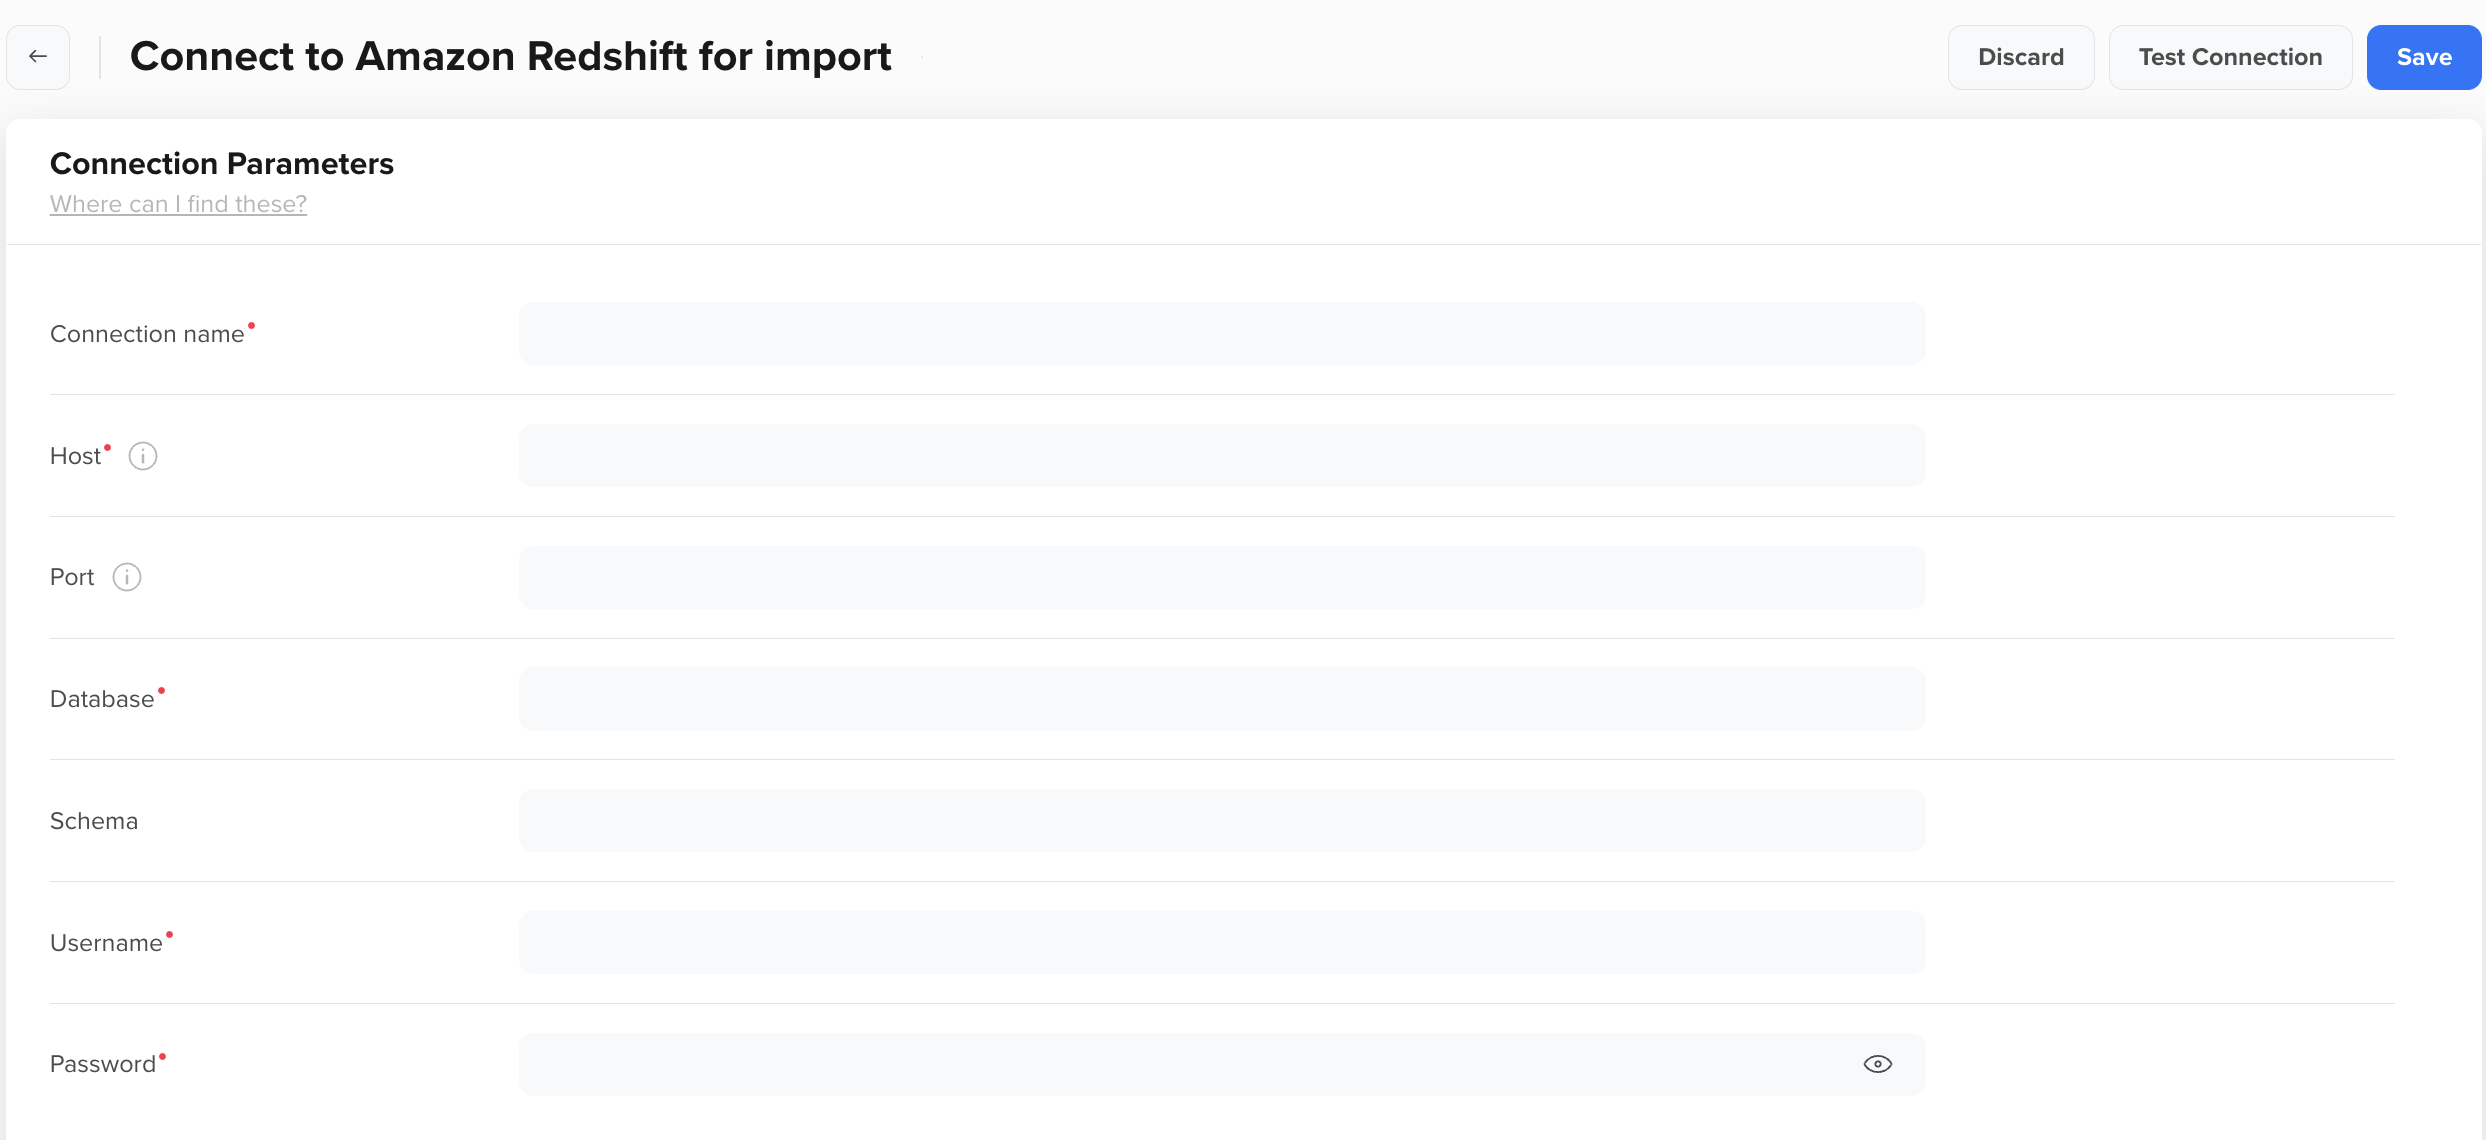
Database Details
| Field | Description |
|---|---|
| Connection Nickname | A unique, user-defined name to identify this Redshift connection within CleverTap. This name is used when setting up imports. For example,Production Redshift - US East. |
| Host | The endpoint URL of your Redshift cluster, excluding the port and database name. It typically follows the format:<cluster-name>.<unique-id>.<region>.redshift.amazonaws.com. |
| Port | The TCP port number your Redshift cluster uses for connections. Default: 5439. If left blank, CleverTap uses 5439 automatically. |
| Username | The Redshift database username that CleverTap uses to authenticate and access data. |
| Password | The password associated with the specified username. |
| Database | The name of the Redshift database containing the data you want to integrate with CleverTap. |
| Schema | The specific schema within the database that contains the tables for import. Use public if no custom schema has been created. |
Test and Save Connection
After entering all the details, click Test Connection or Save:
- Test Connection: Verifies if the database credentials and network setup are correct. A successful test confirms the connection, while a failure prompts you to review your settings.
- Save: Saves the connection details, enabling you to proceed with the data import process.
Troubleshooting
If the Test Connection fails, use the following table to identify and resolve common issues:
| Symptom | Likely Cause | Resolution |
|---|---|---|
| Connection timeout | The network or firewall is blocking the connection |
|
| Authentication failure | Invalid credentials or disabled user |
|
| Schema or table not found | Incorrect database or schema, or missing privileges |
|
FAQs
This section addresses common questions about managing Amazon Redshift connections and imports in CleverTap.
What is the default port for Amazon Redshift?
The default port for Amazon Redshift is 5439. If you did not change the port during cluster creation, use this value. CleverTap also defaults to 5439 if no port is specified.
How do I whitelist CleverTap IPs for my Redshift cluster?
To ensure seamless communication between CleverTap and your systems, whitelist the required IP ranges. To access the list of IPs to whitelist for import integrations, refer to CleverTap IP Ranges for Import.
Can I use Redshift Serverless with CleverTap?
Yes. The configuration fields remain the same. Use the Serverless workgroup endpoint as the Host and the associated database and schema details.
How can I find my schema if I have not created one?
Every Redshift database includes a defaultpublic schema. If you have not created a custom schema, enterpublic as the Schema value.
Next Steps
Updated 3 months ago