Purchasely
Payments
Overview
Purchasely is a platform that enables businesses to manage and monetize their mobile apps through In-App purchases and subscriptions. This integration lets you send all subscription-related events and user properties from Purchasely to CleverTap.
With this integration, you can:
- Analyze subscription events and user properties to gain deeper insights into customer behavior and trends.
- Trigger personalized messaging campaigns across channels
- Optimize revenue performance with real-time insights.
Integrating Purchasely with CleverTap empowers businesses to refine their in-app purchase strategies, increase revenue, and improve user engagement and retention.
Support For IntegrationThis integration is managed and continuously improved by Purchasely. The CleverTap and Purchasely integration has undergone stringent testing to ensure seamless functionality. For any questions or issues, contact Purchasely for support and resolution.
Prerequisites for Integration
The following are the prerequisites:
- Ensure you have access to your Purchasely account.
- Ensure you have a CleverTap account with a valid Account ID, Passcode, and Region.
Integrate Purchasely with CleverTap
The integration process involves the following three steps:
- Sync CleverTap ID with Purchasely (SDK implementation).
- Find CleverTap Project Details.
- Connect and Configure CleverTap and Purchasely Accounts.
Sync CleverTap ID with Purchasely (SDK implementation)
To effectively integrate CleverTap with Purchasely, ensure the SDK is properly installed and user IDs are mapped. Mapping user IDs enables both platforms to recognize users, consistently maintaining a unified user profile. Use the following code in your app to map the CleverTap Distinct ID with Purchasely:
CleverTap.autoIntegrate()
if let clevertapId = CleverTap.sharedInstance()?.profileGetID() {
    Purchasely.setAttribute(.clevertapId, value: clevertapId)
}
val cleverTap = CleverTapAPI.getDefaultInstance(applicationContext)
cleverTap?.cleverTapID?.let {
Purchasely.setAttribute(Attribute.CLEVER_TAP_ID, it)
}CleverTapAPI cleverTap = CleverTapAPI.getDefaultInstance(getApplicationContext());
if(cleverTap.getCleverTapID() != null) {
Purchasely.setAttribute(Attribute.CLEVER_TAP_ID, cleverTap.getCleverTapID());
}CleverTap.getCleverTapID((err, res) => {
Purchasely.setAttribute(Attributes.CLEVER_TAP_ID, res);
});Purchasely.setAttribute(PLYAttribute.clever_tap_id, "clever_tap_id");Purchasely.setAttribute(Purchasely.Attribute.CLEVER_TAP_ID, "clever_tap_id");private PurchaselyRuntime.Purchasely _purchasely;
_purchasely.SetAttribute(PLYAttribute.CLEVER_TAP_ID, "clever_tap_id");[CleverTap autoIntegrate];
NSString *clevertapId = [[CleverTap sharedInstance] profileGetID];
if (clevertapId) {
[Purchasely setAttribute:PurchaselyAttributeClevertapId value:clevertapId];
}For more information, refer to Set CleverTap ID.
Find CleverTap Project Details
To connect Purchasely with the CleverTap dashboard, you need the following project details:
| Field | Description |
|---|---|
| Account ID | Locate the Project ID under Settings > Project from the CleverTap dashboard. |
| Account Passcode | Locate the Passcode under Settings > Project from the CleverTap dashboard. For more information, refer to Account Passcode. |
| Region | Locate Region for the API endpoint you want to select under Settings > Project. To find the API endpoint for your region, refer to API endpoints based on your data center region. |
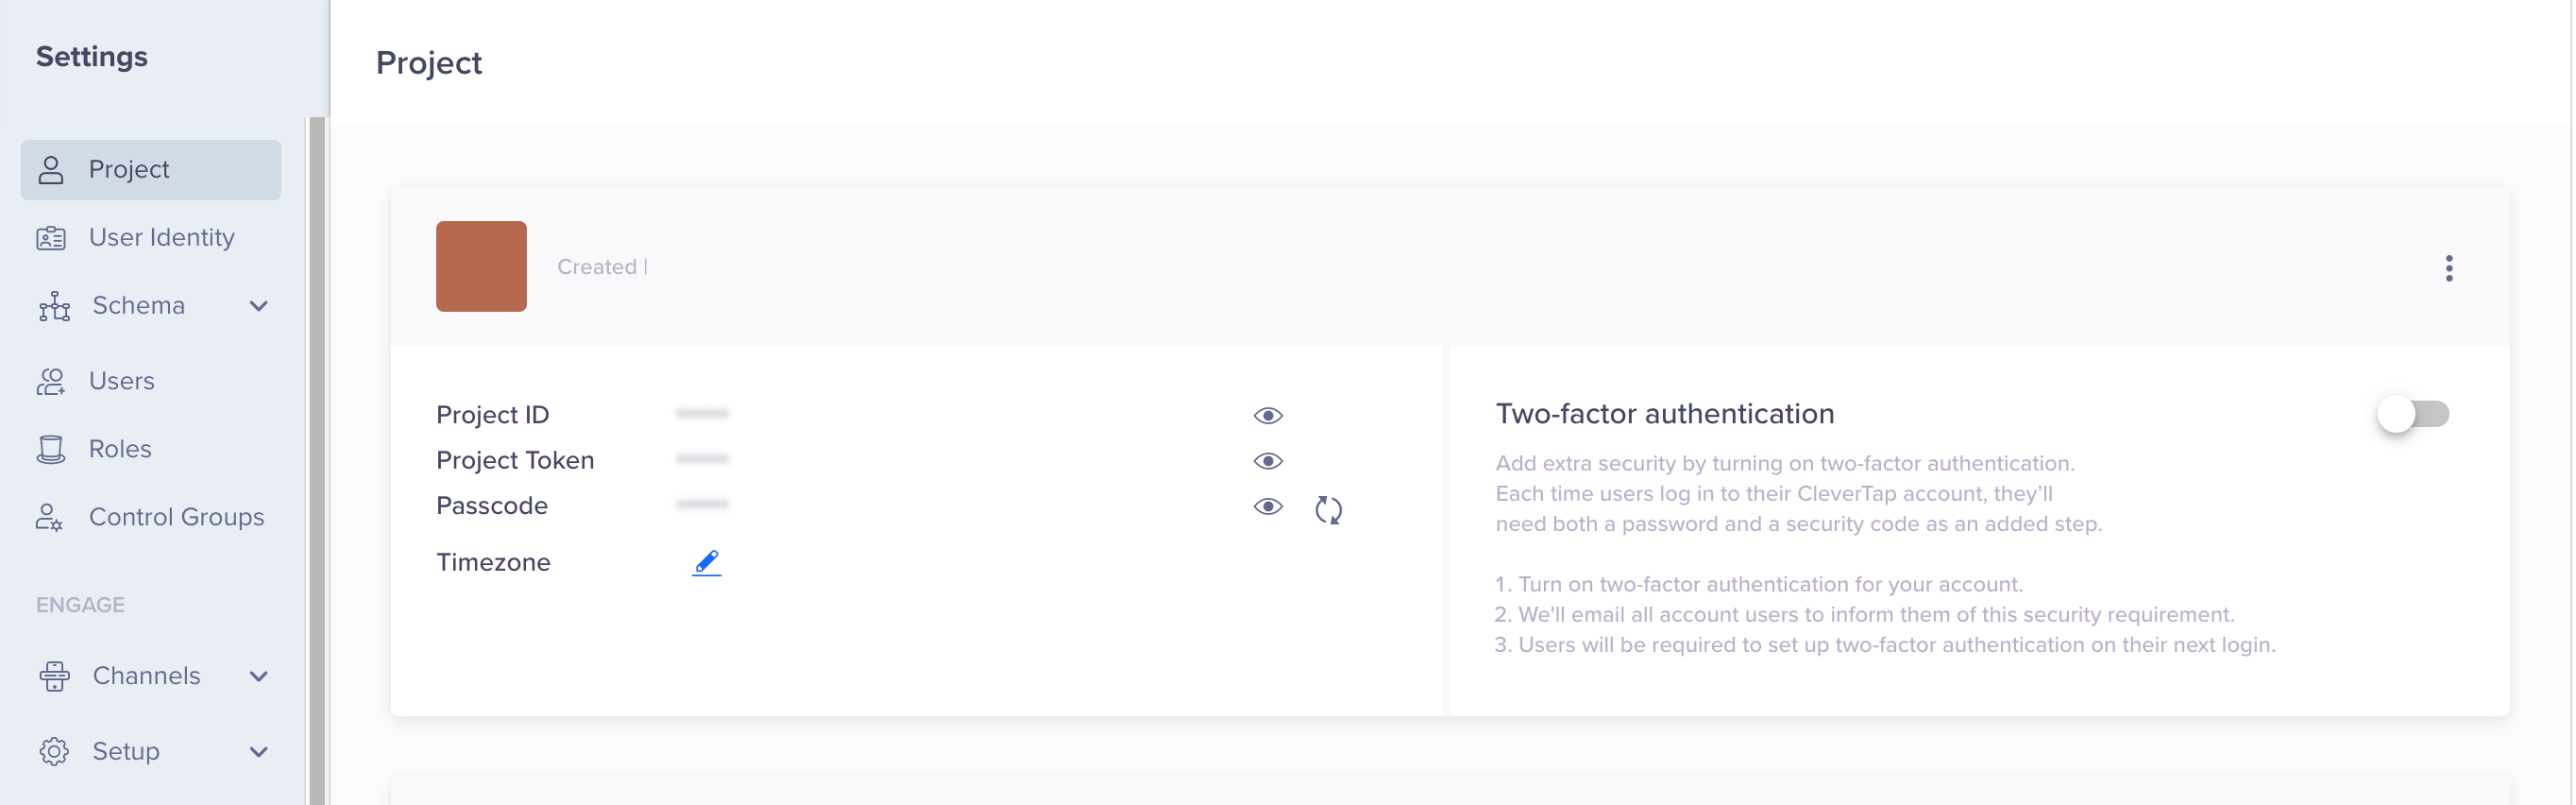
CleverTap Project Details
Connect and Configure CleverTap and Purchasely Accounts
To set up CleverTap in the Purchasely dashboard, perform the following steps:
- Go to Settings > Integrations from the Purchasely dashboard. The External Integrations page opens.
- Click the
 icon on the CleverTap tile, and select Edit.
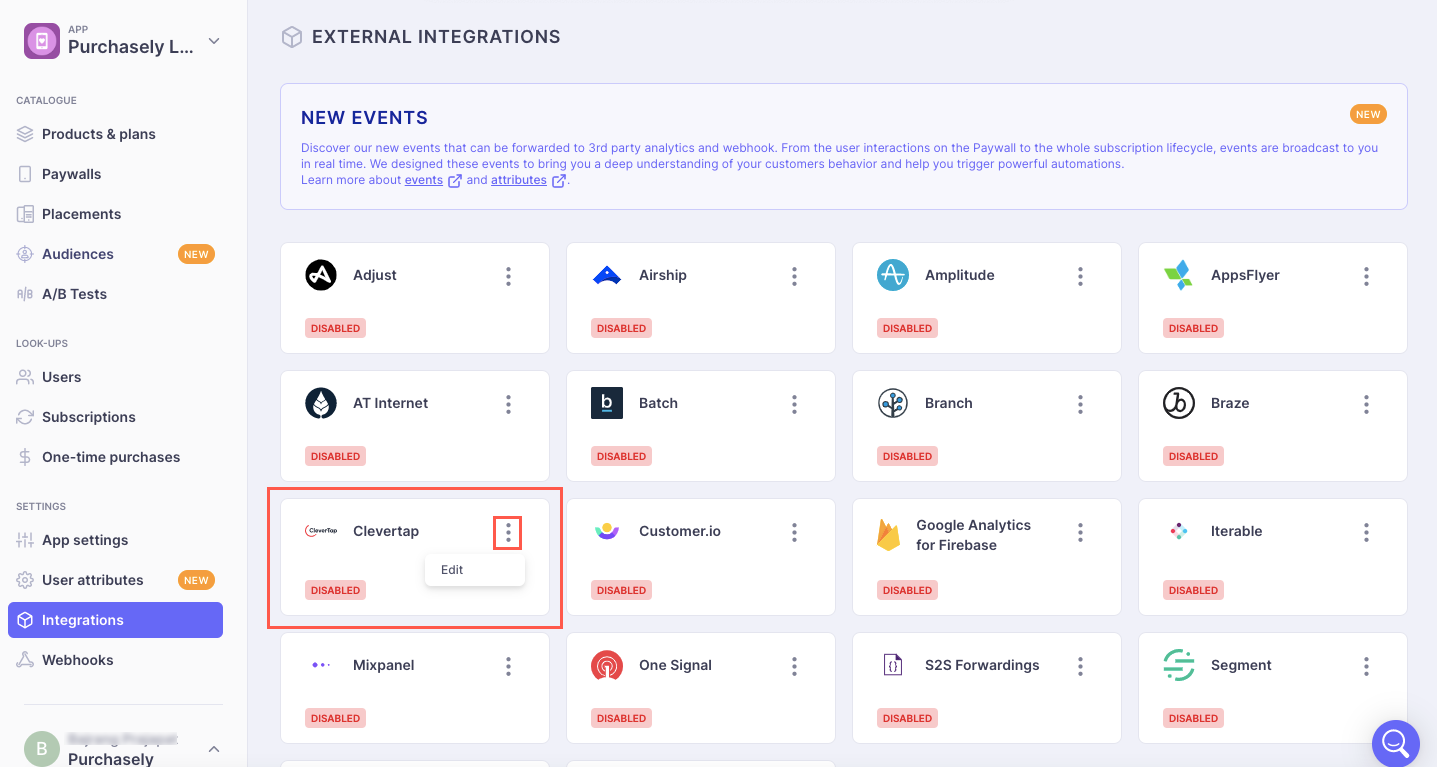
External Integrations
- Turn ON the INTEGRATION ENABLED option, and enter your CleverTap Account Region, Account ID, and Passcode under the Account parameters tab. To find these details from the CleverTap dashboard, refer to Find CleverTap Project Details.
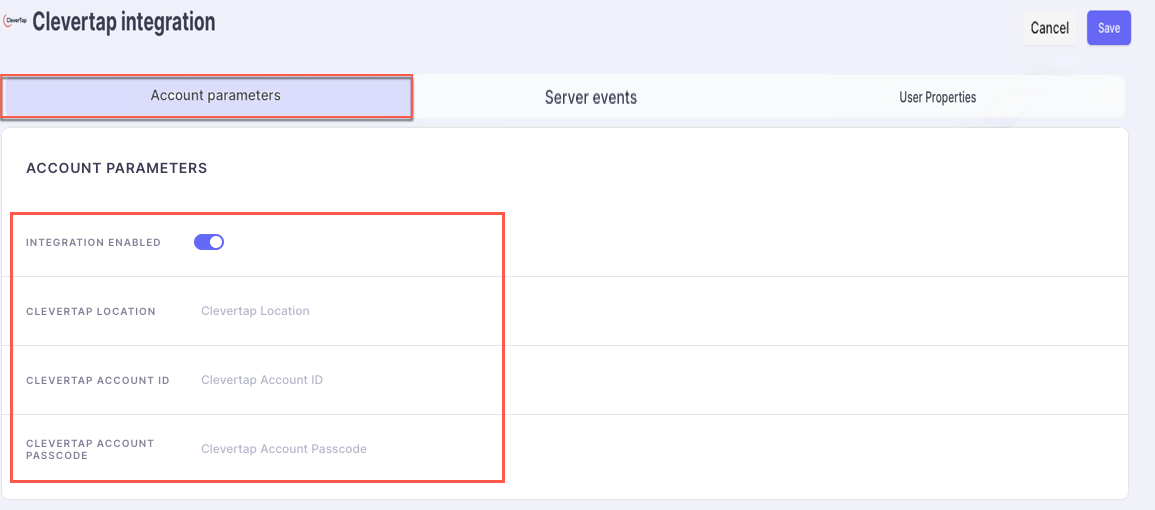
Account Parameters
- Click Save.
- Go to the Server events tab, enable the events you want to send to CleverTap, and click Save. For more details about the types of supported events, refer to Server Events.
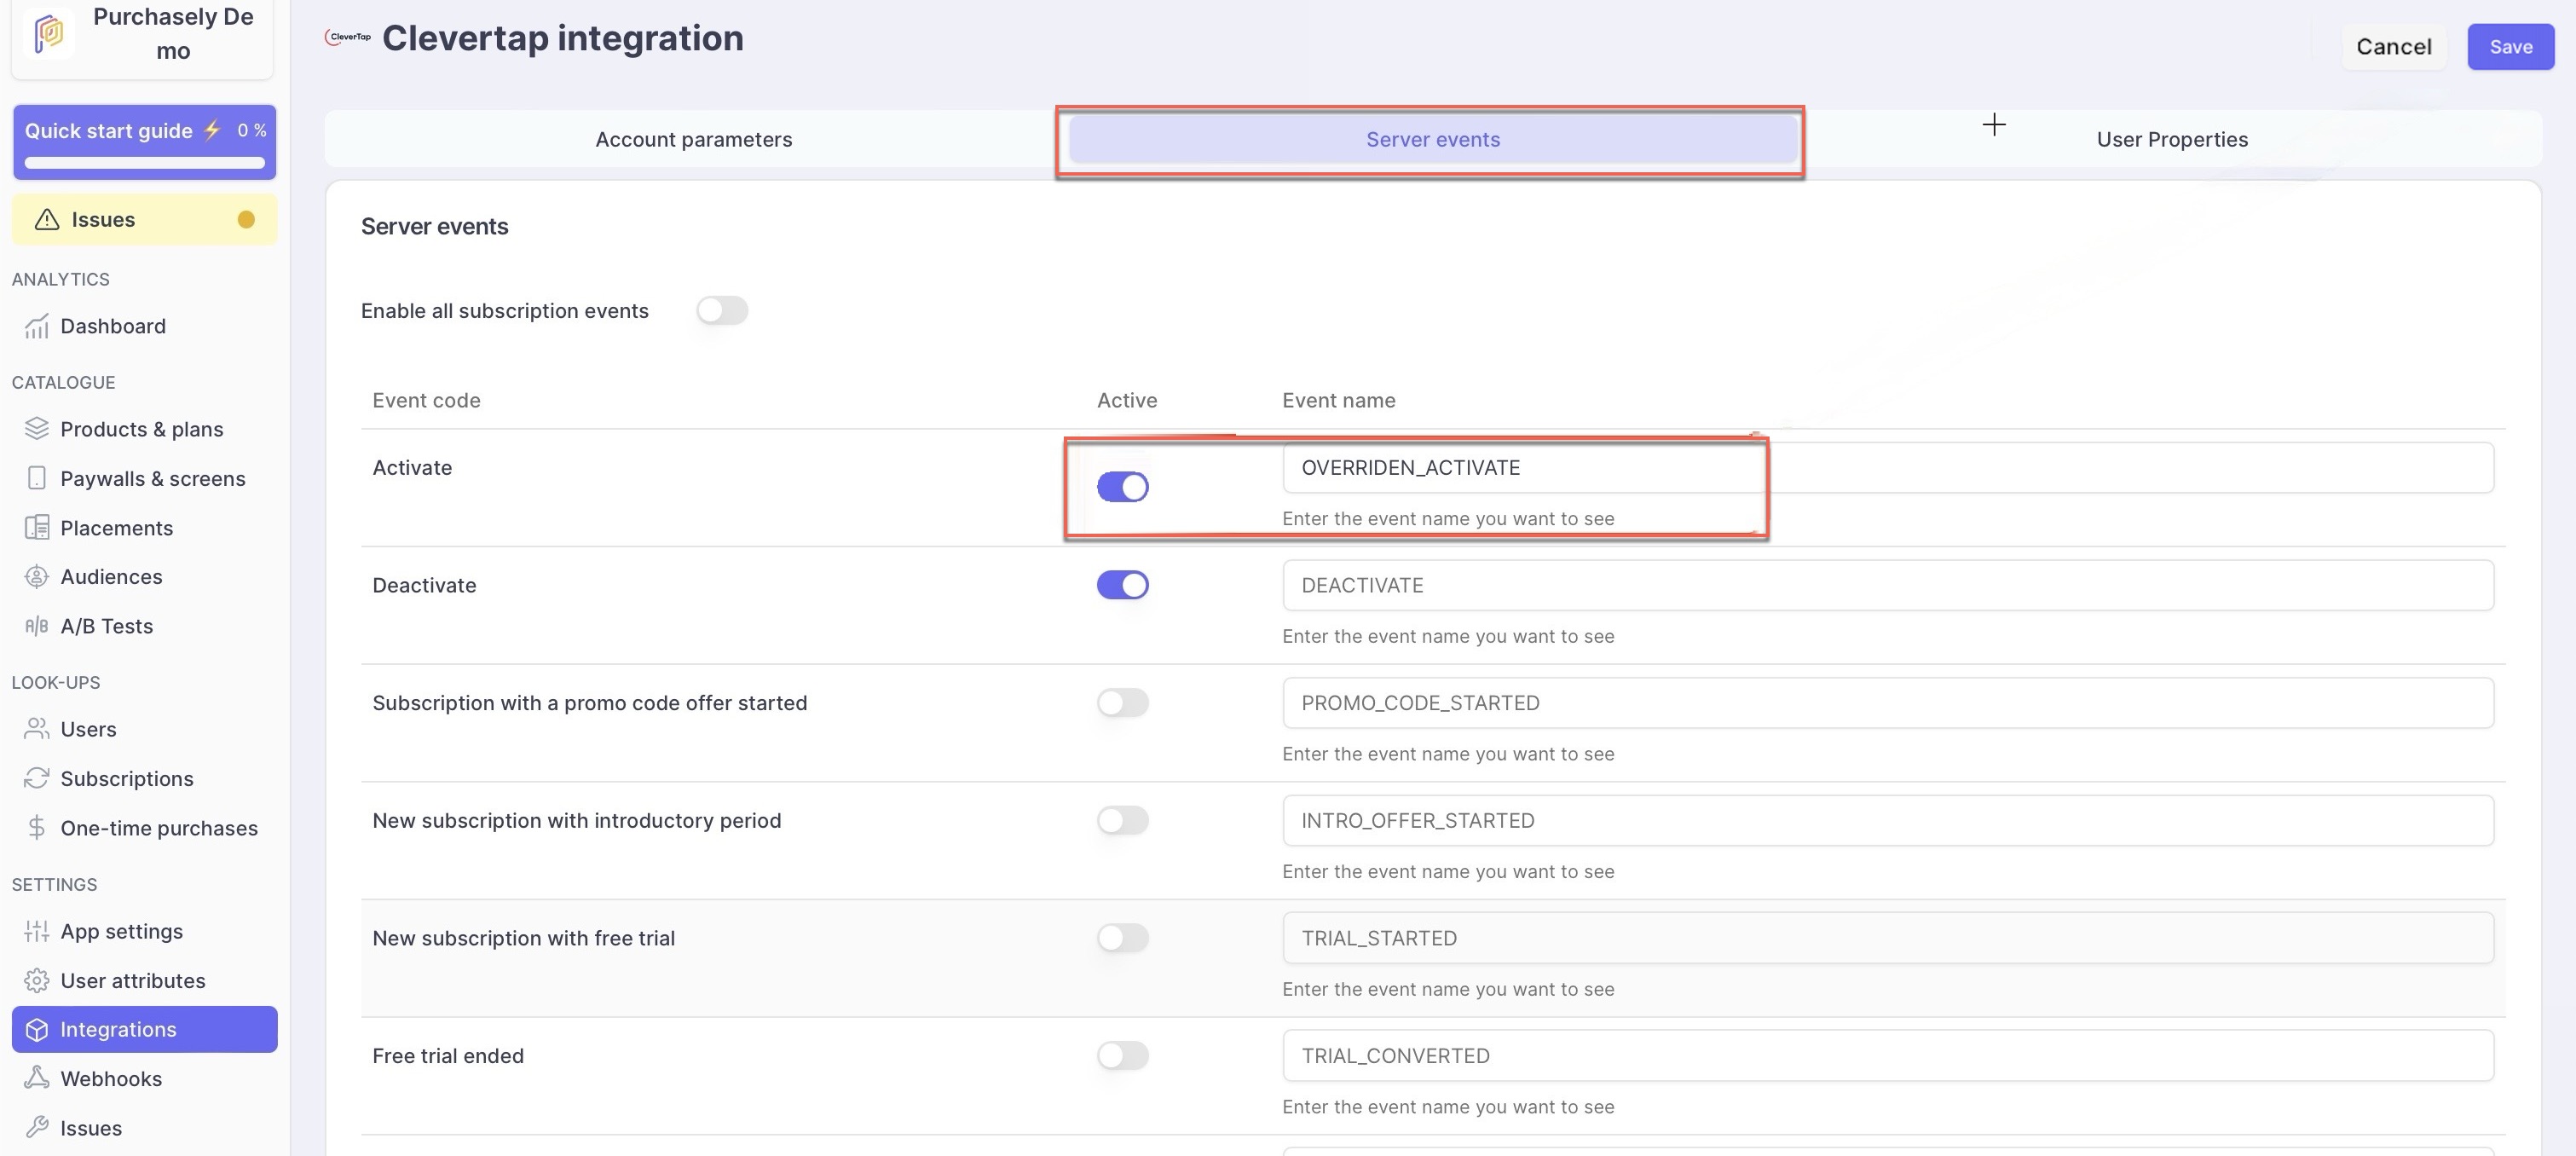
Server events
- Go to the User Properties tab, enable the update of user properties to be sent to CleverTap under User Properties, and click Save. For more details about the supported User Properties, refer to User Properties.
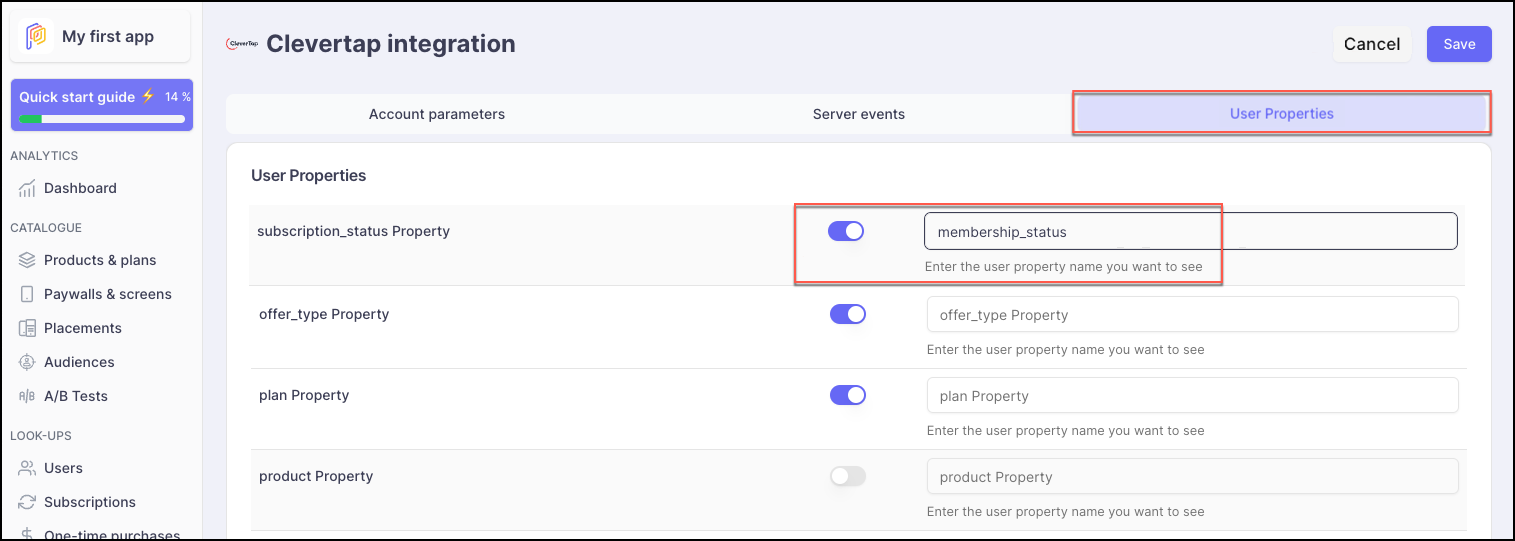
User Properties
Renaming EventsYou can override the names of Events and User Properties sent to CleverTap when setting up the integration.
With a few simple steps, synchronizing user identities, configuring integration settings, and enabling event tracking, you can unlock deeper insights into user behavior and take action through CleverTap’s powerful engagement engine.
Updated 8 months ago