Send Test Personalization
Learn how to send personalized test push campaigns from the CleverTap dashboard.
Overview
In modern marketing, creating personalized campaigns is crucial for connecting with audiences. The Send Test Personalization feature streamlines this by enabling marketing teams to test campaigns with personalized values, ensuring a seamless display of tailored content. This empowers marketers to scrutinize individualized elements within the message with precision. For example, marketers can send a marketing email that includes product recommendations or specific user data to their internal audience. The results of the test help verify that the personalized elements in the campaign are displayed correctly for the internal audience before sending it to their customers.
You can send a test push campaign with personalized values using the Preview & Test option from the campaign page.
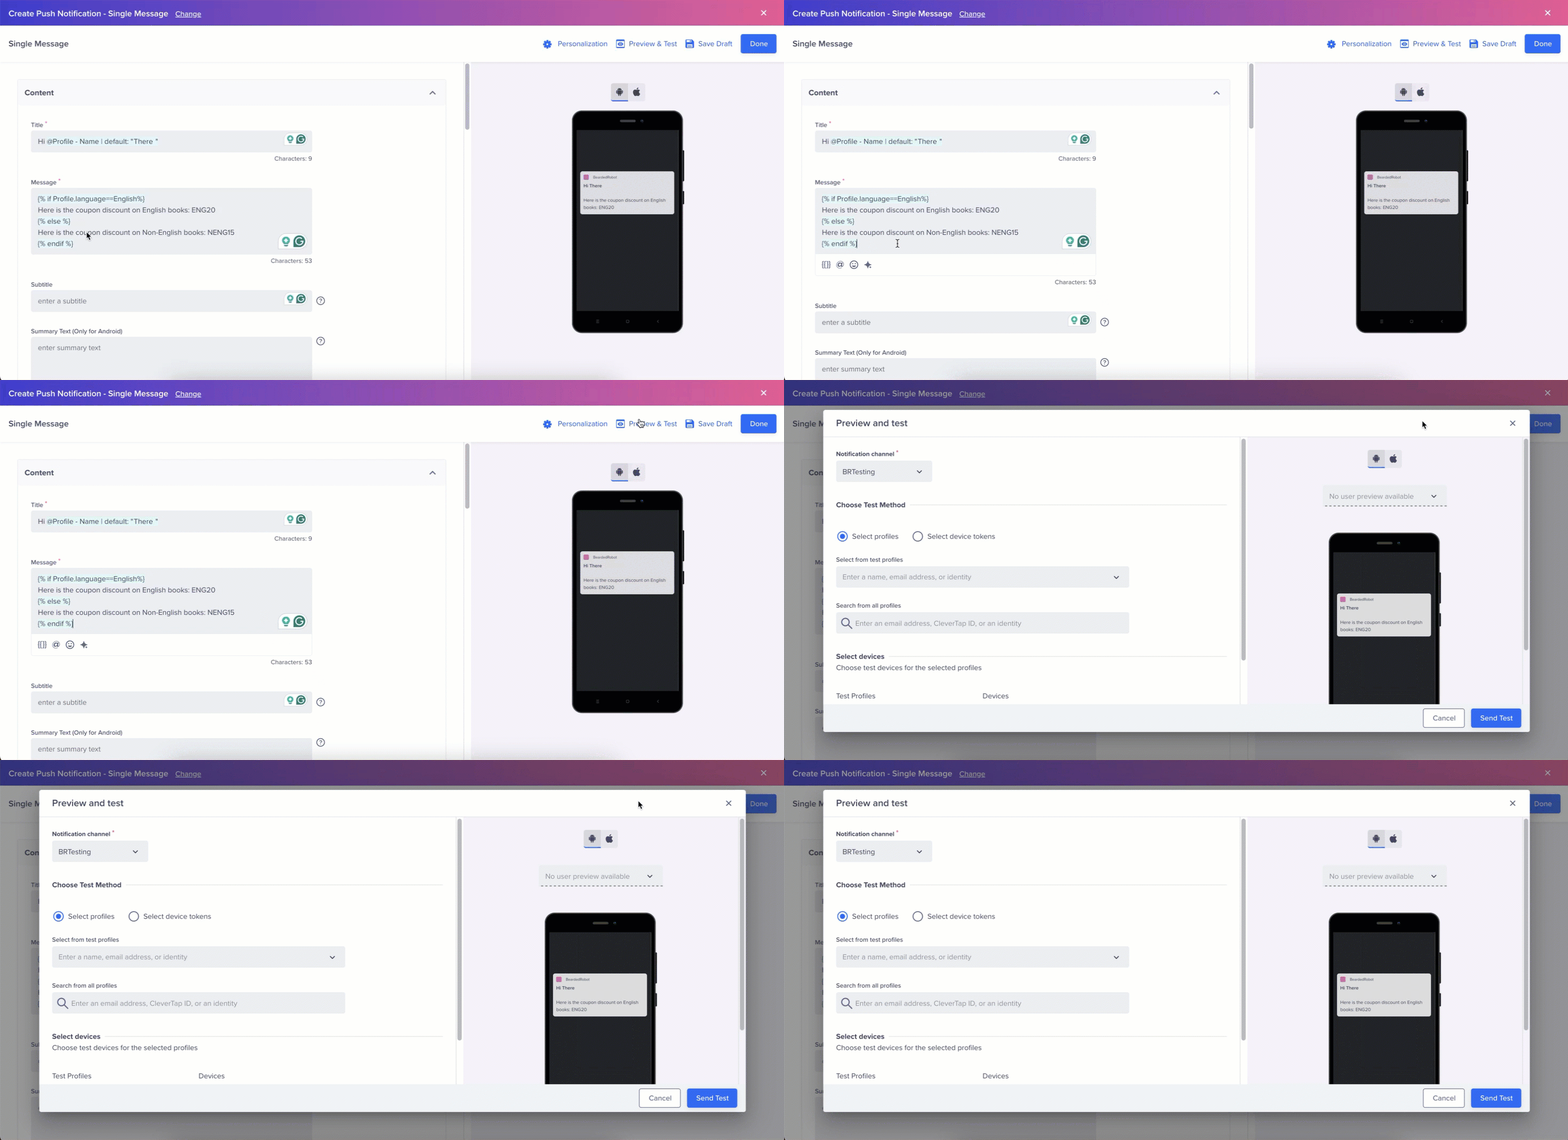
Preview & Test Popup
Ways to Send Personalized Test Message
CleverTap provides the following three ways to select the users to send a personalized test message:
- Select from test profiles: In this case, you can select multiple profiles that are marked as test profiles and send a test message to them.
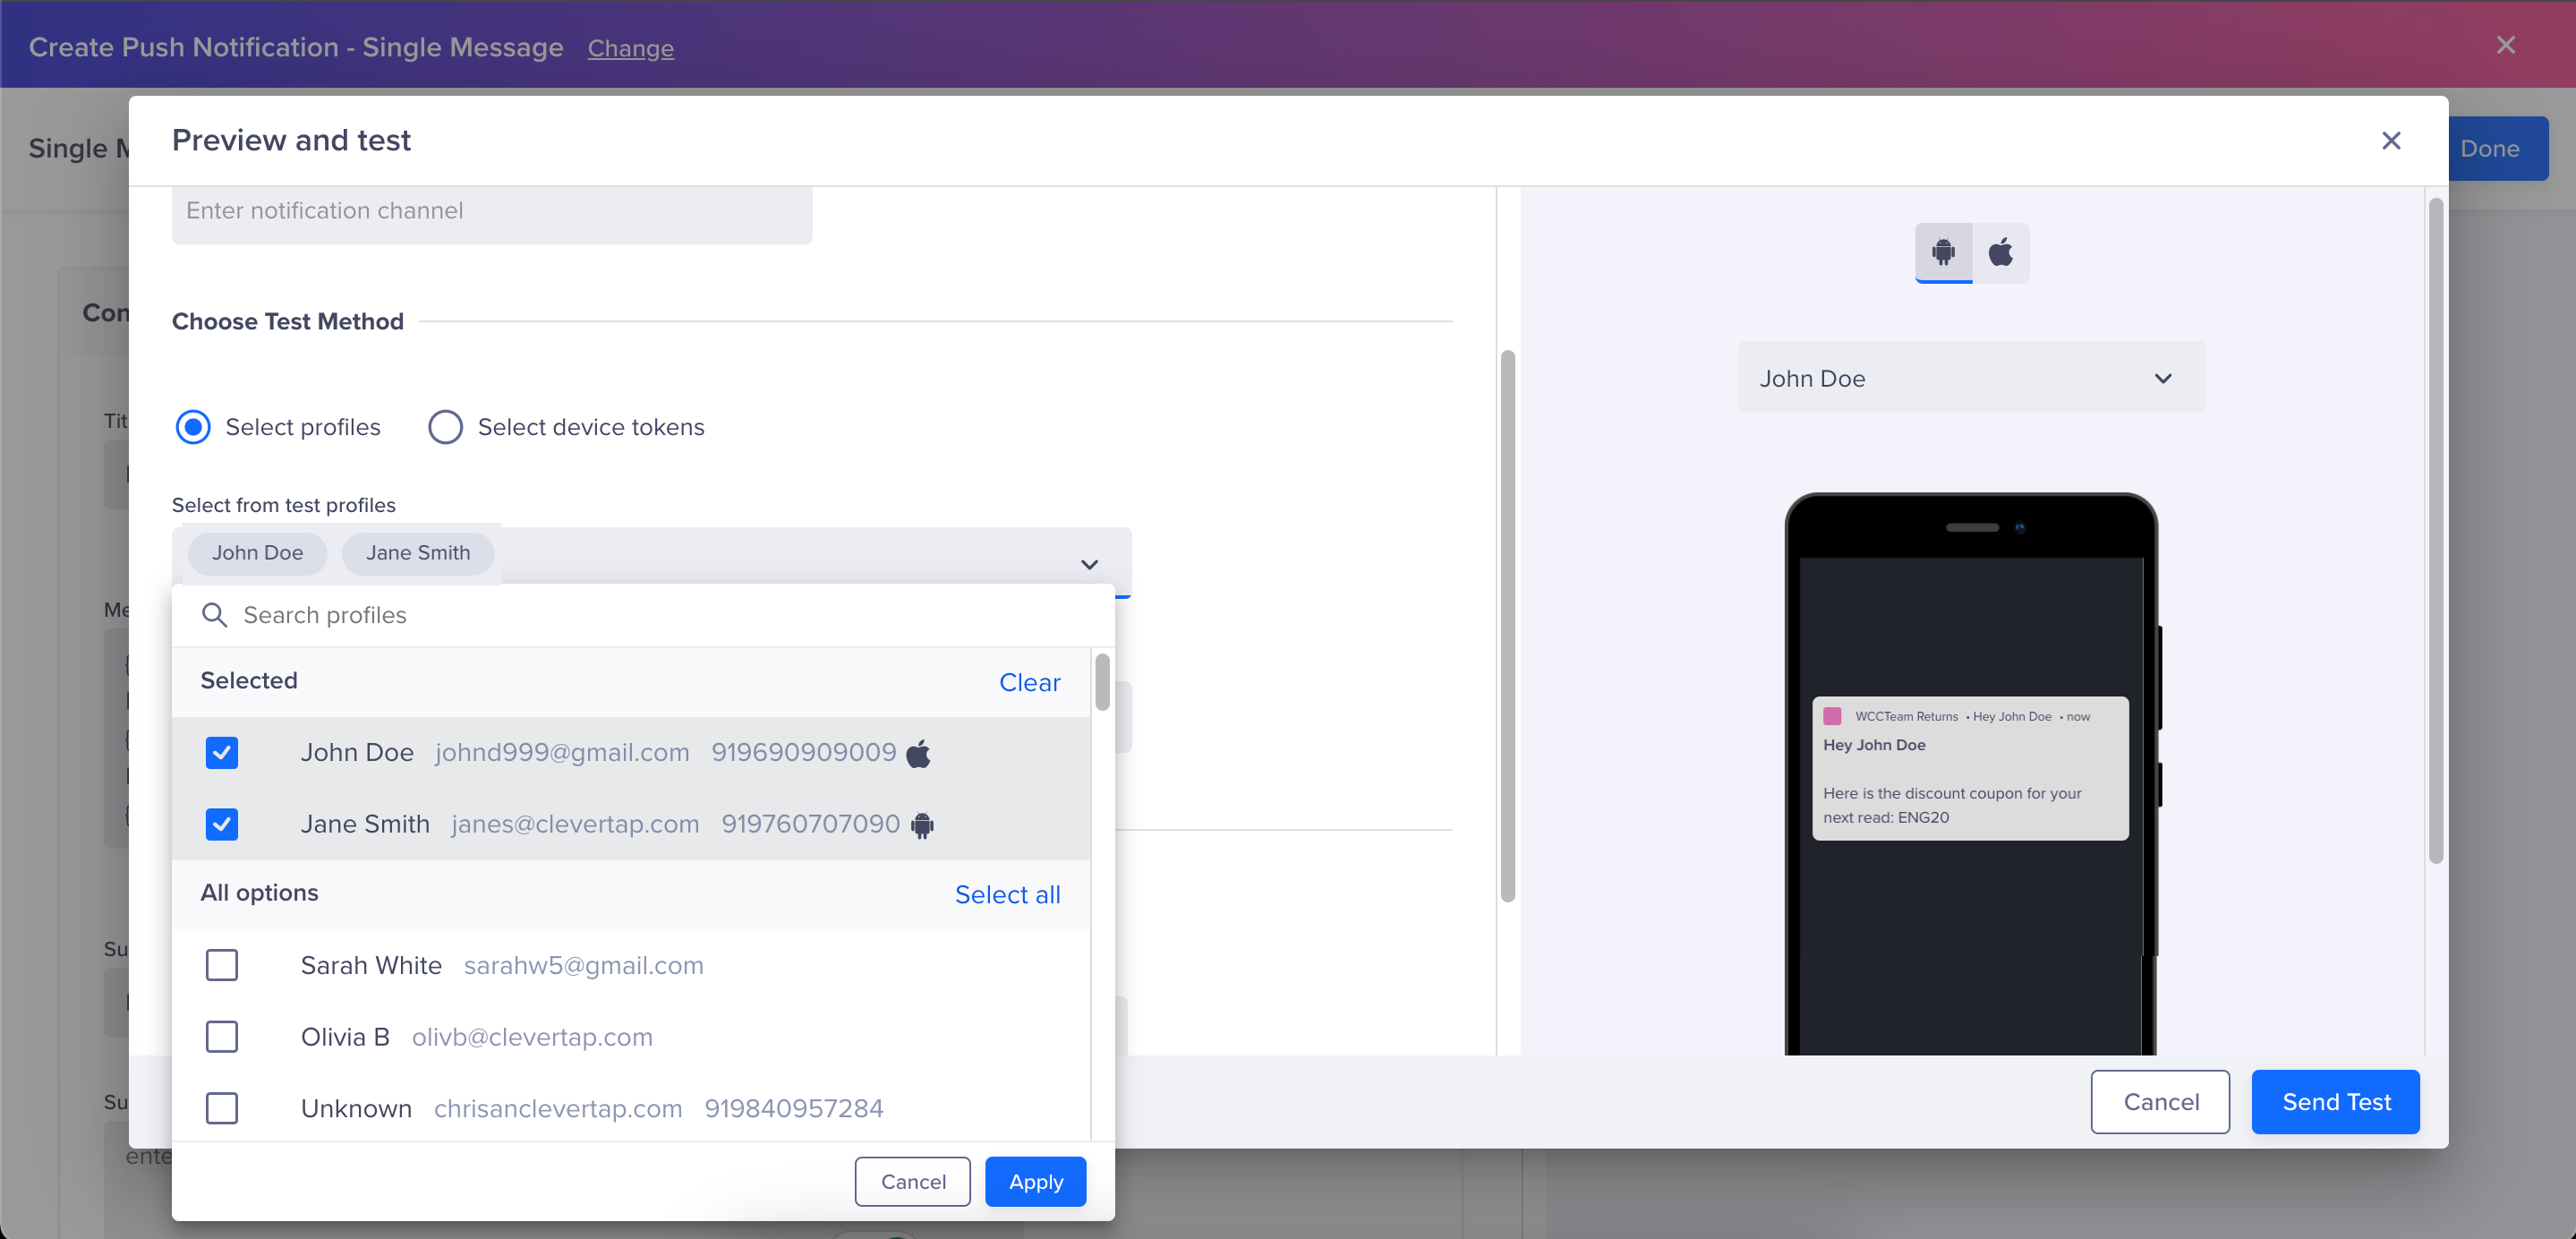
Select a Profile from the Test Profiles
-
Select from all profiles: In this case, you can select the email address, CleverTap ID, or identity of the profiles that are already present on your dashboard and send them a test message. You will be able to send a notification to the profiles with valid tokens.
-
Select device tokens: In this case, you can manually enter the Android or iOS device tokens of the device to which you want to send a test message. Only event personalization, constant event property, and linked content with event property personalization are supported with this option.
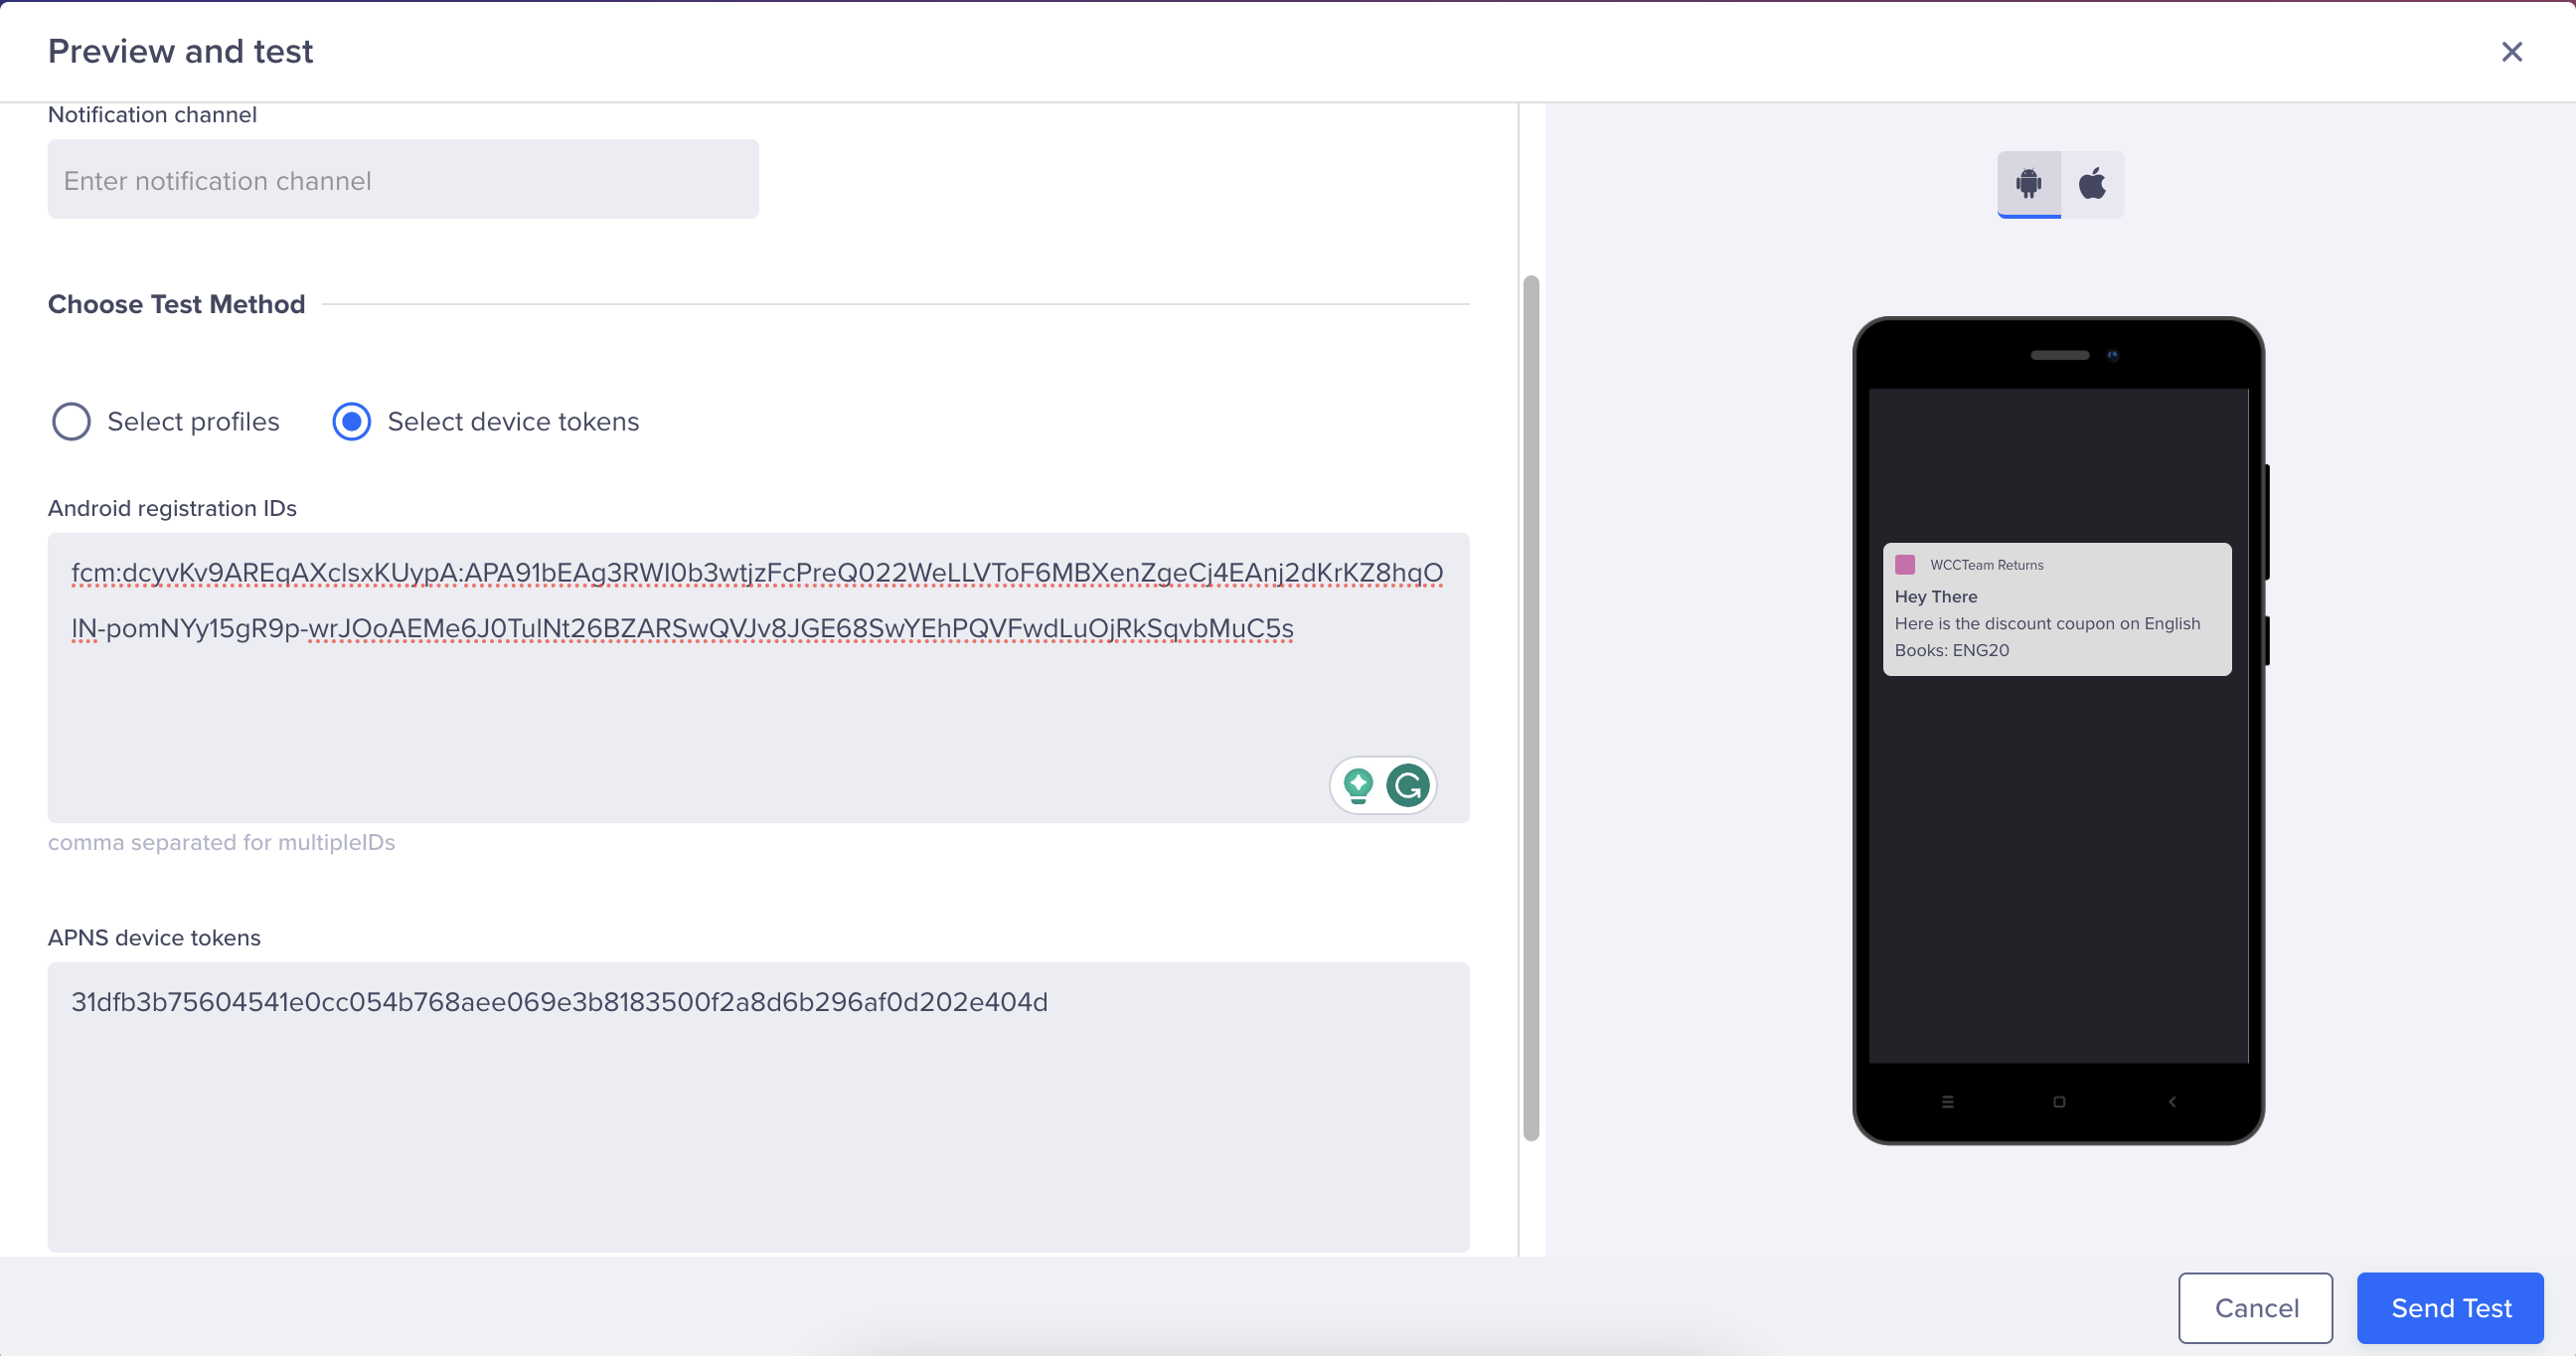
Select Device Token
You can also select one or more devices for the selected profiles and send them a test message. The Select devices section lists only devices with active push tokens for the selected profiles.
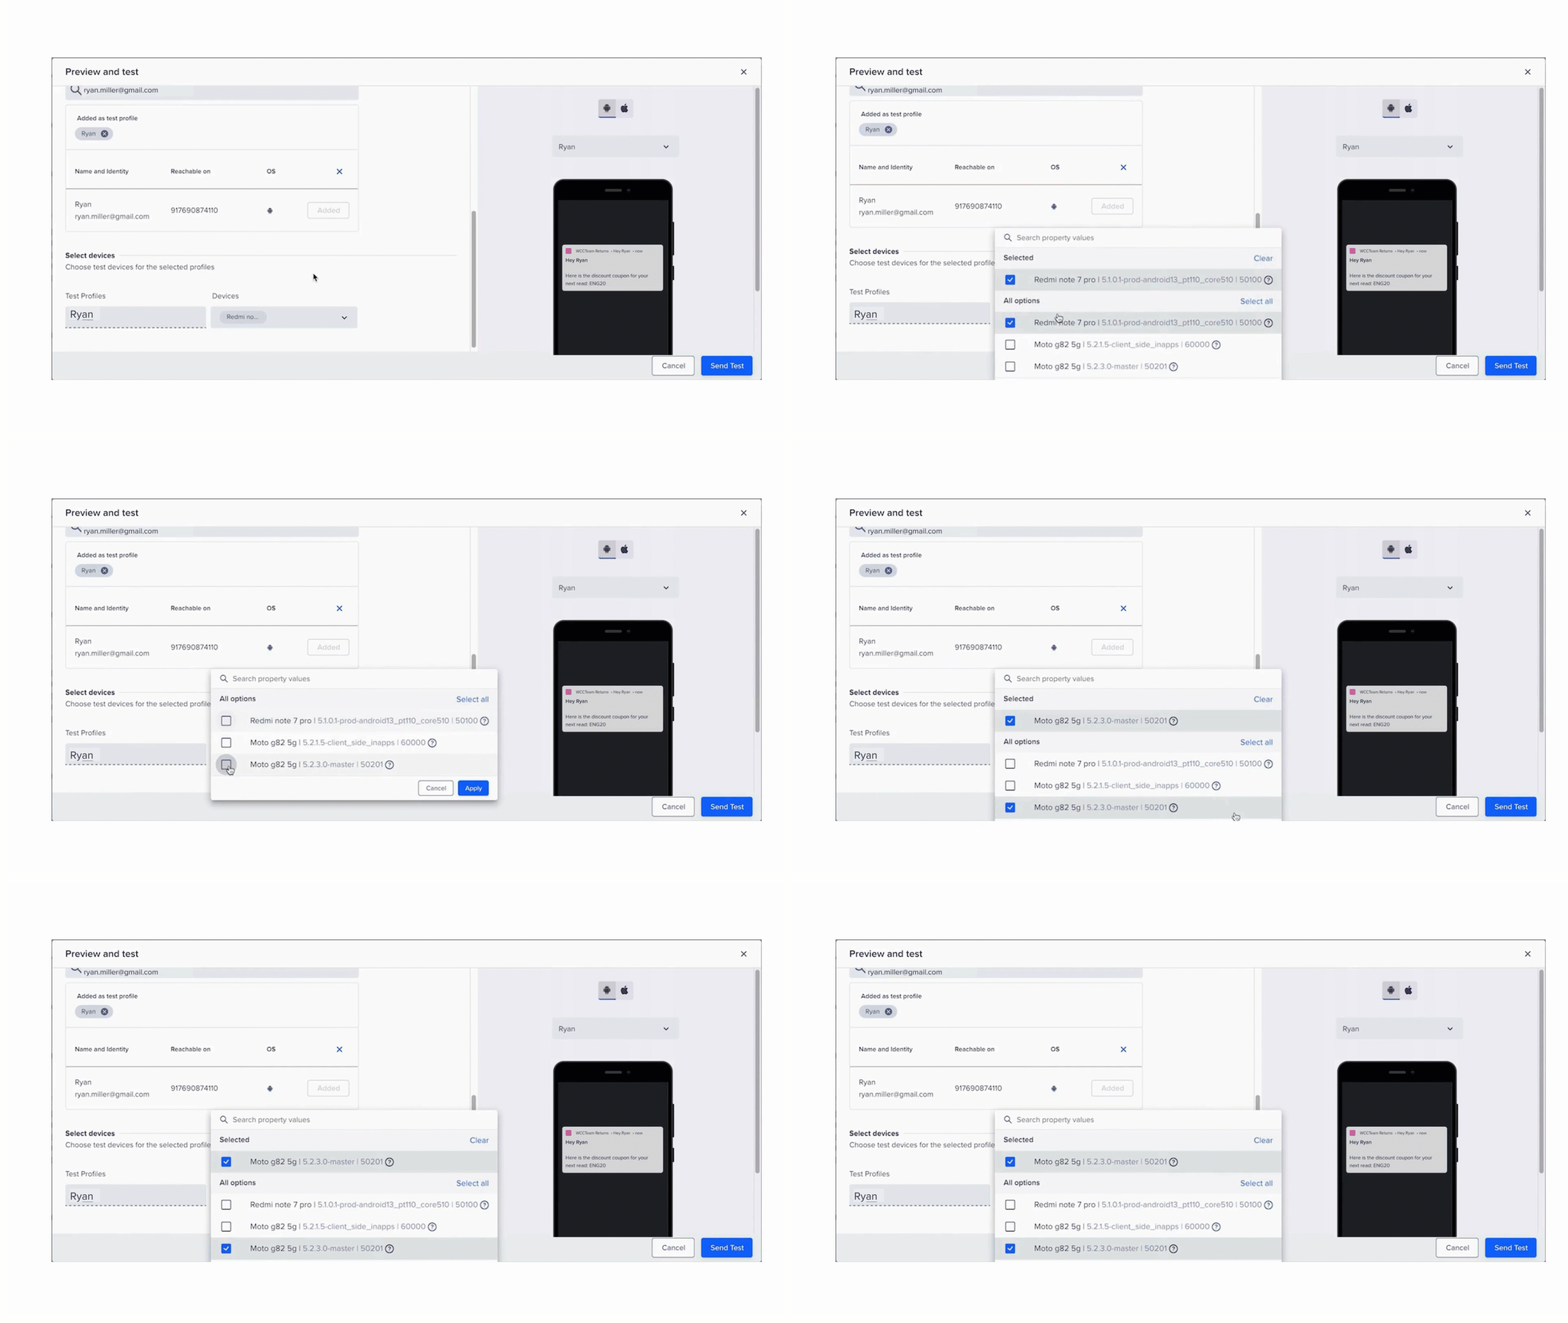
Select Devices for the Profile to Send Test Message
After configuring all the required fields, you can preview the campaign with personalized values for the selected user profile before sending the message. If you select multiple profiles, you can select the user from the dropdown under the Preview section on the right (refer to the following image).
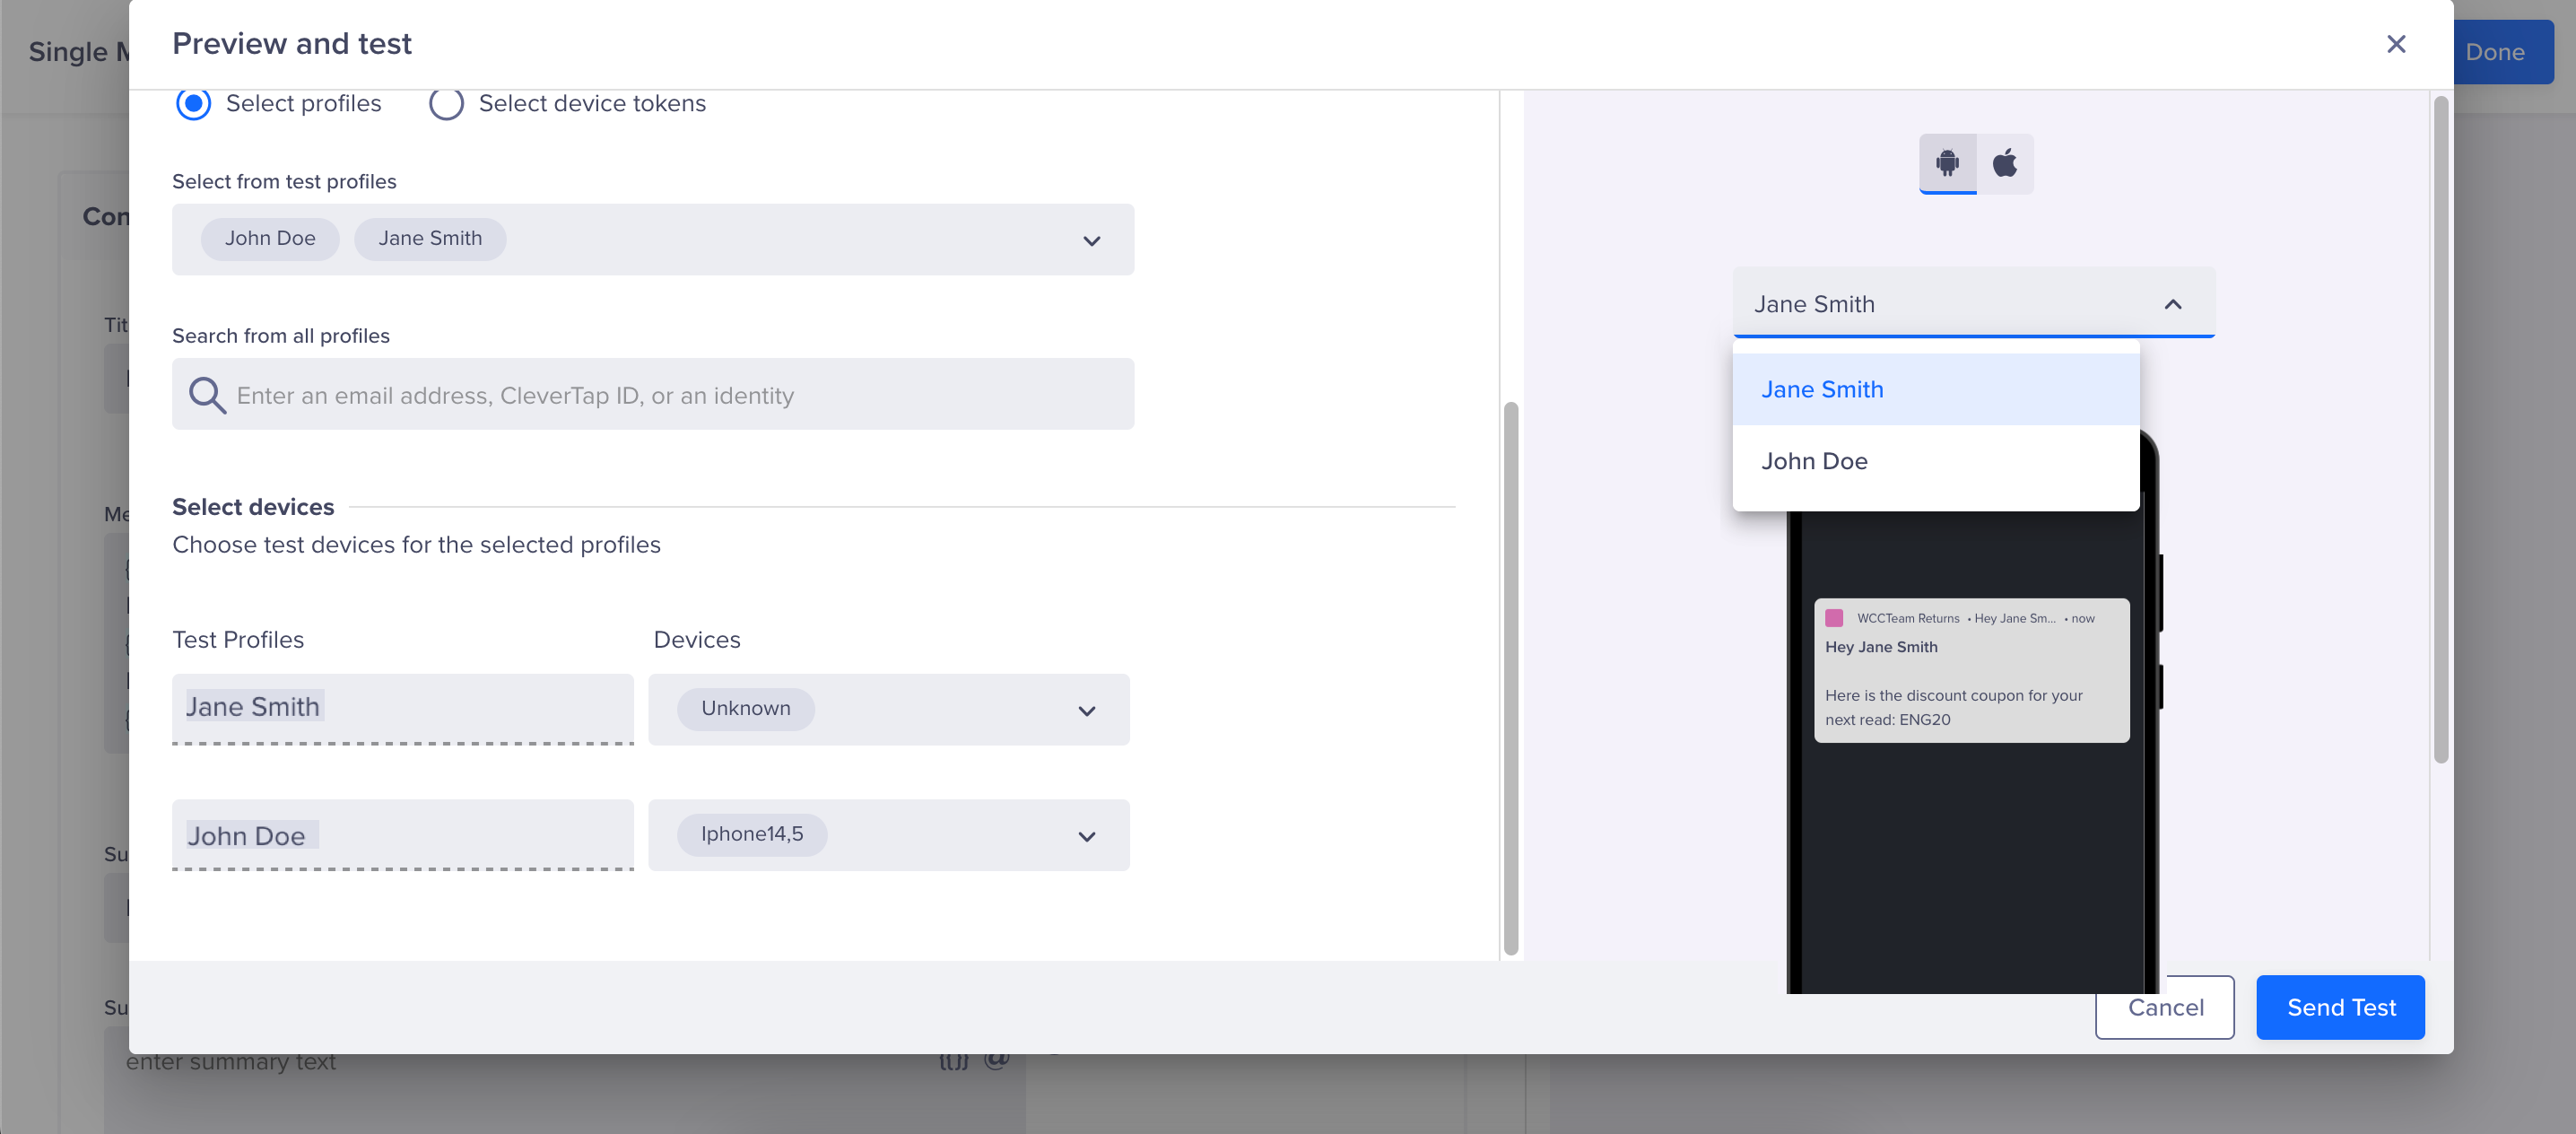
Select User Profile to Preview Campaign with Personalized Values
Consider a scenario where your message includes event personalization, that is, you want to send a personalized value for the event properties in your message. You can only use the event properties of the triggering event you selected in the WHO section. The top 20 event property values associated with the same event that occurred within the last five days are listed under the Event Personalization section. You can select from the list the value that you want to send in your test message. The value that you select here will be sent to all the selected profiles.
For example, if you are a subscription platform and you want to send a reminder campaign to your subscribers to resume watching the series from where they left off. Here, the event will be Video Watched, and the event property will be Series Name.
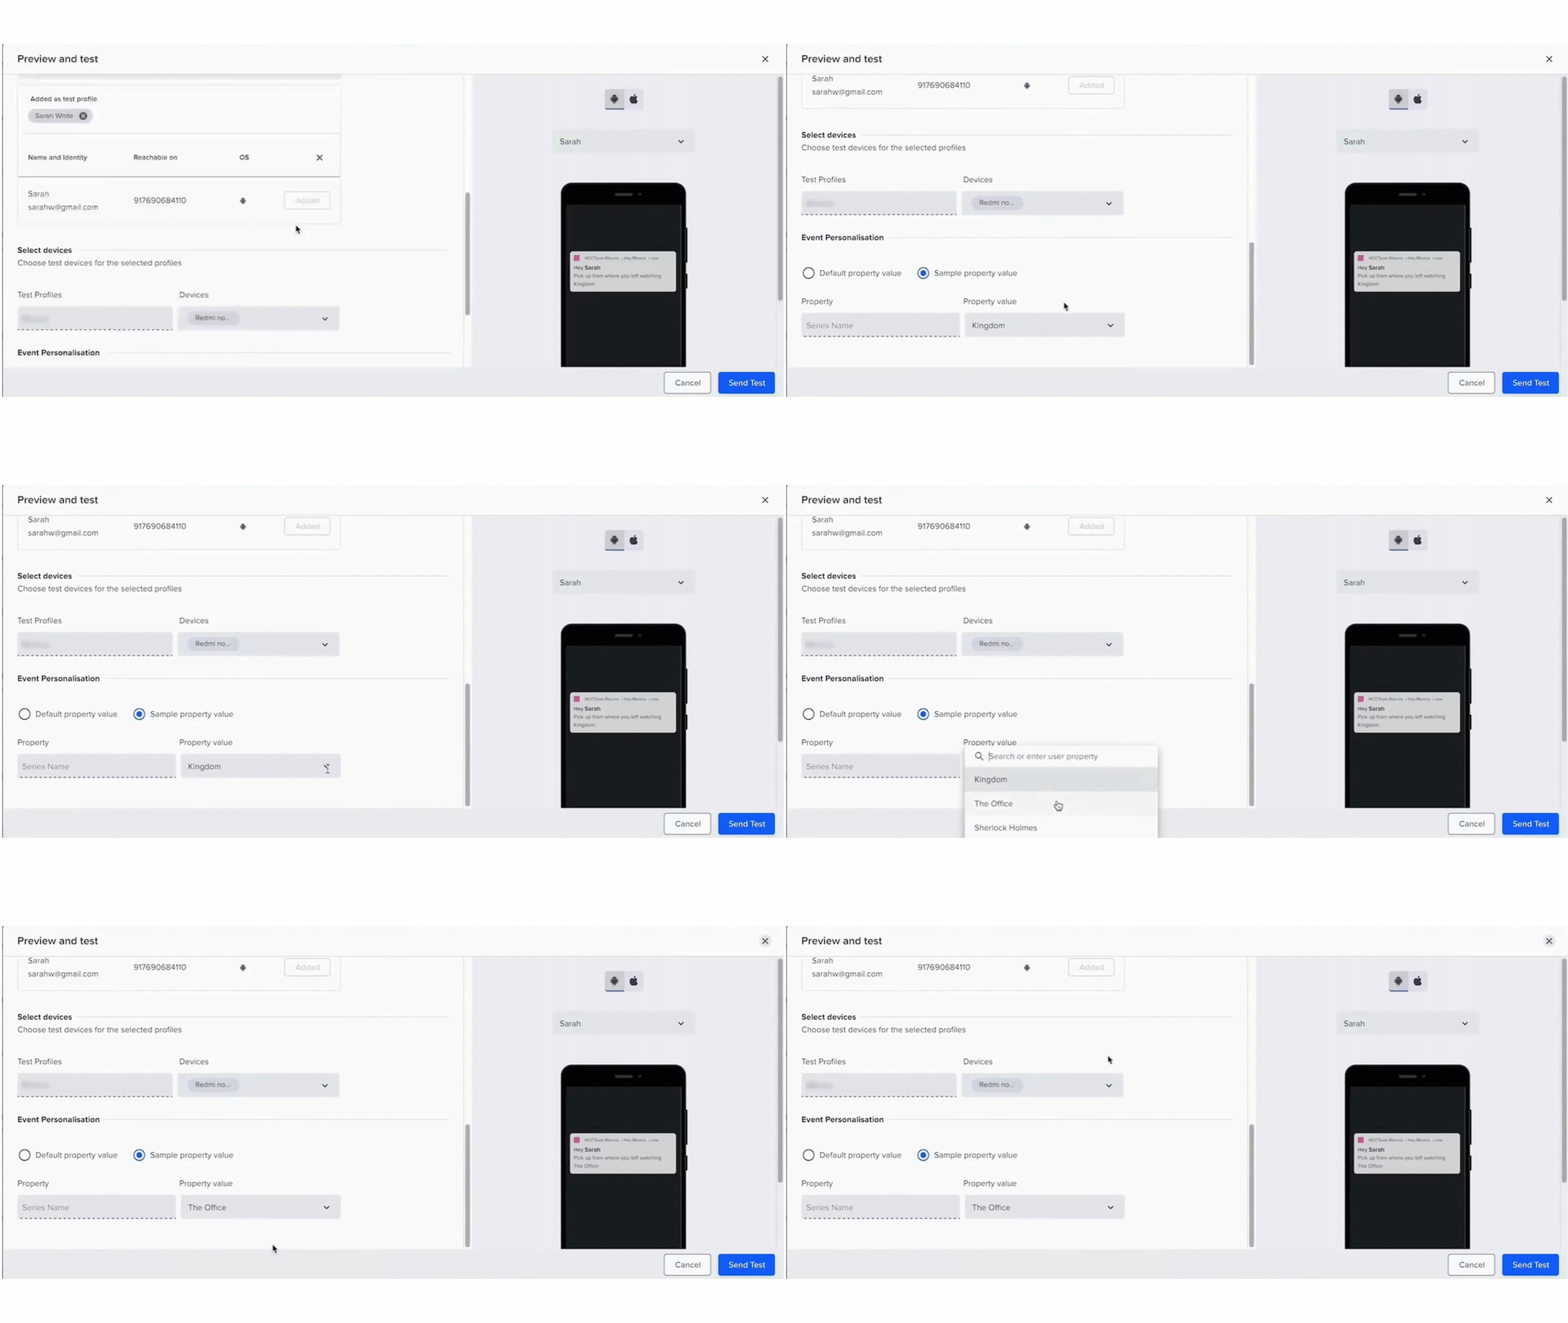
Event Personalization Example
Send Test Response
You can view the response details as soon as you send the test message. To do so, click Send Test from the Preview & Test popup. The Send Test Response window opens, where all the response details are classified into the following categories. Click the + sign against each user to view all the details (refer to the following image):
- Details of the message sent successfully
- General Errors, if any
- Linked Content Response: You can copy the responses by clicking the
 icon against the respective response.
 - Liquid Tags Error, if any
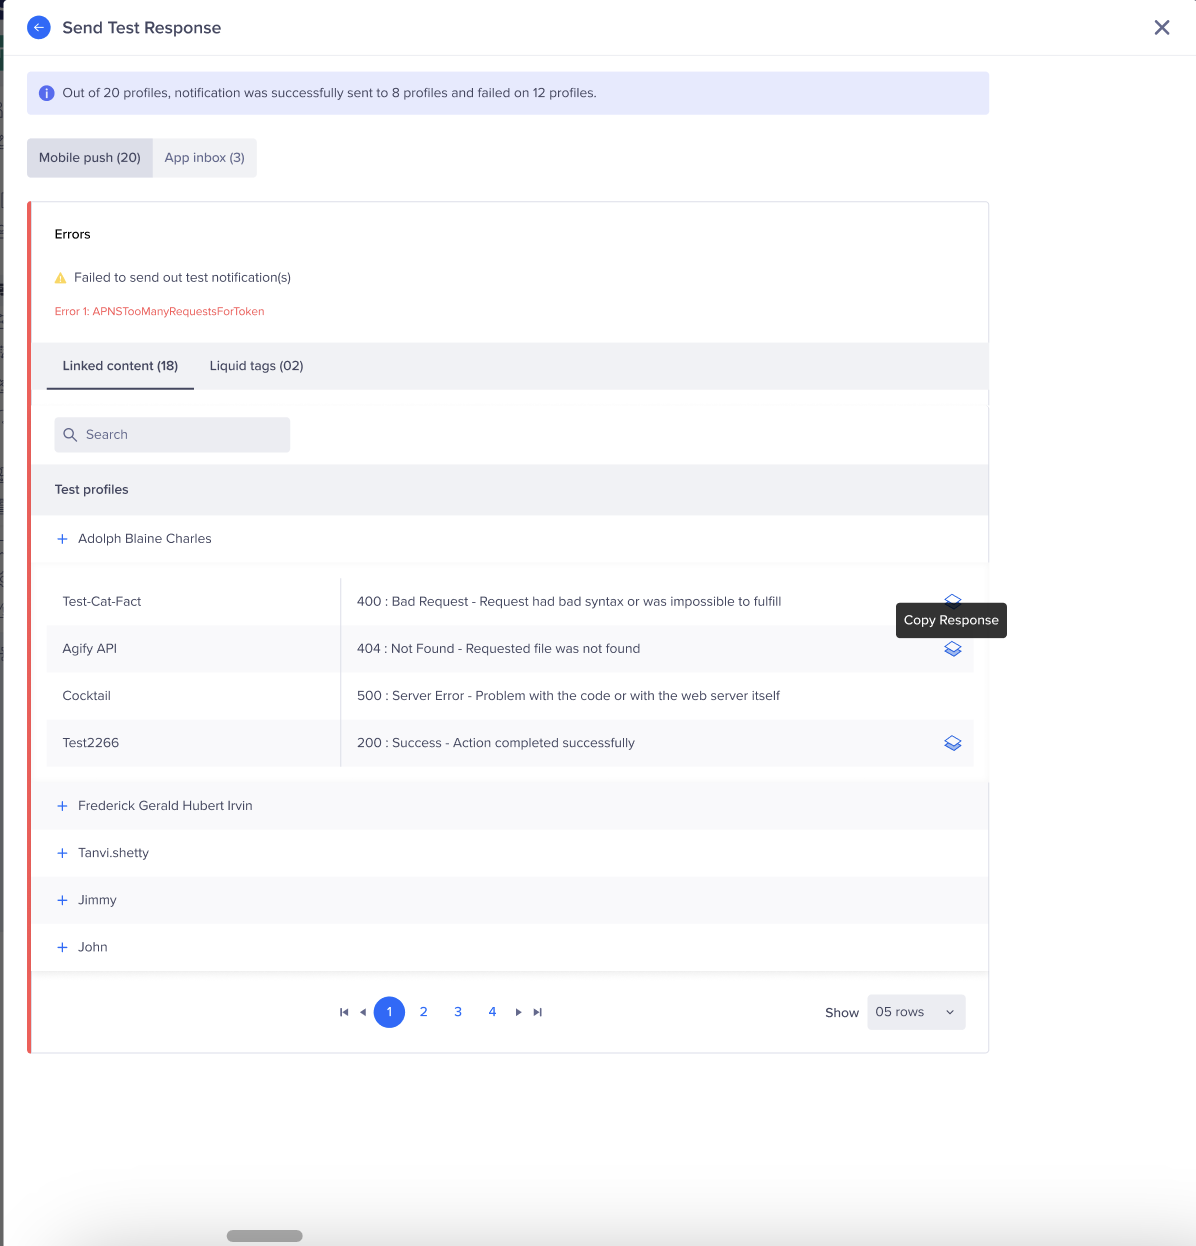
Send Test Response Per User
This ensures a thorough examination of the test response, offering valuable insights into the success and potential errors associated with the sent test messages.
Updated about 2 months ago
