
Create Message
Understand how to create a campaign for Google Ads
Overview
Remarketing with Google Ads is a way to re-engage users outside your app or website by showing them ads across the Google Search Network, YouTube, and Gmail. Using CleverTap, you segment your users, export those segments to your Google Ads account as audiences, and run targeted remarketing campaigns against them.
For example, suppose a group of users viewed a product in your app but did not purchase it. You can build a segment of those users in CleverTap, export it to Google Ads, and serve them ads for that product the next time they are on Google Search, YouTube, or Gmail.
The Google Ads remarketing module under Campaigns on the CleverTap dashboard is easy to set up for all your users or for distinct user segments. You can base these segments on past user behavior, user properties, or a combination of both.
NoteBefore you create a campaign, check that you have connected your Google Ads account in Settings > Channels > Remarketing > Google. For more information, refer to Google Ads Setup.
Create a New Campaign
Create a campaign to deliver your Google Ads message.
To create a new campaign:
- From the CleverTap dashboard, select Campaigns.
- Click + Campaign.
- From the Messaging Channels list, select Google Ads.
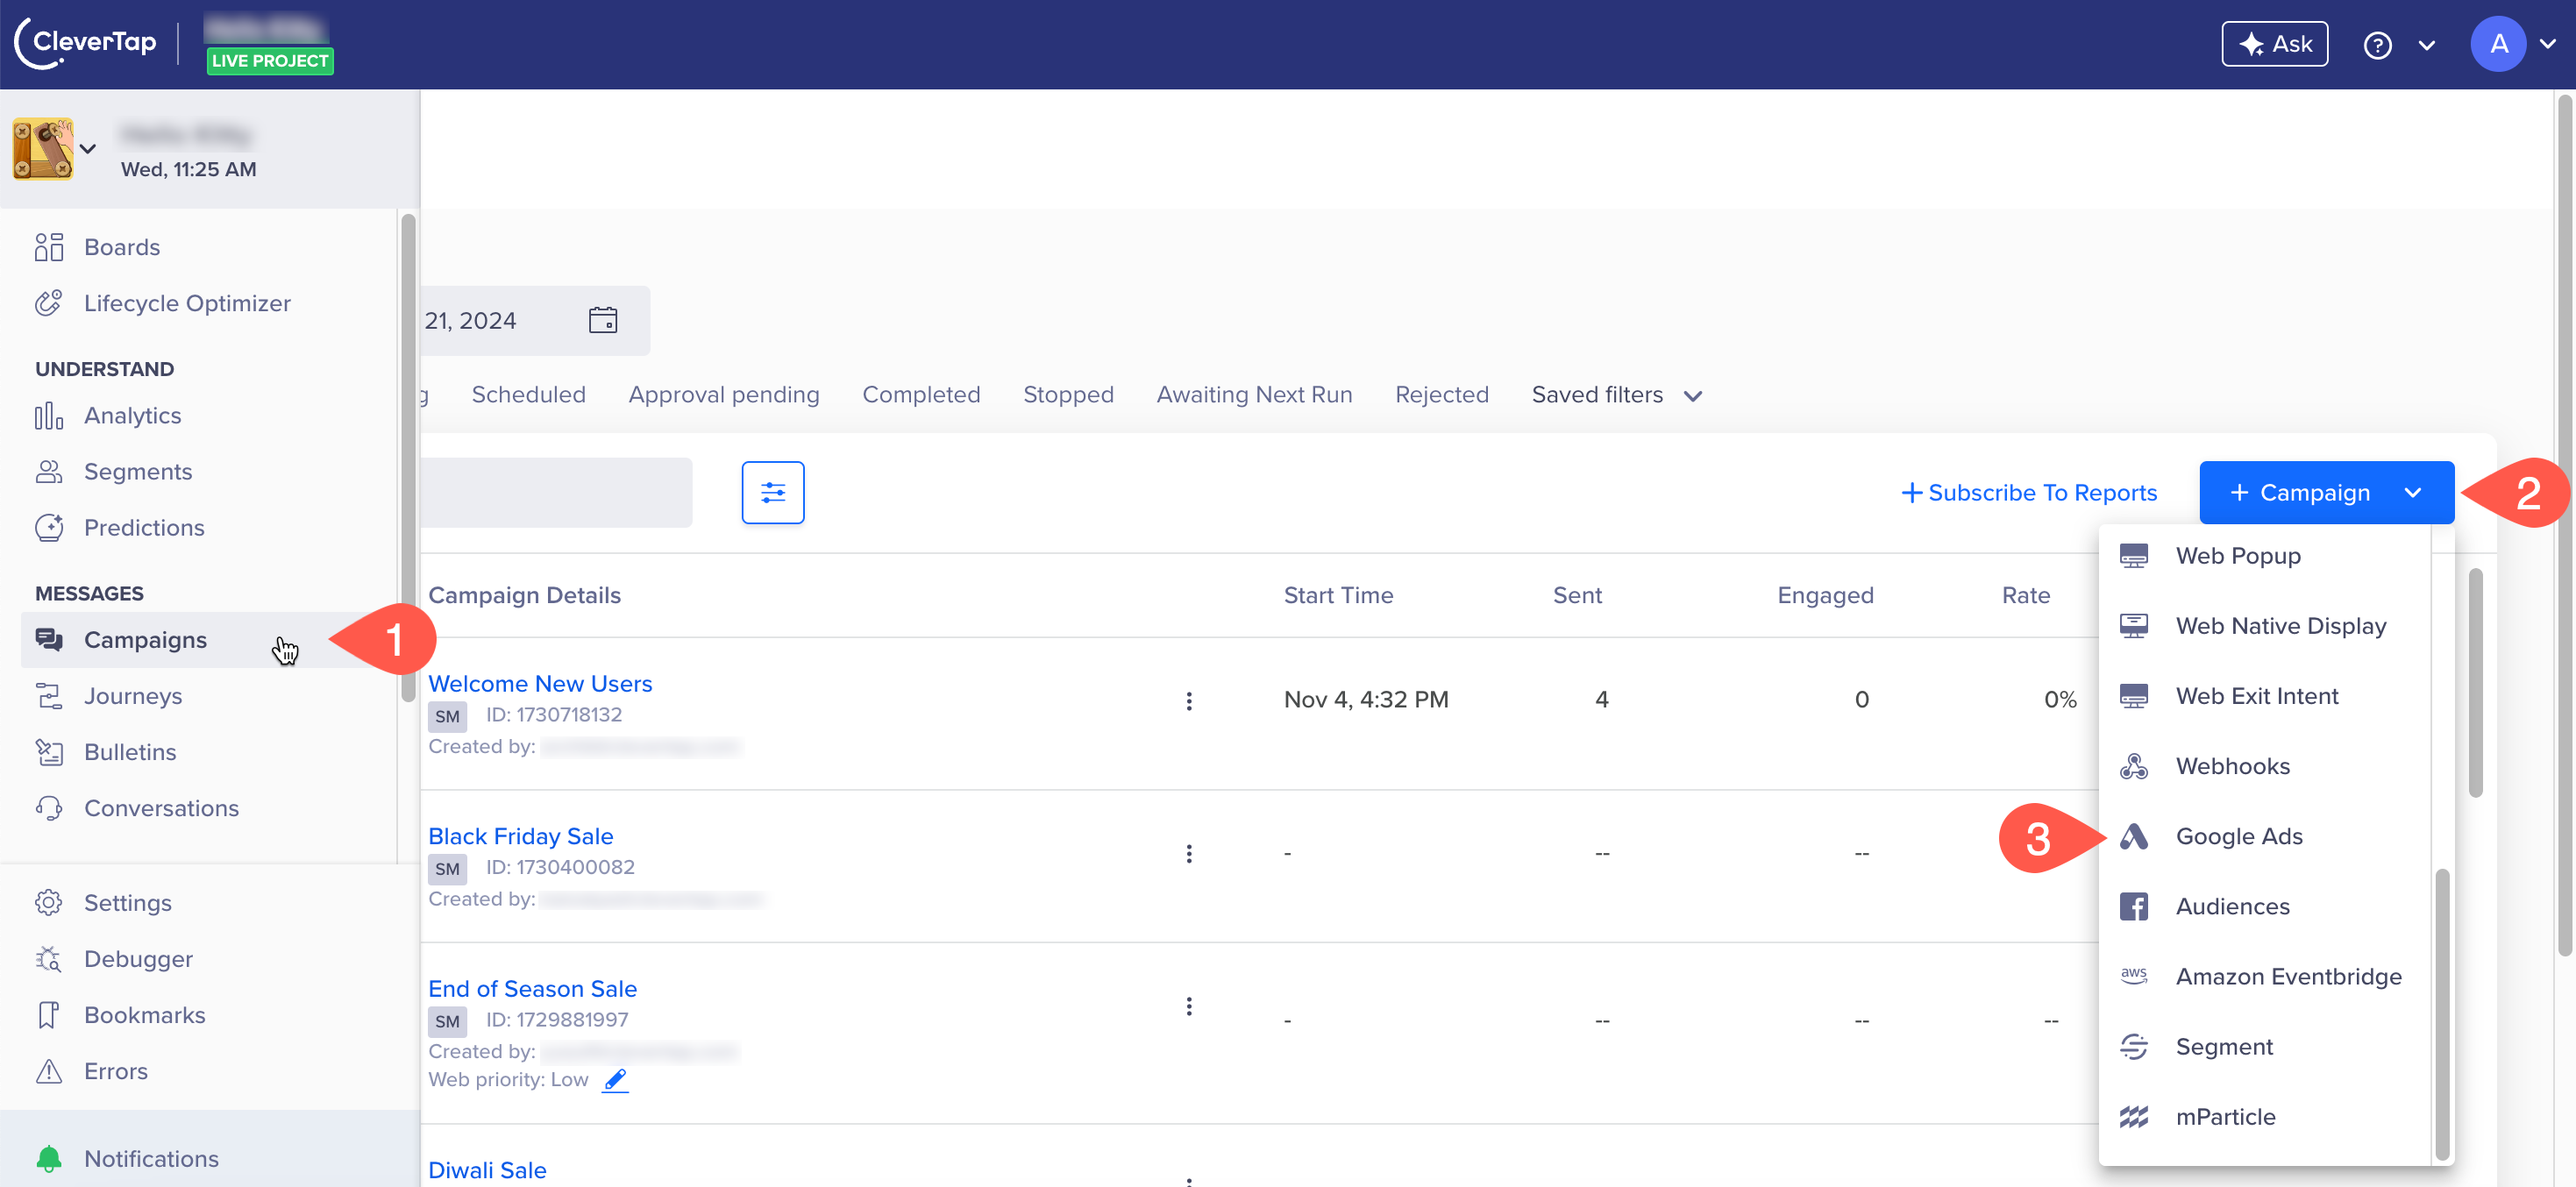
Create a New Google Ads Campaign
The Campaigns page displays.
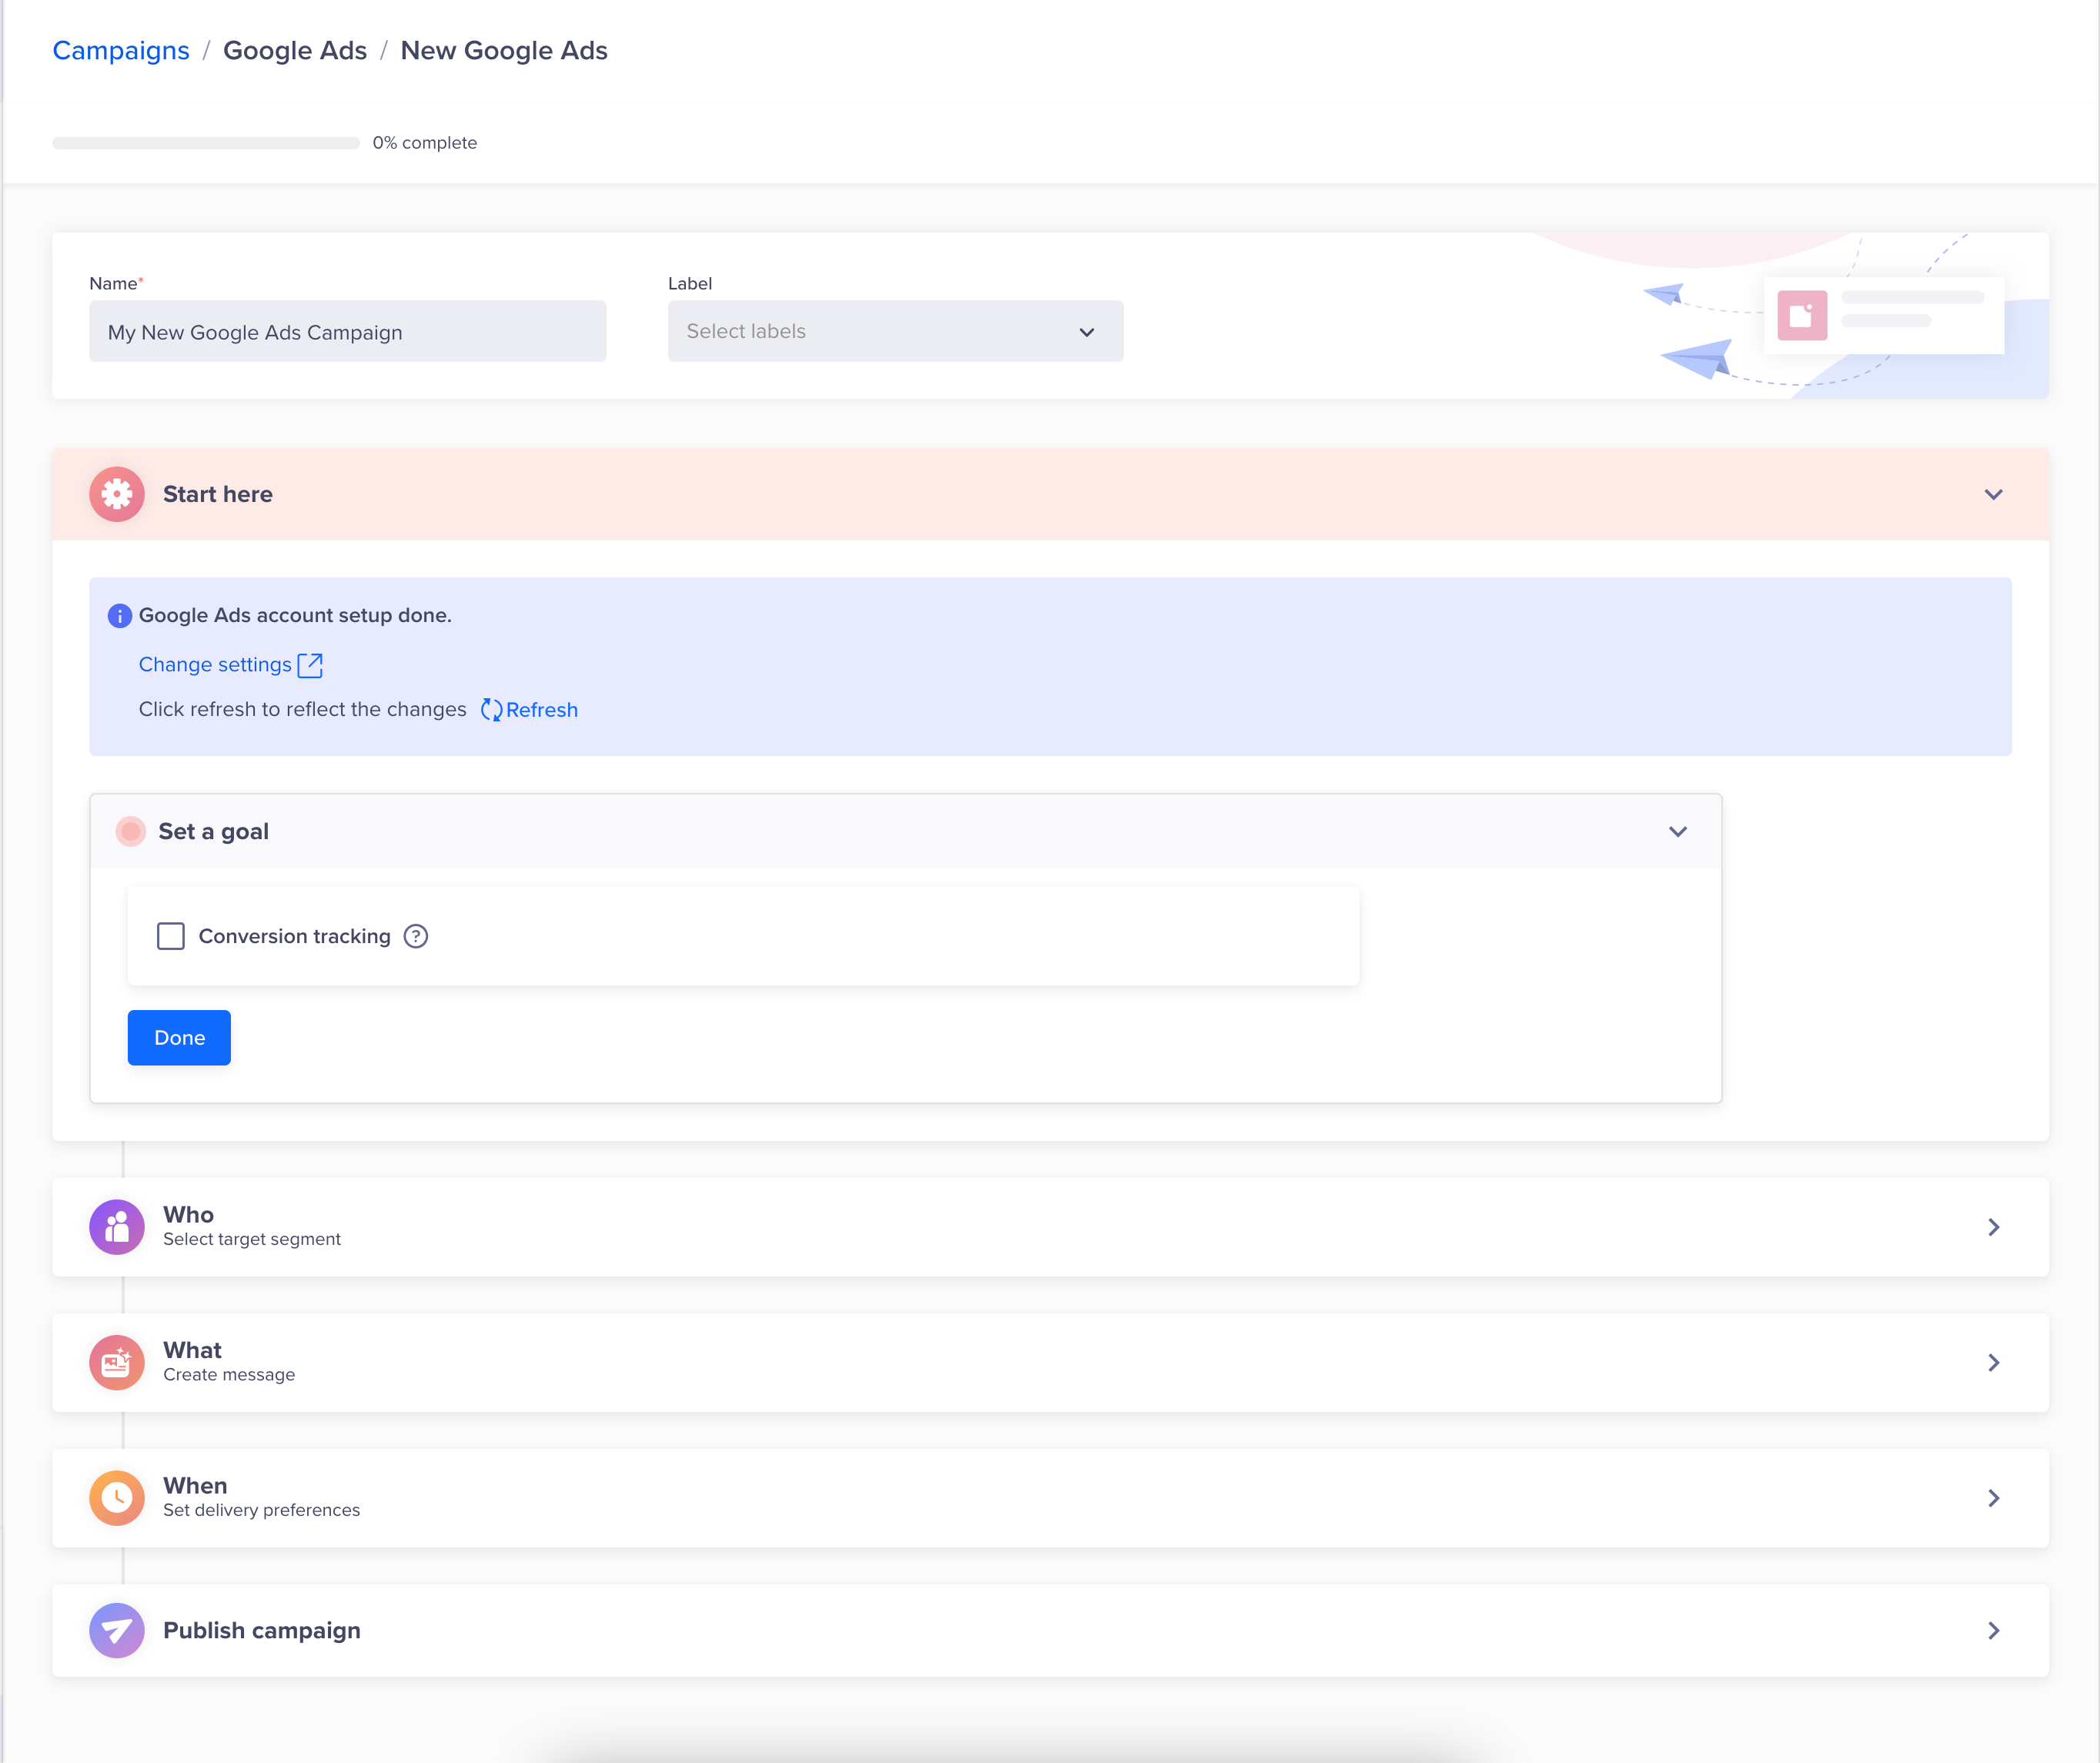
Google Ads Campaign Configuration Page
Define all the sections and publish the campaign.
Start Campaign Setup
The Start here step is where you select the Google Ads account for the campaign and set an optional conversion goal. It has the following sections.
Ad Account
Select the Google Ads account that receives the exported users. This is the first section in the Start here step.
Export destination (required): Select the Google Ads account to which you want to export qualified users. The dropdown lists all connected Google Ads accounts. If you set a default account in Settings > Channels > Remarketing > Google, it is pre-selected here. You can change the selection for this campaign.
If the account you want is not listed, click Connect account to connect a new Google Ads account, then click Refresh to update the list.
The campaign cannot proceed until a Google Ads account is selected.
Set a goal
You can track your campaign conversion by setting up a goal. Setting a goal allows you to measure your campaign effectively against what you want to achieve with the campaign. This selection is optional.
Select Conversion tracking to enable goal tracking for the campaign. You can define your conversion goal further by filtering an event by event properties.
The campaign goal can be as generic or as specific as you want. It can answer questions from How many users were influenced for purchasing an X amount? to How many first-time visitors purchased red shoes worth a minimum of X amount and blue jackets worth a minimum of Y amount?
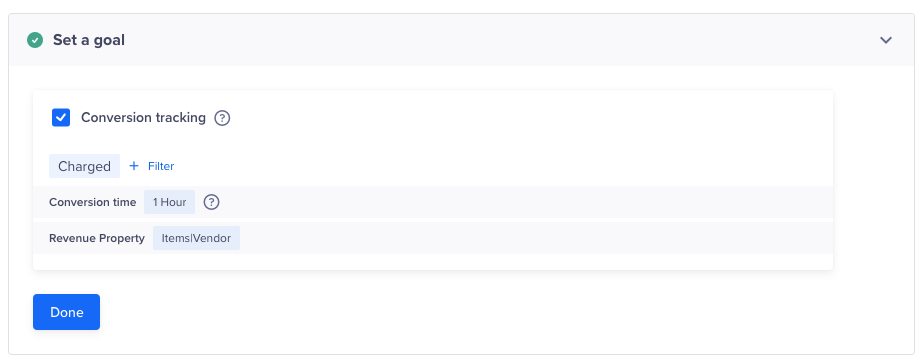
Goal Conversion Tracking
Define the Audience
You must indicate the target audience for your Ads campaign. You can specify your target audience from the Target segment section. Here, you can create a new segment or use a previously saved user segment from the segment list.
For Past Behavior segments, you also calculate the Estimated reach.
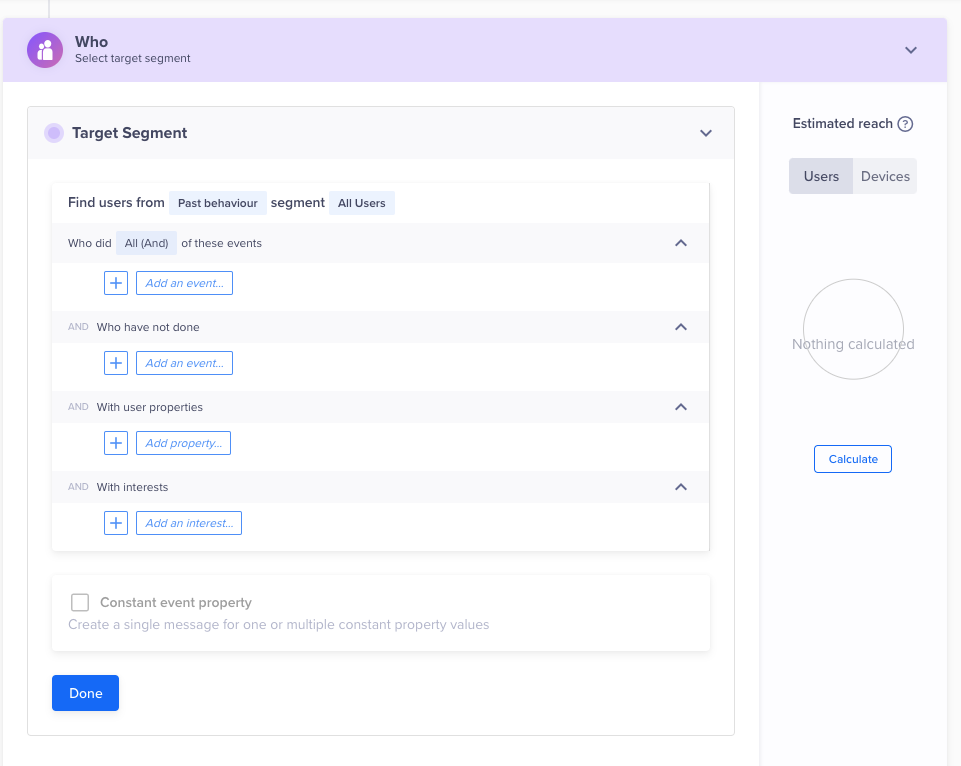
Segment Your Target Audience
Segment
If you want to create an ad-hoc segment, you can select a type of segment on which to base your Ads campaign. You can create the target based on past user behavior and user properties.
On this basis, you would then set up the Who by choosing to send this campaign to all users who qualify or just a portion of the users who qualify under Estimated reach.
Deliver Ads Notifications based on Past Behavior (PBS)
You can also target users based on their past user behavior. For past behavior campaigns, you also have an option to calculate Estimated reach. The estimated reach shows the number of users that qualify for the campaign criteria and the number of reachable users.
Filter by User Properties
Using the With user properties filter in the Who section, you can segment your campaign to only reach users who meet specific criteria.
For example, you can send an Ads notification to English-speaking female users who live in the United States.
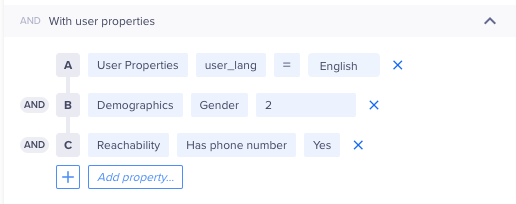
Filter by User Properties
The following table explains the various property types:
| Property Type | Description | Example |
|---|---|---|
| User Properties | Custom user profile properties that you define and send to CleverTap. | Customer Type = Platinum |
| Demographics | Demographics filters include Age and Gender. | Age = 25 to 40 years Gender = Female |
| Geography | User's coarse location. Filters include Country, Region, and City. CleverTap's SDK can automatically detect this from the user's IP address. | Country = United States State = California City = San Francisco |
| Geography Radius | User's exact location. You can select a city, and then define the target radius. You can also select multiple cities. You can send this information using CleverTap's SDK. For more information, refer to the iOS and Android developer guides. | Locations = San Francisco, USA; Paris, France |
| Reachability | Reachability filters include Has email address, Has phone number, Unsubscribed email, and Unsubscribed SMS. | Unsubscribed email = No |
| App Fields | App fields filters include App Version, Device Make, Device Model, OS Version, and CleverTap SDK Version. This information is sent by CleverTap's SDK for each device that has your app, which means a single user can have multiple devices associated with their user profile. | OS Version = 10 |
To know more about what segments can be used, see Segments.
Define the Message Content
Now, you can set up the What, that is, you can select the audience to which you want to export the user details.
Ads Editor
In the What section, select the audience type and the user details to upload. The Google Ads account is selected in the Setup step.
Choose the audience type
Select one of the following audience types:
- Add qualified users to existing audience: Append the qualified users to an audience that already exists on the selected Google Ads account. Select the audience from the drop-down.
- Create a new audience on Google Ads account with qualified users: Create a new audience on the selected Google Ads account and add the qualified users to it.
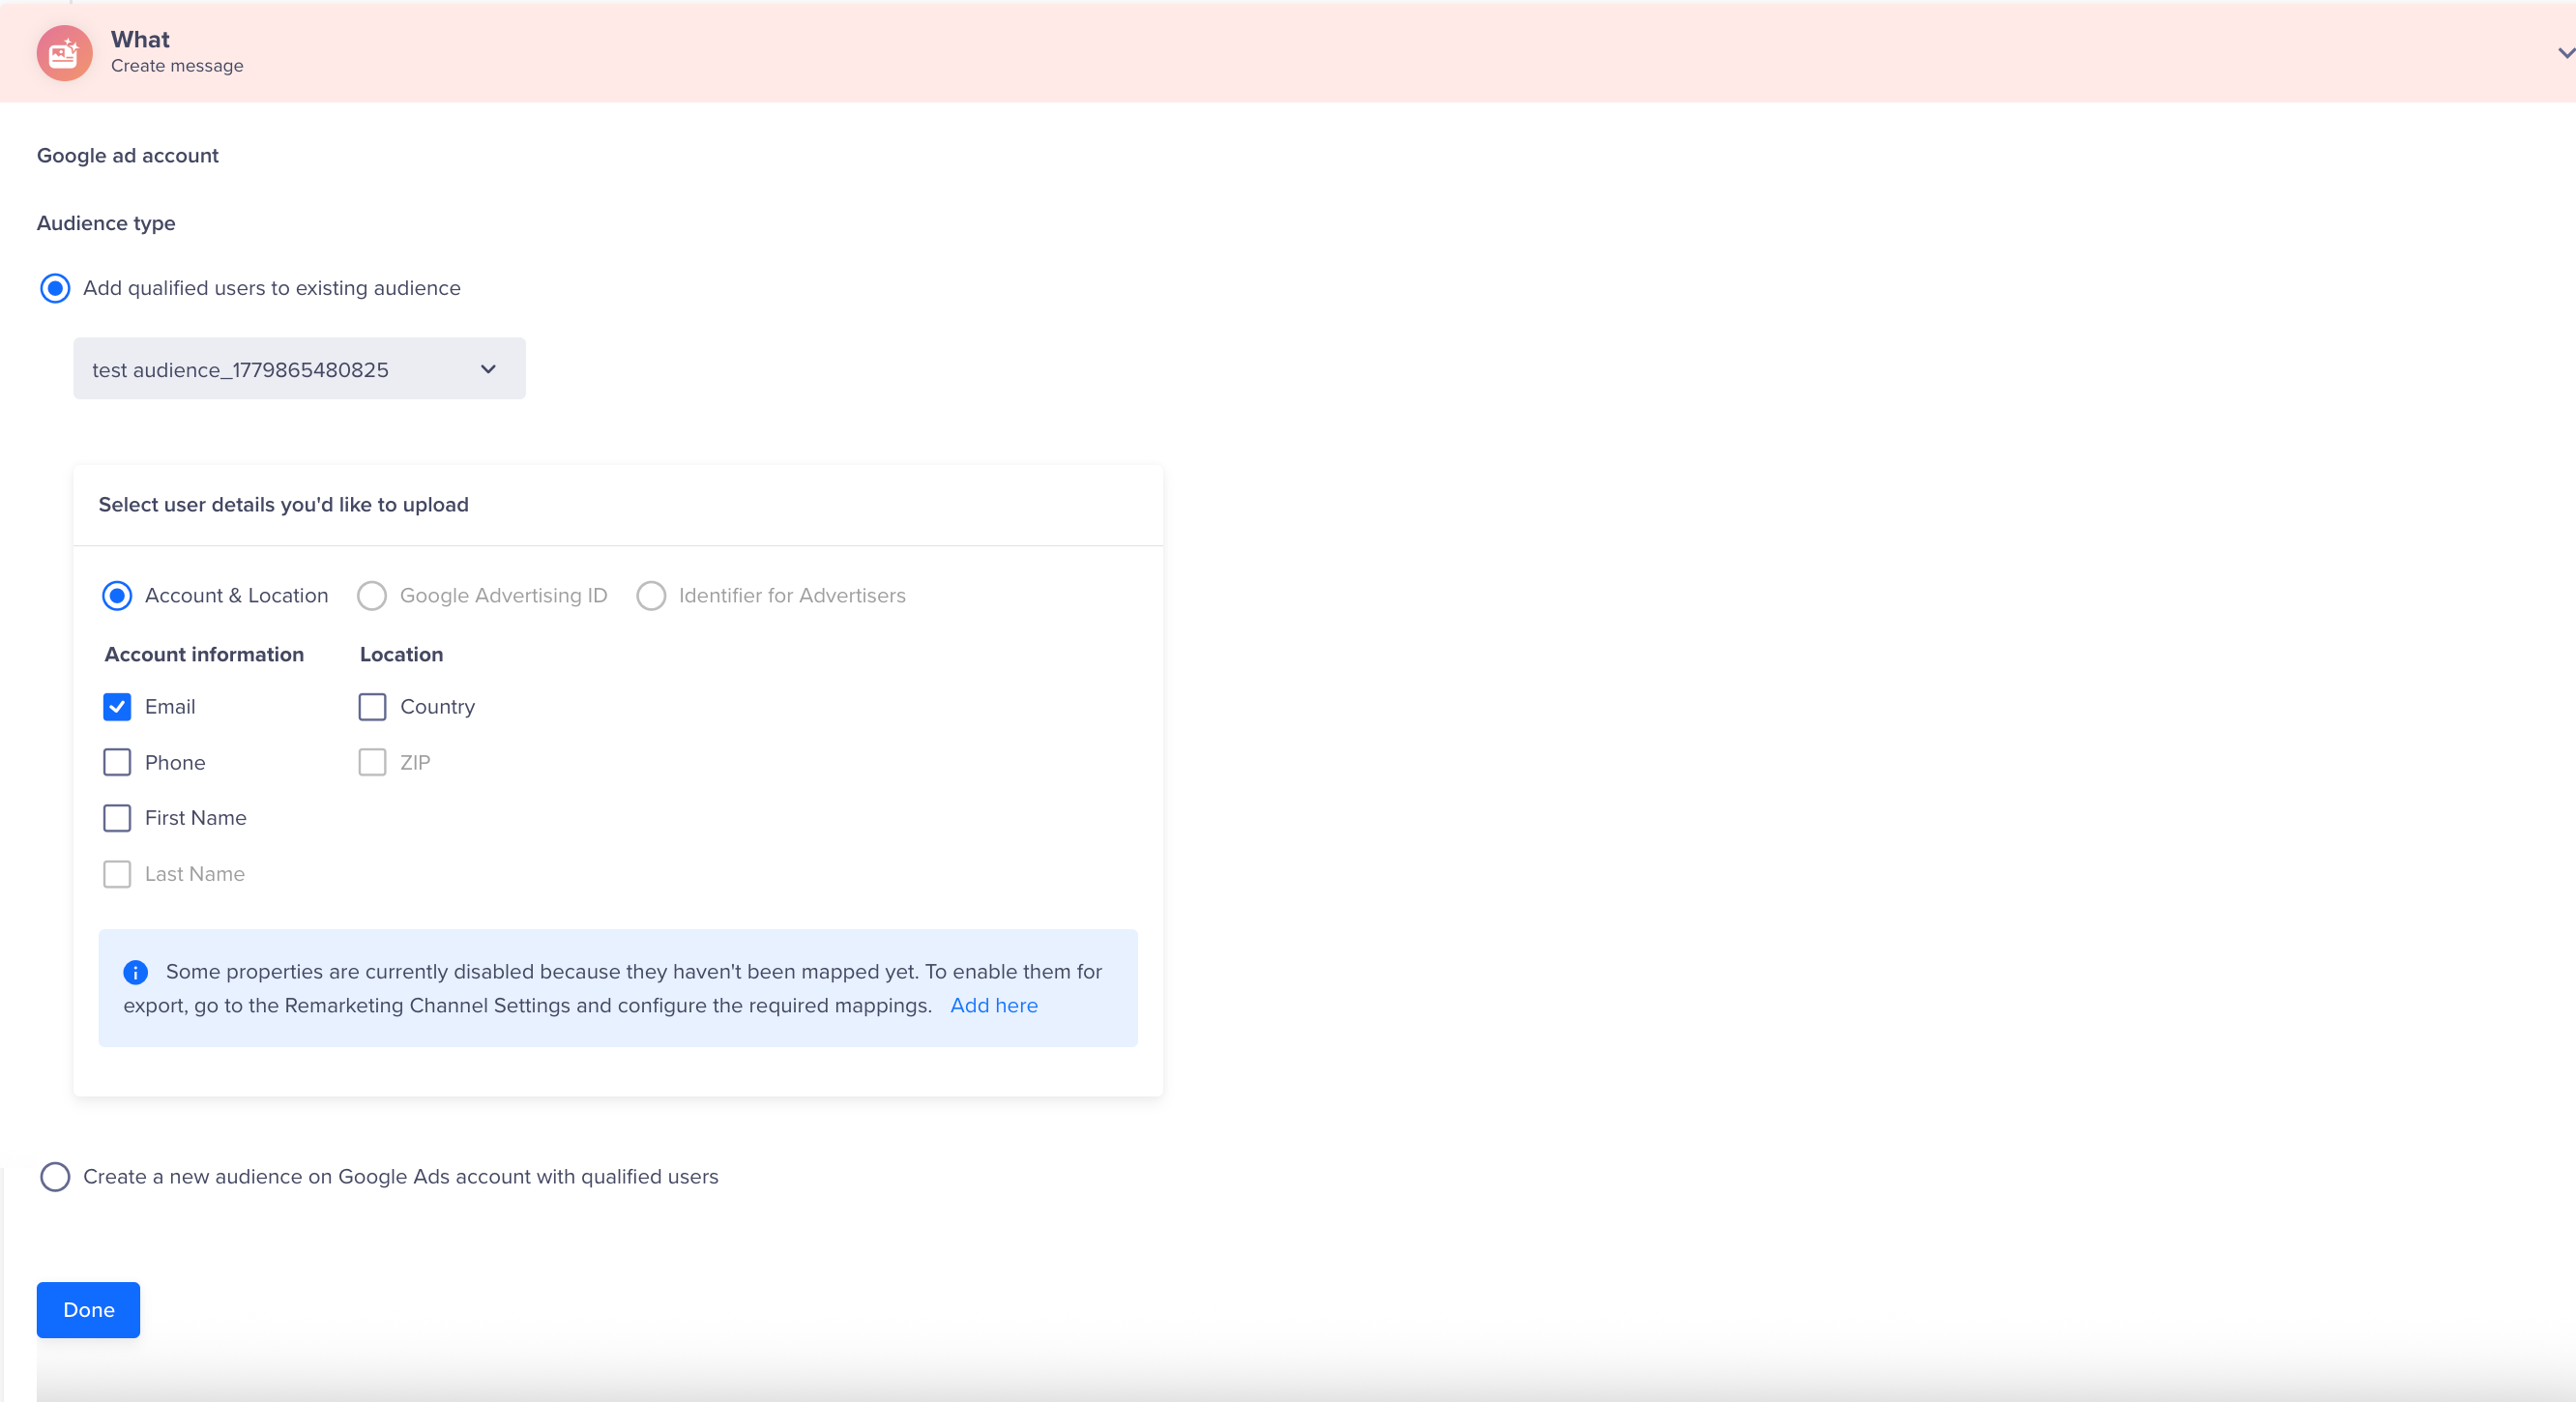
Configure Audience Type In What Section
Select the user details to upload
Select the user details to upload for matching. The user details are grouped into three types, shown as separate options:
- Account & Location: Account information (Email, Phone, First Name, Last Name) and Location (Country, ZIP). You can select one or more of these details together.
- Google Advertising ID: Google's device advertising identifier.
- Identifier for Advertisers: The advertiser-facing device advertising identifier.
You can upload only one type at a time. The three types are mutually exclusive and cannot be combined in a single upload. Within Account & Location, you can combine any of the available details.
Only details that are mapped to a CleverTap user property are available for selection. Unmapped details, including the Google Advertising ID and Identifier for Advertisers options and individual fields within Account & Location, appear disabled. To enable them, click Add here in the panel, or configure the mappings in Settings > Channels > Remarketing > Google > Map Properties.
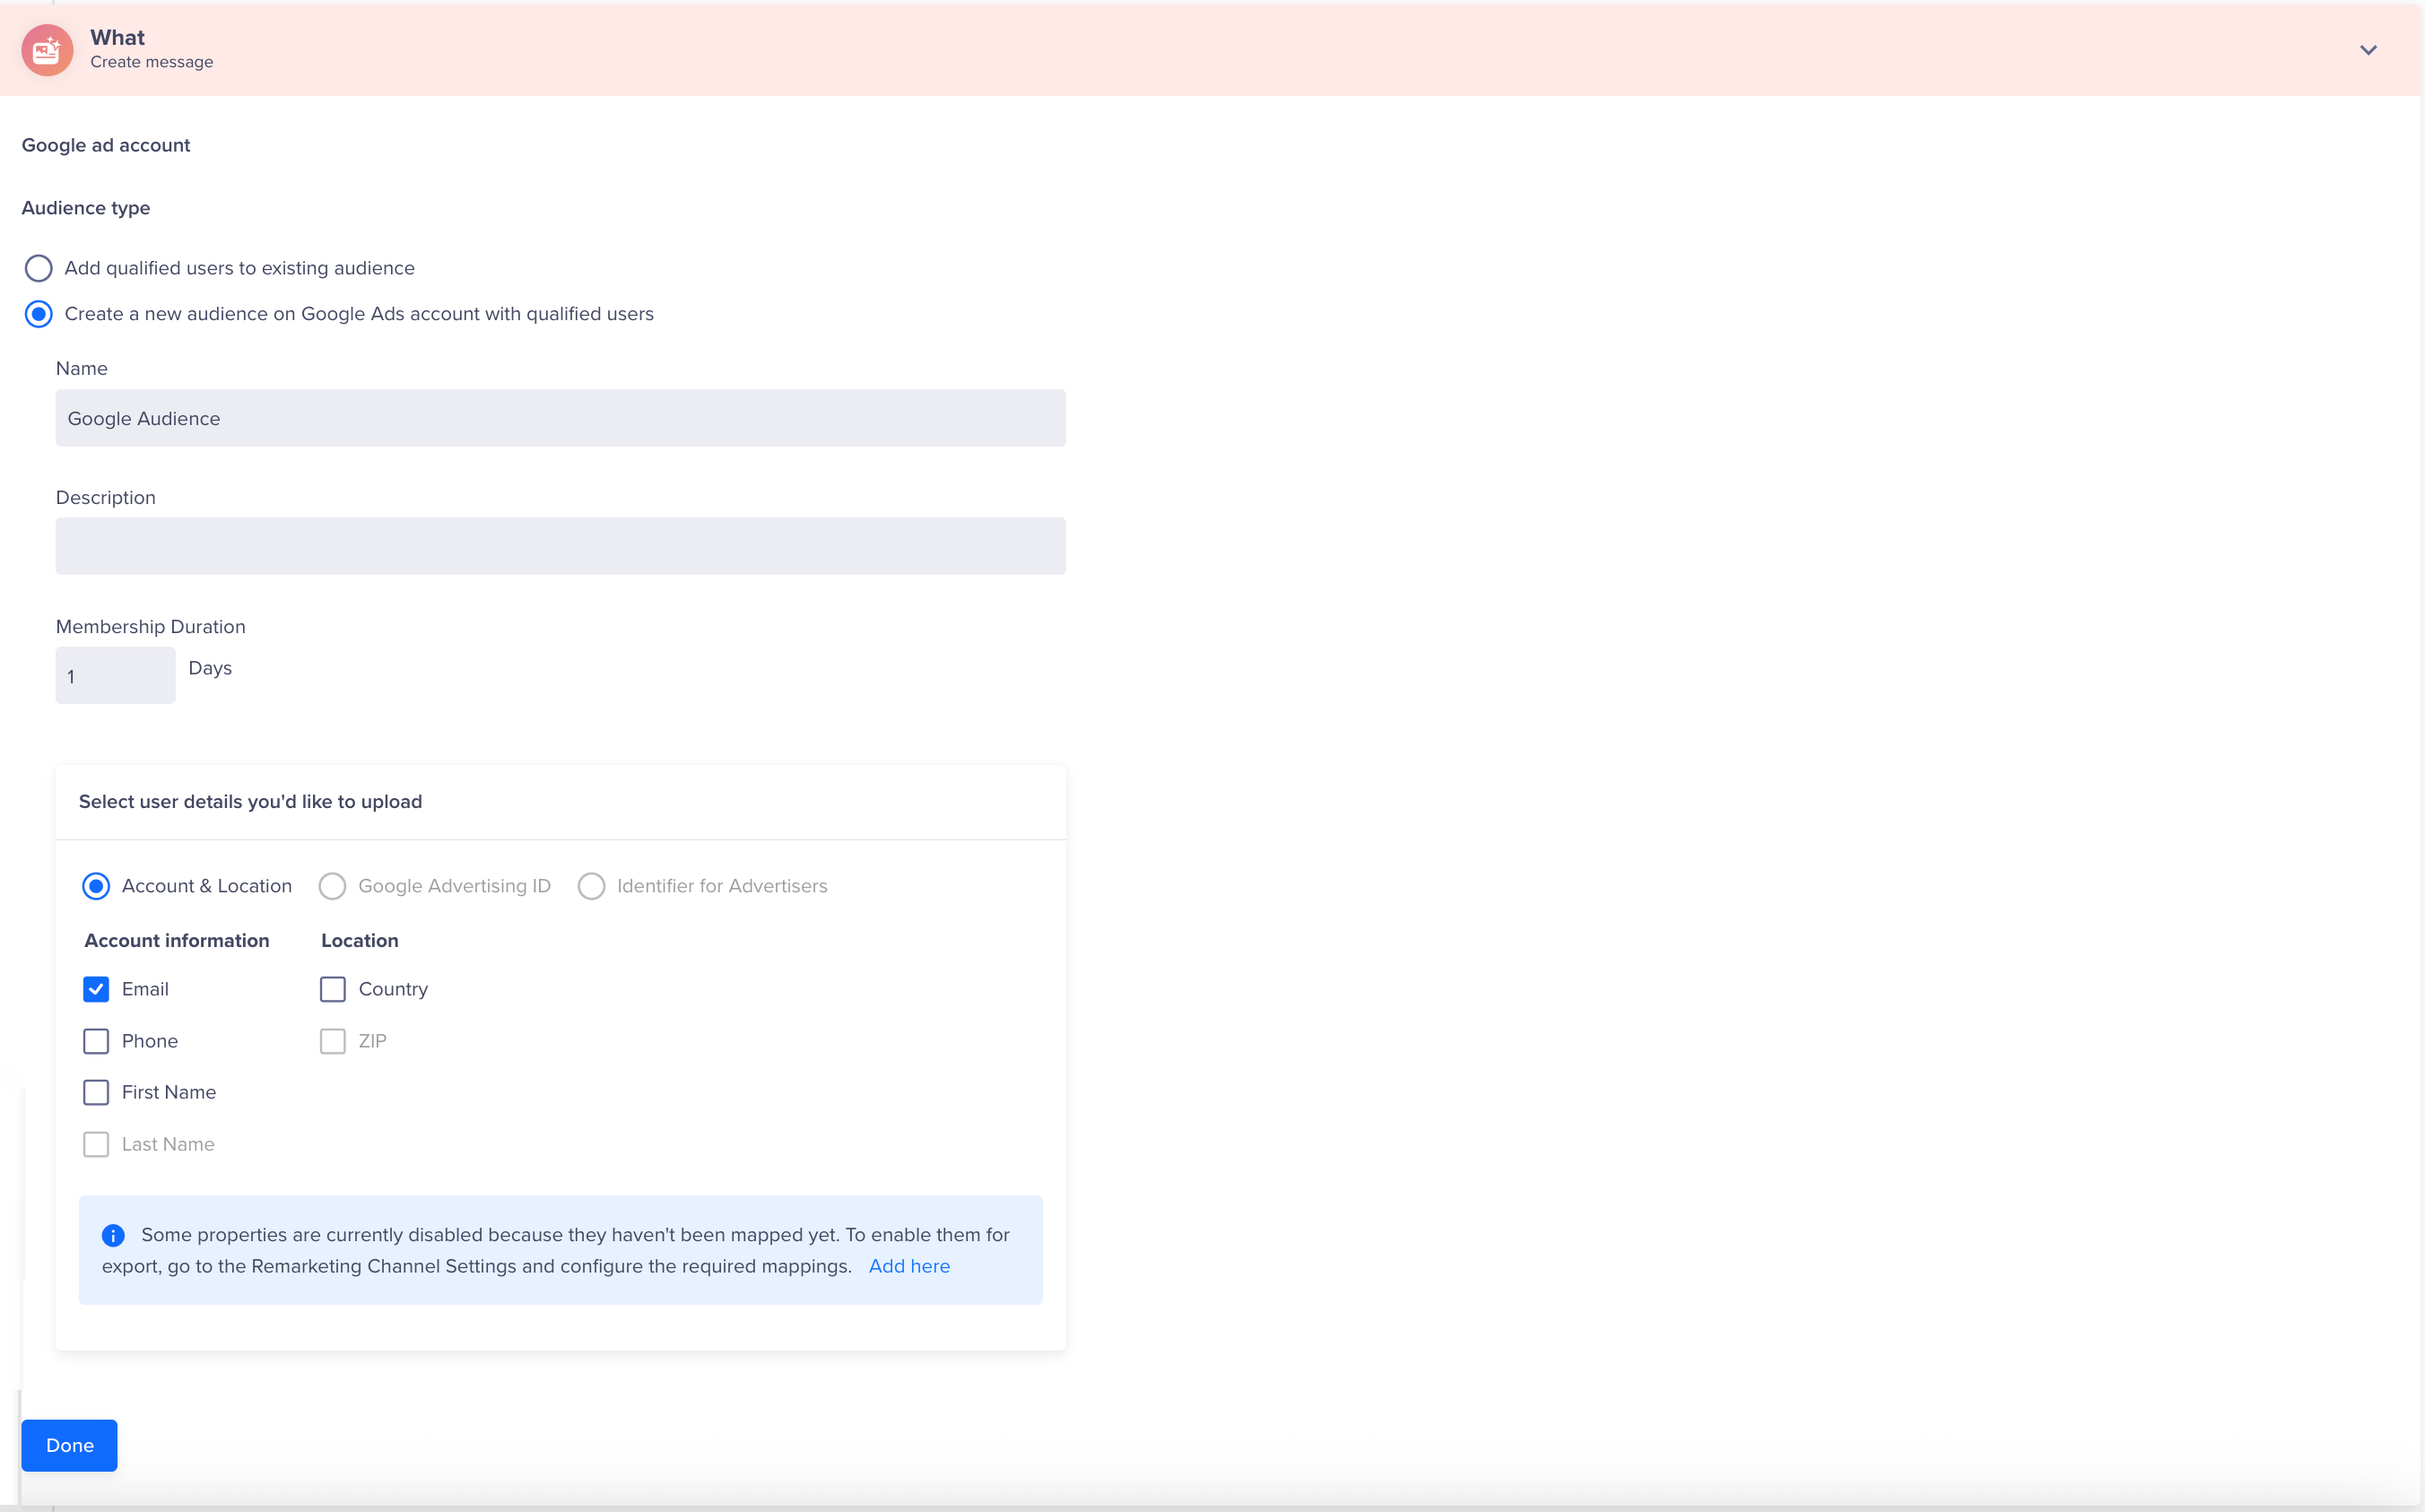
Create a New Audience on Google Using CleverTap
Define the Campaign Schedule
You can set up the When to schedule the campaign start and end using the options below:
The delivery preferences for Google Ad campaigns can be set as follows:
- Send Now: Select this option to send the campaign right away.
- Schedule for later: Select this option to send the campaign on a specific date and time.
- Set as Recurring: Select this option to send the campaign at specific intervals.
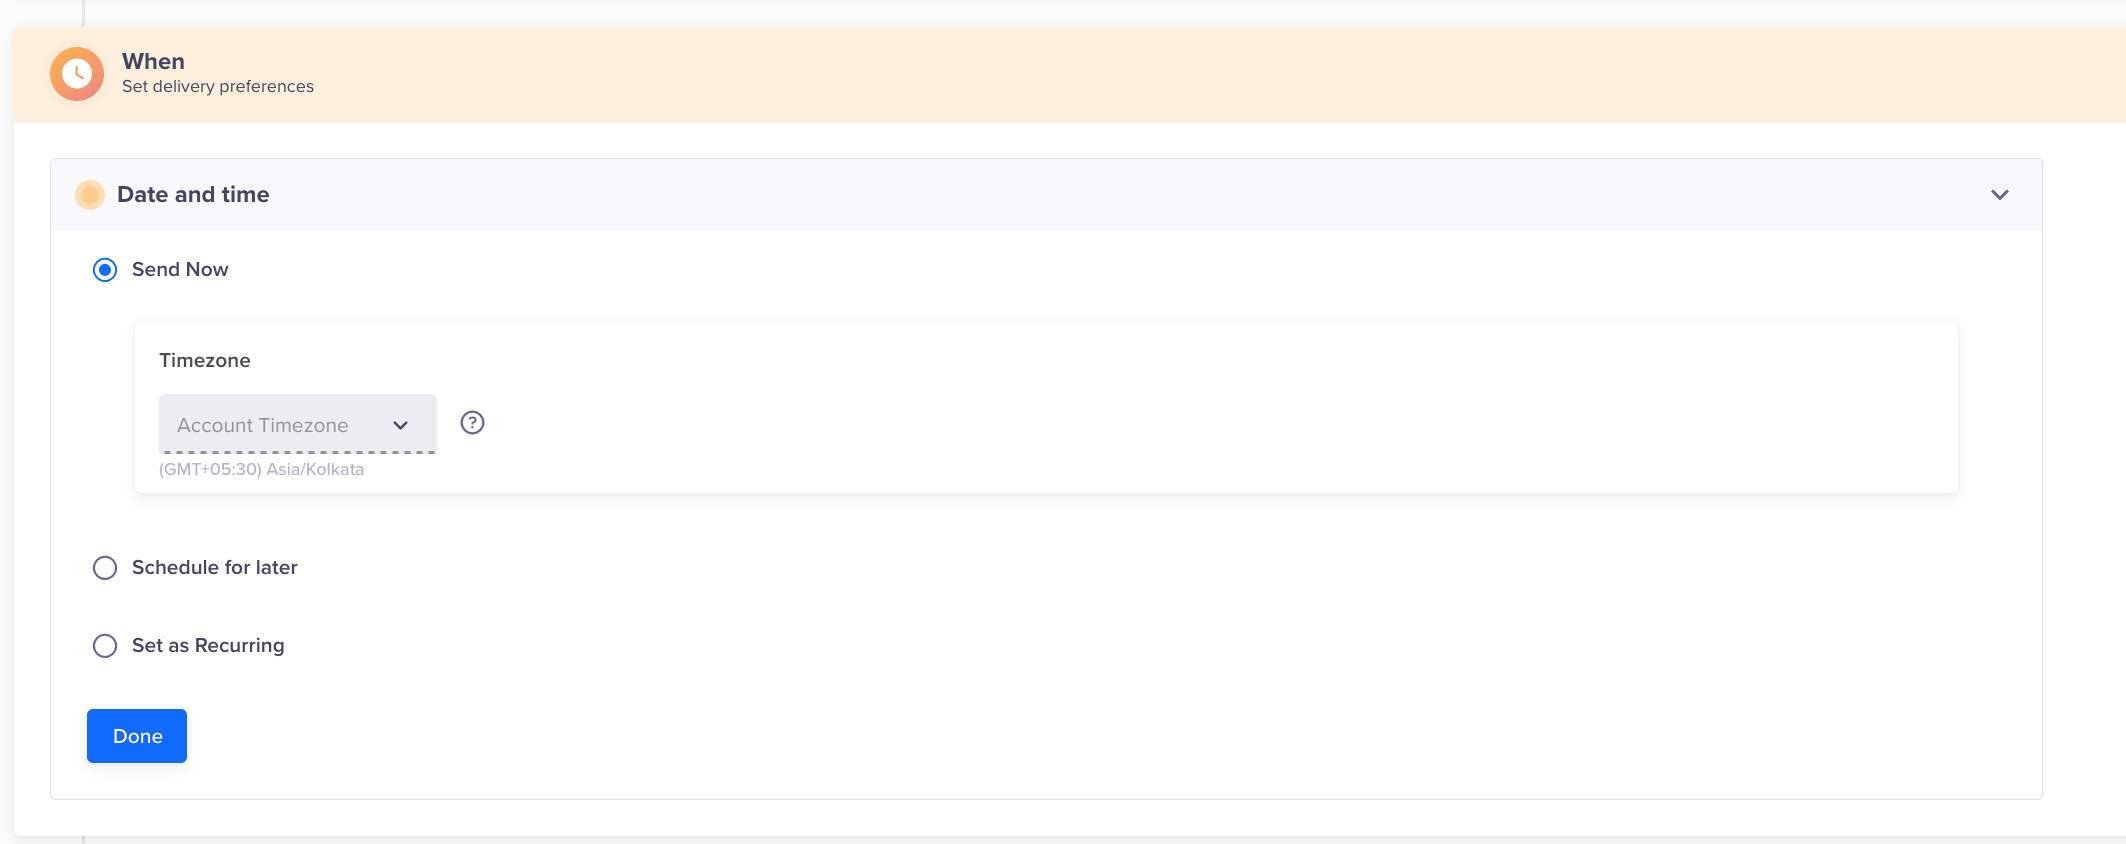
Define the Campaign Schedule
Recurring DayIf you specify a recurring day for a campaign such as the 7th of each month, then the campaign will start for the specified day and ignore the creation date. This is a precaution to avoid sending a campaign unintentionally on a prior date.
Publish Campaign
After testing and previewing the appearance of your campaign, finalize your campaign by clicking Publish Campaign.
Publish Campaign
Updated 3 months ago