Loyalty Lion
Loyalty Partner
Overview
LoyaltyLion is a customer loyalty and engagement platform designed for e-commerce businesses. It helps brands to incentivize customer behavior and personalize user engagement through data-driven loyalty programs.
By integrating LoyaltyLion with CleverTap, you can:
- Send order and event data from CleverTap to LoyaltyLion using Webhooks
- Fetch user-specific reward data from LoyaltyLion into CleverTap using Linked Content and personalize campaigns
Prerequisites for Integration
Ensure you have the following:
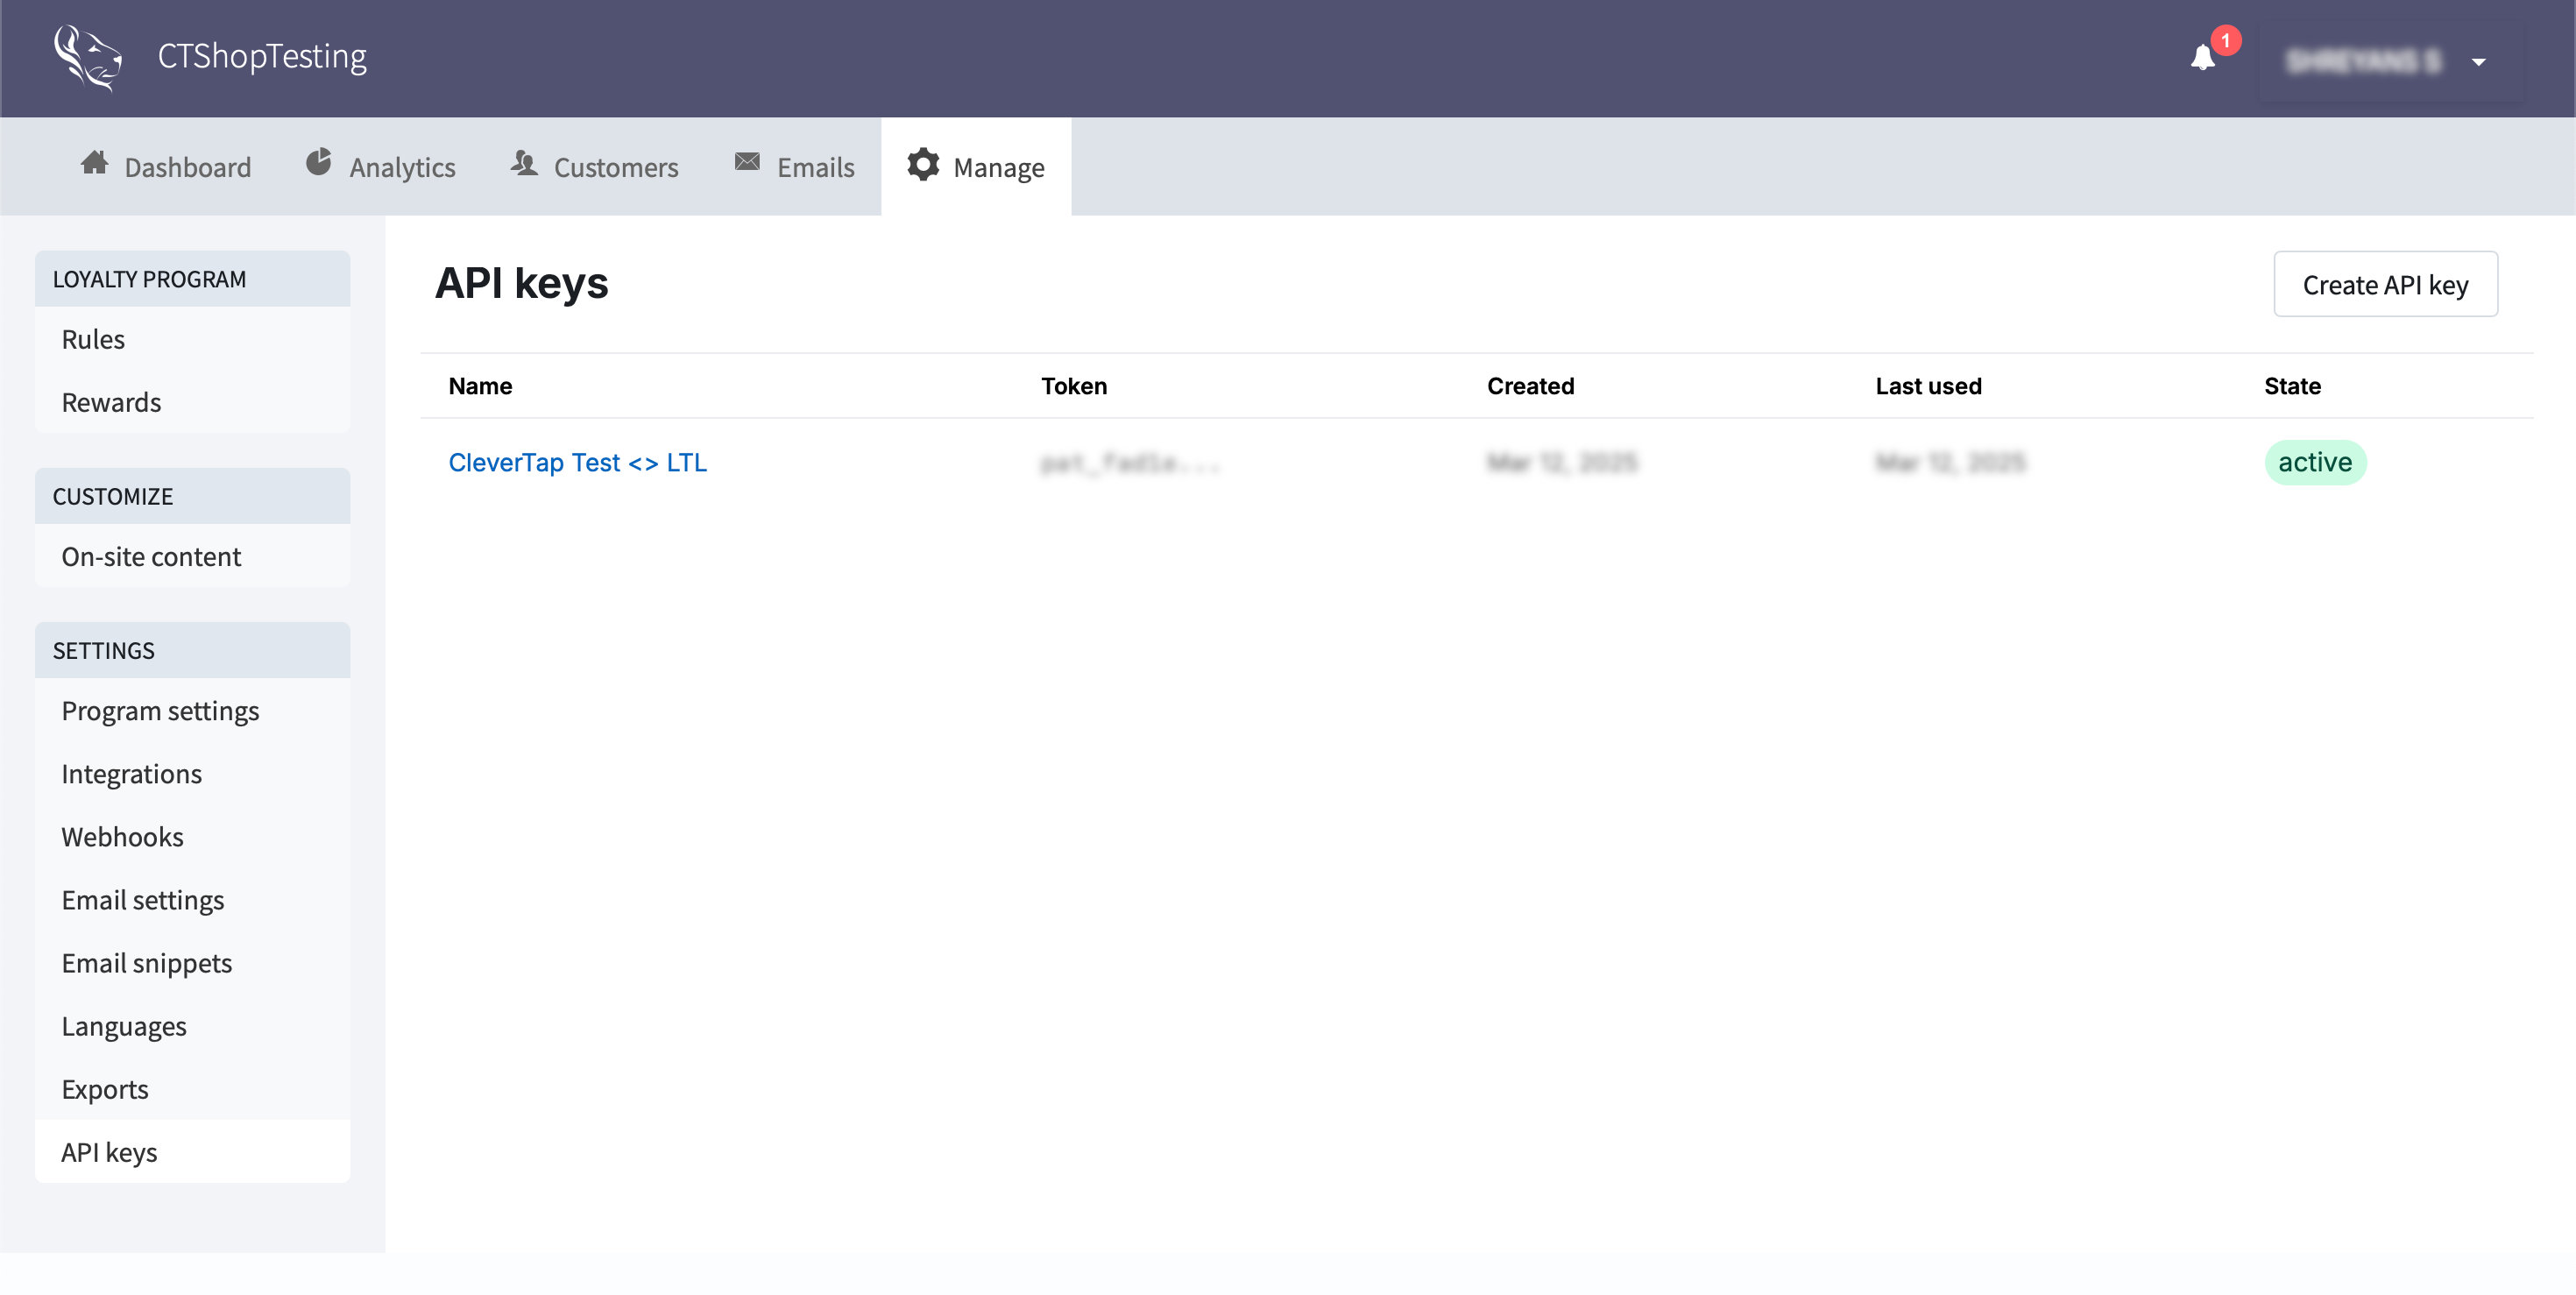
- LoyaltyLion API credentials (available in your LoyaltyLion dashboard).
- Access to your CleverTap dashboard with permissions to configure webhooks and campaigns.
Integrate LoyaltyLion with CleverTap
To integrate LoyaltyLion with CleverTap, perform the following major steps:
- Create a Webhook in CleverTap
- Configure Webhook Campaign in CleverTap
- Personalize Campaigns Using LoyaltyLion Rewards
Create a Webhook in CleverTap
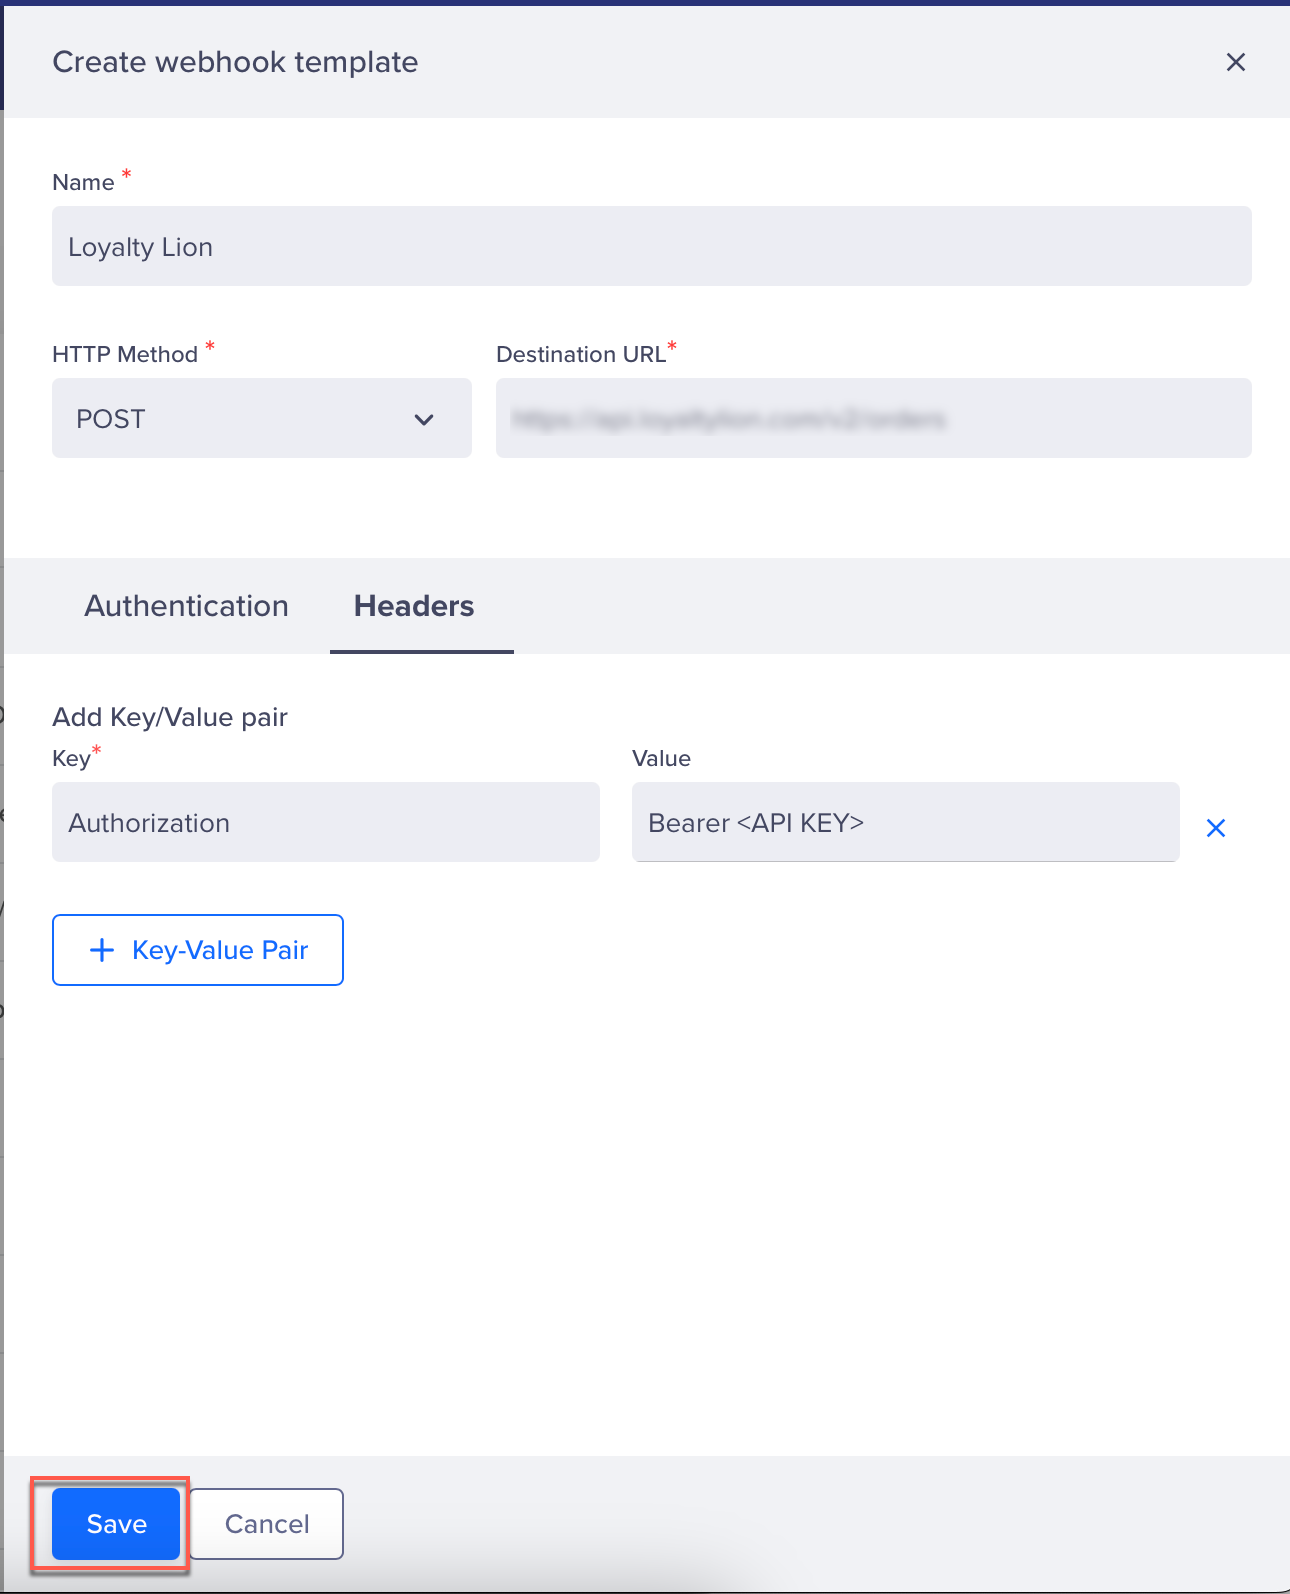
Create a webhook to push event and order data from CleverTap to LoyaltyLion. This webhook lets CleverTap transmit relevant customer activity data (for example, purchases, order totals, shipping) directly to LoyaltyLion in real time.To do so, perform the following steps:
- Go to Settings > Channels > Webhook from the CleverTap dashboard.
- Click + Create Webhook and fill in the details:
| Field | Value |
|---|---|
| Name | LoyaltyLion Orders Webhook |
| Method | POST |
| Endpoint | https://api.loyaltylion.com/v2/orders |
| Headers | Content-Type: application/json |
| Authorization | Bearer <Loyalty Lion API Key> |
You will find the API key in your Loyalty Lion Dashboard in Settings
- Click Save.
Configure Webhook Campaign in CleverTap
To push transactional data (like orders) to LoyaltyLion:
- Go to Campaigns > + Campaign > Webhook.
- Select the Webhook configured in Create a Webhook in CleverTap
- In the What section, under the Webhook Content section, select the Content Format as JSON and click the Custom body option.
- Paste the following payload:
{
  "merchant_id": "1212",
  "merchant_number": "12",
  "customer_id": {{ Profile.Identity | default: "0" }},
  "customer_email": "{{ Profile.Email | default: "[email protected]" }}",
  "total": "{{ Profile.Total | default: "0" }}",
  "total_shipping": "{{ Profile.Total_Shipping | default: "0" }}",
  "payment_status": "{{ Profile.Payment_Status | default: "Fail" }}",
  "date": "{{ Profile.order_date | default: "0" }}",
  "discount_codes": [
    {
      "code": "{{ Profile.code-used | default: "0" }}",
      "amount": "{{ Profile.amount | default: "0" }}"
    }
  ]
}
Type {, {{, or @ to view available personalization options.
- Click Preview and Test the campaign to check if the data appears correctly in the LoyaltyLion dashboard.
- If everything works as intended, click Publish.
For more information, refer to the Loyalty Lion API documentation.
Personalize Campaigns Using LoyaltyLion Rewards
Use Linked Content to fetch real-time rewards from LoyaltyLion and show them in campaigns. To display personalized creatives using dynamic URLs, follow these steps:
Configure Linked Content API in CleverTap
To display the personalized rewards in CleverTap campaigns, you must configure Linked Content. To do so, follow these steps:
- Go to Settings > Setup > Linked Content from the CleverTap dashboard.
- Click + Linked Content.
- Provide a relevant name for the Linked Content, set the
HTTPmethod toGET, and use the following endpoint as the destination URL:https://api.loyaltylion.com/v2/customers/{{cid}}/available_rewards
In this URL, cid represents the customer ID used to retrieve the user's available rewards. Ensure this parameter is marked as mandatory.
- In the Headers, add this below key-value pair:
- Authorization: Bearer
{'<Loyalty Lion API Key>'}
- Authorization: Bearer
- Test the Linked Content to ensure it returns the expected output.

- Click Save to finalize the Linked Content configuration.
Once your Linked Content is configured, you can use it in any messaging channel.
Create Personalized Campaign Using Linked Content
With LoyaltyLion connected to CleverTap via Linked Content, you can now deliver personalized rewards through your campaigns. To do so, perform the following steps:
-
Go to Campaigns from the CleverTap dashboard and click + Campaign.
-
Select Push Notification from the Messaging Channels list.
-
Configure all the campaign settings and then go to the What section:
- Click Personalization.
- Select the Linked Content configured under Configure Linked Content API in CleverTap and click Apply.
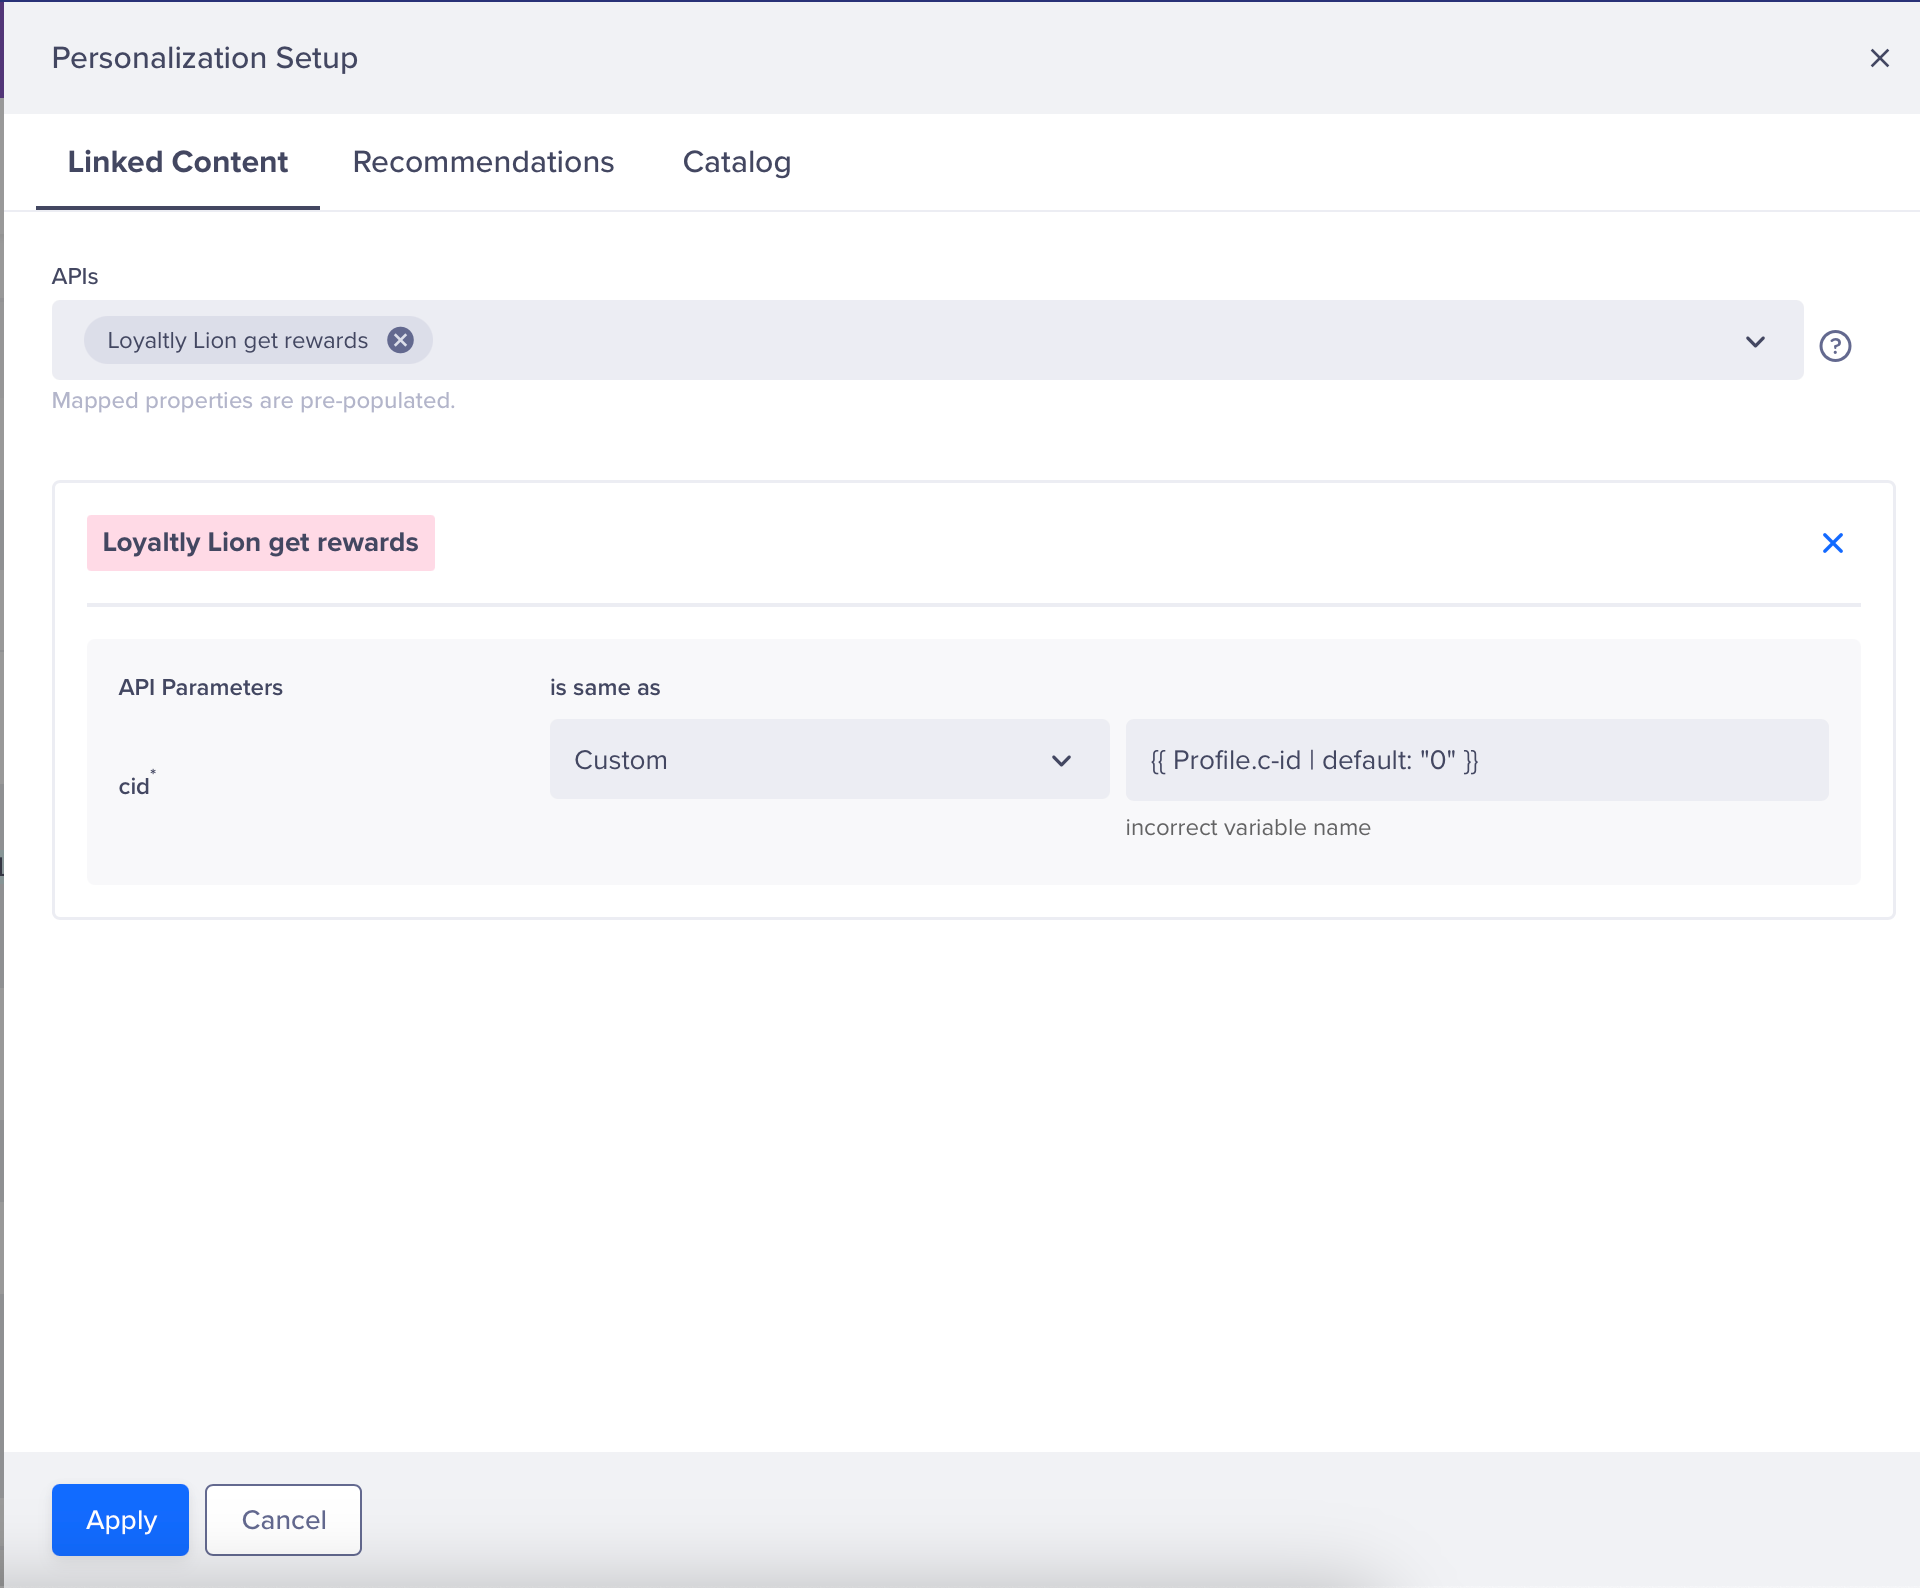
- Set the
cidparameter to Custom and assign the value{{'{{ Profile.c-id | default: "0" }}'}}. This dynamically fetches the customer IDcidfrom the user profile when the campaign is delivered.
This configuration ensures that the correct variant is fetched based on the user's customer ID and displayed in the campaign.
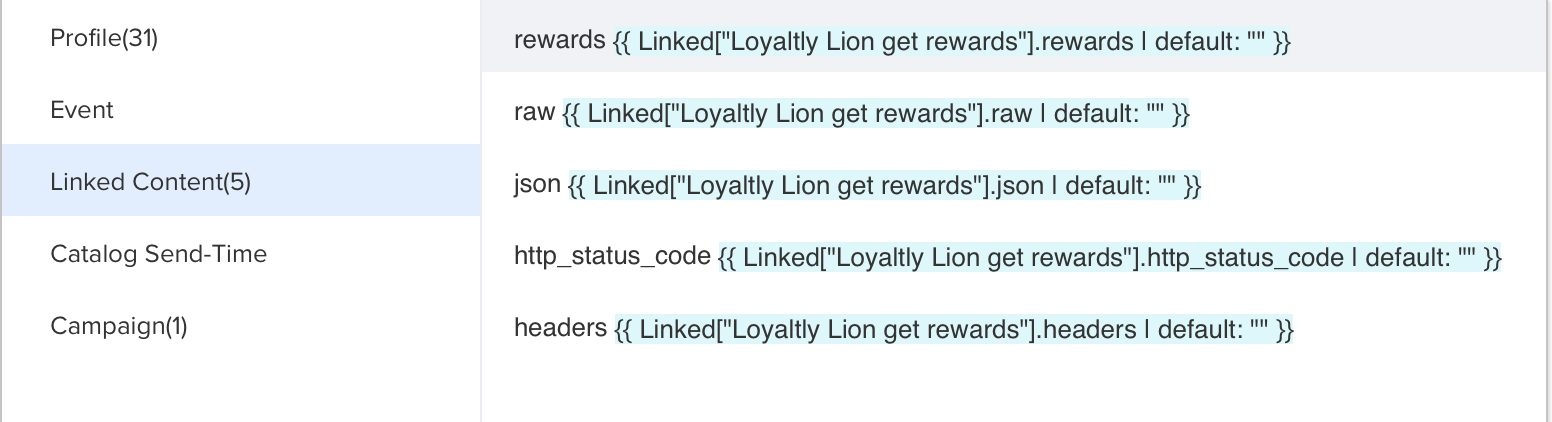
- Use the following Linked Content Liquid tag to extract the reward title from the LoyaltyLion Get Reward API's
JSONresponse:
{{ Linked["Loyaltly Lion get rewards"].json.rewards[0].title | default: "NULL" }}- Configure the campaign's Title and Message using the retrieved reward title. For example:
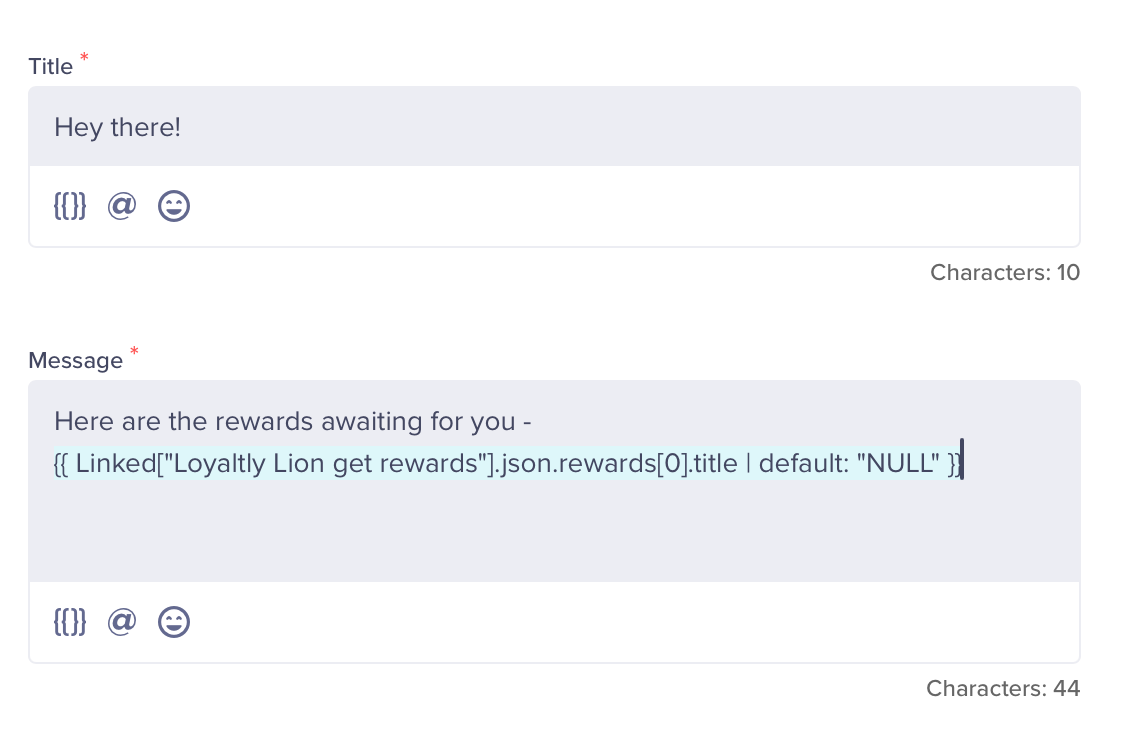
- Click Preview & Test to verify if the campaign pushes the default values you configured.
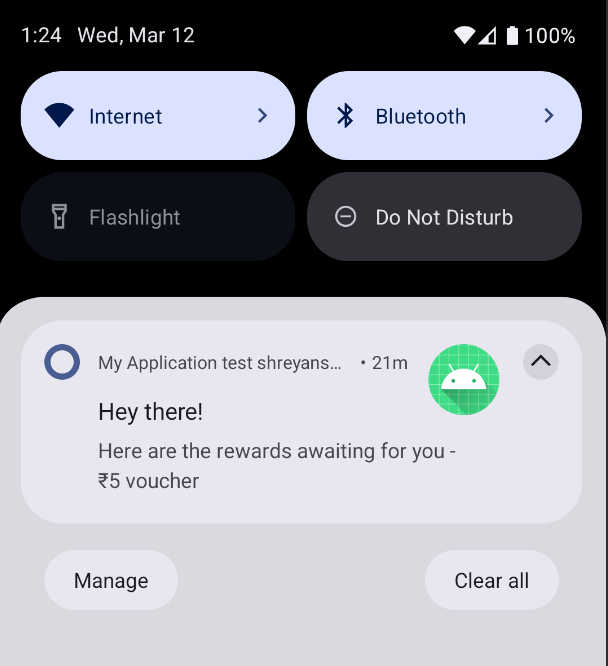
- Click Publish to launch the campaign. Verify if everything works as intended. Users will receive a push notification such as the one below.
By integrating LoyaltyLion with CleverTap, you can deliver real-time personalized visuals at scale across the following channels: Push Notifications, Email, In-App Messages, or Web Popups, LoyaltyLion empowers you to deliver highly relevant, personalized messaging at scale.
Updated 7 months ago